Transcripts
1. Introduction: [MUSIC] Something
that's fun about wearing imagery that is
specific to you is that it's also a great way to do a little bit of
storytelling about who you are. There's just a lot of unloved, unused garments out
in the world already, just waiting for your hand
to make them extra special. [MUSIC] My name is Kathie Sever. I'm the founder of Fort
Lonesome in Austin, Texas. In today's class, I'm
going to show you how to create a hand
chain-stitched embroidered, vintage, western-inspired,
custom garment of your own. Fort Lonesome is a collective
of designers and artists that work in Western wear
and jeans stitch embroidery. [MUSIC] In this class,
we're going to start off by learning how to create a basic hand embroidered
chain stitch. After you've gotten
the basics down, we'll move on to thinking about what kind of imagery
you might want to see that we will then teach
you how to transfer onto your garment as
a pattern to follow. We'll take you through how
to apply linework and fills so that you get the
texture that you want. We'll talk about adding text
touching and rhinestoning, just to send it over the top if that's what you choose to do. Hopefully at the
end of this class, you're going to have a custom one-of-a-kind garment that
you have stitched up, either with some of the imagery that we have provided for you, or maybe with some imagery that you've conjured
from your own brain that you'll never see on
a rack at any store ever. Thank you for joining us. I'm ready to get started. I hope you are too. Let's get stitching. [MUSIC]
2. Getting Started: In today's class, I'm going
to go over the basics of learning a hand chain stitch
embroidery technique. Then I'm going to
teach you about how to utilize that technique to dream up some imagery
ideas for your garment and apply them to whatever
garment you desire. To get started,
in today's class, you're just going to need to arm yourself with a
few basic materials, all of which should
be easily accessible either online or at
your local craft store. You'll need some size
of embroidery hoop. Here, we've got a
pretty small hoop that is made out of bamboo. You can find plastic hoops, you can find them
larger or square. There are things that
different people like about different sizes and
shapes of embroidery hoops. I personally like to keep the
hoop relatively small and then just move my fabric
around as I'm stitching, rather than starting
with a larger hoop, which can make it
difficult to access the center image area while
you're doing the hand work. It's nice to have a few
straight pins around for when you're doing
the transferring process to secure your image so that it doesn't shift
around while you're tracing. Speaking of tracing, you'll want just a simple
piece of carbon paper that you can get at any
office supply store. Then, of course, there's
embroidery thread. For this class, we're
just going to be using 100 percent cotton skeins
of embroidery thread, it's the most accessible, easy-to-find type of
embroidery thread. You'll find it in skeins
that look like this, sometimes you'll find
it individually sold. Often you'll find them sold in pre-aggregated
color palettes. I recommend once
you've got your skeins home from the store that you wind each skein onto, this is just a homemade
cardboard thread bobbin, I literally just took
a piece of chipboard, cut it into squares, cut the center sides in a
little bit to hold the thread, snipped a little
notch at the top to start the winding process and to secure the thread once
it's wound onto the bobbin. When it comes to figuring out what
you're going to stitch, we will have some ideas for
you that you can download from the resources
section on the website or we'll help you to figure out how to get the ideas
that you have, generate them, turn
them into line work so that you can print them out. Then use, again, just a
regular piece of carbon paper to transfer your image
onto your fabric. When you're tracing your
image onto your garment, it's nice to use
one of these tools that has a ball at the end. It's got a ball tip as
opposed to a pointy tip. That is so when you're tracing, you don't actually pierce the paper that
you're tracing on. These are nice to have,
but they're not necessary. You can also just trace using
a dull pencil or a pen. We've got some beeswax here. Again, this is not
entirely necessary, but it's a nice way to condition
your embroidery thread to get it ready to more
smoothly and efficiently move through the garment
as you're stitching. If you're going to use the
wax to condition your thread, you'll also want
to have an iron, and we'll take you
through the process of waxing your thread using the beeswax and
iron in another lesson. You'll want to find a pack
of embroidery needles. Ideally, especially if
you're just getting started, you'll want to find a
pack of needles that has an assortment of different
sizes of embroidery needles with different size eyes and different lengths
of needle shafts. This is just so that
you can play around and figure out which
needle is the one that feels more comfortable
for you to stitch with. It's nice to have a little
small pair of embroidery snips. This is just obviously
to trim the thread. The shorter the shaft
of the scissor, the less likely you
are to accidentally snip something that you
don't mean to snip. These little guys are
nice to have on hand when you're doing
delicate embroidery work. Then we'll be moving
into some embellishments that, again, are
completely optional. But you might want
to play around with seeing if you can find
some heat set rhinestones at the local craft
store or online, they're pretty easy to find. You'll look for
the ones that say, either iron on or heat set, if you go that route, you'll want to
also find the tool that you use to heat
the rhinestone up, melt the glue so
that the glue then hardens onto the garment
and stays affixed. The one other thing that
you might want to utilize when you're dreaming up
your imagery is an iPad or some sort of
tablet and a stylus so that you can play around with either tracing
images that you find that you want to reproduce or dreaming up your own images. Lastly, and most importantly, you're going to want to
dig around in your closet or the closet of someone you
love and see if you can find a garment that is
begging to be reborn. Something that ideally
is not too thin, but also maybe is not too thick. You can work your way up to doing embroidery
on a denim jacket, it works great, but it's a little bit
more labor-intensive. To start off with, I recommend finding a
nice soft chambray shirt, maybe even for this class, something with a
western yolk so that you can really play into
that vintage western style. That is about all you
need to get started. Once you've had the opportunity to gather all of your supplies, then join us in the next lesson and I'll go over the
very basics of learning how to use the hand chain
stitch embroidery technique.
3. Practice Chain Stitching Basics: Before we get too involved
in any of the development of imagery or thinking
too hard about what we're going to
stitch on our garment, I'm going to talk you
through the basics of how to do a hand
embroidered chain stitch using just a piece
of scrap fabric or anything that you find around the house
that you can use. To get started, I've just
got a little piece of scrap here and I've got my
hoop and my thread. I'm just going to draw a
curved line on here to follow. To set your fabric
up in your hoop, all you do is you
take the smaller of the two circles and lay
it down on the table, lay your fabric over the hoop. I center whatever
I'm going to be stitching and then take
the second piece that has the screw attachment on it and place it over
the smaller ring, so that you've got a tight fit. But then you'll actually
screw the top hoop in tighter so that you
can then go in and pull the fabric out around
the edges of the hoop. You don't need to
worry too much about creating too tight of
a fit in the hoop. But it is nice to basically
just give yourself a relatively stable
surface to stitch on so that you're not creating
a wiggly wobbly stitch. Once you've got your
fabric in the hoop, then you're going to unwind yourself a little
bit of embroidery thread. I'm going to put my glasses on in order to be able to do this. I'm going to start off
by stitching with a full unsplit piece of embroidery
thread just to give you a thicker stitch to follow. When we get into our
garments stitching, I'll show you how to split the
thread in half so that you won't wind up with a
slightly more delicate line. But I start off by just cutting off a little
piece of thread. This is just practice,
so it doesn't really matter how long it is. But you don't ever want to cut
off a piece of thread much longer than measuring from your nose to the
tip of your finger. If your thread is much
longer than that, it's just too easy to get it tangled up as you're stitching. I'm going to select
a needle that has a relatively large eye, especially because I'm
not splitting my thread. It's a thick thread to try to get into the
eye of the needle. I always wet the
end of the thread. That just helps it stick
together a little bit better. Then I pinch the end of the thread to flatten
it out a little bit, which just makes it easier to insert into the
eye of the needle. I just squeeze the end of the
thread and literally just sort it from between my fingers into the eye of the needle without
giving the end of the thread too much
wiggle room with which to come unwound and become
a little bit unwieldy. Then you're going
to want to create a knot on the other
end of your thread. The way that I was
taught was just to hold the thread between your
thumb and pointer finger, wrap the thread around
your pointer finger, and then just use
your thumb to roll the thread up and off the
tip of your pointer finger. Then if you take that
mass that you basically just collected and pull
down on it like that, then you'll wind up with a knot at the end
of your thread. Once you've got a knot, you're going to come
up from underneath your fabric at the
end of your line. Pull the thread all
the way through. You're going to create
a little bit of a lasso around the area that
you're stitching towards. You're going to sink
your needle down right next to where the thread is coming up and out
of your fabric. This is going to be a
down and up motion. You'll sink your needle down
and then you're going to come up from the bottom
of the fabric to the top. You're just going
to want to create a stitch that's
approximately anywhere between a third to a quarter of an inch down the line
that you're stitching. Then you'll just pull
the needle through, pull the thread all
the way through, and you'll see that
you've created a chain that is being held
in place by your thread. That is then where you will
start your next stitch. Again, you're going
to sink your needle down right next to where
your thread is coming up. You'll have it emerge about a quarter of an
inch down your line. You're going to want to catch this loop that
you've just created. Again, sink the needle where
the thread is coming up. Move your needle
about a quarter of an inch down your line, make sure that you've got
this loop setup for yourself, and then pull the needle through so that it's
coming up through that loop and catching
it on your next stitch. Then you're just going
to keep doing that to create the line that you've
drawn on your fabric. Again, as we get into the
imagery creation process, you'll see that there is several different things that you can play around with here to
create a thinner line, a more nuanced line. You can play around with the
thickness of the thread, with the distance
between stitches. Once you've gotten to the end of the line
that you're stitching, you'll want to lock
down your last chain. The last loop that you created, the thread came up
through the center of the loop and then
you're going to want to have your needle sink on
the other side of the thread. So that when you pull your
thread through to the bottom you're locking down
that last final stitch. After you've got
that locked down, you can flip your work
over to the back. What I usually do, because I don't like to create too many knots on the
underside of my project, I'll usually just take
my needle and work it back through a few of the
stitches that I've created. Going one way and then I'll come back going the other way. Then I use my little snippers to cut the thread off there. Now that you've got
the basics of how to do a hand embroidered
chain stitch, it would be a great
time for you to doodle around a little bit on
your piece of scrap fabric. Maybe create a spiral or a
larger circle and just buckle down and practice
for a little bit so that you feel like you've got the gesture
comfortably down. Next, we're going
to start talking more about imagery ideas and developing some
concepts for what you might want to see on
your garment. [MUSIC]
4. Find Your Inspiration: [MUSIC] Step 1 is going
to be asking yourself some questions to give
yourself some ideas about what you might
want to stitch. Some of the things that we
often prompt our clients with are things like favorite
flowers, maybe a state flower. Sometimes people
actually like to use the outline of a state
where they're from. People like to bring
in elements like astrological symbols,
sometimes constellations. Pets are always popular. Often, there are elements
from the natural world that people really like
to play around with. That might be a mountain range
or it might be a skyline. Other things that are
popular prompts are the names of your children or your grandchildren
or your parents, the dates that they were born, or sometimes it's the date that you might
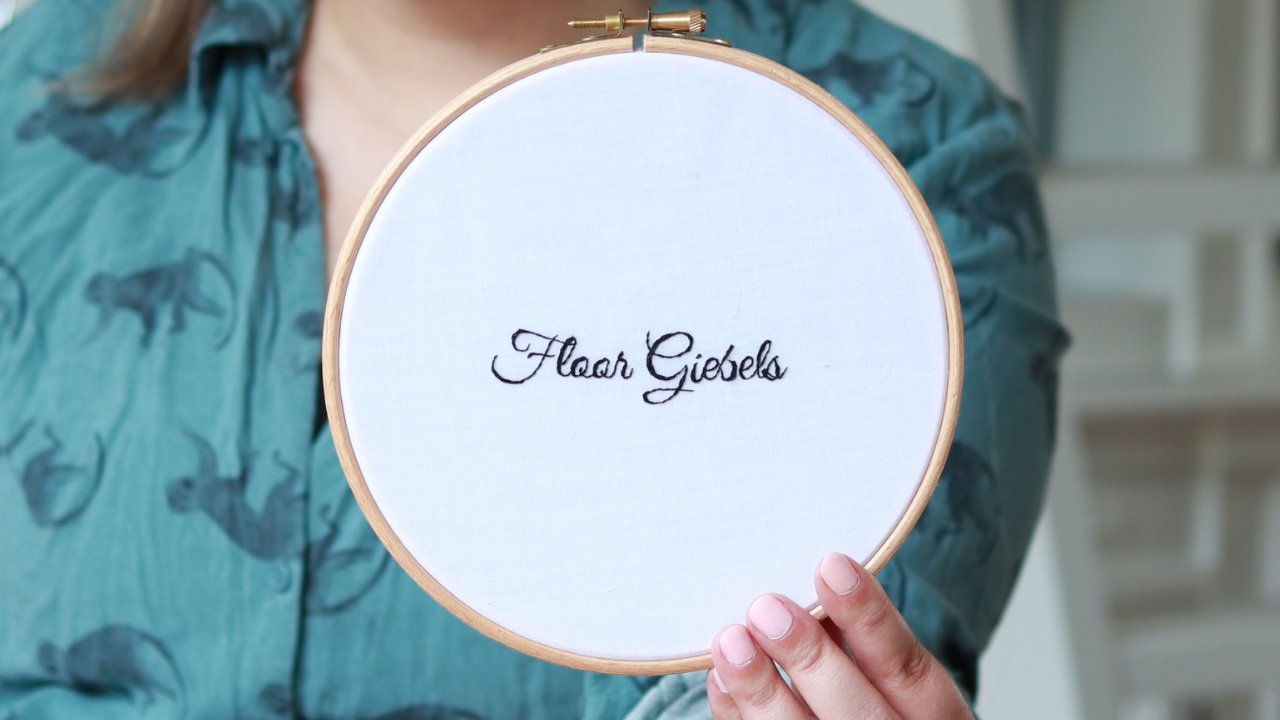
have lost somebody or a date when you were married. You can use the line work
that I already showed you to create a cursive script. The punchline of a inside joke that you share amongst friends could be put on
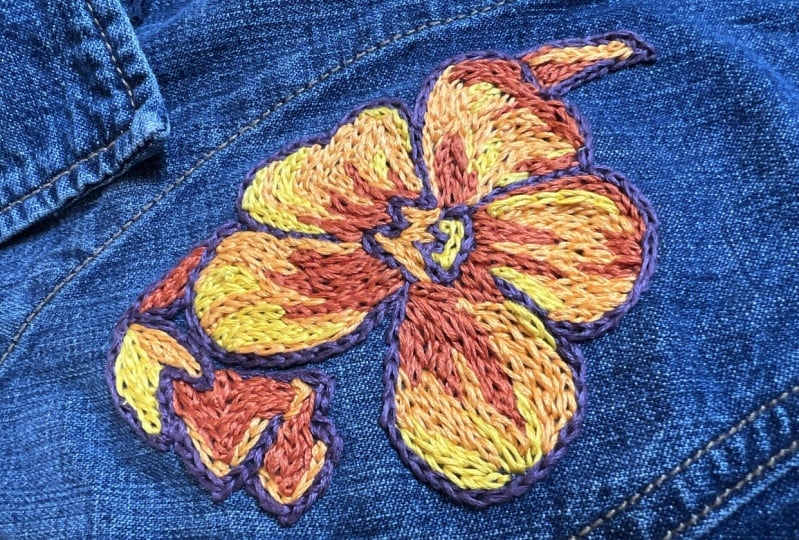
matching garments for your run group or whatever. You can see here the
examples that I've pulled are Southwest inspired. This is reminiscent of a
paint-by-numbers swirl cacti. Here we've got our
Texas taco patch. It's got the Austin City skyline with a radiating sun slash taco. I've hold out a couple of other
garments that we have here that were actually
done on our machines. But I thought they might
be fun to show off to start sparking ideas. This is a dog's face
that is all done with that one chain stitch. This is 100 percent
reproducible at home using what we've
already gone over. I also grabbed this guy. This one is obviously
a little more complex. But again, it's the
one chain stitch. We've got the Big Sur coastline with Highway 1 snaking
its way through, little bit of
surreal action here with the road turning
into a snake's head and gobbling up the setting sun. There's fill with line work layered on top of one another. I would recommend
for this class that especially if this is a
first or one of the first chain stitch embroidery
projects that you've done, that you not get too excited about incorporating too large
or complicated of an image. Not only is it okay
to start simple, but that it can actually
be incredibly powerful to start with a simple
image or a simple number, something that is
meaningful to you that you can talk about. Chain stitch embroidery, the one thing that it is
not the most effective at is communicating
really small detail. It's more of a broad
stroke stitch, which is why we love to use it for bold line work and fill. Maybe as you're coming
up with design ideas, try to stay away from
anything that's too tiny and needs to be rendered
in too small of a stitch. You might want to start
off by thinking about something that's maybe
not much larger than, say, a large orange, and isn't incorporating
much more than maybe 5-7 colors
to start off with. It doesn't need to be
layer on top of layer. It's really just about the customization of
creating something that nobody else in the
world is also going to have. Also, maybe think about the
garment that you're using and the area aesthetically
that you want to hit. Some areas of a garment are going to be more
difficult than others to actually get your
hoop and needle into. On a chambray shirt like this, almost all of the territory
is going to be up for grabs. One thing to think
about though is that you probably will want
to avoid stitching over the main area of a pocket. It's doable to get
your stitching on the top part of the flap, but not stitch through
both layers of fabric to where you're closing
up the pocket entirely. But you just might
want to think about the more accessible
areas of your garment especially for starting. I'm going to be featuring the embroidery on
the two front yokes. I wanted to come
up with an image that would fit in
one of these yokes, but still have enough
color, diversity, and interest to look nice but not be overly complicated where I'm shrinking down
a really complex image into a small space. I'm from California. I love California poppies. Possibly utilizing that
semi traditional platform, but playing around
with it somehow. Now I invite you to sit
down with a pen and paper and maybe write down some ideas that spring forth to mind that you might want
to play around with. If nothing comes to mind, if you're left feeling
a little overwhelmed by the idea of generating
your own artwork, then we've got you covered. You can go to the resources
area of the class, and we've put together a
little visual FlashPage that you can download
and print out. That'll get you started, it'll grease the wheels, and you can take it from there. [MUSIC] In the next lesson, I'm going to go ahead
and pull out my iPad and show you how I go about
my sketching process. I'm going to play around with this idea of
a California poppy and how I want to represent
that on my garment. Grab whatever sketching
tools feel best to you, and I'll see you in
the next lesson.
5. Sketch Your Design: In this lesson, we're going to start the
actual sketching process. The first thing that I often do when I'm working on a
pre-existing garment, is I get my garment out
and I snap a photo, either of the entire thing or I take a picture of the area that I'm focusing
on for embroidery and I load it into Procreate. Then you can open up a new layer and just start using that layer to play around with
sketching in the space that you're designing for. If I was going to start thinking about putting a flower in here, I might just play around with where I want the petals to go. I like the idea of using
the yolk shape in some way and filling in with
some leaves or vines or filigree that emphasize that you're designing
specifically for this space. If I want it to look relatively symmetrical
from side-to-side, I will take it, and then basically
just erase half and then copy and paste and flip so I can start to get a sense of a more symmetrical
view of the image. Then I'll compress those layers, clean them up a little bit, and then carry on from there. I'm going to add little
eyeball into this guy because I like the idea of plants looking back at us, plants that we
identify with having a lens as to who we are and why we might be
attracted to them. Can start just with
really rough sketches. Another thing you can do is
like you dropped your photo of the garment is you can
actually upload a photo that maybe you found
on the Internet. If there's some imagery in there that you like that you
want to play around with, you can add the image trace
on top of it on a new layer. Then when you drop the photo or the uploaded image
out from underneath, you'll just be left with the line work that
you're creating. The way that I like to work
is I really like to get a solid outline down before I start worrying
about color too much. Then from there, you can go ahead and add all
of your color in Procreate so that when you're
embroidering, you're not necessarily
having to do too much guesswork around what kinds of threads you
want to throw in there. Some places that I like
to go to get inspiration for coming up with
a cohesive palette. You can actually
go into Procreate and you can click on "Palettes", and they have some nice
aggregated palette combinations for you to play around with. Another thing that I
like to do is go online and you can search for all
kinds of different palettes. My favorite search is the Wes
Anderson palette selector, because they take
all of his movies and they break them down into
the palettes that he use. There's all kinds of different
ways out there to go and grab palettes so that you're not necessarily
having to second guess your own ability to
color-match particularly well. Once I've got a basic outline, what I like to do is
create another layer and put it underneath
my outline layer and then start playing around with painting with
broader strokes. That way, you're not going
to paint over your outline. In this case, I'm going
with a poppy palette. So I'm going to stay in
the orange and red family. I tend to start
with the line work and then often I'll
go straight to whatever I think the next
darkest thread color might be. I lay down that and start
building contrast first. I'll lay down the darkest. The next darkest to
the outline color. Often my outline color
is the darkest threat. Not always. But in this case, I
think it's going to be. I'll lay down the
next darkest color and then I go to the lightest and try to define some
of the highlights. I'm trying to keep it
relatively simple. Next is going to be
just a mid-tone. Obviously, you can play around with however many
colors you want to add in that spectrum
between dark and light. But I think for
sake of simplicity, I'm just going to add
one more color here. Now let's get that eyeball to that green family just
to keep it simple. A lot of times with eyeballs, I like to pick a couple of different colors and
go dark to light. Just gives it a little bit
more of a ethereal quality. Again, not worrying too much about having things
be too clean on here. This is just giving
yourself a reference for how you might want
to stitch stuff up so it can be pretty sloppy. Then this is usually where
I stop in this process. Once you've got what you're
relatively happy with in terms of an image and in
terms of a color palette, then the next thing
that you can do is just drop away the color because you don't necessarily
want to print that out. You just want to print
out the line work. If you want, for the
sake of printing, you can make the
whole thing black. You can drop away your photo. That way, you've just
got your line work image that is ready to
scale and print. The next thing that you're
going to want to do is to measure the area that you're going
to be embroidering. For the most part, match up your line work with
the area to be embroidered. I'm calling this approximately a five-by-five inch square. You'll create a new art board. Make the art board be
representative of the size that you want your
finished embroidery to be. Then you'll copy your line work, paste it onto your new art board that is scaled appropriately. Then you can tweak it and then
go ahead and print it out. Sometimes there's some trial and error with
printing things out. I did that with this image. I put it into a
five-by-five inch art board and printed it out. Came up with something that
looked about like this. I'm going to go in with
a pair of scissors and cut this image out so that you can really see where it's going to
lay without having to worry too much
about the extra paper. Now I can see that yes, in fact, that is
going to fit nicely, nestled right into the
triangular shape of this yoke. Take some time and work on
your design and prep it, scale it, print it out. I'll meet you in the next lesson where we'll go through the
process of transferring your design onto your garment.
6. Transfer Your Design: [MUSIC] We've got
everything prepped, we've got our design work
setup and printed out, and now we're going to
go through the process of transferring the
design onto the garment. You've got your scaled artwork, you've got your garment, you'll need some
carbon paper and some tool to transfer the
carbon onto the garment. I also like to cut
down the carbons so that you don't have
an unwieldy amount of carbon paper flapping
around on your garment as you're transferring
the image. The carbon will transfer
the ink to the garment anywhere where there's
enough pressure, so you want to
limit your ability to accidentally transfer carbon onto your garment in
an unwanted area. I go in and I cut
out the carbon paper so that it is loosely the
same size as your image. It doesn't have to be exact. I just like to get some
of it out of the way so I don't make a mess. Once you've got the carbon about the same size
as your image, you're going to lay
out your garment keeping in mind that you want
a relatively hard surface underneath your garment, or you're going to
have a hard time transferring the image. You'll take your image,
take your garment, line your image up where you're going to want
to see it on your garment, and then if you have
a few straight pins, it's a good idea to pin
your image down first. You don't want to pin when the carbon is
underneath your image because if you pin
through the carbon, it will leave marks where the pin goes in
and out of your garment. But you do also want to
leave yourself a nice flap. You're going to be
lifting your image up and down a little
bit to make sure that the image is actually
transferring to the garment. You don't want to necessarily
pin here and here because then you don't
have the ability to really give yourself a good
look at what you're doing. I pick a side, I pin the image down in a
couple of places on one side, and then you take the carbon and stick it underneath
your printed image with the glossy side down. There'll be a matte
side and a glossy side. The glossy side is the side that actually has the carbon
that's going to transfer. You'll insert the carbon
underneath the image, trying to make sure
as best you can that you've got the entire
area where your image is. If you've got one of these tools that has the little
ball end on it, now is a great time
to bust that out and play around with it. If you don't have one of these, you can use a pencil. I just recommend that it's
nothing that's too sharp. Basically, you just start
the tracing process and I would recommend starting
on the outside of the image and working your way in. That way, it's just easier
to check and make sure that the image is transferring. The other thing that I
do when I'm tracing, is I don't worry too much
about really scraping down because that, again,
can end up getting you in a situation where
you're tearing the paper and tearing the carbon, then what I like to do is go in and I give myself a little
bit of a dotted line. If you're tracing onto
an area of your garment where there's a lot of fabric, like if you've got
a seam allowance, the bottom of the yolk here, there's going to be
more layers of fabric, it does make it more difficult
to transfer the image because it's basically
a softer area that you're trying
to transfer onto, so you want to give it a little bit more
pressure in the tracing. I've just gotten around in a dot to dot method
on this teardrop. I'm going to lift this
up and take a peek and you can see the outline
of the teardrop there in that dotted way. Then you're just going
to go in and carry on tracing the rest of your image, and again, being relatively
mindful of how much pressure you're putting on the rest
of the piece of paper, being careful not to get too much extra carbon
on your garment. If I'm pressing down here in the image that I know I'm
going to be embroidering over, I'm a little less
concerned about it because the embroidery
thread will cover any potential carbon that may be difficult to
get out of the fabric. As you're tracing your image, if you're using the
dot to dot method, you just want to make sure
that you're getting any area where there's an abrupt angle
in your drawing like here, I want to make sure I
get that angle so that I'm not faking it in
the embroidery process. Here, I want to make
sure I'm getting that edge of my pedal, but then you can get
a little more loose when you're just making your
way down a straight line. If you created a
color in your design, if you've created a situation that you're really happy with and you want to, in
your line drawing, jog your memory about where
you had color splits, then you can just include
that in your line drawing and then trace out the areas that are going to be
one color or another. It looks like I've
gotten it all. At this point, you can take
your pins out and recheck. Sometimes if there are areas
where you're concerned when you're doing
your stitching, it might not be clear
enough for you where to go, it's okay to go in with
some marking tool. You can get a fabric marker. You're going to be
stitching over this. Sometimes I'll actually go
in with a permanent marker, especially if it's an image that I know is going to be
taking me a while to stitch and I don't want to lose the
line work that I've created. [MUSIC] That's the basic transferring your image
onto your garment process. Once you've gotten your images all transferred
onto your garment, join us for the next lesson where we'll go over
the process of getting your threads
all ready to go and beginning the
stitching process.
7. Prep Your Thread: Once you've gotten a relatively good idea of the color family that you're going to want to
be stitching in, I would recommend
either getting yourself a pack that not only has the colors that you
know you're going to use, but also gives you
some options to play around with while you're
in the stitching process. I really like to leave
myself some looseness in the stitching process because
when I've got something set up digitally and then I move
into the embroidery phase, often there's just
a complete shift in my approach when I see how
the thread colors look. A bead against one another on the fabric versus digitally. You'll want to find
some happy medium between getting too few
colors and too many, either via buying threads in a pack that are
pre-established pallets, or going to the store and actually buying
your thread colors one at a time that you can match up specifically to your design. When you go looking for thread, you'll primarily be looking at 100 percent cotton
embroidery thread. There are other types of
thread on the market. There is silk embroidery
thread is a popular option, but it has its own set of rules that we're not really
going to get into here. Today, in this class, I'm stitching with all 100 percent cotton
embroidery thread that comes in these skeins, where each thread is
actually made up of six smaller pieces
of thread that are wound together to
create one thickness, but we're going to split this in half in order to give ourselves a slightly thinner piece of embroidery thread to be working with while
we're stitching. Once you've gotten all
your colors picked, you can either move through the thread prep process
all at once if you feel pretty confident
about your palate and the amount of thread
that you're going to use. I like to take this one
color thread at a time. I'll figure out what my first
thread color is going to be and I'll prep the thread for getting
started on that color. Then, once I see that color
laid down on the garment, that's when I'll actually figure out which color I want to work with next and I'll prep
the thread for that color. We're going to start off with laying down the
line work for our image. Here I've still got the line work mocked
up in black and white. I know that that's not the color that I want
to see on the garment, but I do know that I
want the line work for the flower to be in a dark red. You'll see here a darker
maroon color that I have picked out later for going in and doing
the iris of the eye. I want that to be
my darkest color. I want the line work to be just a slightly lighter shade
in the same color family. I've got this lighter
maroon picked out for that. But your threads are going to
come in skeins like these. If you try to pull
the thread out this way in order to
cut it and use it, it's going to get knotted up in the way that the skein
is actually wrapped. You're doing yourself
a favor if you take just a minute and take
the paper off the skin and wrap the thread around
these homemade thread bobbins. The general recommendation
for how much thread to prep at any given time
is about three feet. You'll measure out
about that much, cut the thread and
then you're going to split this thread
into two lengths. I'm going to come in and
it's a little tricky, but you want to eyeball three threads and
three threads and hold three between one thumb and forefinger and three between the other thumb and forefinger, then you're just going to pull
those two sections apart. If you pull too quickly, you're going to knot up the thread further down
the tail of the thread. You want to slowly give yourself some space to hold onto
the thread up top. Then what I do is I
like to make sure that my tail has room to unwind itself without
getting caught up on a table or my clothes or my
hands or anything like that. Then you just use your finger to slowly split the thread in
two working your way down. You also want to hold the
two sections of thread as much away from one
another as you can. Because if you were
to let go right now, the thread would wind
back around itself. It's going to wind up one way or another and you
want it winding back onto just the section
of thread that you've split. You'll see it's twisting
itself back up. That's good. You want it to do that, but
you don't want it to twist itself around the other
section of thread. I'll let both sections of thread twist themselves back up
again, set one aside. You've got one
three-ish-foot section of thread that has three little threads
wrapped around one another. In order to be able
to stitch easily and comfortably with this
now split thread length, you have the option, this is not necessary, but it's really helpful to use a little bit
of tailor's wax and an iron to glue these three pieces together
for the sake of stitching. Otherwise, as you are pulling the thread
through the garment, sometimes the three
different threads will pull through at slightly different
tensions and rates. That will cause tangles and knots and you'll be
spending a lot of time trying to undo the
knots that you are then going to have
a hard time pulling through the garment fabrics. What we do to try to
alleviate that issue is you can take any little
chunk of beeswax. All you do here is you're
going to take your thread and nestle it into a nick in
the wax, pull it through. As you pull it through, it's just transferring some
of the wax onto the thread. You don't need too much, but you want to get enough
on there so that it feels like the three threads
are all being held together. But then in order to not be left with chunks of
wax in your garment, that will then when you go
to wash the garment or press the garment bleed
into your garment, we use an iron and
a press cloth. Today, we're pressing using a little
makeshift ironing board so that we don't have to move our whole setup over
to the ironing board. If you have an ironing
board at home, that's going to
be your best bet. You want to use a press
cloth so that you don't get wax all
over your iron. I just stick the thread
between two layers of a press cloth with a
little tail hanging out, hold the iron over
the press cloth, give it a minute and then
you're just going to pull the thread through so that each section of thread is getting heat by the iron
just enough to melt off any excess wax
and to melt the wax into the thread a little
bit so that it saturates the fibers and holds the
three threads together. You can pretty much
use any scrap of fabric for a press cloth. Here, I've just cut
out a little chunk of a gabardine that we had
laying around the shop. Cotton is a good one to use. You want to use
something that is going to absorb enough of the wax off of your thread to
keep the threads supple. You don't want to use
anything that is going to stick to your iron obviously or potentially stick
to your thread. But you can use this press cloth for waxing all of your thread. You can use it over
and over again. You just won't be able to go and use the fabric for
another project. You do want to make sure it's nothing that is too
precious to you. Once you've got your first
length of thread waxed, I like to take the
thread and gently wrap it around my fingers so that
I've got a little bit of a way to store and
organize wax thread. I'll set that aside
and then I'll move on to my next length that
has yet to be waxed. I'll go through the
process so that I can set myself up to be able to stitch for a while
without having to stop and re-wax
a bunch of threads. But I'll cut maybe three
lengths of the same color, split them, wax them, Iron them, and set them aside. [MUSIC] Once you've got enough thread prepped so that you feel like
you're ready to go, either starting
with just one color or maybe even prepping two or three colors
so that you've got yourself a little
library to work with. Then, we'll move to the
next lesson where we'll start actually stitching up the line work on our garment.
8. Prepare to Stitch: In this lesson, we're going to dig in and start the fun part, which is the actual
embroidery process. The first thing we're
going to need to do is get ourselves set up with
our embroidery hoop. To get your hoop setup, again, you're going to
take your smaller ring and set it down somewhere where you can work your
garment on top of it. You want to the best of your
ability center your image. I've got my image placed. The one thing when
you're working with a pre-stitched
garment is that you do have to be somewhat
mindful of the fact that you've got a
bunch of seams, and those are going to
be big and difficult to work your upper
embroidery hoop over. You just have to go
with what works. I'm going to loosen
the top hoop. I'm going to unscrew the screw just about as far as it will go. You don't really
want to start off with your hoop
completely unscrewed because it can be hard to get the screw to
set back in again. I have it loosened up as
loose as it possibly can be to make room for a lot
of these shoulder seams. You'll work your top
hoop over the bottom and this is really tight, but
I can squeeze it over there without breaking anything. For the most part, I've
got my image centered. This is good enough. Ideally, you don't
want to be too close to the edge of your
hoop with your image. Once you've got the
top hoop locked on, you can tighten it
using the screw. This is already really tight, so I'm not going
to worry too much about really cranking
the screw down, that can just make it
really hard to deal with if you need to move
things around later. It's a good idea to go around
and tug just a little bit on all of the edges
of your fabric so that you've got a nice
even amount of tension. The garment is good to go. Now we're going to
get our needle ready. We've got whatever
needle we've selected that feels comfortable
with a decently large eye, but nothing too big. You will find if you go
for a larger-eyed needle, that it's easier to thread, but then it's more difficult
to pull through the fabric. You want to find a
happy medium and we'll take one of our
pre-wax length of thread, push the thread through
the eye of the needle, give myself a little tail
through the eye of the needle, maybe five or six inches. You're going to tie a knot
at the end of your thread. Again by just holding the thread between your
thumb and forefinger, wrapping your thread
around your forefinger, and then just rolling the threads together and off
the tip of your forefinger and then pulling down
to create a knot. Now we're ready to start
stitching our outline. It doesn't really matter where you jump in
to start stitching. The things that
come into my mind when I'm deciding
where to start is I like to start at one
edge of that corner and start working my
way out and around so that when I am finishing up, I can finish up with a nice
locked stitch right there. The one thing about chain stitch is sometimes going around curves and turning corners is
a little less precise, but I'll talk that
through as we go.
9. Start Stitching Your Outline: I'm going to start pedal outline right here in this corner. You'll just come up
from underneath. Pull the thread all
the way through until your knot meets the
bottom of the fabric. As you're getting
started, as you're getting used to this stitch, I really lay the loop out
on the fabric so that I can see the direction that I'm
stitching in and exactly how to catch that loop as I'm
pulling my needle through. So again, you're going to sink your needle and then
you're going to give yourself a relatively
small stitch length, especially getting
started you don't want to do anything that's too big. The larger your stitch length, the larger that chain is going to end up and
the larger the chain, the less accuracy
you're going to get when you are creating
your line work. So I've given myself here less
than a quarter of an inch. So I'm just making sure that the thread is coming up
through the center of that last sew chain
that I created and pulling it snug
enough so that you can tighten up
that little chain. But the tighter that you yank on this thread to kind of
tighten up that chain, the more risk you
run of actually gathering in the
fabric underneath the stitch and creating like a shrinkage in the fabric underneath where your
embroidery is going to be. Then you're just going
to repeat this process, following the line
that you've created for yourself and trying for the most part to stay somewhat consistent with
your stitch length. This is where you can play around with what feels the most comfortable in terms
of the direction that you want to hold the hoop. As you're moving around, you're going to want to
change your hand position over the course of time. So as I'm starting and
the stitches are closer to this side of the hoop here. I'm stitching in this direction. But as I cross the halfway point of the
diameter of the hoop, you might find that it's
more comfortable to actually flip the hoop and
create the same stitch, but moving the stitch towards you instead
of away from you. What that looks like
is flipping the hoop around and then you're
just doing the same thing but you're actually
moving the needle towards yourself instead
of away from yourself. So again, you're going to
sink the needle down but then you're grabbing the fabric and pointing the needle
towards yourself, keeping it in the loop
that you've created and tugging towards yourself. If you're stitching and you have a longer straight
away like this, that is a good time to
play around with using longer and shorter stitches just to get a sense of
what it looks like. You can see here, I'll
take a slightly longer stitch and pull that and you can just see it just makes
a larger chain in your chain stitch series so it might look a
little out of place. But if you're in a
hurry and you're just trying to cover some territory. You can get away with creating a larger stitch on
a straightaway. If you're working on a
shirt that has a yolk, that is a second layer on top
of a base layer of fabric. One little trick that you
can use in order to clean up the back of the fabric is that when you stick
your needle down, you're just going
to try to catch that top layer of fabric
and not the bottom layer. So you'll see my
needle here has gone down and up but if
I flip this over, you actually don't see
the needle coming down and up through that
base layer of fabric. That is totally unnecessary. So I'm about to come up on an area where I'm
going to be making a pretty tight pivot. When I get to this point, I'm basically just
going to estimate. So here's where I'm
going to make the turn. Right here. That's the end of my
flower petal tip. So I have to either
think to myself, do I want to take
one long stitch and make it all the
way over to here? Or am I going to
split this stitch in half so that I've got
one stitch that ends here and one that ends
here and it's going to always look a
little cleaner if you take the shorter
stitch first so that I can basically bend my stitch down this way and then bring it back up a
little bit here. So I'm going to split
that length in half. Make one stitch that splits the difference and then one that finishes the
end of the line, so that my needle is coming up right at the end
of my line work. Then when I go to
make that sharp turn, as opposed to creating another chain where I
sink my needle inside of this chain loop and move my needle forward in the new
direction that I want to go. The first thing that
I'm going to do is lock this stitch in place by actually sinking
my needle just to the outside of that chain. Sinking the needle
pulling it through to the back, pulling it tight. So that way that chain is
actually locked in place. The loop itself is not
actually going to move in the direction that I'm going
to start stitching now. What I'm now going
to do is if this is the line work and this is the direction that I'm going
to start stitching in, I'm going to basically start a new from about here heading
in a new direction. So come up from underneath. Sink my needle right down next to where the
thread is coming out of the garment and then start heading in that
opposite direction. You'll see as I'm trying to
create these curves here, the shorter the stitch
the more accurately you're going to be able
to follow that curve. You'll see here I just
pulled up and see how you've got a messy like I'm tugging on the thread
but it's not pulling those three separate threads
through at the same level. When something
like that happens, what I do is I go back and
I loosen up the stitch, I use my needle to pull that
chain back up and out a bit and then somewhere between here and the
end of my thread, the three individual threads have fallen out of
alignment with one another. So I'm just going to take the tail that's sticking
through the end of my needle and pull from there. To try to even things out, I often will take the
eye of the needle and run it down to where it meets the garment so that I can really
take a look at what's going on with the length of the thread that I still
have to work with. Then I'll pull the
eye back up again, leave myself a few
inches of tail still and then try pulling through
again and see if it evens things up again. So that's tidy things up a bit. Then you just start cruising
down your line again. My length of thread is
getting shorter and shorter. The more thread you use up in the actual
embroidering phase, the less thread you
have to use to tie off. So you don't want to waste
too much thread by tying off early and then
throwing that thread away. But you also sometimes don't want to get to
a point where you're working with such a short amount of thread between
your needle and the garment that
you're really going to great lengths just to try to get your needle up
and down and through. Since the curve
of the pedal goes down and then it goes up and now it's going to start
going down again. I could just continue my chain stitch going
in this direction. Or I could if I
wanted to make things a little bit more
precise, again, lock the end of that
chain down here and then start another chain going in a slightly
different direction. It just makes a slightly
tidier line work. You can see here the
tail of my thread it's starting to become really close
to the eye of the needle, at which point you
just are risking your needle slipping off the thread entirely
with every stitch. So I'm going to take one
more chain stitch here and then I'll show
you how to tie off the end of the thread. So one more chain, pull through and now with
about this much thread left, I'm going to lock that chain. So sink the needle just to the outside of the chain
that you've just created. Flip your garment,
pull through to the other side and
then because I don't like to have a lot of knots on the back of my garment, here's the knot that
we started off with. But then the rest
of this is all nice and smooth and clean. So the way that I like to
finish off my thread is I just catch a little bit
of the garment that I'm working on and I pull the needle through and if you do that
three or four times, then that's enough so that you don't have to
worry about the tail coming out and you can just
snip it off back there. There's enough of
a tail to secure your stitches and you don't have a bumpy knot on the back of your fabric
right there. [MUSIC]
10. Finish Stitching Your Outline: We're still going
on our line work with same color. I'm just going to
take another piece of my pre-waxed thread, thread it up through
the eye of the needle. Then again, tying a knot at the end of our thread
by wrapping the thread around the pointer
finger and rolling up with the thumb, pulling down. Then you're basically
just going to start where you left off. You can try to actually get your needle to come up
through the last chain that you made or if it's just to the outside of
that, that's fine too. Pull it all the way
up and through. Then just carry
on down the line. Again, shifting the
embroidery hoop is necessary to make sure that you're feeling like you're
going to hold it comfortably. I've got my thumb holding down the lasso part of the
chain that I'm trying to create and I've got
my fingers underneath the fabric just giving
a little bit of guidance and pressure
to the fabric to help me be more precise with the needle as
I'm moving along. Again, here's another one of those spots where
I might want to lock my chain in place so that I can make a slightly more
precise direction change. I'm going to lock
it here and then start stitching in a slightly
different direction here. This is another spot where I've got not quite two
stitches worth, but longer than I would
want one stitch to be. I'm going to just
conscientiously take this length and split it in half and turn it
into two stitches. Make one stitch,
and then finish out the line with your
last stitch here. Then you're going to
lock that last stitch by sinking your needle
to the outside of the chain you've
just created. Pulling the thread through, you can either flip
your project and pull the thread through a couple
of stitches and clip it off or since we have
more line work to do, you can also just carry the thread over to where
you're going to start working on a different area of line work and come back
up and keep going. It's okay if you end up with some carried thread moving from one
spot to the next. If you wanted to slide your needle from this
spot to this spot, in order to then hide
that length of thread, you could do that, but
that's not necessary. This is your garment. It's okay if it's a
little messy on the back, especially if you're
just getting started. Once you've gotten [MUSIC] to the next area where you're
going to start stitching, just get started again. When you're trying
to create contour that isn't a smaller
area like this, you might want to
consciously think about shortening your
stitches so that you can really follow the contour
of a more delicate curve. If I was to take a
big stitch in here, it would basically just be too broad of a stroke and it would cut the curve down to
more of a straight line. I'm taking smaller
stitches here. Again, I'm going to lock the
stitch down here so I can emphasize the fact that
I'm now going to be moving in a different
direction from up here. At this point before I start this
line work that will define the outside edge of
this main middle petal, I'm going to come in and
hit these contour lines. I'm going to show you how
I'm going to do that. You can sync your needle
down, lock that chain, and then just bring your
needle up over at the end of this single line and carry
on down that single line. I'm going to move
the hoop so that I can stitch a little
more comfortably here, going in this direction again. Then once you're
ready to jump over here to this contour line, I'll just sink my needle and then I'll pop
it back up again. I'm just going to
take the chain on this line work and work it
in the opposite direction. Sometimes you might end up wanting to be really
mindful of making sure your chains are following the exact same
directional pathway but for this line work we're
not going to worry about it. I brought my chains towards me on this line and
now I'm going to send them off away from me
for this line and you'll see, you can tell a slight difference in the way that the thread lays, but it's pretty subtle. You can work in the way that is more convenient,
directional way, as opposed to making
sure that all of your lines are being stitched
in the same direction. Now I've got these
two little areas of contour line work stitched. I'm going to sync my needle, lock that last chain. Then I can jump back over here in order to start working on this main
petal area line work. Now's your chance to go
ahead and take some time and finish up the line
work on your design. In the interest of time, I'm going to try to
get as far as I can on this line work but
in the next lesson, we're going to jump
to showing you how to go about
filling in some of these spaces with the
colors that you want to use to fill in your design.
11. Fill in Your Design: I have laid out all of the line work that
I'm going be doing in this red color on here. Normally, I would
probably go in and hit this leaf area with the
green line work before I started on my fill but in order to move us through this project a little
bit more efficiently, I'm just going to
leave that for now, revisit that later and jump in here so that we can
start talking about the different ways in
which you might approach filling in some of
these larger spaces. We're going to start
off by filling in the bottom area of the
flower right here. I know that this is all just
going to be one fill color. I don't have to
think about changing colors or adding
shading or gradient. I'm not going to worry
about that down here. I'm going to do all of this in just this darker orange
color that I've chosen. I've got a couple of
links of thread waxed and ready to go and I'm
going to get started. You start just like you
would with the line work. It's basically the
exact same process, but with slightly
different outcome. I've got my waxed
thread on my needle, a knot at the bottom of
the length of thread. Then, I'm just going
to think for a minute, how do I want to go
about filling this area? There's a couple
of different ways to approach it and you'll see as we start working
through the fill, that the ways that you approach working in
the fill will have some impact on the overall aesthetic of the stitching
when you're finished. But for now, as a beginner, it's nice to just
let go of having too many expectations
and overthinking things too much
and just thinking about filling in an area. That being said, the way that I think I'm going to
go about filling, is I'm going to
mirror this line and come up here and then
I'm going to turn around and come back this way, and I'm just going to
go line by line by line as opposed to another
way that you could approach it would be literally to follow
this line until you got here and then follow
this line around here, and continuing to do that until you've filled
in that entire area. One thing that I start to
think about as I'm doing fill, is using the texture
of the thread to emphasize the contour
of the drawing that I am trying to create. Here, I really want this sort of scooping action of the shape of the bottom of the flower
to be accentuated more than I want to be accentuating
the shape of this petal. So just like before, you're just going to find a
comfortable place to hold the hoop so that you can
start creating your fill. I really like to snug my
lines up close together. When I'm sinking the needle and bringing
it back up again, I like for the needle to really hug the line that's just
to the outside of it. That way, as you're
working in your fill, you're going to have no empty spaces
between the two lines. Some of that can show up
sometimes a little unexpectedly. You think you're filling
things in really nicely but then when
you're finished, you'll see that the lines of stitching have
pulled away from one another a little
bit and it can end up looking a little thin, which that is just a
different aesthetic. There's nothing inherently
wrong with that. You'll just find that
as you practice, you might like that
thin look and you might like a really
thick filled-in look. It's just a matter of personal choice
but I like again, to really sneak that
needle down and up very close to the line
that I've already stitched. It also has a tendency
to mimic a little more closely the type
of work that we do on our machines in the shop. Here, like I said, since I'm going to basically
be turning around and coming right back from the direction that
I was just coming, I'm going to lock in that
last stitch and bring my needle back up
right next to where I just locked the stitch and then just start coming back in the
opposite direction, taking fairly small
stitches along the way. Just following that contour line of the bottom of the flower. Again, going to lock down
the last stitch here, come back up right
next to where I locked that stitch and start heading back in the opposite direction. When I've finished an area and
it feels like it's gets dense enough for my taste, then just like you've
finished the line work. I'm just going to make
sure that I'm sinking my needle to the outside of the last chain that I created, pulling through and if I'm not immediately
going to move on and start filling using this
same color somewhere nearby, I'll flip the project over, grab a couple little
stitches on the back, and clip the thread and figure out where I'm
going to move on to next. If you want to find a spot
on your design that you feel is pretty
straightforward and it's just one color fill, why don't you go ahead
and jump in and play around with using
contour to fill. In the next lesson, we'll
dive in a little bit more about color
combinations and starting and stopping
different colors and then also how to emphasize different pathways and contours to help bring your
image to life.
12. Introduce New Colors: I've dug in and done a little
bit more fill in my flower. You can see here that I've
riffed off of the idea that I lined out on
my digital SketchUp. But I haven't worried
too much about being 100 percent true to the exact
drawing that I did here. So I've gone in and added a darker orange,
a lighter yellow, and then this middle
range, orange here, which is the same three
colors that I'm going to be using for these
petals up here. You can see here, light to dark, and
here dark to light. So I'm just going to
carry on for now, basically using the chain stitch to go around the line work that I've laid to just
create a little bit of shading around the color. As I'm starting the
process of adding my fill like what I
talked about down here, there's almost a
sculptural quality that comes into this part of your
decision-making process, which is, what are
the shapes that you're trying to emphasize here? In a petal, I want there
to be some movement that looks almost like
the cupping that you can imagine would exist
with a flower petal. So as I'm stitching, I'm thinking about
accentuating this curve right here that just plays into the
idea of the petal cupping. I'm going to just carry
on right now using the same technique
that I had showed you for not only the line
work but the fill. In terms of keeping my
stitches really snug up against the line work that
already is laid down, you can take corners. You don't always have to sync and lock your previous
chain stitches. You can also just
go ahead and make a much smaller chain stitch in order to set yourself up
for taking a nice tight corner like when I'm going to go up and around the top of
this line I don't really want to create a
really boxy look by locking and pivoting. I want to round that by
just taking a number of smaller chain stitches that'll take me around the top
of this line work. So now I'm going to save this to finish up another time
so that I can show you guys how to switch colors and start playing around with
shading within a space. So again, I'm just
going to reference my original drawing
over here and see that I hit the petal over here with a little bit of
a highlight in this area. I'm going to move from my darkest orange to
my lighter yellow. So I'm going to go in. I've got my yellow
all threaded up and I'm going to go in here and hit the far end of this
petal with this highlight. So again, I'm just
nestling this line of chain stitches right up against that dark red line work. Start off by just mirroring the outside shape of the petal. In a situation like
this where I'm not necessarily following a
distinct pattern line, it's good to remind
myself where I do and don't want this
color to show up in my final piece of work. I find it helpful when I'm
flying by the seat of my pants color-wise to add the darkest
and then add the lightest. Those two things are
more spatially defining. Then I go in and I just
fill everything else in around the two ends
of the spectrum that I've just established. So now I'm going to go in and create some of
this highlight action that's a little bit less
line-work specific. I want the color to come
down here a little bit and then I want it to
come into this area a little bit more also. Now I'm thinking about it
more like I'm drawing. So if I was using a
pencil or a paintbrush, which directions, would I
like the strokes to go in? I'm just going to
carry my line work through in the direction that I would be
dragging my pencil if I was working in that medium. So I'm just going to bring a
little bit of a line in here, and then I brought my
needle and thread back up to where I left off above. Again, I'm thinking about
that contouring shape. So what I'm thinking
about now is essentially, I'm basically just
drawing a line that's from here to here. I'm not going to bring
it all the way down. But I want this line to follow
the shape of this curve. I'm going to come down in
this general direction. I don't necessarily want
the highlight to come down and completely touch
this darker orange. I want to leave some room for that intermediate
color in there. So I'm going to lock
that last stitch there. Take a look, see where
else I might want to fill, reference my digital mark-up and I think I'm going
to come back in here and do a little bit
more filling in, in this general area. I think that's probably good for the highlight on
this petal over here. So at this point, I can either just jump over and start working on the
highlight on this petal, or I can flip over, take a couple of stitches on the back and then
clip this guy off. Diving in with like the
intermediate color. I'm just thinking, I just
want to fill the rest of this petal with this color, but I still want to emphasize the contour that
I've got going on. That's trying to mimic the
cupping of a flower petal. So as I'm stitching, I'm going to start in here and sneak some of these stitches in between the darker
orange line work I have here and here, just to give it a hit of
color in that smaller area and also to establish
a pathway that mimics this darker red line right here. That's just going to set
me up to be able to follow some lines that have
been established by the curve of the line work. This is one of the areas where you can really play
around with how thick you want your stitches
to appear when you're done. Because you can go in and keep adding lines
of stitching in areas that might seem relatively dense already to thicken it
up a little bit more. Here's one of those times where I could lock
this stitch right here and pivot and start coming back towards myself
in this direction. But because of the fact that I think of these
lines of stitching as very similar to brush strokes and I'm working this contour
in this direction right now. It just feels more
comfortable for me to come back to where I started and again squeeze in another
line of stitches in this area that ostensibly looks
relatively dense already. But I'm going to squeeze
some more in there just to really emphasize not only the contour but
the fullness of the shape. So I'm going to come back in
here and continue to follow the shape of that petal
to sculpt this shape. About to fill this guy in. So again, I'm just going to lock down my last stitch,
take a look, see if there's anything
that feels thin or any areas that feel
like they need to be fleshed out a
little bit more. This feels pretty good to me so I'm going to flip it over. You can see here
I did a lot more jumping around, which is fine. So here I'm just going to weave my thread in a few times into the stitching and the
garment and then clip. Take a look. See how it feels. See if it feels
representative of the drawing that I've made for myself and then think about where
I want to start next and what shapes I want
to be emphasizing. But you can see that it's
just a really spontaneous, expressive, meditative
experience that you can play around with,
experiment with, and not feel too much like
you have to figure it all out before you just dive in
and start stitching.
13. Add Your Final Touches: Through the magic of television, my fill is done. This actually took several hours just to do this one image. The beauty of hand embroidery
on a garment like this, is you can shove it in your bag and take it with you
wherever you go. I took this garment with
me to California, Oregon, Washington, and back to Texas and worked on it a little bit in every one of those
places along the way. It's seen the world
and been through lots of showing in
and out of backpacks but that's the beauty
of this handwork, is it just accompanies you
wherever you want to take it. You can see here
that I've gone in. After doing all of my fill work, I made the decision
that I didn't pre-plan out this blue outline
in my digital image. Often when I'm done with the basic image
that I want to stitch, I like to tie things
together using some outline. You can use a color
that's a bright color that really emphasizes
the outside contour of the shape that
you've just stitched, or another thing
that you can do with an outline is
actually pick a color that's really close to
the color of the garment that you're stitching
and if you do that, and just outline things tightly around the edge of your shape and the color of your garment, it just gives it a clean, crisp transition, as
opposed to looking at a lot of the outline
of the chain stitch which can be a little
bubbly and uneven, which is fine, and can
also be quite charming. But if you want to
clean things up, adding an outline around
everything can do that. I'm going to go in and
I'm going to outline this teardrop shape down here and that'll be the last thing
that I do on this image. But I wanted to show
you that not only did I add this image to
the front yoke here, but I added one
to the front yoke on the other side
of the garment. If you look closely, you can see that I made some different
decisions over here than I did on this side, where I was going to add shading and contouring in this
bottom petal versus here. It's subtle, but it shows
the hand work quality. I added a little bit more
highlighting over here. This is more thickly applied so you can just see
a little bit more. You get a little more body and texture in here
than you do in here. The last thing I'm going
to do on these guys is just outline these
little teardrop shapes and then they'll be done. When you've gotten to the point where you feel pretty much
like the main outline and fill of your
image phase is over, just glance over everything, maybe do another reference
to your digital image, see if there's anything
that's standing out that you want to add. Keeping in mind that you can
always go back and add more. But if you've gotten to a place where you feel pretty
good about stopping, then feel free to join
us in the next lesson where we're going to talk about some of the little extra hits that you can add to
your garment to give it a little extra
western wear flare.
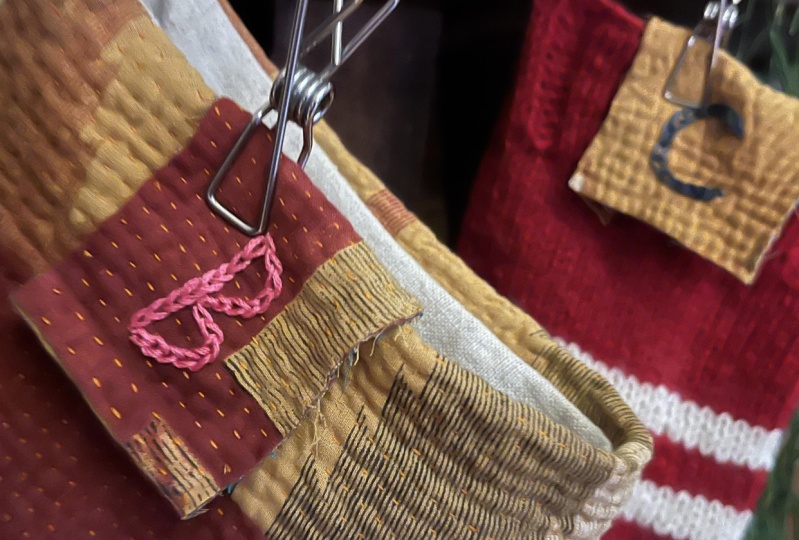
14. Add Western Wear Flair: You've got your main image
or images embroidered. But if you're curious
about little hits that you can add to
your garment to give it a little bit more
of a Western look, a couple of suggestions
that I've got for you are adding pick stitching, which is just basically a simple running
stitch that is used to accentuate certain
angles or areas. You see pick stitching
in Western wear a lot. Often, they'll use
a contrast thread specifically to emphasize
the pick stitching so that not only do you get a
little added emphasis on a color edge, lapel
edge, yolk edge. But it also actually shows
off the fact that there was hand stitching involved in
the creation of this garment. That is one thing
that you can do to add a little nod to
vintage Western wear. Another thing that we'll
play around with here that you can think about whether
or not you want to do is adding some rhinestones. To get started with
a pick stitch, I'm just going to
pick stitch along the edge of this
yoke right here, just to add a little
embellishment. I'm not using the
embroidery hoop primarily because the area
that I want to be pick stitching is wider
than the hoop itself and I'd rather not be
messing around too much with taking off the
hoop and moving it. The other nice thing
is that when you're stitching along a
seam line like this, this yoke has three layers of
denim along the seam line, which means that
it's going to hold its shape pretty easily. I'm not going to have
to worry too much about when I pull my
thread through tightening and gathering the fabric
like we talked about with the embroidery. To start the pick stitching, you basically are just going
to pick a side that you want to start on. You're going to
stick your needle up and through the fabric
about just a little under a half an inch away
from the edge. Pull the thread through. Then each stitch that you take, you're going to
move backwards from where your thread is coming
up out of the fabric. You'll sink your needle just about a quarter
of an inch or so depending on how wide you
want your stitch to appear, we want it to be relatively
bold and decorative. I'm going to go more
a quarter-inch back from where I came up, sink the needle down, and then come back up maybe
about half an inch or so. You're just keeping in mind that each time you
make a stitch, you're going to be
moving the needle backwards from wherever it is, coming up and out from
the front of the fabric, pulling it through. You see you've got a nice
little stitch right there. Again, I'm going to come back about a quarter of an inch, go down, come back up a little
bit further down the line. These can be a little tricky as you're getting the swing of it to try to get nice and even. But again, that's part of the charm of a hand
stitched garment, is that it doesn't have
to look too perfect. If you're working on your
garment without a hoop and it feels difficult to manage then you can
always just pop it in the hoop whenever you want
to make that transition. You're coming up to a corner
like the tip of this yoke. This is a good time to plan where you want those decorative
stitches to show up. I like to try to hit
one right in the corner there as I'm turning
that corner. I will just plan accordingly and try to get a stitch
that nestles right down into the neck of the yolk. Finish off. Just the way we did
with the chain stitch, I'm just going to take
my backward stitch here, flip the garment over. Again, just take a few
little stitches on the back of the fabric, either through the fabric or through some other stitches
that might be showing up on the back of the fabric and then trim the
end of the thread. Here you've got your
little added accentuation of this Western yolk right here. The next thing we're
going to do is add some rhinestones on here. The nice thing about
the rhinestones that you can easily find
out there today is that they are heat set rhinestones. You can find these really easily online or
at craft stores. They come in all
different sizes. You just want to look
for the ones that say that they're hot
fix rhinestones. You can find hot fix rhinestones
pretty much anywhere. And the other nice
thing about using heat set rhinestones
is that these days, the glue that they use
to fix the rhinestones seems to be really pretty
sturdy and last for a while. That being said, if
you're trying to prolong the life of say a
heat set rhinestone, for both the sake
of the rhinestone and the sake of the embroidery, you want to think about
wearing something more before you're worrying
too much about washing it. But to use a heat set
device like this, the first thing that
you do is literally just lay out all of
your rhinestones where you think you would want to
see them permanently set. I'm just going to lay
some of these out and then you can
move them around and decide if you want them closer
together or further apart. You can, should
you want actually set them right on top
of the embroidery. If you wanted to give this
eye a little extra twinkle, you could actually glue a
rhinestone right there. When I'm trying to
figure out where the rhinestones
are going to live, it really is just an aesthetic
decision based on density. If I want to get a rhinestone on that point and that point, then I'll find the center
point of this over here. Then you can wiggle these
other guys around to mirror that same
spatial relationship. Once you've got your
stones laid out to where you want them, hopefully, have turned on your rhinestones setter so that
it's nice and hot, you'll notice that the tip has a little crack in each
side here and here. I don't know what that crack
is actually designed for. But what we use it
for is that often you need a way to hold
the stone down on the fabric while you pick up
the rhinestone setting tool or else the tool will
sometimes maintain its grasp on the rhinestone and pick the stone
up with the tool. We hold the tool down
for 10 second or so, and then use the pin to hold the rhinestone down
while we pick up the tool. Well, we've got an ice
storm accompanying us. Now, as I was laying
the rhinestones down, it started dumping rain, which we desperately
need here in Texas. We're going to be
grateful that it's here even if the timing is
maybe not the best. Forgive the background noise. I finished the
rhinestones on this side. I left the other side
temporarily rhinestone free, so that you can take a look and see aesthetically what
maybe appeals to you more. Either way, it's
totally up to you. The pick stitching here, I did it in blue here,
I did it in orange. There's all kinds of
ways to play around with all of these different
little accentuation. Other areas that I love to add pick stitching would
be around the callers, around the flap of a pocket. Same goes for any and all
little embroidery hits. Sometimes I'll add an
initial to each color point. It's fun to add words, dates into little
unexpected areas. Basically we just want
you to figure out ways to play around with these ideas and show us what
you come up with.
15. Final Thoughts: That is about it. Hopefully, you've
had some time to sit and think about things
that are important to you, images that you
want to play around with and talk to
the world about. I am hoping that it has
felt fun and playful and that the actual
embroidery process has felt fairly straightforward. I hope that it's
felt meditative. I hope that your project has, accompany you on all kinds
of adventures and journeys. I hope that all of
this inspires you to just keep thinking about ways that you can embellish
old garments and give them new life. Head on over to the
project gallery, you can upload a photo of whatever you've been working on, and I'll do the same. I'm going to upload a photo of this project once it's done for you guys to take a look at. Thanks for taking the class. I really enjoyed the process
of slowing things down and getting off of the
machines and remembering how satisfying it is to sit down and just do some hand work, and I hope you find
it satisfying too.
16. Bonus: The Legacy of Chain Stitch : [MUSIC] Fort Lonesome is a
collective of designers and artists that worked primarily in Western wear and
chain stitch embroidery. We all considered textile
arts our primary love, but we have airbrush artists, we have graphic design folks, we have tailors, but the fort is the
umbrella of all of us working collaboratively
here together primarily in chain stitch
embroidery and Western wear. [MUSIC] We're primarily
interested in creating heirloom garments
that tell stories that are deeply
meaningful to people that they will hold onto, and pass on to
future generations. The idea behind this class is to give people the tools at home, to recreate things
not too dissimilar from what we create
here in the shop, and to be able to
re-purpose garments that they find and
give them new life without having to rely on
anybody else but yourself. After my daughter was born, I started meeting more people who were also trying
to figure out ways to use entrepreneurial
inclinations, to stay home with their kids, and I banded together with a group of other women in Austin and we started figuring
out how to help each other make things and
sell those things. We created a group that we called Coup De Tot at the time. Get it. Coup De Tot,
T-O-T, it's hilarious. We all made and sold
things for kids, and that just basically
evolved very rapidly into a line of
children's clothing that I was taking a market
in New York and LA, and I had reps that
were selling things all over the world. While I was making
children's Western wear, I bought a machine
from a friend. She sold me a chain
stitch embroidery machine that she couldn't
figure out how to use. Over the course of a few years, I was able to get
the machine running to the point where
it felt like it had an enormous amount of
potential above and beyond even just the Western wear
paradigm that I was working in. So Fort Lonesome was born out
of rebuilding my business around these machines that
I was really excited about putting at the forefront
of everything that we did. Those machines are out there, and you can still find them, but they're hard to find, and they're even
harder to get running if you don't feel
super comfortable being a relentless
machine mechanic. But the nice thing about chain
stitch embroidery is that although it's lovely when you can get your
hands on a machine, and learn how to use the machine that speeds things up a bit, but the stitch itself is
completely doable by hand, which makes it accessible
for anybody working at home. [MUSIC] I think what I really
love about chain stitch is just that it brings to mind all kinds of vintage
garments that I've seen. It's a very familiar
aesthetic for those of us who are charmed by Western wear. There's nothing necessarily so special about
the stitch itself, it's one of many types of hand embroidery
that can be done, but it is one of
the only types of vintage machine embroidery
stitches that are often seen. It feels familiar. It feels like there's a legacy. There's a hand of the
maker that's involved in a lot of the chain
stitch embroidery that you see out in the world. I just feel like it's really
vibrant and versatile. There's a long legacy of using garments to tell
personal narratives, pretty much in every culture dating back thousands of years
or at least 1,000 years, there has been some element of graphic representation of
life story on garments. My hope for you is that
if you're going to invest your precious time and
newfound skill set into embroidering something
that is meaningful to you, that not only will you
wear it with pride, but you'll also consider
its potential legacy to be handed down to
somebody you love. [MUSIC]
 Kathie Sever, Artist, Designer