Transcripts
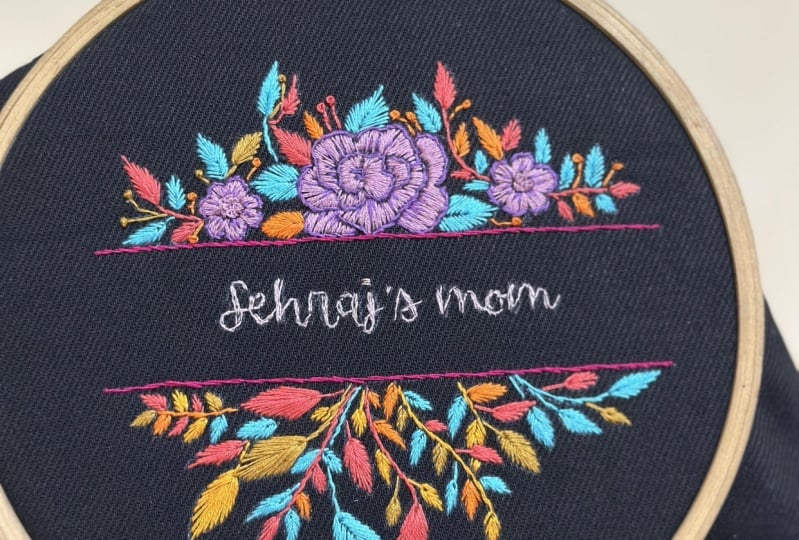
1. Introduction: I think there is nothing more fancy than hand
imported letters. My name is floor and I'm
enhancing already artists. I like to mix embroidery
with other mediums, but I also love traditional
hand embroidery. In this class, we are
going to do exactly that. We are going to make imported
letters in a script fonts. I'm going to show you
everything you need to know about importing a lines from
starting your first stage, making three different stitches or four in bordering lines. And how to get that
design on your fabric. And you will know how to make your own imported letters and be able to a monogram anything or have the
best gifts at Christmas. This class is for beginners. You don't need any
experience with embroidery. This class is great. If you want to try
out embroidery, I want to be able to make those as smooth
lines with threat. Let's go to our next
lesson where I will show you in the class
projects and join me.
2. Class Project : In this class, we
are going to cover the following materials
or what do we need and how are we
going to use them? I will show you everything
you need to complete this project and
some other options that you might want to try out. Fabric versus our hoop. What fabric is best to use, and some little tips to keep
the back nice and society, your first stage, how do
you start that first stage? And how do you end
the first stage? I'm going to cover three
different stitches. A debt you can use for lines, transfer your design on fabric. The best ways to get
your design on fabric. It is way easier than
you think, trust me. And then it is time to
make our class projects. For the class project, I want you to have
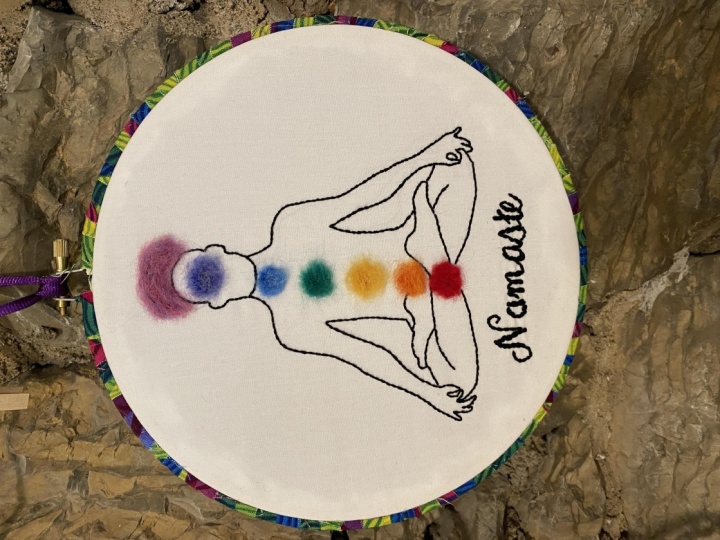
letters or maybe an illustration with
lines and only lines. I will show you
all the steps you need to make your project. In the end, you will have a hoop ready with some nice
line work on it. Let's start with our materials.
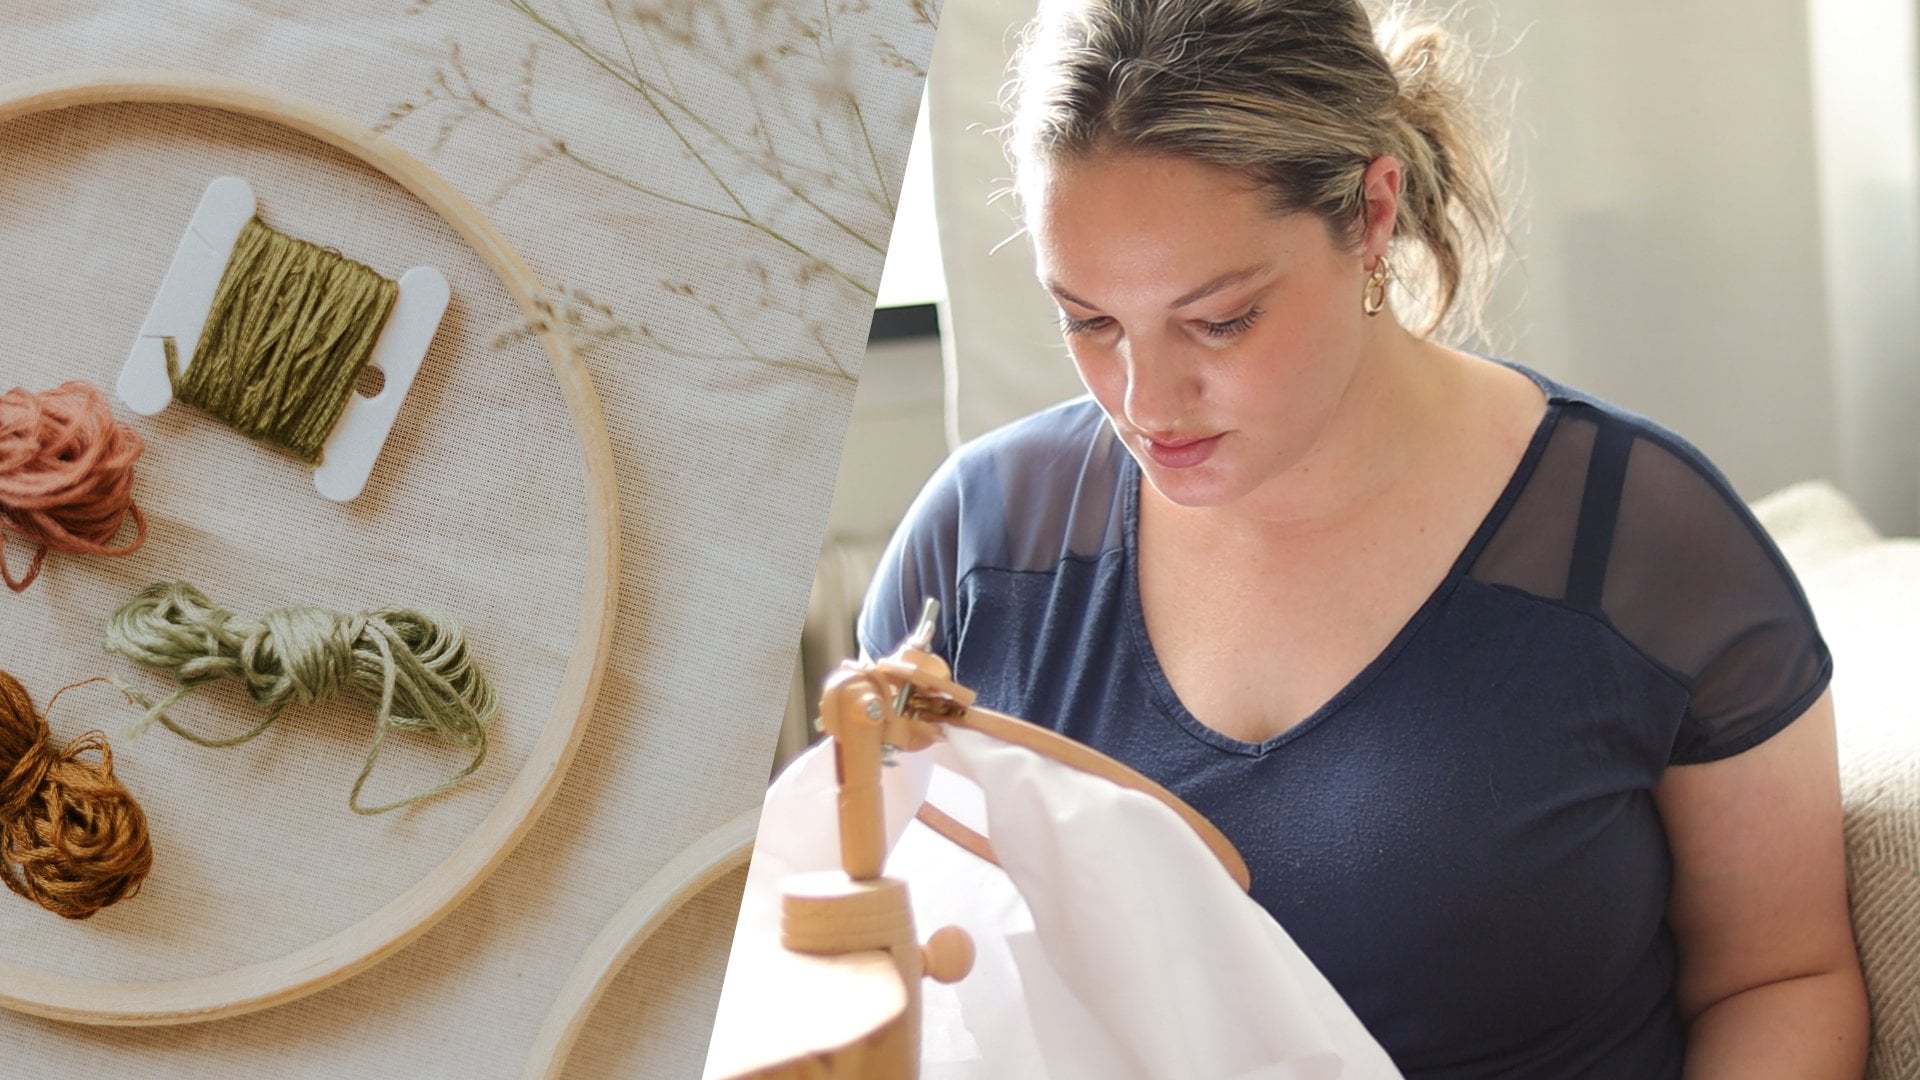
3. Materials: Before we do anything, we have to have our materials. For embroidery don't
need much materials. And there are many options
open in the materials. And I'm going to
start with the hoop. I have two groups here. This is a bamboo hoop, and as you can see
with the bamboo hoop, it's not completely round. Sometimes they are
around, I have to say. But with bamboo it can
happen that it is not perfectly round and that your
edges are a bit more rough. Now, if you spend a little
tiny bit more money, nothing wrong with
a bamboo hoop. But I do like the wooden hoops. You can see that. But it wouldn't hope you have
read as nice round shape. That is persistence. And this one has a little
bit of roughness here. So it can't be that it's
not completely smooth because this is not
a super quality. Wouldn't hope this is a group that is not from
very fancy material, but it is a slightly more
up than a bamboo hoop. And in a materialist you can find everywhere where you
can get these things. And I will also put in
some really fancy hoops. You do have a really, really nice hoops that
are more expensive. What is also really good idea
is to look at places like eBay or a thrift shops or
wherever you have a line, you can look at Etsy. I live in the Netherlands that
we have marked clades and all those vintage websites
where you can buy stuff. A lot of times they have vintage hoops which
are really cool, which have these big, big screw here, and it's
from having materials. So keep an eye out for
that because a lot of embroidery stuff
is on those places on the secondhand website or in thrift shops because
unfortunately when someone passes away or something happens, don't
know what to do it. It is not something that they generally think is worse
allowance or debt. They can do anything.
Widths are just, they just get rid of it. So always look for that if you are interested in
this kind of thing. And same goes for threads. Look online at second-hand eBay, a lot of great deals
and a lot of science. You have these used
embroidery stuff that you can just
get for really cheap because someone doesn't
need it anymore. Needles are very personal. What I would advise you to do is to get some different
kinds of needles. Make sure they are
have a pointy tip and that are not too
thick. Most of the time. They're called
embroidery needles. But you have them in
different thickness and lengths and it's so
personal what you like. I sometimes like to
have a shorter one because it just easily
goes up and down. Sometimes I like a longer one. And I just wanted to show
you here that I have when I really like It's a
very thin needle, but because the
needle is so tin, it is very easily that it bends. You can see that is
not straight anymore. It has been it from use, so that will happen quickly. The thinner a goes with this. I have no idea what
brand they are anymore because I have so many
jars with needles in them. But in the class description, any downloads, you can find some examples of needles
that I really like. But again, my advice is
to try different things. It also depends on how many
strands you want to use, how to make your tread is. But we are going to make
really fine lines and then it's nice to have a quite
thin needle for our tread. I have some different
examples they can use in different situations. This is a MATLAB and this
is a machine embroidery. That means is very thin, but it is very good to use
when you are doing fine lines. It doesn't have to call
up pucker or it doesn't. It's a very tread that
is very nice and smooth. No edges around it. It's nice and smooth tread. That will last a
really long time. You have this also in
cotton or even silk. Some cases, if you want to use more strands
or he just wants. A slightly thicker line
and does because this one is going to make a
really, really thin line. You might want to use
embroidery scheme. If you want to know the color
of black embroidery thread, a debt is the DRI said, this is just a thicker
thread than this one. With this one, you can
also use more strands. So make tick aligns
with this one. You cannot really
use more strands because it doesn't look
nice, nice to each other. They don't attach
well to each other. These are really
made as a scheme. So if you use two or
three, they release it. Nice to get into kind of like, you know, stick together. And this really doesn't
stick together if you use two strands and
I'm using the MC, but you don't need to use DMC. Embroidery. Thread is fine. I have some cheaper options that you can use that
are also in a PDF. And for our scissors, you can use any
scissors she wants. I know already where
these came from. If I see acute center
somewhere, then, you know, I'm going to buy it and I found these
look very cute. Always be on the
lookout for cute scissors because why not? It's so much fun. This is something that
is very handy to have. This is called a friction pen. And what it does is that you can draw with it
and it is erasable. And it is erasable
with friction from the backside of this
and also true heat. So if you draw on your fabric
and you put heat on it, then it will disappear. If you want to know
more about how to get your designs on fabric, I have a separate class for
that that you can watch. It's all about how to
craft your ideas onto fabric and how to
make it come alive. If you want to know more
about that and know how different ways on how to get your
design on the fabric. Then, then you should
watch the class. I will link it down below
that you can also watch it. But today we're just going to use this pen and
I'm just going to draw some lines and show you
how we're gonna do that. Now, 40 fabric. I'm going to use this fabric. And it still has the
little sack on here. And the tag says it's
called quality protists, whites quality, but this is a fabric that you
can get anywhere. I know, I know that it's
also available on Amazon and it's just a really
nice sturdy cotton. You can find all the materials
in the PDF download. I have options for fancy silk or options that are more
budget friendly. Let me know in the project
section what materials you are going to use
for your project. In our next lesson, we are going to
put the fabric in the hoop with some
tips and tricks.
4. Fabric versus Hoop: I remember when I
started with embroidery, I had to Google how to put
fabric in an embroidery hoop. I had no idea how to do that and it didn't make sense to me. So don't think that it's strange when you
don't know something. So if we're working with lines, with thin lines and letters, I'm not the neatest portion. I like to go up and then down and all over the place so the backside will
not be super neat. And you can look through
this fabric a little bit. And my advise to use a
two pieces of fabric. Then it's much easier to
just do your thing without thinking and not worry about how it's going to shine through or if it's going
to shine through. Okay? Now when it is in your hoop, you want to make sure that
it is nice and tight. And let's get rid of
all that excess fabric. That is just gonna
be in our way. Remember that fabric
should not have a stretch. And other than that,
you are good to go. I hope my tip I'm using the
two layers will make you more relaxed about not having
to keep the bag so neat. I would love it if you show
me any project section, what kind of fabric you are
using and if you would, also use two layers, we are almost ready to
make our first stitches. But first, I want
to show you how you start your stitching and
how you end your stitching.
5. Your First Stitch: For some people, this
might be super obvious. But how do you start making those first stitches and how
do you end your stitching? We all have different
ways of doing this. The way I do it is in no
way a professional way. This is just the way
I like to do it. Here has a DMC
tread and there are six little strands in a scheme. And I can take all of
these individual treads out. I like to do it like this. I can hold one in my hand
and then I slip it off. So what it will do is
I go in with my needle and then I leave my
finger right here. And I will keep that finger on there for about three stitches. So here we have one. Number one, I can turn it around and I
can pull as hard as I want and it will stay there. So if I'm stitching and I
have some more stitches. And now it depends because
if I'm not done yet, if I'm still want
to search something else after it is in
the same project. I will adjust, cut it off. And then I will cut
it off till here. And then if I stitch again, I'll do that actually. I will cut it off till here. And then I will do
the exact same thing. Put my hand on it.
I think there. You will see that it
then sorts itself out. See this is really
like nice and tight. This will also not go anywhere. But it also really
depends what you're doing because if
it's for clotting, then yeah, I would not
leave this hanging. But if it's just for normal stitching like something you're gonna put on a wall. I just loved this
because it will not come off unless you're
really yanking at it. Now, if you want
to be more secure, what I do is I weave
it underneath. And then I go into
that little hoop, that little loop here. And I just make a
little not that way. It really is secure. I want to point out again
that this is the way that I do it and you can do it
the way you would do it. Show me any product section out. You like to start
an end your stitch. Now that we have
this information, it is definitely time
to make some stitches. Let's make some stitches.
6. Three different stitches: In this lesson, we are going
to make it three different stitches that you can
use for making lines. I want to show you really
quick what I'm using now. And this is an
embroidery stand at you. Screw on to your table. You see here that it is
screwed onto my table. And then here I can put my embroidery hoop,
it not necessary. This is just something
I'm using because it is easy for me to film this way. It's really study. And then you can really have a good look at what I'm doing. The first one that I'm going to make is the outline stitch. And with the LN stitch,
I'm using the DM see, I'm using one strand. I think this is like
a stage that a lot of people use to do the outline. And what you do is you're
going in what you needle. Go a little bit up. And this loop stays on, it's up. For our first stage. We're going in the middle
of that stitch back. And now we're going to a
little bit to the side, again, keeping this stitch up. And now we are going back
into that other stitch. And like go. Again. When you have a curve coming up, make sure that you
make that stitch. Smile. Let me see it. If you have a really nice
outline stitch, nicer, rounded. To always keep this on top. And this is called
the outline stitch. Look at it, it doesn't tangle. And when you want to
stop using this stitch, just simply go to last. You ended there. We have another different
variation on this stage. How can I use megan
that align and dad is called the stem stitch. The stem stitch is
exactly the same. For this one I really
want to show you. So you have this nylon thread, which is like
really good to use. But what you also have is the tread with like
lots of colors. And I haven't used this one is actually the first
time I used this one. I do have them from a
different kind of brands. This one is from DMC, this room is from MATLAB. I will give you all the links or where to buy them
and reading from. But it's just a really
fun way to just spice up your outline is just the same
as this but then colored. So now you can also
see how that looks when we work with this strategy, start is more thinner. I really love
colorants, stitches. It's just fun. What we're gonna do with
this is we're gonna do exactly the same. So you have to be
careful with this because it has this
tendency to tango more. And we're gonna do
the same thing. We're just going to leave
a working tread down. So again, we're doing
the exact same thing, going into that same stage. But pulling it down. You can see that is quite
tricky to work with this stage because
with this tread, it is more slippery. You just have to get used to it. So same thing, uh, just to keep the tread
there instead of up. I'm going to end it
right here again. Now we're going to stitch, that is my favorite stage and
that is the split stitch. Going to use some DMC for it is. What we're gonna do
is we're going to go in it's it aside. And then again a little
bit to the side, go up. What do we do is like we
could go in that last stage, but what you wanna do, it
just splits search as you go directly in the middle
of that our stitch. And then you have this
nice seamless line. Say again, going in a
nice seamless line. And I love this stage
because this stage, well, this is my favorite
for doing outlines because I like it
that I don't have to, um, work with another thread. It's really easy. Yeah, I like it because it's
just it has a good flow and you can immediately see that this is
my favorite ride because it goes so fast. From all those tree
that I just showed you is just what you prefer. And I really prefer
this one because it's just nice and he hands
and that's what I like. But this does give a more rounder affects
all disk even more. Stitcher effect is
just what you prefer. And of course there are
many, many more stitches, but these are just the
most common stitches for outlining a project. We made the outline stitch, the stems stage, and
the split stitch. Show me any project section. The three stages and what
your favorite one was. Now, only need to make
our design on the fabric.
7. Transfering Your Design: Transferring your
design on fabric. It can be done multiple ways. I'm going to show
you two ways of doing this with a really
easy method of just tracing your design from your laptop and with the help from sulci
prints and stitch, I'm going to explain
those two methods and the pros and cons for tracing. I have here my name typed out in Canva and I use the font. A great vibes here, you can see it on my screen. I'm taking my hoop, make sure that you only have one layer of fabric
for the tracing. You want to see as much
as possible to the hoop. Make sure that you only have one layer of fabric
for the tracing. You want to see as much as
possible through the hoop. I place my hoop
against my laptop. Don't worry about your
laptop getting scratched. If you push gently,
nothing will happen. I use the friction
pen on the fabric and trace the lines on the letters. Now I can imagine
that this might look intimidating and that's why
I also have another option. And that is using the print and stitch from sulci fabrics. You put it in your printer, doesn't matter if it's
an income parents or, or a laser printer. You just printed design out
and stick it on your fabric. To make this work, we switch
are designed to an A4 on Canva and put a sheet upside
down in the printer tray. Now I can print out
my design and cut it out and stick it on the fabric. I can just wash it
off once I'm done. Now both these methods have
their downsides of tracing is difficult with small
lines as this one. And the prints and stitch
method is a grade, but you do have to wash
it off once you are done. And because it is
disappears when it's wet, it can get sticky if
the weather is hot. But if you don't have a sweaty hands and have
an air conditioner, has or it is just not that warm. I would definitely go for it. This steak and
stitch, that's it. It's so easy to transfer your design and make it
look super professional. Show me any projects section what tracing method you like to use now it's time
to stitch or name or what ever name you
would like to stage. It can also be a drawing.
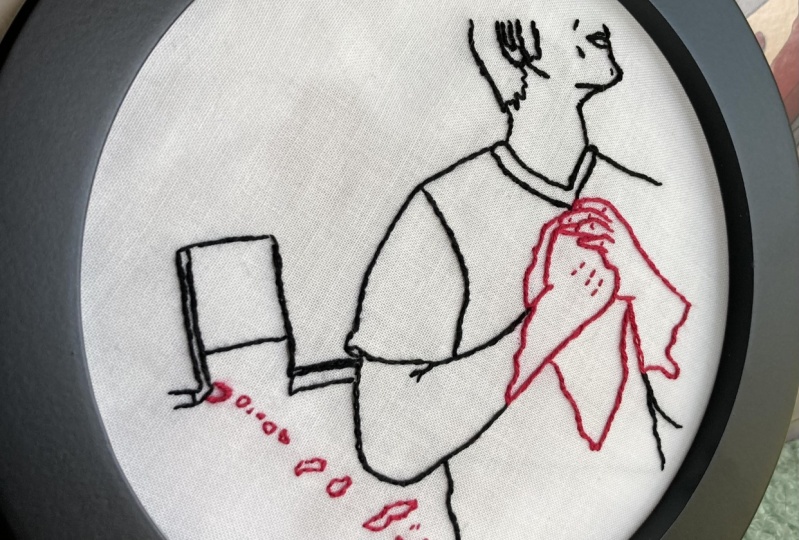
8. Embroider Your Name: You now know everything
you need to know to embroider what ever
align you want. This can be letters, but also an illustration, and you can do this on
what ever you like. So here it is, This is my name. I'm going to embroider
my own name. So you can see that it is a
little bit tiny mistakes, but don't worry because
we have the erasable pen. I can always get rid of it. I shouldn't do this
really like in a classic way and just
use black thread. I'm going to use the
DMC black thread. I'm going to use one strap, going to start at the very end. Just following the line. To have a big curve here. I make my stitches
bit smaller and I'm going to use the split stitch, gonna go in into
that other stitch. And always make sure that
you keep your fabric side. So just always
keep an eye on it, like Okay, it's lighten it up. You don't want it to pucker. And the problem, it's
not really a problem. But the thing is with
this pen is because it is a warm day here is that
it will start to erase. I can still see it and
that is fine for me. Now I'm going into a more
of a straight allies. I can make my stitches
a little bit longer. And I made a mistake. So when I make a mistake, I just whip it out with
my needle and go back in. Here. We already have a difficult one. And how I'm going to
tackle this is I'm going to make a really small stitch. C can make just a really
small stitch just to cover those curves
that you come across. I'm going to get c making
all these letters. Now that I've done most of it, what I want to look at
is add our letters. If we look at our letters, you can see that at
some point it is a bit more thicker than
at other points. And this is really, if you want to make it more fancy because it already
looks really good. And what I'm gonna
do is I'm going to use the same method. I'm just gonna go next to it, next to that line and
do the same thing. So making that split
stitch right next to it. See that already makes
a big difference. You can do that at any point where you see that
it is a little bit thicker than at other places. See here at the F, it's a bit more ticker. It's always good to use
the outer side, right? Because the outer side
is just the easiest. But you see sometimes you
also have to look at, okay, am I going to use the outer side of
this inner side? Because if I use the other
side like friends with z, o, if I use the outer side
and I'm going to really change the look of a dad letter. So be aware that you don't
change the shape too much. So you just do that split
search right next to it. That's how you create a
difference in thickness. Here I'm going a bit. It's only in that arch. Okay? This is optional because it is already looking really good. But if you really want to
make your letters stand out, then this is really
a way to do that. Here you see that first letter. It's subtle, but it's
definitely there. And does make a difference. Now that you've
seen how I did df, but I really want to show you also how we're gonna do the o, because the OH is a bit tricky. Because I think I'm gonna
do the inside of the o. Otherwise we get a really huge o and that's also
not what we want. You see, it's really on
the inside of the OH, that the letter is more thick. Try not to overdo it. It's easy to overdo it. But don't really see where
are you going to do it. Getting inserted outside
with the L you can do definitely on the
outside because you still have a little
bit of room there. You do have to like look and choose where
it will look good. And you really get
that monogram. Look. You did it, you stage your name. Now, how cute is this for
Christmas or as a wedding gift? With this skill, you
can make a hoop with baby names or a monogram below
covers as a wedding gift. The list goes on and on and show me in your project
section what you made. I can't wait to see all that
creativity comes alive. I do want to do one thing
before we are done, and that is finishing our hoop.
9. Finishing Hoop: Like with everything
a debt I mentioned, there are so many ways
of finishing your hoop. This is just one
way of doing it. You can see if you look really, really close because
I traces of course, would depend that
we can still see a little bit of those lines
versus what's a b here. We still have that line and now I'm going to
use the hairdryer on it and get rid
of those lines. First gonna go around
and cut off the edges. I did the initial cutting. I'm going to cut it like
really short on the ends. Oh, I remember the
first time I did this. This was so scary because I was afraid that I wouldn't be enough fabric left to
put down to glue down. These are all things
that you just have to, at some point you have
to trust yourself and you've done it so many
times that you know, okay. I can get it this shirt, It will be fine. But I'm using I'm just
using an all-purpose glue. So any glue actually will do just putting a
little bit on it. I'm not yet gonna glue
it down and first waiting to it so
little bit tacky. Do that all around the hoop. Putting it on the edge. Now that I put the
glue all over, I'm just going to use my
thumb and push it down. I'm just going to go over
that again and again until it really is glued down. Now I'm going to let it dry
eye disease and we're done. And now we are
really, really done. I hope you enjoyed this
class and I really hope you will share
any project section. You're finished hoop. Please leave a review and
also tag me on Instagram, which your finished
piece so I can share it on full metal
needle on Instagram. And I will see you in my
next Skillshare class. Thank you so much.
 Floor Giebels, Embroidery Artist