Transcripts
1. Introduction: One of my favorite things
about what I do is that you can create something
from scratch really quickly, especially in Procreate
Dreams because you can just draw anything you want and
make it move immediately. I think that's really fun.
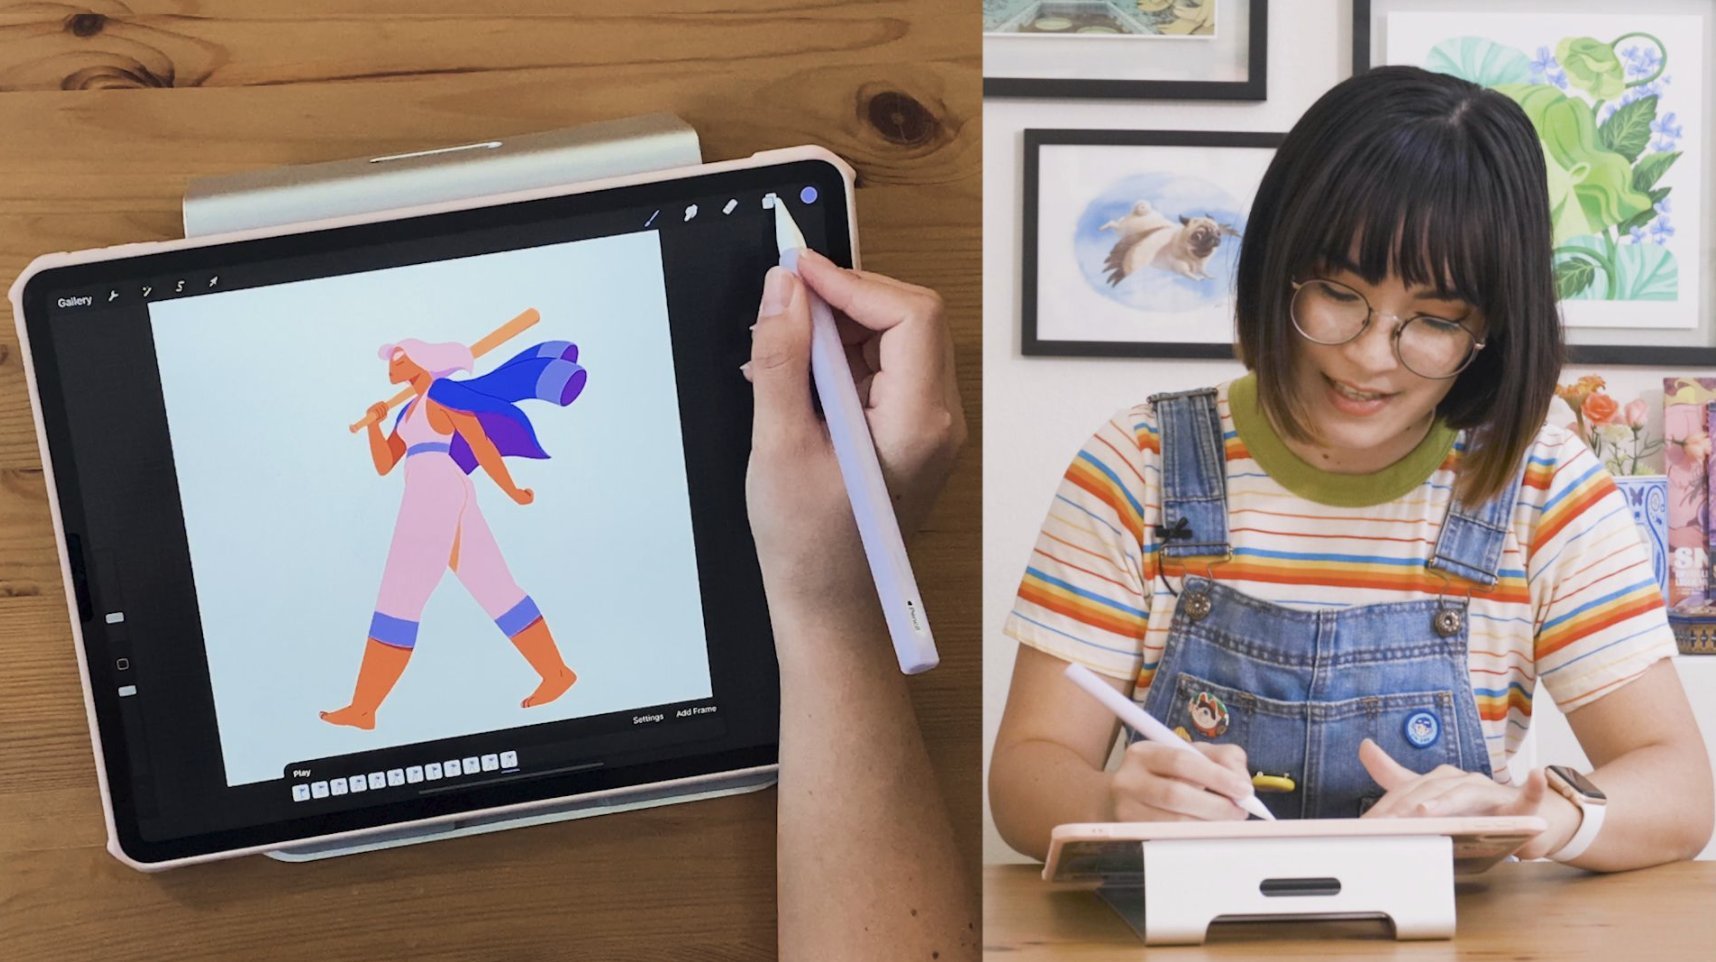
I'm Danni Fisher-Shin. I'm an Art Director,
Animator, and Illustrator. I really like creating
the things that I wish existed in the world. You might know my work from several made-on iPad
campaign videos, music videos for
Zedd, Olivia Rodrigo, [inaudible], and
I've also worked on projects for Apple, Google,
Facebook, and [inaudible]. Today we're going to
learn how to create a full 2D animation, completely in Procreate Dreams from rough animation
through cel animation, learning a bit of the
performing feature, through the end product
and compositing. I think the hardest part of
2D cel animation when I first started was having the confidence
to play around with it. You really can find
your own voice. It'll be a lot easier and
it'll be a lot more fun. All that you need to take
this class is your iPad, Procreate Dreams, and
your Apple pencil. By the end of the
class, you'll have a professional-looking
fully completed, and composited 2D
and cel animation. I hope you'll leave
this class with a newfound confidence in
using Procreate Dreams and an excitement to
get started on making all of your own
professional-looking projects. I'm so excited to
be teaching you in this class.
Let's get started.
2. Getting Started: Welcome to the class. I'm
so excited you're here. I've been creating 2D animation professionally using
Photoshop and After Effects. Now I'm excited to use Procreate Dreams to do all
of my process in one app. Professionally,
I've always had to use cel animation and then export and bring it into another program to
composite and finish. But with Procreate Dreams, I can do everything all in one app. I started using
Procreate all the way back in 2016 and it sparked my creativity because
I was able to do fully illustrated digital
art all in the go. Now I'm excited to use
Procreate Dreams to do that same process but
with full 2D animations. I love the accessibility and mobility of Procreate
and Procreate Dreams. I have a short
attention span and I like being outside
and moving around, so this was the perfect
development for my illustration and
animation practice. We'll be going into
this class with our knowledge of
Photoshop, After Effects, and Procreate, and using Procreate Dreams to recreate the same processes
all in one app. We'll be learning as
we go in this class. Taking a rough animation all the way through to polish
and the finished piece, we'll be creating a fully
realized 2D animation of a sprite zooming through vortex with transitions
in and out. We'll be going through
all of the key steps including the
performing feature, key framing, and style
animation within groups. All of the skills you're
learning here don't have to be used to
create the same thing. You can take these
skills and transfer them to your own animations
and your own ideas, because we'll be learning
all of the basics. Now that we know what
we're going to make. Let's get started,
grab your iPads, and meet me in the next lesson.
3. Setting Up a Rough Animation: We're going to start with
the basic file set up. As you can see here, I have my frames per second set at 12 just because I like a step more hand animated look
and the duration is just 7 seconds for right
now because that's probably around where
we're going to end up. We can always change that after. What I'm going to
do is the idea for this animation is to
have a sprite that moves across a vortex and then ends up in a swirly end bit that
it disappears into. With that beautiful
sketch in mind, we are going to draw the basic background
layout so that we can use that to keyframe
a fake camera move. I'm going to start laying
out a full panel for us to move a fake camera
over with our keyframes. This is just going
to be a guideline for our end animation, and the nice part is that
we do get to keyframe it, so it'll be there the entire
time for us to reference, to make sure that our
camera move looks right and everything is looking like a real camera is going
on a real space. I'm just going to draw some really rough
sketched guides, and these can be, again, very imperfect because they're just guides and that's
the nice part of this. We're just getting the
main key frames in, the main camera
movement and then we get to do the fun stuff. I'm going to draw
these out super long just because we want our sprite to have a ton of
room to travel this way, so we get a really nice
sense of zooming through, we can have cool little
like sprites shooting past as speed lines
and things like that. It'll be much more dynamic
the farther we take it. I'm going to draw just a really
simple little fake vortex for our end part here. Just for this purpose, we'll sub in a nicer, more simplified
version of this later. But this is just to
get placement right, so this is fine for now. What I'm going to
do here is since we have this whole long piece, I'm going to take this piece
and put it in a group, press and hold with this
selected and press Group. If you do that, it becomes
a group and you have your main drawing layer
inside of this larger group, like in Procreate,
when you group layers. Whatever a keyframe on this group itself is
going to apply to everything within the
group and I can still edit this inside of that group without
affecting the key frames. We're going to use this group as our camera move group and put all of our
keyframes on this part. To do that, I'm
going to tap here at the very beginning and
select the move action. I'm going to choose
move and scale, because we want to slide
this all the way over, and I'm going to click
and hold and expand that. What this does is it
breaks out all of our different dimensions
and properties here, like if you were to separate
dimensions in after effects, et cetera, or go into the
additional properties. We have our x movement, our y movement, our scale on
both axes and our rotation. What I'm going to do is just keyframe the x movement here. I'm going to go all the way
to the end of my composition. Maybe I'll go right around
here because I want to have a little bit
at the end while it's straight on the vortex. Let's go here. See I have this x showing
on the key frame. It shows my y
whenever I move it, so I know that I'm on the x
horizontal movement here. I'm going to tap that
so it makes a keyframe, and I'm going to drag
this all the way over to make our camera move. Now if I press Play, we can see that we've created this false camera move
with our keyframes. It's very rough right now, but this is what we're
going to use to set up our main camera
move animation and then animate within
that and on top of it. As you can see, it's
easing in here to this animation and
that's something that we're going
to edit as well. If you click and hold again
and click Set easing, you can change from
linear easing, which is basically all at
the same speed, or ease in, ease out and ease in and out, which is just easing
in and out with speed between each key frame. We want this to move
a little faster. We don't want it to start
from such a slow start. What I'm going to do
is I'm just going to drag this key frame a
little bit earlier, so we hit right around the part where it's
getting a little bit faster. Now we're starting a
little bit further in. Let's see how that looks. That's looking a lot better.
I'm going to speed it up a little bit because
that is super slow. I'm going to drag this back. Let's say around here, we
can see how that looks, and our camera move is
going a little faster. I think that looks fine for now. We can always adjust this later. That's the really
nice thing about it. Now that I've
keyframed the x axis, I'm going to start keyframing our zoom into
the vortex at the end here. This is why I separate
the dimensions. At this point, I want to be able to control everything
individually. Now we're going to zoom into the vortex using our
rotation keyframes. What I'm going to do
is select this layer. If you see these three dots, you can edit the anchor point, which is something
that's really nice, that is not in the regular
procreate. I'm zooming out. My anchor point is all
the way over here, because this is where
I started drawing. I'm going to put it
right in the middle of this beautifully drawn vortex. We're going to use that
to start rotating this. I don't want it to stop and then start rotating
so I'm going to use these separated dimensions to have it start rotating
a little bit early. I'm going to delete this first key frame because
we don't need it, and it's a little cleaner if we just have the ones that we need. Now I'm going to offset
this a little bit. Our x key frame stops here, and on either side,
we have our rotation. I'm going to click on
the top right corner to create the rotate option here, this little arc and I'm
going to rotate it. Let's do just one for now. Now we can see how
that looks. So good. I'm going to change
this easing to an ease in because we want
it to blend with the movement that we're
having here sideways, and I'm going to drag this
a lot farther over here. There we go, because
it's starting to spin a little bit too soon. That's a little more like it. This looks really simple, really rough, really
gross right now. But this is the basis
that we're going to use for our nice
animation later. We want to lay it out very
well at the beginning. Now that we have a rotation in, I'm going to start
keyframing a zoom in for the end and for that we're
going to use our scale. I'm going to create two scale keyframes
because we want it to scale at the same
rate on either axis. I'm going to make end
keyframe here and then scale the entire thing up to where I want it to end
at. Let's take a look. There we go. That's not bad
for our general layout. It is starting to spin a little awkwardly and scale at the same time, so
I'm going to again, set the easing here and this is also going to be an ease
in because we want it to feel like it's starting slowly and then sucking
in really fast. Now that we've learned
basic keyframing and set up our main camera move, meet me in the next lesson
to go over creating cel animated elements that
will add into this move.
4. Creating Cel Animating Elements: So now that we have our
main camera move animation, I'm going to start creating
our cel animated sprite. One of the nice things
about this is I can create a little
living hole loop, and then keyframe that for
the overall animation. I'm going to start by just
drawing our little sprite. It's just a little brushy ball, and I want this to look very
hand-drawn and hand-done. I'm using this big
gouache brush. What I'm going to do is
I've created this layer, I can actually just
swipe down here and use the flip book feature to animate frame by
frame very easily. Now that I have
one, I'm going to actually click here and
do show onion skin, and that way I can see what
the previous frame was. You can go in here and edit
all of your onion skins, change the colors, change how many frames,
forward and backwards. These are my settings,
I like to keep it on a lower opacity and different colors for
forwards and backwards. All I'm going to do here is just keep drawing over
with the same brush, the same circle, and as
I go forward frames, it's going to jitter
a little bit. I want that because it looks like I hand-drew
every frame, but I didn't, it's a lie. I'm going to keep going
through and doing that, creating several
frames for it to loop through that we can
then keyframe overall. Now that I've created
a few frames, I'm going to swipe down to get out of the flip book feature, and we're going to
see how that looks. I'm going to drag my timeline over here so
that I can see the loop. That's not too bad. I'm going to add a
couple more frames, and I'm going to make sure
that the scale matches, because these are looking
a little bit different. What I'm going to do
to create a good loop, I'm going to duplicate
this first frame and drag it back over to the end, when I look at my onion skins, I can see the difference between this frame and how it will look when it loops back
to my first frame. I can see that this one is
going to be a little small, so I'm just going to scale
that up a little bit, instead of hand-drawing
it all over again. This one also needs
to be scaled. We can take these pieces that
we've already hand-drawn, and adjust them
like this as well, which is really nice so we don't have to redraw everything. I'm going to add a couple
more frames just to get a longer loop, so it looks a little more realistic that we
hand-animated every frame. I'm going to make sure that they match to this last frame, and this one can also
be scaled up just a little bit more. Let's see one more and
see how that looks. I like to keep the edges really textured here because
that's what's mainly going to show when we end up key-framing this later and
make it look really handmade. Now that we have this loop, I'm going to delete this
last duplicate frame, and I'm going to select this
and just drag all of these, click and hold and group them. Now I have my loop as a group. Let's see how that
looks. That's not bad. What we're going
to do is I'm going to name this, press and hold, and I'll name this Sprite Loop. Now what we can do is instead of taking this and redrawing it over and over and over again, we're just going
to duplicate this. This way, we have it animating in a living hold
throughout the entire piece, and we're going to take this as a full group and keyframe that. That way the entire time it
will look hand-animated, but it's not, it just
is much more efficient. I'm going to select all
of these, and group them. Now we have our living hold of our sprite that we can now animate over our
main camera move, and it already looks
somewhat convincing, even though we haven't
done much yet. Now that we have our hero
element animated in the loop, we're going to animate a few different
effects that we're going to use within
the camera move, that we're then going to
duplicate in the same way so that we have the entire
screen populated, but we only have to create
a few different assets. What I want to do is while we're zooming through this
horizontal space, is I want to have some animate
speed lines, some blobs, stuff like that, flying
past in this direction to really emphasize the speed that we're moving
at camera-wise. I'm going to choose my brush. I'm going to go into my camera move and
I'm going to start animating some
streaks flying by. I'm going to do the
same thing again. I don't want to start at the
very beginning for these because we're just creating the straight ones for right now, for this big long
horizontal piece. I'm going to go into
flip book again, and I'm just going to start
animating a piece flying by. I want to make this
look very textured again because I like making it seem this whole
thing was hand-drawn, and we're just going
to very easily, very simply, roughly
draw in a few frames. As you can see, we're following these guidelines that
we've set for ourselves, so we can pretty clearly see what everything needs
to do in order to look it's moving with the
overall motion of the piece. I'm going to drag this
down a little bit because that is a
little bit off, go back to my drawing function, and then back to flip book. That is one of the nice
things about this, is that now that we have
our rough animation, it's pretty much set to
go in terms of needing reference for making everything look right motion-wise,
which is really nice. Let's have our little sprite
just fully exit off screen, and then we'll see
how that looks. That will do. I've made a
few in different colors. We can always go and if we
want to change a color. If we press this Plus
sign and add a track, if we wanted to
change the color of this one, right here, then we could just take
this color and drag it in, and then create a clipping mask. If we do want to do that while we are duplicating
these, we can do that. That's a really nice thing about working with these
animation layers. We have these few
different ones here. I'm just going to
start duplicating and dragging these over. This is all just stuff that we can edit and finesse as we go. I'm liking how this
is looking so far. What we're going to do next, now that we have our
speeding sprite animation, is we're going to go into this vortex part at the beginning where it's
a little more curved, it needs to be customized, and this bit at the end
when it starts to spiral. What I've done here is I've
added this guide because hand-drawing spirals is just not going to happen in a
way where it looks perfect, so we have this guide in here and I'm going
to actually follow these guidelines instead
of the rough ones that were in my own sketch, and animate a few pieces
going into this vortex. I'm going to take my main colors and start
right around here, where we start to see it
within the camera move. I'm going to follow these lines that we have in the guide. Again, I'm going to keep
this really rough and make sure that it's
following these lines. Now, one thing you can do
is you can animate this outside of the group along the spiral and then put it inside of the camera
move if you don't want to go hand-drawn
for each of these. But in my opinion, it
looks better like this, so I'm just doing it on top of the entire thing so it
looks a little smoother. Again, I'm just following
the same line of the spiral as we go. As it goes farther
into the vortex, it gets smaller because
it's farther away, so I'm just enhancing that scale a little bit to
add to the effect. I'm going to have it break
up a little bit as it goes, so that we can have it fade out. We're just going
to keep doing this for the rest of
our spiral pieces. I don't think we'll
need to make too many. But we can also take this
one that we have here, and since this is a perfect spiral that we've
dropped in here, we can always duplicate
that and move it as well, in the same way that we
did the other sprites. I'm going to go
back and animate in the same type of way
at the beginning, following my guidelines, a few sprites going in this
more curved perspective. Again, these guidelines
are super helpful even though they were really
rough at the beginning, having them here
now makes it way easier to know what we're doing and not have to
keep the guesswork. In the same way, I'm going to take these, duplicate them, and make custom animations for each of these more
curved parts that need their own specific pathway. I'll just take those and
add them so that we have enough to duplicate across these whole spaces and make the beginning and end of
the vortex feel full. Now I'm going to go through
the tedious part and duplicate all of
these and create all of the custom animations. Now that we've animated all
of our horizontal elements, duplicated them across and created a really nice
scrolling background, we've added our custom pieces, cel animated at the beginning
and end of our vortex, now we're going to animate the hero element using
the performing feature.
5. Animating the Hero Element with Performing: Now we're going to bring
back our main hero element that we pre-animated
at the beginning. We have some nice textural
animation happening right now, but we want to make
it move and have its own character
within this vortex. What we're going to
do is we're going to use the performing feature, which is something
that's extremely unique to Procreate Dreams and very exciting to animate something that feels really
natural very quickly. For this animation, we want it to be a
little more subtle, so I'm going to do a more
natural looking animation where the sprite stays a little
more in the center and then zooms into
the vortex at the end. So we're going to select
our main hero element and we're going to press this
"Record" looking button. What this is going
to do is as soon as I start dragging this layer, it's going to move it both where I'm dragging it
and across the timeline. As I drag it throughout
the entire timeline, it will play and it will record that animation and keep
that as keyframes. Let me show you what I mean. Now, when I go back,
you can see that we have that entire
animation that I just moved with
with just my pencil that's already animating
throughout the entire piece. Now this is something that
is then saved as keyframes. If you look here,
you can see all of the individual
keyframes that were saved for each position
that we were in. This is editable, which
is something that's nice. We can go back in here and clean this up and make the motion
a little bit smoother. We can also just undo
it if we don't like how we did that movement and
just start over again, and it's super, super fast, which is really nice. I'm going to try to make
this a little more natural, a little more centered,
and then I want it to have a big
movement at the end. Something like that Is a little
more what I'm going for. Let's say I don't like
where it's landing here. I want it to be a little
bit closer to center. I can just take that keyframe and drag it in a little bit. This way I can have a custom animation that
feels really natural. But I can still go
back in and edit and make it feel exactly the
way that I want it to. It's now has a bigger circle and then a smaller spiral as it gets deeper into our
center of the vortex. One of the nice things about
performing is that you can do different functions and it will record them
at different times. I just did the position. Now let's say I want
to animate the scale. I'll press the "Record" button. Let's say I want it
to start very small, get bigger, then as it
goes into the vortex, I want it to get smaller again. Now we have that also built in, also baked into the
same keyframes, and we didn't have to
hand do that at all. The great thing about
the performing function is that you can use
it to any extreme. You can make an animation as subtle or as crazy
as you wanted to be. Let's say we wanted to make the zoom toward
screen zoom away. It really dramatic with it. We can do that super easily, just as well as if we were doing a subtle,
more natural animation. Now you can see we have
them zooming everywhere, all over screen and we could even play with the
scale on top of that to make it
even more dramatic. Let's say it's getting
closer and farther. Now we have the super
dramatic crazy animation that could be really fun and happened extremely
quickly if we wanted to have that level of movement. Now we have our main hero
animation done super, super quickly and
just the amount of time it took to move my pen. We're going to go into adding in some bespoke cell
animated elements on top of it to add character.
6. Adding Character to Hero Element: Now that we have our
full animation with our hero element and our
background animation scrolling, we're going to start
adding some character to our hero element by adding
cell animated touches. What I'm going to do is
I want to add a bit of a trail behind it as it's
flying through this space. What I'm going to
do, since we have our sprite within a main group, is I'm just going to
duplicate one frame and turn off everything else
so we can focus on this. I have it positioned a little bit farther
from the center. This is probably
the farthest from the left hand side
that it will ever get. One of the nice things about
key framing on groups is it's like key framing on a
precomp in after effects. If you add something
to the precomp or to the group that the
key frames are on, then it's also subject
to that movement. I'm just going to
animate one loop of a trail and then put
that inside of my group with my sprite and
it should move with all of the movement that we just did using the
performing feature. I'm going to take one
of my trail colors. I want to make this
really nice kind of textured wavy trail for this. It'll be like this shape
and it'll just trail behind and undulate like a wave motion behind our main animation,
something like this. I'm going to use the bonobo chalk brush because
I really like the nice noisy texture that it makes and it's
very big and soft, so you get some nice
edge texture as well. I'm going to start animating
still on this background. I'm going to turn on my
onion skins again and I'm going to just follow
this wave motion and create a simple
loop for our trail. I'm going to make this
pretty subtle just because I don't want
to distract too much from the main animation and
if we have it going too far, it will become a little more obvious that it's key framed. We want to make this
look really natural. I'm just extending that
wave motion a little bit, keeping it very textured
and getting a little bit wider at the end for the drama. What I'm going to do
here is I'm going to do that same trick that we
did for our last loop and I'm going to take
the first frame and duplicate it and drag it to the end of our cycle so we can see what the differences and see how it's going to loop. Now I'm going to use that to make this match a
little bit better. Now we have this
rough animation. Let's see how that looks. I'm going to again group
these and move that to the beginning so we can see
what our loop looks like. Now that this main
animation is in place, I'm going to key this
in a little bit more, smooth it out, make it
a little more subtle, and then we'll get into adding more pieces of character
to this hero piece. Now we have the simple
looped animation of a trail for our main sprite. I'm going to go ahead
and drag this into my main sprite group and it should perfectly line
up with the animation. Now we have just a few
frames of looping animation that will loop through the entire straight part of this animation, which
is really nice. We don't have to animate
anything else for this, it's just five or
six frames and we can have that play for
most of this piece. Now what we're going to
do is add a bit more of a personalized animation
for this end bit since clearly our straight trail won't make sense with
the vortex part. And just a little bit at
the beginning to make more sense with the depth that we've created
in this environment. Now we've added some animation
at the beginning that's personalized and some at the
end for our spiral swirl. Now I'm going to add a
little bit more character to this by adding a
gradient to our trail. It's a little plain right now. I'm just going to go into our trail loop here and I'm just going to make a solid
and drag that in. I'm going to use our big texture brush that
we're using and just make a little bit of a gradient just towards the
edge of the screen. Then I'm going to
go ahead and do that clipping mask
that we did earlier. Since this is within
the camera move, I do need to make sure
that it goes all the way to the edge all the time. I'm going to scale that up a
bit so it still looks good. Now we have a nice little
bit of colored detail. Now we're going to apply the same idea that we did before with our first
trail and I want to add a little bit more of a thin line detail since most of our design so
far is very brushy. I'm going to take
the same principle, and I'm going to
use a thinner brush that's a little
bit less textured and I'm going to go ahead and
start making a wavy trail. I want this thin trail to be
a little bit less perfect and a little bit more
scribbly than our last trail, to add a little bit
more character. I'm going to go into my
flip book feature for that and see what starts
looking good. I'm again going to turn my onion skins and just start animating straight
ahead for this. Sensors is a little looser. It can get a little bit more crazy and I want this
to be a lot faster so we really get the feeling of wind and speed whipping
through this environment. Once again, I'm
going to bring back that first layer
and duplicate it so that we can get to a
good looking loop. I'm going to draw these in
between frames to make sure that our loop works smoothly and we'll
see how that looks. This isn't looking too
bad, so I'm going to clean this up a little bit
and then we're going to get into duplicating it and adding it into our
main animation. Now we've dragged our thin
line trail animation into our main sprite animation and is following just as it should. Same as the other trail. I'm going to make
a clipping mask that's plain white so that it shows up a little bit better against our other
colored elements. Once again, this is a
super nice way to make quick edits without having
to recolor every frame. That looks pretty nice to me and what I'm going to
do is I'm going to take this trail that we have, which is just on one side, and I'm going to duplicate it. I drag it back a little bit
because it's within a group. I duplicate it and I'm going
to just drag it so we have the same exact layer,
one on top of the other. What I want to do is
make this actually happen on both the top and
the bottom of the sprite. I'm going to take
this duplicated piece and I'm going to click this
top button and flip vertical. Now we have the same exact animation, just flipped around. I'm going to rotate it
a little bit so we have some nice variation in there. I think I'm going to offset it a little bit so it's not
the exact same animation, so it looks a little
bit more natural. I'm going to drag that just
a couple key frames ahead. Now, just by animating one line, we have this nice
multiline trail that follows our entire
preanimated ball. Now that we have
our cell animation customized for the beginning
and end of the vortex, for our thin line trails, we're going to start
going in and adding several passes of
extra design layers, a little bit of
customized cell pieces. And just generally
making it have a very finished
and designed look.
7. Adding Depth, Color, and Lighting: Now that we have our
final animation Keaton, we want to add all of
our finishing touches and make it look as best
as it possibly can. We're going to add
some lighting passes, some extra vortex
darkness and rings of color and anything we can
to really plus it up. I'm going to start with adding a little more dimension
to our vortex and to the beginning to
add a little more depth. I'm just going to go
into the camera move that we already have
and I think I'm going to use that same brush
that we used before to start darkening the parts where it goes farther
back in space. I'm going to just do a really big loose pass and it mostly happens
around this area. I'm just going to blend
it out really smooth, lower my brush opacity so it feels like it's gradually
coming towards us in space. I'm going to go ahead
and move this back a little bit and this way, we're getting a
little bit more depth here as it comes towards us. I think I'm going to make that
little softer and then add an even darker piece as well. This is all just design stuff that we can add at the end, just little touches that make it look a little
bit more complete. I'm going to add
a darker color as well just to see how that looks. Again, I can edit all
of these in color, placement, everything whenever I want to because it's
within a keyframed group. That's the really nice thing about using this
keyframe function for our main camera move. Now we have a little bit
more of a sense of depth here traveling through
space towards us, and let's start to add some
of that at the end as well. What I'm going to do is add
a track and start adding a little bit more depth to
the center of our vortex, and this is again going
to be really rough, and I think I'm going to
layer this up a little bit, so we get a really nice
gradient as we get farther in. Maybe I'll make another track and make a slightly
darker color. It really feels like we're traveling through space
as we go farther. I can always take this and start playing with
blending modes. This is a really fun part of
the project to do that on. It basically just makes
everything look a little more lit when we have some nice
colors interacting in there. I think I'm going to add
one more and make a light at the end of the tunnel here to contrast our main
sprite, which is very dark. Now, it really looks
like it's zooming into an entrance or
an end of a vortex, and it looks a little bit more dynamic and has a
little more depth to it. I'm going to try to center this a bit as well because it's moving a little
bit where I don't want it to in the camera move. That looks a bit better. Now we have this fun vortex
moment that really feels like we're going deep into our space. Since some of these swirls are getting lost in
here a little bit, I'm just going to take some of these layers that I've
made and use them. I'm going to duplicate this
gradient layer that I have, and I'm just going to use
that as a clipping mask over some of these swirl
layers that we've animated. These pink ones are
getting a little lost. I'm going to add this over them, make it a clipping mask, and
I think I'm going to see if a blending mode can pop these
out a little bit as well. These, I usually
just like to cycle through them and see
what looks best. Sometimes I get
one that's close, but I want it to be
a little bit later, a little darker, so I'll
just go in and hand edit it. I think for this one, I'm just going to customize
it specifically. I want a pretty bright color. I'm just going to fill it with a color that
I feel like is good. That feels like it stands
out a little bit more. Now we have a little
more depth added here, and I think I'm going to make
sure this doesn't pop on. There we go. I think I'm
going to make this fade on a little bit because it's
a little stark right now. Here I just made an
opacity keyframe, and I'm going to set this
one to a little bit lower. Then by here, I think I
want it to be fully dark. That way, it feels a
little bit more smooth, and I'm going to
do the same thing for this piece as well. This is one of the
nice things about being able to keyframe
in this program is we don't really need to reanimate much, which
is really nice. Setting my opacity and then
bringing this one lower as well and I think
that will do it. Yeah, so that's
looking nice to me. I think what I want
to do is now add some lighting passes
on our main sprite. I feel like that will make it look a little bit nicer
and more polished. Let's go out of our camera
move and into our main sprite. Right now it's
just a flat color. I think I'm going
to add a little bit of a glow around the edge
where the trail is coming off because maybe it's just like a glowing sprite emanating
light as a trail. Who knows? Whatever looks good, so I'm going to go in with one of my color
palette colors, and I'm going to just
add a little bit of, I'm going to use the
same brush that I used before and add a
bit of lighting. I think I'm going to
focus it around the back here so that it feels like
it's glowing towards the edge. I'm going to drag
this layer out, so it covers the entire
thing and let's see how it looks as a clipping
mask and a blending mode. Now we have a little
lighting and adds a little dimension to
our static sphere, which adds a little bit
more of a finished look. Now that we have that
light source in, I'm going to add the
specific lighting on that part of our hero ball. For this room light, I think I want to make
it a little more thin line to match these
little trails. I'm going to start going in with this same brush that I use for that and I want this to
be very much a rim light, very hard lighting coming from this really intense
light source happening here. Let's see if we can get
that to look right. Again, I'm going to blend mode. Add is usually a good
one for light itself. I think I want to make this a little bit more
saturated and darker. Let's see. Again, this
is all experimental. This is the fun phase where
you can play around and see what looks best just by adding these simple
layers on top of things. It's a really nice way to make something feel
a lot more finished without having to put
in a ton of more work. These layers of
detail are something that I would normally
add an after effix after exporting all
of my cell animation from a program like
Photoshop or animate, and being able to do it all in one place here makes it
a lot more streamlined. That way, I don't
have to jump back and forth between apps,
re-export things. I can do everything
all in one place. I'm going to play around with
this color a little bit, find what looks best
and add this lighting. It looks like it's emanating from where our main
center light source is. I'm going to rotate
this a little bit and I think I'm going to
have this fade on as well. Started more subtle and
by here it's more opaque. There, so we see it fade on. Since I don't need all of these, I'm going to delete
them, and I'm just going to keyframe
the rotation. It's a little cleaner this way. You don't need to do
this, but I prefer it so that I don't have a ton of unnecessary keyframes just sitting around confusing me. Here we have a rotation. I'm going to keyframe this here. Here it's turned inward again. Adjust again here and so forth, so it really feels like it's being lit by this light source. This adds a lot of dimension to what otherwise would have
been just a flat shape and that's a really nice
and easy way to add a little bit more of a personalized touch
to something like this. Now, this looks a lot more lit, a lot more designed, a lot more finished than it
would have otherwise.
8. Adding Finishing Touches: Next, I think I'm going to add a little more detail
to the background. Since we have the
scrolling camera, we might as well add
some static lines that will be scrolled past
with our camera move. We don't have to
animate anything else, but it will add the
illusion of more movement. I'm going to go within the background area of
all of our animation. I'm going to go ahead
and add a track here. I'm just going to go
over this entire thing and add some lighter lines, just very subtle, like our beginning sketch. I'm just going to sketch
them out like we did before, super subtle, and drag them all the way across and see how it looks when our
camera moves across them. This, again, can be very rough. We'll just be
scrolling past them, and the more irregular they are, the more motion we will
see as our camera moves. I'm going to take this bit and customize it a little more to our dimensions here to
reinforce our space. We scroll for a long while, so I'm going to add even
more length to these. Again, these are super rough, but that adds to the feeling
of passing through space, to the imperfection, to the texture, and makes it feel a little
more human and detailed. Even just by adding the super simple static lines
on our back layer, it adds so much more
motion to our main camera. We have a lot more of a
feel to that background, it feels more dynamic, and it has more texture
and detail to it. Now, I'm going to add that same principle to our
spiral here at the end. Just some static lines that go along the same spiral that
we used as a guide before. Just to add a little bit more of that same detail to that piece. I'm going to go in actually
on top of everything. I'm going to go all
the way up here, add a track, and so
adding some more spirals. This again, can
be super sketchy, just adding some speed lines, super loose, adding to the sketchy feel,
the level of detail. Just because these lines
are super thin and clean compared to the rest, it looks a little
bit more detailed. I'm going to blend
them in a little bit with the other lines as well. Once we get these all
in here, in this way, when we start zooming in here, we get more pieces
coming towards us, more depth without having
to re-animate anything. I'm going to clean up some
of these a little bit, but you see how we are already getting a lot more dimension. I'm going to have
this fade on as well. It's really nice being able
to just do this all in here. Super easy, super fast. I'm going to blend out
those straight lines that we added
before so that they don't conflict with
our spiral lines. Again, our big textured
brush comes in very handy. Blend that out, and it looks a little bit
more clean that way. I think adding a couple more
small cell animated touches is going to help make this
feel a bit more detailed. I'm going to add a dramatic little sparkle here
when the ball disappears, because that will help with the visual impact of it finally disappearing into
the super swirly vortex. I'm just going to, again,
go on top of all of these layers because this
is more of additive, fun little hand drawn piece. As this disappears,
I'm going to just draw a little bit of
a starburst effect. Again, these are
all extra touches. You don't need them
but it's fun to think about what would make your animation look a
little more exciting. What small details you
can add to just add that extra layer that makes something amazing
instead of just good. Let me turn on my onion skin so I can see where
my last frame was. I'm going to make a
little starburst here. Since this is [inaudible], I'm going to just go
back into my flip book. Again, I want this
to look sketchy, so I'm going to make
it not too perfect. Maybe there's some hand
drawn edges that are coming in to match the aesthetic of the rest of
the stuff that we're doing, but with this thin brush, it automatically looks
a little more detailed. Same feature as procreate. You can drag and drop, and use the threshold
to create a shape. I'm going to make this
a little smaller. This is maybe going to end up being two or three frames
of hand drawn animation, but I guarantee you it will change the overall impact a lot. Especially with adding
these levels of detail, maybe a little thin
lines on the edges, small touches like that can
make all the difference. We have our sarbo, so let's do a little bit of a remnant here. I think I'll have it
traveling to the edges. It feels like it's emanating
out from the center, adding to that depth. Let's turn off our
onion skins and see how that simple three
frames looks with this. That definitely
adds a little bit more drama to that end part. I think I'm going to experiment with blending modes on this. Maybe I'll go back and add a little more detail,
a little more glow. Maybe something
like that is cool. Just playing around
with a little bit more, adding extra touches. All of these small pieces makes such a big
difference in the end. I think I want to
add a little bit of glow to the sparkle. I'm going to duplicate that
and add a blending mode. I think I'm going to use add because that's usually
great for lighting. It just adds a little bit of a glow to the
edges of our burst. Then I want to have this fade out to white as if the vortex has overtaken the entire screen, just to add to the
drama of this last bit. I think that is
looking good to me. Any extra touches
we can always add later because we have all of
this animation ready to go. This is part of the process
that I would normally have to export my cell animation and
pull it into after effects. Maybe another program
for compositing, and then pull everything out, flatten it, and start making all of these
layers of detail. But the nice thing about having procreate dreams is that I can keep all of this in one place. I don't have to re-export if I want to edit something
in my cell animation. It's way easier just
having everything all editable in the same place.
9. Final Thoughts: Congratulations, you made
it to the end of the class. We've learned how to create cell animation, add key frames, who's a performing feature, and composite all in
Procreate Dreams. With this, you can have
your entire workflow all in one app to create
a fully finished piece. I can't wait to see what
you've created in this class. I hope that you use these
principles to create your own animations other than the project that we
made within this. If you've made any of those,
please remember to share those in the project gallery as well. I'd love to see them. So much can be done in
Procreate Dreams that couldn't be done in
other iPad apps before. Among so many useful features of after effects with cell
animation programs, and makes everything
so much more convenient and local
on the one app. Whether you use Procreate Dreams for personal professional work, it's the perfect tool to
streamline your workflow, especially moving through
2D animation processes. I hope this class helped to open your mind to
what you can do with this amazing new tool and spark some creativity to create your own fully
fledged animations. Thank you so much for watching. I hope you had a lot of fun in this class and I
can't wait to see you in the next one.
 Danni Fisher-Shin, Animator & Illustrator