Transcripts
1. INTRO: Okay. Hi there. This
is Terry Runyan, visual artist and
creative encourager, cat lover, animal
lover, people over. So I am going to spend
some time here with you, and we're going to paint some cats on the move
because you know, cats love to be on the move. It's not just about running
around the house anymore. It's about scooters,
it's about cars, it's about boats, a submarine. It could be anything. So I've been painting cats and all kinds of things
for quite a while now. I worked at Hallmark
for 30 years and have been running my
own business since 2016. And I love to share what
I do with all of you, and hopefully you get as much joy out of
painting cats as I do, as well as other animals. I most likely will use all kinds of different
media in this class, including watercolor, cut paper, colored pencils, pens,
acrylic markers. You name it. And I know
one thing for sure, we will have cat hair as well. I would love to see
what you are creating. If you could share
your work with all of us in the project section, that would be wonderful. And let's go ahead and get started with our first
kitty on the go.
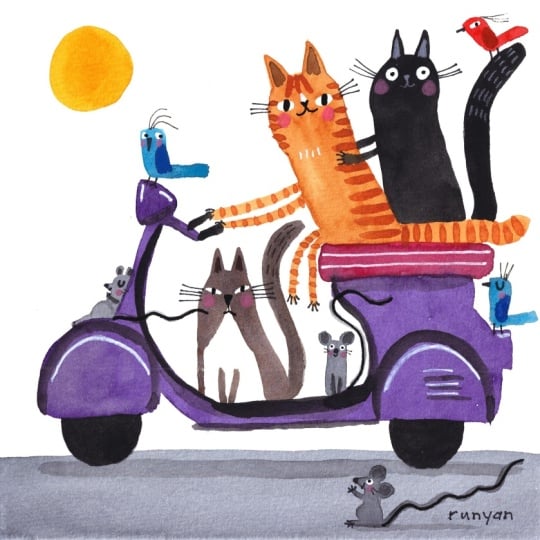
2. 1 SCOOTER PROJECT: Alright, the first project we're going to do is with scooters. This could be for you anything. If you don't like cats,
you can do dogs, Mcepurds. Maybe they'll all show up here. I don't know. But we're going
to go ahead and jump in. So here we have our paper. I use fluid 100, 100% cotton watercolor paper. And this is an
eight by eight pad that has gluing on
the top and bottom, which helps the
paper not to buckle. I also use a lot of
different watercolors. I use several from Daniel Smith and many from Windsor Newton. So you can find out all about these in the about
section in this class. I will have a list of
all my stuff I'm using. I like to begin my process with doing a little research about
what I'm going to paint. So, yes, I usually break out Pintrist and right now I'm looking at scooter
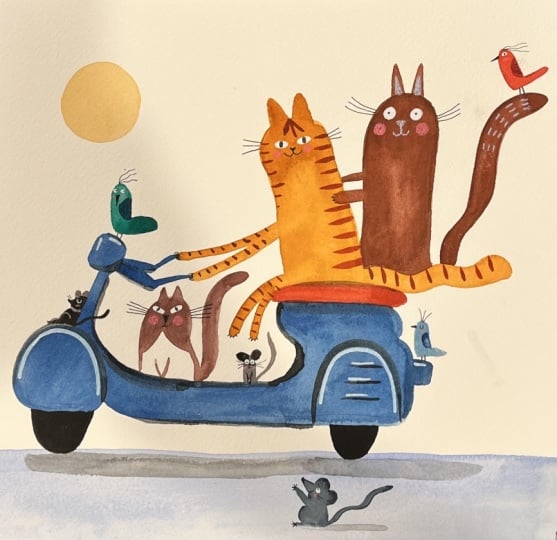
illustrations. Here's one of mine,
and, you know, just look up scooter
illustrations, and you'll find all kinds
of different inspiration. I'm not doing this to copy
any particular thing. There's another one of
mine, but to actually be inspired and get an idea
of the shape of a scooter. So, yeah, that's my first step whenever I start a new piece. I use a big old
very messy palette, so I like to have a lot of paint on hand and a lot
of room to mix my paints. Two brushes I'm
going to be using during this class
are a mimic round, size ten, and also a mimic
Kolinski round, size 12. Both of these are synthetic. No animals were harmed, so it's all good. For this piece, I'm going
to go ahead and paint in the actual shape of the scooter before
I do anything else. I don't think I actually made
a purple scooter before. I'll mix up the color over on my palette, and then
I'll come in here. You can see all the cat hair. I'll come in here and just
test it out to see if I like it or if I want to modify it at all before
putting it to paper. But I'll go ahead and do that color because I kind of like it. Have this new craze for purple. I never used to
use purple at all. Like kind of didn't like
purple. Is that sacrilege? And at this time, I'm taking reference from my own artwork. So I love that I can reference my own artwork because,
you know, I start with it. I don't stay with it. And it just gives me an idea of
what I've done in the past. Oh, yeah. This is
already very different. I know there's gonna be
a lot of people riding, so I think I will
actually give this one a very long wheel base to
fit more friends on there. Cats and other friends. So, I think they kind of
go straight across, but, you know, yours does not have to actually look
like a real scooter. As long as people
get the general idea of what the scooter is
that it is a scooter, then you're already there. So I'd like to have this
go out a little further. And with this big brush,
this is the size 12 brush, it's got a good enough point I can get away with
working with it for a while longer before switching over to
a smaller brush. This, of course, needs to dry before I start adding
any more details. This is a Daniel Smith
carbazol violet, a very nice purple indeed. I might just come
in here since it's still wet and fix
my little boo boo. Now, I'm going to use
Windsor Newton Pains gray with a little bit of
black to do the ground. I think scooters run a
little close to the ground. That doesn't mean
yours needs to. So there. The ground. I'm going to take a moment. This will be the
real time part where I'm going to dry this
so I can keep going. I'm gonna start adding a few
details now use my black, put some tires on this. Removing the cat here. This could actually
be a little more saturated with black
instead of gray. So I've added more
pigment to the color. It is a very long
wheel based scooter. Normally, they're not this long, but we can do whatever we want
with our artist's license. Nothing perfect here. All mistakes, so to speak, or opportunities. I got my tires on there. This one needs to be a little
bigger, maybe, maybe not. Small is fun, as
well. I'm also going to put a black seat on
this. You know what? I'm gonna put a pink seat
on it just to be fun. This is also a
Daniel Smith paint, and it is the I don't know
how to pronounce this, but it is in my notes. Who doesn't want to ride a
scooter with a pink seat? Certainly not me. It's a little bit of
an oversized seat because we're gonna probably
have a few friends riding. I go to grab up a
little of this paint, I dry out my brush a little and come back in and
just suck it up. While I'm waiting
for that to dry. I'm gonna go ahead and start
adding a few more details, maybe some more black. Y. Every time I do something
that I've done before, it always looks different, which is what makes
art so exciting. There, that's probably good. Maybe one more thing here. And some little marks here. Very technical these
terms I'm using. I have some turquoise blue
on my palette right now. I'm going to go ahead
and use that to make a little bird friend they love to just
ride along with their kitties and
animal friends. It's always fun to
add extra characters. We know we're going
to do cats on here, but it's always nice to see little extra characters
showing up within the scene. So I'm one for adding birds
and mice and flowers. Well, the flower
isn't a character, obviously, but it
might as well be. And let's see if
anything else shows up. I think it will just be cats, since it is really about
kitties on the move. Not dogs on the move. And I'm going to bring in some paska now for
a few more details. This is a molotaw one for all, and I use the 1 millimeter size. Posca pens, moloto pens, pretty much any kind of acrylic pen takes a bit of
work to get it to be opaque. And I like to test
it out after I've messed with it over on a
separate piece of paper so that I'm not finding
out I have too much of the acrylic in the tip
before I start and it blobs. I'm just going to put
some highlights on here. This pen is not
quite opaque yet, but I'm okay with that
because as long as the eyeballs are opaque on the characters,
that's enough for me. Could be. I can start
painting the kiddies now. Yes, I do believe I can. I will start with
a ginger kitty, also known as an orange kitty. I'm going to make this kitty
lean forward a little bit, because this kitty is on the go and doesn't want
to fall off the back. And there's also going to
be a side view of a kitty, which I don't do as
often as front views, but I think it's the perfect thing for
this particular kitty. Us kitty is gonna have to have some pretty long arms to be able to reach that steering. But we can have long arms. Or what I could do is make
it halfway there and add a little bit more to this because
that is a super long arm. Crazy long. And the tail, showing
the movement. Okay, so these are too
long for what I like. The way I'm going to
mess with that is to extend my kitty. I'm going to extend my kitty, so it's a bigger kitty. Here's how we fix things in
the midst of our paintings. I'm also going to make it front facing so that it's
looking at the audience. So there you go. There's a fix, and I'm going to make these
back legs a little longer. That'll work. I like that a little bit better
for its proportions. It's very silly, and we all
like it silly around here. Just trying to get these
paints to even out a bit. I don't recommend
working back in because it makes watermarks
and stuff on your artwork. And some colors are way
less forgiving than others. You can see the way this is separating in here, but
we're going to make it work. Now I'm going to grab some
very light Lackin pins gray to add another friend. I kind of like this
one I've done before, which put the mouse, so it's laying down on
the front of the bike. Very relaxed. I'll add more details to this
so you can tell what it is. But we do know they have a tail, and I think I'm
going to do the tail in a black posca pen, but I will indicate it with
a little bit of a line. I'm gonna put another
mouse in here. This one will be
looking at us all. Looks like a bird shape. Could be cat shaped, bird shape, mouse shape. This mouse is a little larger
than that other mouse. And the tale. Who else? I do find that it's really useful when I'm
working on something. I mean, I have an
idea about this one because I'm looking at something
I've done in the past. But to really pay attention to the
painting itself and see if there's anything that's coming that feels
like the next step, I do have to wait for
some things to dry. So I am limited in
what I do here for a little while as far as adding to these characters
that are still drying. Like, I don't know
who's going to go here, and I'm sort of just
being with the painting and seeing what might show up. I do believe it's going
to be another cat, and this kitty will
be a brown kitty, I want to make it different
than the black of the outer. I'm using some red oxide Daniel Smith mixed with a
little black or ultramarine. And this is a little tricky. I like the texture that you
get from this combination, but the ultramarine
and the red oxide, you really have to be careful
not to work back into them, because they will make a mess. More ears. We know
what's coming. Yeah. Kitty with a white chest. I don't really know where
my tails are gonna go with these I've pretty tight in here, so I'm just gonna have
to make something up. Like I didn't know where
this was gonna go, but this is where it fits. I do have some
inner critic coming up saying that this is smaller, this is larger, things
are not in proportion. And when that happens with me, I just ignore it 'cause
it doesn't matter. This is me creating something and being
surprised as I go. So, yeah. I think I think that
orange kitty is dry enough now I can
add a black kitty. So many different colors
you can do for cats. I was having a hard time
getting a point on the brush. This kitties gonna be behind
the tail of the other kitty, and, of course, it's going
to hold on for dear life. Always good to hold on. See, that wasn't quite
dry, but that's okay. So when you're
painting your scooter, like I said, it doesn't
have to be Cats. All these things all
these elements could be your own ideas to mix it up from what
you're seeing me do here. It's lovely to see what people
come up with from a class. And please make sure again to share those in
the project section. I got my black cat back here, and of course, it does
have another arm. I also have to put
an extension on the steering so kitty
could get to it. So, yes, that's the way
I cheat the system. Might need more birdie friends since we have a
couple mousy friends. Maybe a red biird. Where does Redbird want to be? Maybe riding back here
on the back tail. I was very thick paint. I'm gonna go ahead and suck a
little up with a dry brush, or it'll take forever to dry. You can see this
one's still trying to dry. This little mouse. Maybe hasten the process a little bit and do a
little more hair drying. I'm actually going
to add a sun in here because it's a nice
sunny day for a ride. This isn't pure Windsor yellow. I've added a little bit of
red and a little tiny bit of the yellow ochre. Another imperfect shape. And who else needs
to join this group? Anyone? I feel like I
want someone down here. There's a lot of road
surface going on. But I also don't want any
deby to get run over, so I know not put it
necessarily on the horizon line here because that'd be too close to the tires, so
I'll put it down here. Who wants to be down here, so you got to ask the painting, What's going on down
here? Let me know. I do want to add another
blue bird up here while I'm allowing the idea to come to me about what's
going to be down below. Oops. My favorite word. I think I'm going to do
another mouse down there. Some of this is dictated by the fact I've got
a gray down there. Colors won't go over
that very well, so my little mouse will be here, maybe wishing that it could
be on the scooter, as well. Okay. Maybe waving to the
scooter that's going by. Hey, wait for me. I want to go. That kind of just gives it a little something down
here, which is nice. That ear needs to be
just a little bigger. So good things don't have
to be in proportion. I give this tail a
little extra color. This, I'm going to
have to come over with black or white to
get it to show. While I have this color, I'm going to add a
little darkerne so I can do the details on
this little one. He's got his hands
over his chest. Arms getting way too big. Little ear centers. I think I'm going to take away that arm and make
it a little thinner. And what else do we need? We got this piece
coming back around. Also too dark. And this little mouse needs
legs in the centers of ears. This one's still wet, so I
have to wait on that one. I can add some
wings to the birds. I'm adding ultramarin mixed
with some of that turquoise. Everything's pretty dry now, so I'm going to come
in and add this wing. This is a mixture of
this pink color I talked about that I can't
pronounce and Scarlet Lake. Bird is dry enough, little wet still, but I think
dry enough to add the wing. This little mouse is dry enough
now to add some details. The centers of the ears
had to pull some off. I think that's all that needs. Okay, now I'm gonna start
adding some details to this red orange kitty
going to be a tabby. This is my size ten brush. And since this kitty is turning, you wouldn't see the
stripes on that side. I'm going to make them a little
bit longer on this side. And, of course, on the
tail and the legs. The very, very, very
long arms and legs. This kitty could be as
long as it wants to be. Who else needs some details? I think we may be good
with the watercolor. I actually think I am going to put in a little
bit of shadowing, and I'm going to do this
with some Pains gray. Not super dark. I just think it helps
with an illustration to have a little
bit of shadowing. So there'd be a shadow
underneath the seat and a shadow maybe here. Maybe not. Definitely one there. There. Let's see a little more here. Good to have a little
here 'cause there's a bird staying there
and a little here. And then I'm going to do a
shadow underneath the scooter, which is a little tricky because
we have our mouse there. So we'll have to kind of
work around the mouse, and the mouse is
gonna get lost a little with that shadow,
but we'll make it work. There, we're grounding
the vehicle. And this mouse also
needs a shadow. Alright. I can't seem to get
that dark enough there. As the paint dries,
it dries lighter. So good to know. Since this little
mouse is getting lost, I'm going to make
it a little darker. Not a lot darker because
it's still a mouse. Classes. My aim is just to get it
darker than the shadow. And I'm definitely
achieving that. Okay you know, if you get
too dark on something, you can come in with a
tissue and blot a little up. I also know this is going to dry lighter than it looks here. A little more color
on these details. I'm actually going to extend this tail because I'm
going to come in with posca and darken these up. Yes, I definitely want to
lighten this mouse a little. So I'm just taking
the tissue and very carefully, setting it on there. Clean tissue, and
Walla it's lighter, and it's still standing
up against the shadow. I put a little color inside
the ears as I like to do. I'll have to use a colored
pencil with the dark kitty to do this because you would not see a dark
color on top of this. And while I'm here,
I'm going to give it a few hairs as we like to do. I think it's time to
add some other details. Bird has got to be
holding on with something and definitely
needs a beak. This is a statler
permanent luma color pen, and it will not run. It is waterproof, so water will not affect
it once it's dry. Little nose on this guy. This one. Are you dry? Yes. Little nose on you. Smile, little fingers. Sometimes referred to as toes. Because these are on black, they're going to have to be
a different color finger. Who else needs fingers? You do? Maybe just a couple
here on the steering. Whiskers. This bird will be chilling back here, definitely sleeping
on the job here. Needs a little
nose, little mouth, and maybe a mouth here too. I'm going to switch over
to my white molotau again. Whipping the paper. I can't always tell
what I'm doing with expressions when I
flip paper like that. Sometimes the cat I don't quite get where I usually
like to put them. This guy is going to be
just plain old surprised. This one's relaxed,
but still aware. Very happy here and here. Happy here. Here. Add some little details
in on this, kitty. Nobody else needs a
light color for details, except for that little kitty. And, oh my goodness,
I almost forgot the toes on the hand. I will come back in and put
another coat of white on those molotaucrylic
white markers with these darker colors, oftentimes the paint will kind of come up through
on the first coat. I'm grabbing a 0.3 unipin
to do some fine line for the little whiskers
on the mouses, Hey, mess. Some hair do on the birdies. This can also help
with the motion. This is Pen is drying up a bit. I'm gonna have to
treat myself to some new pens. Let's see. I was going to do
this posca pen, black posca pen to give this mouse tail
a little more oomph. That one, I think shows up
enough. This one needs it. Since everybody else has it, I'm going to give it
to this one, as well. I'm not quite sure that works. I could have used gray, which might have been a better choice, but it's on there, so there
you go. More details. Whitening up these eyes. Birds are okay. Mice look okay. Add a few more details
onto the old vespa. I might actually do
a little bit more of those highlights 'cause they
think they add something. So, yeah, let's see. Nobody is looking at
anybody yet, I notice. This was definitely
having a joy ride. This one is just there. Kind of grumpy, actually, with a very big nose. This one also needs to have a little
something in its ears. This is just a dark umber color. And while I've got
it, I'm gonna give the skitti a few furs. Don't forget the cheeks. It's just a rose colored PC
929 prisma color pencil. Alright, even this angry one Crouch one
needs some cheeks. Everybody gets some cheeks. It won't show up on the red. I'm gonna come in with a darker
color for the cheek here. I could have actually
used a darker color here, but I'm not going to
do that at this point. A little signature?
While I'm here, when sharing your work, be sure to credit whoever
you're copying, if you're copying to learn. If you mix it up enough
or it becomes your own, then you don't have to
credit the artist per se. You might want to just
say you're influenced by. Dt Eyes. That bird is not too sure about what's
happening back there. This one wishes it was
with everybody on Scooter. Always feel like I want
to do a little more here. A few furs, maybe a white
thing over the nose. This one's too grouchy
to get anything. Alright, we did get it
done in this section, and I can't wait to keep moving along here with all kinds
of other transport. So let's go on to
the next section, which will be a car. See you over there.
3. 2 TRUCK PROJECT PART 1: Okay, Project two. And I talked about doing a car for this Kitty's on the go, but know that you could do
any transportation item because we're wide open here. I actually been thinking
about doing a truck because you could fit so many characters in the
back of a truck, and I might not just do
kiddies on this one, but we'll see what happens. I do plan on doing
a color background. So with a color background, you won't be able to
get back to your white when applying your characters and vehicles and all that stuff. So just know that that you're going to
have to come in with cut paper if you want to
get back to your whites. So with that said,
let's see what happens. Okay. As mentioned, I'm going to do a colored
background on this one. Since I'm doing a big wash, I'm going to use
the 12 round brush. Not sure what color I
want in the background. I think I'll do a cool color. So how about some
ultramarine watered down? That looks about right. Using fairly light color
for this background, and that'll make it easier
to come on here with some watercolor animals because I'm not going so dark
on this background. I'm actually thinking
I'm going to switch over to a
green at the bottom, because these cats might
be driving on grass. Plus, I like the idea of
doing a split fountain. So with these split
fountain type watercolors, you want to keep moving, as always, keep the paper wet so things blend beautifully, and now I'm going to
bring in my green. I'm doing a grade
down green here. I had a lot of color on there, so I'm just coming in with clear water now to water
it down a little bit. So there we go. We've
got our split fountain, and because it's so much
fun to watch paint dry, I'm going to go ahead
and come in with my hair dryer and dry this up. I'll speed that up. I ended up with a little bit of
a ditch on my ground. So I'll probably come
in with another color down there just to define
things a little bit more. So see, here's my ditch, and I'm going to grab basically the same green with a little black in it and define
this a little bit better. And the cool thing about this is you still have the
fuzzy edge up here, so it's not a really
super hard edge. That kind of brings in. See, I love the way this
blends a little bit there. So yeah, second layer.
The first one was dry. Alright. No, I'm going to decide on what color
vehicle I want. I'm going to be facing this way. I know I don't want to do
purple since I just did purple. So I try to when I'm
doing projects or things that I want to share with people to kind of mix
it up from day to day, you know, not do all the
same colors each day. So today, we're going
to work on something other than purple as far
as the vehicle goes. So now you know
part of my logic. I always kind of
like a red vehicle. So I'm going to do
a red truck, yes. And I am going to draw
with my scissors. So we know a truck. Kind of guestimate how long this
truck's going to be. Set that aside.
That's a good length. A nice long bed for many
characters to show up. Whoever those characters are. I'm gonna do a tall cab with a rounded front and just
a small small front end. So a small engine. Okay,
that's nice and wonky. We also need some wheel wells. I'll add those because our truck can't get
anywhere without wheels. Okay. The screen's still
a little wet down here, so I'm being careful not
to run my hand through it. We need to cut this
out in order to be able to see out the window. I'm going to go ahead and
use my exacto knife for that and just come around
with the exacto knife. Gonna also use a
cutting surface, which is what I usually do. But for this class, I'm
just going to cut here. There we go. Now the
driver can fit in. Goofy. Yes, very short end. I'm loving it. Gonna grab a piece of paper
here to glue on. The backside of one of
my splotchy paintings, and I am going to apply glue. I tend to use the
Elmer's extra strength. These glue sticks are
really nice because they're less messy than doing, you know, wet glue and
painting it on and all that. Whenever I have a
shape that's kind of outside the main shape, I usually work into it
from the main shape. I seem to have less
trouble when I do that with too much glue
coming off the sides. Then I just work my way
Oops out from the middle. I know it's hard to see
this truck as I'm gluing. But when I flip it over,
all will be apparent. So all glued up, moving that paper and
placing it on the page. You get it fairly close to the ground and
sticking her down. You take a clean piece of paper, and I'm going to
burnish it down. This helps to get it to
stick to the surface. So there's not so much fixing. You keep this gluey page over here in case we do
some more cut paper, which I do believe
we'll be doing. So, yes, the most critical
thing, the shape of the truck. Well, we all know the
most critical things the animals in there,
particularly the cats. Truck complete details
still to come. I will wait on the
details on that and start giving my truck some friends. I know that I can paint
on top of this blue with some colors because I
don't need to have white. And one of those colors would be the color black as if that's a color or possibly a
gray or bluish cat. When I start coming over this blue color with
any kind of warm color, you're going to get a muddier look unless it's pretty dark. So let's go ahead and
try this process. I'm moving to my size ten brush, and I'll start the
kiddies off here. And as you can see,
since this is so dark, it covers the blue very nicely. Not going to get back
to the white with this paper because all
the white's been covered. With blue and green. First passenger is in. And while I've got this black, I am going to paint the steering wheel.
Let's do it this way. We don't know who's driving. All will be discovered as we go. I got the steering wheel, and now we can do the tires. The wonky or the better. It's a good thing
because this is a very strange
shape to put a tire in if you want to get
anywhere close to circular. But ultimately, for me, it just doesn't matter
because I mean, actually, I like it wonky, so this will be definitely
hitting that category. A sausage shape. I mean, to act like it's sort
of meant to be that way, I'm going to go ahead and make this one sort of the same shape. Kind of an egg shape, really. This one got a little rounder. Gave myself more room
on this wheelwow. So I'm gonna come in
with yet another friend that I don't have
to cut paper yet. This one's going to
be in Paine's gray. I'm going to vary my shapes. This one has got little ears. And a thin neck. That looks like black.
It's so dark, doesn't it? I'm going to add a
little water to my paint here because we don't want to have all black
cats in this one. There's nothing wrong with
having all black cats. I've been known to paint
it like that quite often. I love the black kitties. They get a bad rap
because they're black, but they're the best. Well, and I also like tabbies and pretty much every
other kind of kitty. And this one will go ahead and have a tail
coming out the back. We never know where these
tails are going to go until they start
being painted in. I didn't leave enough room for it to trail off the back here, so you can see my trucks
coming up a little bit. I'm going to have to
come in with some glue and fix that. But it's fixable. Alright. Got kitties done. I'm going to start working
with some cut paper. We've got this piece
of white paper. It's a little thicker
because when it's thicker. You can't see the color through it as much from the background. If you use a thin
piece of paper, you may not be able to tal this, but you can see
how it grays down a lot with that
darker background. Here's the difference.
See, thicker or thinner. And I'm gonna cut
some kitty shapes out to go in here that
have some white on them. Oh, here we go. I know this kitty
is gonna be about that big. I can go ahead and go. Maybe this is a fat kitty. This is a big kitty, right? So I could keep it that big F. I could cut it down to size, which I think I'm gonna do
since I don't know who else is gonna show up in this picture. It's still a very large cat, isn't it? Let's just leave it. But I'm going to add some
color to it so that it's maybe got a little of the
old ginger look to it. I'm mixing up some Windsor
yellow and scarlet lake. Cover my scene here. Actually, I'll just shove it off because it's still drying, and I've cut through
my page down here. Oh, well, and I'm going
to paint off the paper. I might want a little bit of
the orange down here, too. So this one will just
dry off to the side. Put that up there. And I think there might be
room for one more cat. Again, I'm going to
start with white paper, and this one's going to
be a thinner cat because that's all that will fit in with a little
different shape. Basically, kind of start with this shape and go from there. This is still a big kitty, so I'm gonna cut it
down a little bit. 'cause we want it to fit, maybe this one has tinier ears. The funkier, the better. So yes, there's that shape. And it is definitely funky.
I'm just gonna leave it. And back to painting this
one, what color do we want? Let's see. Maybe this is a black and white kitty or know a black and white
kitty is gonna work. I will do spots on this one. Here. Definitely needs to
have some help with its body. Doesn't have to be even. Yeah, we got our second
painted kitty head. Let's see here. I'm
moving right along, waiting for those to dry. And I'm thinking about
who's going to drive. And I personally think
it'd be very funny for a dog or some other kind of
animal to be driving here. So I am going to add a pepper. And for this pepper, I'm doing red oxide fairly dark with some black in it so
that it'll cover the blue. I don't want it too dark. So PupperGa start with the nose. I do like painting
dogs a lot, too. The kitties don't like it at all when I do this, but
they'll get over it. The arm must strive. I will add the ear
after that dries. Who else wants to be in
this little vehicle? We could put in some birds. There's a nice amount of room pretty much everywhere,
but you know what? I can't help myself. I'm
going to do another cat. This cat is going to be
more of a blue gray, more blue than the
last blue cat. Go get enough paint on here. Be dark enough to go over
that background color. This one's going to be
lying down on top of this. And let's try to side view something I'm not as familiar
with doing of this kitty. Kitty's noses are not as long as puppers Keep that in mind
when you're painting. Of course, there's
all kinds of kiddies. Some of those kitties
have very long noses. And since this one's up here, I can give it a fun tale. In the breeze. See, when I'm doing this kind of stuff, I'm thinking about, Oh, that gives me lots
of opportunity for adding more characters. Okay. There we go on that one.
Are these ones dry yet? Let's see. Set these in here
and see how they're fitting. Everybody fits. Oh goodness. The paint was wet. I messed it up,
continuing to mess it up. I might try to fix
that a little bit, but it might just mess
it up more to do that, particularly since
it's still wet. So I am going to wait on
this and fix it other ways. This one is also still wet. So yes, I'm going to drag
these off to the side. So this one's pretty dry, and this one is pretty dry. So I see, I made that mess. You can use it one of these stiffer brushes and
come in with a clean brush, try to pick up a little
bit with a tissue. And you can go over it. That could make more of a mess. But it picks up the
main part of the paint, so it's not quite so thick. And then I might finish it
off with this little brush. Most of the time when I make
a little unquote mistake, I just work it into
something else. So I'm taking this
little brush and I'm scrubbing just very lightly because I don't want to
completely wreck the paper. And this is not like
a high quality paper, so it is wrecking it a little
bit, but it's good enough. I got a lot of it off. It's time to glue
these kitties on. Back to the glue
stick. Let's see. I've got my piece of paper
to glue with working from the main shape
out into the ears. If you work this way, the glue can go
underneath the ears. So it's the same for any corner. You got that glued up.
Let's set it on here. Get this kitty riding. One more. Little black
and white kitty. You do that little kitty
over a little bit. I'm gonna come over here
and nish these down. So you can see that I have
some things going on, but none of that will
matter as we go along, and I have run my hand
through these paints. So just know these
things happen. It's not a loss. It's all okay. Is this one dry? Dry enough. I'm going to add an
ear to this pup. I'm gonna make it a
little darker than the actual pup
because I want it to not just be over the pup, which would darken it enough, but back here blowing
in the wind a bit. Okay, who else wants
to be on this ride? I know I like to add
a little antenna for my vehicles in
these vehicles. Most all, if not all the time, have a little bobble at
the top that is a kitty. And as you know, this could be a kitty, it could be a bird. But since I'm so
obsessed with cats, we'll just make it a kitty head. So at this point, I could go a lot of
different directions, and I'm sort of being
with the painting. I kind of treat it like
a little story going on, and I'm letting the
painting itself kind of inform me about where
it wants to go next. So let's see what happens. I had mentioned doing some
other animals in here, I can put another
layer of cats in, or I could keep it simple, which I think I'm going to do so this class isn't 100 hours long. We've got our character
dog doing the driving, which is always good. I think I'm going to add
another arm to this pupper. Not near enough steering
power with just one arm. I originally had thought, Well, maybe I'll put an elephant in there or I'll put a giraffe. But since this is really
a cat focused thing, I will do that on another
video coming soon. For now, I'm gonna
keep a kitties, and, of course, we'll
bring in our bird friends. And which bird
friend do we want? Let's make a red bird friend. Just gonna grab a piece of
this paper I've already used. A little bigger. Maybe it'll ride back here. So I think I'm going to
do a little yellow bird, and I don't have any
paper that's yellow, so I'm going to paint
some right now. Then we'll have to
wait for it to dry. I'm gonna paint enough of it, so I'll have some extra
yellow for future reference. Leave this aside. Kind of fun
to paint papers to cut out. You can put patterns in
them, too, of course. No need to stop now a little bit more yellow there in case we
need it, which we always do. I'm gonna dry it
on the side here. Okay. I've got a
chunk of yellow now. Just go to remove
it from the white. So it's its own entity. Be independent, you yellow. Right. So a yellow bird, maybe think about doing a different shape than the
one I've already done. Maybe this one's leaning forward a bit or maybe the
tails up in the air. So I'll set it here for now. I'm soaking up a little bit
of this color on this pop because I got it very wet and I don't want it
to take too long to dry. So we got the two birds. We seem to always
like to add a mouse, too. So why deviate? Since this mouse is going to be darker than the background,
I can just paint that on. Where do I want it? Oh could be riding off the tail. Sure. It's kind of like a bird. This one is really like a bird. I think I will make it looking this direction since it
was such a weird shape. Also quite large. But we can play with
this tail, which is fun. As we're driving along here, shows a lot of motion to a
very fat little critter. And we'll have one on. The hood, as well. Kind of enjoyed the one that
was relaxing on my last one. I won't make it
exactly the same. Lots of water in there. I'm using a soaked up a little to be able to
use it for the ears. Maybe this mouse is
holding on to the antenna. Who knew that was going
to happen? I didn't. And we need a tail. If that doesn't dry dark enough, then I can always
come in with a pen and add some more
darkness to it. There, holding on for dear life. We never know what's gonna
happen with this dog driving. Well, this stuff is sort
of setting up and drying. Actually, what I'm
gonna do first? I'm gonna get these
little birds glued down. So working from
the middle again, grabbing the little bird. Where do I have this? I think I had it
here. Good enough, no matter where I had it
before. You got cat hair. I run my little red biird,
put some glue on it. And glue it down. Wait. Maybe this is gonna
go on an ear to keep it from being too
close to the edge. Right, everybody's glued
down, things are drying. While this is all going on, I am going to start adding
some details to this truck. I can add the truck details with white or black or
colored pencils. There's so many
opportunities to explore. I guess I'm going to do white. Like always. I want
to test my posca pen, get it running on something
other than my artwork. Probably more shaking required. So I'm going to put a
little running board down here at the bottom. First, this has
got a grill on it. So wheel wells. This is still wet, so I'm
gonna have to come back in with the other details
there with the door. But in the meantime, these
cats are kind of dry, so I can start adding my
features. This is dry? The dog this kitty. I'm gonna turn the
paper sideways so that I can get a little
angle on these eyes. I'm going to do the
rest of this shoot on the next session because we don't like each
session to be too long. So that's what I'm going to do now and we'll see you there.
4. 2 TRUCK PROJECT PART 2: Alright, we're back. Let's keep going
on these details. A few more eyes to take care of. Big eyes. Little eyes. So while I'm here, I'm going to just
use this white pen to glasses to get this
a little cleaner. You know, preferably,
you won't have to go over this because it is a
little different quality. I could even, if I
don't like this, come in and replace that kitty. So what I'm trying to show you here is that in a perfect world, you wouldn't have to come back in and work things like that. But when you do have
a little mishap, which seems to happen
a lot with me, I can fix it up a little bit with doing different
things like this. Or better yet to replace this
whole cat with another cat. What's this one doing?
I think it's scared. Okay, let's see. Is this dry yet? Pretty dry. I think I will run a little line back to the back of the truck. We need to have a door. Actually, we don't absolutely
have to have a door, but we are going to have a door. No other doors required
in a door knob. And you can see that
little blob there, but when I come in with my whiskers and stuff,
that'll get covered up. Start adding a few more details insides of the
ears on the mouse. So little feets. More insides. I'm looking around to see who else I can use this color on. I'm going to switch over to a brown color for the
insides of this ear. It's a relatively dark brown, dark umber, it's a little
too dark for this. I'm going to get
a gray pencil to do the inside of the
black kitty's ears. And I'm actually going to do
it on this blue kitty too. I'm sort of jumping around here. More black. Oh, you
could add black, too. So, yes, this is very
rough right here where I did that
work on this kitty. And see this, I can
actually scrape it off. I don't like it. So you
know what's gonna happen? I'm going to go ahead and
remove this cat and start over. See, here's how easy this is. You just pull it up. I just got to make sure that
the kitty I put in there covers that
mess I just made. And one of the
ways I can do that is to just cut from this, lay this on top of my
paper and use it as a template to cut
out my new shape. Doesn't have to be too precise. The ears can be whatever
we want them to be. There. My new shape. That work? Okay. We got a new cat in there. Oops, I didn't get high enough. Instead of redoing this, I am going to just paint a
little bit in that space. That's white. Of course, you want to try to get very
close to the same color. And as long as I give it
a little bit of color, it doesn't have to be perfect. And that's obviously
not perfect. And then I blot up a
little bit just to sort of make it less obvious. So I'm going to paint
this guy now with the black guy or gal. So this one I had
just the eyeballs. Done. And I think I'll just
do back here on this one. There. Now I have to wait
for that to dry, of course, or go off to the
side and dry it. So I can start adding a little bit more
details while we're waiting for this to dry. I think I'm going to put some white in the center
of these tires. I'm going to start working
with a little bit of black posca for the details. Some noses, some beaks. This. I'm not going to do
this thick pen for the mouse. It's a little too thick. But I do like how
black a posca pen is. But it can get unruly
it's so thick. This is happy bird.
This bird, I think, is pretty neutral come in with my light gray to add the
black kitty's features. And I'm going to grab my
0.3 unipin fine liner, which is running out of ink, but I will make do to add
some of these details. We need the fingers,
little whiskers. This cat would like to be
standing with some legs, maybe a little feather
blowing in the breeze. This one can also
have a feather, legs, of course, whiskers on this one. This is a happy dog
driving. This is not sure. Let's see. Who else needs
to be showing some emotion? Much more subtle. And
you sort of grouchy. I think my other
kitty is dry now. Give it some glue. Set that in here, try to cover up our mess. And do a little burnishing. I do want to show you how I fix it when we have spots where the glue is
coming up like here. This trick is from Lin Genta. If you don't know Lin
Genta's work, check her out. She's on social media like I am. You grab a little
piece of paper, and you're going to
use this to apply the glue underneath the
parts that are coming up. So you just put that glue
under there, press it down. Is there any place
else that needs it? Yeah, I think everything
else is looking pretty good. Here's a little spot. Yes, tap it on down.
Thank you, Lynn. Birdis need some wings. I could tape some wings on, but I'm going to just paint
them on a darker red. A darker yellow. It's
very soupy yellow. I'm going to grab a
little bit of that pain out of there with
my splayed brush. Okay, dry it out, splay it, and then you can suck
up some of the color. These cats feel like they
need just a little detail, as well as that dog, which, you know, a collar is essential. I'm going to use my black
posca for the collar. You know, cats don't
have to wear collars, but dogs do have
to wear collars, because they are in
service of the feline. This one wants to
have sleepy dyes. But you could actually use
white colored pencil for this, and it would show up
a little bit better. I'm glad I switched out. The kitty, this one's much cleaner needs some ears
inside of the ears. The whole replacement thing that you can do with cut
paper is awesome. As Lin genta says, it's just like Command Z. Let me give a little
fur to these cats. This one might want to
have some white fur. What about you puppers? Nope. You don't get any. I feel like I do want
something on this cat, so maybe I'll make
it a tiger stripe, grabbing some of
the color I already used with a little
more oomph to it. It doesn't have to be a lot different because
we're coming over with a second coat and that will automatically
make it darker. Probably could be a little
darker than this, but I'm going to go
with what I've got. I've run my hand
through over here. As always, I like to try
to mix up my characters, their expressions and
attitudes and shapes. That adds a little
interest up there. I think we need a
little shadow down here to ground this truck. But I think I'm going
to keep it simple. I'm just going to add that
shadow and no other shadows. Time to put in the
kiddy expressions. And mouse expressions
and bird expressions. This is definitely afraid. I think I'll have this
dog watching the road. This paint's still wet, so I got to keep my hand out of it. Some of these cats are
keeping an eye on what's happening in cockpit
here. What else? You. We need more
whiskers and such trying to vary those. Dogs usually have these little spots
there on their nose. The infamous cheeks. There we go in one of those last minute editions
of the Terry union style. Anybody who's red or dark
orange is going to need a darker color of pink
or red to do the cheek. So we'll grab a darker color. That's dark enough.
I hope there. It doesn't really
show up too much, but you get the picture. It's probably too dark
for this, but it works. I think this one needs
a little hair. Yeah. And maybe a little spot
there. Always good to sign. We do need a few more nails. We get the 3.3 size. It's the details that matter. I'm feeling like this
might need something else, but I'm not going
to add it right now because this video
is getting along enough. Okay, Project two in the C. This one was fun to
do, like the last one. The cut paper edition
is always fun. And I do like that another animal showed up in
this one, the dog driver. So in the next video, I'm going to do some
sort of water device, and I haven't decided
quite what that is yet. I'm sort of thinking it
might be a submarine. So we'll see what happens. I'll see you in the next lesson.
5. 3 SUBMARINE PROJECT: Remember back in
the last project, where I said I was going
to flip the image, so it wasn't going the same
way as the vehicle before. And then I didn't do that. Anyway, so for sure this time, I'm going to do it as I work on my watery travel situation
with the kiddies. And I am going to
do a submarine, but you never know a boat
may show up as well. So I'm just going
to jump right in. I don't know if there'll
be cut paper in this one. It may just all be watercolor. But as always, I do
recommend that you take a look at Pintrist
or whatever source of inspiration you like
to look at and check out submarine illustration or
different things like that, and that can help
give you some ideas for what your submarine
might look like. Remembering to pull your
inspiration from a lot of different sources because we don't want to copy
any one person. So with that said, let's
go ahead and get started. Alright, here we are. Again,
I'm going to start with my big number 12
mimic Kolinsky brush. Since I'm going to be
doing a wash again this time underwater wash, and I am considering what
color I want to use. I think this time,
I'm going to use primarily turquoise
for the water since we used a split fountain, ultramarine and turquoise and
all that on the last one. And I'm going to start
at the top of the water. And then this one I'm going to be painting the shape by painting
around the shape. So the shape will stay white, and the water will define it. And that will become more
clear as we go here. I got my top of my waves done. My little not pointy waves. Let's point them
up a little bit. So it's not perfectly smooth
out in this here water. I'm going to start
defining my shape. I know they most often have
this little top thing, and then they go around and
come back and around again. Maybe yours will end up being
yellow or maybe you'll do a different kind of water
vehicle altogether. Keeping this edge
wet so we don't get a mark where it started
to dry moving quickly. And like always, nice and wonky. I'd like to be a little more
circular with this one. I'm going to do a
little modification of that shape while the
paint is still wet. Very weird. All is well. I'm also intending maybe
to show someone on top of the water and perhaps some
fishy friends in the water. So I got my basic strange shape of a submarine here so I
can keep moving along. I'm going to give it a
little dry so far so good. I know I'm going to
have windows in this. I'm going to actually start
with these details with the statlerPermanent
luma color pen that will do fine when
I wet this image. This is our little
top on our device. Not sure if I'm going to
fill this in eventually, but I do know I want to
have a window up here. And many windows with
other friends back here. I wonder if I could
fit three in. Why, yes, I can. Okay, good. And we know that submarines are all welded together
so they don't fall apart, so I'm going to put in
the little weld mark. And the reason I know this is because I'm looking
at some research of submarines on Pintrs
as I work on this. Your lines go all weird like
mine, it's still perfect. It's an expression
of your style. I will give this
little edge to it. A little more definition
in the windows. And you notice how perfect
these circles are. So there we go so far so good. I think most of
these have some sort of something coming
out the bottom here. And they also normally have some sort of fin
coming off the back, maybe in both directions. And in order to power this
puppy, sorry, this kitty, will have a little
lad in the back. So yeah, we're all ready to go. And things are
moving right along. I'm just adding details directly
on top of the watercolor because you don't have to
have these be solid shapes. They could just be drawn
in, like I'm doing now. So this is a little
bit different style than the last two I did. And we know it's going
to have something like this coming out. And here is where the story
telling starts to occur. This has got to be looking
at something, right? Definitely. Maybe it's
looking at a boat. So I'm going to go
ahead and continue the style of drawing in the shapes with the intent of possibly putting a bunch of watercolor characters in there. This one does have
an outboard motor. With another propeller, which I've made a mess up
there, but it still works. Let me go one more time. That's funny. I'll
do a few more. Like a big flower back there. And these guys usually
have some markings on them and something for
someone to steer with. So there, maybe a little flag, getting pretty close
to the top there. You can think about that
and keep your image lower. I'm going to put a few
more details on this. Maybe this has got a little anchor if we can remember what
anchors look like. I think they're like this.
If not, it's close enough. Right. We got all kinds of opportunities for
characters in here. Before I get started with that, I'm going to put in some
fish friends. Very simple. A different sizes to
keep things interesting. This one's trying to look
like the little submarine. Maybe it has fish
lips. Yes, it does. Another one down here. Another angel fish
looking thing. I'll come in later with
some more stuff there. For now, we're going to move on to who's driving these buses. Let me see, where's my brush? I'm going to move on to
my smaller creative mark mimic number ten, round brush, and start adding
the featured characters. I can do any colour cats I want in here because
I'm working on white. I'm going to start
with a brown kitty. Maybe this one will
be facing forward, like so many of my cats
do. The white chest. These colors right here are the red oxide again,
mixed with ultramarine. If you guys could
see my palette, it has got so much hair
on it from the cats. I just don't fight it anymore. I just pick it out
as we go along. I usually pick it out after the paintings are dry because if I try to
get it before that, I'm messing with wet paint, and that can be a big mess. So there's your
cat tip big time. I'm gonna put a yellow
kitty in there by doing Windsor yellow with a little yellow ochre to
darken it up a bit. It's good to add the yellow
ochre to the Windsor so that is dark enough to show up. Yellow can come
out really light. And we want to be
able to see our cats since they are so important. Maybe we have an orange, kitty or definitely
more red than that yellow one
because I'm trying to keep things from
being all the same. Very orange. I think I'll have this kitty looking
forward it's driving, not that that's a
critical thing. But it's good practice for
doing cats from the side. I've practiced a
lot of cats from the side because they're not dogs or their nose is a
lot shorter than a dog. I also look at my own
cats a lot and think, What the heck does that cat
look like from the side? So there's that little one who will be piloting this vessel. I'm going to bring a black one. We always like to have
a black. You know what? I'm going to do a
black dog instead. A black dog right here. Let's make it sideways. Turn the paper, this dog is
really big in this tiny boat, which is, again,
siliness, which is fun. Maybe this dog's ear is already there with
another one up top. He's making his way around. And here we will do a gray
kitty in Payne's gray, something a little lighter. Make this kitty taller and thinner than the
others to vary the shape. I went over and took a
little bit of the paint off my brush because it was
starting to puddle. And this way, I can just
move around what is there. And it makes it so it will dry before the end of the month. Okay. This little captain here doesn't want to
be doing it alone, so just going to have
a little mouse friend. Get in there, mouse friend. Maybe this mouse friend tail is coming out over this side. And you know a bird's
got to show up here, so we'll save that for later. I'm thinking of doing a seagull
or something like that. And seagulls are usually white. I'm gonna cheat this because
white's the background, and I will do a
seagull with a light. Paine's gray and hope it looks
like a seagull. Oh, sure. That looks like a seagull.
I am going to soak up some of that paint because I don't want it to
be quite that dark. There. I'll look more like a seagull
when I get the wing on it. So we got our basic
characters in here. I could do a lot to put design and color in
all these areas, but I think I'm going to keep
it as simple as possible. I am going to add
some more details to this submarine to keep it
more interesting again. And all the kitties
are drying right now, so I want to wait for that. Looking like we're on the ocean. Some little fish. I forgot what I was doing here. This looks like it might just
be a school of fish here. I'm sort of staggering their
positions. Need one more. How do I know I need one more? I guess I didn't want
them all centered underneath, so that's why. I need a pufferfish. Particularly since puffer
fish do have lips, and we love to do lips. I was checking out that boat up there to see what
the heck's going on. That would be a
submarine, not a boat. Who else is over here
do another bigger fish? Another sleepy fish. I want that fish to be awake. There, it looks like a dog
with that nose, doesn't it? And what else is going to be
down here? Nothing for now. More small fish. These are secondary characters, so not that they have
to be secondary, maybe these are the most
important thing in your layout. What else? I could put a little porthole down
here cause why not? And some rivets
around this to hold these frames around these
windows onto the vessel. I'm going to probably come
in with a color back behind these cats to kind of show
they're in something, some deep inside that vessel. I am going to use a little bit of green
maybe with some gray. I'm going to add some black into this and then really
water it down. So I've got a color
sort of like this. Do I like that
color? Not really. Rethinking. I think what
I'll do is just use a black and pains gray to do this to be more neutral
about my color choices. So this is light
enough that I think it will keep the cats standing out. But it'll look like
there's some space in there behind these cats, and they're not just sitting
on flat white surface. Light enough to not get lost
with this gray kitty here. It's pretty easy to
handle watercolor in these smaller spaces
when you're not trying to fill a whole big
space at the same time. 'Cause it doesn't really
have time to dry before you move on. There. Reloading my brush. I'm noticing a value similarity here, so hopefully this will
dry a little lighter and we'll be able to see that
yellow kitty back here. There is a little
bit of a green tinge to that. Not intentional. It must have been left on
my brush when I switched over. It's very subtle. And being very quiet
because again, the concentration is
happening. Right. There we are. Got
some depth there. I think I'm going
to keep it simple. I might throw a little
shadow on a few things, same color as just using, we feel like there's
some shadow under here. Maybe there's a little
shadow under these. Again, we'll give it a little
more depth. Three D effect. Almost time to get to switch this brush out for
a new brush because the tip is getting a
little not pointy. These are pretty subtle colors. Maybe there's a little
color under here. And for sure, a little
shadow under the tail, perhaps under this
anchor down here. And where else we can do a
little something on here. When I accidently
paint over like that, I use my finger to rub back in, and sometimes that helps. Where else do I need a shadow? Maybe a little bit on these. A little definition
on those blades. This is my favorite thing here, these fish lips.
I love fish lips. I know that these seagulls
have a dark wing, at least my seagulls do. So it looks a little bit
more like a seagull. And what else do I
want to do? I know I like a little more crowded
scene in the water. So I'm gonna ad just maybe
another bigger fish over here. Maybe it has lips so that I
can be very joyful. Okay. Not making any sharks. Sharks would be funny, but there's no sharks in my picture. Sometimes there's some
little extra doodads on the back of these submarines. And since this one
is so realistic, I'll go ahead and
put those there. Just adding things as
it seems like I should. I have a lot to say in my
head about that propeller, and I'm just going to laugh
at it and keep going. Yes. Alright. Do we have enough fish people
in this scene? Maybe one more larger one. No fish lips. Anybody else? Let's see. I
think we're good right now. I am going to add
a little bit of water like greenery
down here in the water. Like, we have a few things
coming up from the bottom, and this will be just
little subtle bits that add a little interest. I don't want them to
go through the fish, so I'm just going
to hold that aside. Maybe a few over here. Seaweed, some sort of weed. And if you want to have
a ground down here, you could have all kinds of other friends like
little crabs and stuff, but I'm not doing
that on this one. It just gives it a little
something extra down there. I want this to be longer. I kind of helps to frame
up what's happening. And now I'm going to go
onto my infamous white pen, which we all know,
is a challenge. We'll give it a little
shake and a try. This is a relatively
new pen, too. Seems to be working okay. So, getting these eyes on here. A different sizes. I'm not going to put white in the fish's eyes since
they're underwater. Got to have at least
one different eye in here because that's
the way I work it. Now, fish and
propellers have bubbles because they're moving
through the water and that sets off some
bubbly action. So that's what I'm
working on now. White posca pen. Actually, this is a molotu
but posca works great, too. And you're going to see a lot of this behind this propeller. You could even put
in some motion marks on this propeller if you wanted. Let me go ahead and do it so you know what
I'm talking about. So it gives it a
little movement. We also have this
propeller chugging along. And it definitely
needs some movement. But you know who else needs
some of these is the fish, 'cause they need to
breathe, and if they don't have little bubbles,
they are not breathing. I'm just mixing up the
shapes a little bit. These guys don't need fat
ones because they're so tiny. Mr. Pufferfish lips. Little angelfish lips. Very convincing when you get the little bubbles in there. I'm sorry, you almost
got forgotten. Oh, we need another
eyeball on this bird. I did notice I kept these
fish a little too simple. I do want to add an eye
on the smaller fish. You could really make
this your own by doing a various numbers of fish, all sorts of different shapes on your submarine or
boat or whatever it is. And all those differences are going to really
make it your own, which is really the
aim of these classes to inspire you to create your own look little
insides of the years again. I'm kind of loving how this paint has kind of run
into the cats a little bit and made it sort of wet on wet looking a wet on wet really does
make sense with us. Actually, I used
watercolors for these. Dog, good old dog. You can't do a black nose on this because the dog is black, so I'm doing a
lighter gray color. And the dog has insides
of ears as well. And you know, dogs
have to have a collar. I think I'll just
draw this collar and I'm pink with a pink pencil. As we'll start on these cheeks. The fish get to
have cheeks, too, not the small ones
because they won't fit, these bigger ones
can have cheeks. And of course, the cats
get to have cheeks. You need a darker
color for that one. This one is Rouge Pavo or ppt. So good with my pronunciation. I'm gonna come back in with the pasta just to
do the noses on these and go back to the staler to work on the mouths and
whiskers and such. Could have made that orange, that beak, but I didn't. Back to the smaller
pen, the Stler. Where am I? I'm over here. All different expressions. I went ahead and put
something to steer with right here and I'm going to
add some whiskers. All kinds of traveling on the move kitties
with their friends. I'm gonna put a few
details on these fishes here and there. Is that enough? Enough for now. You
got to get your cheek. I'm gonna go back to
the black Posca for the pupils. Very quiet. I don't know what this one's worried about, but it's worried. There, I think these stand
out well against the blue. What else do I want in here? Anything? I could put
a few bubbles around, as is the case in the water. Little indiscriminate bubbles, 'cause there's bubbles that
come off of seaweed and such. It kind of ties it
together not to just have the bubbles where
the fish are for me. You may feel
differently about that. Starting to look done to me. I did have a little something, something else I wanted
to add to be ultra silly. I'm going to put on one of these sailor hats
on this little guy. And I think I'm going to put
one on this little guy, too. Or maybe it's a girl there. So they're sailing along. I do feel like I want
more color in here, but I'm going to go ahead
and keep it simple. We have one orange shape here, it feels like I want to have
some orange somewhere else. Maybe I'll just go ahead
and give in to my whim here and put some
color on that flag. Oh, yeah, that made all the
difference. Okay, good. Oh, I know what I wanted to do. I'm gonna give this a
little bit of emphasis. Maybe one more line on this. Hmm. Okay. I think
we're good to go here. Alright. That's Project
three. Kitty's on the move. I hope you're having
fun with this. We'll have one more little before it's over, and
I'll see you there.
6. FINAL THOUGHTS: I hope you've enjoyed
these projects. I know it was a lot,
kind of a long class, but breaking down each one, I think will help you to keep up or you may want
to do one on different days. I usually only create one
piece of artwork a day, but sometimes when I'm
doing a class, I go crazy. And sometimes I just like
to make more than one. So you just got to do you. Do I like that saying? I don't know. But I've really had
fun doing this. Cats on the move,
traveling cats. You can't go wrong with cats
in vehicles moving around. So I want to let you know I have a bunch of
other classes here, and I hope you take
a look at those. There are ones about
finding your style, about doing character
development and storytelling.
What else do I have? Paper collage, lots
of watercolor, and who knows what
will be here next. So I hope you have a fantastic
day and keep creating.
 Terry Runyan, Visual Artist & Creative Encourager