Transcripts
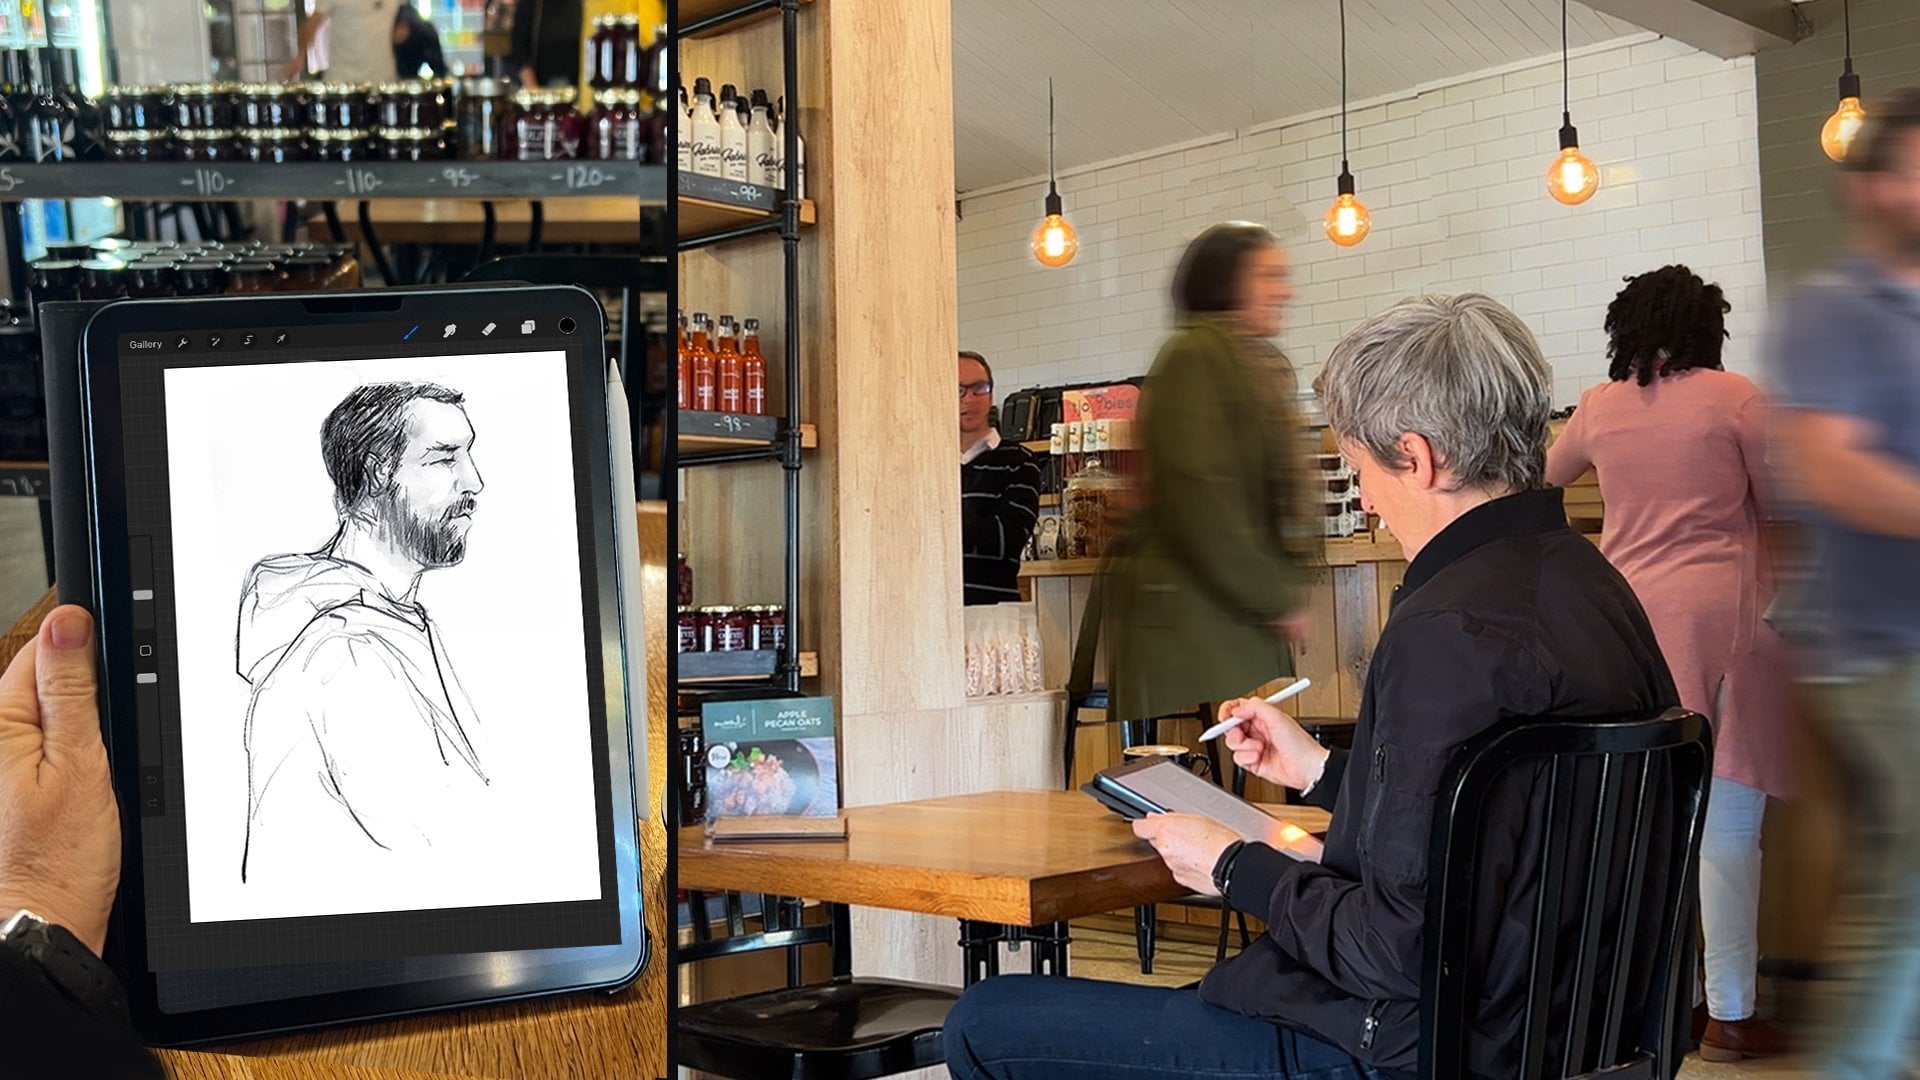
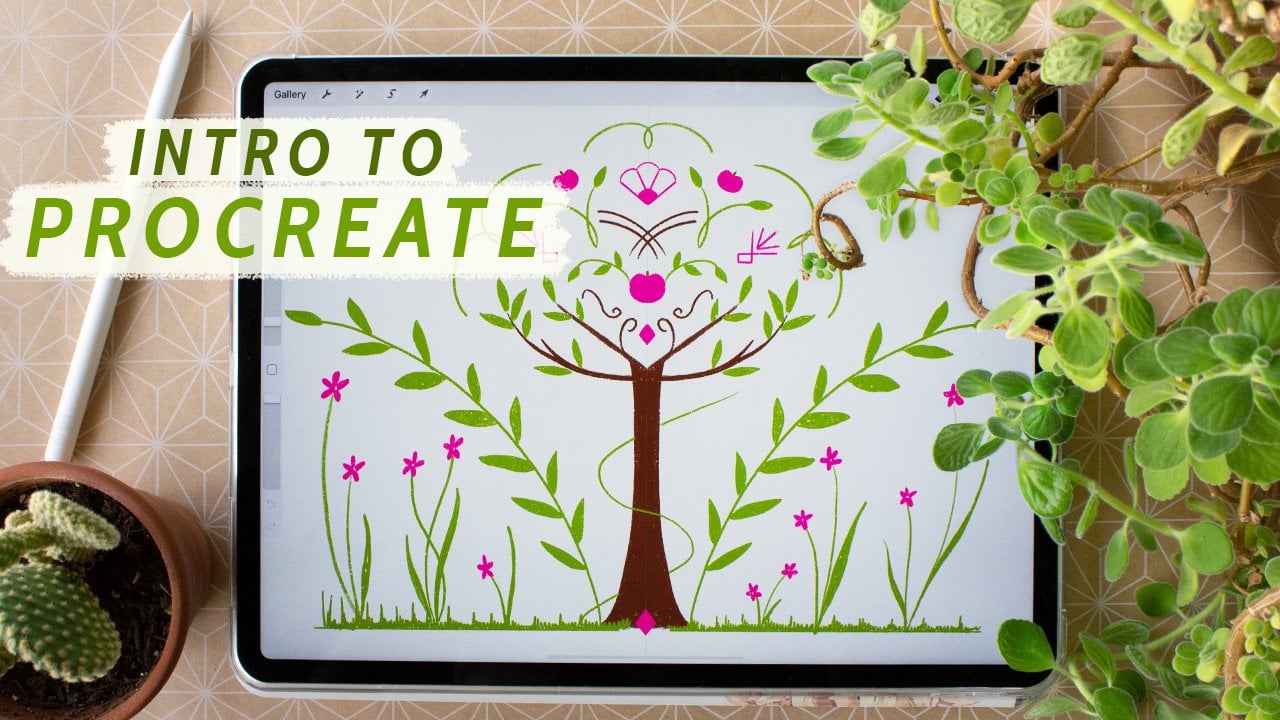
1. Intro: Have you ever end up in 20 layers later for your daily drawing practice? When you're drawing on iPad, sometimes you end up thinking too much about the details because the app you're using has so many functions in it is to explore and you want to achieve perfection for your art. In my experience, it is done consuming, exhausting, and let's move feeling discouraged to continue my whole body on digital drawing. Have you ever feel the same way? Hi, my name is Arini. I used to be a programmer and now I'm a mother of two kids. I love to draw on the iPad and I share my creation in my art account on Instagram. I've been drawing on iPad for about four years and have tried so many apps to smoothen my drawing workflow. In this class, I will share my approach of quick and loose way of drawing on the iPad that has helping me to enjoy drawing without being overwhelmed. This class is suitable for beginner that is starting up the journey of digital drawing or an experience hobbyists that want to explore another way of making art on IPad. You need to have the pro version of Paper by WeTransfer, a free app called Tayasui Sketches School and also the Procreate app to follow along the lesson of this class. This class doesn't require an iPad Pro, so you could use a regular iPad that support those apps. We're going to practice drawing from reference in only one layer using paper by WeTransfer and explore another option with Tayasui. Sketches School. After that, we're going to add some finishing touches and Procreate to give our drawing more depth and make it prettier. By the end of this class, you'll have some digital art that to enjoy the create and makes you happy because you're not exhausted by the process. I want to share the skill to you so you could improve your productivity and bring happiness to your drawing practice. So let's get started.
2. Your Project: For the project of this class, I encourage you to follow along the lesson or create a drawing of your own in the same method and see how long it takes to finish one so you could compare it to your own method. I already provided the reference photos in the project resources section. But of course you could use your own reference photo. I recommend searching on Pexels Unsplash, or you can snap some with your phone. Next you can pick the app between between Paper by WeTransfer or Tayasui Sketches School for drawing. After you finish, add final touch to your drawing using procreate file that I also provided. Or you can try to create your own overlay by following steps in the lesson. Please publish your final drawing result onto the project section And you can tell me about the process and how you feel about this approach. I can't wait to see what you will come up with. If you have any question about the class project or maybe want to share your thoughts about this class. Don't be shy at the pop it up in the discussion section. Next we're going to dive into the tools and basic workflow. See you there.
3. Tools and Basic Workflow: Before we practice drawing, I want to give you some quick intro about the tools and basic workflow that we're gonna use. First we have Paper by WeTransfer, which originally known as Paper by FifityThree. It is the winner of Apple iPad App of the Year in 2012. This app used to have a breakthrough companion stylus called Pencil before Apple thinks stylus is cool. In 2018, FifityThree was acquired by WeTransfer and hence the name changes to Paper by WeTransfer as we know today. I actually know this app from Skillshare original class may Catherine Madden. There are some class in Skillshare that exploring this app, but most of them are using the older version. Initially, I use this app for digital journaling and sketch- noting but along the way I use it for doodling and quick drawing practice because of its simplicity and intuitive interface. You can download Paper by We- Transfer for free on App Store. But in this class, I'm going to use a tool that require a pro subscription that is about $10 a year. So let's have a quick tour, When you open the app, there is a predefined journal called Paper Demo. If you couldn't find it, you can get it from the Paper Store for free. I think is super useful to help you getting started. And I highly recommend that you try it by yourself because it will show you the ability of Paper app. And you can try all the tools before you decide to purchase the subscription or not. And here is the tool that we're going to focus on using : the fill tool, we're going to use it for coloring and some people refer this as lasso fill technique. And it helps you to color your sketch quickly by filling in colors. So it automatically darkens when it is overlapping and the movement is intuitive, which makes me love this app in the first place. The next app I'm going to introduce you is Tayasui Sketches School. So if you still hesitate to purchase the Paper Pro subscription, you can download this instead. This app is totally free and have similar tool like Paper. But the downside is that it doesn't have as good palm rejection as Paper, so I recommend you to use some glove. The glove that you're using for digital drawing to improve the experience when you're using this app. Tayasui Sketches School is actually a kind of a mini version of Tayasui Sketches Pro. It mostly has the same tools, but the option like layers and brush are limited. Just like Paper, kostly we are just gonna use the pencil and the fill tool for the practice. The basic workflow of our practice is we're going to do sketching and coloring with apps I mentioned before. And after that we'll give our drawing some texture with premade template and add some sketchy finishing to it. And this brings us to the next app, which is Procreate. I believe most of you already know Procreate. It is such a golden standard for digital drawing on iPad. So I think I don't need to talk too much about it. But maybe some of you wonder, why don't we just use Procreate for all the steps , the sketching, the coloring, the finishing. Technically, of course you can, but Procreate can't do the fill technique as easy, quick, and intuitive as Paper or Tayasui Sketches. Another thing for me, who put drawing as a hobby, Procreate is kind of overwhelming and for more serious drawing, like for a professional work, and what I want is loose and casual way that doesn't put me on too much pressure because we want to have fun drawing not exhausted. And I found that more on Paper and Tayasui Sketch. Lastly, for the device, you don't need an iPad Pro for this class. You can just use regular iPad with iPadOS 13 and compatible stylus to follow along. Okay, I think that's all I want to talk about the tools and basic workflow. Next we will do the actual drawing practice with Paper by WeTransfer, stay tune!
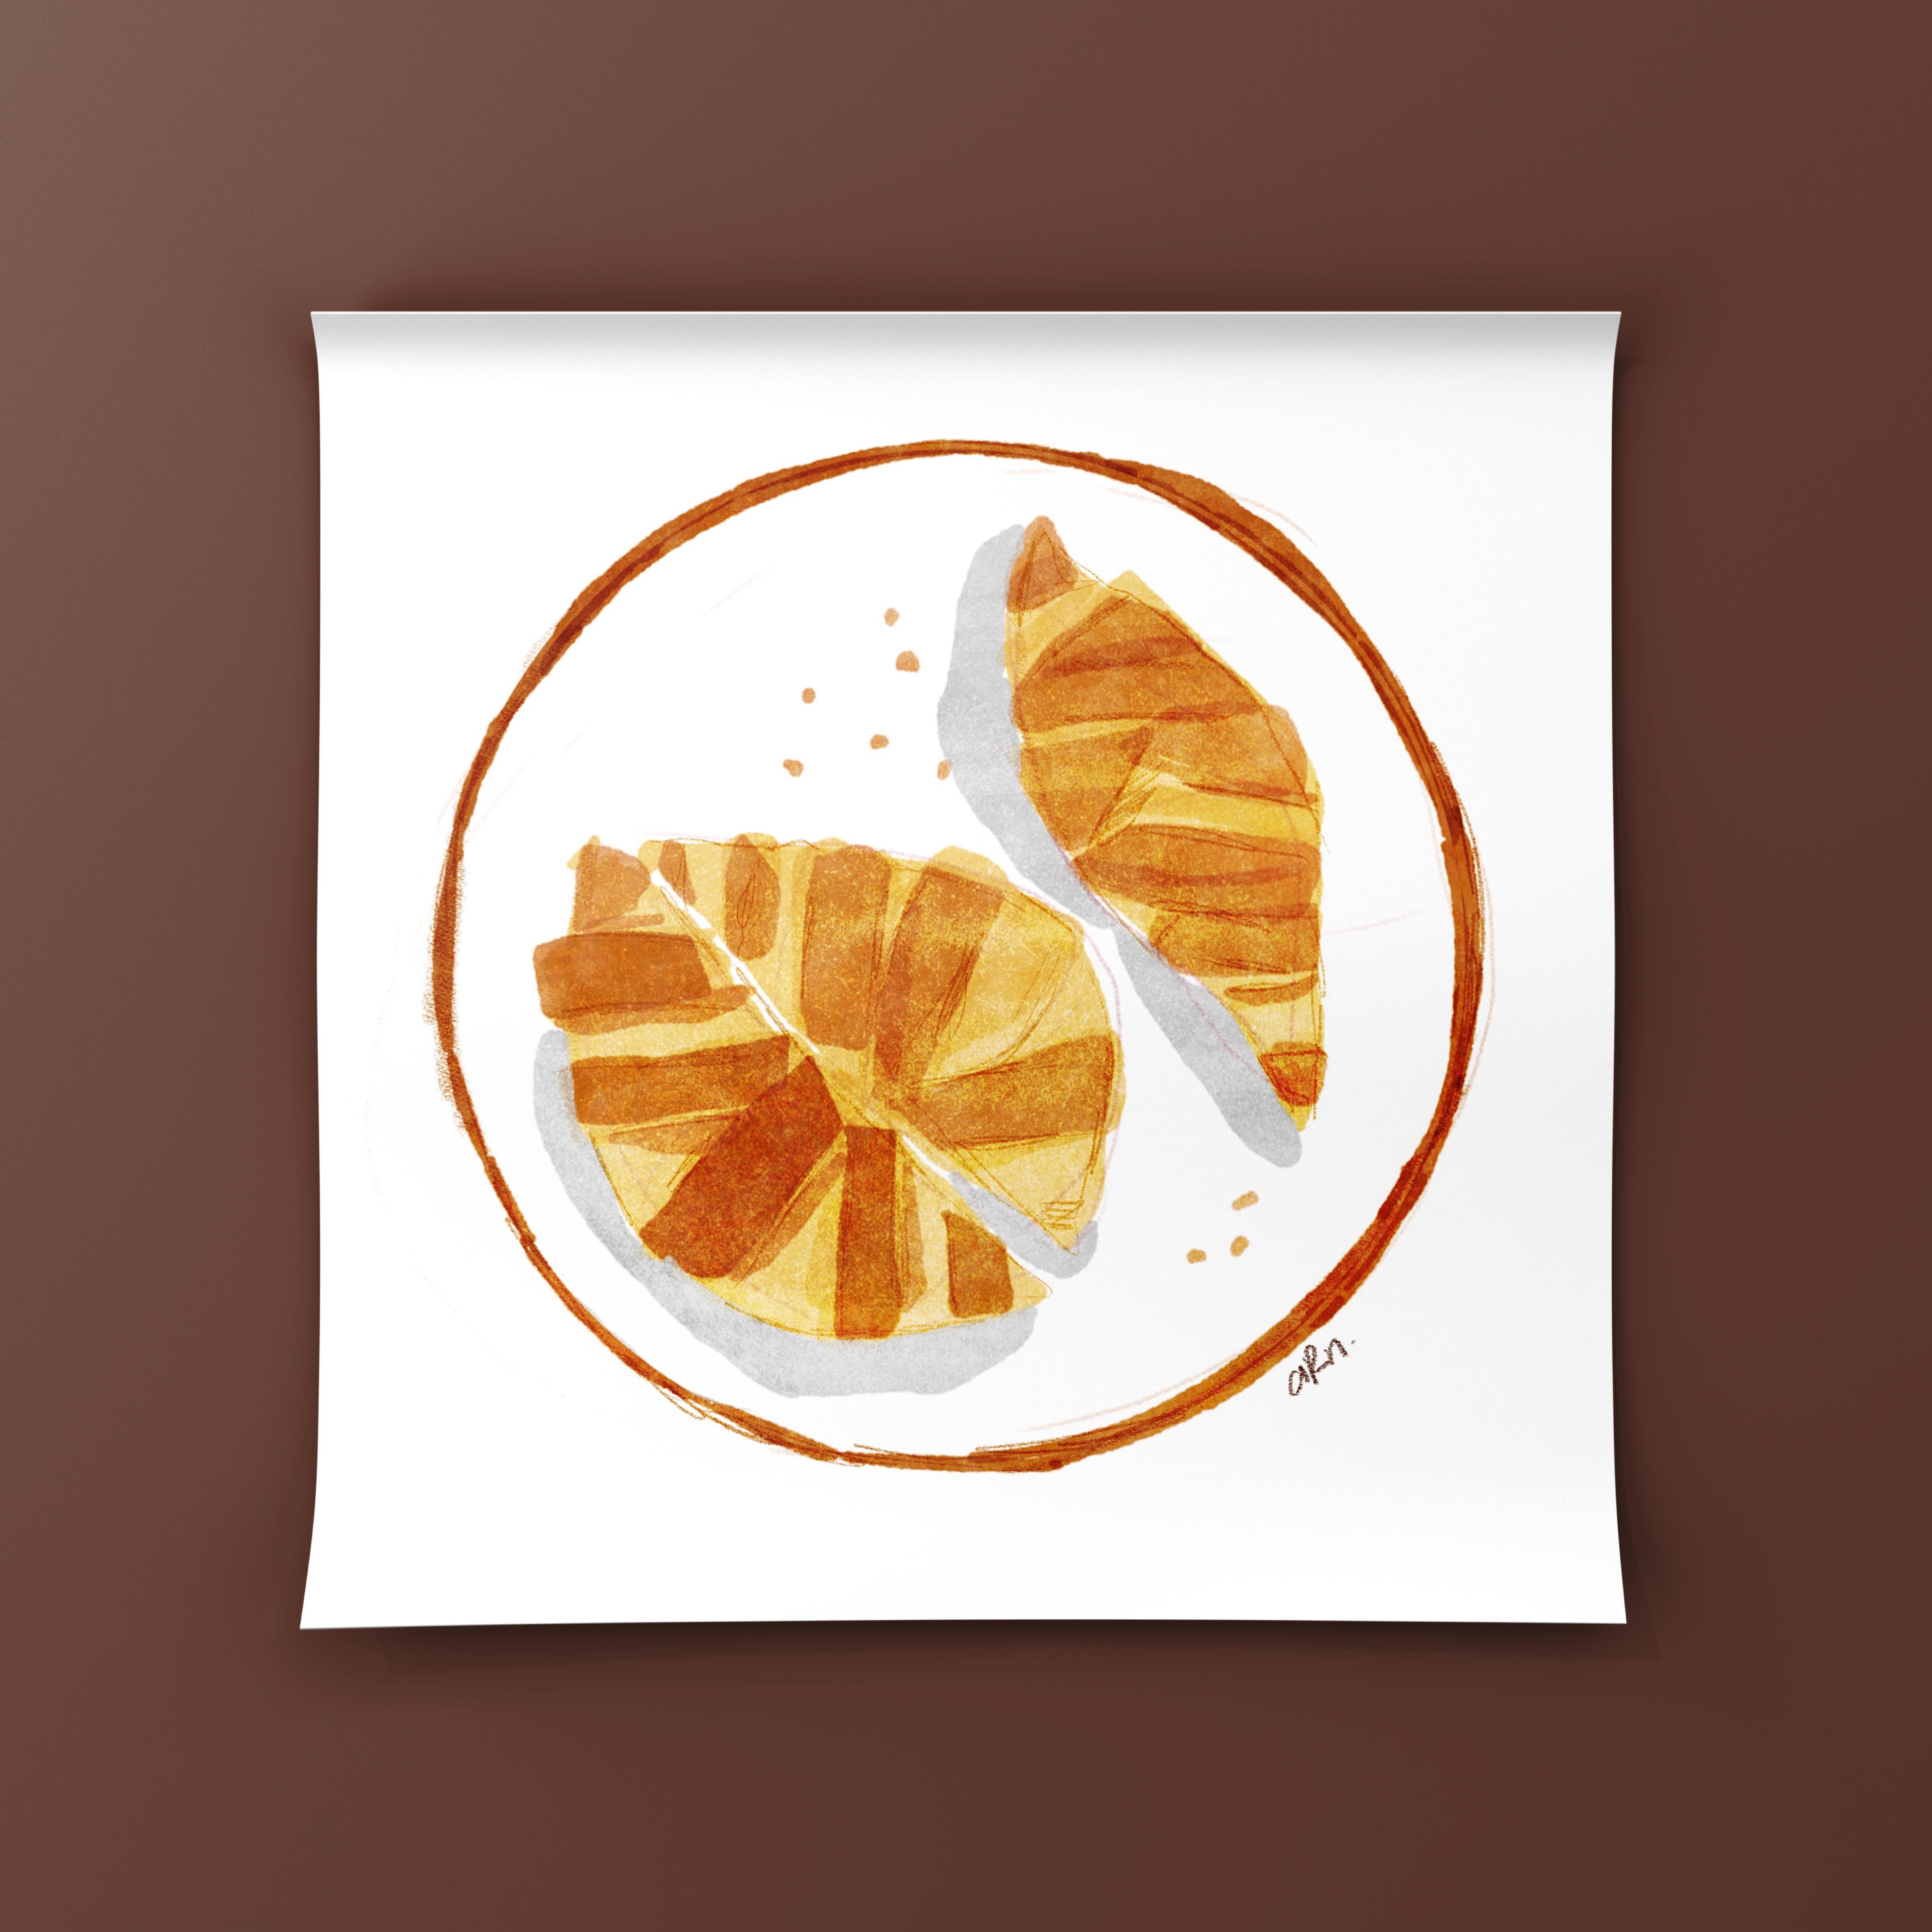
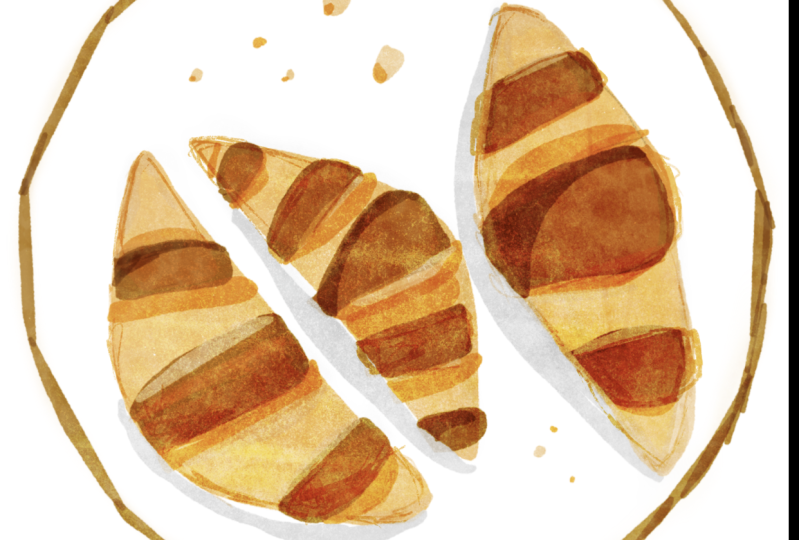
4. Drawing with Paper by WeTransfer: Hi, welcome back. In this lesson we're going to draw some croissants with Paper by WeTransfer. I'm going to show you how to do the sketch, painting with color fill tool, and then export it to be ready for the finishing touch. Let's go. I assume that you should have tried the Paper Demo journal first before starting this practice, so you would already know the basic tools and control. But if you haven't, it's okay because I think you will find it as you go along because this app has such a great user experience. Okay, So let's just start drawing. In Paper app, there is a feature to search image directly from Pexels. So here I'm using that feature. I'm going to pick an image and I will attach it in the project materials section in case you and to use the same reference me. You can do tracing directly over the reference photo if you want. But here, I just going to put it into a corner and do a rough sketching by looking at it. I'm using the pencil tool for this sketch part and do a quick sketch of the shape of a croissant. You can see here that my sketch is fairly simple and not even resembles a croissant, I do sketching to help guiding me about the basic shape of what I draw. And don't worry too much if it is looking weird because the drawing will make more sense when we start to color it. I think my sketching is finished. Now let's do the coloring. I'm going to do some color picking for the croissant. Sometimes when you use the color picker, that color's still maybe too dark or too bright. You still can adjust it by tapping the color dot to make the color slider appear. I'm going to adjust it a little. Now let's start filling in colors. So I start coloring the bigger shape and I will overlay it with the same color to get some shadow or other details. This feature is why I think it's perfect for quick drawing. Actually, when you overlay two colors, it is not always multiply or darken. If you put some bright color on top of dark color, you can use it as a highlight. So just play with this fill tool to experience it yourself. Okay, now I'm going to color the other croissant. Just casually color it using what I could see in the reference picture and my sketch. I think this part is the most fun part because you can play with color, following your intuitions. And as you can see, now, as I fill in color, it looks more like a croissant, it start getting some shape and make more sense as a drawing. I'm going to start adding some details and using some yellow brown color tone to give more variation and add dimension to the croissant. I think I'm going to fast forward this part until I'm done adding the details. Okay, I think it's done for the croissant. So let's color the plate part. First, I'm going to use the Cut tool, the one that looks like a scissors to move my drawing a little bit to the middle. And adding a little bit sketch for the circle shape of the plate with the pencil tool. Well for making an outline, it's kinda hard to make a perfect one with fill tool So here's a trick. I will use the diagram tool. This is available in the pro version. It looks like a marker with a ruler to make a perfect circle outline around the croissant. And I'm going to use it as a guide and tracing it little by little with fill tool to make the line a little bit organic. And because we cannot rotate the canvas in Paper app. So I just rotate the iPad instead to make me more comfortable to draw. And here I am tracing the circle to making the plate. Little by little. Okay, I think I'm done making the plate. So let's make some details like little crumbs over here. Oh and yes, I forgot to tell. Please be careful when you use fill tool inside a smart shape from Diagram tool because it will automatically fill the color all over the circle if it recognizing a tap. So be extra careful when you want to do some free form fill. It happens all the time to me, but don't worry because it's digital. You can undo it. Next. I'm going to make some shadow on the plate using some gray tone color. Being mindful of your stylus when you want to draw something with the fill tool inside a smooth shape. Here I just pretending the light is from the right side. So there will be some shadow in the left side of the object. I'm not really good at putting shadow and highlights. So I just go with a pretty basic concept all the times. I'm going to make some shadow here and here. And then I want to move my croissants to be more in the center of the plate. So I'm going to use the Cut tool again to drag it a little bit to the right, so it is right in the center of the plate. Then I'm going to erase some leftover fill here in the corner. Just like you do some dish plating. Okay. I think I'm done with the drawing. I'm going to toss over the reference because I don't need it anymore and I think it is ready to be exported. For this one, I will use to drawing as it is to be exported. If you want to get rid of it, There's a trick I always use, which is blending tool. For your information. It seems we draw all in one layer, but the canvas area in Paper has a number of built-in layers. From top to bottom. They are Ink layer, fill layer, collage layer and background layer. So our sketch, which use pencil tool will always be in the top of the filter because the pencil is in ink layer and the fill is in the fill layer. So when we blend over a canvas that has pencil and fill, the one who will get blended is the ink layer only. And that's how I utilize it to get rid of my sketch. But you have to blend it thorouhly so that you will get a nice and clean transparency when you paste or insert it to another app. If you don't really like this trick, the other way to have just the fill color is by creating a new page and insert your sketch page as a reference so you can use the sketch as guidance and then completely remove it when you're done coloring. The only downside of it is that your sketch won't be showing through anymore because you put it in as image which will go in the collage layer. Okay, back to the exporting thing. I'm going to show you how to export the drawing as a transparent image. First, you have to make sure the Canvas setting in Paper app for exporting the background is disabled. So when we are using the copy or Save Image action, it will be transparent. You can find this action when tapping the share button of the journal page. After your tap Copy, you can paste it directly to Procreate or you can save it to your camera roll and insert it instead. Okay, that's all for drawing with vapor where we transfer. Next, I'm going to show you how to do the same thing with Tayasui Sketches School as a free alternative to Paper. See you there.
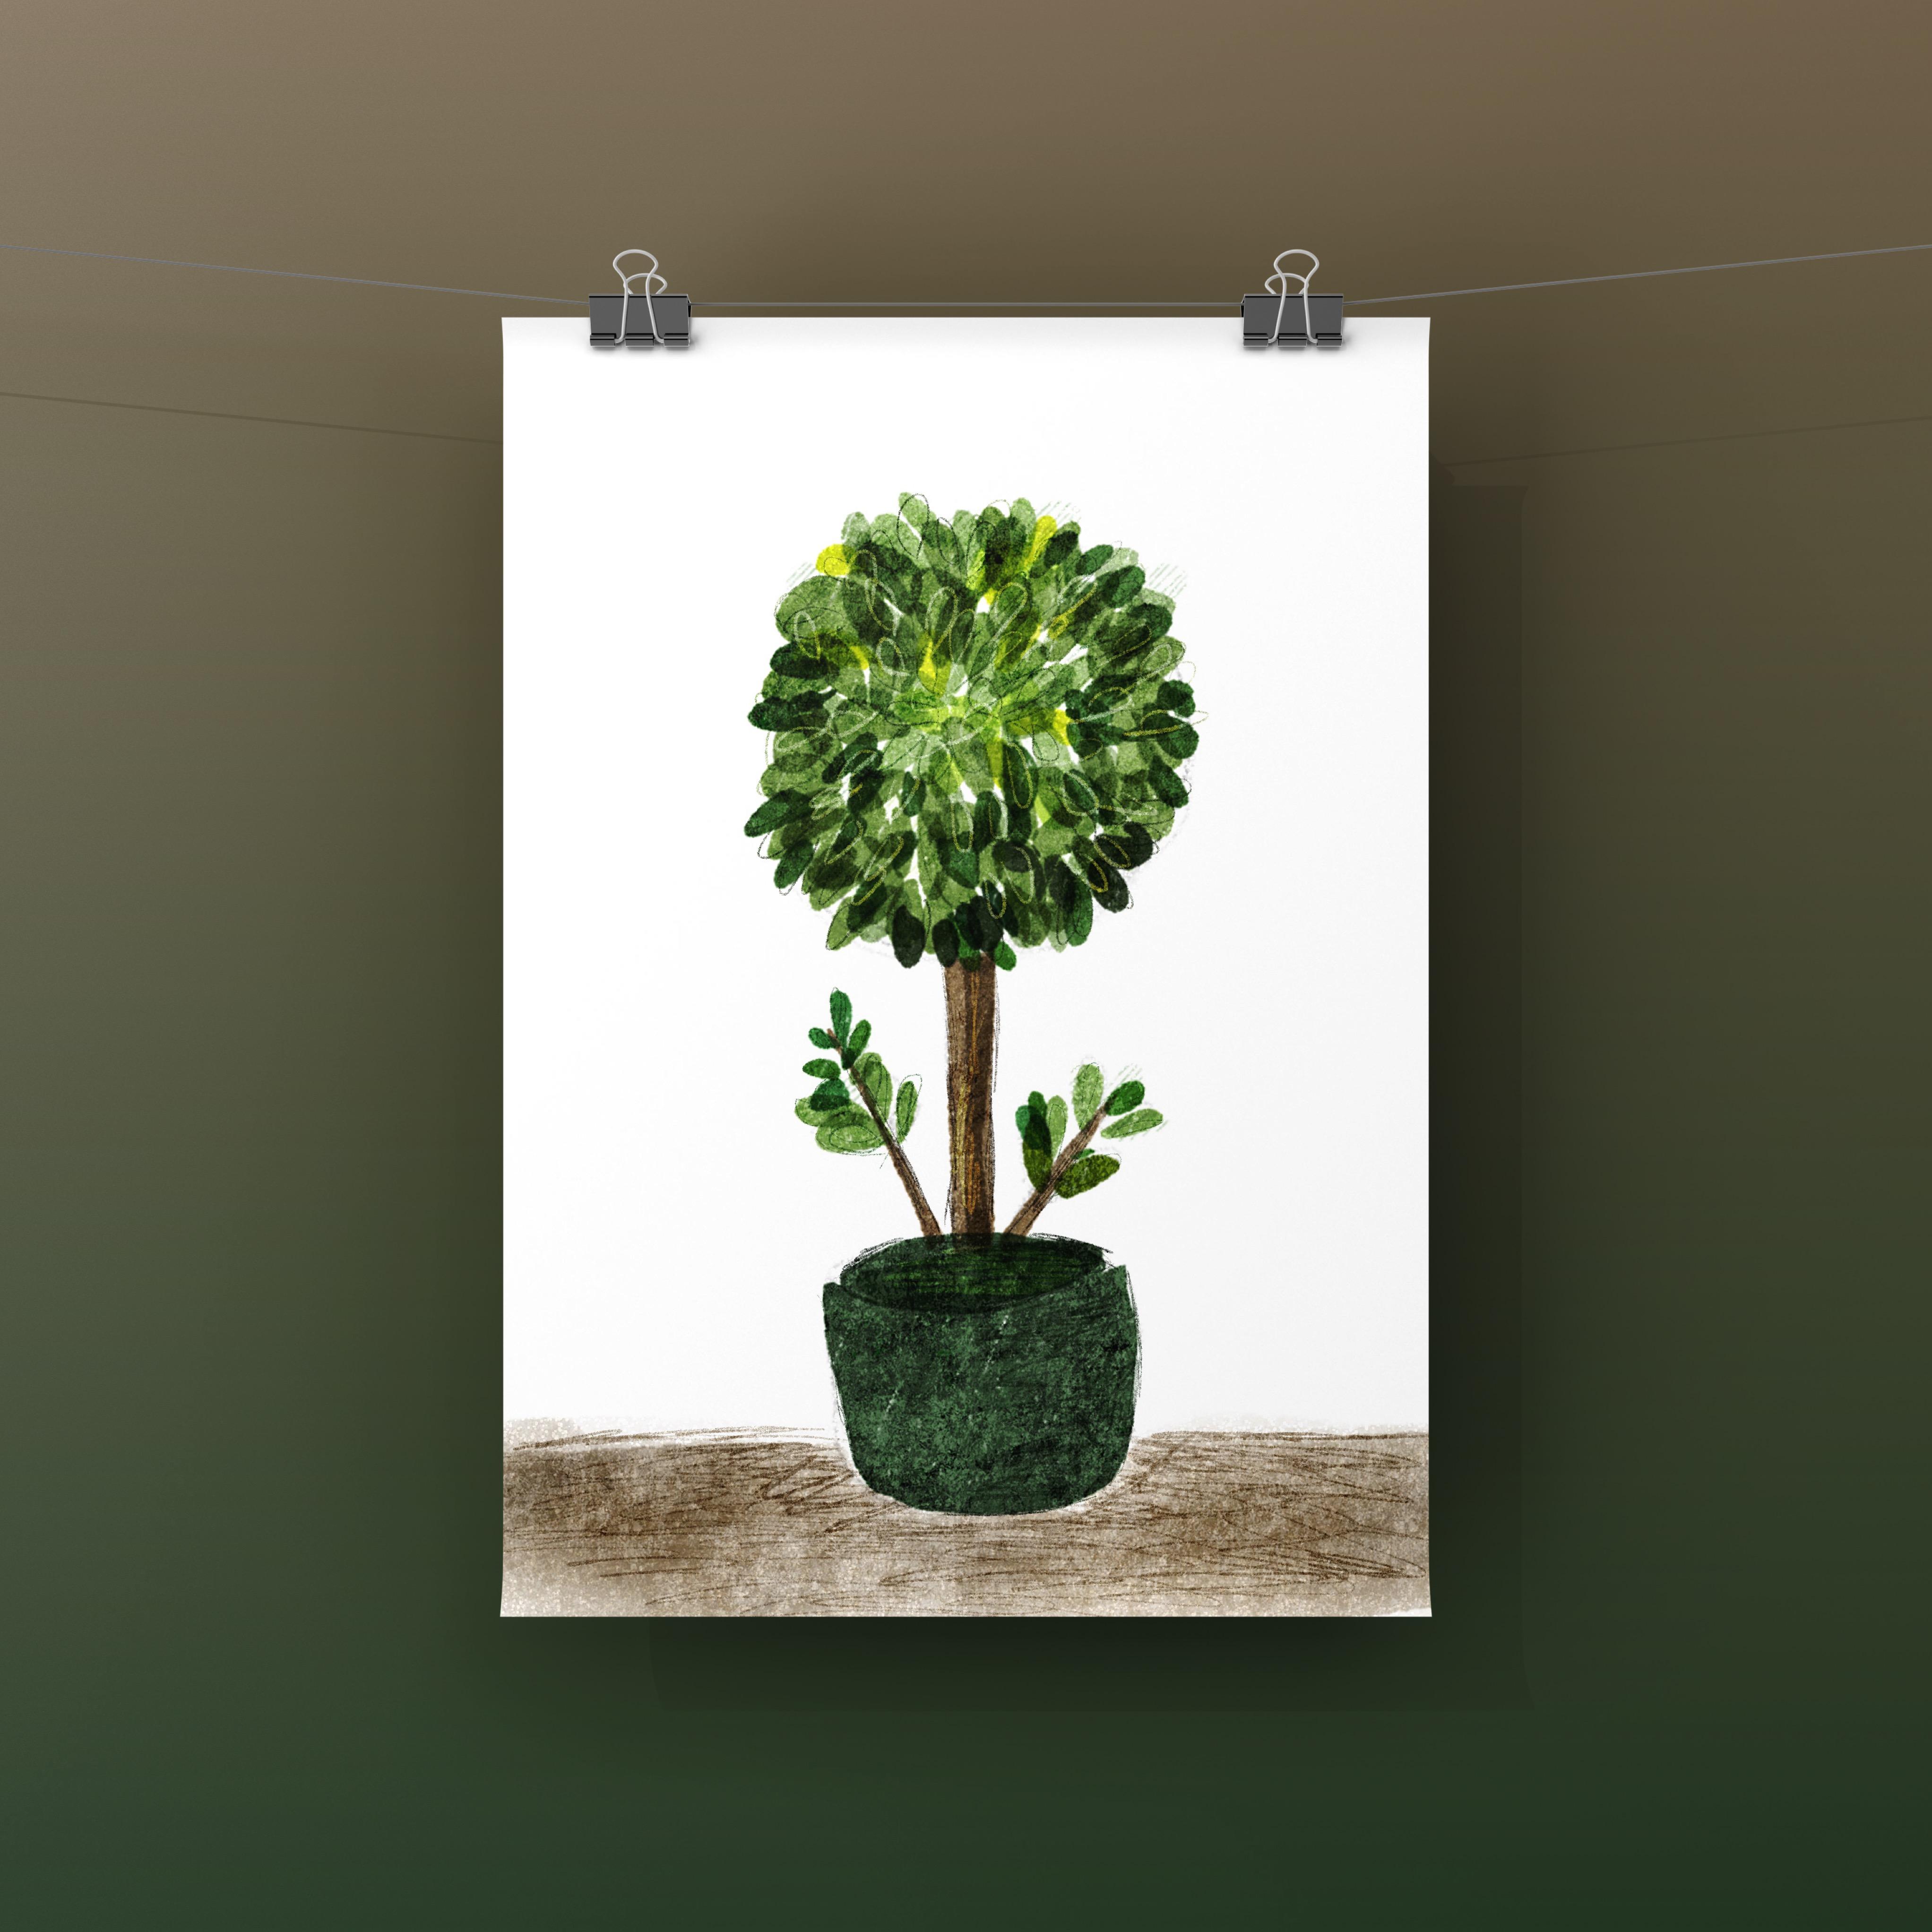
5. Drawing with Tayasui Sketches School: Hi, welcome back. In this lesson we're going to draw a potted plant with Tayasui Sketches School I'm going to show you how I sketch and then quickly painting it with color fill tool and then export it to be ready for the finishing touch. Okay, so let's just get started. First. Let's open the Tayasui Sketches School. You will see some journal or folder here, just like in Paper. For first timer, I recommend you to see the "Learn" section to have some basic knowledge about tools and features in Tayasui. You can also tap a help button in different area that will show you some information about the basic control around this app. And let's go back to the folder section. I already made one name "Practice". I'm going to make a new page by tapping the plus button. Then we're going to insert the reference picture, which I also already provided in the project materials section. You have the option to trace it directly over it by putting it in the center of the canvas. Or you can just put it in some corner and start drawing by peeking at it, Same as in Paper, here you draw everything in one layer. Okay, first we'll do the sketching part using the pencil tool. There is also three size option for the pencil. Here I am going to use the medium one so you can see it more clearly. So I'm going to sketch it from the bottom part and just making a silhouette of it and following the contour of the object. Simple sketch to help me know the basic shape for the color filling part later. I think it's done. Now on to the coloring part. As you know, because there is no layer here your sketch line should be showing through in a drawing. For me is totally okay. But if you don't want that, there is an option to save your sketch as transparent image. Then create a new drawing, insert your sketch as the reference picture and position it in the center so you can draw over your sketch and just hide the sketch when you're done. So it's basically same like in the Paper. Here in this practice, I'm just gonna go with all in the same drawing because I don't mind the sketch to be show through a little because that's what makes it more natural. So the fill tool in Tayasui Sketches School has more variety than Paper. In the Tayasui Sketches pro version It has more than this, I think is about 20 pattern. And this one is my favorite option when using Fill tool because it has some jegged fill that feels more organic than the others. I'm going to color it from the pot with the green color I picked from the reference here. And so in Tayasui, the way we use the fill tool is a little bit different than Paper. In Paper, there is a live preview as you do the color fill. But in Tayasui you will make a kind of free form selection with your stylus first because before you can see how the color fills in. But otherwise I think it almost the same. I do the color fill in the same method. I do to bigger piece first and then overlay it here and there to give it dimension. Now I'm going to color the trunk. I'm going to color pick some brown here from the reference and filling it here and here. Then next let's do the leaves. I'm going to loosely making some leaf shape with some different tone of green here. I love how they are multiply when overlapping. It helps create some variation in color. So I just filling the circle with some leaves and have fun. Oh yes. As you can see that I'm using glove here. Because what I mentioned in the previous lesson, this because the palm rejection in Tayasui is kind of not really working for me when I don't use a glove. It happens pretty often. It can be annoying because it's like you accidentally tap in the wrong place and it will be color filled all over. And I think you need to know, and that is why I recommend to use a digital drawing gloves when you're using Tayasui. It's kind of significant. Okay, now I'm filling some more leaves here and there. I'm going to use the other pattern fill option to add some variety to the drawing. Just loosely adding patterned leaf shape here, wherever I think it fits. I think I'm done filling the leaves. Let's try to see it without the reference. By tapping this button. I think it looks good enough. And now it's the time to maybe fix some weird sketchy lines here with eraser. I'm going to add some shadow in the pot to make it not flat with some pattern fill. And there you go. So I think it's done, but I think I'm going to add a little water color background here. Taysui actually has an awesome
00:07:35.600 --> 00:07:38.480
watercolor engine that I think it's worth to explore. It's kinda limited here, but the pro version has more option to offer. But it's enough for us. I think it looks great and ready to be exported as transparent image and we will use it later in the next lesson about adding overlay and finishing touch in Procreate. Okay, that's all for drawing with Tayasui Sketches School. In the next lesson, I'm going to show you how to add texture overlay and add finishing touch in Procreate. So see you there.
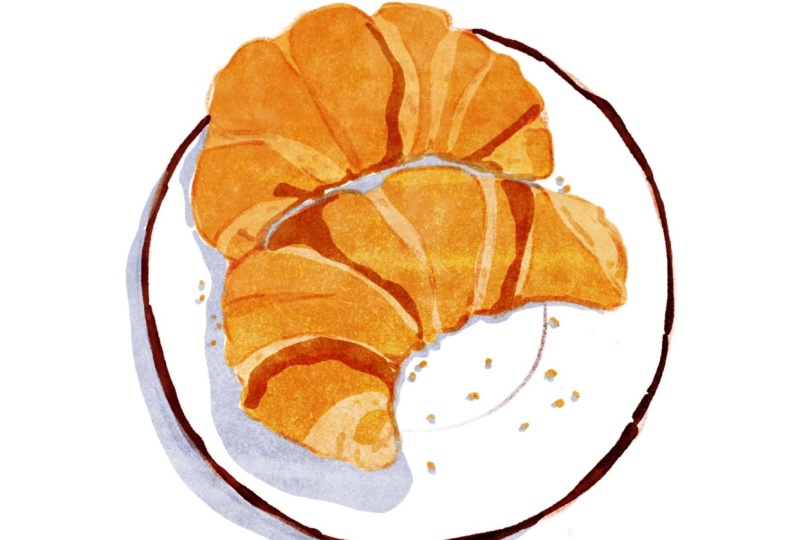
6. Adding Overlay and Finishing Touch: Hi again. In this lesson we're going to add the overlay and finishing touch to the drawing we made in the previous lesson. So let's get started. First, I'm going to show you how to add the finishing touch for the drawing we made in Paper, which is the croissants. I assume you already exported your drawing as a transparent image or tap copy from the journal page in paper. Now, let's open the Procreate. I'm going to use my already predefined overlay files which I also provided in the project material section. So if we're going to follow along, you have to already import it to Procreate. The final name is Overlay1.Procreate. I know it's different here with what you see in my cluttered Procreate projects. But it is this unnamed file that has already some drawing in it. I'm just going to duplicate it and open it, and clear all the drawing inside. I already copy my drawing from Paper. Make sure you are in the layer under all the overlays when you paste or insert your drawing. I'm swiping my 3 finger and paste. There you have the croissants having all the overlay. Look. It's already looking great. Now I'm going to resize it to my liking. In this part actually I think is already looking awesome. But if you have some time to spare, I will add some sketchy finishing on top of it. This part is absolutely optional, but I will show you how I do it. First. I think I want to do some erasing the sketch line here to make it a little bit cleaner. There you go. I'm going to add a multiply layer on top of my drawing layer. I'm using a sketching pencil brush. You can use whatever brush you have. I'm going to pick some color from the drawing and start to make some sketchy lines on top of it. Do it freely and just have some fun. There is no right or wrong in this step And if you see the overlays is kinda too much for your drawing. You can play around the overlay layers by changing their opacity and see how it fits to your drawing. I think it's done and ready to be exported for sharing. And this is the final result of my drawing. Now let's go to the next drawing which we made in Tayasui Sketches School. ... I'm assuming that you already have saved your drawing as transparent image to your camera roll. And here I'm using the Overlay2.procreate file that is available for you to download in project materials section. Make sure you are in layer name. "Put Your Drawing Here", and then insert your drawing, transform it the way you want it in the canvas. And you can see all the texture over your drawing. You can compare it before and after by turning the overlay layer group on and off. Of course, you can play around the overlay layer by changing the opacity and see how it affects your drawing. I will show you how to make your own overlay later in the next lesson. In case you're getting bored using the same overlay all the time. Back to the drawing. Again, You can just stop here, add some signature and export the drawing to be saved and shared. But, if you've got some spare time, they can add those sketchy finishing lines. in the layer above and drawing that is set to multiply. I'm going to use a default sketching procreate brush called Peppermint here. Here I'm going to sketch over my drawing, just a rough sketch using color that I pick from the drawing, some dark green for the pot and leaves and brown for the trunk. Just let yourself loose and having a great time. I'm feeling great today. So I'm going to add one more layer and I'm going to set it to color dodge. I'm going to add a little bit highlight using a yellowish green. Not too much, just a little here and there. I'm going to adjust the saturation and brightness. And I think it's still too bright, so I just lower the opacity. I think I'm going to add a little bit more in the trunk and the pot. Oh, I forgot to add some sketchy lines in the watercolor background. So I'm going to add it. Okay, I think it's done. And that's it, congratulations for finishing all the steps. I think I spend about 20 minutes for all three steps. How about you? In the next lesson, I'm going to show you how to make your own overlay files. See you there.
7. Make Your Own Overlay: Hi again. I already promised to show you how to make your own overlay file. so let's make it. Let's create a new file in whatever size you want. And then I'm going to create about three layer here. Well, it doesn't have to be three. You can make it less or more, it's up to you. But for me, five is my limit. The basic rule of the overlay is you will have some layers to darken and some other to brighten so it will have interesting texture combination. Here I'm going to set the bottom overlay layer as color burn for darken. The second layer is color dodge for brighten and the top layer I'm gonna set it to divide also as brightening layer. This is just my usual choice, but you are free to experiment with blending mode you want to use for the overlay layer. Now we're going to group these three and rename it to overlay. And then we're going to use the bottom layer to insert our drawing. I'm going to use this drawing I already made with Paper app. I'm just going to copy it first and then paste it to Procreate. Now let's go to the overlay layers group. In the third layer, which is a darken layer for me, I'm going to use a gray tone color and some texture brush here. So this is the perfect time to use all of the texture brush you ever bought and collect. I'm such a brush hoarder. So I get it. But here I'm using a default Procreate brush named "Spires" and brush all over the concepts. Make sure that it's cover all of the canvas. So I recommend to use the maximum size. For the second layer, which is set to color dodge. I'm going to use another texture brush which is "Flick", and brush all over again. Don't worry if it is too bright, you can always adjust the saturation brightness setting or lower the opacity later. And for the very top layer which is set to divide, I'm going to use a light gray to give some subtle highlight by using other default brush, which is "Noise" brush and brush all over the canvas again. When you're done, you can look how it fits your drawing. Remember you can always adjust the opacity and brightness. You can also add some more layer that is containing some texture in between. And that's all how to make the overlay. So congratulations, you just make your own overlay template that you can use it over and over again for post-processing. That's all for this class lesson, what do you think about this approach? Please join me next on the glass closing to have some recap. See you.
8. Closing: Congratulations for finishing all of the class lesson. Thank you for joining me in all the three process. Quick sketching, painting with color fill technique and adding the overlay and finishing touch. I hope it will help you to improve your productivity and brings more joy to your drawing practice Don't forget to post your final drawing and maybe some of your process as your project and please what do you think about this casual drawing method that you learned in this class. If you still have some questions about the lesson, you can post it in the discussion section, and I will try my best to help you. Once again. Thank you for all your time and have a great day!
 Arini Rusda, Ultimate Hobbyist