Transcripts
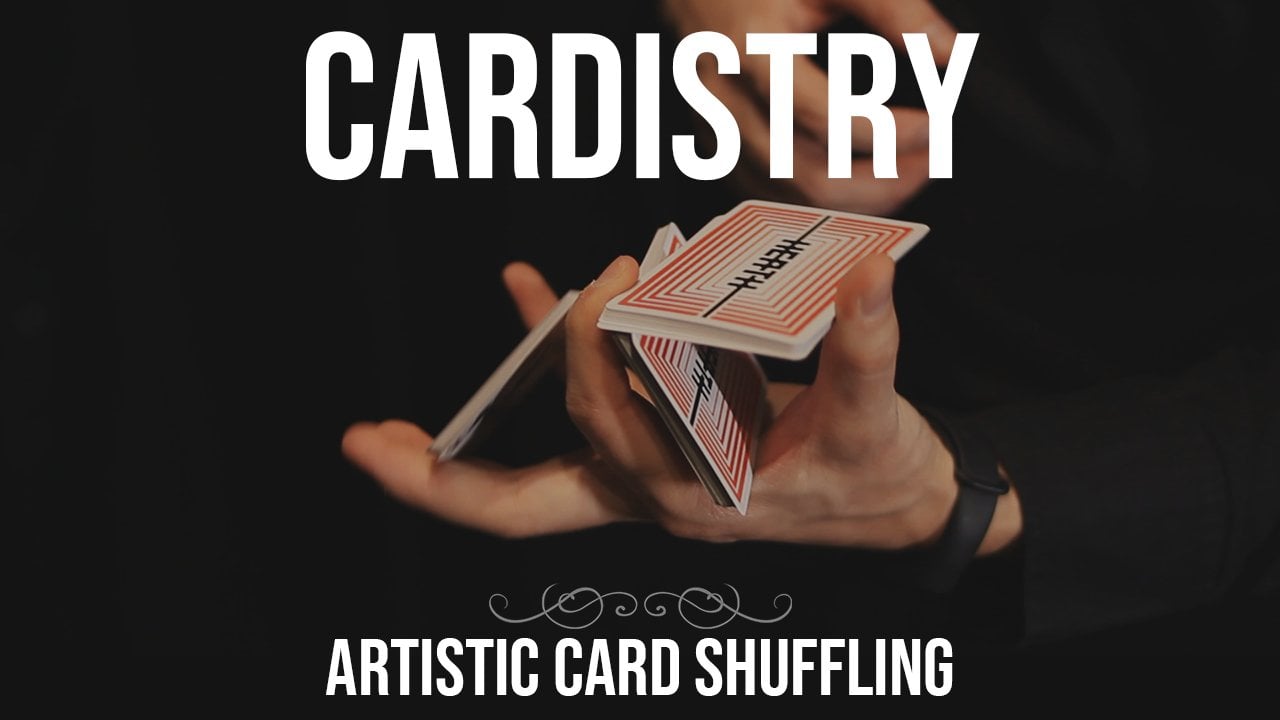
1. 1. Intro and Trailer: Hey guys and welcome to cart
is Shri one-handed cuts. In this Skillshare course, we're going to be looking at five basic one-handed cuts
intended for beginners, entry level people in the
world of cards Sheets. My name is base. I've
been acquired as for the past 13 years. And I have been practicing
this beautiful art form probably every day of my life with some
breaks here and then, and I really want to
pass you this beautiful, beautiful art form so
you can play with it. It's a very meditative thing. Can do it anywhere. And at any time it clears out all of your thoughts as you're focusing just on
the playing cards. So I really would like
to pass this on to you. So you can have something
to play around with any deck of cards is
good as long as you have a deck of poker playing cards so that they fit in the hands
just like in mind, if you have smaller hands, you can use bridge sized. So guys, welcome to Current
History, one-handed cuts. Let's begin.
2. 2. Charlier Cut: The first thing
that we're going to learn is called
the shore yea cut. This has been around
for more than 200 years and has made its way from the magicians realm
to the cart is well, to start, we're
going to be using something that is called
the dealer's grip. We're going to have the pinky
at the bottom of the deck, then this is going to
help the card stay in place and not slipped
down to the floor. So really do keep that
thinking over there as it's really going
to be very helpful. Always pay attention
to the pinky. Because the two fingers on
the right ring finger and middle finger and the
index finger on top. And the index finger is going
to be the one that's going to do a lot of the
job over here. And I'll show you over
here what's happening. We're just lifting
half of the deck with our thumb from the left
side, just like this. And we're doing this at
the tip of the thumb. So it's not actually
happening down here nor is it happening,
you know, over here. So you're not going
underneath the packet. You're actually just
putting the tip of your thumb over there on
the side of the packet. And this point on,
you are going to go with your index finger and
I'm going to move here. So you can actually see from this point of view
what is happening. You're gonna go with
the index finger and push the packet upwards. Notice that when I push
the packet upwards, what some of you
might actually be doing is in this position where this packet feels like it's completely being
pushed up by this one. So if you would
leave your thumb, the packet would just fly out. Normally that happens
in two cases. One, you have smaller fingers or to the grip on the deck
is not a correct one. So notice how my
fingers over here, this is a bad position. What I want is I want the tip of my fingers to contact that much. So I'm over here. Liftoff half, which
is the tip of Maine ring and middle fingers
contacting the packet. This is actually helping me lift this first
packet up in the air so much that I can just push this bottom packet casually
up and down scene. So this is one thing
that I've always seen happen with my students, is when I'm teaching live face-to-face is that they're not actually accustomed to bringing a package to their fingertips. So do bring the packet to your fingertips so you can
push that bottom packet. Now, once you push
the bottom packet up with your index finger, notice that I'm not doing
it from this corner. I'm doing it by making it come underneath and then pushing
it from the middle. I will tilt my risk of
bit towards the left. So it makes it easier to
let go of the packet. And this one should fall down. And in this position I
can just hit the packet, so it falls down as well
here and then leave it down. Or we can end it by clicking
this packet over there, which is a nice little
subtlety from Aviva, who is a very well
note card is in the current issue
community of moral, you should definitely
check his stuff out. So this would be the basics
for the Charlene cut. The five fingers
are in position. We lift up half of
the deck at our tips. If we want to create more space, we lower our fingers by bending them and then lifting
the packet up. This is something that
you won't have to do as you keep on going. We push the packet with
our index finger until the point where we can
leave this ones with false. It has fallen usually
on our index finger. So you can just keep on crawling the index finger until it's
safe for us to extend it. Because if we extend it earlier, sometimes it will spread the
chorus just like this C, it will spread the cards. Other times it might
knock it out completely. So what I advise you to do, you see a kid and then
I started bending my index finger down
until the packet 4's, I am safe to go in 19, close it. And that leaves and
gems is the Charlene. And once you can get
it to this spin, then you can
actually think about teaching yourself how to
do it in the other hand. And then he can try
and combine the two as such for great dynamic practice. And also for allowing
your mind to be able to split between two tasks
which simultaneously happen. And then you'll go
into other stuff which we'll discuss
much later on. But this is it guys,
the short cut. Congratulations, you've made
your first step towards acquiring a new base
of hand skills, which is called carpentry. And this is the first
cut that we have learned that shiny cut, a one-handed cut that you'll find repeating
itself through many, many videos and also moves. Congratulations. Now let's move on.
3. 3. Scissor Cut: The following cada
we're going to be learning is called
the scissor cut. And it looks because the packet opens up just like
a scissor would. Or at least that's what
people thought when they created the cut. I feel it's a natural segue from the shoreline cut as what
you're actually doing is just using the thumb to grip
a packet together with your index finger
and move it towards the left and then bring
it underneath the deck. It has a very easy
cut and there's not a lot of complicated
things that are going on. So let's move on to the silicon. We're going to grip the deck
into opposition like this, similar to the dealer's grip. But we're actually
gripping the entire tank is known as how my index
finger and ring fingers, pinkie, over here,
are actually gripping the deck so that I can actually hold it
between the fingers. And from this position, I am bringing my thumb down to the bottom of the packet
at the inner left corner. And then I am contacting
half of the deck. And just like in
the Surely it got, we're picking up half of
the deck and then we're grouping it together with the
index finger and the thumb. And we can move it
towards the left side. Once you have grip the packet, you will notice that
there is pressure. Now here, here and here, all of these three fingers
are actually holding those two packets
together and such. We're going to be
bringing the thumb as far as we can until
we can't anymore. And from here on the
fingers that are just casually sitting over there
minding their own business. We're actually going
to help us tilt this packet so that now when we come back
with our thumbs, we can actually put the
packet underneath down. So it comes over here. We're tilting and then
we're going down. Notice how my
fingers are actually at the side of the deck. So they're not over here. They can be in the middle. Really helps for them to be
at the side of the deck. So you are at the site, you're gripping this
with your thumb. You can move your
index finger and the middle. No problem. You're gripping it. You're moving it
as far as you can. And then your ring and middle
finger are pulling down on this until it completely
escapes this grip. And then we can
just come back with our thumb and drop the
packet over there. And when you do it faster,
it will look like that. Notice how my fingers over
their comfort split-second. That's a completely
different flourish. Come for a split
second just to tilt that package from underneath
towards the right side. And this is why everything, the Surely cut and the scissor
cut a really tall cuts. There are very
similar in mechanics, whereas one of the fingers
does most of the job. Where here we have
the thumb that is doing the pulling
and pushing. Here we have the index finger that is doing most of the job. So I really want it to be this the second
cut they were doing. So to practice these
21 after the other. So you become more accustomed to each one of their mechanics, but also that your
fingers are going to get tired from just doing one thing and becomes kind of boring. So that's why I advise you to switch from one to
the other and then do not forget to teach your
other hand how to do the same cut as it's a
completely new experience. The fact that you are
teaching your other hand something evolves you both as a person and
as acquired this, because you're going to be
able to use your right hand later on when you're
doing two-handed cuts, you know, and you want to use your right hand to do
completely different stuff. You really want to evolve those
muscles from the fingers. And by executing one-handed cuts is the best way to do this. There are court
lists are there in the world quite plenty
that do not know how to execute the same cuts with both hands, so
don't worry about it. If it's not something
that you don't want to do, don't do it. But I advise you to do it
because it gets really fun. When you can split
the deck and you can actually perform the
same cut in both hands. And you can do different shapes. And it becomes this sort of
very beautiful synchronicity. The fact that you can do the same thing with both
hands at the same time. It feels like we've got a
friend over there joining you. So this is a guide
for the scissor cut. Though we watch them. If you feel like you've missed any of the points that
I've talked about. And let's move on
to the circuit.
4. 4. Index Cut: The next got there we're
going to be looking at is a great cut when you'd like to chain the
Charlie a with something, notice high-end
taking the packet from underneath and
I'm moving it back. It's also a false cuts or definitely learning a
lot more right now. But it's very similar to
the scissor cut over here. Mainly they are
moving one packet. And I actually think
this one is a bit easier than the pseudocode
because there's not this extensive thumb that was going over there
and you have to tilt. It feels like there's
a lot more going on. Whereas over here, you're
just going to be moving that packet from
underneath to the top. And this is a sequence
that is used in many displays when you want to display both packets
at the same time. But it's also used when you
would like to perform a one-handed shuffled
just like this. So it is a card that
will serve you into the future when you
would like to do different and more
evolved things. This is why learning just the basics of it is going to be very
useful in the future. So let's get going, buckle up, and let's get
those fingers rolling. We're going to have though, we haven't got to
have the index finger over here in a grip. Very similar to the scissor cut. Notice how the deck is
lifted up from the hands. I can actually fit
an entire hand over here underneath the packet. This is how much
space there is there. Because we want the space
is going to really help us. And my index finger moves from its regular position and
down to the right side. And it's going to split
the deck in half. After we split the deck, you're going to start moving your thumb towards
the left side, and you're also going to move your index finger
together with it. Notice how I have
gripped the packet. It made it look like I'm not
really putting any effort, but that packet is really, really held in there
between these two fingers. I mean, it's not
going to roll away, is not going to do anything. So I am really
firmly gripping it. Gripped the packet. I am moving now the packet
towards the left side, but two things are actually
happening at the same time. This top packet is actually sliding down on the
nail of my finger. It's very useful because of how all of these
fingers are positioned. The packet is held
very nicely in the left-hand one
sliding underneath. This feels like a nice slay
in Christmas over here. And we can just slowly
take this packet towards the left side and bring
it above over here. Notice, I think most of you could already start
executing this. As there is not much going on. We're grouping it,
pulling it down. And then grouping that packet, you are allowing that
slide on your nail. You're coming with
your thumb towards the left side over here. And you might actually
ask yourself here, but it's not going down and I
feel like I'm blocked here. What, what do I need to do? And then you move
forwards that the packet can actually come down
towards ourselves. And then we can keep on
bending our fingers. And this is not something
that you always have to do. It's something that
becomes much more natural as you keep
on practicing. At the beginning, you
have to pay attention to what every muscle is doing so that you're basically
teaching your muscles what to do and in
what way to move. Whereas now when
I'm performing it, I'm not even thinking
about what I'm doing because it becomes
muscle memory. So this is what we're
training right now. We're actually trying to create a new memory in our
finger muscles. So together, just keep
on doing this command. New gripping down,
gripping the packet, moving towards the left. And then you are coming
forward events so the packet can evade and
then you bring it down. You can even put it
into this role. Yeah. A position, not leave
it fall like this, but putting it into a position, then you can know
surely a cut over there was beautiful
about this cut there. You can actually keep
doing the same thing. And this is a cut that
I've actually taught in a past course of mind
with three packet guts. Because you are having
three packets over here and you're
moving that down. So this is definitely a
move then you can do in different ways and evolve like many of the one-handed cuts are. So this is why I wanted to
teach you guys this one. As I feel it's something
that you can do early on and it's something that
you can play with further. So I hope you guys
liked the index cut. And we can move onto
the fourth cut.
5. 5. Let There Be Play: Current history and its
pure state is just play. It is an art form, but if you take a look at it, we're just playing
with a deck of cards. So I highly advise
you to play trying, experiment, even if
you're at the beginning, make it a habit to have fun. Even if you can't
do all the cuts, try doing something
that's impossible, doing it in both hands
at the same time. You really pushing yourself. If you don't feel like
pushing yourself, that's completely fine as well. But do remember to have fun while you're doing
it to all of us have different points of view over what entertaining
ourselves means. But I really have
found that if people try to hide to be very
good at the beginning, they're really
making it harder on themselves to enjoy
what they're doing. As such, to really be too
harsh on yourself because, you know, have actually been
a beginning for one year. And the beginning,
we're just trying to do the same things on and on, but it gets easier with time. So there's no point in
being harsh on yourself. Just have fun and you're
actually going to forget about the entire
learning process while you're having fun and make it a beautiful
experience for yourself. And you're going to discover at the end of that
experience that Hey, you actually do these 500
cuts, five one-handed cuts. Men can imagine
having five hands and performing cuts. Wall.
6. 6. Thumb Cut: This is as old as
the Charlene cut, and it has been passed
down by the magicians onto the modern era of history
and is called the thumb cut. As you can see, I'm actually gripping the packet
from above with my thumb over here and I'm pulling the packet
towards my left side. And then I'm tilting
this packet with my pinky ring finger over here and then I'm dropping
the packet underneath. Yes, this is a cut that will really put a strain
on your thumb if you keep on doing it
like I am doing it right now in front of
you to demonstrate. And it is a cut that most people think
they came out to do. Because they say
they have small, they have small hands and
as such, they cannot do it. And there is a
solution for this. And the solution is
to not really hold the deck into opposition where
your thumb can actually, can't actually go
all the way there, but you rather move it
down at the fingertips. And as such, notice
just how much it can actually move
with my thumb now. So I can grip the packet over there and then tilt it from
there and move it back, grab it from over there, and then tilt the packet. I know I'm actually not
explaining first how to do it, but I do want to
eliminate any sort of doubt there may be in
some of your minds. So let's see how
the mechanics are, even though they're
pretty straightforward. I do have a dealer's
grip going on. We're here with a bit
of space underneath. Now, I'm going to
eliminate that space by just letting the deck
drop into my hand. And then I'm going to
come with my thumb from above and grip the packet. That's all. I'm just gripping the packet. And there is really pressure
going on over here. I mean, I am, I'm really
gripping that packet and some is not absorbed to be gripping it is gripping,
gripping the packet. And from this position, this is the hardest part. You're actually
going to be tilting this packet over here
with your pinky. Notice how my pinky is really
bending all the way here. And this is a move that is
a bit more difficult at the beginning because
you don't really trust your fingers yet. See, I can actually just fill that and know that the packet won't fall because I
already trust my fingers. But this is something
that we're going to be building on slowly. So don't really rush and make sure that you're
performing on a bed. Summer, we can actually pick
the chords up very fast. So or one of those
hammer pants, you know. So we can actually do this
without any sort of fear. Now, we do this by
bending our pinky down and helping with our ring
finger, then this packet. So both of these
fingers are doing it. But you're also rocking
your hand forward as such so that you're
helping the packet tilt. See, I M pushing the packet either with my wrist by going
over here to the right, or I'm using my index
finger to push this back. It's slowly. See, I am just extending my index finger a
bit. Let me show you. I'm extending my index finger or just a bit so that this
packet can lift up. And then from this position, I can just pull down with
my pinky and ring finger. So then I can drop the packet
and push it back on top. Over here, I push up a
bit with my index finger, drop the packet and
then he's back on top. And then we have the thumb cut. And this is I can really feel pressure on my wrist over here. So don't really practice
this a long time as you're going to put stress
on your wrist. Practice until you feel comfortable and then
move into other cuts. Notice how a lot
of these costs can actually segue into other cuts. They can already have
this one over here. Or I can start from here
and go into a shore yea, and then go into a thumb cut. And assuredly at the end, I almost dropped the
cars over there. But the songs, but
there's definitely many other cards
they can do with it. So this is why I wanted to pass this on to
you at the beginning, even though it is a
bit more difficult. But I really think you guys
are going to be able to do it given that you are
here on Skillshare, I think you have the patients to actually go through this cut. And I believe that you can do it because you're already
on the fourth cut. And by this time, with the help of the Charlene, with the help of the index card, and with the help
of the scissor cut, you can actually start doing something that
requires a view, a bit more strain on the muscles, not
technically speaking, is not that difficult, but it does record some
strain on the muscles. So saying everything
that I just said, we can now move on
to the next cut.
7. 7. Revolution Cut: This one is thought of as one of the building blocks
of car industry. Together with the Surely cut, this is probably
the most learned, but that is one handed. And it's called The
Revolution cut. And it was created by Brian Tudor and Sean
for the first time, I believe in 1999 in
his show off Volume 1. Uh, Bryan today has definitely really more one-handed cuts, but this is the one
that really put him out there and is probably the one that she will do
that most honestly, this revolution cut also
because it looks so nice. They, you're spinning
that packet over there. You're starting very
similar Tushar LEA cut, but then you are rotating that packet with a
help your fingers, something that we are now
able to do knowing that you have gone through the pre cuts that we've
learned until now. So I think the next one is the
revolution guard for sure. So you level up the packet, just like in the
Charlene cut over here. And now we're going to
be changing our grips. So we're going to
move our index finger over here on the right side. And then we're going to
move all of our fingers. See, packet is actually being held by my thumb
and index finger. The bottom packet is
hold by my index finger, and this packet is
held over there by my thumb and index finger. So these three fingers are actually going to be
gripping the packets. See, pinky finger doesn't
actually do something yet, but he is going to be helping. Saw the packets don't fall or here see. So let me show him. We're going with our
index finger over here, and then we're moving
our three fingers. As such. Middle finger goes
on the bottom, ring finger goes over here on the left side and we're
grouping the packet. And from this position, the packet is actually
gripped between the index and ring finger. And this finger is
over here just to help it so it stays
loose in the course. Don't actually fall down. And we're bringing all of this motion is actually
done by the ring finger. So we're over here and we're bringing with our
ring finger down. And naturally, just
like in there surely occurred since the index
finger is over here, I can push this fact that up and let that fact
that fall down. Notice how I can spin over here. And then I can just complete their rotation by pushing
the packet and then LN letting it fall down over
here and then falls down. So just take it step-by-step, lift, move finger
out the fingertips. Because if we're not
at the fingertips, then we're going to have less
space to actually maneuver. Everything is going to
feel a bit more rigid. So at the fingertips over here, we start by orange
twisting the packet of BID before we actually
move our fingers, notice how I am twisting with the help of my thumb over here. Just going down a bit length is going down with them
so that I can actually come up my ring finger
at this side and then complete the rotation over here, start start twisting over here. Grip. I pass the
grip over there. I move my thumb over here and then I
continue the rotation. Internet can actually
complete the cut over here. And then we're done. Grip, start twisting. Grip again. Continue their rotation with
the help of our ring finger going down and the
index finger coming up in order to
push this back in. And then we, it's very hard
to do it in slow motion because I have to show you just everything
that is happening. So that's why I'm ripping
the bank over here. So I'm pushing the packet
and letting it drop. And then this one
drops there as well. And there you have guys
the revolution current, once you learn it, really going to start wanting to do in each hand completely. And I really advise
you to learn both the Surely a and the revolution in both hands as you can
really play with them. And it looks very beautiful. And once you know
the revolution, you can actually mix it
with so many other cuts. Just because you
know, it's mechanics. And one of them that are really like is from Dimitri or Larry, where he pumps one
card over here. He lets it down and
then he twists it, see. And that car is
now supposed fall, but we do drop cards from
now in them as well. See you twisted ladder go
there and then he falls down. So there's plenty of room to actually play once you
learn on one handed cut. So this is why I really
advise you to put in the time and just make it fun, make it fun for yourself. Try and play with it. That's why I say play
on a mat so that if you drop cards can actually just pick them up and continue going. There is no rule in
car industry or in any art form that forces
you to take it slowly, not actually try to
play and experiment. And who knows you might
actually be a product yourself waiting to discovery. So do allow yourself to play and don't just do the
same thing on and on. Trying to other things. Try and split the packet. Once you over here,
try putting it down. Then you can even help
yourself with the right hand and then go with one and then be careful so
it doesn't draft. And then, you know, you've
gone over here and anything. Maybe I let it fall down and then it goes in
this hand and UWP. And that's where Carter
shares actually begin. Self-expression is the
ultimate form of any art form. And it's actually should
be like the norm, but it is so early doing advise you to express
yourself through the cards.
8. 8. Last Words: I'm very happy that
you've been with me until the end of this
Skillshare course. This video over here is actually part of a longer series
that I'm doing on Skillshare called car industry wide triangle
through each one of the things that are part of current issues such as
one-handed cuts to 100 cards, three packet cuts for packets, displays and so on. That all of these
genres or these types of moves that belonged
to color SRI, and I'm trying to present
them to you guys. So make sure to check out my other Skillshare courses and see what I got
prepared for you. I think you're gonna
really like them. My name is base and it's been a complete pleasure
to be here with you. I will be have an amazing day
and I'll see you next time.
 Elisav Bizau, Close Up Magician, Cardist, Creator