Transcripts
1. Introduction: Does your to do list have an
item labeled marketing video that you keep ignoring because you have no idea where to start? Does this sound familiar? I don't know what
to say on camera. I can't afford the proper gear or even the all encompassing. I have no idea what I'm doing. If you've heard yourself
saying these things, then this class is for you. I'm going to walk you step by step through producing a short, effective marketing video for your business using tools you already have
like your phone, natural light, and free apps. Hi, I'm Bath and welcome
to Canvas to Camera, DIY Video Marketing
for creatives, a class for small business
owners who want to market themselves confidently on
camera for little to no cost. I worked in the marketing and communication field
for over 20 years, creating marketing
plans and producing videos for YouTube and
social media channels. I'll be showing you how I made a video for
my own business. Beth Doman Studio
Custom Pep portraits. We'll cover what to
say in your video, even if you're
awkward on camera, how to write a script
with help from AI, how to film using t your phone and a free
teleprompter app, so you don't even
have to memorize your lines and how
to easily edit and share your video on various platforms in order
to speak to your audience. You'll finish this course
with a video you're proud of, and more importantly, a streamlined system you can
use over and over again. And just so you know, I'm using the exact same gear I
discuss in this class. Are you ready? Come
on, let's dive in.
2. Project: Your project will be a
32nd marketing video for your own product or service using the skills and techniques I
teach in this class. The benefits of uploading a video will be the fact
that you will end up with your own marketing video for your own business
that you can use right away on your social media channels
and your website, receive constructive feedback, and just feel like a champ. I look forward to
seeing what you do.
3. What Makes a Good Marketing Video?: Here's a truth you'll
find comforting. You don't need a viral video. You just need to make a real connection with your audience so they can feel comfortable reaching out or
taking the next step. A great marketing video
has three primary goals. Connect with your audience.
Your video should quickly help viewers feel
seen and understood. They want to know,
can this person help solve my problem or
bring my idea to life? Build trust by
showing how you work. People are more likely to act when they understand
how things work. Your video helps by showing your process and what they can expect when
working with you. Make it easy to act. A good video gives viewers a simple and clear path forward. Whether that's messaging you, placing an order or
visiting your studio. For example, in my art business, I paint custom pet portraits. My clients are pet
owners who want their animal's unique personality
captured in watercolor. When they're looking
for an artist, they're not just buying
any old product. They're trusting a stranger with something close
to their heart. A short video lets
me show my face, talk about why I love
doing this work and build trust that I'll create
a portrait that I'll love. So keep this in mind,
authenticity is the key here. You don't need to be polished. You just need to be clear,
warm, and trustworthy.
4. Plan Your Video: We film, we need a plan. You wouldn't start a painting without sketching first, right? The same goes for your video. Step one, what's your goal? Ask yourself, what do I
want this video to do? But first, keep in mind, it's best to identify
a single main goal for each video so you
don't muddy your message. Here are a few ideas. You could introduce yourself
to new followers. In other words, put a face
to your name or product, or you can promote a
seasonal product or service, or you can explain your
process in order to gain trust or drive traffic to
your website or online shop. The goal from my video was to introduce myself to
first time prospects. I wanted them to understand
what I do and get a feel for connection to my painting style
and personal values. Step two, who are
you talking to? Your video isn't for everyone. Think carefully about
who your audience is. In many cases, it's actually
people a lot like yourself. In my case, I was talking to pet owners who think of their
furry friends as family, people looking for unique gift for that friend who
has everything. Or someone who wants a memorial portrait
of a special pet. So I spoke to them directly with warmth, care,
and creativity. Step three, write
a simple script. A good script has three parts. The first is the hook.
Grab their attention in the first 3 seconds. The second is the value. How does that thing you
do help your audience? It's sad but true. People mostly only care about what can
help them in their lives. Third, call to action. What should they do next? Here's the script I used. The hook was want to turn your pets unique personality into a one of a kind portrait. The second, the value. I'm Beth, a pet portrait
artist who helps you celebrate the love you have for
your furry friends through custom artwork. Whether it's a sweet dog or a cat who rules the household, I capture their special
character on paper. Third, call to action. Send me a few photos
to get started. I have some openings available. If writing doesn't
come naturally to you or if you just get stuck
staring at a blank screen, I've got some great news. You can use free AI tools like hATGPT to help draft your
script quickly and easily. All right, let's get started. So the first thing you need to do is sign up for a new account, so go to chatgpt.com. Sign up for a free account. Enter your email address,
create a password. Continue. Enter the code. Enter your name. Click Continue. Once you're in, you'll be interacting with a
tool called hat GPT. It's like a helpful
writing assistant that responds to your prompts
in plain English. Don't worry. No technical
knowledge is required. If you can describe your
business to a friend, you can use this tool. Now you can enter the prompt. Step two, start with
a simple prompt. Think of the prompt like tossing out an idea to a
creative partner. The better you explain it, the better the results will be. Here's a great starter prompt
you can copy and paste. Write a friendly 32nd
video script for a small business owner who offers and here's where you describe your
product or service. The goal is to introduce themselves and explain how
they help their customers. Make it clear, natural
and confident. So I just copied and
pasted this prompt, hit Enter, and this
is in real time. This is how fast it is. It's actually pretty
incredible tool. And as you can see, it suggests what kind of
footage you can include. And then you can
edit from there. You can type revisions
such as make it more conversational and
include just the script. And you can just
click here to copy, paste it into your word
processor, and edit from there. Don't be afraid to tweak the tone until it
feels like you. You're not handing
over your voice. You're using AI as a collaborator to get
the wheels turning. Pro tips. Paste in your
rough ideas first. You don't have to
start from zero. Give it a sentence or
two you've already written. Read it out loud. If it sounds awkward, rephrase
it in your own voice. It should sound conversational. Save your favorite versions. You can copy paste them into your word processor
and refine from there. In the next lesson, we'll use that script to film
with confidence. No memorizing required.
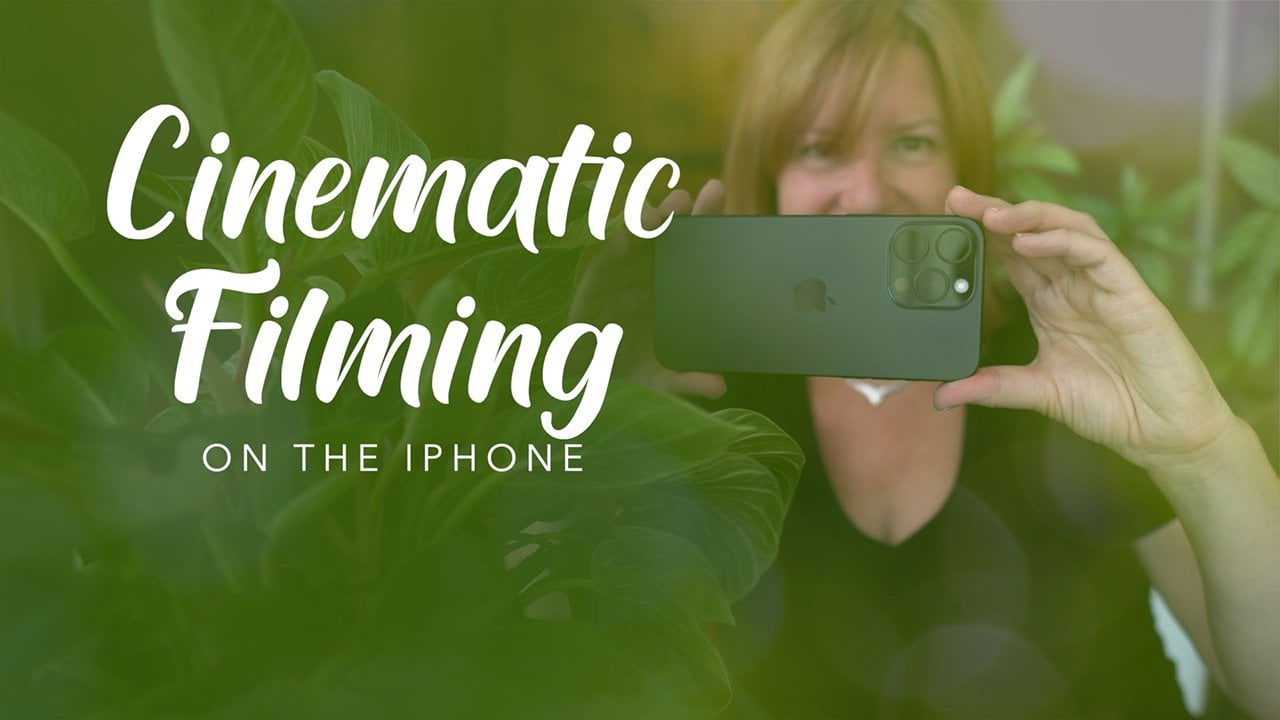
5. Film With Confidence: Okay. So you've got
your final script. Let's talk about
how to film it now. You do not need fancy gear. All you need is your smartphone, a small tripod, or in a pinch, just a stable surface
to prop it up. You need natural
light from a window. Indirect lighting is best. You'll need a quiet space. You need to download a
free teleprompter app. And if you want to take the
audio quality up a notch, you can try out a
wireless microphone. See the resources section for
more gear recommendations. I used an app called
Teleprompter for video. I pasted in my script
and recorded using the front facing camera while the text scrolled
right near the lens. That meant I could speak naturally without
wasting a ton of time and losing confidence.
Here's how it works. You'll download the app
from the App Store, search Teleprompter for video, and you'll see this
red icon here. Text or email this
script to yourself. Now, you're going
to open the app, and the first window
you'll see is the scripts. So you'll click New
compose New Script. Give your script a name. Delete this type
your script here, default text and then hold down your finger and hit Paste. Scroll to the top. And here I'm just deleting the title that I accidentally
pasted in there. I can hit Done. So you'll
click the settings. Click font and size. And you can increase or decrease the type
size to your liking. And here is the speed. The turtle is slow,
the rabbit is fast. You'll need to
probably experiment a few times just to
get the speed right. When you're ready to start,
click the Start button. You'll get a countdown, which you can change in the settings. And here, you'll see that
the text is just scrolling. And then when you're
done, you hit Stop and then hit save
in the upper right. And then click here save video it will download
to your photos. If you need to re record a take, and it will happen, just click this left
arrow here to scroll the text back up to the top
and then hit Start again. Recommended phone settings. Make sure you film in
landscape mode for YouTube or Vertical
for reels or shorts. You can't change this later, so think long and hard about what platform you're
publishing on. Ten ADP is okay for
standard resolution videos, or you can choose four k for
high res YouTube videos. Be mindful, though, that this
takes up a lot more space. Have a glass of
cold water handy. If you get nervous,
take some sips. It helps with the dry mouth
and also resets your mood. Frame yourself in the middle of the screen from the waist up. Leave a small amount of
space above your head. A bonus in filming
this far away is that the viewer won't see
your eyes reading the text. Okay, so you've got your
script all loaded up and now you need to find
a nice place to fill. So what I normally
do is focus on two main things,
lighting and background. So this is what not to do. Don't stand against a wall. Don't sit on a couch against a beige wall because it's just really, really
not interesting. So what you'll want
to do is just move around and just experiment while keeping an
eye on the light, on your face, and
the background. Shooting into a corner
is often interesting. And I'm going to
just to have a seat. You can sit, you can stand. So I'm just gonna sit here and just see how the light changes when I face
into the window. And then away from the window. So the shadows change. So just move around and see
what kind of shots you like. You'll see there's a
radiator down there, which is not the most attractive, so I'm
going to avoid that. And I have a cat that just joined me, so
that's kind of fun. So yeah, I'm just going
to maybe frame like this. Are you ready to hit record? Keep it conversational. You're not giving a speech. You're talking to someone who might become
your next customer. Feel free to live a bit. Inject your own
personality in there. Don't forget to smile. You'll relax once you've
done a few takes. Even if you mess up, I recommend keeping
reading until the end. It's good practice
for the next take. Your first take
won't be perfect, and it doesn't have to be. You'll feel when you've
nailed the shot. You can always just deleke takes you don't like
and start again. And here's the best take. I had to redo this quite a
few times until I was happy, and it's still not perfect. You'll see that
the lighting needs tweaking and we need to
trim some pieces out. But I liked the tone, and the cat did a stretch
at a perfect time. So I just liked
the overall vibe. Want to turn your pet's
unique personality into a one of a kind portrait. Hi, I'm Beth, a pet portrait
artist who helps you celebrate the love you have for your furry friends
through custom artwork. Whether it's a sweet dog or a cat who rules
the household, I capture their special
character on paper. Send me a few photos
to get started. I have some openings available. And here's how to
add some sprinkles. Now that you've recorded
your main video, often called the talking head, it's time to gather some extra footage to
bring it to life. This additional footage
is called B roll, and we'll layer it over your
main video during editing. But don't worry, your voice will still play in
the background. But instead of just watching
you talk the whole time, viewers will see visual examples of what
you're describing, making it richer
experience for them. In fact, I've been doing it already in this video
just like that. Did you notice? What types
of rl shots do you need? Well, using the
script as a guide, write down shot ideas that
could help support the story. For example, here's
some categories and shots I captured for
the Pep portrait video. You've got your behind
the scenes category, which could include
sketching and painting, mixing paints, prepping tools, and scrolling
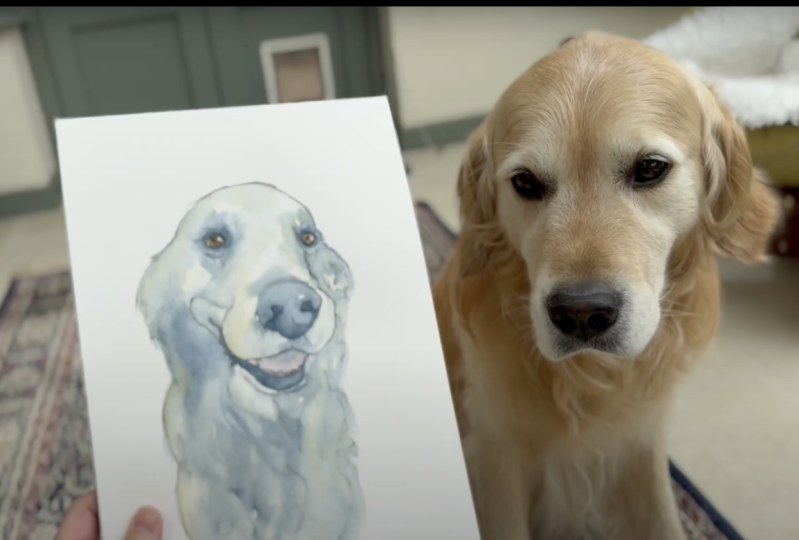
through Pep photos. Finish portraits, side by side of photo and
finished piece, artwork framed or displayed, and then the client connection, which is really
important so people can envision their own pets. So you can take
photos of the dogs next to their
pictures, packaging, thank you notes, unboxing
moments and lifestyle touches. Your pet sleeping
nearby as you work, studio details or natural light filtering
through objects like glasses of water and drinking
coffee in your studio. In the next lesson,
I'll show you how to put all these pieces
together on your laptop.
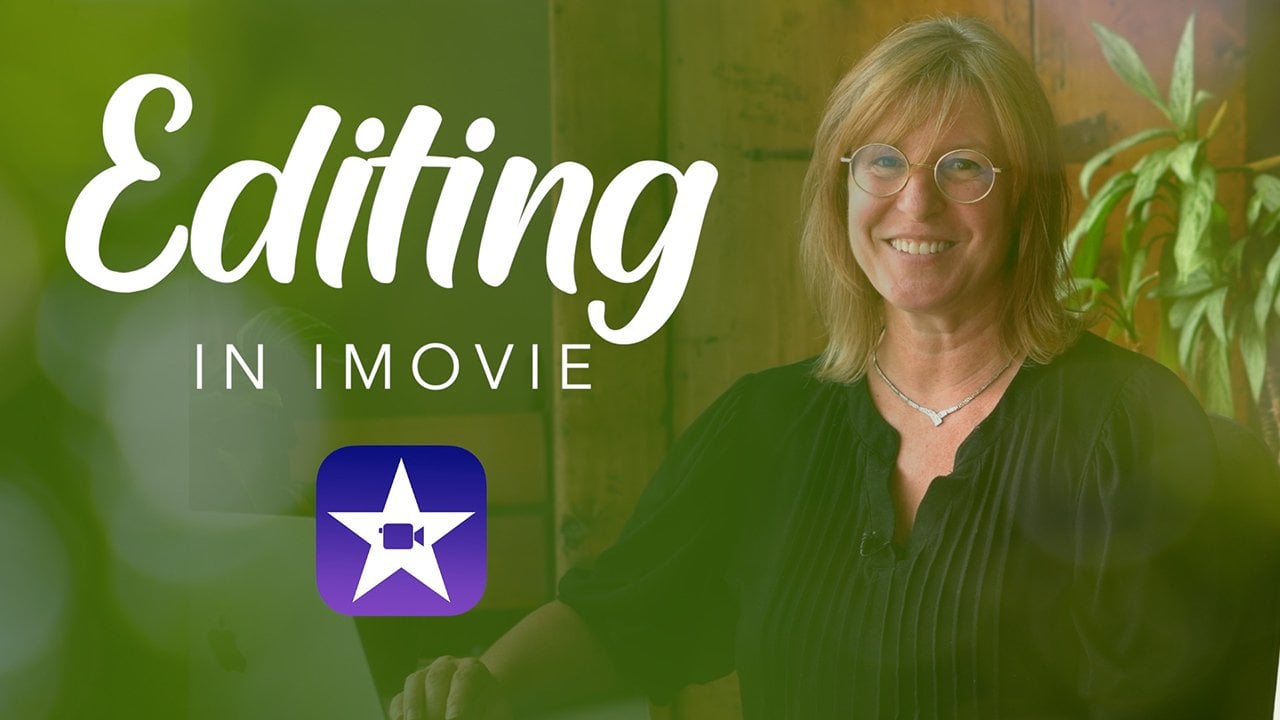
6. Edit and Add Some Polish: Now that you've recorded, let's do some editing
on our computers. You don't need complex software. I recommend the
following free apps. Their interface
layouts are similar, so try them all and decide
which one works best for you. We have EMV, which is free
for the MAC, DaVinci Resolve, which is free for Mac and PC, or you can use CapcuT which is free and
beginner friendly. My favorite beginner
app is ImoVe. If you don't have a
MAC, I would recommend trying DaVinci Resolve,
which is quite similar. If you need a deeper
dive into editing, see my video on Editing I movie. To prep our video
clips for Import, you can airdrop them
from your iPhone. Or you can export using your Photos app as long
as your iPhone and your MAC are synced and they're
using the same Apple ID. If you just open the Photos app and scroll down to videos, you can click hold down
Command, click again. And then you can go File, Export, Export two videos. Make sure the quality is ten
ADP or four K, your choice. Click Export. And I would just for now save to the desktop, make a new folder, call it video, hit Create, and then click Export. You can also plug in your
iPhone and import into IMVe. You just click the video you want and then click
Import Selected. Depending on how many videos
you have on your phone, it could take a while to load. And of course, I
do understand that not everybody has
animac or an iPhone. So transferring the files from
your phone to your laptop, you can use an
intermediary service on the Cloud such
as Google Drive, if you can't figure out how to transfer directly from
one to the other. So in Google Drive, you
can just click there. I've made a new
folder called video, and you can just
drop your files here using Bluetooth or plugging
your phone into your laptop. And from there, you can save them onto your desktop
for the next step. Okay, so I have now
opened I movie. There are just two
tabs you need to understand media
where your photos and video and music are stored and projects where your
main projects are stored. So we're going to
create new movie, and then we are going to import I'm going to
navigate to the desktop, and here are all the
videos that I have saved. So I'm going to just
click the first one and then hit Command
A to select all of them, and then import all now, I won't be going
into great detail on how to edit an I movie. You can see my other
class for more details. But what we're going to
do import this video. This is the main
talking head video. And so what we're
going to do is just drag this down
into the timeline, or you can just hit E, and it will append the video
onto the end of your file. This bar increases or
decreases the volume. And then when you hit
Spacebar, you can play it. Now, I'm going to increase the viewer here so I
can see more detail. And you'll see down in the sound wave here
that there are gaps, and that's where the teleprompter
was a little bit slow. So what we're going to
do is just pull this, just tighten all the gaps
up a little bit here. And then we can select
the blade to trim. So I can actually
just right click here and I can split clip. And now I can drag and just
tighten up those holes here. So I'm just going to
tighten up this gap here. Again, right click, split clip, drag this over to tighten
it up a little bit. And then one more time here. And then pull. And then at the end, you'll see those little
arrows left right, so I'm just going to drag here. Now we have four pieces, and you can see here
it's 21 seconds long. But I think we're
aiming for 30 seconds, and we will be putting some footage in here to make it a
little bit longer. Now what we want to do is match the B roll to what I'm seeing as we discussed
in the planning section. And because we need a
hook at the beginning, I am going to put something interesting in
here rather than my face. So the text says, Do you want to turn your pet's unique personality
into a portrait? So I'm going to find some footage that talks about
pets unique personality. So I think, actually this
is pretty cute here. What I'm doing right
now, I'm not clicking. I'm just running
my mouse over top. And I don't want
this whole clip, so I'm going to just go here and I'm going
to hit I for in. And then, oh, for out. And now you see
those yellow bars for the in and out points. So now I'm just going
to pull this section of the clip down on top here. So now this is
stacked in layers. So you can still hear my voice, but you're actually
seeing the dog. So I actually feel
like that clip is a little bit too short. So what I can do is
just drag this over a little bit and then
drag the beginning. And I don't Okay, there, I think is a good spot. So now I'm going to g drag
and click to the left. So I have another cute
clip of the cat here. So, again, I'm going to
go in point, out point. And let's see if that
fills the space. Oh, yeah, see how
much longer that is. So I'm going to hit space. Okay. And there's sound on here, too. So I'm going to just
drag that sound down to mute the B rule, and I'm going to drag
the endpoint here. Okay, so the second part is me talking about who I
am and what I do. I feel like this
clip is probably too long to have all of me talking. So the point at which I say celebrate your pets unique
personality with a portrait, I could include
this clip I have. To zoom in on the clips, you can click this little
gear icon up here. To show 10 seconds at a time, because if you pick a clip that's too long and drag it down
into the timeline, it could interfere
with your other clips. So I like the part
where I hold it out, so I'm just going to
back up just a bit, hit in, and then
out, drag it down. And then just tidy
that up a little bit. And here, so I'm saying
whether it's a sweet dog. So let's just hear in and out, just show the artwork again or a cat that rules
the household. So let's so we've already
got this orange cat in here. I have a black cat who looks like he likes to
rule the household here. I'm going to drag that down. Okay. I do actually have a painting progress video that I'd like to just
maybe pop in there. I am going to just click in and out here
just a little bit, and then I'm going to just
pop that in between here. And again, split the clip because it looks like
it's quite long, so I'm just going
to delete that. Again, I'm going to mute. Now I'm going to add
my logo at the end. I've just imported
this file here. I'm just going to hit E
to put it at the end. And something I Movie does automatically is
pans the picture. I don't want it
panning like this, so I'm just going to go up here to the crop and see
how it says Ken burns here. What we don't want is that. So we just want to fit. So it is a little abrupt. So let's just check out
transitions up here. I think I'd just like to
try a cross dissolve. You just drag that in the middle and you'll see
what happens here. All right. Okay, so I've
imported a few more pieces here, a couple process photos
and a final piece. And I've imported my logo. And let's add the music. So I've downloaded a
piece of music here. I bought some stock music off my stock site called
Invato elements. I'm going to click here. And I'm going to import. And now to insert the music, which is exactly
30 seconds long. I'm going to drag
down underneath here. And you'll see from
these yellow marks here, those are called peaks,
so it's very loud. I won't be able to hear myself. So it's really important
that you drag it way, way down. I'm going to try four. Alright. So I think
that's pretty good. The last thing I want
to do is just fix the color on this clip because
it's a bit washed out. So I will select the clip here, so it's outlined in yellow, and then I'm going to go
up here to the palette. So this, you can see if I drag it to
the right and to the left, it changes the exposure, and this is the contrast. So I feel like I want to
make it a little bit darker. It's not perfect, but again, like I said, this doesn't
have to be perfect. It feels more authentic. There's the saturation, so I'm going to just pump
that up just a bit. And then this is just the
warmth or the coolness. You can see if I drag it to
the left, it goes quite blue. So I feel like I could maybe
warm it up just a tiny bit. So I've just made those
little adjustments, which hopefully will help a bit. I am now happy with my video, and I'd like to export. Go up here, click Share. Export File. You can name your exported file
here. Marketing video. This description is what
will show up in YouTube. And you can change
the resolution here, quality and compression. And I'll just save it
to the desktop for now. And this little pie here
tells you the progress. It should only take
about a minute to export Want to turn your pet's unique personality into a one of a kind portrait. Hi, I'm Bath, a pet portrait
artist who helps you celebrate the love you have for your furry friends
through custom artwork. Whether it's a sweet dog or a cat who rules
the household, I capture their special
character on paper. Sally, a few photos
to get started. I have some openings available.
7. Share Strategically: Now let's get that video seen. No point in creating a video that's just going to sit
on the shelf, right? Each platform has its own
formats and unwritten rules. So here's a quick guide on using each to
its full potential. Instagram Reels. Best for vertical or portrait
videos under 60 seconds. Add text overlays since
many watch without sound. Use relevant hashtags and a short caption to
help with discovery. Post to your feed, as well
as reels to boost visibility and consider uploading behind the scenes or shorter
cuts of your video here. You can repurpose
a longer video by trimming it into bite
size clips for reels, as long as it works vertically. Your business Facebook page, upload your video
directly to Facebook. YouTube links do
not work well here. Include a descriptive caption. This helps with SEO
and engagement. Ask a question or include a call to action to
invite comments. AI tools like hat QPT can help you write a
friendly caption or blurb if you're stuck. Your email newsletter is a
great place to share a video, but never attach a full
size video in an email. The file size is way too big. Instead, you can
link the video to your YouTube link or
your website link, mention the video in
the email body and include a screenshot or thumbnail with a
play button over it, which is linked to the video. Free platforms like Substack, Mailer Lit or ConvertKit, make it easy to include
these visual links. Video on your homepage can
boost trust and engagement, especially for service based
or handmade businesses. Embed the video using a
link to YouTube or video. Place it on the homepage near the top or somewhere prominent. Add a short intro recaption
underneath for context. Your Google Business profile. Log into your Google
Business account via Google Maps
or Google Search. You can upload a 32nd video
directly under photos, video, keep it short, vertical or square, and
relevant to your business. Google My Business videos show up at local
searches and maps, a great way to connect
with nearby clients. Reuse and recycle. Your fabulous new marketing
video is not one and done. Post it again in a few months, recycle the content into Instagram reels or YouTube
shorts on a regular basis.
8. Congratulations: Congratulations. You did it. You just produced your
first marketing video. You can check that
to do list off using gear you already have all while gaining confidence
in your abilities. This process works, and the more you do it, the
easier it gets. So what can your next steps be? Well, you could reflect on your success and think about what you can improve
for next time. Watch other creatives on YouTube and take note
of what they do well. See if you can channel
those qualities. Are you pumped to do more? Consider creating a
series of videos. One for each style, product or FAQ. You've got the skills now. Don't forget to
upload your project. I can't wait to see
you shine on camera, and I'm cheering you
from the sidelines.