Transcripts
1. Introduction: Hi. Welcome to the class. I'm sure you've heard of Movie, the free software that
comes with Mat Computers. And I'm sure you
probably think it's quite a basic beginner app that is only good for
really basic editing. Well, I have some
good news for you. I Movie is actually
quite powerful, and once you're armed
with some pro tips, which I will show you, it
can take you really far. You may actually never
need to upgrade. The end of this
class, you will have the tools necessary to produce a slick video complete with
titles, music, and voiceover. You'll learn how to select
good clips on your iPhone, Import the clips into iMovie, record a voiceover, add clips to the timeline to
match with the voiceover. Trim and reorder
clips as necessary. Adjust color and
exposure on the clips. Choose and add a soundtrack, add titles and transitions. Finally, how to
export your file. Hi. My name is Beth. I'm a creative professional. I worked for 20 years as a videographer and
a graphic designer, and now I'm exploring
the world and sharing my knowledge to
bring some beauty and global understanding
to our collective lives. Join me while I
edit a short video of house sitting in Europe. As a bonus, you can learn how I filmed all the clips
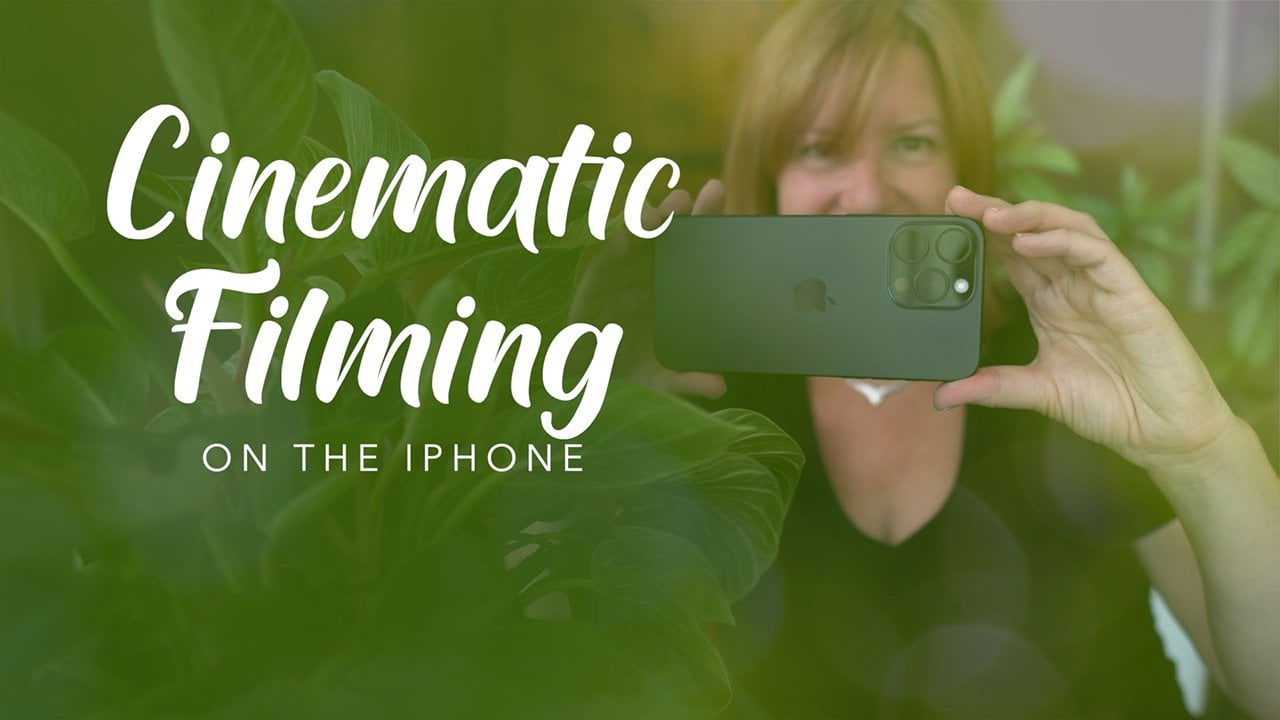
if you take my class, cinematic filming on the iPhone. Your project will be a
1 minute edited video complete with music
and voiceover. The only garial need is a
MAC with iMovie installed. To take full advantage
of the course, it would be useful to also have an iPhone and wired ear buds. Are you ready to level
up your editing game? It's easy. I promise.
2. Project: By the end of this class, you will have the tools
necessary to produce a slick video complete with
titles, music, and voiceover. Your project will be a
1 minute edited video, complete with music
and voiceover. The only grill need is a
MAC with iMovie installed. To take full advantage
of the course, it would be useful to also have an iPhone and wired ear buds. Are you ready to level
up your editing game? It's easy. I promise.
3. Getting Started: So when you first open the app, this is what you will see. If you've had any previous
projects, they'll appear here. When you create new,
you'll want to choose M V, and here's the main interface. So on the left hand side, this is the media that belongs
to your current project. And if you do use an iPhone, your photos will appear here
if they sync to the cloud, which is super handy. And then you've got events. And event is a collection
of clips and audio. And then here's the library for specifically for any projects
you've done in the past. Along here, you can select the media that
you're using currently. And then here would be anything pulling from
your music library. You'll see here Apple TV. Then there's a lot of built
in sound effects here, which is something we'll
be covering later. It really adds a lot of cinematic value when
you can add things like bird sounds and nature sounds and opening doors and
things like that. We'll get into that later.
When you click here on Titles, there are some built in titles here that we'll be
going over later. I don't tend to use
this area too much, so let's just skip
over that for now. A transition is a transition
from one clip to another. You can roll over what's
called scrubbing. I'm not clicking. I'm just moving my mouse back and forth, and you can just preview what the transition might look
like in between each clip. Well, again, we'll
go over this later. And then up here,
you won't be able to do anything until you
actually add a clip. So let's just go ahead and
go back here to my media. And I am going to just
double click here. Here's a little clip of
Skina eating her breakfast. So why don't we just drag
that down into the timeline? And then now what
we can do here, we can see that there are some
tools along the top here. These are some automated
color correction tools. This is a way to
correct for exposure, saturation, and
color temperature. You can crop the
image with this tool. This one allows you to
stabilize shaky video. This is audio. Here are some more
advanced audio tools. This is a re time, so you can adjust slow motion clips here. These are filters, and
this is information about the clip.
Here's a play button. If you hit play, you'll
see that the video plays. If you hit pause,
it'll hit pause, and that one will jump
to the next clip, and then you can go back to
the beginning of the clip. Some adjustments here, you
can zoom into the timeline, or out again by dragging
this little bar. If you want to
record a voice over, you just click
this little button here and then hit record. We'll go over this later. Then there are some drop down
tools here to modify clips, what to view, what window
to look at, some help. If you want to have a
full screen view here, You just click that button. Then if you want to go back
to the main project bin. When you back out,
it asks you to name. I'm just going to
call this demo it. And now you'll see that we have a new project
here called demo. Let's go back into the
demo video and take a look and I'd like to
explain how timelines work. It's made up of clips and
you go from left to right. How this works is that you
just go back up into the bin, and you grab a clip, and then you just
drag it down into the timeline wherever
you'd like it to appear. You can put transitions
in between there, which we'll go over
in a little bit. You can reorder clips by grabbing them and
just dragging them. Here, you don't even need to actually drag the whole clip. What you can do is
put an point by hitting I and then set an
outpoint by hitting O. Then now when you drag that
down into the timeline, it's only dragging down your selected portion
of that clip. If you'd like to
reorder that again, you just drag it to wherever
you'd like it to go. To go over some terminology, a project is your project with a completed timeline and
all the media inside it. An event is a
collection of media. For example, if you were
to have three shoot days, you could have one event for each day if that would
help you organize it. It's just a way to
organize things. Just think of it as a library.
4. Importing Videos: I would like to show
you how to create an album for ease of use
for importing into I Movie. So what we're going to do
is open the photos app. And then we are going
to scroll down here and and tap videos just
to make things easier. What I'm going to do here
is to scroll through my videos and here is a video that I think
I want to import. I'll just take a
quick preview of it. If I tap down here, I can scrub through.
This is the one I want. What I'll do is tap
this up arrow here. Add to album, and here
I can tap new album. I will call this Demo two. Let's take a look now to see how what we just
made the album Demo two, how that looks in i movie. Let's just back out here. I'm going to just
double click demo. When you click on
your photos here, you'll see here's some albums, if you've already made
a few other ones here. Here's the demo two
album that we just made. When you double click,
you'll see that it contains that video
that I just made. To pop this into the timeline, you could either drag
it down like that or a shortcut is to just hit the
letter E on your keyboard. To open the photos app, just hit Command Space
bar type photos. You'll see here that you have your full library favorites, and then you can even
select by video type, and here are my albums. What you can do here is just select a video
you want to include. Let's take this one and you just click and you can just drag
it down into the timeline. You'll see here
that it's stacked, which we will get into later. But for now, let's just put this in between here
in a single line. Here's another way to import. If you go up here to this down arrow, that's
the import button. When you click it, you will
see your folders here. I made a new folder inside
the movies called Demo. Then you can click to browse
the individual videos. If you want to play
them, you just hit play. Pause. This is the
one I want to import. I click that and click
Import selected. There it is. To add
to the timeline, again, I'm just going
to grab and drag. M If you hold down Command tab, you can switch through
apps you have open, which is a fun handy
trick. Here's the finder. I'm going to navigate
to movies here. Double click the demo folder, and to preview a video
without opening quick time. You can just hit the spacebar and then hit the spacebar
again to close it. This is the video
I'd like to import. What I'm going to
do here is just click and drag
into the timeline. And then place it
in the single line here like we did before. Okay. The last way you can import footage is by plugging
in an external device like an SD card reader with
an SD card on it if you are using footage from
a digital camera. What I'm going to do here is just pop the SD card reader in. And I movie automatically
recognizes it. It might take a while just to refresh all of these things. Here's the footage and
up here, you can select. You can make a new event or you can select an existing event. I'm just going to
select this event here. I am just going to maybe
select these last two videos. Then I'm going to
hit Import selected, and here it is.
5. Voiceover: I'd like to show you now
how to record a voice over. My project involves
a voice over. It's better to record it
first and then match the clip editing to the voiceover rather than the
other way around. How to get the
voice over tool up, you just go under Window
record voice over, or you can just hit the keyboard V. Before you start recording, you can set the
microphone source. If you plug in wired earbuds, this is what you want to choose. The Macbook Air microphone
is the built in one. It's not great, so I would not necessarily
recommend that. Then when you hit record, it gives you a little
count down here, and then you can start talking
and you'll see right here it's recording and it's showing that it's recording
because it's in orange. You can adjust the
input settings here by going up and down. You will need to experiment a little bit because every
microphone is different. When you'd like to
stop recording, you just hit the
record button again. And here is your voiceover. You can move it around
just like any other clip, and to change the
volume up and down, you can just simply do this.
6. Editing in Timeline: Before we get started,
let's review. Hopefully, you've
imported your clips just at least to get started. You've recorded your voiceover and you're familiar
with the tools. If you took my previous class, cinematic filming on the iPhone, you'll remember we talked
about outlines and shot lists. You will have a basic
understanding of story structure and what your ultimate goal
for your video is. Basically, a video is
much like an essay. It has an introduction, telling people what you're
going to talk about. You have a middle part where
all the information is, and then your conclusion
will just reiterate what everybody learned
and or saw in your video. Great. Okay. Let's get started. Go ahead and open Movie. Movie will set the frame rate based on the first clip you add. If you have a slow motion video, like I'm going to start with
at 60 frames per second, it will set the whole timeline
at 60 frames per second, which is something
you do not want. To get around this, what
I'm going to do is actually insert a clip that is
24 frames per second. Can find this out by clicking
on a clip here and then hitting this little
I in the photos app. You'll see right here, it says 24 frames per second. The first clip I wanted to add was this one, and
when I click I, you'll see that it's
59.96 frames per second, which is essentially
60 frames per second. We don't want to
add that one first. What we're going to
do is just Go back here and this is the
24 frames per second. I'm just going to drag down here just to
set the frame right. Now we can start
from the beginning. This is just a work around. It's just because I Movie is obviously not a professional
editing program, but there are little tricks
like this that you can use. Now, this is the actual
first clip I want to add. I'm going to set
an in out point. Here is my point that I'd like because I'd like to
get this nice sun flare. I'm going to move
my cursor here, hit I, for in, and
then oh for out, click and drag to the beginning, and you'll see here
it says 4.0 seconds. Now to re time this, I want to change it
from 60 frames per second to 24 frames per second. How you do that is you go up
here to the retiming tool. You go to speed, custom, and then you want
to type in 40%. You'll see how you've
got a little turtle here and it's made this clip now 9 seconds because it's stretch
those frames. What we now want
to do, 9 seconds is way too long for an intro. What we're going to
do is just trim this. I'm going to go to the
end here and I'm going to click and drag and you'll
see in the window here. There's the flare
that I want to keep. That's the end,
and now I'm going to trim the beginning
a little bit just so we can start off of maybe about 4 seconds and then
we'll see how that feels. The second clip is my
establishing shot. I want to reveal the
house where I'm staying. Scrubbing back and forth, you can't see the house here. Again, I'm going to hit I
for in and then for out. Then I'm going to
drag it down here. Now. Remember how I told you we have to match everything
to the voiceover. The thing we need to do now is add the voiceover
before we go any further. I've recorded my voice
here in e movie, and so it's here, and you can control the volume by just grabbing this bar
and going up and down. See those little yellow
marks right here. That's called peaking,
and that means that the audio is reached an
uncomfortable level. You want to just
click and lower. Til you don't see those
yellow bars anymore. Now you can move the audio
anywhere you want to start. I am planning on putting
a title over top of this, and I don't want the voice
over to start immediately, and I'm just going to drag it. It's now attached to this clip. This is a standalone now. I will be adding
the titles later. Now we want to add
the next clip. I have a story line laid out, and so I know that the
next clip I want to add is a video of Skina
wagging her tail. Again, I'm going to do
the in out clip here in out and you'll see
this video is vertical, and I'll show you how to
rotate that in a second. I'm just going to grab this clip and it's going to go third. I'm going to just grab here and drag the audio down to zero. How to rotate it? We're going to go up to crop. You'll see here are the
tools to flip left or right. I'm just going to flip it once left and now it
fills the screen. I'm going to listen
to the audio and just make sure that the
ino points match. You can see down here, I'm a bit short here. This third clip is
starting too soon, and you can see the
dip in the audio here. What I need to do is extend this clip
a little bit more and you'll see when
I extend that clip, all the other clips to
the right move with it. Then I'll extend this
one a bit more as well. Now, I am matching the audio. The third clip is kina
rolling on her back. This is the entire
clip of me coming in and greeting her and then
she rolls on her back. It's quite a long clip. I only need a few seconds of this. So I think the cutest part is when her little paw goes up. Let's just start here with the
endpoint and the outpoint. What I'm going to
do is just grab that and drag that down here, again, grab the audio and
make it down to zero. Let's listen to the audio again. There's a lot of back and
forth listening to the audio. To listen, you just have to
move the playhead over here. Don't even have to click
anything and then if you hit the space bar, things
start playing. I'm going to show you
now how to stack videos. You may want to do this if you have a long clip
with a background, someone talking or
some bird singing or something like that in the background and you'd
like to retain the audio, but introduce another
clip on top of it. I've just selected this because
it has some bird singing. I'm going to click
the whole thing, it to put it at the end. I'm not going to mute
the audio for this one. I'm going to leave it there because it's got
the bird singing. Maybe I will introduce some
of the leaves in the middle. In and out, and now when I
drag it down, I can stack it. I can move this around
wherever I want it. Then now the top one will be the prevalent
one, as you can see. When I hit spacebar to play, I can hear the music or the audio cut there and
then cut back again. I have populated the rest of the timeline using the principles we've
already discussed. I did insert a screen recording
here of this website, but you won't need to do that. That's just part of what I
had to do to tell my story. If you have some footage
on your phone that you shot at 30
frames per second, what you can do is retie it
like we showed before to 80%. That's how 30 frames per second translates to
24 frames per second, which is, if you
remember earlier, we set the first frame
of this eye movie at 24 frames per second because that is the
cinematic look, 24 frames per second is what we perceive as most natural
to the human eye. 30 frames per second has
a overly realistic video, which some people
don't care for, and I am one of those people. I always go 24
frames per second. Now that we have all of our clips laid out
here in the timeline, the next lesson
we're going to go over is the finishing touches, titles, color correction,
and transitions.
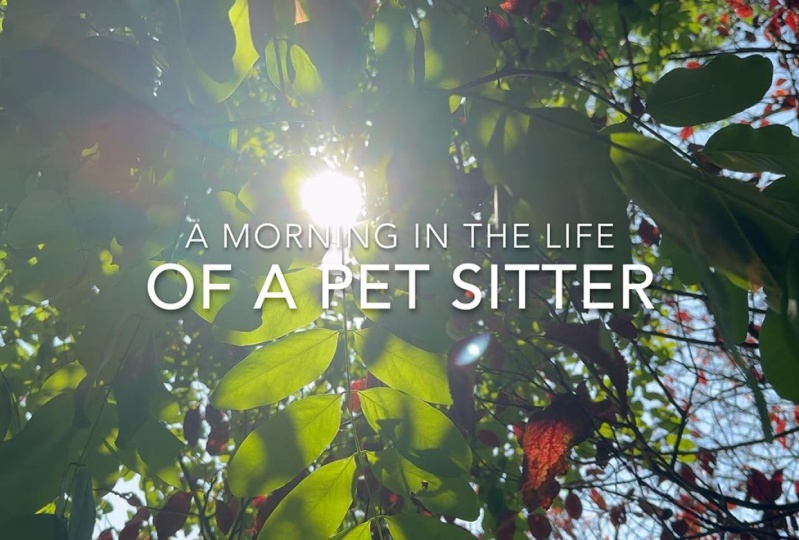
7. Finishing touches: Let's add a title here
at the beginning. How do you do that is go
up here. Click on Titles. You can preview all
the different types of built in titles here. Keep in mind you do not need to keep the typeface that
it's showing you here. Those are editable later. You can edit the
color, typeface, size. The thing you should be paying attention to is the movement. The one I like is this one here. It's quite classy. It fades in and
enlarges very slowly. How to apply this title? You just click at once,
and then you drag it down. Just like any other clip, you can change the length of it. I think I would want
to just have it fade just as the next
clips coming in. It says here, it says
the length 4.1 seconds. To edit the text, you go over here to the window,
double click. I am going to type
morning in the life, and then the next one here, double click of a pet sitter. You'll see that
this template has a third title here,
which I don't need. I'm just going to triple
click and then hit delete. To preview, I'm just going to click down
here on the timeline, hit Spacebar, and then
just see how that looks. Yeah. I think that
looks pretty good. Let me just extend this just
a little bit more into here. Yeah, I like that, actually. Let's take a look now
at color correction, p a clip, and then go up to
these two first tools here. I'll just go through them quickly and show
you what they do. This clip and this clip and this clip are
actually pretty good. I'm not going to do any
adjustments, but this clip, as you can see it's quite dull compared to this one.
We'll do our best. The first thing we can
do is just click auto. That actually isn't too bad, but it still looks
a little bit dull and there's no brightness. You can see how bright that is, and this one just
feels a bit dull. We can leave that and we
can continue to edit. There is actually a
really neat option called Match Color. When you click that, you'll
see two screens pop up. When you come down here,
you'll see that the, the cursor turns
into an eye dropper. We can do is just
click on any clip. To match the color. I'm going to click on
this one because it's in the same room at
the same time of day, you'll see on the
right hand side how much brighter it got. I think I'm just going to click the check mark to accept it. It's better. But I think we can maybe try a couple
more things here. If you grab that,
that's the shadow, so it goes down and up. We can maybe bring the
shadows up a tiny little bit. This is the contrast. We don't want to do
that, I don't think. Then let's just bring this highlights up a little bit more to make
it a little brighter. It is looking a bit contrasty, so let's just drag the
contrast down just a bit. Then here's the saturation tool. You can see if you
pull all the way to the left it goes
black and white, all the way to the
right it gets intense. I always like to increase the saturation just
a little bit here. This is the temperature slider, so that you can make
it warmer or cooler. I'm going to make it a tiny
little bit warmer here. It's not perfect, but
it's pretty good. Then this clip here
is too bright. I'm trying to make
this look like morning and you can see
how bright it is. This one's better
because it's quite dark. What I'm going to do is
just click this and then let's see what happens when
I click the match color, and then I'm going
to go maybe to this. I'm going to click that and then I want
to make it darker. I'm going to click over here, and then I'm going to
just experiment here. This is the mid tones.
Let's just drag. That looks better. It's
now warm and dark. Then you can see that this color matches quite a bit better. Now let's go over transitions. Now, a little secret
with the filmmakers, they don't use a
lot of transitions. If you click on the
transition button here, you can do a bunch of previews. Some of these are
pretty intense. This is this wipe is something that George Lucas used in the first
Star Wars movie. If you're doing
something retro and fun, you can experiment
with some of these. But honestly, I would really, really keep these two a minimum, especially the
really intense ones. The only ones that I
use are cross dissolve. Cross dissolve is often used to show a period of time passing. Or maybe fading from
one scene to another. But again, be mindful to
not overuse anything. Cross blur is actually not
too bad and at the very end, fade to black is
what I usually use. At the very end, I
want to fade to black. I'm going to click
and I'm going to drag onto the end of my clip. To preview it, I'm
going to go like here and then hit Spacebar, and then it fades to black. Let's just do one
transition in between here. I think maybe between
this and this. Let's just do a cross dissolve and just see what
that looks like. You just drag it in
between the clips. Enter preview, click. That's not too bad. If you don't use a
transition at all, it's just called a jump cut. Let's add a few sound effects. It really makes a
big difference. It's called sound engineering. Our movie has a library
of sound effects, which you can find
under audio and video and sound effects. You can do a s. I just
seed here for Bird, and you'll see that
there's a few here. This one will work well for
the beginning of the video. I'm just going to grab it and drag it down into the timeline. And it's quite loud, so I'm just going to do that. And I think because
of these two clips, they're both outside, but
then this one's inside. I'm going to drag the end of this to the end of that clip. But you can see
from the waveform. I start talking here. I'd like to fade this out. You can see that the cursor changes from the
left, right crop. If you move it up, you can see those little
arrows change. What that does is it
fades the audio out. You can see there's a curve now and it fades
down to nothing. I'm going to just listen. Ss. Did you know that
you can stay in a really nice house
overseas for free? Then I'll look through
and see if any of these clips would benefit
from some sound effects. I think I'm just going to repeat the birds at the end here. What I could do is just go
down here and then go edit. Copy, and then go to the end, put the playhead here, and then command V to paste. I'll drag this to the end, and then maybe crop it
a little bit like that. Right Let's add the
soundtrack now. What I did is I clicked on audio and video and then
went to music. This is the clip that I selected from my
subscription service. If you don't have a budget
for a subscription service, you can use the YouTube library, and they have sound
effects here, and they also have music. You can filter by
mood time genre, that thing, and you can
just download the file. You'll go under it, go under
a pen to background music. It will add the
background music. You'll see how loud
it is because it's got those yellow
peaking markers. We are going to just
lower that quite a bit. And then just take a listen. Really important, do not let the music overpower
your voice over. That's a very common error. It should not compete. It's for free in exchange for a minding s.
That sounds about right. It's a good practice to
check the end of the music. You don't want it ending
abruptly or getting cropped off. This just happens
to end perfectly. If it didn't, if it
extended past out here, what you could do is
just pull it back and then fade it out as we discussed before
using this Fade tool.
8. Exporting: I think we're ready to export. We've added our titles. We've added the voiceover, we've added the
background music. We've done the color correcting and a couple of transitions. What you do is you go
under file down to share, and then you want to go to file. You can rename your file here. I'm going to call this
morning in the life. This description is
which will be added to the metadata if you were to upload it to YouTube or
something like that. I'll just type in morning in
the life of a pet sitter. I made this in ten ADP, but you could export to four K if you shot really
high Rrose footage. And you could just export
the audio if you wanted to, but we obviously want
video and audio. You could select low quality
here if you were sharing it on a platform that couldn't
handle large file sizes. To be perfectly honest, I
have never seen a difference between the faster compression
and the better quality. It depends what you want
to do with it again. I'm just going to hit next. It's remembered the name,
the morning and the life, and you can decide where
you want to share it. I'll just save it to
my desktop for now. I'm just going to hit save. In the upper right,
this little pi graph here shows you the progress. It's done now. If we go to the desktop, we'll see it's right there. It's 174 megabytes and it took less than a
minute to render. Let's take a look at it. I's. Did you know that you can
stay in a really nice house overseas for free in exchange
for minding someone's pet. Follow me for a morning, while I care for the
owner's dog Skina. To find a sit, you can use a site like trusted
House sitters, which connects pet owners with sitters just for an
annual subscription fee. The Dog's morning
walk is at 8:00 A.M. Being not so much
a morning person, I get out of bed at seven, get dressed, and off
we go immediately. While having access to a car
is not the norm pet sitting, I must drive their car since the best trails are
too far by foot. The morning walk is
around 45 minutes. Skina is pretty energetic
for an old gal. She keeps up and listens well. After we get back, kina
gets her breakfast, which I think is her
favorite part of the day. After a hard morning's walk, it's time for Skina
to have a little nap, so I can get on with my day.
9. Conclusion: Congratulations. You did it. You made your first
movie in I Movie. That wasn't so hard, was it? Now that you're armed with
these pro tips and tools, you can make captivating videos
for your YouTube channel, tik talk, or just to
share with friends. As a wrap up, I'd just like to remind you of a few key things. Please remember to structure your video with the beginning, middle, and a conclusion.
Keep it simple. Let the footage tell the
story instead of using really intense transitions and effects and things like that. But at the same time, please
have fun and experiment. Please watch the Companion
class cinematic filming on the iPhone to learn
how I shot this footage. Please upload your project
using a YouTube or video link. Skill share cannot currently
accept video files. I can't wait to see what
you made. Happy editing.
 Beth Doman, Creative Professional