Transcripts
1. Introduction: They can't get home, candid about a lot of joy to our friends and family. And no, My name is I'm a professionally trained pastry chef from Korea and have been walking in a pastry kitchens at a restaurant for more than a decade. Ioc studied French pastry proudly to go don't go Sydney. I believe the food trend and love and are fascinated by it. Again, you can make cakes that are much better than this though, put one in your home kitchen. And I'm sure that I can help you by guiding you throughout this lesson. We start this class by learning the tools we're going to use what an essence, people that help you to understand the importance of using derived tools for baking cakes. Then I will show you three different cake recipes, which are my favorite. The first lesson he says strawberries and cream k. In this lesson, we will be able to learn how to make the basic generous apologizing. We've covered techniques are piping and degrading. Okay. We'd, which helped to improve your cake that Gretchen skills. The second NAS needs and read that. But K we choose for no, my favorite tags. This k can be a bit tricky to make to get that bright red color and sick and cream cheese frosting. But our share with you all the tricks to get a perfect texture and k. The third lesson is that pins chocolate k. This k has been served a thin, eligible for many years on that birthday. This gay consists of Chocolate, Jenna's bonds. We've got chocolate frosting and finished with a shiny chocolate glaze. The class time. So we'd online recipe notes, which covers all the ingredients and mess hoods we will cover in this class. This class covers all of the steps. Indeed, a vector SP, easy to understand for lawmakers had of economics. I can isolate, divide you to learn how to improve your cake baking and negotiation skills at home.
2. Tools for the Class: You think they arrived to allow you to make the most beautiful pastry. Here they send least fundamental tools that you will use them in Fanon, your pastry journey. This is my stand mixer, this my hand mixer. And now we're seeing the cooking school and was really painful experience to waste cream or neat though with my hands. This toad do the job better and faster. And mostly it doesn't make an armed hand mic so that the best job when you make a cake at home. See us together life on an inch by removing all the lungs or impurities. I use a scene which has a long handle and it is comfortable when they need to see any dry ingredients. We use a list mostly to incorporate x and xi by in this class. It is one of the most essential tools to make egg or pastry. So I recommend you to have one. I had to determine size. So risks, this bakeries works better when you need to make a big portion. And this small one is a regular size. And it's good to use in most of our baking recipes. Palette knife is helpful and you need to do icing on a cake or glazing. It helps to spread the frosting easily on a k. This palette knife has a cough, German. So it has to get better angle when you do, I see when a k, having a sharp knife is always useful when new cutting the k was less than this point. Breath Night works better when it's class list passenger jhanas K to divide it into several pieces. But when it comes to cutting a cake, chest nine works better. A chef's knife is also useful when you need to cut fruit, nuts and chocolate as well. So they can specialize very useful when you need to folding or mixing vectors. It has to minimize wastage. And silicon is heat resistant material. So it is a for your SOC team, the moment that can help us to check internal temperature of mixture, such as costs or melted chocolate. It is very useful tool and I will say it is essential to have one folder paste kitchen table is a must have. If you want to improve your grading scales. It helps to decorate your K like a professional. When it comes to IC with creating a smooth flat phone towns in either direction. For ease, I seeing and boarding, I have the most affordable timetable. But my favorite are least metal line because it is more stable. But this Italian table also works well. This scale help us to measure the ingredients correctly. I highly recommend to use a scale instead of using a cup. Because of measuring with our car is not highly accurate. Honestly, as a professional pastry chef, I never use that to measure ingredients. Instead, I always use a scale. So I prefer using a distance two essay. You can change the metric to gram or ovaries or ML. Always remember to use the tear button while measuring this to scale, it would really help you to make a good quality pastry. Chefs are many different size and shape of cake tins. My recipes based on 8-inch, 20 centimeter size of gating. And this size 80 me, suitable for most cameras piece. This gating is later non-stick material and has attachment on the side. So it's easy to remove respond from CAPM without any damage when it's baked. I recommend you to get a set of two cake tins of the same size. Because I use two pins to get a better result. If you take these little bigger or smaller than this, That's okay.
3. Strawberry Cake: Lining the Cake Tin and Making Cake Batter: So to align a cake tin, we need Caesar's and baking pay and pump up brush and oil or butter. I'm using the melted butter. But if you have a sprayed oil at home, you can also use that as well. So firstly, grab some baking paper, check the size, whether it's goes into is going to be defined and basically fold into half. And I gain from it again. And then the noun form is a diagonal sides. Maybe one more, like an ice cream cone shape. And then enter now is how we'll check the size. Now line here. I can't say that clean line. And my line is he off, but I'm going to cut this paper a little bit up here. So I like blotting paper leader bit bigger than that. So whenever you need to remove the paint, but it makes it easier to make the sidewalks traits. Lay that pane on the baking paper. Check the length and cut about one pill strips. So baking paper off. I like how thin paper? Slightly higher than the height of the thin. So when you need to remove the baking paper, make it easier. So I'm going to brush them out to the bottom on the side of the cake. Tin. Can use that as well. And I have it. And it should be loved to be able to cover FDA lining the pin. We will learn how to make the bad path. The first step is to weigh it out all the ingredients before we start to mix. Make sure or ingredients low temperature. It will help to get more added texture in the finite k. Because the room temperature ingredient PNP much better than code ingredient. The open should be nicely pre-heated before your cake backpage ready. So your cake would rise up beautifully. I have all my ingredients here. I already cracked five x integral, and we'll put 120 grams of sugar and little bit of vanilla. And I'll use a whisk. And until everything is nicely combine our just with good. You don't need to deal with critical mass. It just needs to be combined. We then our mixture when new bank money and a day, that goal shouldn't be touched the surface of the water at all is not that chain. And make sure that the Holy Spirit clean and does not have any moisture in it. Especially if you're working with eggs or truck lead. It is very important to keep your bowl and a treatment Twain because any moisture can make her egg not aerated. And your took ledge and this data as well. We will make a mixture are really Shabbat. So I have my element here. And now I sub b, that is six, that is. Let me check again. Now the temperature is about 40. I'm gonna call up the heat. I'll use the hand mixer to aerate the mixture until your ribose. So this cake batter has been reached the ribbon stage yet. It's still tricky and doesn't hold or even shape on the surveys. What I'm gonna do is I'm gonna use my hand mixer. So now this K at least ready, the visible signs though this ribbons are like unnoticeably thickness, will be remaining clearly on this interface photo few seconds before we slowly disappearing. So I'm gonna go above 140 grams of flour and seven grams of baking powder. And then I'll use a spatula, silicon spatula, and then makes it very gently. And please don't use a list. If you use the leaves, then we'll know found all the bubbles inside the Fed has scraped from the bottom and then fold onto the surface. This is the mixture of melted butter and milk. It should be a loom temperature, not too cold, not too hot. So I'm going to add the cake batter into this bowl to make the same consistency. If I add that baton milk straightaway into the cake batter, Sets break from the better. And what DO goes on the bottom MOOC double. So actually it's very important to make the same consistency. And now add this to my cake better. And as I say, you don't need to, over makes sense. Now my bedtime reading, this is very nice to me. I'm gonna completely cooled it down for two hours.
4. Strawberry Cake: Making Sugar Syrup and Cutting The Sponge Cake: So while cooling now under cakes, punch began to make the sugar syrup, which is really important to make your cake supervised. So I'm gonna put 50 grams of sugar and same amount of water, 50 grams of water. And I, we use small silicon spatula and small brush size, small port here. So firstly, I'm going to put 50 grams of water, and then I will put 50 grams of sugar and let it mix together with my silicone spatula. And, and then I'm going to turn on the heat. Is the bottom medium hit. And let the Ashuka diesel. It's very small quantity of sugar syrup. So it will take long time. It will take about two to three minutes from hitting two and the shoe lies completely dissolved. And it's under medium here, do not use too strong here. Otherwise, all the water will be evaporated. I use this small brush to remove all the excess water around the pole. So it prevents all the crystal lies of the shoe girl. So I'm gonna let it boil about a minute and I will turn off. The heat. Gets to shoot I, Sarah the web one minute. Now I'm going to transfer to my smaller lamin. Can mold hissy, you can say it has consistency, is not too liquidy and that today. So our issued a consistency of these two guys, Sarah is little bit, but not too much. So it's good to use as kx. So the Skaggs punch has cooled down for two hours. And I'm going to unmute this cake tin. And I'm going to take over the baking paved path. So now we are ready to cut it. This beautiful sponge. And before we start, I have something to explain you. So when you correspond to pay or different, I will pastry is always better to use bread knife, but a fool don't have it at home. You can also use normal chef's knife, but that need to be really sharp. Idolized, I will give a lot of damage on Mary Kay and base three. Firstly, I'm going to cut off the cover because it's not observe the sugar syrup as much as it inside a Kecks bunch. Drive to slicing interbedded thymine. Then part of the K, It has little bit of Labaree texture. So it's better to just remove. I'm going to cut this bunch k into three pieces of. Firstly, you align your response day before you start cutting it. So it will be 1.5 centimeter, two centimeter. I can see the line. When you're slicing that K tried to not over privacy or k and let them live. Just gently glide through the sponge. And you need to know that where the knife it's going. Make sure the knife feeds, cutting this pond horizontally. Let the knife just gently glide through the Spanish sin. Now we are ready to take. Great, kay.
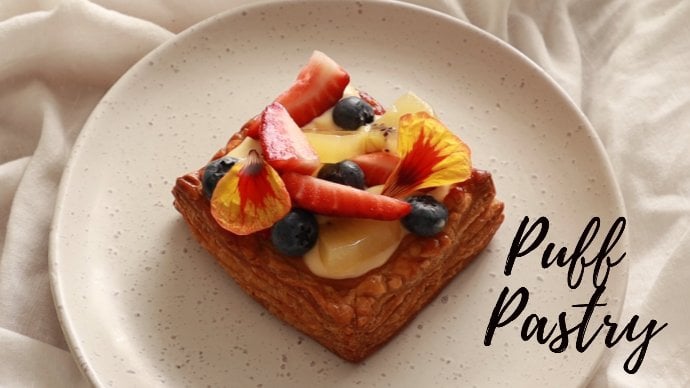
5. Strawberry Cake: Icing and Decorating the Cake: I'm going to show you how to decorate your cake with a palette knife using piping bag. So basically put older cream on the side of the ball and make this Molson evening. And clean your palette knife nicely. Put your pollen that inside a cream. This will be a BAD 45 angle. And then scrape this up. And I'm going to gently glide us bachelor. And let the cream full net trillion by K and just scrape this. And again, clean your spatula and put pollen live inside a scrape this up. So the last one, try to not touch the finite shape is little bit looks like a flower. So what it can do is you can post strawberries in the center of that k. This is our fine, I hope you enjoy. So this five thing nozzle has the eight tips. And I will fill this selfless cream. So this is semi with, so we're going to fill this out about half full, this piping bag. I have my silicon scraped by surveys colleague, put it back and then push it again. Again. Well, if bad. So basically you just tried to remove the bubble inside of the cream and push it back again. If you see are crammed, become really smooth and night and that it's got removed all the bubble inside. And we can also use Levo band too. Thank you. I'm gonna remove a little bit of cream remote the bubble inside. And if this is first time I'm doing piping, I suggest you do some practicing before you start piping on your K. I'm going to start piping at the edge of my k. So basically popped a cream all the way around until I reach the end. And at the end you need to press a little lesser to finish the shape and tried to give it delivered over volume. Do not make it too flat. I'm going to start to understand as well. And to finish this k, I'm going to decorate with strawberries and flour and little bit of icing sugar. And requires a lot of Prim's. So if you not really a fan of eating a lot of cream, you don't really need to cover the side. Hello, The Sims co-varies on the top. Ready? I'm going to explain, knew how to cut the cake nicely. So I have my shaft nice and high, have some tau clean towel. Then I also have hot water in a cup. So firstly, you've put your knife inside hot order and just wait for a couple of seconds. And basically just slipping it and make it clean and nice. So make sure your knife face a little bit hot. And then I can put into the hot water and remove all the water. I'm going to transfer my palette knife. This paan case when they nicely soak with sugar syrup, so is moist and this well-balanced gay with cream. And so I'm really happy with this. And I hope you enjoyed this recipe and I hope you make it too as well. Thank you.
6. Red Velvet Cake: Lining the Cake Tins: The first step is to line the cake tins. The reason we do this before start making a cake is to be organized and it makes it easy to bake. To make this cake, we need to cake tins because it would help you to prevent deflation of your k direction. Well, that CAG is quite airy and has a big volume. So it is easy to be sinking in the middle side even though you bake perfectly. So I suggest they use to cake tins in this recipe to line up getting when a scissors taking paper, spray oil. I used melted butter in my previous video. So if you don't have that video to help you, firstly grab some baking paper and using the PE so that Tina as a template. And check if the teenage fitting inside of the baking paper. So it should be fit in folder backing pay far into half. And then folded and making as a diagonal. And place it in the middle of the cake. And check the length and make a mark. Easier centers cut off the line you make. So I'm gonna just write the paper perfectly fit in the mode. I'm going to spray some oil and we place them inside. Let's make the sidewalks trips to make the side of the strips. Later on the backing paper and check the length. I just made a mark and cut up 12 strips more to be able to cover all the sides. Actually, I like cutting paper slightly higher than the height of the tin. So a new need to remove debating paper, it would make it easier time than inside. So I made one strip and I have to extract now. So now I'm going to ask praise them. This should be too loud. So I want to save some paper towel, so I'm going to cut a little bit. So I'm going to edit the same way to cover the other case. We just have finished our first step. And before going for the next term, don't forget to preheat your oven at one hundred, one hundred eighty degree. So when your cake batter is ready, it can be back nicely in the hot oven. For the next tab, I will explain you how to make the cake batter. I will see you soon.
7. Red Velvet Cake: Understanding Ingredients: They sell my dry ingredients to make a less bump texture. We used cake flour and I use baking soda is arising agent because it reacts to it, such as vinegar or lemon juice. So and I use non batch process cocoa powder 0 to give a bright red color for this punch. If you use Dutch process cocoa powder, it can make your cake very dark. So I use non Dutch processed and borrow should be room temperature. It need to be cut into two centimeters small cube size. And I use tests as sugar, the silhouette in nutrient. And please make sure all ingredients are at low temperature. I have two legs in this bowl, and this is final phase which leaves. And this is food coloring gel type. And I have full-fat milk in this col, and I'm going to add 15 grams of illegal straight away. They mix together. And now let us say for ten minute to get cuddle itself, make a huge difference because acid reacts with a leavening agents such as baking soda. So I use for nickel for this, and this is gel food coloring. And I found that the delta ab is give the West bright red color. I try to use a rigid type and powdered time as well, but it didn't it didn't go well. So if you are looking for to make, making a bright red colors punch, I suggest you use a gel tie, but if you're a little concern about using covering, you can just skip this part, then your spongy color will be naturally chocolaty brownish color. Now the ingredient jam major and prepared. In the next video, I'll show you the mixing process with all the ingredients to make a perfect texture.
8. Red Velvet Cake: Making the Cake Batter: So I have a big large bowl hill and I'm going to shift the flower and cocoa powder, baking soda. And so together. I put baking soda and sort. And it makes together just to share folder. And I'm going to add the cocoa powder as well. And I'm going to use kicked a combined. And I prefer to mix butter and combine. And please don't forget, your photos should be random temperatures, so it's very soft. And I suggest you use round bow. If you use the shallow goal or just small sized bowl, it can make a lot of mass throughout all this mixing process. So please use d and big round will add border. And I'm going to use my hand mixer before I've put the shoe by name. It looks very soft. So now I'm going to add all the shoe. So it's been about 30 seconds. I wanted it to be creamy and likely airy, but I do not want it to, want to give too much air is psi because we keep going to mixing the other ingredients into it. So it's very important to give just enough light peer inside until combined well with all the sugar and butter. So I'm going to just mix it well, six crew till the boredom. And I'm going to mix a little bit more. So spin on it. That is again, I'll show you two chromosomes from the state. So the Shogun but a mixed well, but it's not super creamy. I'm not done. I gave more mixing and I will just let it be and then I'll add another ingredient into it. And I'm gonna incorporate x one at a time. So we are not going to over mixing mixture a combined well, that's good enough. So now in this battle, I'm going to add buttermilk and manila paste and food coloring. This is about 15 grams of food coloring. Before start using the mixer, I'm going to just gently mix sacred my constraint to law. And then mixing them is debit things combined. And I'm going to add a dry AND gate in this mixture. And we'll be using that makes sense. It makes their greatest silicon, silicon spatula. And I'm going to keep it a mix. So whenever you make a k is important to check the boredom if that is anything from the bottom. So just keep it a big mix together throughout all. Take better and check whether the lung or powder, little bit of sugar left on the bottom. So now it is well mixed. So now my cake batter is ready and they again quite fluffy and there's the normal now everything's well combined. So now I'm gonna divide this K beta into my take 10 K Beta as the same amount. So I'm gonna use a scale. So, so now I'm trying to flatten the Caixa phase. The myoglobin is nicely preheat this, I'm going to make this gait belt out.
9. Red Velvet Cake: Making the Cream Cheese Frosting: While we are cooling down to begin, I prepared a frosting and Shiva Sarah, I made is Sheila Sarah with 50 grams of sugar and 50 grams of water. Oh, it's the same recipe how I did in my previous recipe. And this is the green cheese and I've political by the Laplace inside. And this is thick and cream, and this is icing sugar. So I'm gonna whip this cream cheese until it becomes smooth. And I will add item through violator. I will add the half of the cream. So now my couldn't Jesus, ready as you can see, the shed was holding and this not falling apart. And it has quite escape phone. I'm not going to be the cream more than this. Otherwise the criminal be separated. So it just came out from the ovary. And I'm going to show you how to check whether this kook nicely. So I have a small post-pay. Or you can also use a little bit longer sides obscure. Some gonna put inside the middle, in the middle. I put until the end and I'm going to pick it out. So as you can see, it come back quite clean. There's no excess battle or something is quite clean in mind, it means is completely cooked. So I'm going to let it cool down about 30 minutes, half an hour. And I'm going to be mole, these cake pin, some that I've demoed that case. So cool down very nicely. So now I'm going to create this face and then use the phase as crumbs. I'm going to show you how to make crowds of the k. So I'm gonna use this cheese grater. Make the best. Instead I'll be using.
10. Red Velvet Cake: Frosting and Decorating the Cake: So Place 1 cake layer. And I'm going to spread evenly my palette knife. I'm just turning my cake table and then push the frosting. I like to layer the first thing to balance. Because the first thing he has a light texture compared to the original version. And I'm going to add the second layer of k. And again apply the sugar syrup. The first thing. I'm just timed out, push the frosting down so it's covering the surface and spread it over the top. I'm going to work it down the side. I'm kind of angling it down and gently pressing toward myself and add more first-day lead to violet to just make sure that you are not missing uncovers part. I'm looking forward to make really smooth side. So I'm gonna use my bench scraper to spread your turning table from Cloud Plate at 45 and just slow the pulling your hand back. Hey, I'm going to punch in my palette knife underside of the k. I'm going to touch moving off slowly. Table in the fridge for one hour. So now I'm going to come. I have some of mine from my garden. I'm going to use it as a decoration. And I'm going to sprinkle them. So my setup is ready. The hot water is here. And I have a small knife. Remove the water and make sure your knife is one. So I'm going to transfer this cake to my plate. So this is our finite k. I'm going to paste it. So fluffy and creamy and also well balanced with the frosting. I modify the recipe many times to get the best result for whom bakers. I hope you enjoyed your recipe and make it as well for someone who you love. Thank you.
11. Queen's Chocolate Cake: Getting Prepared: We all love chocolate and Akin anapsid as well. I'm going to show you how to make the Queen's Birthday to collect k with the simple ingredients. As always, I'm going to align my cat can first. If you want to know how to line the K ten, please check my previous video. I just dial my urban and for 180 degree to be able to back the best chocolate journalist tag we did. We need really hot oven. So don't forget it. I just try my cake tins. To make this cake is better to use two cake tins because it would help you to prevent deflation of your K or so. We're going to make a layer cake. So iterative make the process easier.
12. Queen's Chocolate Cake: Making Coffee Sugar Syrup: And then I make coffee. She does Sara. A dash of coffee gives such a good flavor to your chocolate cake. To make coffee, we need 50 grams of Shu Biao, a 100 grams of water, and one shot of coffee. For the instant coffee, it will be about 1.5. Teaspoon supplies water into the pan. And you show bias well and mix it well, combined. And Tom on the hip and bring it into this documentary. So what does this for a name radical in 30 days, I can pay you for the sugar mixture. We just mixed it Val and let it cool down. Some gonna let it cool down. In the next video, I'm gonna show you how to make chocolate generous bunch.
13. Queen's Chocolate Cake: Understanding Ingredients: So let's check the ingredients for the chocolate generals. For the bang Larry, we need Lume temperature, eggs and a test, test tube and then marries one of the cooking technique. Basically we make a hot wallet to Bob and gives indirect heat to the egg mixture. So it gives high balloon to your agenda as punch. And for the dry ingredients, we need some cake flour. I already put some pink job sold in hell and baking powder as well. And we need cocoa powder. And I have some melted butter. This one is consulted melted butter. And we also need Biola paste. I'm going to see all the dry ingredients first. So this is the cake flour and salt and baking powder and my cocoa powder. So now all the basic setup is ready for the generals punch k. So I'm going to show you how to do the bank Mary
14. Queen's Chocolate Cake: Making the Chocolate Genoise: To make a fluffier triple-A generalists, we're going to bang my dad gametes, true? So firstly, choose the correct size of the saucepan and bow. And let's check if your goal is not to be too small for us, those fan. So yeah, it's perfect. And I already add some water in there, so span as some water and it shouldn't be touched, the ball shouldn't be touched the surface of the water like this is not touching at all. I'm listing my x and I'm going to add my sugar. So now I'm going to just keep whisking your egg mixture and make sure the water is not overwhelming. Was the water starts to boil, reduce the heat to medium. We are looking for Bitcoin 43 to 45 degrees for this admixture. So just be prepared and check the temperature occasionally. I'm going to check the temperature. So it's about 37, 38. So once it reached by 40, I'm going to just turn off the heat because the temperature gonna be given crazy ways. Get a little bit more. Yeah, it's pretty cool, but 41, I'm gonna kind of move this bowl from the heat flow. The next page I'm going to use my hand mixer and we skied until it doubles in Boolean. So now I'm going to use my hand mixer. So it takes about 45 minutes to get this texture. So just drawing that a ribbon shape and the shape is remaining on the self phase. It's not disappearing in a second. And the color become like a bright lemon yellow. And it get double in volume. I think is ready. And half Armando diag mixture and the dry ingredients and mix it together. And little bit more of the egg mixture. So all the mixture combined male em. So I'm going to add melted butter. Then add this mixture to the remaining egg mixture. So as they can say, older mixture combined well, but just be careful to not over mixing it. Otherwise, all the bubble will be disappearing and you will get the volume of the k. Let's see. Yeah, it's perfect for you at a. So now I'm going to put this paper into my cake tins. I'm going to use my half. And I'm going to remove that. So I'm very satisfied by this spines is very moist and I can smell the chocolate. So why is cooling down? I only show you how to make chocolate ganache. Will I seeing and frosting as well. We'd only simply ingredients.
15. Queen's Chocolate Cake: Chocolate Frosting and Icing: Ptolemaic frosting and chocolate and cream. For the frosty, we did 175 grams of dark chocolate and 350 grams of cream for guys. See you in a 175 pounds of chocolate and 250 grams of cream. I use 58% of black chocolate, but it's your choice. If you prefer the other type of chocolate, you can use a less well for the first day. If you're using a blockchain of chocolate, make sure your chocolates are cutting to the smooth quizzes like this. For the first thing, I'm going to melt the chocolate by using vein larry. If you want, you can microwave the chocolate as well. And I'm going to have a little bit of cream. And please make sure you're taking it all from the stove as soon as it has reached boiling point. Otherwise you're creating will be separated. So I'm going to pause. It's a small quantity, so it won't take long time to boil and just get us small wooden spoon or speci lineman to stare it. Okay. And now my previous task, it will be reached a boiling point very soon. Reached a boiling point. I'm going to turn off the head. I'm going to put a high premium to my truck left. I'm going to pour half of the cream. But the chocolate and can lay my supplier to get out. Was it combine and mix it well, and I've covered and I'm gonna refresh rabid about one hour for guys seeing the economic, the basic ganache. So firstly email that you're Glenn. I'm going to pose some cream to it. As well as the first thing once it reached the boiling point on the Macondo of the hip. And I'm claiming that the chocolate, just half of it makes it mail order or a soda cream. Let's keep it on the band chunk. And the first thing is said in the fridge.
16. Queen's Chocolate Cake: Assembling the Cake: Going to slice this the phase of January to make smooth the face of bread knife. And we're going to slice the knee. I just did this frosting out from the three I've been said the first thing about two hours in the fridge. And the first thing is completely set as a ganache texture. I'll issued a texture of it. As you can see, it has a very small, it's creamy texture with this ganache with my hand mixer to get more fun texture. So I can say that my frosting is ready. As you can see, the shape is holding. So it will be perfect to decorate my k. So I'm going to put this first thing, my piping bag. Piping bag. And the smallest size and shape node x2. So now I'm going to put frosting into the piping bags. So basically just pull it back and the ship. So now my piping bag is ready. My k, So some cake layered on the subbing play. Tried to place it in the middle, in the middle. So despite prepare coffee cereal that you made before, as always, I prefer this font completely with the coffee snow would give really nice chocolate sponge gate. Just make sure that you're not covering this outer edge a little bit. And I'm gonna stop this generous with the coffee, Sarah. And we're going to cover this k with the rest, so frosting. But I don't want to miss any single trying to come up. So now we're going to place this in the fridge. Now she has led to date or too thin between 29 to 31 will be perfect to cover your k. And I just print. You're going to say use bread so we don't make any wastage. And I'm gonna spread it evenly. Just wanted time would be enough. Campaign us that we can reuse it later. So just a little bit. Then I use it as a decoration. And I'm going to finish this declaration with golden leaf. But if you don't have, you can use any number of flowers, anything from ADN, be flagged, cut at k. I'm going to put in the free zone flipped ten minutes. Just to escape from the freezer, I'm going to cut it now. Is hot and sharp knife. We load the excess water to make sure your nine-fifths little bit hot. This is our final result. I hope you enjoyed this recipe to make it as well.
 Lilly IN, Pastry Chef - Le Cordon Bleu