Transcripts
1. Introduction: Having fresh fruit with soft Genoa sponge cakes
is the perfect pairing. And using fruit is a great way
to lighten up any deserts. In this class, we
will learn how to incorporate fresh fruits with
light sponges and cream. Hi, my name is Stephanie. I'm going to go down blow
drying shaft from Korea. In this class, I will be sharing with you not
just the recipes, but all the different
techniques and skills I've acquired over
more than a decade. Looking at the pastry chef, the first recipe is watermelon k. This is one of the most
famous cakes in Australia, and it's been my favorite kids
since I had my first bite. You would experience the
amazing freshness, lightness. By pasting this K. The K consists of two
layers of almond dot class, pastry cream rows Sarah and fresh watermelon is topped
with scoop watermelon, edible flowers,
and green garnish. The second list needs
a sweet potato. Okay? This is a Korean
style cake with a really light texture with a creamy sweet
potato fillings in between three layers
of generalists bunch. The cake is finished with gently whipped cream and
generalists K crumbs. And I will share
with you how to make petals with a whip cream
on the k as a garnish. The third lesson
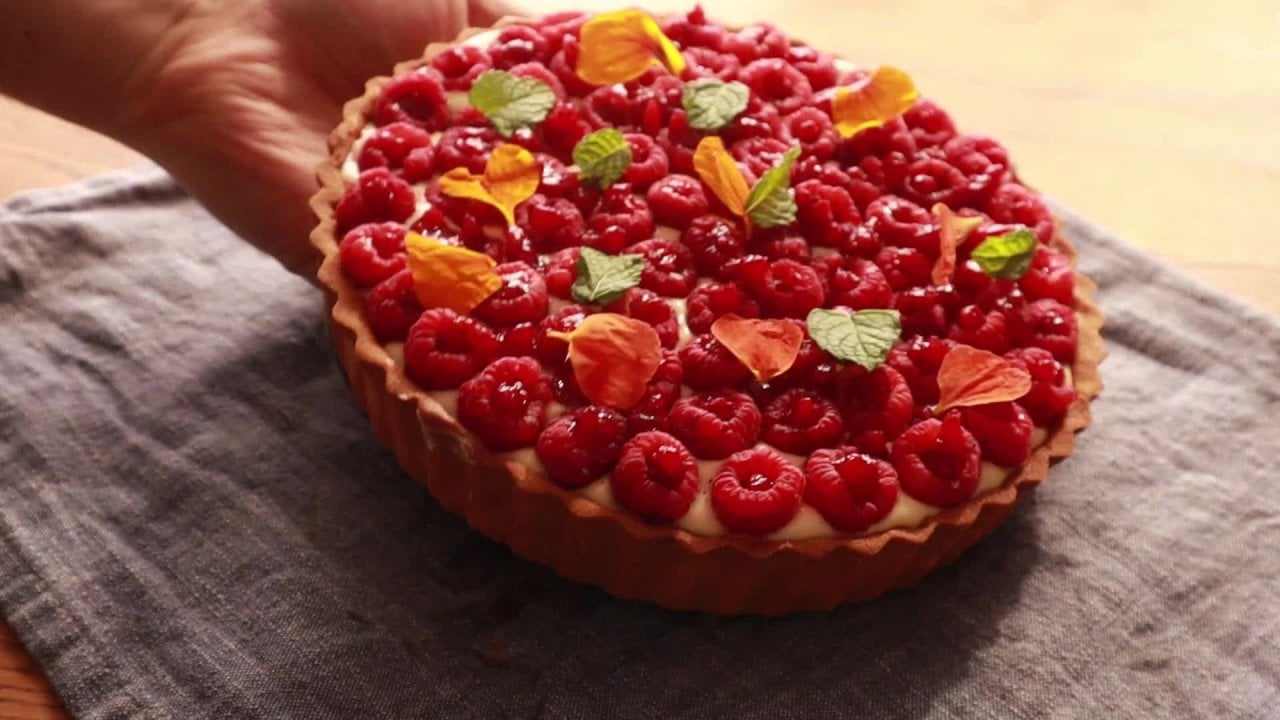
is grape yogurt k. This k gets super refreshing
and perfect in summer. This K consists of a soft cream yogurt
and likely whip cream. In this lesson, I
would guide you on how to use setting agent
such as gelatin leaves. Knowing how to use the correct amount of
gelatin could really improve your skills to
make good textured cakes. This class covers all
the steps in detail to make it easy to understand For homemakers
and beginners.
2. Class Outline & Project: Welcome to this class. In this lesson, we're going
to simply bring forward a class outline and project
is covering watermelon, grape yogurt K, and
sweet potato, kay. A class project for the class is to share a picture of anyone recipe so that I can help you to improve your
cake baking skills. Let's have a look how
to download a recipe, not the recipe notes sat
down in the fourth tab. Just click on the attachment PDF file and let it download. Open the download file. Then you will see all the recipes and mass
hoods for the class.
3. Simple Preparation: Let's prepare the
watermelon slice. This recipe is based
on a 16-inch green. So it'll be better
to check the size of your K Green and buy a watermelon according to
the size of your cake ring. I'm gonna show you the easiest way of
cutting whole watermelon. Prepare a clean chopping
board and a bread knife. Instead, the chef's
knife also works well, but I prefer to use
a bread knife when I cut a hole, watermelon
or pineapple. So I'm going to cut off the top and the bottom parts
of the watermelon. Then I will remove the rind
on the side. Let's start it. Clean up the chopping board. Now I'm going to
trim the edges so they can look more
clean and round. Like a ball on a creaming will help to make a
better shape of the cake. I need one slice watermelon
took place in the center of the k and 300
g of chunk parts. So I can use that as a garnish. At the end of the lesson. I'm gonna use the ruler and measuring the size
by two centimeter. So basically I'm going to
mark on the watermelon. Now I'm gonna try to
slice the watermelon. But tickle, make sure that the slice watermelon
is evenly cut. In this book, I have a 3
g of sugar and sold each. I'm going to sprinkle the mixture on both
sides of watermelon. So it did help to release the
water from the watermelon. So the K doesn't become soggy. Massage it gently, flip it over, sprinkle or
the rest of the shoe guy. And so prepare a clean towel and I'm going to cover it. I'm gonna keep it in the
fridge for about six to 8 h.
4. Making Dacquoise: Now we're going
to make meringue. Before that, I can
on my oven to 150. So the oven can be
preheated nicely prepared, a slick unmet or baking
paper or on your open tray. Actually, I prefer to use
a silicone mat because it's more sustainable
than using baking paper. And we cannot use the
cake ring as a stencil. I'm gonna use a 16 " cake
ring for this recipe. Get a pestle baking paper
for our icing sugar on the top of the baking
paper as product widely. And I'm going to simply
press the cake ring. Please make sure the stem
cell line is visible. So you can draw the line easily. To make that class, we need egg. Why? Lemon juice? Cost is UGA, icing, sugar, almond meal,
and cake flour. Now we're going
to make meringue. To make nice shiny moraine. We need a very clean
bull without moisture. Where does prepare a
clean bowl and the egg? Why? I'm going to repeat
for 30 s without sugar. Now I'm going to
add sugar because the shovel and a few drops of lemon juice add one-third
part of cost issue girl. And we've paid for another 30 s. Now I'm going to add the
second parts of the sugar for the rest of the issue. So this is the
perfect consistency of the medium pink boring. Let's save the Amazon meal, I think Shiva and cake flour. Now I'm going to use a
silicone spatula and be gentle to cooperate the powder and marring mixture together. Please look carefully at
how I mix the moraine. This is one of them
mixing technique. And it helps to not collapse
the air inside the moraine. So the ones the powders
not showing start mixing and we are ready to transfer the mixture
into the piping bag. I have my piping bag here. And I'm gonna use this
small size around noses. But inside a piping bag. Remove the bubbles and
clean the piping bag. You just circle scraper. Now I'm going to cut
off the tip scissors. Before I start piping, I'm gonna spray a bit
of water on the mat as plain water makes it easy
to take off after baking. I started from the center and
I made sure that the pipe, the mixture smaller than
the stands in line. Because once the
dot class is bake, it will be spreading
and become bigger. So I would say leave
the gap from here for about 0.5 centimeter less, sprinkle some icing sugar on
the top of the dot class. So now we're ready to
bake that our class. I'm gonna bake it at 150
degree for about 22 to 25 min. It's nicely bake. When you touch this
surface is crispy outside. So now I'm gonna pull
it down for about 1 h. It's been about half an hour. Nicely cool down. So now I'm going to
transfer these on the plate and I'm going to use these small curves bachelor.
5. Making The Easiest Pastry Cream: To make pastry cream, milk, egg yolks, butter. Because touch and Sheila, beta pinch of salt. Pre-biotic limbo at milk and egg yolks together. Mix it with a wave, caused the sugar
and corn starch. I'm going to save the image and add one teaspoon
or vanilla paste Florida mixture into Klimt port. I'm gonna use the lower hit with a whisk until
it gets thicker, like a custom texture. Please make sure that you are staring through the bottom part, the bottom part of the
stick and get burned very easily. I'm going to turn off. I'm going to transfer that
clustered into the bowl. And I'm going to add
the room temperature butter, mix it together. I wanted to show you the
texture of the cost. As you can see, it's very silky and creamy. As clean up the
side of the bowl. I'm going to color it
with a plastic wrap. Lets keep it in the fridge until it
gets completely chill. I'm gonna send cream with
a tablespoon of sugar. Check the consistency
of the cream. So this is the
perfect consistency. Listen me, whipped
cream is not ready. I'm gonna mix it with
the pastry cream. The pastry cream is completely killed after 2 h though
being in the fridge. That's limb of
this plastic wrap. And I'm gonna use a whisk. And we stayed until it becomes smooth and add the cream with cream. So I have 3 g, so gelatin leads. I'm gonna say, okay, it in this cold water bath and let it soak about 1 min. Let's take them out from the microwave Dan for 20 s. To prevent getting
born of the gelatin late. I left one tablespoon of
water and I microwave. So it's nicely melted. I'm gonna put it over to the cream and gently
follow through. So now I'm going to transfer the pastry cream into
this piping bag. I'm gonna use this
small round Nozick. Place them also into
the piping bag. And use this more
scraper, silicon scraper. Make it clean and remove
the bubbles inside a cream.
6. Assembleing The Cake: For assembling prepared
cake board or clean plate. And place that on
the tectum table. Let's place the dark was on
the bottom part of the cake. And I'm going to brush
lightly with the rows. Sarah. I'm gonna start pipe the cream starting
from the center. Place this myself, watermelon
in the center of the k and brush lightly
with the rows, Sarah. And I'm gonna start pipe the cream starting
from the center. I'm not going to
cover the cream until the end because I'm
gonna cover it with another piece of that
class and press it gently. Then again, brush
it with row syrup. So the assembling
is nicely done. We're gonna keep it in the
fridge for about three to 4 h. To finish the k, we need fresh watermelon, edible flowers, and
some green leaves. Today, I'm gonna be
using Cosmos flower, but you can also use
any edible flowers, like rose petals or frenzies. Made sure to put the flowers
right before serving. And please don't put
it in the fridge. Otherwise they tend to build. I'm going to scoop out watermelon with
this small scooper. If you don't have a scooper, cut the watermelon into the small cube
size, scoop it out. With the rest of
this watermelon. I'm going to make
juice out of it. Let's remove the plastic rep. Now I'm gonna carefully
arrange it on the power of the k. Let's put these
Google watermelon. Then decorate with
flowers and green leaves. Now we're ready. Let's remove the green
and the acetate sheet. Adding freshwater Milan the top, keeps another layer of
texture complementing the silky pastry cream and
self-doubt class bunch. It also keeps
amazing visa appeal and makes the cake looks
extremely beautiful. I'm very excited to see all the layers
inside of the cake. I prepare hot water and the shaft knife
and a clean towel. Remote access water. Make sure your knife is hot enough. Slide. Again, cleaned and I get true palette knife. Now I'm going to transfer the slice of k one
to seven plate. Learning how to make this k will really help you to improve
your pastry skills. It's K is a really refreshing and it's perfect
for a summer picnic. Thank you for watching.
7. Making Sweet Potato Filling: To make separate or filling, we need white sweet potato. It has wide choline side. There are many different
variety of C potatoes, but I prefer to use white one instead of using orange or
a pop-up sweet potatoes. So the white one
has more crumbly and dry texture than the
orange sweet potato. So it helps to get better
texture for the cake. Then we need to concrete beam. We're going to send me
with this cream later. I'm going to mix with Cook
and smashed sweet potato. And to give us sweetness,
we need honey. Let's begin to make the
sweet potato filling first. I washed off the
dirt with water. And I'm gonna appeal this
sweet potato with this pillar. Once you peel the potato, cut into about two inch size. So it can be cook faster. Then I'm going to transfer the sweet potato into
my bamboo steamer. I'm gonna stem this potato
with this bamboo steamer. You can use any kind of
steamer that you have at home. There a reason that I seemed
a potato instead of pulling in is because I don't want to make my secret
aid or two lottery. We can group these potatoes about 20 to 25 min until
it's completely cool. So let's check it with
the skewer cell if this cure slide easily all
the way to the center. Your potatoes, I
cooked. Let's do that. So these potatoes or
cook pretty nicely, I'm going to transfer these cooked potatoes into the bowl and I'm
going to mesh it. I like a bit of chunky texture, so I will live on a little
bit of chunky part. Some trying to spread it wisely so it can be
cool down faster. So now I'm going to place potato in the fridge for 10 min. Why we're cooling down
the sweet potatoes were gonna whipped cream
until it's semi whipped. So I have my taken cream in this bowl and unawareness
sprinkler some sugar. You should be ready. Let's make sure that the sweet potato is
completely cool down. If it is not, the filling. Filling can be split
after mixing with cream. So now I'm going
to add some honey and mix well with
the sweet potato. I tried to smash all these chunky part
because I like the texture. And I'm going to
add the whip cream. So we show the texture
of this sweet potato. You can still see this small, smaller, chunky packed, right? And we really like this texture. So now our sweet potato
filling is ready. The next video, I'm
going to explain you how to make the golden fun, kay?
8. Making Golden Chiffon Cake: Should point k is so
wonderfully light and airy K, it belongs in the same
category as the sponge cakes, but it contains a liquid fat as the rest of loyal
and French marring. These two main ingredients are the key points to
make the most lives. In this recipe, we need x bar, vegetable oil,
milk, vanilla pace. I put surprising
flour and baking powder and little bit of
sold in the same boat. Prepare a deep round bow, then we can save all
the dry ingredients. If another rule we're going
to put eggs and milk, vegetable oil, and
the dry ingredients. Florida French moraine,
we need egg whites. The sugar. That's shove
lemon juice or vinegar. If you have a cream of tartar, you can use that instead
of using lemon or vinegar, sugar and some acid. My case, I'm using a dash of lemon juice and
I'm going to skip. So once you're moraine, give structure and show
this point its shape, it means it's ready. I'm going to add half of the
moraine, the cake mixture. I'm trying to immerse
fight together. So this K mixture is ready. I'm gonna spread is always
play on the baking tray. And I'm gonna put a little
bit of a spread in the top. So the cake batter
doesn't stay on the baking paper for this cake
better on the baking tray. And spread it evenly.
Palette knife. So now I'm going to
place it in the oven at 180 degree and it's
nicely cool down. So we're going to cut this pines with this round
shape ring cutter. Oh, this one is
about 12 centimeter. Before we cut this bond, I'm going to remove the
baking pet PayPal from this. Because while we're
baking this punch, it tends to stick together. It tends to stay on
the baking sheet. So it's better to remove before you start to
cutting this punch. Let's talk about three pieces. And we can use the off
guard as a crumble. Put the link or toned
Golden ship on K, and then press it. To make crumble. We have a few options. One is using a cheese grater. You can also use a
food processor if you have at home that I'm gonna
use the cheese grater.
9. Milk Honey Syrup And Cream For Icing: To make Milliken is Sarah
began to warm up the milk, but it shouldn't be Boyle, just need to be warm. So the honey could
be measured easily. So I'm going to
turn on the head. I'm adding milk. Once the milk is simmering, I'm going to turn off
the head and I will add the honey and mix
it well together. I can't see the
bubbles coming out. I start simmering it. I'm going to turn off the head. And I'll add one tablespoon of honey and just mix it well, let it cool down on the
bench to make whipped cream, Cream, sugar, and vanilla paste. So I'm going to place all
the ingredients in Nepal. I'm gonna whisk it until it
becomes medium whipped cream. Soda cream is ready. Since we are using
the thickened cream, the Fed is legally
separate from the cream. And it's usually happen when the cream is
not cold enough. So make sure your cream
is placed in the fridge. Also putting out bid up sugar
could prevent separation.
10. Assemble The Sweet Potato Cake: It's time to assembling
the k. So get your subbing play and place one cake layer
corners having play. And apply the mix here
up that you made. I tried to soak in the
sponge completely. And then piping the
sweet potato feeling. I'm gonna start from the center. As always, I'm going to
leave a little bit of gap. Decide. Okay, I'm going to spend a little
bit to make it even. Then I'm going to add the
second layer of cake. So King with a
sheila sera, sera. Again, five sweet
potato feeling. Flatten the survey. Then place the last piece of cake layer on the top of the k and soak the sponge
at the sirrah. Let's cover the k
with whipped cream. So put the whipped cream
on the top of the k. Gradually spread the cream on the side as well. So for the side, I'm kind of holding my palette
knife like a particle. And again, one side
will be touching the K. And my left hand is
just turning the table. And my right hand is not moving. Just telling the table. I'm going to add more cream on the side to prevent
this transparent. Let's place this k in
the fridge upon for 1 h. Let's clean the
serving plate. F. To clean your plate, we can add crumble the side
of the k. So let's do that. So we are ready to
decorate the top of the k. I would like to show you how to
decorate the type of k as a flower shape. For this, I'm gonna use
this kind of shape of nozzle and small piping bag. So let's put the nozzle inside. So make sure that your nose
is perfectly fit inside. And let's put the cream
inside a piping bag. Let's flatten the piping
bag with this scraper. Do it one more time. Let's cut off the tip. So we're going to pipe this flower shape from
the side. Let's start it. I'm trying to layer
this flower shape. We're flower. Don't
press too hard. Just naturally press it. So the cream comes out nicely. You can ask just
amount of green. If you're not a big fan of
reading a lot of green, you can add a little bit less. To finish this equation, I'm going to use
this edible flowers, which I just got from my garden. You can use any
different type of flower that you
prefer. Let's do that. To give more contrasting color. I'll use this mentally. This is our finite
k. As you can see, it has a beautiful
flower pattern. I use very simple and
easy piping technique. But at the same time it looked pretty elegant and beautiful. I'm gonna keep this Gag inside the fridge for half an hour. So the cream will be
sad in the fridge. And then I will show you how it looks like from the inside. From the center, we're
going to slide one cake. I'm gonna transfer k
one disturbing plate. To finish the k, sprinkle some
icing she learned the top. This is our final
K. As you can see, all the layers turn
out very evenly. And actually this is
one of my favorite K. I'm gonna show
you the texture of the cake, but amazingly tasty. I hope you enjoyed your recipe and I hope
you'll try it as well.
11. Ingredients For The Genoise: In general, there are three different food to
make a general as pij k. Each meso makes different
texture of the k. This time, we're going to separate the
yoke and the egg white so we could make the most
structure and then sponge cake. I personally like it the most because of the texture
of the sponge. So let's begin to introduce the ingredients for
the genuineness punch. In this recipe itself, raising flour cause
damage costs. Ashuka egg, white egg, yolk, butter, milk,
and baking powder. I'm going to save
the dry ingredients. Self-rating flour, corn
flour, and baking powder. I wanted to give a
lot of air inside. So I'll let this
dry ingredients. I'm going to bang married
and butter and milk. So in this bowl, I pour hot water already. Placed the marine side. I'm going to put
a miracle in it. So basically I'm just trying to melt the butter with milk. It can simply microwave it. Instead of doing been married has melted with milk almost. I'm going to set it aside. Let's prepare a cake
tin with baking paper. I'm using a cake tin, which is this ten
centimeter size. And I'm going to
cover it with begging PayPal bought them and
on the side as well. So basically, just for the baking paper and make the cone shape very simple. Just measure, decide, lovely, and make a mark. So you will be
able to cut it off its leash and prepare Caesar. I have a scissors here and
I'm gonna just cut it off. Followed a mark. I make this status by listening. I'm bigger than it's
supposed to be. But actually it looks better
because after you bake, it is much easier to take
off this baking paper. Okay? I'm gonna spray oil on the side. I haven't two strips or baking paper. They're
going through it. It's perfectly ready. And please don't forget to print your oven for 180 degree. So the K could be
erased beautifully.
12. Making Geonoise Sponge: Prepare a clean bowl and made sure that the bowl is
clean without moisture or dust in it with the British sugar
until it becomes stiff stage for that ad they
should bind to three times. Let's start whipping the egg
whites without sugar first. Before putting the show girl, I'm gonna put a
little bit of lemon, lemon juice, just food drops. So when it's get
wide bubble foam, we can add one-third
of Sheila and now I can make a
mark on the top of the moraine so I can add
more Sheila into it. I can feel the mores
structure and heavier. So I will add the rest
of the sugar into it. So as you can see, the pig is not straight, but it's class structure. I don't want to over
with the moraine. This is perfect consistency. So this is about medium,
stiff peak stage. So this is perfect
consistency for the k tau and the below table. And add the egg yolk into it. Just give it a mix. It's okay to be
not make it fully, but we should avoid over mixing. I will add the half of the dry ingredients and mixing
it all the way through. Be gentle and tried to walk fast to prevent
full marble lamp. I'm going to start
mixing from here. Since all the powder
back makes with marring. So we can add the
left dry ingredients. Just gently falling through. Okay, I'm gonna stop
mixing it in milk mixture. We're going to just put it over. And I'll add a beta of
cake batter into it. And just mix it, well, put it all over the cake better for the true class as much
as you can, but be gentle. Okay, I'm gonna stem mixing it. So let's put it
over the cake tin. I'm going to bake it for 165. I beg, did beautiful, gentle as well,
about half an hour. So I'm going to let it cool
down another half an hour. And I will remove the cake tin. Let's remove the cake tin. I'm going to let it
cool down for an hour. We can slice the jealous
into two pieces. Let's cut off the table. But we do not really need
to cut the bottom part of the K because the bottom part is also very soft and fluffy. Since we're not using
the cake leveler, always better to make a
cutting line on the side of the K class smoothly. I'm using a bread knife, slice vertically. Now, if M I make small
size of genderless punch. If you have a ring cutter which is about 14 to 15 centimeter, you can use that either. We can make an outline
paper like this. So this paper is all bond for ten centimeter size is very
straightforward to make. This make a cliche
and check the length. So it's about seven centimeter. Knife cut off the
paper with scissors. I'm going to draw the line
with this small knife. We have two different size of Genoa sponge is all
nicely prepared. Let's set on the side.
13. Vanilla Syrup And Simple Preparation: To make vanilla sugar syrup, prepares sauce pan
and the water. She'll get a nice mix. Once they start Boyle, I'm gonna let it for three to 5 min until it gets thicker like
the same texture. I'm going to get thicker
like a therapist. It's been about 5 min. I'm going to turn off the heat. Transferred into a glass. Smells so good. I'm going to let it cool down
on the bench for the gray, wash it nicely with water, and remove the
water with a towel. Then we can add color into how I pick a grade that
is big and constant, Shay, I'm just going
to cut into half. Not many of grades, just 15 of them. We're gonna start
with the cream. I prepared a cold water bath
with these ice cubes in it. So these things really help them prevent separation
of the cream. The prepare a clean bowl
and put them all in there. I'm gonna put a thick cream and sugar in it. I'm going to start
from the lowest paid was all the
ingredients I combine. I will increase this bit. I can see that the
cream is ready now. Saying the texture of the cream. I love to show you the
texture of the cream. So this is a medium.
Whipped cream. Cream is ready. I
prepared cold water in a bowl and I put one ice cube in it to cool down the water temperature
is always better. I put one-by-one. So it doesn't stick together
to prepare a sauce pan. And we're going to add 50 g. Yogurt in it and
turn on the head, make sure that the
heat is slower. So Toyota is Guam
up very nicely. I just turn off the heat. This is the gelatin lift. Squeeze out all this clutter. Put into the sauce pan. So that gelatin leaf
cut makes yogurt. Now I'm going to
transfer. In trouble. We have whipped cream gelatin live with little bit of yogurt. And this is low
temperature yogurt and paste, and then lemon. Now, I'm going to add the gelatin if mixture
into the yogurt. Give it a nice mix. So it's mixed nicely
without any lung. Now I'm going to add
it into the cream. So it's all mixed together. Now, I'm going to add lemon zest and the cream is ready. Now, in the next video, I'm gonna show you how
to assemble the cake.
14. Assembling The Cake: Okay. We need a K Green
and I'm after they shift. If you don't have an answer
that ****, Don't worry. Instance prey on the keg ban
that you're going to use. Put one slice generous
on the bottom. So this generalizes
the bigger one. So can we serve is very
important to make a soft moist k. So give enough
time for sulking. Once they finish this. Okay. We can arrange the grades. Make sure that the
grave is take on the effect that the
shade or your cake ring. Make sure that there is no gap between the cake
ring and the grades. Okay. I'm going to Florida cream until I can see the half of the gray on
the side of the ring. Put the green grades on
Done cream one-by-one. I'm gonna apply more cream onto the grapes and
completely covered. Place the smaller
size of degenerate. Press into the bed. Something like the
Bonilla Silva Sarah. The sponge is
completely submerged. Sugar syrup. I'm going to add more green on
the top of the cake. Spread a little bit. It can use a small size of COPD palette knife to make the surface clean
and smooth late. Let's place the k in the
fridge for four to 6 h. It's been about 6 h is nicely. So we're going to
remove this cleaning red and the foil on the bottom that's removed by rain
and the acetate ****. Look at this beautiful
patterns of grades. Oh, is it Gregson? Nicely organized?
15. Decorating The Cake: We cannot make whip cream
for the decoration. Measure that the
cream is cold enough so we could get really shiny,
smooth, textured cream. For that, I've prepared
a cold water bath, and I already put a minute. I'm gonna add 20 g of sugar and then paste. I'm gonna whip cream
until they become nice. Medium stage. We didn't pick stage. Somehow medium whipped cream. I wanted to show the
texture of the dream. So is hold the shape
is still soft. This is perfect consistency. So our cream is ready. Let's put the cream
into the piping bag. For that, we need a piping
bag and smallest size. No. I want to show you
what I share with nozzle. I'm going to use this j. So basically it's curved
and narrow opening number. So either you can
use this trait one. So let's put a nozzle
into the piping bag. I'm gonna use these Craig Berg. Get rid of all the
bubble inside. Ready, we're ready
for like curation. Before you start by pink, make sure that this part of
nozzle goes to the boardroom. So it should be inverted
S shape. Let's start it. They can see all the pedal
has different shapes. Some of them are B and
some of them are smaller. So it always looks
better if you give different variety of the size. Let's make one more layer. So it looks more like
a beautiful flower. Let's decorate the cake
with grades and flower. So I just got the
grades into half size. And I'm going to squeeze out a little bit of lemon juice on it to prevent oxidizing
of the grapes. If you're selling
the CAG in the show, It's better to keep the
grape in a whole shape. But if you're selling
the car immediately, it's better to cut into half because it looks much fresher. Just keep in mind, the brown part of the
grade goes to the bottom. So it doesn't really shows when you're putting the
next layer of grades, put it in between two grades. Just like this. To finish the
center of the cake, make sure that you are using
the smallest size of grades. It looks much better. Another great decay with some
edible flowers and leaves. Let's slice the k. So I prepared hot water and a sharp
knife, small tau. So put the knife
into the hot water. Just wait for few seconds. Okay, then I face warm enough. Remote access border. Again. Let's travel further
K on the plate. This is our finite
k. The reason we got the smallest size of
sponge is because of that. I wanted a cream
fill up the side. So you can see this pond
when you cut it through. This is our final kick. I'm really happy with this. Gay. As you can see, all the layers nicely organized
and it's very evenly. It's very delicious. And it's one of my favorite
cake to make him summer. Thank you for watching. Acidity of the yogurt, balanced the sponge and cream
really well, and degrades, give a very fresh texture
and paste is very delicious and is one of my favorite cake
to make in summer. Thank you for watching.
 Lilly IN, Pastry Chef - Le Cordon Bleu