Transcripts
1. Intro: Hello, and welcome to
Beginner woodworking. I'm so Cow Woodgal and today we're going to tackle
a super simple, super quick, and
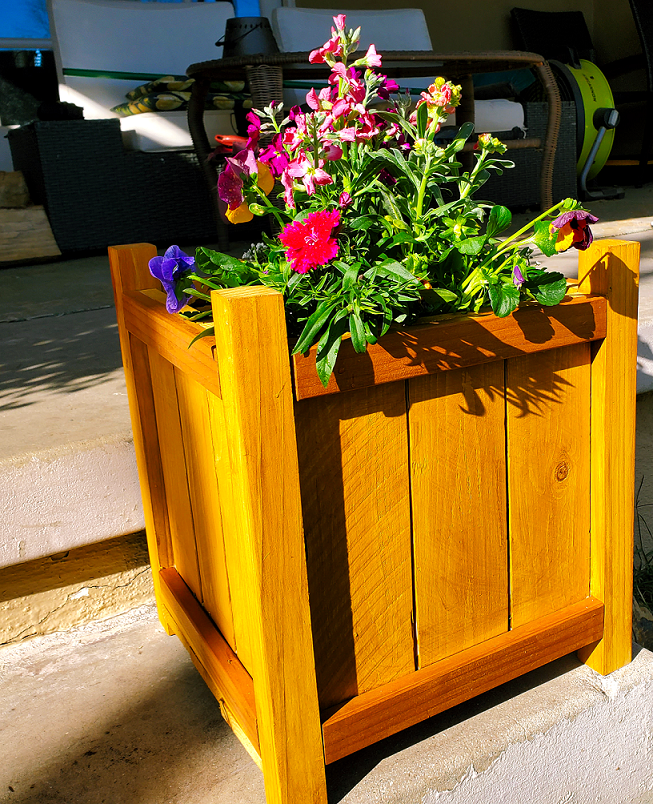
super cheap project, a cedar planter box. This class is appropriate for woodworkers of all skill levels, and only a few basic
tools are needed, including some form of a saw, whether it be power or hand, a sander, a hammer and nails, or a nailer, or a pocket
hole jig, and a drill. That's it. We'll go over what
we want the planter for, the design and measurements, the supplies needed, cuts, assembly, and finishing
of the planter. Buckle up buttercup because
this project will only take you an hour or so and
around 25 bucks to make. So what are you waiting
for? Let's die in.
2. Overview: Love planter boxes
because they're a simple way to really
upgrade your entryway, your porch, your deck, or even a wall in your yard. We're gonna make
ours out of cedar because it's naturally rot, weather, and insect resistant, which is perfect for
outdoor curb appeal. For mine, I want
it right next to my front door so I can
place my fall mums in there as a
welcome greeting to visitors or change it
out during the season. What are you going to
use your planter for?
3. Design: I'm putting mine
on my front steps, I'm going to measure the area to see what kind of space
I have to work with. I'm also going to
check the size of my planting pot
that will go inside my cedar planter to
make sure that I can cover the height
and width of the pot, and just the pretty
plant will be visible at the top
of my cedar planter. If you want your plant or flowers spilling over
the top of your planter, this is particularly important. Like mine to be about 15 " tall and 13 and a
quarter inches wide. I'd also like there to be
legs that extend above and below the box portion of the planter, about
an inch and a half. Let's do some calculations. To keep the cost down, we'll
be using cedar fence planks, which are less than $3 each. These will be the sides and front and back of the planter. I'm going to use
Redwood one by twos for the top and bottom supports,
which we'll call aprons. If you'll remember,
we talked about the extensive use of aprons in building a
simple table class. Do this because my
big box store doesn't carry cedar one by
twos or two by twos, but the redwood option isn't too cost prohibitive
and is also rot, weather and insect resistant. We'll use redwood two by twos
as the legs of the planter. Just to note, these
two by twos are actually one and three
eighths inch wide. They don't sell
the typical two by twos at my store in
the redwood variety. So let's make the
legs 15 " tall. Sides and front and
back, let's make 12 ", which is the 15 inch
height minus the 1.5 extension at top
and bottom of the legs. Cedar fence planks
are 3.5 " wide, so we can fit three in
between the legs nicely. Remember to account
for the width of the legs here in
your measurement. Since I want my planter width to be 13 and a quarter inches, I'll subtract two and
three quarter from that, which is two legs with each width at one and three eighths, giving me 10.5 ", which works great for the
combined three fence planks. We'll also use that
10.5 inch measurement as our aprons at the top
and bottom of every side. Since the sides and
front and back are 12 ", we'll make all those
fence planks 12 ". For the bottom, we'll want to span the distance
from apron to apron, since that's what we'll
nail the bottoms into. So we'll have three
planks there at 13.25 ". Up next, we'll go over all of
our supplies and materials.
4. Supplies: Now that we've got
our design and measurements and we know
what we need to buy in wood, we can determine
all our supplies. First up, we'll need three
cedar fence pickets. Choose the ones that are
five eighths inch thick and 3.5 inch wide and six foot
long with dog eared tops. We'll get one redwood one
by two by eight foot, which is actually five
eighth inch thick and one and three eighth inch
wide and eight foot long. And 12 by two by eight redwood. If you don't have them
already, you'll need nails and potentially 1 "
pocket hole screws, if you'll be pocket hooling. I found these panel nails that works really
well on this wood. You'll also, of course,
need your drill if you're using the
pocket hole jig. We'll also use wood glue and some sort of fence stain
meant for outdoor use. You can choose a
tinted one or one that is more natural and let
the wood do the shining. For our tools, we'll
need some sort of saw. You can use a handsaw, jigsaw, or my personal
favorite, a mitre saw. We'll also need a
sander or sandpaper. You'll need either a hammer and those nails or a brad
nailer and 1 " long nails. If you're not using
a pocket hole jig, you'll also need two
inch long nails. Finally, you'll need a brush and gloves for
applying the stain.
5. Cuts: And now it's time
to cut our wood. We'll start by cutting
our four legs from the two by two redwood at
15 inch long each. Next, let's cut our aprons
from the one by two wood at 10.5 " long each.
We'll cut eight of these. Then cut 12 fence planks at 12 " long, and
with your last bit, cut three pieces at 13.25
" long. Super easy. That's all your cuts. I've got a buy and cut list uploaded
to Project Resources, so you can reference
that as needed. And also, if you don't
have a miter saw and you need a little bit of a primer on how to use different saws, then go to one of my other
classes where I give a super thorough overview of each of the saws
that you can use.
6. Assembly: Before we get to my
favorite part of assembly, let's give a quick sand
to all our pieces. I'm not super worried
about this being buttery smooth as
it's for outdoor use, but if we get some of
the roughage smooth now, we'll have less or none at all to do after
it's assembled. And that's a win in
my efficiency book. After things are sanded down, give your workspace
a little cleanup. Alright, we're going
to either pocket hole our aprons or attach them
with two inch long nails. I will warn you that five
eighth inch thick material tends to break the surface of the wood when attaching
with pocket holes, so you have to be
pretty careful with it. If you'd rather not
deal with that, just use the hammer or
nailer with two inch nails. Pull out your pocket hole jig, set the depth of both the jig and your drill bit
to five eighth inch. Set your apron in the
jig and drill one hole. Do the same to the
other end, making sure to keep the holes
on the same side. Do this for all eight aprons. Now, we're going to attach
the aprons to the legs. First, mark the
legs at 1.5 " down from the top and 1.5
" up from the bottom. This is our placement line
for the top and bottom apron. Set the legs on your
bench and line up an apron at either
the top or bottom, leaving the 1.5 inch
extension above or below. We want that apron flush with the outside
edge of the leg, so we're keeping them both face down and pocket holing
from the inside. This also effectively
hides our pocket hole. Glue the ends of the aprons, drive the 1 " pocket
hole screw into the leg, being super careful
not to blow through the wood on the legs as the
screw makes its way through. Drive in the other side. Do the same for the top or
bottom on all sides. If you're nailing, line up
your apron and leg as before, glue the ends and hammer
or shoot a nail in from the outside edge of the leg into the apron. I do two here. Do this for all four
sides, top and bottom. You should now have
a skeleton box, which is your framing for the
fence planks to attach to. Lay your planter on
its side and place a 12 inch picket on the
frame and nail it in. To up top into the top apron and two below into
the bottom apron. You can do this with
a hammer or nailer. Be sure to use 1 " nails. Place another plank next
to it and do the same. Now place one at the end. Nail in. Do this for all
sides of the planter. Finally, we'll put on the
bottom of the planter. Take your 13 and a
quarter inch pickets and place them on the bottom, spanning between bottom aprons. Make sure to nail
into the apron, not the fence pickets on
the inside of the planter. Glue this first where it
will sit on the apron. Nail it top and bottom. Up next, we'll
finish this bad boy.
7. Finishing: I already sanded before, I don't see any need to do any more sanding at this stage. That's just how I roll.
I'll go ahead and wipe down the planter to
prepare it for stain. Mix your stain, then dip your brush into the
stain and apply, making sure to wear gloves
to protect your hands. Brush on the stain evenly,
and after a few minutes, if you have any drips, wipe any excess stain with a
shop cloth or paper towel. Let this dry fully.
Check your can for re coat and dry times. Gonna be placing a
potted plant in here, but you're welcome to line the inside with landscape cloth, stapling it to the sides of the planter and filling
it with dirt, placing the plants
directly into the planter. Whatever suits you,
just make sure to poke a few holes into the fabric if needed so water can
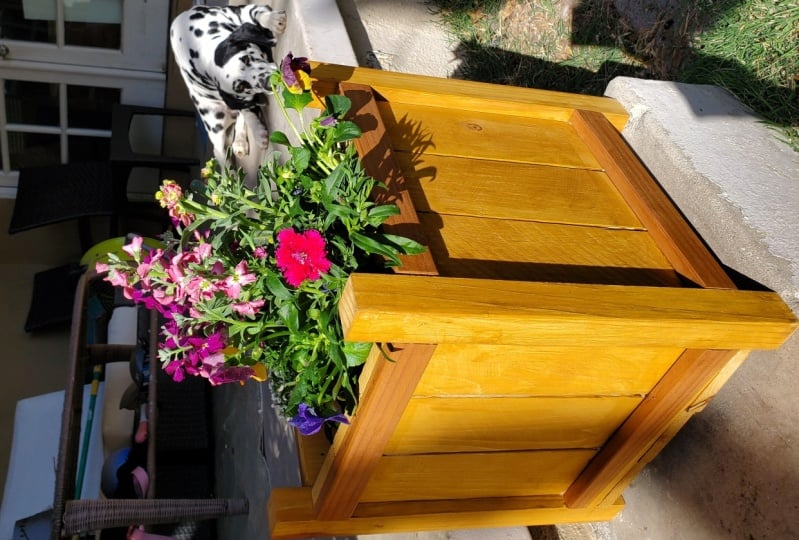
drain out the bottom. Put in your flowers or plants
and admire your handiwork. And perhaps make a few more with all the time and
money that you've saved.
8. Final Thoughts: Okay, how easy was this built? Amazing what a handful of
fence pickets can make. Incredible. I hope you'll
make more of these. And if you can, please post
yours to the project section. It's so cool to
see what you make, and it encourages others
to make their own. Also, if you get a chance, if you found this
class helpful in your woodworking journey,
please post a review. Reviews are the way that
students find my classes, and it truly helps to spread the word of woodworking
empowerment. I really appreciate
it. Meanwhile, I think I'm gonna make a few more of these planters as gifts
from my neighbors. Until next time, keep building.
 Brittany Joyner, SoCal WoodGal