Transcripts
1. Introduction: In this online course, you're gonna learn to create your own Internet of Things
device with an ESP 32. The next few minutes,
we're gonna create an Web Dashboard on
un-free to use IoT program and also create the proper
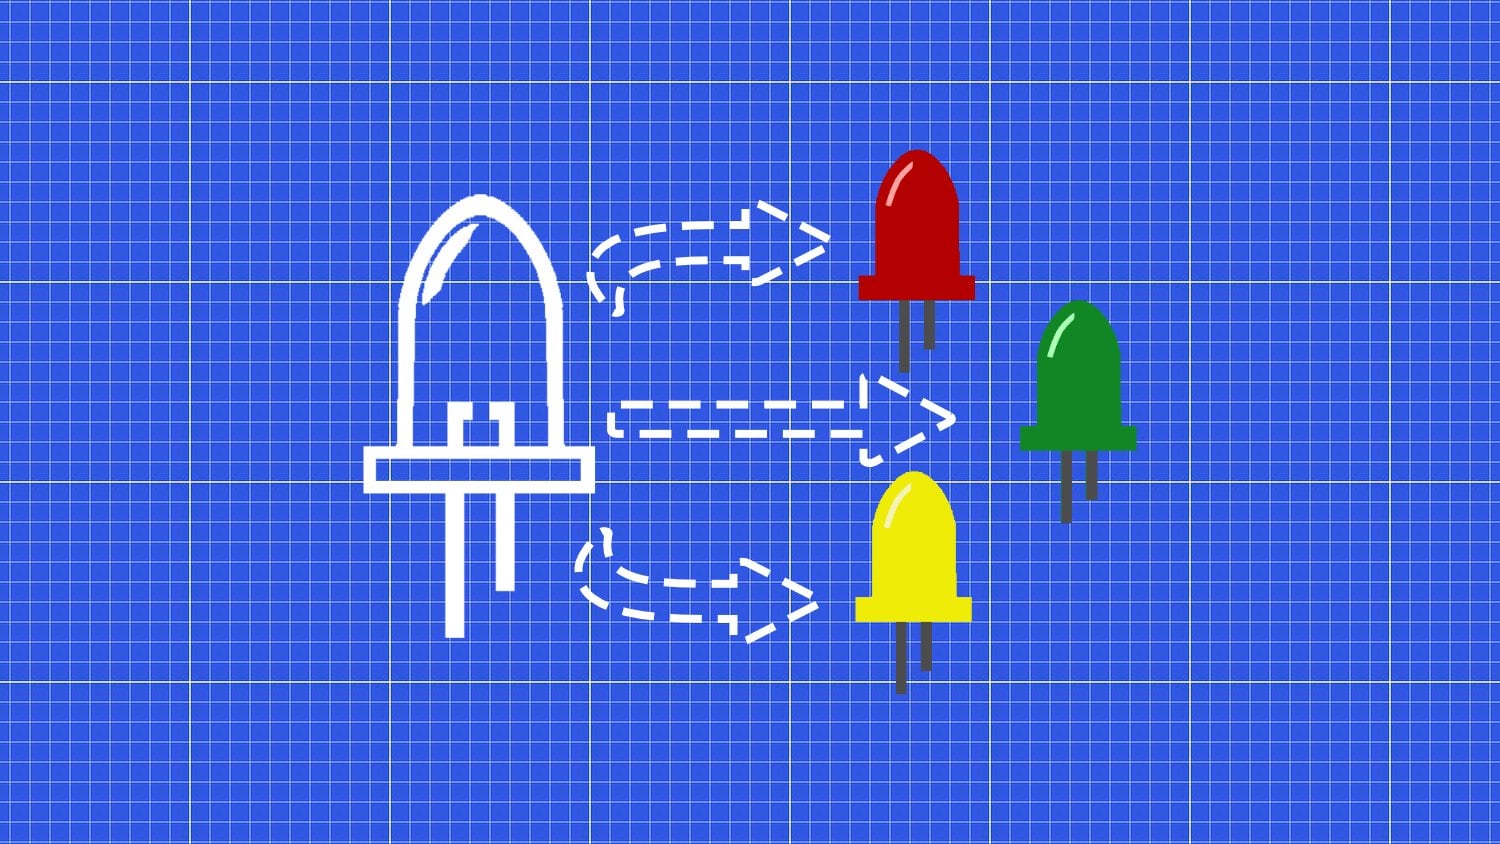
sketch so that you can control here an LED or from the
Internet in real-time. Also can manipulate the
brightness level of the LED. And we are sending
real-time sensor data from our Arduino to the web dashboard and visualize it afterwards. We're also add some
optimizations that went on. Thresholds will be reached. Then we get the notification
on our smartphone. We're developing the
Arduino code step-by-step, and all codes are
available for downloads. I'm looking forward
to see you in class.
2. Free IoT Brokers: Let's start with
some quick over you. Blink is one of
the IoT protocols, which I think is really, really handy because they
have a good library. And also we can
start right away. The next cool thing is
they have a free account. That means we can
connect two devices. Five uses maximum basic widgets, but it's enough for us. And also we have one
week of historical data. Bus pricing sources is by $5 each month and
have ten devices. It's awesome. Reasonable
price when you want to add more devices to you. Blinker count. But there are also other IoT protocols
which I can recommend. And F If you have
steam one setup, there were all in the same way. For example, thing i o, It's also nice platform where
you can connect with you ESPs and make some
nice IoT devices. Thing i o is more in the m
CPU and Tegea environment. It's not so straightforward, but also easy to use
when you like MQTT. And I also can recommend
these because all of these platforms has been
having free account. And this is in my opinion, always a good way to make the first experience
and afterwards. You can also choose if you
want to go pro or not.
3. Wiring: Let us jump right
into the wiring part. I have fear, an ESP 32
and temperature sensor. The 112 resistors with 300
ohms and ten kilo ohms, one LED, and a few
jumper cables. In general, here I have
connection to five worlds to ground the four pins
of the VHD L11. The first one is
connected to the VCC, him to five-year-old,
for example. The second one is the data line. We are connecting the data line. For example, GPIO. Twenty-five, GPIO means general purpose input and output for our ESP 32. And also there is
recommended and ten kilo-ohm resistor going from
the data line to their BCC. It's pull up resistor
so that we have in good sign on our data line. The certs pin is not connected and default pin of the DHT alignment
goes to grants. Then on the GPIOs 32 I think is that we're
going to the resistor. The resistor output in our
LED him to the anode and the blood side and
the cathode or the minus side that
goes to ground. That's on what we have here. So the main purpose
of this sketch, or if this warren part
would be that we sent the data of temperature, humidity date down to
our blink website. And also that we can manipulate and switching on and off the
LED via the web dashboards. So let's focus on the
varying part here. So I feel the components. And now the USBE certainly tool I have
here, the developer port. I think in a second, can you also can
use an ESPN 8266, but then be awhile you have
to implement other libraries. First of all, I make
the connection. Similarly a bit in.
Make the connection from five volt pin to
glass on the breadboard. And also with the grounds. Also I recommend to look at you are pinouts
because I have fear. The second pin, knot and
ground It's a cmd pin. But I saw an add-on pin outs from the ESP sorted to the
second opinions grounds, my ground pennies here. So let's check your pin outs according to your
ESPN so that you have the proper and right pins. This is our ADHD 11 project
will also work with ADHD 22. This one has not
so much accuracy, but for our project
It's totally fine. Sticking. Dan. Fear some short circuits
for making the connection. Then we're going to get
the first pin two plus. We have also the last pin, two minus or the ground pin. The second goes the data pin. The data bim goes to Let me see, Twenty-five.
Twenty-five is here. And also we have ten
kilo ohm resistor. Ten kilo ohm resistor goes to Vcc and that's disconnection. Then once again, the
output sir 72 or think goes to the resistor and the resistance jumps over to the next part of the breadboard. And then I have feared the LED and steady long opinion
would be the plus poem. Smaller than d plus, minus. We're connecting the minus side. So the ground off
debt bradyzoites, That's our finished circuits. So once again, connects plus and ground from the
ESP into the breadboard. The first pin will be the blast. The second data pin is not
connected off the DHT E11. The last one is two,
goes to the ground. Also add ten kilohm pull-up
resistor to the data pin. Pin goes to G 25 and the
LED goes from GPIO. 32. Resistors reentered
ohms, the LED. That's what we want now. Short little circuits
for our IoT device.
4. Datastreams: We are now back at
our blink website and I'm assuming that you
have already registered, you set up an account
and logged in. And it then you should
see the same website, nearly the same website
as I have here. Let's jump right
into the templates. It should be on the left side. And I already have
one template here, but we are going to the right top corner and
creating a new template. We're typing here in the
name as you would like. Here, we have two options. The hardware under
connection type, I always are only use
wife team so far, and it's a hardware
you can choose here, your microcontroller,
for example, ESPN thirty two, eighty two, sixty six or also at respiratory buyer can add a description and
then you hit done. Now we have our main template. And with this template
we can organize ourselves also the virtual
pins and the web dashboard. And this is what we do know. We have a felt their
configuration and disinformation. We get a little bit later
so you can copy it, but you don't have to. We are jumping now
into data streams. The data streams
are the connection from the dashboard to our ESP, where now connecting
virtual pins here on the dashboard and later on in the sketch so that we can hear fear and data exchange. The main purpose will be in this project that we switch on the LED and also within
slider changed uprightness. Therefore, we need two
data streams, virtual pin. The first one will
be brightness. I select virtual pin one. We are only taking into churn this example and
we say 0 to 100, sera means completely dark and 100 different brightness can also define them default value. If you want to. Under advanced, I would like to turn
on switch with latest. So we're really every time
device connected to the Cloud. That's really convenient. So you always get the
last state of your LED. Then click on Create. We're making new data
stream because we also wanted to switch
on and off the LED. Therefore, we are defining
LED, making an wheat, for example, integer min, max one because we
only need two states. And I also want to
define sync with latest. And the default
value will always be theorems or it should be off. Dan, click on Create. Let's all what we need so far. Then. Don't forget to
click here on safe. And now we have already
insert our two data streams which will be later connected in our sketch
for the data exchange.
5. Web dashboard: As a next step, we set up our web dashboard
here on the menu, and we'll click on Edit. And T, We have a few widgets. Not all are available for us because it's in
the basic version. We only have fewer and
slider, for example, drag and drop it here into our dashboard and
also and switch. The main idea is
that we set up now and the communication from the
web dashboards to the ESP. And later on we're
also sending data from the ESP and visualize
it on a dashboard. But this will be the first step. So Trek and dropped the
elements here on the dashboard. And when you hover
on the widget, there's a gear symbol. Then you click on the stream, we're selecting brightness were already have defined here. Everything click and save. The switch. Choose source, LED. We too safe. Don't forget to save on
the whole dashboards. And that's all for making a template for the
VAP dashboards.
6. Add a Device: So now it's on the time that
we are making the next step. So we're clicking on
search or under main page. And we want to add here and device on the right top corner, clicking a new device, Dan, we're selecting
from templates. Choose template. We are sent drop-down menu, click on it, select USP to LED. Device name already inserts, and then click on Create. Here we have our secret
source because this is what we need afterwards for
the USB connection. Now I can show you here are the dashboard which we are already implemented
in the template. And this is now
where afterwards we can make some changes. But as you can see, my device is not online. That's because we haven't
got implemented it. So we are created in
template and device. And in the next video, we're
gonna set up this sketch.
7. Libraries and compatibility : Before we start
with decoding part, I would like to introduce you to the main
library of blink. I give you the link also. It's attached in the
sketch by itself. But what I would
like to focus here is we have fear examples. Now we can choose, for example, board swiping. Here you have a lot of
examples for node MCU, for ESP 8266
stand-alone, it's at. And I'm using the
ESP 32 WiFi example. With this sketch by itself, you should make and
connection to the blinks out, which we do later on. But just go through
the main basic steps. So we have here and
define a serial. We may can, we feel we have to include
three libraries, Wi-Fi, wi-fi client and the blink simply ESP certainty
to them which already included one you have included are in starts
the whole Blink library. And then we have to
define three variables. The char for SSID and password
is for your local network. And TEA, we have also a char out variable
for the outs token. Once again, I'm switching
back to the blink sides. Don't mix it up because
here it's undefined. Declare it a little
slightly difference. But keep in mind, use this chart elements and
then you're in a safe site. Then in the setup, just
we making a book Blink begin with the
author variable was the SSID variable and the pus. And that's all
what we need after we make it run in the loop. And then we have from
proper connection to the blink website. Nevertheless, if
you're using the ESP 32, it's pretty straightforward. But as you can see, there are lots of
other examples. When you have another
microcontroller.
8. ESP32 first connection with Blynk: Let us now start with
the coding part. And my approach is dead. I'm always saving after
each video my whole sketch. And I give you always the filename at the
beginning of the video. And now we will start
with several, one. And I also created here on file, It's called micro-credentials
dot h. When you create this file and then
you open your Arduino IDE, you can see yours and second
top where you can omit. And in this topic, I've included my
credentials in this form. Here is my SSID or
my passwords and my alt key from the website, from the blink website. This is what you
also can include, but you also can
include it here. In main sketch. With includes. You can add the file
into the main sketch. Don't forget to select
the proper board for you. Yeah, and the board manager
and the Arduino IDE to him, you can install, for example, these be 32 core. What we have to do now is we're going to the library manager
and you're typing in Blink version from below the mean demand skier
is the right one. When your insulin the blink. Then you also can add snow building library
for the ESP 32. So let us start with
domain D defines, first of all, blink
several prints. Then we're defining here the
template ID and the name, but I have to switch back. What's the template ID? Afterwards, we have
to include the Wi-Fi. Wi-fi clients should be
included in the core. If you have not getting
uncomplaining error, just go to library
manager and install it. Now we've already included the blink simple
USB 32 should be, I think it should be everything going do
a desk setup apart. In the setup part, we now make
the connection to deserve. This will be happened
with the blink begin off SSID and pass is
in the credentials. In the loop. We're typing in Blink run. Let's give it a try. If I've misspelled, maybe
it's something I mistyped. Then compiling. Compiling. Looks good so far. Then, what do we have here now? Let's see it. Connected, of course, the
USP and toward my PC. Then we click on the indices and monitor. It's connecting. And it's connecting
to my wife team. This is my temporary IP address. And here we see the blink connection is
successful. You are very good. If you have some troubles, then check once again your
credentials from the blinker, authToken the template ID, and be aware of the variables
for the connection. It should be in this format and then you should have
and simple connection. But it's, nothing happened because we have
nothing implemented, but the connection is right.
9. Get Data from Blynk: Now we want to make
and data exchange run the web dashboard to our
USP and with my new file, 0 to one, where only needs to add a few lines so that
this could be happening. You can see obviously
here in green dots, that means that the ESPs already connected
to my dashboard. Now we're jumping above the white setup part
and we typing in the blink right inside this
blinker, right function. It means that the sketch will be monitored
in the background if there is some
changing our diet data incoming into now a weekend, simply assign a
temporary variable, for example, a pinwheel you. And this will be
always the same. We type in Param, this is the part of
Meta which will be transferred from the
dashboards to our sphere. Then we typing in as an
integer because we want an integer and
just print it out. We one where you
stand and print line. And then the LED is also value from 0 to one. So we copy function here
pasting in, changing to F. We could also leafed a temporary variable PIN value because it's insights
the function. And then we say ReLU is,
let's give it a try. Uploads the whole sketch, and then we should
make some changes. Catch his compiling
and uploading. No typing errors. Uploaded completes. Then we opened a ceremony
Tom, connecting to homebase. We are connected. Now. We should see when
we turn on the LED, we should have an one off. Very, very good. And also here
when we change the slider, we should get here some values. And as you can see it with these few lines we have here and real-time communication
exchange from an Baptist sports to our ESP 72. So easy. So first, in the next video, we once now really interact
with our hardware parts.
10. Change LED state and brightness via Internet: Now let us interact
with the LED. And therefore, I would suggest if you want
to follow me along, I've created a new file, three, and now we have to define at the very first
beginning on Rich Pin, we have our LED and therefore
integer, for example, LED pin, and it's
their pinna 3232. In the setup part, we have to define pin modes. It's called LED pin, and it's an output. Let me see if I've
outputs should be an uppercases dip in O-chem. Then we could now jump into V1. And then we say, we do it because we do is to switch leaf to print earlier. For debug propose if
PIN value is one, then digital rights too high. If Sarah, Digital
LED pin is low, send it to the device. It's finished, upload it. Then we're going to the serial monitor connecting
the device once again, switching the camera split, we can see something. Now when I'm clicking here on the LED, it's
in front of debts. The ADD pattern. Then you can see at
the serial monitor we centered one and also the LED. Will it go on? I think the first thing
works really well. Now, what do we want to do is we want to change the
brightness of our LED. And therefore, I would suggest we have to add tier and other
Librarian for the ESPN. When we want to make some
changes to the analog rights, then we have to include
here Awesome library. That means analogWrite
is an SP 8266 included. Here. We have to include
it and it'll rights. Just download it on from
the library manager. Now, first of all, we have also changed yet
a digital rights. So for example, analogWrite were sent here and PGM signal, that means we can send not also, not only a digital, digital value means 0 or one, but now we can send from
one to earn that 55, for example, different
invidious bright LED pin. And when we want to have fits very proud to be sent to 255. Low will be here as 0. The same thing we
could now apply here. For B1 means we are seeing
analogWrite LED pin. The pin value will be here. The value will be
the variable from the pin value of sum.
Now changing here. That we also can see here
the LED am a switch, but we are stuck to the
brightness layer is so therefore, when our null passing the
value of the pin value will be only can change
values from 0 to 100, but the LED can have
states from 0 to 255. And therefore, we also have
here another function. And the function
what we want to use is east and mapping function. So for example,
we say Nu is map. This mapping function
will have five integers. The first will be the
variable which we put into the function that's the pinwheel
here from above. And then we can see
from low, from high. So our lower, the
pinwheel is 0 to 100. We remember we can hear
change serum to 100. This value should be
changed from 0 to 255. This isn't a convenient way. Then we are writing
the analog rights with the new way Lian,
uploading the sketch. And then we should
be able to see, hear and fading
effect when we change the brightness slider up
on our lab dashboard. So we have 255 different
kinds of states which LED will be
turned on and off. So how about my piling
progress or progress? Not very far. There we go. Let's see. Uploaded. Making the hardware sets
connected to homebase. Readier refers to a website. Then LED on LDF works perfect. Led on. If you can see
here a slight change. 15%, 80 percent, Sarah
will be turned off. Then I can turn it on with this slider because we're
making another look right? Then when I'm switching
on LED switched, I need to jump to 255 and we can turn it off with the analog
write brightness slider. Very nice. As you can see, simple, simple methods with
brightness and switch and implemented in a real-time
Internet environment.
11. Sending sensor data to Blynk: In this video now, we
want to make an exchange from their DHT 11 temperature, humidity and will be sent to our dashboard
and also visualize it. Therefore, we have to add
something in our templates. Templates years BY 32 LEDs. We go to data stream
and we click on Edit and we add more pins. For example, temperature. Who came is there also WAS okay, min, max, advanced sink,
not daunting kids. And the pin is three. Then we add a new data stream, virtual pin, which
would've been for whom? 100. Some units. Let me see. Millimeter kilometer ground
milligram quota seconds, Celsius. Interesting. Then. And one under default value on, looks good so far. Then we say Fitz, update the active
device continuum. Switching back to
our device now, before we go to dashboard, because we want to
edit something, for example, drag
and drop one gouge. Click on the year, some boom, we're choosing here. The temperature. Title is temperature on congested duplicated data stream for we can choose to color, I would like a blue one. And tier I would like
to have an red one, orange safe safe Update device. Going to my device. Espn. We have now our dashboard. But of course we haven't implemented anything
in this sketch. Therefore, we are
going back to false. Okay, that's better. So let us see that we get
here in our sketch some data from our bed here
from our sensor. We have to implement
also an library, and it's called the DHT library, just downloaded through
the library manager. Then we have to define
here to thinks the pin and which sensor type there is also an ADHD 22. More accuracy one. Then you have to
change 20 to the pin. We have fit in the
wire diagram and then we are initialize
the object, the HTM with the
pin and the type. And for later on, we also include here and
Taemin and blink time on. This is also in the
core ESPN included. And now we have to jump
into our setup setup part. We start with our
VHDL and begin. And we also include in the loop that's blink timer
will be run because we want to send to you
on a regular basis continuously our new data
to our web dashboard. And this will be
assigned with our timer. So therefore, we can set in the setup timer set into volume. We can put in
milliseconds defining as long and send data to blink. And this will be our
own created function. Each seven seconds
to timer will jump into this function and
call the function. We also could do it in the
loop with the Middle East, but why not using
here the timeout? So going a little bit up here, I would like to use some
white sand theta w. Therefore, we have to read the temperature and the
humidity from our center. We're making and
temporary variable. It's called Team and DHT. Temperature. If you would
like to have unit celsius, more other other types, then you can type in true or for fine
heights, for example. But I went to have to Celsius. Then a float atrium
immunity MD BHT. That's the name of our object. Read it. Now in this temporary variable, our real-time environments
sensor data will be stored. Then we're making
here and logic. If it's not a number, then there is something
doesn't problem. But if there is a number, if condition will be skipped. And then it's really
simple to send the data to our web dashboard
with say for example, V3 him, blink virtual rights, we sorry, that's
the temperature. And passing the variable t, then blink. Ritter rights. V4 is too many idiom. I want for debug
purpose would like to have the temperature data
also in the serial monitor. And it's all we have to do here. So let's see if we got any
errors in their campaigning. But I think That's all
what we have to do. As you can see, it's also an simple simple lines of codes. Just read out the sensor data. And with blink Ritter rights, we can pass values
to our dashboard. Sketches uploading. We can see our setting. Turn on the 0 monotone
connecting to homebase. Connected connection is there. Here we have our data
tempted to 22 degrees. Perfect. As you can see, him will be
updated every seven seconds. And with our temperature 2200 and also your humidity
and with certain date, but on the serial monitor I
only printed the temperature. There we go. We have our
Internet of Things device which sends data to the
dashboard and we can send also data from
the dashboard. To our years being ECS, it is with only around
about 80 lines of code.
12. Use automatization to observe your sensors: Blink offers a lot more than only sending and receiving data. There are some
optimizations algorithm in the background
which we can use. For example, when some values, there is a threshold
from some values, then sending and they're
sending an e-mail or we get a notification
on the hip. And step by the way, is
also good. Downloaded it. It's the blink IoT app. And we can also
create and dashboard. It's not suit with
the web dashboard. All what we did so far, you can also use or make
on their Android and iOS. So, but here I
would like to show you what we can do
with optimization. First of all, we go jump into our templates
to the data streams. For example, I
would like to make your threshold from the
brightness level when uncertain type of brightness
level will be reached, then I wouldn't get and
notification on my smartphone. So of course you can do it also with the
temperature level, but it's easier with
the slider to show you. Click on the first of all, we have to go to Edit, then to the brightness level. Go to Advanced scrolling down. And here we have the exposure optimization and voice assistant exposure to our optimization. Then we click available
in conditions and we choosing here for example,
brightness level. You see color changing range
control or power switch. What available in actions? Click on Save. Click on save. Update one device continuum. Now, here, there is the
optimization link missing. Just reload the page. And then we have here
the optimizations. If we changed here,
the data stream, then we click on
optimization automations. Automations. And here we have conditions, schedule on time, sunset,
scene device state. And this is really handy when it comes to Internet of Things
devices, for example, if you want to control
some liquid levels, or you want to start some
motors, some relays, etc. Really, really
cool device state. For example, you can
also open windows or doors when some temperature
level will be reached. But here we want to set the brightness level from
our I-SPY surgeon to when. It's, let me see. Not equal, less than
equal, for example, 20. Brightness control. Then send an app notification
and the subject, it is too dark. Help limit, temporary, no limit. What's that? Can change those to cover. And that's it. Safe. As you can see, we can also change here to
e-mail or whatever. But I only want you to have
this brightness control here. Let's jump back to our device, to our change here. Here's my device. I have opened up there, blink up, but I close the
app, then switching off. We are changing the
brightness level. Nothing will happen. Nothing will happen. Now I go on the 20th. I got the notification
from blink. It's too dark. Help. You see that instead? Instead of focus, I don't know. But here's the the dark. Listen once again. Above the threshold. Going on, the knees
are going below. We've got the notification. And this is also very
handy when it comes to, for example, watering
your plants, liquid things also
with time conditions. A lot of opportunities which the blink dashboard and
optimization algorithm. So far we are coming to the
end of our whole project.
13. Conclusio: We are now at the end
of this online course, and I would like to summarize all the learnings which we
made here in this course. First of all, we created an
Internet of Things device. We are sending data from our
web dashboard to our USP. For example, we can switch on the LED and also change
the brightness levels. Then afterwards, we're also sending
real-life sensor data to our dashboards and wishlist it also in real-time
on the blink website. Afterwards we edit also some
optimization algorithm. For example, when the
threshold is reached, then also we get notification
on our smartphone. And this is really smart home or also an Internet of devices
thing was few lines of code, easy-to-use, free to use. This short and quick
online course. I hope I see you
in another class.
 Markus Edenhauser, Bringing IT and People togehter