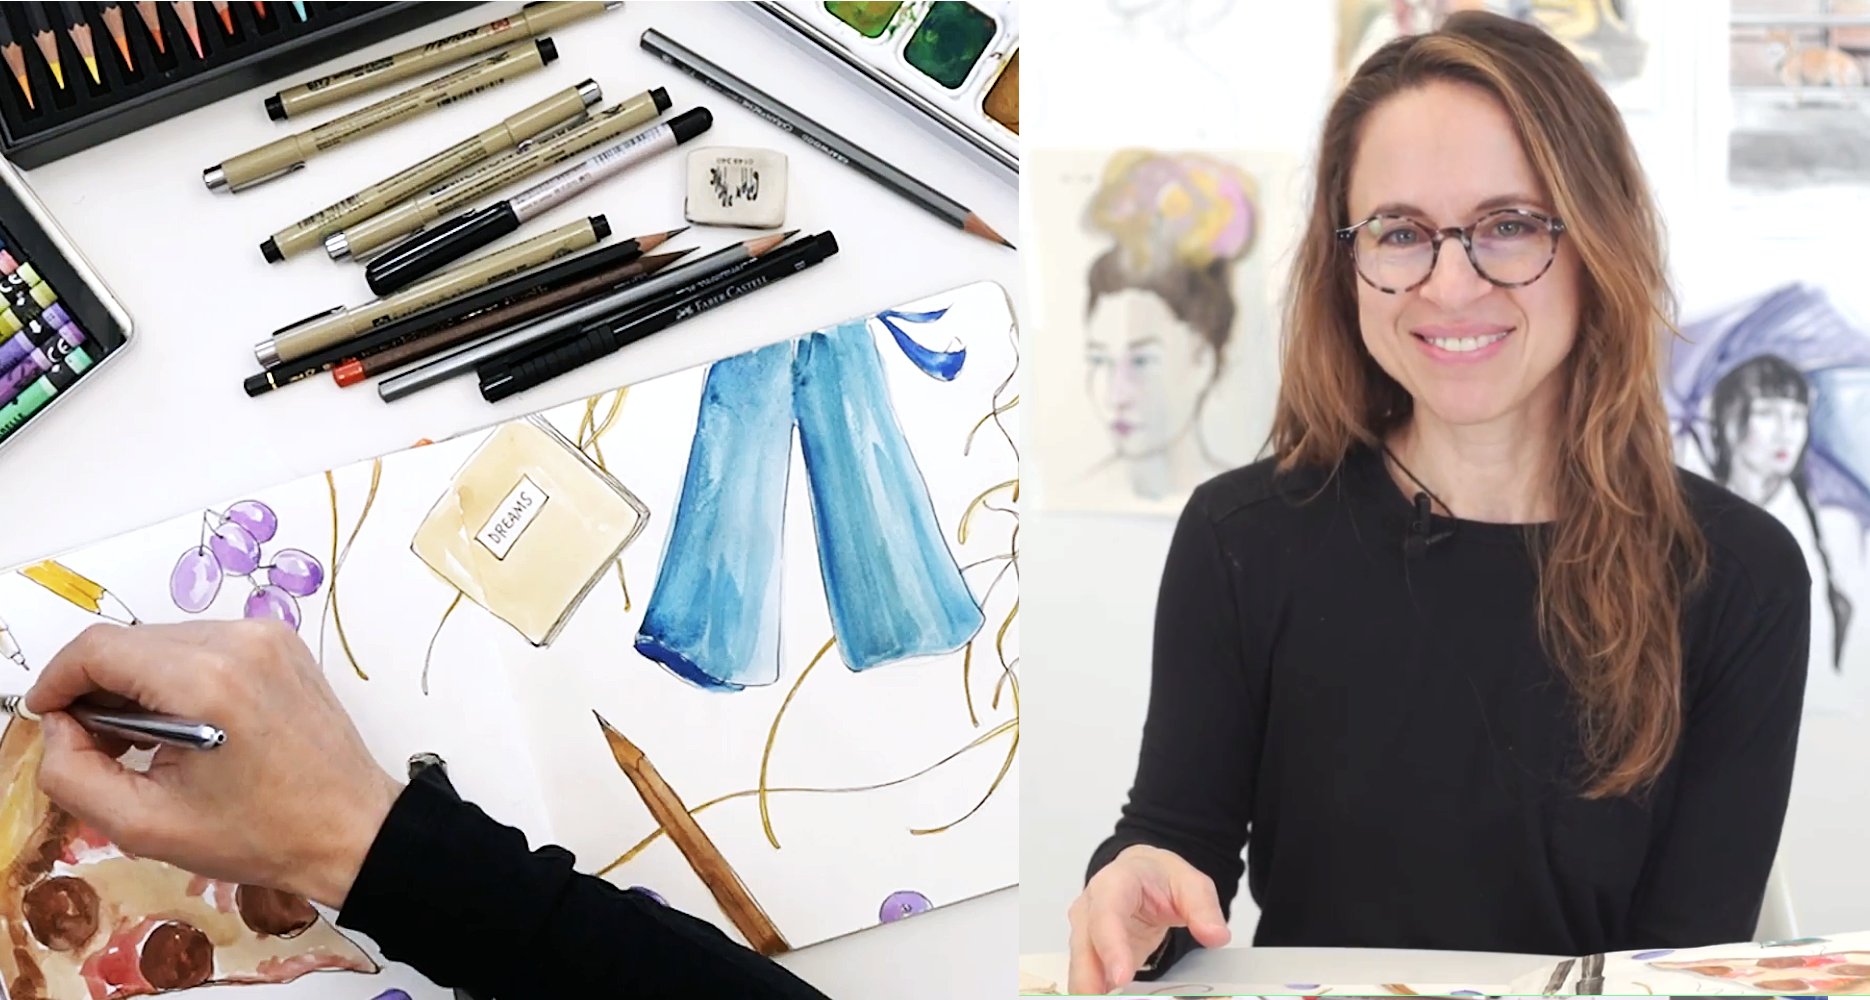
Transcripts
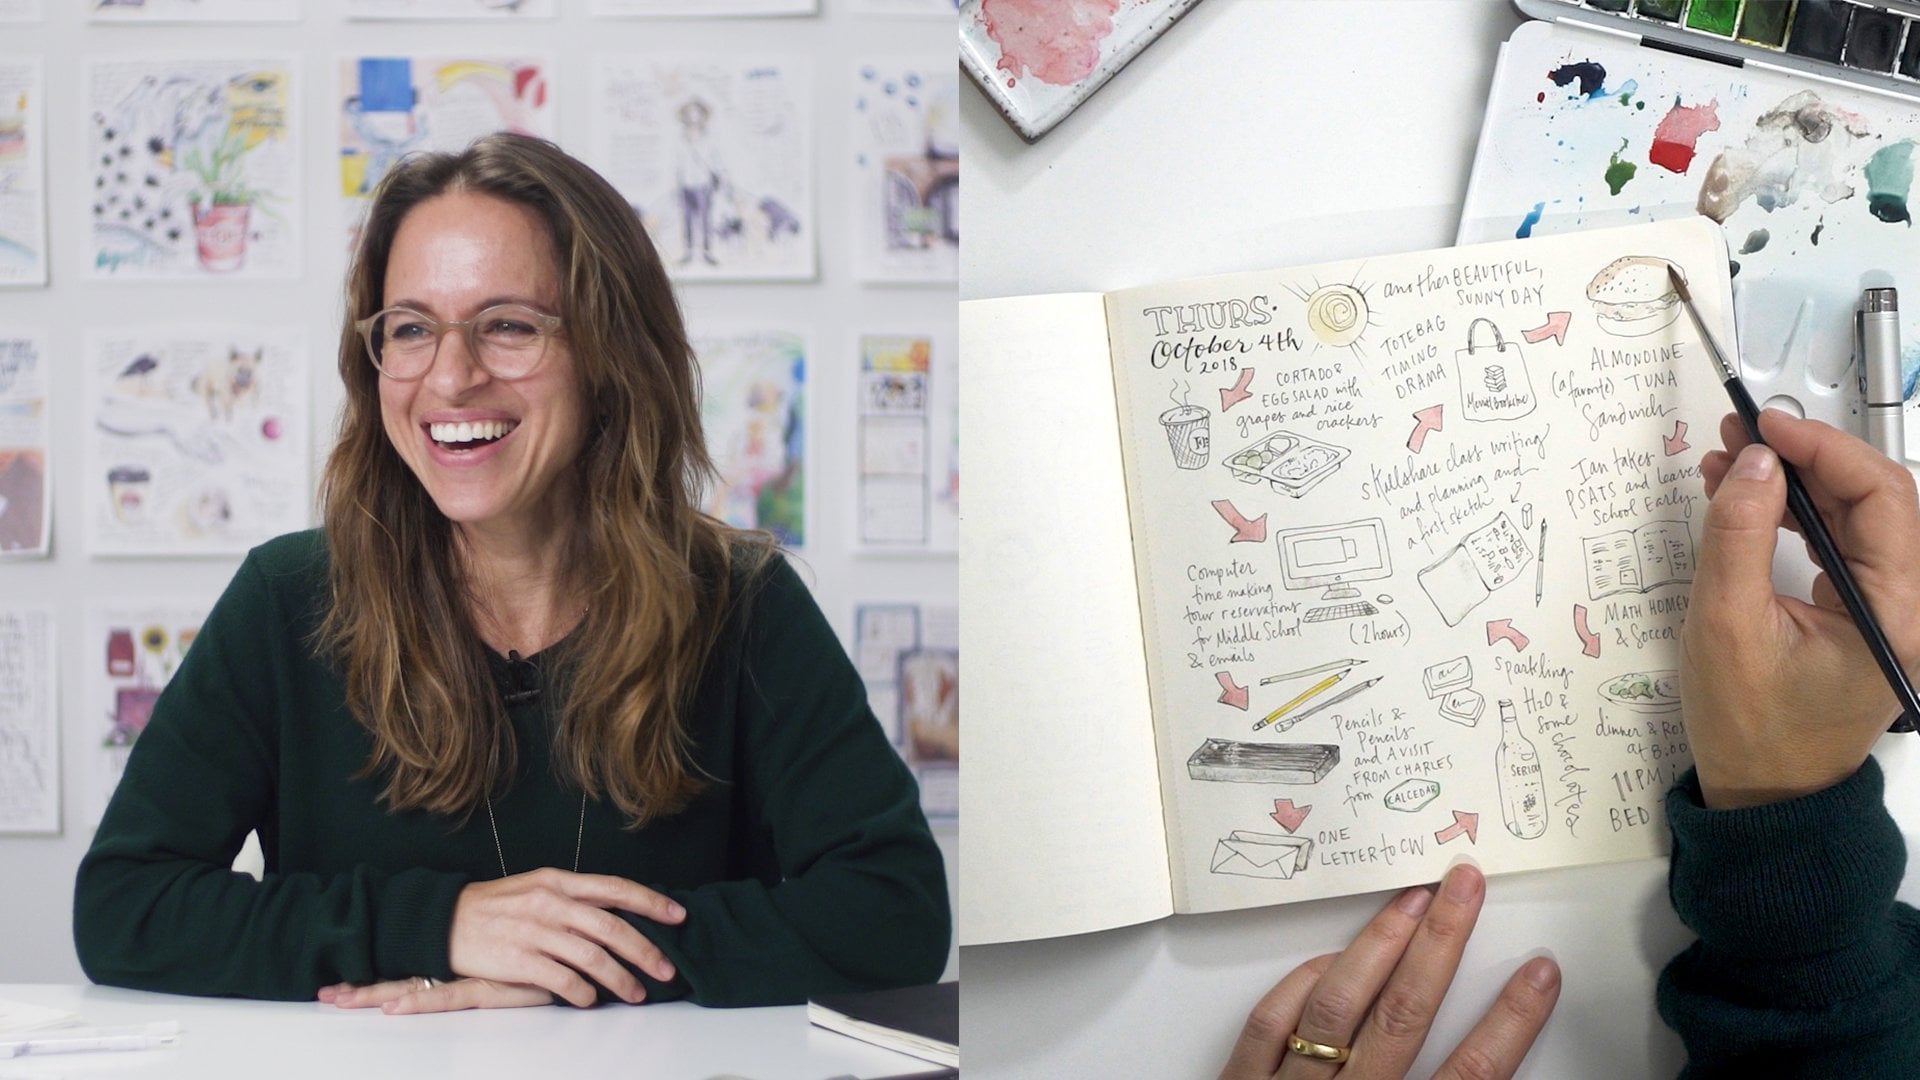
1. Introduction: Hi everyone. I'm Samantha Dion Baker and I'm here in my studio in Brooklyn, New York. I'm really happy to be here today. I am an author, an artist, and an illustrator. One of my favorite things to do and what is mostly what people know me for today is creating drawings in my sketchbook. I've been doing it for many years. All the pages behind me are pages from my sketchbook. I have a book out called Draw Your Day and a new book that just came out called Draw Your World. Today we're going to be doing something really special that I've done for years in my sketchbooks which is create really fun interactive moments. How fun is it when you were a kid when you would open a children's book and there would be a little door or a flap or a page that was die or something that moved that you pulled? Some of these things are super easy to do. We're going to look at some of the things that I've created in my sketchbooks and do some of them today. These projects are really personal to me also because I not only love these experiences in children's books and in adult books, but my grandmother made everything and we would make things together. She taught me how to sew. We're actually going to be sewing today. You can sew your paper. One of the things we're going to do is sew a pocket. This class is great for all artists at any level. The five projects that we're going to do are really accessible. You don't have to know how to draw. You can add as much drawing to these elements as you wish or you can just play with color and cut and paste. Part of the joy of all of this is that it brings you back to childhood when we would just cut paper and feel free and not have to worry about the perfect drawing. I'm really excited to share a few projects with you, so let's get started.
2. Class Overview: Today, we're going to be working on five simple projects and I'm really excited about all of them. The first one is just going to be a whole exploration of the idea of a pocket, and all the different ways that you can incorporate a pocket onto a sketchbook page or into your artwork. You can put anything in a little pocket. You can use an illustration, and make a little vase and have flowers come out. A tiny little envelope glued down with a note in it to finding something that you experienced during the day that can become a pocket. You just fold it and glue it down. The cover of the play bill can be glued down, and become a pocket, and you can stick your ticket stub in it, all sorts of things. The second thing that we're going to do is a fold-out secret note or just like any kind of fold-out. The page can fold-out to an illustration, can become three-dimensional and fold-out. You can fold out just a portion of a book cover that you got and show the title page. The third thing we're going to do is have a secret door, a cut out that opens up to something on the page behind it or that is just glued down. What happens is as you cut the page and you cut holes into your page, naturally, there's going to be a three-dimensionality created because there's subtle shadows underneath as I blow the cutout. Either you can have that be a door to the following page or it can just be something that you glue down on the page behind it and the cut-out creates three-dimensionality. We'll talk about all of that. The fourth project we're going to cut out some little shapes that reveal a whole story behind it. It's a continuation of the previous lesson, but we'll explore it in a different way and a little bit further. The fifth is our grand finale. That is we're going to be sewing a pocket and creating a little story booklet that will go inside of that pocket. We'll talk through the whole process of creating a tiny little story booklet, how you create the booklet, and also sew your pages. Keep in mind that you can follow along exactly, in your own way, or you can let all these lessons as inspiration. I can't wait to see what you create. Please share all of your projects to the project gallery so that other people can be inspired by what you create.
3. Tools & Materials: Now I'm going to talk through all the materials that we need to work on these projects. You don't need all of them, but I'll show you what I have and you can decide what works for you. Very important to all of this would be scissors, also an X-Acto knife. These are not the safest. I always say to my kids this is the most dangerous tool in the house, so please be very careful. If you don't have experience with these, just be careful. You want to keep your fingers away from the blade as you're cutting, so an X-Acto. I have a little board. This is just a thick piece of cardboard. You can also purchase a small cutting mat or plastic cutting board. I have a really big one, I don't have it here on the table. But this would be to put underneath the page as you're cutting out so that it can protect the following page underneath you don't want to cut through. This one's really thick so that I know I won't cut through it. The next thing is a bunch of extra pieces of paper for anything extra. If that we need for our flaps, for the pockets, or anything that we're creating. I also have a bunch of little envelopes here. I collect these whenever I find them in shops. This was I think just an envelope from a little note card that I saved. These envelopes are great. You can paint them, you can do all sorts of things with them and just stick it down on your page and then that becomes your pocket. I am today using some of my favorite paints. They're Caran d'Ache gouache. When I first started experimenting with gouache, this was the set that I was given and I love it. It's just easier. A lot of gouache comes in tubes and you have to squeeze some out and it's just a little bit more high maintenance. But this, you can just throw in your bag and go and the colors are great. As you can tell, it's very well-loved. I also have some Caran d'Ache colored pencils and Neocolor pastels. These are water-soluble, so they're really fun because we have water-based paints going and I have my paintbrush. This paintbrush is awesome and it comes in the set of gouache. It's a wonderful paint brush which is a bonus because usually, the paint brush that comes with paints isn't always the best. These are wonderful. They're crayons. You can do a whole area of color and then add water to it. They're really fun and beautiful colors. This is a small set. They come in all different sizes. Then if you want to get smaller areas, these are my very well-loved super color water-soluble colored pencils. I just have them out as well. I'm not sure if I'll use them yet. Again, these things are optional, but I do love these products and the links to these products will be in the resources. Pencils, always important to sketch everything that you're doing. I'm a big believer in the pencil, and planning, and a big eraser, very, very important. Pencil eraser. Then I have some other things here and we are going to sew. I have the needle and thread that I shared earlier. Very important is glue. You're going to need glue. The other option is, I have some fun Washi tapes. These come in all different patterns and colors. I'm sure most of you have heard of Washi. You can also just get plain tape, but I have those for fun. This glue stick is great. There are many on the market. You can really get whatever works for you. Today I'm going to be using some fine line permanent pens. This is a Pigma Micron in Size 03 and this is a Faber Caste-ll Pitt pen that is in a Size Extra Small. But I also like Copic Multiliner pens. Just make sure that your ink is permanent. I'm also going to be using this beautiful sketchbook that I started using a while ago. It's not what I use all the time. People who know my work know that I always work in a black sketchbook. But this one, the paper is just so beautiful and it is by Global Arts Handbook. There will be a link to purchase in the resources of the class. The paper is a little bit too thick but not too much because I personally like to work on hot press paper. But it is really gorgeous paper to paint on and it's thick. You can use this for your regular sketchbook. I highly recommend it. Everyone knows I really loved the square size. This one is a square. It's I think 8.5 by 8.5 and has a beautiful linen cover and even a little bookmark. That's about it and let's get started on the first lesson.
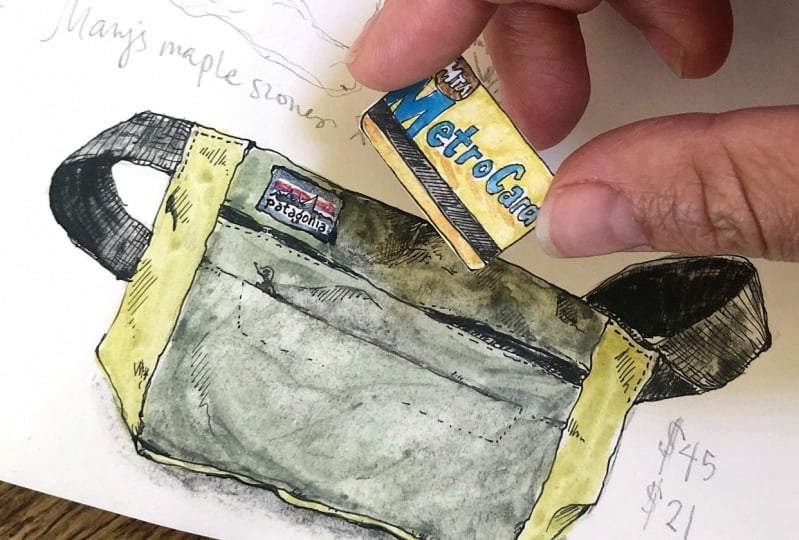
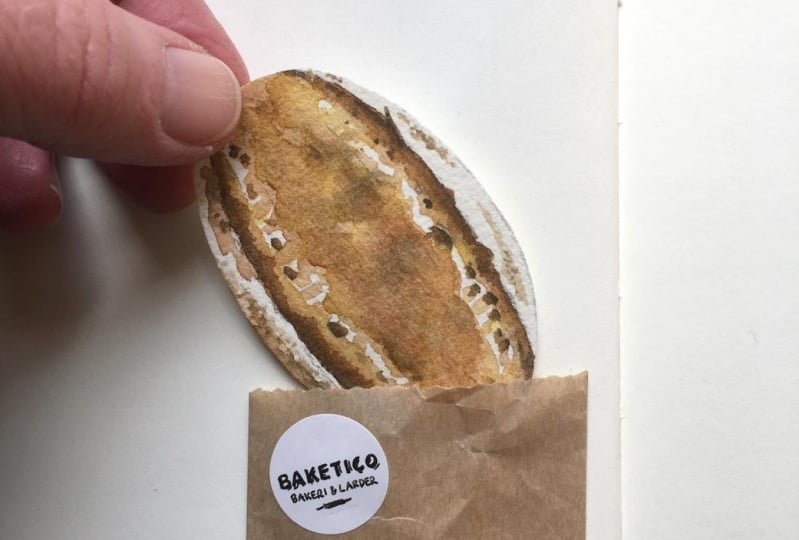
4. Pocket Lesson: For our first lesson, we're going to be working on a pocket. There's so many ways that you can do this, and I'm first going to share some of the pockets that I've created in my sketch books over the years. This one is early on when I first started adding, and this reminds me a lot of the Jolly Postman, Griffin and Sabine, these books from my childhood and my adult life, where there are pockets with a letter inside, and I love that. I love that you turn the page and just discover that, my gosh, now I'm going to interact with this, and pull something out that is separate, that's not bound in the book, and open it up, and then put it back in. It's just such a moment of discovery, and wonder, and what's in there? I really love it. I'm just going to share a few. This has a little painting inside. This I stuck a little fortune that I got inside, and things that you don't want to glue down. Here are some more. These are some little notes to my kids. This one is a little letter catch that has a glued piece in the back that is just with transparent tape so you don't really see it. This was a time when I wasn't working on both sides of the paper, and it catches it so that it doesn't just fall through and go nowhere. We can talk about how to do that as well a little bit more as we work. This actually is a letter that has a giveaway winner inside, and it goes into the letter slot. Here's a little pocket. I think this was one of those tiny little brown craft bags that I got in the stationery store, and I made it into a pocket, and inside is all of these little paintings with the word love, so I called it a pocket of love. Some more envelopes. Let's see. I've got a lot here I want to show you, so some I'll be coming back to. There's a note in this one that's stuck down. This is a hidden letter inside for Ian and Theo, that's for my boys. Someday, they will undo the tape and pull that out. This pocket I loved creating. I made a tiny little Metrocard that goes inside of a little pouch from Patagonia that's made out of recycled fabrics. I love that my Metrocard went inside the pocket, so I just recreated it in my book. Again, there's a little piece of paper glued to the back that catches it so it doesn't fall to nowhere. This is a pocket with some illustrated Polaroids of the highlights of our summer. I asked my family to tell me their favorite thing from the summer that they experienced, and then I illustrated it, and put it into a pocket so that we can look back and remember. Just a few more. This is a sugar pocket, and I just stuck a letter inside. Things that you wouldn't think of can become a pocket. Here is a folded piece of paper that we got on the top of a mountain in Argentina, when I bought my son a little whistle, and there's instructions and music, so I just glued it right in. Last is a pocket here with a little painting, and I did this in Iceland, and I made some of the paper, and the whale fin going into the pocket, and a little puffin painting. Those are some samples. Today, I'm going to do something really different and fun. I'm going to be creating a pocket with French fries. Let's say you went and got some Belgian fries or you went to McDonald's or somewhere, and you got your fries, and they usually come in a paper sleeve. I'm just going to get started creating this, and then walk through the process of how I cut the little French fries out, and make it all, and then you can hopefully either copy this just for the experience, and for fun or you can think of other ways that you can illustrate your pocket. These French fries I'm making up. I do not have any photo reference, it's going to be just from my head. Hopefully, I do an okay job, and it's clear what's happening. But I'm going to just sketch out a little bit of the shape of what I think a French fry pocket looks like. I think it's something like that, so I'm going to just have that. What I would want to do then is add a little flap to here, and to here as I'm cutting out so that I have that to fold, and stick down. I'm just creating a very loose template with some flaps that I know I can cut out, and glue down efficiently. Today, I'm going to use these craft scissors. I got these years ago, I think it was on Martha Stewart website. I'm cutting it out first, and I'm realizing as I'm going that I could have painted it, and then cut it out, but there's really no rules. I'm just going to see how this goes. If I fold these flaps down with my guide, I always have my eraser to erase them. Well, there that's sticking out, so I'll just cut that out. There we go, and the bottom. There. As easy as that I have a little French fry pocket. I'm going to put it down here and maybe do a very light pencil so I can see where it's going to be. Then maybe I'll write, we had Shake Shack, and I ate too many fries. I sketch that in. I'm going to put this here. Now, out of my other paper, and to this I am going to paint flat and then cut out. I'm making a whole bunch of little fries. Shake Shack fries have those little ridges in them, but I'm going to make some regular fries just for ease because we're recording. That should be enough, let's see. Paint, and the gouache is great for this because it's really opaque. I added a little bit of a darker color, brown color here to show the burnt edges and three-dimensionality of the fries. Because I'm making this up, I have artistic license to make the french fry holder any color I want. I'm making it a bluish gray. One of the things I really love is that you can really think about upcycling, meaning that if you find something out in the world, if you are about to throw something out, even the container that your french fries actually came in, as long as it's not too greasy you can either tear the paper or you can save a little piece of it so that you know what color it was. But you can upcycle materials that you have out in the world so you don't have to purchase everything. That's a really fun way of just thinking of ideas. If you receive something, if you really like a business card from a restaurant, you can glue that down on three sides and that can hold something. It can hold the receipt. It's really nice to look back on our receipts later on to see how much we spent on a meal years later. It's fun to compare, especially if you go back to the restaurant again. You can recreate a receipt and stick it in one of those little envelope things or that leather thing that they bring to the table when you get your bill. You can make that and make that into a pocket on your page and put either the actual receipt or a drawn version of your receipt right into that. There's so many fun things you can do. This is pretty dry. I'm going to add some glue to this and stick it down and see how it works. It's nice to have an extra piece of paper for your glue sticks so that you don't get glue on your page. Some people like to use bookbinding glue with a paintbrush. It's really up to you. This glue stick happens to work really well, but there's lots of options for a glue. Now I'm assembling, I'm adding my fries. I think I'm going to need a lot more. But maybe I can just have it so that they are only a few left. I'm going to flatten them again. Over time, as the book is on the shelf, they should flatten out. That you can use thicker paper if your paper is too thin and things are curling. I think that looks so cute. These fries and the holder do not look like they're from Shake Shack, but that's okay. It's the idea, artistic license, and because I draw everything in a journal, I'm writing down what they are and why they're significant. I just ate too many. Some of these ideas can be incorporated into a card for a loved one or you can just create an isolated piece that you can send to somebody. Things that are interactive would usually be in the context of a book or a card or something that wouldn't necessarily get framed. But some of these elements just have that three-dimensionality like this. See, you just see shadows underneath. The fries are curling. You can frame it or you can put it in a shadow box. You can even tape this down or have all the fries be glued down if they're falling out. The idea is that no matter whether they're physically interactive or not, the three-dimensionality is there and that quality is really just visually so nice and fun to look at. I'm going to erase the pencil. You have to wait till your ink is dry, so be patient. Now what I'm going to do is I'm going to create some other fries on the page. These I don't really need to sketch because I know they're just random shapes. There'll be a few that are just floating outside. Some you can pull out, some will be painted right on the page. I think that's good for this. It shows you the idea. It shows you just a creative way that you can incorporate illustration into these ideas. They can be something that just is a visual like three-dimensional thing or actually an interactive thing. If you have kids, it's so fun because they can pull the little fries out and put them back in, maybe count them. Again, these probably will flatten as the book is just sitting on itself for awhile, but if you want to use thicker board, that might be a little bit more sturdy. I like using this thin paper too because the thicker everything is, the more heavy it is and the more likely it is to fall out. There's pros and cons to using different kinds of paper. It's trial and error. I'm not a pro, but I just have fun with this. That was our first project, the idea of a pocket, because you can do so many things. The options are endless. Just have fun and think as you go about your day, what could maybe be transformed into a pocket or become a pocket? Now we're going to move on to our next project, which is playing with the idea of flaps, things that fold out.
5. Folded Notes Lesson: Hi everyone. For the second lesson, we're going to be creating folded elements to our pages. I'm going to share a few examples of things that I've done in my books and how this idea can be incorporated into your practice. A lot of times it's just as simple as something that was really big that you've got that you want to put in, it can just be glued in and folded out. This is a map when we drove around the Ring Road in Iceland, and I just didn't want to recreate it because we had all of our notes, and so I glued it down and it's just folded. So simple. Let's see, here's another thing. You can just add a little extra element to your book. This is just glued stuff down with a piece of tape and it is just a little flap. This is an example of a flap similar to what we're going to do today. Our flap is going to be pretty simple, but this one is also a pocket, and there's these little stuffed toys that I stuck inside under a blanket. This was actually a toy, little tin that I got from a friend and she made it and it's adorable, and so I recreated it in my sketchbook. The glued down piece of paper then has a slit in it, and I only glued around the edge, so that these can just slip in. Again, because the paper is not too thick, they just catch themselves and they don't move. This has been a few years and it works well. Here's another flap. I just did two versions of the same painting and I wrote underneath. Here's a little tiny flap with the date, and last sample is this. This is a really good example of this idea. This is a little book and this is actually what we're going to be doing today. This is a little tool pouch from Peg and Awl. Some of you might know of this tool roll, and I just recreated in and it folds right in itself. Because it's been in my book for so long, it just closes and stays that way. That is a great example of this idea of a fold-out. Again, there's so many possibilities for this project. I just encourage you to use this as inspiration for your own ideas. Some of you know, I have a new book out. What I have always done is recreated my books or other people's books, books I love into little tiny versions. I love things small. This is a great way to practice this idea of a flap. The idea of a flap and seeing something underneath is something that I know that we all remember from childhood, just such a part of childhood and discovery. I know that either we read them to our kids or we remember them from our own childhood. This is a little bit of that idea, simple, and so many ways that you can incorporate this into your artwork. One thing that's wonderful about all of these ideas is they can just add to a story. If you're drawing something and it's something that opens or like I said, the check at the restaurant with the receipt in it that opens. All things open. A door opens. A lot of things other than a book, but a book is a great example. Today I'm going to recreate the cover of my book very small and the title page and it's just going to open in my book. Right now as we're filming, my book has not been released. I'm still really excited about it. This will be something that I can use to promote the book. But if you have a favorite book that you love, that you've got as a gift or that you have re-read a million times or for whatever reason, this is a great project to think about adding to your sketchbook or your journal or just making a card for someone. Maybe it's a joke book or something that brings back a memory, you can make in and of itself a card or something that goes into a pocket. All of these things can be layered and hopefully inspire you. The shape of my book is a little bit off square. These dimensions of this little quick piece of paper that I cut out is a little wrong. I'm going to actually cut side off so that dimensions are a little closer to my book. Now it's fun, I get to just draw a tiny version of it. Now, again, if your drawing skills are limited or you just don't even want to draw, just think of all of this as inspiration. The lift the flap idea does not have to have a whole drawing. There's my quick sketch. Now I'm going to take a micron, and I also have a Faber-Castell Pitt pen. There's so many options. I also really like to use Copic Multiliners. As long as you're using a pen that is fully waterproof, you should be able to paint at any point. You can paint over it wet or you can add the paint after you're done. I will talk about when I'm done this just ideas on how you can add a flap to your page, how things can actually work logistically. We can't cover everything together in our lessons, but there's so many other things that you can do, and some of it is trial and error. But if you take the same paper that's in your sketchbook, that's a little hard to do, but it would mean maybe tearing a page out of the back or maybe you're like me and you have extra paper or you're buying your own. I actually buy my own sketchbooks and I love this one. But as people know my work, they know that I always create in a black cover sketch book like these and I have for years. I just started making them by myself. I have extra paper and therefore I can just even bind in a larger piece of paper that folds. But we can talk through that when I'm done making my little mini book here. I can glue this down into my journal anywhere I want. I can design the whole page around it, do all my writing around it. When you first open the book, this is what you see. It's all blue on this side and then there's a little window, which I thought was really a nice thing to add right in the first title page of the book because it's a window in. Also this is a little teaser to what we're going to do a little bit later on. This is the finished little book. Cover, title page, closes up, super-easy, and it can just go away and become a part of your page. Now I wanted to just show you and talk a little bit about how you can add a whole page to your page, just make that become a flap. Here's an example. This sketchbook got a little messy, but I wanted to just show this fold-out. I decided to do this on the spot after I had created the page before. I couldn't glue the paper on this side or else I would cover up this drawing. What I did here is I just glued a little bit of a flap right here, and the glue is strong enough that it's held. You can glue to either side. That's one thing. The map sample that I had shown earlier, that just was a piece of paper that just became a fold-out. From little to big the entire page or just a tiny little flap like this, or even a fold-out that folds multiple times. Just have fun and be creative. You can even just add a color piece of paper that folds out with a note in it and it just gets glued down at the bottom. It's a really simple way to add three-dimensionality and interaction to your pages. Now, we're going to move on to the next lesson where we're going to start with cutting things out and cutting our pages and adding surprises when you lift the page. I'm excited to share this and so let's move on.
6. Cut & Reveal: For the next lesson, we're going to move on to cutting things out and having things revealed underneath. This is really just so open-ended. There are really so many possibilities. I'm going to share a few things that I've created, and then we're going to create a night sky, and then on the following page, a day sky. I'll show how the stars will be cut out and just how simple it is. You don't really need a lot of artistic talent to be doing things like this. This is going to be a really fun, easy example of something that's just delightful and really like a surprise when you're flipping through the pages. Here are some of the things that I've done. This is a cutout that is just literally the front door in our apartment, and I just illustrated the whole entire view from the hallway looking to the door. This was when we were in lock-down and I was just fantasizing about going outside. It really tells the whole story. I want you to understand that you can tell as much of a story as you want through these ideas. This one really for me told a clear story, which was that I was stuck inside, and what could possibly be behind the door? Was it Paris or traveling somewhere far away which we definitely could not do or just something that is different than what's normally outside your door. We live in an apartment in Brooklyn and there's just some tiles and it's a beautiful hallway. In fact there's not much there. Outside of my front door, maybe there was a garden. Maybe I was just really desiring some nature, so that's what I drew. There's actually like a little tiny lock here to keep it closed. You open the door and there's a little hint of the page underneath, which could just be glued down behind this. These two pages could be glued and then it becomes like a lift the flat book like from childhood, and there's just something under the door and it's only takes up that amount of space. But instead this time, I just used the opportunity to create a whole scene, and so that is what I created on the page and the door just shows a bit of it. That's a simple cutout example. Here's another one. The idea here was probably better to actually have it glued down because I didn't really do much on this page, but I haven't glued it down yet. What I probably would do is glue it down just so. This is like one of those really a beautiful childhood moments in a book where something moves, and I have always loved this. This tells a story about my day. It's relevant to this day. I love this page. There was a lot that happened, but there was an incredible spiderweb in between the trees out at my in-laws house on Long Island, and it was incredible what this creature created and it reminded me of Charlotte's Web. I used a quote from Charlotte's Web and, or actually might not be actually from Charlotte's Web, but it's by EB White who wrote Charlotte's Web. Then I just use some dental floss and taped it to the back of a little illustration of a spider and it moves. This is a little bit incomplete only because I have not glued it down, but I think this one would be much better off if the pages were glued down and then this just moves. That's another example. Here's an example of similar to what we're going to be doing today. They were red dots in the rain. I don't remember why it was probably confetti. This page was done a while ago, and so this was 2017. I really like the colors reminding me of the colors in a card deck. What happens on the next page is there's a ribbon, and this ribbon was relevant to what was happening on this day. Red ribbon on a shopping bag, so I just love that. I love this simple cut-out and these were just circles. You can even use a hole punch. Let's go on and now I'm going to start creating, and I'll show you a very simple process to creating a night sky and revealing day time. First, I'm just going to put a wash of blue down, dark blue, beautiful color. These gouache paints are great for this because the color is so rich. Maybe there's a horizon here and there's a little bit of reflection of the light. Maybe there's some water. This could be the water. I'm making this up. Everything I'm creating in this class is made up aside from the cover of my book. I just really want to stress how easy these ideas and the process can be if you are not comfortable drawing or if you love to draw and paint and, either way, you can incorporate these projects into your practice. Some other ideas, let's brainstorm together. You can cut down the page to be smaller, or you can do, let's say there's a mountain in the background or something in the background, you can cut around it and have your page be like a die cut. That would be a really cool. I've seen many people doing projects where the page is cut out and it becomes a shape. Let's say it's that whale tail that I shared earlier coming out of the pocket and maybe cut around the whale tail and then that becomes the page. Remember I had this little board, this will be underneath when I cut my stars. Now on the next page you want to make sure that whatever is behind there does not interfere with the little windows that you've cut. I'm going to create a lighter sky. It's always nice if you're working on both sides of the page to do something here as well. You can continue the night sky on this side, you can tell more of a story. There can be, maybe the stars mean something else on this page. Maybe they're not part of the sky, but they're part of a different piece of the story like there was confetti or something else. Stars for doing a good job in school or little stars that you gave your kids for doing their chores. All things that you can think about, two meanings to one shape. As you can see as you're working it's nice to have this, now I'm trying to let the paint dry as well, which is tricky in a short class. But if you let everything dry and flatten [inaudible] close the book, you then see all the little watercolor patterns and different things underneath showing through. As you can see, that's a really simple project. You can do this in so many different ways and like I said, you can cut the side of the page or cut out a shape. This is just one page being cut out to show something else underneath and both sides can be interactive. There's a lot of children's book that use this very simple technique all the way to adult books. I hope that this inspires you. This is really endless, the possibilities. Now we're going to move on to the next lesson. This one was a quick one. The next one is just going to take this a little bit further and to show you how you can do a cutout that two pages are stuck together to create that three-dimensionality that we were talking about. Let's move on.
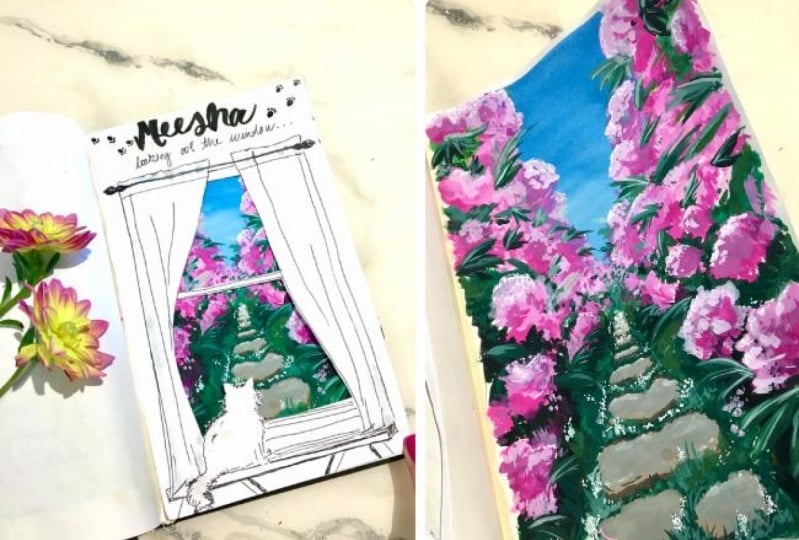
7. Cut & Reveal Pt 2: Hi, everyone. For the next lesson, we're going to continue what we started in the previous lesson. This is another way of cutting out a page to reveal something underneath. This one's going to involve a little bit more illustration because I'm creating a window and I'm cutting out the panels of a window, and then the scene through the window is going to be on the following page. For this one, I actually pre-sketch the window just to save a little bit of time. This way I can do a little bit of more of an elaborate drawing. I do like to show the entire process, but I really want to be able to get this one a little bit more finished and show you both sides. I'm going to paint this first. Just get some color down, I might go back and outline it with my pen later on. Whether or not you are creating your illustrations with pen and ink or paint or you're using color pencils, anything goes. It's not the materials that matter, it's just the story that you're creating and the creativity behind what you decide to do. I think while this is drying, I will start cutting. This way, we can see exactly what's showing underneath. Again, I put my board down, make sure you be very careful with your blade. For these sorts of projects, you really do need a utility knife or an X-ACTO. I just stress again to really be careful and make sure that you're handling it away from your fingers. My lines here are not perfect. But if you want to use a ruler and make your lines really straight, you can also use a straight edge to cut out things like a window or a door. I, personally, just choose to have my cuts be a little bit imperfect. As well each pane of the window here is not exactly the same size. That's just a personal choice on the level of drawing and your style. Just to reminder, patience is key. I am doing this live here, and so the paint is a little bit slower to dry, but I've got a little blob there. That is just a reminder to you all, you do not have to be in a rush. Then I can see right underneath what I planned, which was just by eyeing it in the placement is pretty good. I might want to move that flower over a little bit and I'll just have to see plains of grass, but I like where the tree is and the little bird is perfect. There's a little bird flying. If I wanted to I can incorporate something on this page, or I can just have these two pages glued down, or I can create the scene on a separate piece of paper that's cut to size and then have that just sit behind, and then you can glue that onto this page. You can even make that into a pocket, and then that pocket can hold something, or something could be stuck in there that can show through the window like the little spider that can move. The options are endless. If you decide to do a window like I did, you can paint the scene from your window, you can paint anything you wish to see through your window. It doesn't even have to be an outdoor scene, it can be a portrait of someone, it can be just color, it can be anything. Again, you can glue it down so that it all stays together just like that and the three-dimensionality in the shadows beneath the cut-out will always stay, or you can have it be just another scene, another page in your book telling the story. I hope you enjoyed that and inspired some ideas. Now we're going to go on to our final project, which I'm really excited about, and it involves a needle and thread and an open mind and some creativity. You can follow along exactly to do this project, because whatever is on your little story book that we're going to create can be your own story. But the structure and the process of creating a sewn pocket and a little book, you can follow along with me. Let's move on.
8. Sewing Pockets: Hi everyone. This is our last lesson and I'm really excited about this one. This is just to show you, basically, it's a combination of a few things. We're going to make a tiny little booklet that can tell any story that you wish, and we're going to work on a pocket that goes back to the first lesson. But I wanted to just open your mind to the unexpected and the fact that maybe you could sew your pages, maybe we can incorporate a different material. I'm going to share one with you that I made a while back. This is a pocket that is sewn right onto the page. I say at the top or on the side here, the idea is that it's a pocket of sunshine. I think it was a sick day, I was stuck inside. Little did I know at that time in 2018 what stuck inside would mean later on, but even one day when it's sunny outside is hard sometimes. I sew the pocket and, here on the back I have just a little piece of washi tape. Again, this was when I wasn't working on both sides of the paper. The sewn part will show up on the other side, but you can make that a part of your drawing on the opposite page. You can cover it up with tape, anything goes. There is that, and this is not sewn, but this is just an example of the same idea, a little booklet. We went and stood in line for hours to get our boys passports renewed. I just recreated a tiny little passport and stuck it in a pocket. This is an example of a found piece of paper that I just had, I keep a collage box, a box with all papers that I find with patterns and ratings or anything that I find interesting, coffee cups that have different patterns. I just flatten them and stick them in this box. Here's a piece that I really like. It's just a marbled piece of paper and it's thick so it'll be good for a cover. You can also just use the same paper that you use for the inside pages. I'm going to be cutting out two pieces of paper, folding them both in half and that will create an eight-page booklet. I'll show you how. I'm going to use my board here. Anything that you have around can act as a straight edge if you don't have a ruler. My goal here is to show you that you don't have to have all the fancy materials. You don't have to have fancy paper, you don't have to have the most fine tuned artistic skills. You can do this just like you did when you were a kid. I'm going to cut these two pieces out together. Then when I stick them together, there's something called creep, and that's when the pages that get stuck inside creep out. Then you can just trim that. Here's our little booklet, an eight-page booklet. One, it's the cover, 2,3,4,5,6,7,8 pages. Now we have to build the pocket that it's going to go into. I want to make sure that there's enough room. I maybe even have a trait go around the side. I think this one is just going to sit on the side of the page. You can even do a curved line. You can do anything, anything goes. When you're sewing the paper, it will be really tight because when you glue and you have a booklet that has a little bit of weight to it like this one. This one isn't completely flat, that over time can just pull up and as you're pulling it in and out, it pulls up. But if you're sewing just like anything, just like when you're sewing fabric, it's just stronger. I have regular thread, it's a little bit thicker, and this thread is really fun because it's rainbow color. I got this at a little sewing shop in New York City. I have a needle that is a little bit thicker, a little bit heavier. This is assortment. It's a good idea, in this case I'm going to, you know what, I'm actually going to not use glue, but I'll use a little bit of washi tape. Washi tape is great, just to tack things down. Keep it in place because it comes up without tearing the paper. Now, I'm leaving the end of the thread attached to the spool. I'm not going to cut it off yet because I don't know how much I need and it's fine to just leave it. The needle goes in and out, and in and out really easily through paper. You want to make sure that your paper is thick enough. If you're using a found piece of paper from, let's say it is a playbill or a magazine clipping or newspaper, it might not be sturdy enough to sew. That takes a little bit of trial and error and I recommend, I'm going to pull up this washi tape now, that you use something that's a little bit dryer like a card stock. I'm going to talk just a little bit about my grandmother again now because the idea of a sewn pocket to me is just so reminiscent of my childhood. She taught me how to sew. Anytime I sew, I sew by hand because I never learned how to use a sewing machine. She put a pocket on everything. As I mentioned earlier in the introduction, you can sew borders on your pages, you can sew a clipping onto your page, it doesn't have to be a pocket. What you want to put on your story booklet is completely limitless and up to you. Sometimes it's nice to even put different pieces of paper, it doesn't have to be a bound little booklet. You can just do like loose little pieces of paper that tell a story similar to what I shared earlier with the highlights from our summer. That's also a possibility. You can put sewn papers into the pocket. There's a lot of cards that you might have seen where the edges are sewn just to create a beautiful effect around the edge. You can play with that. Now you might want to put your tied end on the inside or on the back. I'm choosing just to have it sewn, and I'm just holding it down with my nail so that, that knot goes right to the end. I'll have a little piece hanging there just like that. Now I have two ends showing, which looks really nice. Now I can take that same thread and sew my book. One thing my grandmother taught me was how to tie a knot and thread with basically one hand. All you do is you just take your thread and go through. When you're binding more pieces of paper together, you need something called an arrow, and you need to think about it a little bit more and have some more tools. This is not a perfect booklet. It is not lined up perfectly, but I like the Charmin, that's a personal choice. It's really easy when you only have two pieces of paper to line up your needle and push in right at the spine in the exact spot that it needs to be. You can do a stitch that is tighter than this, or you can do a longer stitch and go back and around a few times. What I want to say on this booklet or what I want to write on the pocket, or even maybe for me, if I incorporate this into my actual sketchbook, which I might do, I would probably write a little story about my Skillshare class, and share all the little things that I did today, maybe illustrate a few of them. There are so many possibilities of what you can do on your little booklet. You can tell a joke, you can tell a whole story. You can just paint color and write it out and draw nothing at all. The idea is to just inspire you to think of new ways to make a page come to life and do something unexpected like sew with needle and thread. The needle goes through the paper so easily, it doesn't have to be perfect. Your stitches can be a little wonky and it's still looks good. This thread I have to say is so fun just because it changes color and I think that that's something that you can easily find. Because the project reminds me so much of my grandmother, I'm going to just do a little story inside that talks about all the places that I remember her having pockets on her t-shirts, on her dresses and even on a pillow case. I'm just drawing these things really loosely and I'll just tell my little story. It'll be something personal that I'll have tacked into this sewn pocket. That's what I'm going to do with my pocket. But you can tell any story that you want to. The date can be on the face of the pocket. You can do, as I mentioned, pattern paper on the face of the pocket. You can keep a log and maybe put this little book in the beginning of your sketchbook or the end of your sketchbook, the possibilities again, are completely endless. But I really hope this inspired you and can give you some ideas for your own creative practice.
9. Conclusion: Thank you so much for joining me today. This was a lot of fun. I hope that it inspired ideas in your world that you can translate onto the page in a new, and fun, and interactive way. Just as you go forward, now you can think of the things that you do and see in a new way and think, how can this experience, the simple things like pulling a tissue out of a tissue pack or opening your kitchen cabinets to something bigger like seeing something through your window that you've never seen before while you're traveling, all sorts of things. I can't wait to see what you come up with because it'll just inspire me more. I know that I've only touched the tip of the iceberg of what can happen on a page. Share your projects to the project gallery. Let us all see what you create. Until next time, I'll see you soon.
 Samantha Dion Baker, Artist | Designer | Author