Transcripts
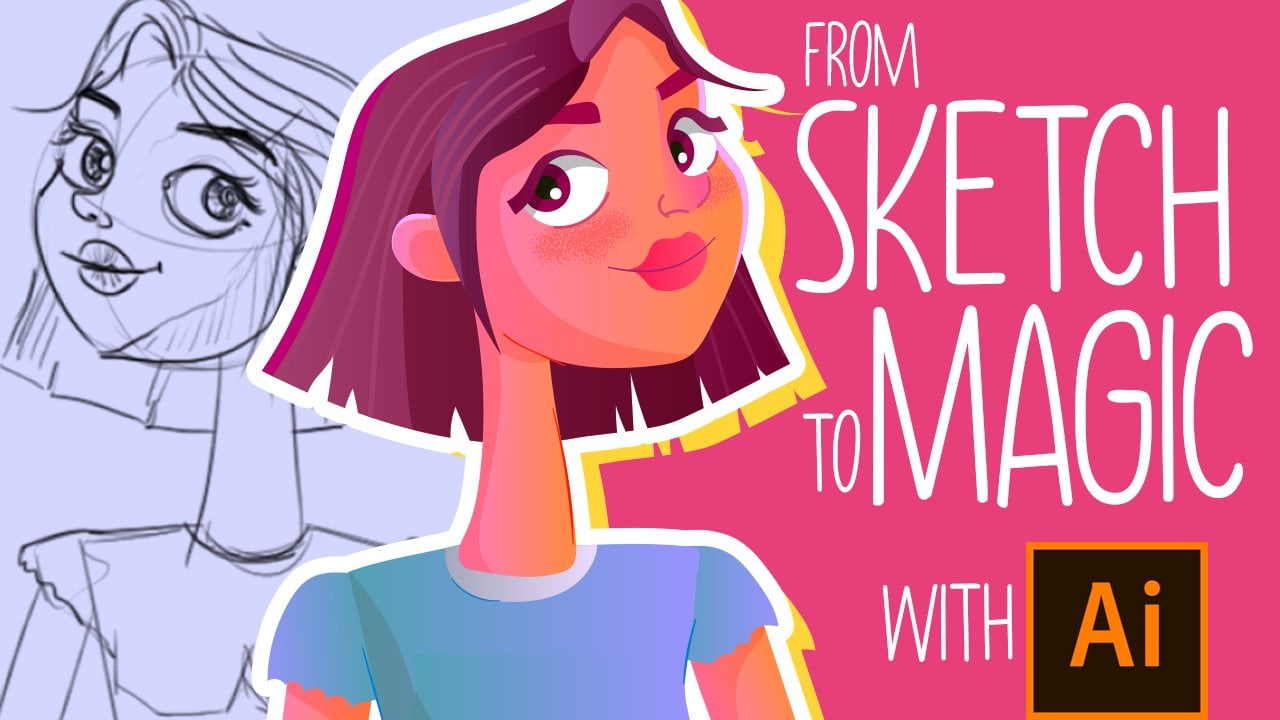
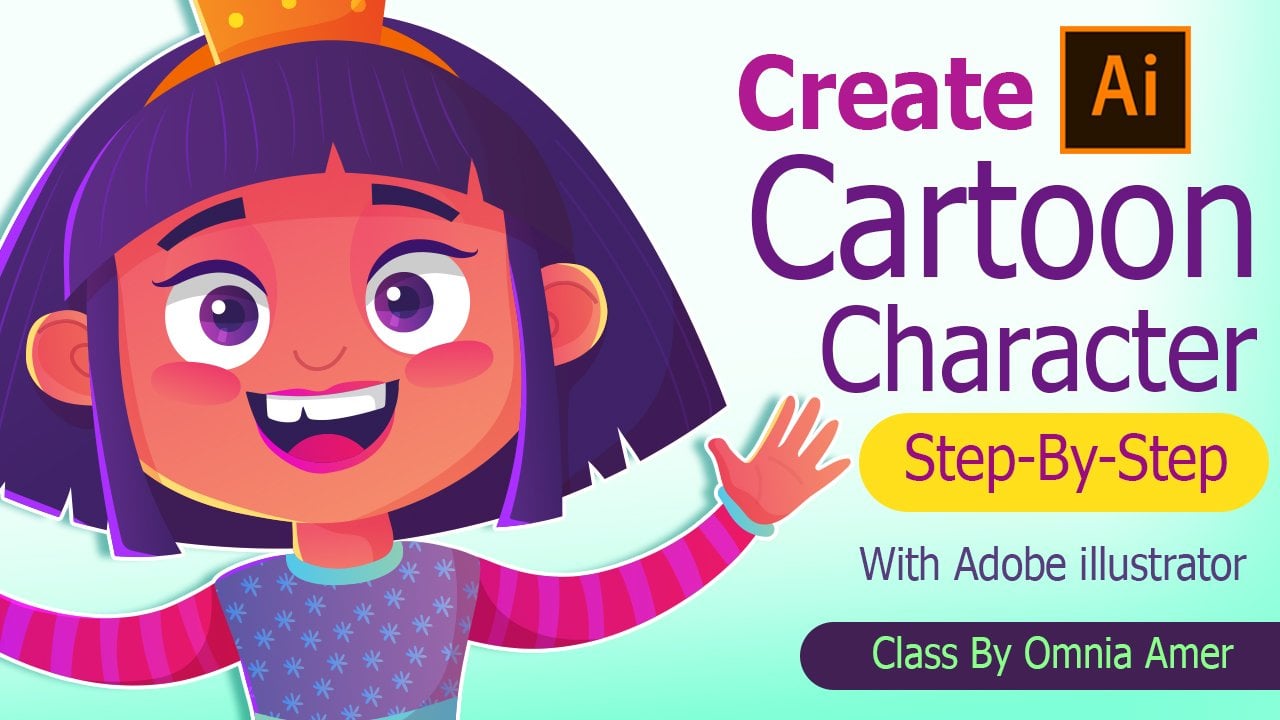
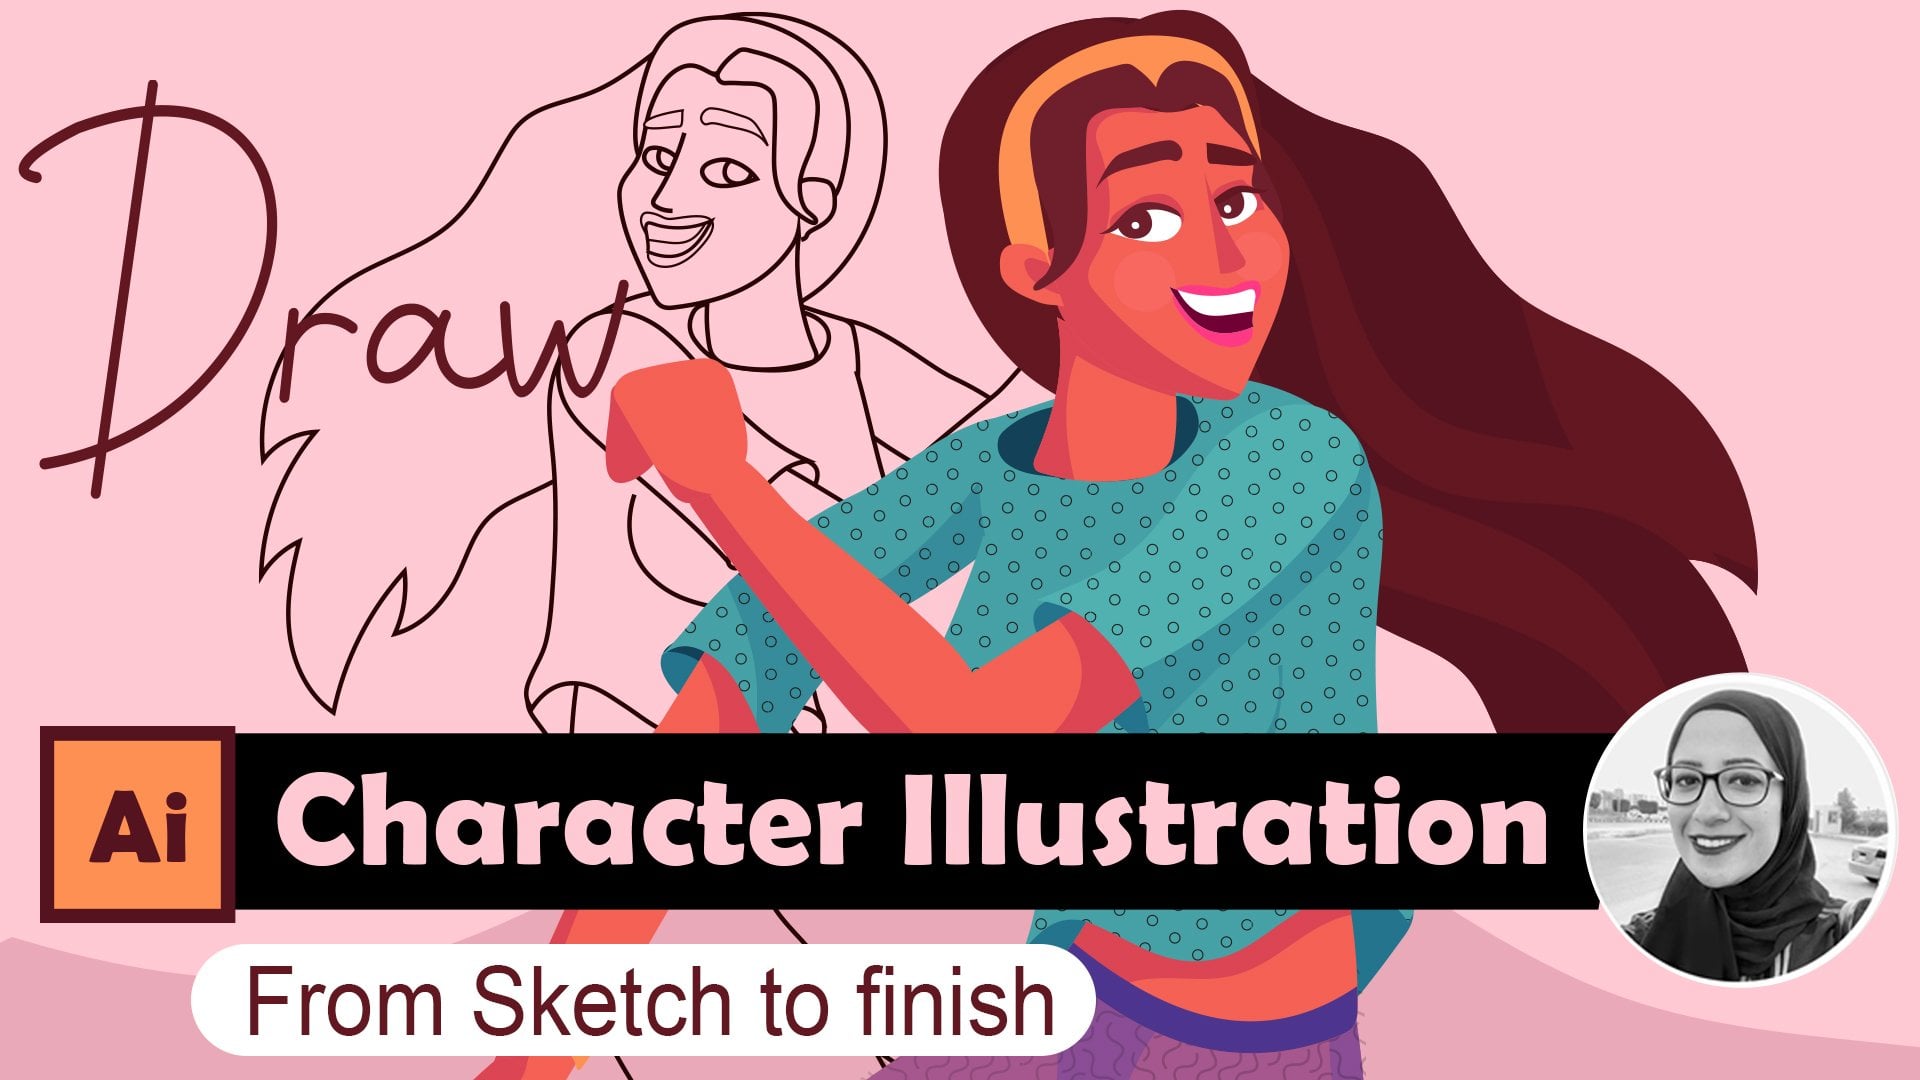
1. Class intro: Welcome to my scale chair channel. I'm only Amor, a character artist and illustrator for more than eight years now. In this class, I'd be happy to share with you my entire process to illustrate characters and had to bring them into life. We will start by sketching out the characters, moving to Adobe Illustrator to blow up the colors, show you the characters and ADSL neither yields that will give them to them. After that, we will have to Adobe Photoshop to do some magic to bring these characters to life by working where a lighting cosine, using brushes professionally to take your characters to the next level. And don't worry about this because as a bonus for this class, and you will be having my home favorite pack of brushes for Adobe Photoshop. You will have all kinds of brushes indexers will, can ever dream for in this class. You will definitely going to enjoy this fun journey to wash this glass old you need to do is to sign up to scale, to air annual, innocently get access to all my classes and doing more than 2 thousand satisfies students on my channel. Not only that, but you will also have access to all the classes when scales share in all kinds of fields from fell teachers all over the globe. So with that said, I hope to see you there and let's get started.
2. 1-Let's Sketch: So for the first lesson in this class, we will be sketching with Adobe Photoshop. So let's start. First, I will open a blank document and create a new layer. To start making some rough sketches for my characters. I have a rough idea in mind about the characters that I want to create. It's about a daughter that loves her father and she celebrating the Father's day with him in the park. So I first need my lines to be so rough. So fairest. We're just making some rough lines for the father and the daughter. Bodies. Just keep your lines so simple and enjoy the process of sketching your characters. It's really essential in this point to check some references for any position that you want your character to billion. Contrast is really great for this. And you just need to write anything like a man carrying a kids, are carrying a child, a man running with his daughter or anything like that. And you will find helpful photos that you can use to draw from. And just start drawing from what's you're seeing. Keep it very simple. Star, first to capture the position or the movement that you have in the photo that you chose. And everything should be great. So here are some central lines for the daughter. It's so rough, nothing needs to be so need at this point. So it's override. Okay. And that's the father. At this point. I know that everything is not that perfect and the proportions are not that great. But we will work on that in the next steps. Alright, at this point I think if he had like glasses, it would be nice not Tour If we will drop this later or not. So let's keep going. So that's all for a rough sketch here. We will take the obesity for this layer down. I will new layer above that. And let's refine the lines a little bit to make it easier for us to work with that when we had to Adobe Illustrator for the vector, I work. Alright, just refine and keep editing your lines. Remember the rough sketch first is just for laying out your idea and that, that's supposed to be so refined or final or anything. So along the way, we will be anything a lot. In that sketch. I'll ride. And the beard. You just keep refining the three lies to try to make as much lead aids as you want in this scattering. Step. Four unit did leave a now guesswork in their next steps. It will make it so easy for you. Okay? So as you can see him or hear more on enhancing the anatomy here in this sketch. And now with the girl's face. As you can see, I'm defining here, enhancing Moore in her hair. I changed I changed the hairstyle. Oh, dr. Let's continue. All right. And the mouth. In that scheme going now, I will be adding your hands on her dad's shoulder. You know, these little details makes all the difference in the illustration that you're making. It can add a lot of emotion and a lot of feelings to your illustration where it can on the facial expression, on the little details and all of that. So feel free to keep adding and keep enhancing EarSketch as you're going. Alright. And now let's keep going with the gardens body, their legs and her feet. It's okay. And maybe she's wearing headdress. And let's keep moving. Oh, right. Ampere the father's legs. We'll be working more on his shoes. And let's continue. Oh, right. Okay. Maybe make this a little bit smaller and keep enhancing and adding more the things tell you feel that you are satisfied with your sketch and you can proceed to the next step. And I think we're done here, and that's all for this sketch. So let's get to the next lesson.
3. 2-Color Blocking: So in this class, we will be making the color block and we'll head to either before the shop and hit m and select that sketch and get to a blank document in Adobe Illustrator and hit control V to paste this sketch. First, I will take the opacity down. And for this color palette, you will find it in the resources section that I will have control or command to, to lock the layer. Then I will be creating a new layer above this sketch. Lear and I had the circle next to that layer. And this has to make this layer as a target layer because we will be drawing, because we'd be colored blocking on that layer. Also IOB changing the blending mode for this layer from the appearance panel at unchanged, lending more to multiply. And this will make it easier for us to see this sketch below this layer. Alright, so let's get started and that's the color palette. After you download it from the Resources section, bring it to your file and it'll be easier for you to color. I will be using the pencil tool and then hit, I do select the color that they want. And it's that easy. There are a lot of ways that you can draw with it in Adobe Illustrator or lie the pencil tool, the brush tool and the pen and the pen tool. But my favorite one is the pencil tool. As you can see, it's really easy to redraw on the path that you just did. And it will be modified automatically. Then hit I and select the color that you want. To create a thing with the glare to find something that's really nice and goes with what you're doing. Alright? And I think that this color is really nice for the hair. Let's continue and back to the pencil tool, or you can just hit the Enter key on the keyboard to get the list tool, yellow dusky. You'll just keep drawing above this sketch that you have defined before, the past, lesser in the past lesson. Okay, so let's continue. And now let's draw the neck and head i and dissimilar to the back, or we call it you need to do is to head control, recommend chest square brackets to bring this selected layer to the front or to the back. All right? And then let's draw the eyes. Okay? You just connect a to select the anchor points in a bass. That's your drawing to modified it 3D and easy way. That will make it easy for you to drop. All right, and let's keep going. I deselect the wife color from the other I. Alright, let's keep going. And then for the girl's face, we'll just hit and to draw it with the pencil tool again. And hits. I just Cholera from here into her eyes. Alright. And just keep moving. Ok. When you just keep going with this step, you'll find that it's really fun. And to have the same properties for my pencil, just double-click on the pencil and make sure that you have these selected. Like me here, it will give you the same properties that you need for the pencil. And that will give you the IED to draw on the same path to those dead to modify it. And three, the helpful. Okay, I think we need to redraw this mouse. So just deleted lamb had to redraw the guards mouth. Okay. Okay, we just change the color to something darker. Just like that. And then the eyebrows. Let's make these does a little thicker. And the other one just like that. And then for the hair, this is hatching their favorite way to drop. I know a lot of people are drawing on endothelial straight toward the Pen tool, but I actually don't like it so much. I just feel much restricted them using the pen tool because I feel like I need to get everything just perfectly. But this way, when the pencil tool, I just feel like I'm drawing with a pencil on paper. So it's much easier. And it's more free. And I think that art is all about freedom. Something to express yourself and to express your feelings and your modes. And it needs to be free. So that's my favorite way. Okay, let's keep going. Because you can see I'm just drawing on the sketch and you you don't have to keep everything like the sketch. You can definitely change anything you need. As you can see here. What I'm selecting any layer and indeed this to get, to get backward one step, I hit Control or Command square brackets for it to get backward or forward. One step put to get all the way to the back or all the way to the front, I hit Control or Command, Shift and square brackets. Just tried to write this down or, you know, like memorize it because you will be using. Lot in illustrating another illustrator, it's a really nice shortcut. And I would really recommend that you download the shortcuts online. It will be easy for you to be faster with Adobe Illustrator. Ok. And now I'm drawing the leg. Let's keep gone. All right. And the girl's shoes. And then just hit control C, control V and sends the new the new leg that had just based it offended to Tobacco Control or Command Shift. Square brackets, the left square bracket to submit to the back. And now with the pencil tool on the drawing, this man's legs. Alright. You just need to experiment with the colors and choose your favorite colors. You just keep adding more and colors that you see fitting to this color palette. Or you can create your own color palette. Sometimes I like to use Adobe Color website to create my color palettes. It's a really amazing tool and it helps a lot to create nice color palettes. Alright? You just keep on defining. You had n and redraw them. You seem that needs to be modified for the shows. I think they are so dark, so I will be choosing any other color that fits, maybe this one, right? And I think we're about to finish here the color block in four hours. And I think that we are ready to head to our next Glaser. And yeah, I think that this has done well, right? So see you in the next lesson.
4. 3- Shading and Lighting : So for this class we'll be working on shading and lighting the characters that we just finished, color locking. Alright, so let's get started. So let's choose this Jo inside mode here. To draw inside the eyes. We'll be drawing the pupils. This choose this dark color and then hit control C, control F2, copy, an ellipse in place on that. And then Control C, Control F again to make this little lighting. And then Control-C, Control-V the whole pupil and choose the drawing side mode. But this time in the other, hit control D to get to your second people in. And that's it for here. For the girl's eyes will draw inside and have control V as well. And then we will choose the transform, could change it to transform vertically and hit Control V as well. Here in the second I. Alright, let's make this a little bit bigger. And as we did with the ai's, we will deal with the mouse who draw inside to draw this, to draw the teeth with the pencil tool, angled truth applied color. And also draw the tongue here inside of the mouth. Choose this color here and maybe just change it a little bit. And that looks great. Let's make this a little bit bigger. Maybe this here. Nonetheless just deleted and drag again to something like that and had control over men's chest left square bracket to take it all the way to the back. Let's just redraw on this polythene here. And dust will defy this part here. And her ear. Go right. Okay, let's work more on this beard with a pencil tool here. And also this part needs to be updated just like that. All right. And let's work more on this part on the beard. Thank to make it light, but I think it will look nice. You just keep playing with the pencil tool and see what will fit the character that you have in mind. Alright? And that's for the faces. Okay? And as you can see, this is the sketch that we started from. O, right? And just, you know, hide this catch, fair? And let's continue for meter. Okay. I think you've changed the color here for her shoes to a physical object, the darker. Ok. a. To work on the anchor points, to modify them. That looks better. Okay, so let's continue. So let's grow inside this leg to add the shading and the shading IRB selecting the same color. But this time we'll change the Blending Mode into multiply to add this shaped shadow effect. Okay? And here as well. So the technique is all about silviculture layer. Choose the draw inside mode and then draw the shadow part inside of it. Byte within the same color of the layer, and changing the capacity and the Lydian mode into multiply. That will give you the nice effect of the shadows arrived. Just being this shading parts. He's t-shirt. And for the girdles, arms you destroy coincide with the pencil tool to make this shading part here. Okay, let's keep going. I think the capacity for these shadows and little bit down. And now let's get to their faces. I was led the face of the Father draw inside and then randomly I would draw with the pencil tool or something like that, and choose this dark color. No need for the multiply option here. And here I will just draw another shaped like that. And I will choose a lighter color for the skin just to add the effect of and the lighting and the tip of his nose. And That's it. Alright. You just hit a to select the anchor points to modify them to look more appropriate. To modify the anchor points. Okay? Alright. Lets say that this here and then select the face. And I let the drawings hide mode again with the pencil tool. More shadows here. You just had to I unselect the shadows that Spotify the nose a little bit. Just like that. Okay? And now let's continue. It's just when the phi this part. And then select the neck to add some shadows here with the pencil tool. And just hit, I, lend this color and that's it. And also the ears and hit I. As you can see, the steps are very simple. But the make all the difference. And then some shadows in the, in the hair with a dark color like that. So you have two options to add. The shadow is whether you can select a darker color from the layer's color, or you can select a color. Or you cancel out the Lear scholar and then change the blending mode into multiplies. It told you, it's really nice. Okay? And the shadows into the beard as well. And into this part. Just like that. Okay. And let's head to the girl's face. Maybe let's make it a little bit bigger. Okay, that's now you get to the draw inside load. And with the pencil tool, we'll be drawing some shading into the girl's face just like that. And also try to keep it very simple. Okay. And then her neck maybe make it a little bit darker. Just the vance. Alright. Let's just, yeah, this just move these eyes and level of it here. Make this a little bit bigger. And with a pencil tool list redrawn this eyebrow. Just like that. Alright. Let's draw inside the nose and other lighting layer as we did in the father's nose. Just like this. Okay. I hope you guys are following along with me now. And if you fail, and if you just found anything that you can gift or anything that's really hard for you. Just feel free to ask me in the discussion board below. Then I'd be really hack, heavy, really happy to help you write with a pencil tool. We will just be drawing to eyelashes here. Okay. And with the pencil tool, we'll be drawing her lips just like that and hence control. That's bracket that they can backwards and then hit either change the color from the color palette panel, who rides in here. That's join side, some cheating as well. In the pointy thing. Something like that. Right? They just weren't on the neck little bit. And then let's draw the father's mouse. Smiling. Ok. We'll make little eyelashes on the father's eyes. Oh, right. And we will draw inside the teeth as well to make some shadows in it. These little details makes a huge difference. Gould's who drawings hide the eyes. Just a little shadow. It also looks nice. So let's continue with the father's eye and make the same effect here as the girl's eyes and the other one. Okay, so let's continue from here. There's just four more. When adding shading here on the fathers are, let's say this one. Then you just hit a select this anchor point to modify this. And this bar is that's created and adds some shading to the girls lives. And also to have Father's hand. Just like that. And I think that this means solidification here. Just like that one, right? Okay, I'm changing the color here and add some shading because just mark martin that barred. To make it looks nicer. And with the pencil tool, we'll draw this part of the address and send it all the way to the bank Control or Command Shift left bracket. Just as a little bit depth seen, o right? And let's add some shading to the address. And for the hands that's well defined them labeled with exactly right. Ok. Let's continue. You just go around and see if anything needs modification. You just take the a and work with the anchor points. Or you see if you have any path that needs to be. I'm really drawn on with the pencil tool. All these enhancements make all the difference at the end. Oh right, that's at Tolman metal. We know part of shading here in this in this leg, just like that. Okay. It is continue from here. Could fill this one needs to be darker. And let's continue. All right. Okay, this hand needs to be a little bit better to add some shading and also to this part of the hand. Thank this one. All right. And that's key point. As you can see, the characters starts to look more alive than we started then. And then the past listen. Okay, let's modify it a little bit. Okay, let's draw the socks that she's wearing here. Also drove inside the legs. Control-c, Control-V and the other link. Okay. Take the pesky down little bit here in the shadows in her own right. So for his shoes. And that's here by drawing inside. Maybe something like that to look like the soul of the shoes. Also this one. Draw inside and draw the same one, hit I to select the same color. And this one commandlets and apparent here and also part here. Okay. Maybe this leg. Yeah. And be like here to feel more realistic as if his really carrying her. The, I think it's really bitter now. Alright, let's continue. Alright, this grow inside this distress to add some details like that. That's experimented with the colors here in there. See what we can do. Also, I think between, if we added something here on the shoulders of the transit will look nice. Let's think a little bit down here. Why this Bart. Okay, let's take this down by hitting Control or Command, left, square brackets on the keyboard. This change, let's play around with the colors level with here. All right. So with the pencil tool, I will draw inside this hand to add some highlight here. Hit I and select the choir from the nose. Highlight. Yeah, let's just multiply this I little bit. Okay. And now let's draw inside the face just a little highlight and the side of his face. That's OK. And for the here we will draw inside some highlight as well. We provide purple color. Just like this. And also for the beard. And this side. Bart. Let's modify this shadow here. And now for the girl's face, let's draw inside some highlights as well with a library blue color. Okay? And we'll decide that at the side of her face as well. Maybe this change this color to something, maybe something knitr. Yeah, maybe this color looks great, right? It's just worth more in this part. I'll write them for her shoes. Let's draw some details as well. The more details you add, the more personality giving here through the characters. Even if it's a small thing, it adds to the story that these characters are having. And it's nice to just try to imagine the story behind them here, like how the feelings between this girl and her father and how much she loves him. And like, they are having a great day in the park, in the enjoyed their day. She is having a surprise for him at home. Small guard that she made for him, for example, or the little drawing for him for. They, something like that. Just give yourself that time to think what's behind the character that you're drawing or anything that's you're doing, try to feel it more. And all of that just shows on your final illustration. Ok, let's continue and add some highlight here on the hair quality. Looks like Dad. Okay. Let's add this this part here behind his arm. It's a really small detail, but it just adds some effect. And let's draw inside this this part of the t-shirt like this. Oh, right. Ok. And maybe near the top as well. Ok. Let's continue for me. Let's just add DO inside the teacher at the little layer of highlights with the this one. And that's, let's keep going. I'll write them for the fans. It's also draw inside of it a little layer of lighting, which looks nice. And let's take a and weren't more on these anchor points. And add a little layer of depth behind behind the leg. Just to add a slight depth with the t-shirts cleaves. Its a small detail, but it just makes a difference. Ok, let's continue from here and write for the dress. Let's also draw inside some highlight here, just like this. And some shadows here. Just below her hand on her dance shoulder, and some highlights on his arm on right. Shaving or lighting. Any scene that you're working on or any character. It just shows us where everything is, auntie know, like where is fair arm, whereas his arm, whereas everything and the relationship between the masses that you're drawing. So it just helps to figure out what's in this drawing are right. Let's continue. And here for the sock splits and sum. The small detail here like that. And for the shoes that straw inside, something like this. Alright. And the other show as well. And hit Control or Command, left square brackets from the keyboard to take it to the back. Ok, let's continue. Let's redraw this path of beard to make it a little bit more interesting than just being flat. Yeah, like if theta is cool, right? Let's continue. I think that there is something wrong with her shoes that needs to be redone. So with the pencil tool, let's just redraw this part. Yeah, keys to be facing up. Like that. Exactly. So as you can see, if you just compared the sketch to the state that we are here right now, you'll find the huge difference. I took a lot of decisions while I'm drawing. And that's just to show you how flexible the drawings process should be. Just be flexible and feel free while, while you're drawing. Then just stick to the sketch and what you did in the first place. Now just enjoy and keep changing. Keep taking decisions. The more you draw and the more you add to your character is, the more life you add to them. And the more really gets and the more close to you, the get and the more you know them. So we will just find yourself adding details and adding stuff. Then that will tell something about them to anyone who's Walton. And that's actually created, that's everything about art. And at this step, before the final touches in the next lesson, in this step, all what you need to do is to go around and see what needs to be done, what needs to be edited, what needs to be modified and just work at the round. Okay. You can see here I drove inside the noses, just a little shadow and the bottom of the nose overrides. And here it's a little bit highlight, just like that. Okay. And maybe some highlight here at the back of the father's head. Get will look more interesting. And some highlighting his ears and to hair ears into her ear as well. Okay. Let's just modify this part to the head. And that looks really nice. Alright, let's keep going. Well, right? Let's add some chat is here. And I think this part here needs some shadows. Yeah, the eyebrows needed chunks. The eyebrows, the units, some shadows to look more. To look more interesting. Arrived this just draw inside here. Know it enjoins idea. Okay, let's hit the drawing side multi-year. And had I to select the shatters. Alright. And also draw here in here. That's great. Okay, let's move from here. All right. Let's continue. And that's great. Okay. And as you can see, it already looks nicer and then how it was and how it looked in the past. Listen. So let's continue. All right. And I think of this step is just it just looks lies. One last step here, mentioning the decisions, I think to Upanishads will look nice here in the groom's here. And that's it for this lesson. So see you in the next lesson.
5. 4- Final Touches : So for this last lesson, it's all about the final touches that we'll be adding to our characters to bring them into life. And this is actually the most amazing step that I like in old this glass. We can just control c and control v to copy and paste that illustration that we just did in a blank document here. And we will choose to get it as a, as a vector smart option because it will be so much easier. And now Control or Command Shift I to change these dimensions for this document, I needed a little bit bigger for printing later. Oh, right. Now let's just get it ready. I really like it already. But adding these details are we making here in Adobe Photoshop will just make all the difference. Alright? So I will choose the Ellipse tool to create an ellipse behind the girl and her father. I'm just create a new layer and head off between the two layers and make a gradient. Hit G for the gradient and select any color to make a great into transparent. It's like that. I'm experimented with the colors to choose the right background for them. And then I had control the you to change the color, this gradient layer. Tele find something that really fits. And I think that lies. Purple is really great. And it really fits the color palette that we're using here for the characters. So that start from here. Okay, I will select these layers and take a little bit down. Okay? Let's just lock these layers to be working on them. Okay, I create new layer hands off between the two layers. Don't mask it into the lira. We'll be making this a lot. Okay. This they are, you'll make it Overlay. And why I'm doing this is to make the highlights, which is actually my favorite thing. I will be using the soft brush here. And as you can see when we draw with a really light purple or any light color is just gifts. This effect to light. With this overlay effect, it's an amazing step, guys, and it just transforms the entire illustration and then takes it to the next step. Let's continue. Maybe some highlights here on the nose. I think it's really great. And maybe here on his ears, Nick, her face, the eyes. We're going to put on the hair. Alright. And maybe here at the back of her head and the rest of her hair. The arms, the dress. You see this slide effect, it's really great. It's simply transforms that vector feeling of any illustration with Adobe Illustrator. It takes it to another level of smoothness and that's feels a little bit like a digital painting. So I just like this stuff. Yeah. And maybe here in his pants. I'm Iceland. Well, I'd end the shoes as well. This is really, really fond step. Then you just keep exploring and experimenting with this effect. Okay. Can hear on the girls legs as well. Okay. Say the size a little bit down to add some final touches to her mouth and her eyes. And you just keep going and try to feel the process and to enjoy it. Now, okay? Alright, let's keep going. And now I will be creating a new layer and make it. This time I blend them or to make it multiply. And this time I hope be chosen. Lights can color. Okay? And live bigger brush to know, a little bit smaller. To add this effect, guys. And this effect is my second favorite here because it ads. Then missing depths that we, we just can't get from a to B the straighter no matter what we do. Because this is smoothness of the digital painting. It should be done with the blending effect for the skin tones. And so when drawing with Adobe Photoshop, Oh, right, so you just keep adding some shadows here and there. Okay. And it will add all the reference desk tried to regular Igloo saddled ongoing, so heavy with that. For you not to burn the skin tones or don't make it look fake or anything. You just go with the flow and enjoy the process. Ok? Maybe some touches here and there. And that will be a really nice. Now, okay. And with a bigger brush size, we will make some channels and effects here on their bodies. Okay? Just slide effects like that when the brush and that will make all the work. All right. Just like that. And the year as well go right. Let's add some shades here on the girls legs. That will look nice. Alright. You just keep moving around your illustration as you can see that it really added a huge difference already. So let's continue. Maybe some shading. Here. As you can see that I changed the color to be exactly like the heroin. Okay. And some shadows in the eyes. Yeah. That looks okay. And let's continue. Okay. Now I will be creating another layer in between the layers to mask it into the illustration again. And this time I'm changes here to be stroke, when you don't know the bonus push back from the resources just loaded into Adobe Photoshop. And I will be choosing this dotted brush here. As you can see. And I'll be working like that. Oh, ride, just to add some texture here. And it will be experimenting with a blending modes till I find something that I really like. And you can choose your favorite tool. And as you can see, I hear chose the lighting vendor mode. And then with the eraser, or you can hit ie, you can delete all these excess dots. Will, right? And let's keep moving. Ok. And then other layer to be masked in the illustration. And this time I will be choosing this brush here. Okay? And this time let's add she is here on the Gertz chose. I really loved this effect already. And it looks beautiful. Right? That's fine. And here as well. Okay. And for the father's shoes, let's also add some textures. This one here, these dots. Okay. Mainly this changes into this one. It will also look like stitches with, we'll add the three elastic effect to the shoes. I'm talking about the little details guys, you know, these little things that you add that will give the effect and the feeling of something that's real. Or it looks like a real thing. These little things makes all the difference after our old, Oh right. Keep warming. And the other show. Okay. Alright, and now another layer. And that's make some sketches here to the girl's dress. Also to give a feeling of the cloth. And here as well. Okay, and with the eraser lead this. And now my favorite part of the OB in another layer, IOB using some floral brushes here that you can find the year. And you can also make your favorite. And it'll start making some surface pattern on the dress to feel like a real gurney address. And I will just add some randomly. That'll flowers here and there. I'll write. That looks fun. And with this little branch here, maybe something like that. And that's already fund. Yeah. Maybe here and here and here. And also with the eraser, we'll be deleting these illustrations outside of the dress. And that's also really important tip for you to make your illustration. And it's nice to take care of these little things. Ok, in here as well. All right, let's continue. And this one here. Okay? And this little flower here. And then we will experiment with the land and modes as well. Blending modes have really interesting feature in the programs because it adds this different feeling in each one. So you just choose your favorite one. Okay? And let's delete this part here. Now, right? I think that looks and so nice. And I really love how they turned out. Ok, let's continue. As you can see, you just go around my illustration to modify anything that needs modifying or to delete anything that's not in place. All right. I've used this big dots brush here. And yeah, I think we need to know and it's just disable this opacity, this opacity here, okay, and delete and just redraw. It would just give this feeling of real shoe. Ok. Here we can just add some statues as well. Will be nice. And here as well. Alright. Okay. You think that there is some excess lighting here that needs to be it doesn't seem right in here as well. All right. Let's continue. Okay, now let's get back to this background and we'll create a new layer mask in it. And this time we're trying to add some trees in the background to just again, a feeling of a park or something like that. And this time I will be using a bigger brush. Yeah. And there's Brush Creek looks dies and it's already gives the feeling of the trees. Okay, let's make it a little bit just like that. And also the vendor modes, I will try to find something to, to go more with this illustration. Okay? Alright, maybe this form, but just take a little bit up. Really looks so heavy. Maybe let's change this case, tell this tracks from the main is crazy. So maybe let's just change the color a little bit. Yeah, avian, this part, this has duration part and bring it back to reds. And I think it looks great now, if hit Delete passively liquid down, it will just look great. Maps exactly it, okay? Okay, and now let's head to another brush. I know they are a lot of pressures, but you can just create your favorite groups in them. And as you can see that this brush, it's for birds. And it will add just a little tiny dots to your illustration that would bring it alive. And anthill add more to the scene. Okay, let's create a new layer for that and also mascot. Yeah. Yeah, just just something like that. And maybe yeah, I can't select it and then just rotated like this and maybe a little bit down. And that's really nice. Okay. All right, now let's unlock this background. And maybe if we took it like that, to look much better, select all of them and try to move them around like this. Let's just move everything here in a little bit and thinking of adding something else to add some effect here. So for this illustration, I will be adding a new mask layer plus like this color and had g to make such a gradient. And with the blending modes, let's just see something that will add some effect or some color to the pans of the Father. And then we'll add some email, like to be something more interesting. Just keep moving around the blend mode to see the effect because you need for this one, I actually like the color that it gives here. But I think I will just delete this part here from the shows and just leave this, you know, pinkish effect here on the pants. It's kind of interesting. And maybe with a soft brush, I create another layer with the same lender mode and just try to experiment here a little bit with their hairs. And let's see if we can. Thumb was something good or not. Okay. I think the null that's just keep everything. Well, that'll saddle. Okay. Maybe trying something like this here. Alright, and now let's create a new layer in the background. And with a soft brush, let's add some bold colors here. Just to make some effect of an inner shadow or something. Just some touches. All right. And let's hit T to add some text here. Like something for the fathers. They like best dad. Now be nice. Alright. And just change this spacing between the letters and the color. Maybe. Yeah. And just find the right place for this. And that already looks great. Right? And maybe the opacity a little bit down. And I think it's really nice. It's just make some spacing here. Maybe here. What were they think here is matter. Okay. Alright. And this is it. And that's over this glass. Thanks a lot guys. And feel free to make your own character. And I will be waiting for it in the project section below this class. Also to be really nice 50k and Lieber view with your faith, with your feedback for me to know more about European in this class. Also, if you haven't checked my previous classes, I think you'll find great classes for beginners and advanced on character illustrations. Although that's my Instagram for more works, live updates and illustrations day-to-day. Also, you'll find some time-lapse videos for my illustrations and sketches and some behind the scenes when I'm working, I hope you guys enjoyed this class and that was on the Amor with you. See you immoral kind glasses and thank you.
 Omnia Ali amer, Character Artist, Illustrator