Transcripts
1. Introduction: Hi, I'm Marie and welcome
to my watercolor class. If you love to paint flowers and natural history subjects
in a realistic manner, then you've come to
the right place. My simple step by step watercolor method will help you to paint
anything you like. So in this class, you'll
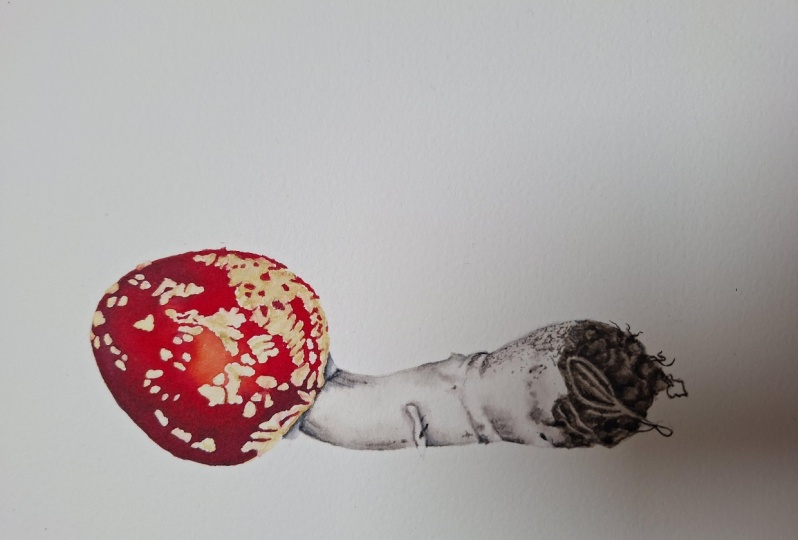
learn how to paint a realistic plegaric mushroom. We'll be using masking fluid in order to save
the white spaces, the warts on the cap, and that enables us to be free with the washes
that we make. We can apply them uninterrupted. You'll also learn how to add fine detail to really bring
your painting to life. You'll find all the
resources that you'll need below in the projects
and resources tab. I've also added an
extra reference image if you'd like to
carry on painting. In the coming lessons, I'll show you how to mix
the paint that you need, and also I'll share with you the watercolor techniques that I use to create
realistic paintings. If you're unsure of anything
or have any questions, just message me below. I'm always happy to help and always happy
to hear from you. Let's get started.
2. Materials: Here I'll show you the materials
I use in this project. First of all, you need a
palette for your paint, and then I use this
big water container because there's two sections. In one, I can rinse
my brushes off, and then I also have clean
water available as well. You can just use two
separate containers. I use a selection of brushes. These two are spotters, which means they're short
haired with a fine point. You can use miniature
range brushes or just a brush with a really fine point if
you can't find these. Then I use a larger
number six brush where I want to cover more area and a number
three to add more detail. Then this one here is
an old spotter that I use to remove any
paint and create highlights with I'll just put these here and these
are the paints that I use. I prefer to use
paint straight from the tube as I find
mixing a little easier, but pans are fine as well. The colors that I list in the
materials list can all be substituted if you already have a different make of paint. All of the colors are listed
on the materials list that you'll find in the projects
and resources tab below. I also always have
a kitchen towel to hand as it can
catch any drips off of my brush or
if I need to clean the paint off quickly and
it's quite absorbent. I use hot press paper because I really like to paint
on a smooth surface. But again, if you prefer
something with a little texture, that's absolutely fine as well. I think it's important to use different materials and try them out and see what suits you best. Next, we're going to look at
how to trace and transfer our image from the
outline drawing provided onto our
watercolor paper.
3. Tracing the Outline: Below in the Projects
and Resources tab, you will find an outline
drawing of your mushroom. I like to also add a reverse
outline drawing as this is a really good simple method of transferring your image
onto your watercolor paper. So I simply place a piece of tracing paper over
the outline image, and I like to use a
mechanical pencil as the lead tip is very narrow
and it stays narrow, it doesn't become blunt. This means that you can be very precise with the details
that you're drawing. If you don't use one
of these pencils, use quite a hard pencil, maybe a two H or harder so that your pencil
marks don't smudge. Again, you can keep your lines
nice and thin and precise. Then I trace all of
the lines of my image, including all the little
details that I've added. You might want to secure
your tracing paper with a little masking tape so
that it doesn't move around. Then once I finish
tracing the outline, I simply turn my
tracing paper over, place it where I want it
on my watercolor paper. Again, secure it with
masking tape if you need to, and then just draw
over the lines again. It doesn't matter if you lightly scribble over them
as long as you cover all of your pencil
lines so that it transfers the image to
your watercolor paper. Then when you've finished, you can neaten up any
pencil lines if you feel the need to or even remove any if they're too dark with an eraser and now you're
ready to start your painting. In the next lesson, we'll
mix up the colors that we're going to need. I
4. Mixing Colors: I'll start with sepia and I'm just pulling it
out so that we can see how it looks when it's very dilute
as a very pale wash. Now, for some of the shadowy areas, I'm going to add a very tiny touch of
French ultramarine blue. This just leans it
towards a grayer hue, which will work well for
the more shadow areas. Whereas the sepia on its own, I'll use for the
more earth color at the base of the stalk. Then I'll take my sepia again and add
cadmium yellow pale, making the mix more
yellow heavy than sepia, as this is the mix I will
use for the lighter areas, the scales and the
warts that are growing on the red
cap of the mushroom. I use this in a water
down wash just to add that earthy tone as these light areas
are not quite white. Then I come onto the red mix. Now for this, I'm
using cadmium red deep This will be color, the main red that
I'm going to use. I'm also going to add some
cadmium scarlet here, which I'll mix with the red for a brighter,
more orangy color. I just want a lighter, brighter red for where the light is falling
directly onto the cap. And then for the darker
shadows on the edges, I'm going to add Windsor
violet to my red, which just darkens it up nicely.
5. Masking Fluid: You can start by either drawing your own
image or by tracing the outline image provided and transferring it onto
your watercolor paper. Then we'll start by applying the masking fluid
to the areas on the mushroom that I want to
save and keep white for now. I start by pouring out a little
of my masking fluid into a dish and using a very old brush that I keep especially
for masking fluid. Don't ever use your
good ones as you'll never be able to get them
quite clean enough again. Then I pick out all of these
little spots on the cap of the mushroom that are
known as warts or scales. This is going to enable
me to just paint over the cap with my red mix without having to
worry about saving all of these little lighter areas. It would be really hard to get a smooth surface and
a smooth transition from the lighter red area in the center out to the
edges where it is darker, if I had to work around all
of these tiny little bits. Now, it's important
to work quickly with masking fluid as it
dries very quickly, especially on your brush. You don't have to spend
too much time being really precise around all
of these little edges. As long as we block out
the areas that we need to, I can come back and make
some adjustment with the red paint around the
edges a little later.
6. Begin Painting: Here is my drawing and the
masking fluid is now dry. It dries very quickly, just five to 10 minutes
and we also have a color chart where I've just jotted down the
colors that I've used. This will help as a reference as I progress with my painting. Now we're ready to get going. I'm going to put a water glaze over the cap of the mushroom first using my number
six brush and apply a light wash of my yellow and sepia mix all over the cap
this is just to lay down a base and keep my
colors leaning towards the earthy shades rather than working
straight onto white. I just paint that in quickly
and then leave it to dry and I'll come down
and start on the stalk.
7. Painting the Stem: Using my number six brush, I laid down a water glaze, starting with the top
half of my stork as I don't want to overwhelm myself by trying to do the
whole thing in one go. I want to be very
precise here with my shading and I
don't want to let the paint seep out of
the areas where I put it down and run into the others. As then I will lose my highlighted area down the
central part of the stalk. As I'm working quite
wet to begin with, I want to keep a lot of control
over where my washes go. So working with my
sepia and blue mix, I've now swapped to using
my number three brush, as this just helps
me to be really precise with my wash. Now, while the first
wash is still wet, I'm coming in here with a slightly thicker mix of
my paint just to really focus on darkening up the darkest shadows that
I can see on my subject. So this is mainly
underneath the cap of the mushroom and
just underneath any little bits of scale that is protruding down its length. And also down the
sides of the stalk, as this is what creates
the form and gives it its oval curved appearance. Now in swapping over to
my smaller brush here, my number four spotter, which has a very fine tip, but quite a short stubby body, so it can carry a
fair bit of paint. With this, I'm going in and
adding in the smaller detail. Now I want to keep this
detail very fine in order to keep it very natural looking
and my paper is still damp. It's not very wet, but it's just damp enough so that when I put my paint down, its edges are just
able to soften. Again, keeping
that natural look. I'm just swapping
here to my number two spotter and I have
them both on hand and just use the
smaller one when I really want to make the
detail even tinier. Then I just go in with
my brush damp and blend it in a little to
smooth in those edges. Then I'm also just picking up any little details along
the length of the stalk, such as odd little bits of dirt or little
hair sticking out. All this really adds to the
interest of my painting. Building up the
layers in this way from the lightest wash to the darkest areas and then adding in this
very fine detail, it just starts to add a real feeling of
depth to my painting. I just continue picking up on all the little blemishes
and anywhere I feel that I just need to blend in any particularly harsh edges or details that
are standing out, I just come back in with a clean damp brush and just work at the very edges
to smooth them in. Then I'll come down to the bottom half and work
in the same way down here, applying a water glaze first, and then start by
adding my lights layer. Picking out all of the
more shadow areas to give my stork its
form or its shape, it tends to be darker down the sides as the light is
hitting the central column. As my subject moves away from the light towards the
edges, they become darker. So now the reason I don't do the whole stalk in one
go is because I really want to be able to keep
the section that I'm working on damp enough so that my paint doesn't start
to dry out as it would then cause
streaks in my washes. Now, if you begin to
get a streaky effect, you can just let it
dry off and then begin again with a water
glaze and just make sure that you're working into
it while it is still wet enough or damp enough for you
to move the paint around. So it really doesn't matter how small the sections
are that you work in. Just make sure that you choose the area size that you
feel you can manage. Again, once my
first washes down, I start to darken up the darkest areas
that I can see first. And just blending the edges
with my brush just damp. I've cleaned it off and
I'm just coming back in with it damp now and just blending on the very
edges so as not to remove the main body
of paint as well. Then changing to
my smaller brush, my number four spotter, I start to apply the detail. Again, if my paper
is not damp enough, then I won't be able to
blend this detail in to the background and
then you start to lose the naturalistic look a little. Here I'm just going in with
my number three damp clean brush and just blending in
again all around the edges. Now, this is my favorite part, just putting in this very, very fine detail with the
paint a little darker, as it tends to be these details that really do bring
your painting to life. U So when I come down to the
bulbous part here, the roots, the first
thing I'm going to do is start mapping
out these little roots as I really want to save
these so I can just lightly put them in and then
be able to work around them. Then I can just
start to build up the area surrounding
these roots, these areas that I want to save, building up the textured surface while avoiding these for now. I'm using my number three
brush here just to cover this slightly larger area and putting down a
light sepia wash. I'm starting to use my
sepia on its own down here, just to give it a slightly
more brown earthy hue and just take it away from that slightly bluish
shadow color. So then while it's damp, I take my number four spotter, my smaller brush and just start mapping in
some of the detail. I'm still just picking out a couple of the
little roots that you can see here and just
working around them again. I'm very loosely picking out my dark and light areas
with this first wash. This will be the base that we'll start adding
the detail to. So I'm just starting to
drop in some darker areas now and just trying to pick out the shapes of
these areas as I go. I'm slowly building up this area by using
a stippling effect, and this is beginning to create the texture because I
don't want it all smooth. I'm also stippling in
all the edges rather than blending them smoothly into the lighter parts as well. Trying to create a bit of
a rougher surface here. Then I come back in
with my smaller brush, my number four spotter and start refining the
details even more. The surface of my paper
has dried off a little, but it's still
really quite damp, so I can still just drop in this paint and it's just
spreading out a little, but still retaining
the definition of the detail that
I'm putting down. As I'm going along
with my layers, I'm getting more and more detailed as the
paper gets dryer. A lot of it is about timing. But again, as I said before, if your paper does dry
off too much, it's fine. Just leave it completely
to dry fully, and then put another thin
water glaze all over, and then you can just start in with your next layer
on top of that. Now, I'm just very, very delicately coming in here
with the absolute tip of my brush and just adding in these lovely
little details, just the wispy bits of root that are coming off
of the bottom of the bulb. This requires a really
delicate touch and be confident and just put in a really quick line
because with this, you don't want to go over
it once it's down as that will thicken it up and stop
the natural fluidity of it. Then I just continue
over the whole root in the same way until I feel
that I'm happy with it. I think one thing to remember
here is to make sure that you are keeping hold of
your lighter areas as well, no matter how small they are because it's this contrast
between the light and dark and then the mid tones in between that are
really going to give your painting its shape
and form and stop this bulbous part at the bottom just being a big dark area. And then when I'm
happy with it all, I will leave it to dry
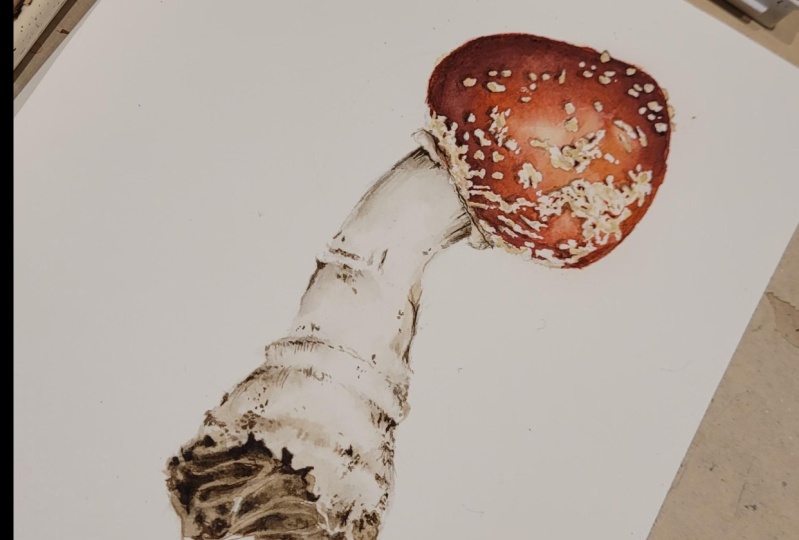
and settle and move up to the top of my mushroom
and onto our reds.
8. Painting the Cap: Using my number six brush, I apply a water glaze all
over the cap of the mushroom, making sure that it's really smooth and there are no puddles of water
gathered anywhere. Then I'm coming straight in
with a lovely thick red mix. Now, this red has a little of the cadmium scarlet
mixed in with it, as I just want to keep it a
bit brighter at this stage. Now I'm being careful to avoid the highlight in the
center of the cap. And just being very
careful around the edges so that I get a really
smooth outer edge. Now, I'm just flicking
through the center here, but this is the lightest
part of our cap, as this is where the light is falling straight
onto the mushroom. I just want to keep the
blend here nice and smooth. Well, I come in
with some more red. So I'm using less and less of the cadmium scarlet
all the time, just darkening up my cadmium red deep and just building up
this lovely color here. Now while this is still
wet enough to work on, I'm using my Windsor Violet and cadmium red deep mix to
darken up all the edges, all the more shadow areas. As the color moves
away from the light, it has these darker tones in it. I'm going to leave
this top part to dry now and come back down
here to the bottom. And
9. The Stem - 2nd Layer: Now, this area is completely dry and I just want
to look over it and see if I need to add a light wash just to
pull it all together and make sure that
the roots that I left white are not
standing out too much. I can just put a very
light sepia wash over them so that they blend
in with the whole area. I'm just coming up to some of these little details here
that I left on the stalk. Again, with my
really small brush, this is my number two spotter. I'm just adding in
the tiniest shadows and the thinnest lines to
just define the edges. Also these two little areas
up here underneath the cap. Popping in the
shadow color there. This is the sepia with blue
mix and just blending it in. So I'm just adding in these dark little
lines here to really define the edges and really
deepen those shadows.
10. The Cap - 2nd Layer: When the top is completely dry, I'll just come back in here and really deepen up this
lovely red color. I just put a thick
concentrated mix of my cadmium red deep all over, and then I clean off my brush
and just come back in with it damp and just
blending these edges, just flicking up through
this highlighted area. Now I'm just wiping
my brush off on a paper towel each time I pick up some paint so that
I'm not going back in and just putting it
down again somewhere else. Then I'm also going to use a smaller brush and just pick up some of the paint in certain
places across the cap here. Now, this is just the
blemishes that are on it and just to begin to create a surface texture that's much more natural looking than a completely smooth finish. Just making sure that all
the little areas are just nicely blended in with
the rest of the cap. Then again, I come in
with my darker mix, so this is the winds
of violet and red, and just darken up
those edges again. I just work quickly
over this surface, flicking the paint through
to blend it all in while it's still wet
enough to work on. Again, if you start getting
any streaks in your paint, then just let the whole thing dry and then you
can come in over the top and just work quite quickly with a thick
red wash again, and this will be fine. Now I'm also just flicking
a very light wash of my cadmium yellow pale just through this
central lighter area, just to enrich the color
and warm it up a bit. Then I have to leave
this for a good ten, 20 minutes, maybe
a little longer, just to make sure it's
completely dry before coming back in to remove the masking
fluid in our next lesson.
11. Finishing Touches: You can just pat a paper towel over the top
just to make sure it's not picking up any odd bits of paint that are still on top
of the masking fluid, and then just rub it all away. Now, you can use a hard rubber, just make sure it's clean
or just a clean finger. It comes off very easily. Check over with your finger, make sure it's all
nice and smooth and there's no masking fluid
left there at all. Then using my number
three brush and my cadmium yellow pale
with a touch of sepia mix. I'm just going to paint
in all the white patches to help them blend in with the background and look
more naturalistic, give them a little bit of shape. So I'm applying the paint
mainly around the edges, and then just with
my brush clean, blending it into the rest
of the little shapes here, just to give a slightly
textured surface so that the surface is not
completely flat and there's some variation of light
to dark tone there. I'm just working quite
quickly around the edges here because I don't want the red to run into
these white areas. It is quite important
that I work quite dry and that the red mushroom
was completely dry first before we started. And as you can see here, I'm not putting down a
wet glaze first here. It's not necessary
because my paint is wet enough and the
areas are small enough. This also helps the
two colours not running into each
other at the edges. Once I've covered in all of
these little white areas, I'm going to come back in now
with my number two spotter, my very small brush and
with a slightly darker mix. I've just added a touch more
sepia to my yellow mix. I'm just putting in all of the little markings that
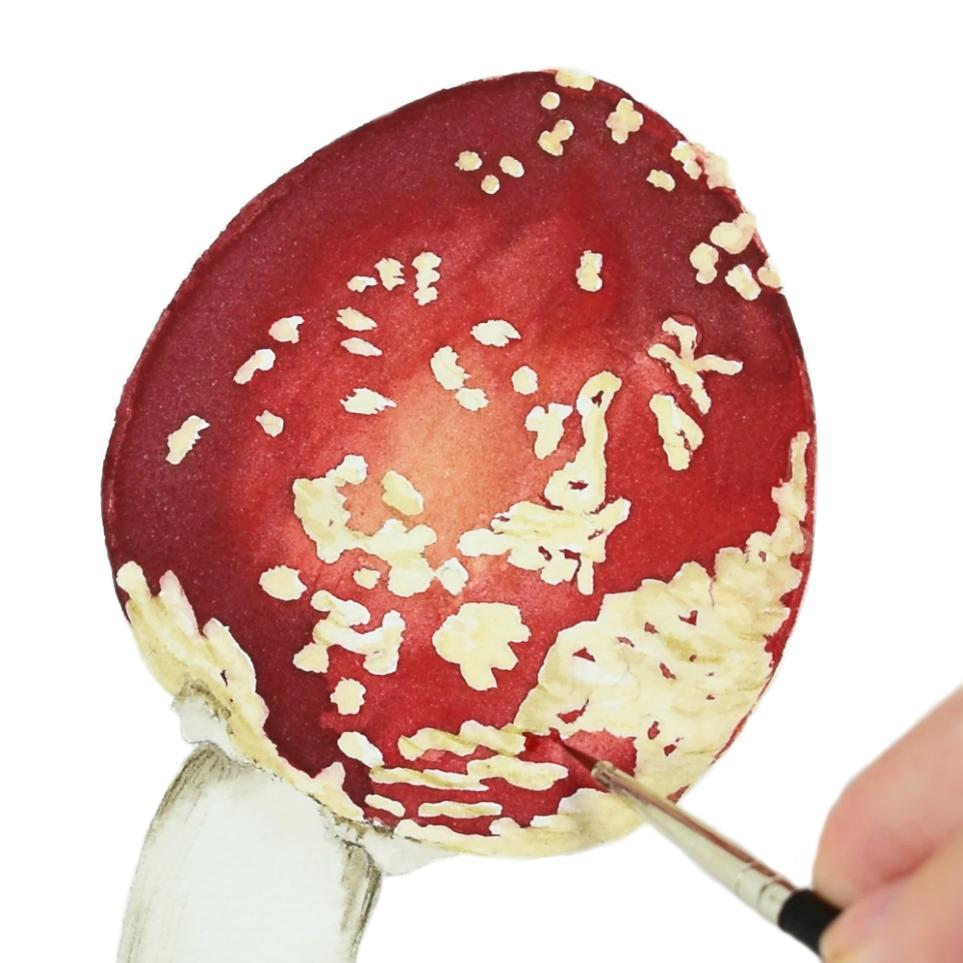
create the texture and depict the scales that form these white areas
growing on the mushroom cap. Once I've added in all
these little lines, I'm just going to come back in with my number four spotter, so slightly larger brush, just wet and just blending wherever I can see some harsh lines or
just around the edges. Then I come back in with
my number two brush and add any more little bits
of detail that I want to. It's just a process of
blending these lines, blending out the edges to keep it very natural and
smooth looking, and just adding in the detail where I
feel that I need to. Then when I finished
with that color, I'm just going to come
back in with some of my red mix with my number
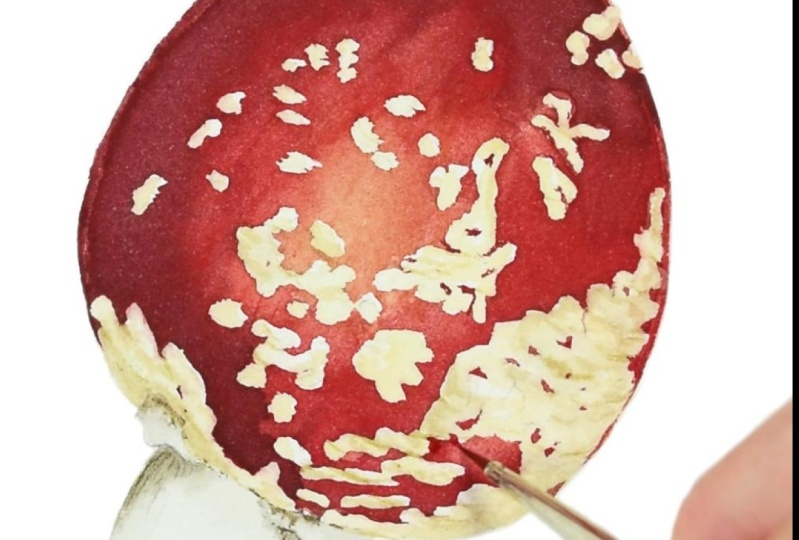
two spotter brush. And just add some detail to
the very edges of these areas and add in any little
spots where there were gaps in the scale and the
red was showing through. This helps to really
define all of the edges now and just really add all of those lovely
finishing touches. Again, I'm working
really quite dry. My paper is barely damp still, but not in any way wet. When I put in the red detail, it's not going to spread out at all as I do want these
edges quite crisp. When you've almost
finished your painting, it's always a good idea
to take a step back, maybe leave it for
a little while, and just come back and take a look over it and
see if there are any areas of detail or tone that you would
like to enhance. Then once you're happy with it, you can just leave it to dry and there you have your
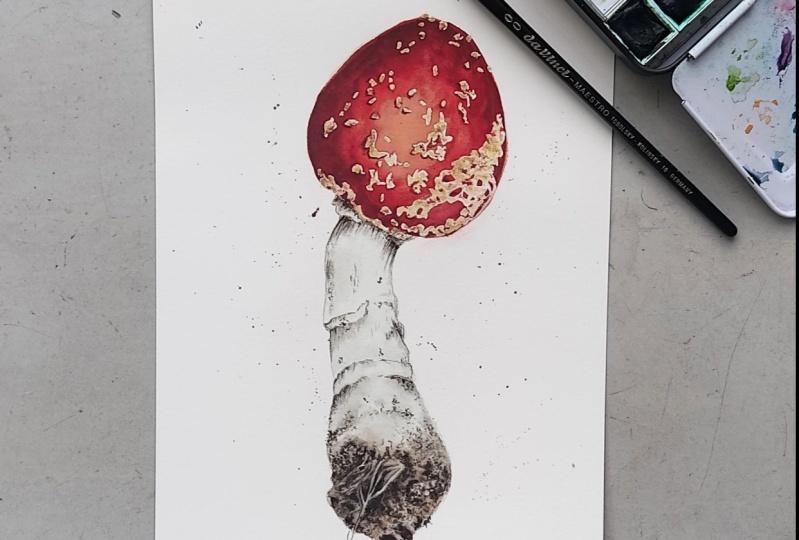
finished painting.
12. Sharing your Painting and Conclusion: So you've finished. Well done, and thank you for
taking my class. I really hope you've enjoyed it. I'd love to see your
finished image. If you'd like to share it, you can do so below. Don't forget to hit follow if
you'd like to be kept up to date with the new classes that I release here on skill share. If you've got a minute, I
love to hear how you got on, please leave a review
below as well. I have plenty more tutorials
in my online art school. The link is below
if you'd like to continue your watercolor
journey along with me. Goodbye for now and I really hope to see you in
class again soon.
 Marie Burke, Watercolor Artist