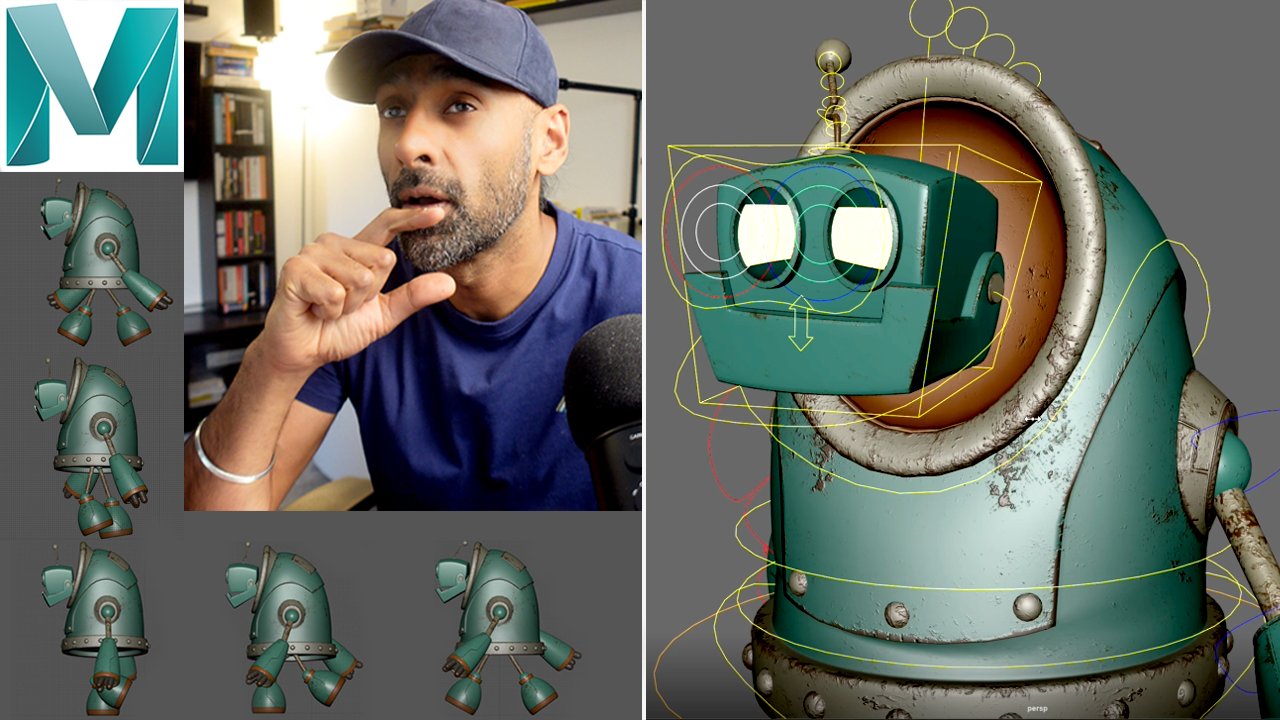
Transcripts
1. Introduction: Animation To me, it's
all about getting out of the world of reality and
going into the deep, imaginative worlds of our minds. Welcome guys. My name is opi. I'm a senior Animate
video games industry. I worked on a range
of AAA titles, Heavenly Sword, motor storm, apocalypse, Harry Potter,
the bone conspiracy, and a series of lego games. And in this class we will be continuing the body
Movement Series. We will be Animating
a weight shift, which is a very crucial part of any type of animation that we're doing in terms
of body mechanics, getting the weight
right when a character is really important to shift in weight formula one
led to the other will give that little
ability to Character. So in this class we
will do pre Blocking. You always stop
blocking the Character. Part one then will
block it a bit more. We started refining the
breakdowns of the animation. We will talk polishing it, move Volume To The
Hips, Adding more, Refining To The Knees, and then also finishing
off with Tracking Arcs On The Hips and Feet. So I'm excited to go over
this basic fundamental again, to make my skills more solid and hopefully make your skills
more solid as well, and get a better
understanding of the foundations of Animation. So get your Maya Blender
max will ever use, like I said in all
the other classes, concepts are the same, that software is just to two. So I'm excited. I hope you're excited
to come along, grab you to animate with me
and have FUN along the way. And let's start animating
2. Where To Download Rigs: Guys, we're gonna do this
side shift weight exercise. Don't forget the non-stop net. Go to this website.
Pre Rigs yet. Just to remind you,
we're going to use this Rig ultimate Walker
download from here. And I'll see you in the exercise
3. Pre Blocking Brief Breakdown: Alright guys, welcome back. So in this video, we're gonna do a simple side
step just to show weight. Just going to be a Side shift. We're going to shift
this mocha character. So let's load this Character up. And let's start. So we're gonna do is
we're going to shift in, we're going to Shift
him this way first. I'm going to lift this up. Now that and then land here. Then the weight is going
to shift this way. This move followed this way. Yeah, it's a simple
weight shift. It was very important,
very important exercise. So come along with
me and I'll show you my workflow, how I do it yet
4. Blocking Poses Part 1: So we've got this
Character, we posed it out. We want to make sure there's
Character is balanced. Anova going to just do
it in the front view, but we want to make
sure that's balanced. Okay? That looks
pretty balanced to me. Grab everything can. Now key every forefront. What we're gonna do is gonna
be a little down that way. So it's gonna go down. Okay, Let's just go down. Slightly, rotate everything there. So it's going down. Anticipation that we're
going to lift here. We'll just have leg up. Close it. This two will get rid of just up back here without wanna do, we want to work this post? So let's move this
to frame eight. And let's just copy frame six, middle click that,
bring it back to three is a bit of a whole. And then you just move
this forward a bit. Who've got a hold here? I might want to just
push this a bit more. We rotate. Rotate this as well. So there's a bit of a whole. Now how much do we want
to hold it? Let's see. Dirac's, we will look be a
quick quantity comes out. And then this starts
to come down. And we're going to put it down somewhat differently
on the same spot. Now, this is starting
to come down, but it's also rotating
as it's coming down. So we'll get a nice
little hole there. Select everything here.
Just a habit I have. I'm selecting everything in
Kenya, so everything's good. Then this leg, we go to Y here so we know that's going
to be on the floor. Then we can go to rotate
X, which we fly it. Then we want to move
and rotate this. So we land. But we still
want it to come here. So it hasn't shifted
yet. Let's see. Lands step and
then weight shift. When weight shift, then
weight shift forward. And then maybe slightly more. With the rotation. This foot starts to come up
5. Blocking Poses Part 2: Coming up. But this is still going
back because it's weight shift comes in and
then this moves as well. Slightly social will move this. And then maybe here
we'll On the flu. This is still moving this way. So the momentum is
still this way. And then it settles as it's
settling, as it steps. Starting to come back here, many steps and then
over in the middle. So we got a little Blocking. They're just trying to
get them mechanics right? So let's see how it feels. I think the, as we play. This side, first
side works, alright? I think there needs to be
erode tension on the second, and so it goes down. And then here we need to rotate. Rotate slightly more. And then comes back. Feels better. Okay, so step. So now we could start playing
around. What do we want? We want this to be a
couple of frames yet. So that's step first
in Weight Shift, depth-first in Weight Shift. So as he lands here, we can go to the foot control. Rotate. Crews can go to don't
you could use that. So we'll use this step. Okay, so as it comes
up, just to go. Okay, so let's just do this. You can rotate this. That's fine. We've got places there. Let's check the foot.
Needs to be quicker. So we'll just select all this. Move it here. Yeah, so we can move it down. We can move it down.
It's going down. We can even Hips down. We could even move this down. So there's a weight here. There's a weight, maybe
not too much down. Move it down, move it forward
slightly member following a curve, following the curvier. But we'll get into that later. But I'm still
thinking about that. Yeah, I'm thinking
about the ball. What path is the following? So it's going up and
then it's going up that following a path here. What I'm looking at,
the middle of this, this dot, this translation. I'm seeing where that's going. Each, every Poses
I'm going that close that close that close down. A little bit oversell. Yeah. We can start polishing.
Relate to below
6. Refining breaking down the animation: Okay, so now we
can check out the whole we could bring
the holding slightly. So let's see. Okay,
it could do that. Maybe a bit longer. Let's make it a bit quicker. Okay, let's get the foot below. Alright. We wanted
to go down here. Yeah. Then we can
get a bit more of a boom book, Pierre. And then the second foot. Make that step a bit quicker. But I don't think that
has to be as high. So that could be could move this steps. Then goes over getting it right the S looking a bit more softer Deci who's going a
little shift coming in. Okay, so now what we can do, now we've got the mechanics
working properly. Yeah. We can feel the way on this side when it's
coming up like this. We can feel it. You know what, we could even move
it a bit more. Yeah. So we know from here
to here to balance, you want to make sure there's
equal mass on both sides. That way you can see the
balance, the central line. So if we draw a
center line here, it's more or less
equal on both sides. So we know as imbalance here. So that's looking a bit more, feeling a bit more better here. Now that we've got that
working, Let's check The Hips. Because of the hips
aren't working well. As we know, everything else
will be affected here. So let's check out
the hips here. Alright, let's take out the Y. Here. We've got a
bit of a whole, but nothing upward and see,
Let's do it like this. So let's do this a
bit more of a high. It's going down. So maybe comes down
first and then goes up, a little bit of
anticipation then goes up. Don't really need that. Systemic down the key we have that seems to be
working alright, goes in. And we don't need these really. We can just gradually come up with getting that
seems to work Becker. Now, let's check
the rotation now, let's go to Z rotation. Okay, So it comes up. Yeah, we need this. We could do without that, so it just goes. And as it comes down, let's see. Should we delay
it? We can delay. If we delay, we could keep these how it
is just overshoot this. Keep the overshoot going, maybe move it down slightly. So let's see. Feels right. That seems to be
working on right. Now what we, what else
we can do is we can try and we can select this or this, move it to friends. So we can delay that. You get a bit of a delay. Maybe if you do
one frame to see. So translate happens first, then the rotation follows. We get more of a feeling there. What else we can do
is they see the Feet here, lift it up. And when he lands here, we can get like was it
got is a toad. Yeah. So we can do we can
select our frame before, have the toe up, up here
as well. Frame before. And then we can zero the toe. So we'll create a bit over breaking out to give
a secondary action. Yeah, same with the other ones. If we select the toe
here, toll road. And here, this is zero. So we can do here as the toe up. Keep that zero so we can go that should we congratulate? Make it go up there as well. There you go.
You've got a little bit smooth. That's
what we soften it. You've already got that. The only thing I would say it's here leg is straight hair. So maybe if we check
out my albion, the overshoot, if we just
slightly the overshoot smaller, see that difference
that overshoot makes. So maybe we can just
tone that down a bit. So now the season
doesn't lock out. And you can also, the
way that angle of this is Hips here. You can try and counter. But maybe we could tone it down slightly because it's extremely, isn't it? This way? This is how you edit your
animation. Just come in. They asked a bit more
subtle, isn't it? Yeah, so that's how you do it. So that's how you
basically do a side Shift. Very good exercise
to do practice, practice, practice that
you'd get more comparable
7. Polishing Part 1 Adding Volume To The Hips: Now we can do here to
fund is less delete these keys at a couple of is controlled is a squash
and stretch here. We can do is from here. As the guy comes up, as this pulley comes
up, we can stretch it. Yeah. Just to add a bit
of weight as it comes up and then as he lands, so we can stretch it up
to the land, is cautious. And then comes back up here, stretch and then step down. And then we can zero that. Let's see how that feels. Adds a bit of Volume. Yeah. All select
all the controls and that's 38 frames yet. So it doesn't matter how many
how many frames you use as long as you're getting
bad for you. Yeah. Let's check this side. You see there's a
bit of a Volume. They're great exercise for showing weight
shifting weight here
8. Polishing Part 2 Refining The Knees: All you're doing is you're
just looking for the Cs here. For the weight. Yeah. So
make sure it's equal. Everything's equal. Then the other side too. So you're just shifting because you're gonna
be doing this a lot with your characters shifting weight,
moving the Feet. That's a really good exercise. This is a brilliant
exercise to do. A current recommended more. If you want to polish
the scene up even more, you just get these vectors here. So Bang. And you can move
these vectors a bit. Normally you want these
vectors to follow the Feet, the direction The Knees should really be falling with
the Feet are going yet. Could you don't want
them in luck there? So all the general rule is, I mean, obviously you
can change that to, but just generally
you can go For each key and just check it out, see what's happening, to
see where the direction is. Co2, your keys maybe put the key air as you land
with key, looks good there. And just bring it out loud. That same with this one here. You go back and then you just layering each
Animation, you're going, you're going next layer, checking it out.
That seems fine. So if we look at that, that feels like there's weight on it. And it's good. Yeah, that's what you're doing. Animation is also feeling. It feels good. So practice, practice,
practice via keep going back. Keep practicing this exercise. Ship weight shift,
Step, Weight Shift, Step Weight ships that were
chips that up, weight shift, Step Weight Shift Up, and then level Weight Shift, and then he settles back in. Okay. Have Fun with it and
practice it a few times.
9. Polishing Part 3 Tracking Arcs On Hips and Feet: Okay guys, and one
other thing we need just going to do
for good practices, which are always do is
I check the curves. So if you slept this curve, go to animation here in
the drop-down and just go to create edible most yet. So now let's have a
look at the path. If you want to polish it more. So what you can do
now is go back. Okay, so I'm shifting
the frame, sorry. How much shifting to the friends aren't visible on your keyboard. If you select this, any control on your keyboard. Basically, if you use
these these keys, both of these this was shift previous and this
was shift the other way. Yeah. That's a good little tip. And I'll try and show
you the tips I use. So when you press those
keys arrow forward, it will go to the next
frame, will shift quicker. Now what am I looking at here? So this curve looks alright, it's going down a
little anticipation. Move it like here. Yeah, I might want to
create this nice Arc. Might still want it down. Hold it up. Cycle. Yeah. So let's check that up. Nights Arcs you got there. Nice moving oxygen. If you want. You could even go back here up. So it's looking a
bit more smooth. A lot more cycle. Yeah. That's all you're doing. This is more or less
the Polishing stage. So you just go in and
having looked at your Arcs properly, cleaned up and down. And then the same with the legs. Flex and an oppressed
create motion. So it's coming up like here. You might want to create
a more of an AAC. Nice. If you want. Here, you might want to only
go in-between and below. Alright, let me just create a nice ARC going up like that. Then. You've got a nice
dark like that. You can play that and
see how that looks. Just getting those nice oxygen. And this one, it seemed right,
but let's check it out. See that Arcs fine. You can see just a simple one. If you really want it to. You could bring it
in a bit Center to get the spacing even. But it doesn't really
nice and soft there yet. That's how you polish the
scene at the end as well. Polishing, Adding a bit
of squash and stretch, pushing that little bit more that wasn't
there before. Yeah. That's a simple process
from start to finish. How you would do animation. That looks good, standard
10. Conclusion: Alright guys, well done. You've concluded on this course. So now you have a
solid foundation on how to do weight shift
from left to right. Now, this exercise
I cannot stress, it's really important because when you're
working in games, for example, Annin
feature as well. A lot of convincing
movements will be, is that Character believable
when it's moving? So the way shift
is so important. So the general gist
is when you step, then the length text away, then you Step than
the leg text away, as explained in the course. So that's the main kind of simplified method
of looking at it. Now, you gotta get those, get those weight shifts
right to make it convincing. So very simple exercise, but it's really important
because in video games you'll also be doing 180 terms, which we will be doing more
classes on that as well. So these, even, even
when it comes to idling, for example, you
might shift from one leg to the other leg. The characters idling at this
then is looking like this. So this is where you put this
practicing into your work. So you can just see where the little minor
weight shift side does not be too
much on Movement. It could be slight to one side, slight To the left,
leg to the right. These are a little bit of shifts that will make your character feel that
much more believable. So in this class, we went over the general
gist of the lines, the sea lines that we wanted to see when we do
the weight shift. Then we went into
the Blocking side. We went straight in, straight ahead than we started
just refining what we had. When we got to the end, we
just looked at the Arcs and track the Arcs advocacy,
that's the process. And at the end you just
refining a little bit more, The Knees, the Arcs On
the Feet and the Hips. In the meantime,
after you've done this little class or you can
check out my other courses. I've got the absolute route, fundamental and
animation in Maya, which for all Beginners who
are ready and just want to just get into Animation
Festival complete novice. So you can, if you
don't know enough about animation or Maya does
the course to go to. And then once you refine
that and work down, then you can go into checking
out the video game series, body Movement Series,
cartoony Series. And you can just have FUN
doing those step-by-step. And also I have a
YouTube channel where I share my tutorials. I also share my fitness journey
on there where I've done an update on where
I'm at with that, as well as also giving
feedback to TV series, TV shows, animations,
animation films out there, Breaking Down the scenes. And also, I am avid war
hammer Games Workshop fan. So I also paint miniatures, airbrush and as a
side hobby for me. Alright guys, so that's more or less the conclusion
of this class. So just remember lastly, as always, stay healthy, have FUN Animating, get out, live life a bit, bring that work experience
back into Animation. That's how you're going to
make your work original. But most importantly,
take care of your health. Stay content. I see you in the next class.
11. Maya Animation Mastery: Hi, everyone. Congratulations. This
is just something after the conclusion
that I just wanted to put into all my courses. If you're really serious about leveling up
your animations, I have a brand new course
that you can enroll in. It's called Maya
Animation Master. This course, I've redone
it with four K Good Audio, came out in January 2024. And this course is
designed in a way how I would have liked to be taught animation when I started. So It basically gets rid of all the pain pain
pressure points that I had when I
started animation. So I want to get rid of those
frustrations and give you a direct line to what that aha moment was for me when my mentor Steve Gagnon Kati taught
me about animation. Something just clicked, and
I teach that in the course. So if you're interested
in enrolling, you can go to the about
me page where I'll have a link there called
My Animation Mastery, and you can go
through the webinar. Then the course breakdown.
You can check that out. And then if you decide, you can enroll, if
not, that's fine. There's a private
Facebook group. There's a link in there
about me for that as well. You can join that
where we get feedback, and there's a nice
community there. And also, when you enroll, there's a private
Myers Mya animation Mastery inner circle
group where it's just exclusive for students
where we give feedback. So, have a look at that webinar and let me know your
thoughts as well. If not, you can join the Facebook group to
the private group. Obviously, the inner Coco group is for people who have enrolled, students who have enrolled,
but check it out, and it's just for
leveling up, and really, it's got all the
theory and practical, heavy on the practical
stuff, video game stuff. If you want to learn
about how to get a shot from reference to
blocking to splinding, to polished, show real level. It goes
through all of that. And also, I talk a lot about networking and
how to get jobs and context that I have within the industry that I can
ph your work out there so at least it's in the right
hands and people can see and at least consider
you for applications. F of my students who
have already got jobs in the industry going
through the course, so have a look at it. And yeah, let me
know your thoughts. So enjoy your animation journey, stay healthy, and
I'll see you around. I'll be around on the
Internet on YouTube and a giving tutorials as
usual. I'll see you later.
 Opi Chaggar, Senior Animator + YouTuber