Transcripts
1. Introduction: Animation to me, it's
all about getting out of the world of reality and
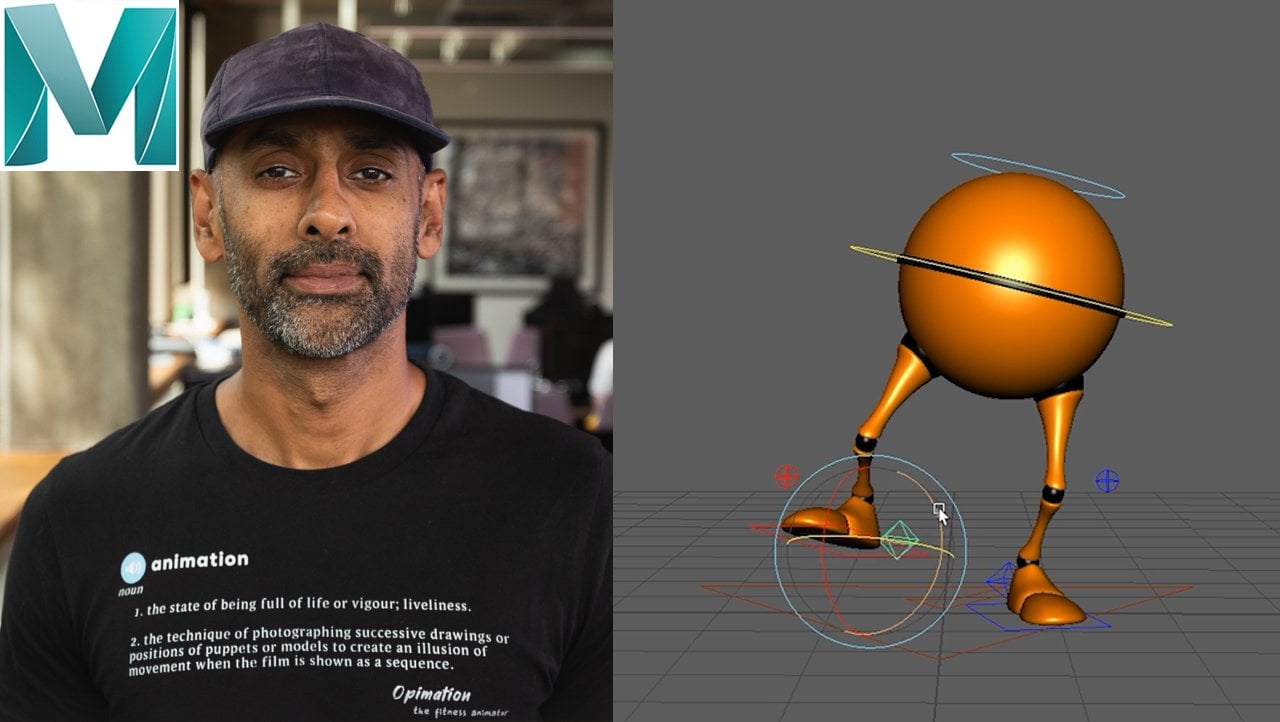
going into the deep, imaginative worlds of our minds. My name is OP, and I'm
a Senior Animator, work in, in the video
games industry. I worked on a range of AAA
titles from heavenly Sword, motors term apocalypse,
Harry Potter, the bone conspiracy, and
a series of lego games. And this class is
really exciting for me because this is the
whole point I got into animation to get out
of that world of reality and do all these costs and stretching
cartoony animation, which we'll be going through
in this cartoon series. I'm so excited to go
through all these. We have to check
out the pro rigs or I'll be using pro rigs, which are absolutely brilliant. They have a custom-designed
for cartoon animation, squash and stretch on. We're gonna be
having a lot of fun with these rigs in
the coming classes. So it doesn't matter
if you're a beginner. But if you experienced, we can all learn something
from each other. And I hope these classes will introduce some new
techniques and new thought processes and workflows that you can
incorporate into your work. This class, we'll
cover a cartoony walk. We will go through
the contact poses, mid poses, and the end
poses and in-between poses. And we will make it look
as cartoony as we can. This class will show how you can use the
same principles for realism and cartoony animation and how we can apply
it to cartoony stuff, which we're gonna be doing
in this series of classes. So I'm super excited
for you to join me in the step-by-step course on
how to do a cartoony walk. Get your maya Blender
max, wherever you use. Let's start animating. I'll see you at the
end of this class. Here we go. Let's
start animating.
2. Where To Download Rigs: Okay, guys, this
is a quick video or where you can
get your ribs from. So I'm using these bricks. Now, there is a fee to
this as $20 a month, which is about 16 per month. But for that much and the characters
you're getting older code because again, you're getting all of these characters with
the right support. Even get pickers
like for the rig. You get the scripts, everything
license is well-worth it. All of these characters
look heavy, light, athletic, bigger
characters, robots. It's definitely worth it. I'm going to be
animating these now, the feature film rigs. So they're really
good to invest in. 16 pound a month, $20 a month is
nothing really got. You get older support you want, you can cancel the
subscription when you want. All right, guys, this
is a quick video where you can get
the rigs or you can just go to free rigs
and use any other rig. But I just for you on animate along with the civil irregular
can go and get these rigs. So great rigs. And I'll see you in the course.
3. Blocking Poses: Okay guys, so firstly
we're going to do is get the reference. I've done some
research on Google, so we're going to follow this, get some reference here. We're going to use these
poses to start us off. Let's get this going. Let me just start with this. Okay, first thing we
wanna do is let's check out the legs. Let's separate these legs like this so we know which one's
forward, which ones back. Okay? Alright, now in the side view, what we'll do is have a look. Which one? No, it's not that 1 ft roll
off in because this one yeah. So we're gonna do
we want to, we want to establish our contact points. So let's, let's move this back. And I'm gonna put everything in. What I'm gonna do is select everything and then put it in constant so
it's all blocked. So step, step, step. Okay. Now, I just want to grab the control
with the foot roll. I just want to make sure
it's all in line here. So this bit, It's all that straight
display in particular, you'll see when you rotate this, it goes to the off, so you just want to make sure it's lined up. So that's what we do for now. So they're establishing
the contact points front and back. So one is low. So we'll do the same thing here. Alright, how's that look? Maybe we want to move
it forward a bit and then snowpack,
something like that. And we might want to
move this up a bit so we can get away with moving it up a bit because it's
called stretch on it. Really lovely, lovely model, this one like this. So we start with that,
That's the basis. Okay. Also will do with the rig. As we can see, it will just
quickly change this to zero. So f k and zero here, f k. So we've got, we've basically
got rotations everywhere. And I'll just put
the timeline to 20. So we work in clean. Every two frames. Every two frames
is what we'll do. We'll key, so let me
select everything. And like I usually
do a key frame now the other thing I wanna
do is while I'm here, is we will contact, contact. Does it yet? So what we'll do, we'll go to the next one, the next frame to
what we're doing. We're just literally, if
you look at the reference, which is going to
move it forward until this back leg is bent. Oh, it's coming down. So what we'll do, we'll
we know that the foot is going to be on the floor. So their foot on the floor. We also know that it's going to be trans, transcending
down forward. It's gonna go down. So
there's a little bend there. And we also know
that the back leg is starting to come up. Some will be like this, slightly forward and
a bit of a foot roll. Kind of do it like that. Again, select everything here. And then I'll just go into
here and come to block. So we want to make
sure it's smooth. Plot. Then the next one, next frame is the
positive position. So this one is going to be, we just want to make sure that
leg is straight going up. And then the positive
position like this, which would be even. We could even rotate
this a bit more. Go past a little like this. And then we're going
to key everything. And then move on. So we've
got all these poses. Select everything, make
sure it's constant. Okay, So we've got that. And then it's going to
be the high position. So this one is going
forward, the highest. And then the reference shows
the foot going forward. So it's kind of going like this. And then there's gonna be
basically this height. So normally what
I'll do is I'll go to here Y and copy this. Go to nine and copy it. There are no, That's the height. That is move it
forward slightly. And then move this forward. The y can be zeroed
because it's on the floor. And then you make the foot
in the contact position. Now this has flowing
pretty well. So we'll select everything here, everything and then put it
on constant interpolation. All I'm doing is I'm selecting everything and I'm going
into my graph editor, select annuities and
go into constant here. Or you can go to
tangents, stepped. Same thing as all I'm doing when I'm going
on to that screen. This is making saw step. Then the next one. Oh, yeah, the back one. Let's also do the
back on the back. This is going to
start rolling as well as this one comes in. Yeah, that makes sense. Then what you wanna do, again, go to the second pose here. The y is 1.8. So we go to here,
paste it in there. Oops, sorry, select the hips. Sorry, let me just
do that again. Y That's what we want, 1.8. And then there we
want to put it in. There. We will forward so we know that it's going to take
the weight. Take the weight. And then the back leg is
just about rolling up. We'll roll this up a little bit. We can make these clunky. Let you could see this clunky going to come later
with the service contact. Then again, pause in position. High. Lead comes through. Just a little bit. Not that we saw at
the exact height of just getting
these these poses. And then positive position, which is gonna be the highest. Bit higher. Then this foot comes
forward, rotated. You get that? Again,
select everything. Now the N1 we're
gonna do here is I'm going to this different
ways of doing this, but this is what works for me. I get all the geometry, go to the Start frame,
duplicate, ECS duplicate. I press Shift P to bring
it out of the group. And then Group. Now you've got a separate pose, the exact pose. So what I'll do here
is go to the end. So 15 or the next few frames. I know, okay, I
know this is here. I know that if I
put this geometry here that I can match it now
is gonna be fairly exact, but we can always finish it off. So let's go back.
Okay, I'll select all of the controls
here, which is okay. Now I'll middle
click, drag it to 17, let go and press S. Now it's going to copy
that same frame C. Now all you got to do
is select the top here, the hips, and move it forward. You got to do an hour. I
might just go into wire. Wireframe is the best
because then you can get exact match,
exactly like that. When there's no doubling.
If it's not exact, it won't be completely
I will be like this. Notice that actually what you
want it exact, so as well. Okay, now that you've got
that, you can go back. You can delete the group and select everything
and just step. Now have a look
at that blocking. So you've got a little
cycle there now. The foot positions in
the right place, you go. What we can do is
we can just 17. 17 at the bottom here. Right. Okay. So you've got
a block in there. The hips, how it's moving. You can even look, you
see the hips there is going constantly forward,
forward, forward. And then we'll go and clean this up and get it all
working properly. But what we'll do now
is go into front view. Will be like,
alright, as it steps. And then leans was
happening here, the weight is shifting. We want to just want
to get those x's in. This way, the weight shifting, it's gonna be a bit clunky. And in this way, the weight shifting, because we know it's the step, right. If we look at this now, it's going to be a bit
all over the place, but that's, that's how it looks. You see the block. So we've got that working. Then the other thing we want
to start doing is to go into the hip controller here. So whatever the foot is raised, we know we know that
the hip will be high. Because raising that foot,
it goes high, right? Same with this way. High. So we're just going
to get these rotations in. So we got an idea. Then we can clean
that up later too. Guys. So that's
basically the block. We could do the arms
and stuff later. But that is the blocking
you're getting. Actual select the arms. Come in here in the layers
and you can go to arms. I'm selecting the arms hair is very nicely done everything. So it knows that it
appropriate is really good. It knows animators
want to hide the arms sometimes because you're
working on one thing. But then you don't see that
we can start working on just the tools so everything makes sure it's
working properly. The other thing we can do
is when it steps here, we know that this is
going to be that C-shape. When we come here,
we know that this way There's a C-shape, this reversal that happens. The hips, we can leave
the hips. Let's see. We've got that happening. So that's just the mechanics. Pretty much how we
want it thus flag. We can start cleaning
up, so that's the block. And then we'll move
on to polishing again into this
blind and starting to really clean things up a bit. Okay, so I'll see you
in the next video.
4. Splining: Alright guys, so we're going
to start supplying us, so I'll just select
the controller, the Coke, the first
thing we want to do. Okay, So if we look here, we want to get the white rather than going constantly
going forward. So normally what I do, I delete
everything in the middle. And then our linear to linear. So if we look now, it's
constantly going forward. So we'll, we'll do, we'll just select everything. And let's display
and everything. It's gonna be all
over the place, but don't worry, man. We'll figure it out. So if we look now,
spline everything. Okay? And this is well, everything we've learned. Okay. Stop flattening
some of this stuff. Okay, let's come back here. There's some stuff
which is still flowing. Select everything again. Select the top, but
this spline has better. So you see how that's
more constant. So if we look at the front,
so all this up, that's fine. Let's check this control, okay, because what data? First thing we're gonna
do if we go there, we made it constant
going forward. Now let's check this
out. You see this. You got all these key
there that you don't need. So let's go. Why is fine, we need that. Then here we can just delete, delete all of these. Remember from earlier
in the cycle. But we have to match tangents
if we match like this. So the cycle, we'll
do these as we go. Always matching tangent u plus precedents
for cycle, cycle. Or you can go here,
curves, cycle, the cycle. You don't wanna
do post-political the normal cycle on the spot. So it's these ones. Okay, Then let's look
at the up and down. So we cycle this. We just want to match
these and then nice way. So we want the high
values to be the same. So we can flatten this out. Now. I flatten it by pressing Alt four,
that's my shortcut. You can use this flap, this one. But I have shortcuts or leave a script for you guys so
you can check that out. Okay, So that's down. And then down. So this is going to be the same, which I think it is,
yeah, that's the same. This is the RPE which is cool. This will be the same
as this one or not. Yes. 6.464. Yeah, that's
the one. We've got. Equal distribution. They write this and
these are the same, okay, so now the up and downs are very,
very much the same. Now, x is fine too,
thus, shifting weight. Flatten this out.
We could just add, if we take this without
the minus put at the top, I think it's the same year. That's the same. That's cool. We
got that working. Now, what we wanna
do is we can get, we'll get this bit
here, this hips here. So coming back here, you can see so clunky up top. And that will go to, normally I go head cello and
I know this is going to be working in this, sorry, this controller here, it's going to be the
same thing here, just like the, just
like the X to delete, delete all of these. This one, this, you want
to have this cycle. Also if you come here, you might want to flatten this, use this value seven
and add it here. But remember, leave
the minus there. So it's rotating equally. Then we can always adjust. If it's too much or too little. Seems fine to me. Then you have these ones, which is the same, same thing, adding, deleting.
Just keep in there. Positions here and here, that will switching
as all you're doing. Then you just add the
cycle there. 6.9. " change this 6.9, so it's both equal. We look now. It's just
the top one is the rocky. Rocky because of all
these, all these curves. And so we just want to
delete this cycle. Again. Flatten, will flatten here, flatten out the value 5.3. Copy that over the stove
happening equally. So if we look now,
see that slightly or Bendigo starting to walk
now more fluently, right? You've got the applet
and now what we'll do is we'll work on the feet. So we've got the
body working well. We can always change that a
bit more if we wanted to. But that's how we can
exaggerate a bit more. Now if we select the fee. So if we go for this foot, we can look here straight away. Foot's going up here, which is fine to flatten
this, it's coming up. Hello, committed
to the top here. This bit here. You see this overshoot
that we've come here that represents this pair. You see how it's going
forward and back, forward and back. So all you're doing
is flattening that. So now it's solid. The only thing is,
is an up and down. So if we go back to your
up and down, same thing, they're just want to
flatten it solid now see. And then you will look at
the other axis just in case they seem fine, rotations are fine
and they look at the Foot Roll, that seems fine. So that is a solid plan. Solid deci Bxy is a little bit of movement
at the back there. That's to do with this. What we wanna do, get that end frame copy because the end frames and
then start forgot the same. I will put up all
these keyframes are flat because that's
where we want the foot, so we just flatten this. That will stay
there, it will stay locked. The same thing. Foot Roll. Foot roll is fine,
This seems fine. We'll just cycle that
and just try and match. You can even get developed. That one is much less traumatic. Now we can do is go to the other one and
do the same thing. So if we look at the forehead, the star, you can see
that it's sliding there. That's because of this is raise, the bed is flat and this, all of this is flattened out. Values are the same. There must be one day a massive overshoot
there. See that? Now if you look all
running smoothly. Now if we go to
the foot control, you see this, you see that slight movement there is
because of this overshoots. That's what happens when
exploring overshoots, is we just chatted
the mic was on there. So now you've got solid fee and a solid mechanics working. Even here. If we come here, you can even go full on this
to get that little flop, flip flop, bit more extreme. You can play around, but you
can just leave it. Leave it. Lambda. Could find, as
you're doing this, there you go,
you've got a solid, a solid basis that what you can do here is you can start to play around and
maybe select all these keys. Press awful for scaling. Go to the point where you
wanna go to the middle. You don't want to go up here
and scale because look, it scales from that point. If you scale in the middle here, it will scale the whole C. Then you can start
playing around. And it will slowly
start offsetting that. So what I'll do the bottom
one of scale that a bit, but I won't scale as
much as the top one. I'll just scale it a little bit, whereas the top one would
scale it a bit more. So you're getting
that big of a weight shift happening is low. Then we'll start working
on the arms and legs. Now you've got that working
and you're happy with it. Now, then what we'll
do with the next one, we'll start working on the arms and then we'll break it down. Working on the head, arms
and heads will do next. Because you've got, you've
got a nice look at it. You know, you know, the
hips are working well. And then we'll start adding the polishing will add the
face and all that kinda stuff. Okay guys, so that's
spinning this quickly. You're getting that
walk or solid. And older rocks move
it on smoothly. I'll see you in the next video.
5. Animating Arms And Head Part 1: Okay, so let's unhide the arms. Let's get this, check this
up, so that's the walk. Okay, so what we can do now is maybe as the character comes up, is also rotating in y. In y here. We're going to be rotating with
the leading leg. Is going to be like
that. Right? We use the whole body or we can do so. We use we use them. We use the hips.
Rotate. Let's say ten. Let's go to the end and
press ten in y here as well, because the start and end
pose are the same, right? And the middle one will be minus ten because it's going
to be opposing way. Okay? And then
again, we'll go into how we could do this later, but for now, let's get it done. I will delete all the
redundant within keys. They're flattened that
cycle. Just to process. It looks a bit more cartoony. Okay, now what you wanna do is is upper because it's opposing. We want to have this go
the other way, right. So let's do -15. Come back here. -15 and the middle, we'll do 50. I didn't go back into here. You can see it's all messed up. Delete those cycle, flatten. So it's all a nice cycle. When I do flattened, I do, I've got a shortcut called alt F as much Schottky.
Show you what I mean. You go to your hotkeys here. There's a, there's a video on this Omega courses
which shows you, if I go to custom. Here, I've made custom keys, so splicing is OS. I'll do a video,
this separate one. There you see there's
an opposing a walk and even the twist is happening
nicely now, isn't it? There's a little twist going on. We've got that happening. So we'll leave that for now. It's nice little
D work in there. And then what we'll do,
we'll get the arms. And the first thing we'll do is let's go to the
channel box here. Let's bring the arms down. So let's bring him down enough so they don't intersect, right. So let's print you
can go around there. Which is what? -70,
I would say -70. Not getting in the
way of anything. You know what, let's
do -68 out a bit. The same on the other side. We'll do -68. So we've got
something like that. No reason why it's come up is because all
these keys are there. So we can just go
in here, highlight, delete the keys, and
copy to the end. So go to a movie like this. Now, we wanna do the opposing. So what we'll do, let's
exaggerate this a bit of fun. Let's exaggerate. This leg is forward, which means we'll have this
back that add this leg. We'll have it. Let's check out the rotation there. E2, right? Let's round it. And this is going to be minus e. We're going forward. Again, copy the first to the
last, so it's all the same. We will go to the middle here, positive position, and
we want to do this. We want to do this minus
the two causes proposal. And then we'll just
see how that plays. Is it cutting through there? It is cutting through
there, isn't it? So now that we know
that's happening, what I do is wherever
is happening there. Just come in here. I just flatten this cycle. I know that this is causing it. What I need to do
is just move it up, select them both, press Shift, middle mouse button up. Let's get it out.
So at least you do the same with the
other side's bigger. It gets flattened,
decided cycle. You see, I'm doing this
as I'm going as well. Okay? So we want to do rotate. It could be settling down
negative space, right? Okay, so we've got that
going, which is fine. School. Now what
we'll do, we'll add. So it will do recover. Ad, will delete all of these in-between case
because we don't need them. So as it's coming back, we know the arm
will be dragging. This might be on go back. Right at this last exaggerated. But that's cool. Not to worry. We don't mind a bit
of exaggeration. In the middle there,
yes, Move the key back. What we can do a cycle that. And if we select everything, move it one frame. Let's just create a
bit more looseness. Can you see that? Then we can start
moving it down. Move it down more if you want. If you think it's too much. Yeah, that's fine.
And then we can do the same on the other side. Sector in-between
keys. Come to nine. We can come here and
just move it back. Flatten that cycle.
Actually, you know what, this one will be forward. And this will be the
other way right? Now what we'll do, we'll
just turn this down as all will come in. Bring it down. Let's bring it down a little bit like this. So this, if we look at the
star head, that's fine. That's fine. Going back more, I think. I think it is. Let's check this. Make
it go back a little bit. So let's have it a bit funny. We don't mind the pill
form that you can start doing is you really want to start dragging the fingers more. So this control is spinning. We're not going to
really use that. We can do is you see these, we've got these controls here. These are all for the fingers. So you got this one. Let's let that, that,
that, and that, that all of these selected. Now, again, delete
everything in here. Checking my mic was working, there seems to be alright. So what we can do, we know here we can just rotate. Okay, that's not gonna work. So we need to do
select this first, this one, this one, and this one. This one. Okay, it goes all the way back. Alright, so this four
controls the 12313. Okay, so let's call it a turtle. These first we are
going to be other one after we delete it, delete this. And sorry, excuse me. So we know when it
comes back here, we know we want to add a bit
more dragged to the fingers. That's cool for me.
And if you come here, we know it's gonna
go forward a bit. So we just copy that,
that we look now, there's a little bit or
that drug right? Now. Go into the graph editor. Will just flatten this all out. Now what we wanna do
is you want to offset. So we'll leave the
first one how it is the second one. Let me undo it. So let me cycle after
cycle this for it to work. Let's go to the third
one and go move it one.
6. Animating Arms And Head Part 2: Alright, so we offset that by one, this by two. Now we're going to offset
the last 13 by three. So you see it's going to
create that kind of drag. Will do the same with
this top one here. We're going to move that by one. The second one by 212, I'm pressing Shift
and middle button. So I'm selecting
everything shift and middle mouse button. And then moving it across. 123 is the last one. So it's going to create
this kind of waves. See that you're getting
that kind of drug. What we'll do that middle one, the one at the
back. Oh, hold on. Someone's doorbell. With that last one we select, it, will move it here. We'll do the same thing. We just rotate it, rotate it back, leg up. And then at the front,
rotate your food. The middle click,
save it to the end. Now what you're
doing, same thing. You come in, in, same thing. Leave the last one
is again hair flat, everything flying
here and cycle. Move this by one, flatten everything and cycle. You can select it by two. And then that one, that one here, 123,
flatten cycle. And then that will create, that will click drag. And if you really
want to make it, because they're all, they're all moving at the same time, right? And if you really want to
offset a bit more, all you do, all the fingers moved at different times is select one of these controls.
So this middle finger. So you've got all
of these controls. 1234, you know, you go for selected because
a is called the names. Literally all you're doing is selecting everything and moving that maybe 12 frames. And then get the
other control here. Move that 1234 frames. Now. Kind of move
it back one row. You can play around with
it forward or backward, but you can see there's a bit
of a drag happening there. Now. Now what do you
want that on a robot? Probably not, but you know what? Last-minute drag. And then if you want
to really polish, we can translate them. So it's a little stretch. We can do that when
we get to know maybe these parts
are big floppy, floppy robo, Then basically has the same you want
to do the other side. So I'll just quickly do it here. You've seen the process. And I'll just quickly
select all of these. Selected all of these delete the inside is cool because
we know this is going back. So we know we can
just move these back and then basically copy it. And in coming forward
copying others. So we'll just call
it like a wave. Now what you wanna do, same thing we did on the other one. In matter of fact, I'll
do these both together. We will get that and we'll
get that cycle by one. Move it by 11 day. Okay, the next one, move it by 21 to flatten cycle. The next one by 3123,
flattened cycle. Got that happening there, right? And then obviously
the other one, which is difficult to find, select these, come
back out this way. Same thing. Delete everything in
the middle. All right. Just chocolate, the microphone,
the officer Taylor, rotate again, rotate
it back, copy it, go into the middle,
rotate it forward. Come back. Now that I've gotten them
all selected our moms of cycle the moon as well. Then same thing here. All
you're doing is selecting the one below
there. Move it one. Knew this 11 to this 1123. Now they're all going to be moving the
same as you can see. And then we'll do the same thing where we'll get all
of these controls. And move it by one. And then we'll get
these controls. Move this by 212, and then a list of
all different levels. If we look now, the timing
is slightly different way. And you've got that happening so that we've got
the all working, how we want it will probably
flop. Which is cool. Now what we can do is
start working on the head. So if we get the controls back, you see you have
these controls here. Move the passivation rotate
can imitate. You can rotate. It will select all of these. Delete, select the head, delete. Matter of fact, we could
select all of this area here. Because you got keys on it. We set the keys at the start. Then here basically what we
can do is you can be like, alright, the head is up here. And then when it lands two frames off land,
it comes down. And then it goes up. And then learns. We can do a little
something like this. You're creating. You
can play around, you can play around,
or you could have a weaker also try one way. Maybe it might be better
if in the middle there. Right now I work at two years. Sorry. Let's keep it like
it was originally. So we've got that kind
of up and down going. Alright. We could do the same thing
like we did with their hands. Let's have a little
experiment SER, looks. This is how it looks. Let's bring it down a bit. Let's keep it a bit
subtle, slightly moving. Now we can do here. We can use, we can select
all of these keys, make sure you mark is on zero. Select all the keys, copy, and go and select the next free. Delete the end frame. Come back and select all the expectations and
it can go to edit, paste. And then the cycle that
see now you've got all. But what you wanna do is, I think each one you do, you just want to reduce,
reduce a little bit. Next one, you might want
to reduce that a bit more. Then the last one. So each one is less than c. You can see
like a little chain effect. The other thing I want to
do is if we go back here, you might want to just
offset that by one. Offset this by 2/1
to make cycling. And then the last 1123. So you'll get that
looseness here. There's a little bit
of looseness there. Then it was too much
doin, doin, doing. So it's a bit we're going to
use up man was happening. So wherever it is we're doing. And you might just
want to take them all. You can do is just
select them all. And then come back here and
then just go like halfway. And just scale it, scale it halfway
to scale it down. Just to make it a bit more subtle than if you're
not happy with that. Scale it back up. Scale it a bit more down. You could play around with that. Then we might be like,
Alright, You know what? Let's play around with this. Also get this bit communism on the public agenda
in the policy. Okay, that's fine. So you've got a nice So
if you look here now, you've got a nice bubble
going on and you know what, you might also need to come
forget about the headman. Let's keep down. So if we go down this top, copy that to the end,
down, up, down, up. So that adds a little
bit of downstream. But if we go back to go for it and we can just play around
with this again, psychosis. So you can add more
or less this 11234. So you could choose,
you could leave it. How it is that? That seems that seems bit cool. We'll do we can just
turn this down. Yes. That feels that feels like a bobble
head, doesn't it? Hopefully it will probably hit. Okay. Now we can do it. Now we can go to the next
video and then we'll do the policy will policy on tonight to bear
the eyes, the jaw. Bring it out a bit.
Just bring it up a bit. Yeah. And then also work
a bit more of the feet. Have it stopped down
a bit more with the spacing and timing. All right, guys, I'll see
you in the next video.
7. Polishing: Okay guys, we're going to
be doing the policy now. Let's check out. Let's just get this, get this one out the way you do this. All right, So let's
animate this control. Let's go in here. So let's try and keep
this one simple. This control, this control,
this control here. You know what, we'll use. This control tastes
like this one. And this one. We want. Let's try and rotate
this like this. We rotate that back to swallow. It goes back and it's bent one. Okay, It's gonna be
a bit different. And then that goes
back. That one. Alright, let's see. We'll do this works slightly forward. Alright. We'll do is select all
of these controls. Make sure so fat
number, flood cycle. Then when we start offsetting, let's go to this volume. Say let's do it. Offset it by one. Offset this by 12. By 123. You can already see is
the laying there 1234. And then five, Let's see, 1234. Okay, cool. That's fine. What we can do that
for us bouncing, going with omentum,
which is cool, okay, now what we can do, the come back here for the
controls back all. Let's check out the
i's second control. Yeah, we want the second one. The second one here. Let's do one at a time. Let's go to the eyelids. The controls. Select this one. So let's have a null. And also we give it a sad, angry. Everyone in this series. Taylor's delete
the end keys here, so it doesn't go
back to neutral. Let's see how this works. I agree he's got an AI today is calling for someone
see how the eyes can just completely change the
attitude of the character. So what we can do is
either so important. Mentor used to say
the I is never lie. Or I got an idea, why don't we do this? Why don't we open a bit? And this is where
the final column, they often have done
all the mechanics and everything. Now you can. Well, now you can
keep it neutral. We will have side,
side is cool and a lower could be like that right? Now. We can do is they could pay. So let's check this one out. All right. And then now we can do
is as he comes down, the jaw could slowly come up. And then down. Then you get in that
personality coming through. Now, it's like it's
like, I don't know, tired and sleepy. Offset the job. A couple of frames that
look like he's breathing. So if you didn't
want to have a look, one to four frames, sorry, what I'm doing here
is just moving the keys back to see how
that looks. That's 100. No offset, couple of frames. It just makes him look like
he's breathing. Three frames. Even free friends
is cool to Fresco. And then you can just
play around with it. Alright, I can lift the
that's a bit too much, but always better to push there. So you got a little subtle
movement, which is nice. We can just bring this down. Just a little bit down. So that works nicely. And then the last
thing we can do is if we go back to the feet. So Bender, go back to the feet. Go to the Start. Select the foot. We
could select this foot. We could be like, Okay, let's break these joints. Maybe have it come down
a bit more abrupt. Look now, it's a bit more
solid the way it comes down. Maybe, maybe, hey, that's fine. We have to worry
about that because like Coda, that's fine. This one too. We can
come back foot roll. Unlike here where it lands. We can break. So you can, what you can do is at the moment the
handles are like this. If you want a break or you
just go to here break, but then you want to go to Keys. Nor wait, sorry, Q is
get this one wrong. Weighted, weighted tangents lets you control some people
like it, some people don't. I swear by it. Then I'll go shortcuts
for this on my keyboard. So let's keep our choice. We can see, but let me just
try and play around and see. Is it gives more of
an impact there. See, there's less spacing. So it's more of an impact. Then you can just come in
and be like, All right, let me clean. Let me clean. Little bit like this up. So this is all lining up. You can come here, maybe clean it up if you
want. Then that's fine. They look cool here. And then this one is the same. You go to this one, we could do this lining up. This is just when
you just finessing. What is that? 9.61 will go to the end
and just type in a 9.61. Then you can go through
each frame and be like, Okay, that's fine. That's fine. Maybe I want it to be
a bit more like that. Oh, sorry. Like
that. That's fine. That was in-between. Then it is just adding
little bits like that. And the other thing you
can do is once you have it saved as quickly as polishing policy and zeros 01. Now you've got it all working. You might. This is cool. So we can do, we can make
it into solid phase. As we come down,
bring it down a bit. Sad face Vasco is red
brick is amazing. You can scale the
Isaiah was cool. We can add a bit of scale
as well when he lands, just to give it that
little bit of polish. But Again, what we can do here is you've got this
route control, and as you can see,
the route control here, It's going straight. So we do this is going straight. So what we do, we can copy this. This is what we are doing
games, so we copy this. So people add me on the spot. But this is how I do it. If you want it on
the spot, it is select the root
controller, the main one, go to the delete all the keys makes what
is key is that the star, I literally just
paste, paste it in. But the value at the end, it just put in a minus here. And make sure
that's posted video just in case you would
make it move every level. Now if you notice when
it works is on the spot. So that's how you
get it on the spot. Daycare, explore. Then
you can put it in game. Now, Let's call it back here. We're talking about the eyes. So let's look at
this scale here. So what we can do, we
can be loud, right? When it lands. When he steps in key. Maybe slightly big. And then back to zero or whatever that are
adapted to copy that over. And in same thing we can do, same thing we can do
copy all these keys and when he steps again
here, just paste it. If you look now,
it's a little bit of a scores there right? Now we can do as a bit
too much, but we can do, we can select the controls. And here's the scales. We just want a very subtle one. It's almost like it's not there, but you can feel it. If we look now, there's
very subtle, isn't it? So we can even move
it down a bit more. It just gives it
that much more life. And there you have it. So you've got a little walk
cycle there, cartoony. You can do all kinds of things. You can speed it up if you want. You can come here and go
to select all the keys, move it, then do it. You could do a really slow one. You can check out. So if I select everything and just snap here, you can see where it ends. It ends here. So if you just type in dirty, it should cycle from dad and we now might be a little few glitches day, but you can sort that out. That's not a problem. But then you got sad, right? Yeah. You can go in. If you go, what I normally do is all the ways I would do it
would be select all the geo, go to the store, duplicate that. Control PI. Control pre brings everything
out, then group them. So when you press, when
you duplicate a credit, number one inside that
group, you press Control. P, It comes up when you group, it will get rid of that because I've
already got one there. So in order for you to
match and see which one, you just keep playing
it until it matches. So let's see. If we go to, let's go to, Let's put this layer. Just hide it. Select everything. Will be okay. Everything cycling,
which is good. Okay. This is I can forward. You can cycle this,
recycle the feet. Make sure everything's on cycle. Otherwise, we want the
feet to be forward. This cycle. That's the only one. Okay. And then unhide, I like to go into side view. And I used to like
to go to wireframe and C until it
matches completely. Let's go 259. So we've got 259. That frame looks like everything is much. Oh, it's not properly matching. Alright, let's check out. Okay, cycle to this. That seems to be alright. Oh, it's this. Let's have a look. See
that's what it is. Look. Rotate. Cc little
glitches like this. And then what we can do this 11111111. Okay. There you go. So
that's basically you can just really slow, but you can play around
with the timing. You can bring it back, love you. But yeah, that's basically
how you do walk. And then just by changing
the face, the eyes. I'll talk more about
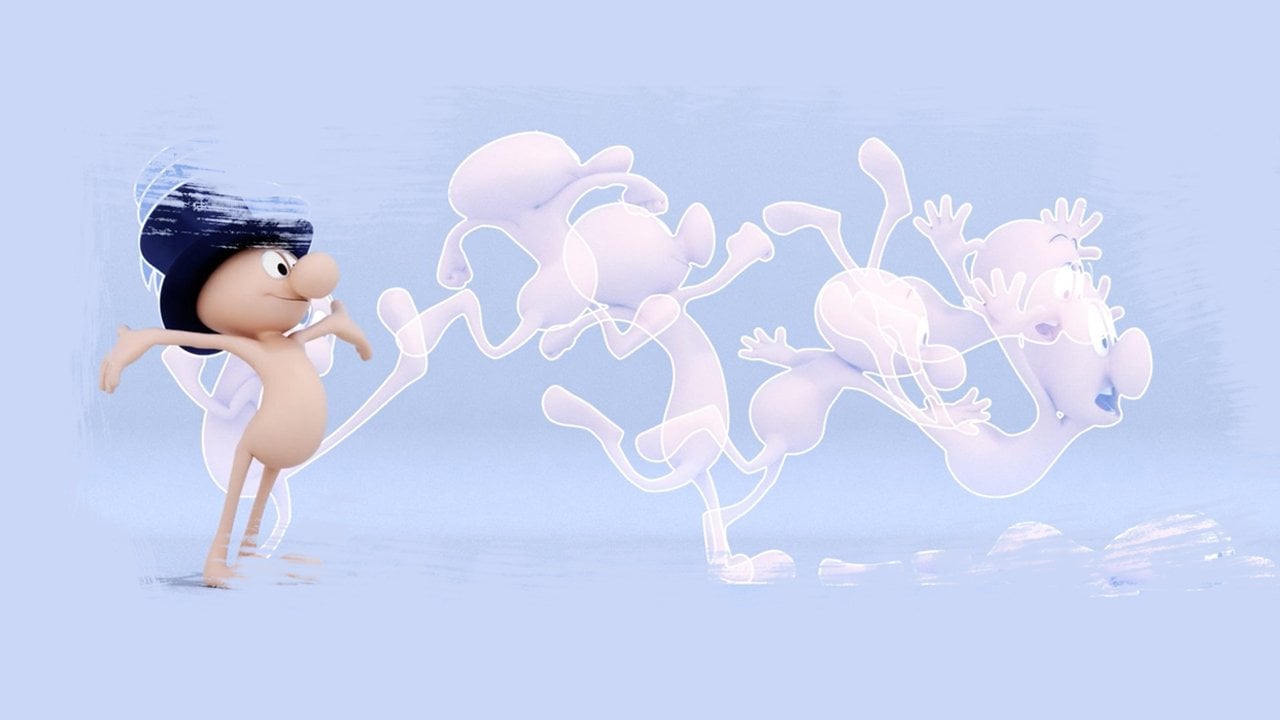
this in a conclusion. But when the next shape, the shape below, it
is a sad character. So all you can do if you've got existing
Walker and if you want to change it to the x-axis
and just start ordinal. Can you rotate?
You rotate it now? You can start rotating
it like this. You're already changing
the attitude like that. Yeah. It's sad, isn't it? Then you can even
have the arms less rolling them just
forward, like this. That's a simple walk cycle
with a call to the characters. I'll do some more
animations with this, really enjoying this
pro rigs definitely were subsequently
to get into r6. Brilliant. The guy who
created this Ricky, I'd met him, he was an animator. I met him at my graduation
at Animation Mentor. And he broke off doing his own thing now and he's
made pro rigs is brilliant. It's a great animator. I remember one of his lectures
that animation mentor. I'll see you in the next video and we'll conclude
on this class. So let's, let's go.
8. Conclusion: Congratulations my
friends, you have just finished how to animate
a cartoony war, and now you can go ahead and
apply that to other models. Pay around, play
around with the poses, timing, what have you? The basic fundamentals
are there, what you need to do
to get a decent work? And then you can go on from
there. So what did we learn? We learn how to do the
contact pose, the down pose, the passing pose, and
the highest pose, and then back to contact. And then we create
that same cycle the other way, the other leg. And that gave us the
continuous cycle. We also learned how to, how to do a walk going
forward constantly, and also how to make
a go on the spot, which is very useful when
you're doing video games. So I hope you post
your projects. I'll be in the discussions. Just post your projects
on Skillshare. And it's all gonna be double
feedback and all tried to improve together as a
community are our guys. There will be more
classes come in, check out my fundamentals, principles of
animations, whole lot of courses or go on Skillshare. But there will be more coming in the cartoon series
Nasmyth focus. And I will also be looking
at lip-sync in as well. We're gonna be doing a
lot more these kinds of classes this year. I also got a YouTube
channel where I share a lot more tutorials and also
share my fitness journey. And also reviewing animations on TV shows and video games, and also book reviews, as well as the militia painting, which is part of my
hobbies as well. In the meantime, happy and the main, and most importantly, have fun animating,
stay healthy, love you See you later.
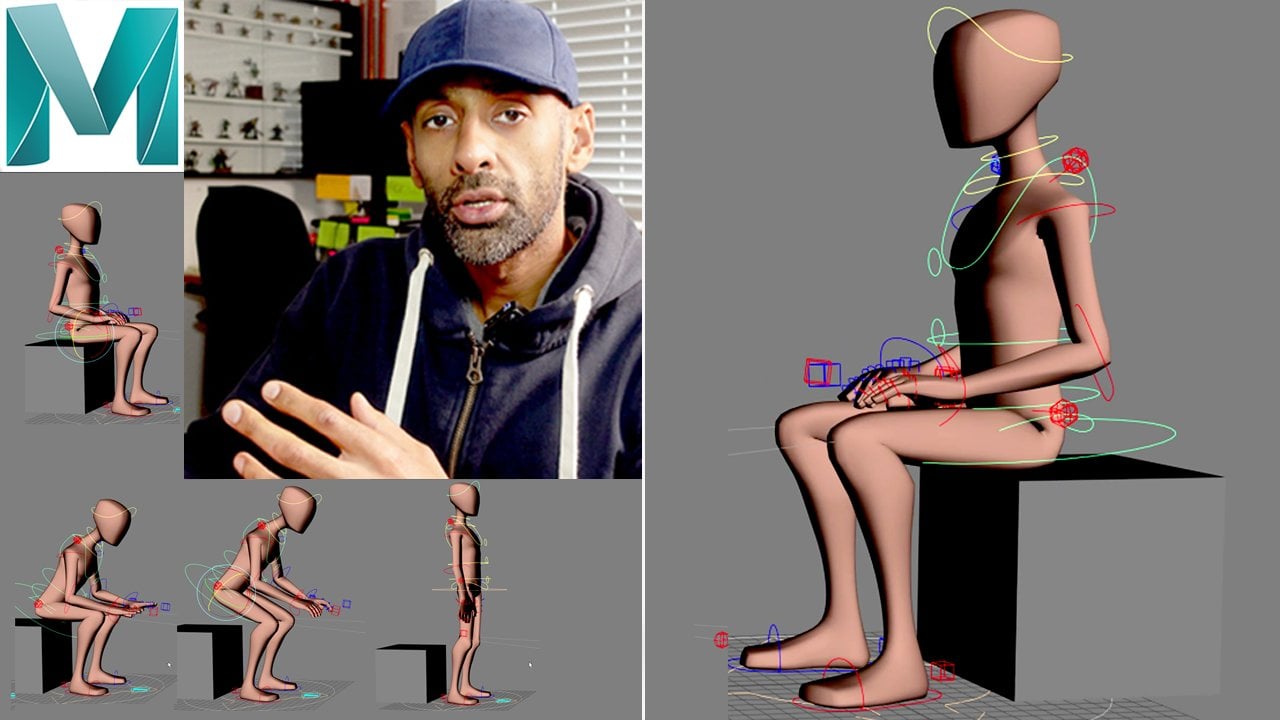
9. Maya Animation Mastery: Hi, everyone. Congratulations. This
is just something after the conclusion
that I just wanted to put into all my courses. If you're really serious about leveling up
your animations, I have a brand new course
that you can enroll in. It's called Maya
Animation Master. This course, I've redone
it with four K Good Audio, came out in January 2024. And this course is
designed in a way how I would have liked to be taught animation when I started. So it basically gets rid of all the pain pain
pressure points that I had when I
started animation. So I want to get rid of those
frustrations and give you a direct line to what that aha moment was for me when my mentor Steve Gagnon Katie taught
me about animation, something just clicked, and
I teach that in the course. So if you're interested
in enrolling, you can go to the
Ay page where I'll have a link there called
My Animation Mastery, and you can go
through the webinar, then the course breakdown. You can check that out. And then if you decide You
can enroll, if not. That's fine. There's a
private Facebook group. There's a link in there
about me for that as well. You can join that
where we get feedback, and there's a nice
community there. And also, when you enroll, there's a private Mystery, Maya Animation Mastery
inner circle group where it's just exclusive for students who
we give feedback. So, have a look at that webinar, and let me know your
thoughts as well. If not, you can join the Facebook group to
the private group. Obviously, the
inner circle group is for people who have enrolled, students who have enrolled,
but check it out, and it's just for
leveling up, and really, it's got all the
theory and practical, heavy on the practical
stuff, video game stuff. If you want to learn
about how to get a shot from reference to
blocking to spining, to polished, show real level. It goes
through all of that. And also, I talk a lot about networking and
how to get jobs and contexts that I have within the industry that I can
push your work out there so at least it's in the right
hands and people can see and at least consider
you for applications. F of my students
who have already got jobs in the industry
going through the course. So have a look at it. And yeah, let me
know your thoughts. So enjoy your animation journey, stay healthy, and
I'll see you around. I'll be around on the
Internet on YouTube and a, giving tutorials as usual.
I'll see you later.
 Opi Chaggar, Senior Animator + YouTuber