Transcripts
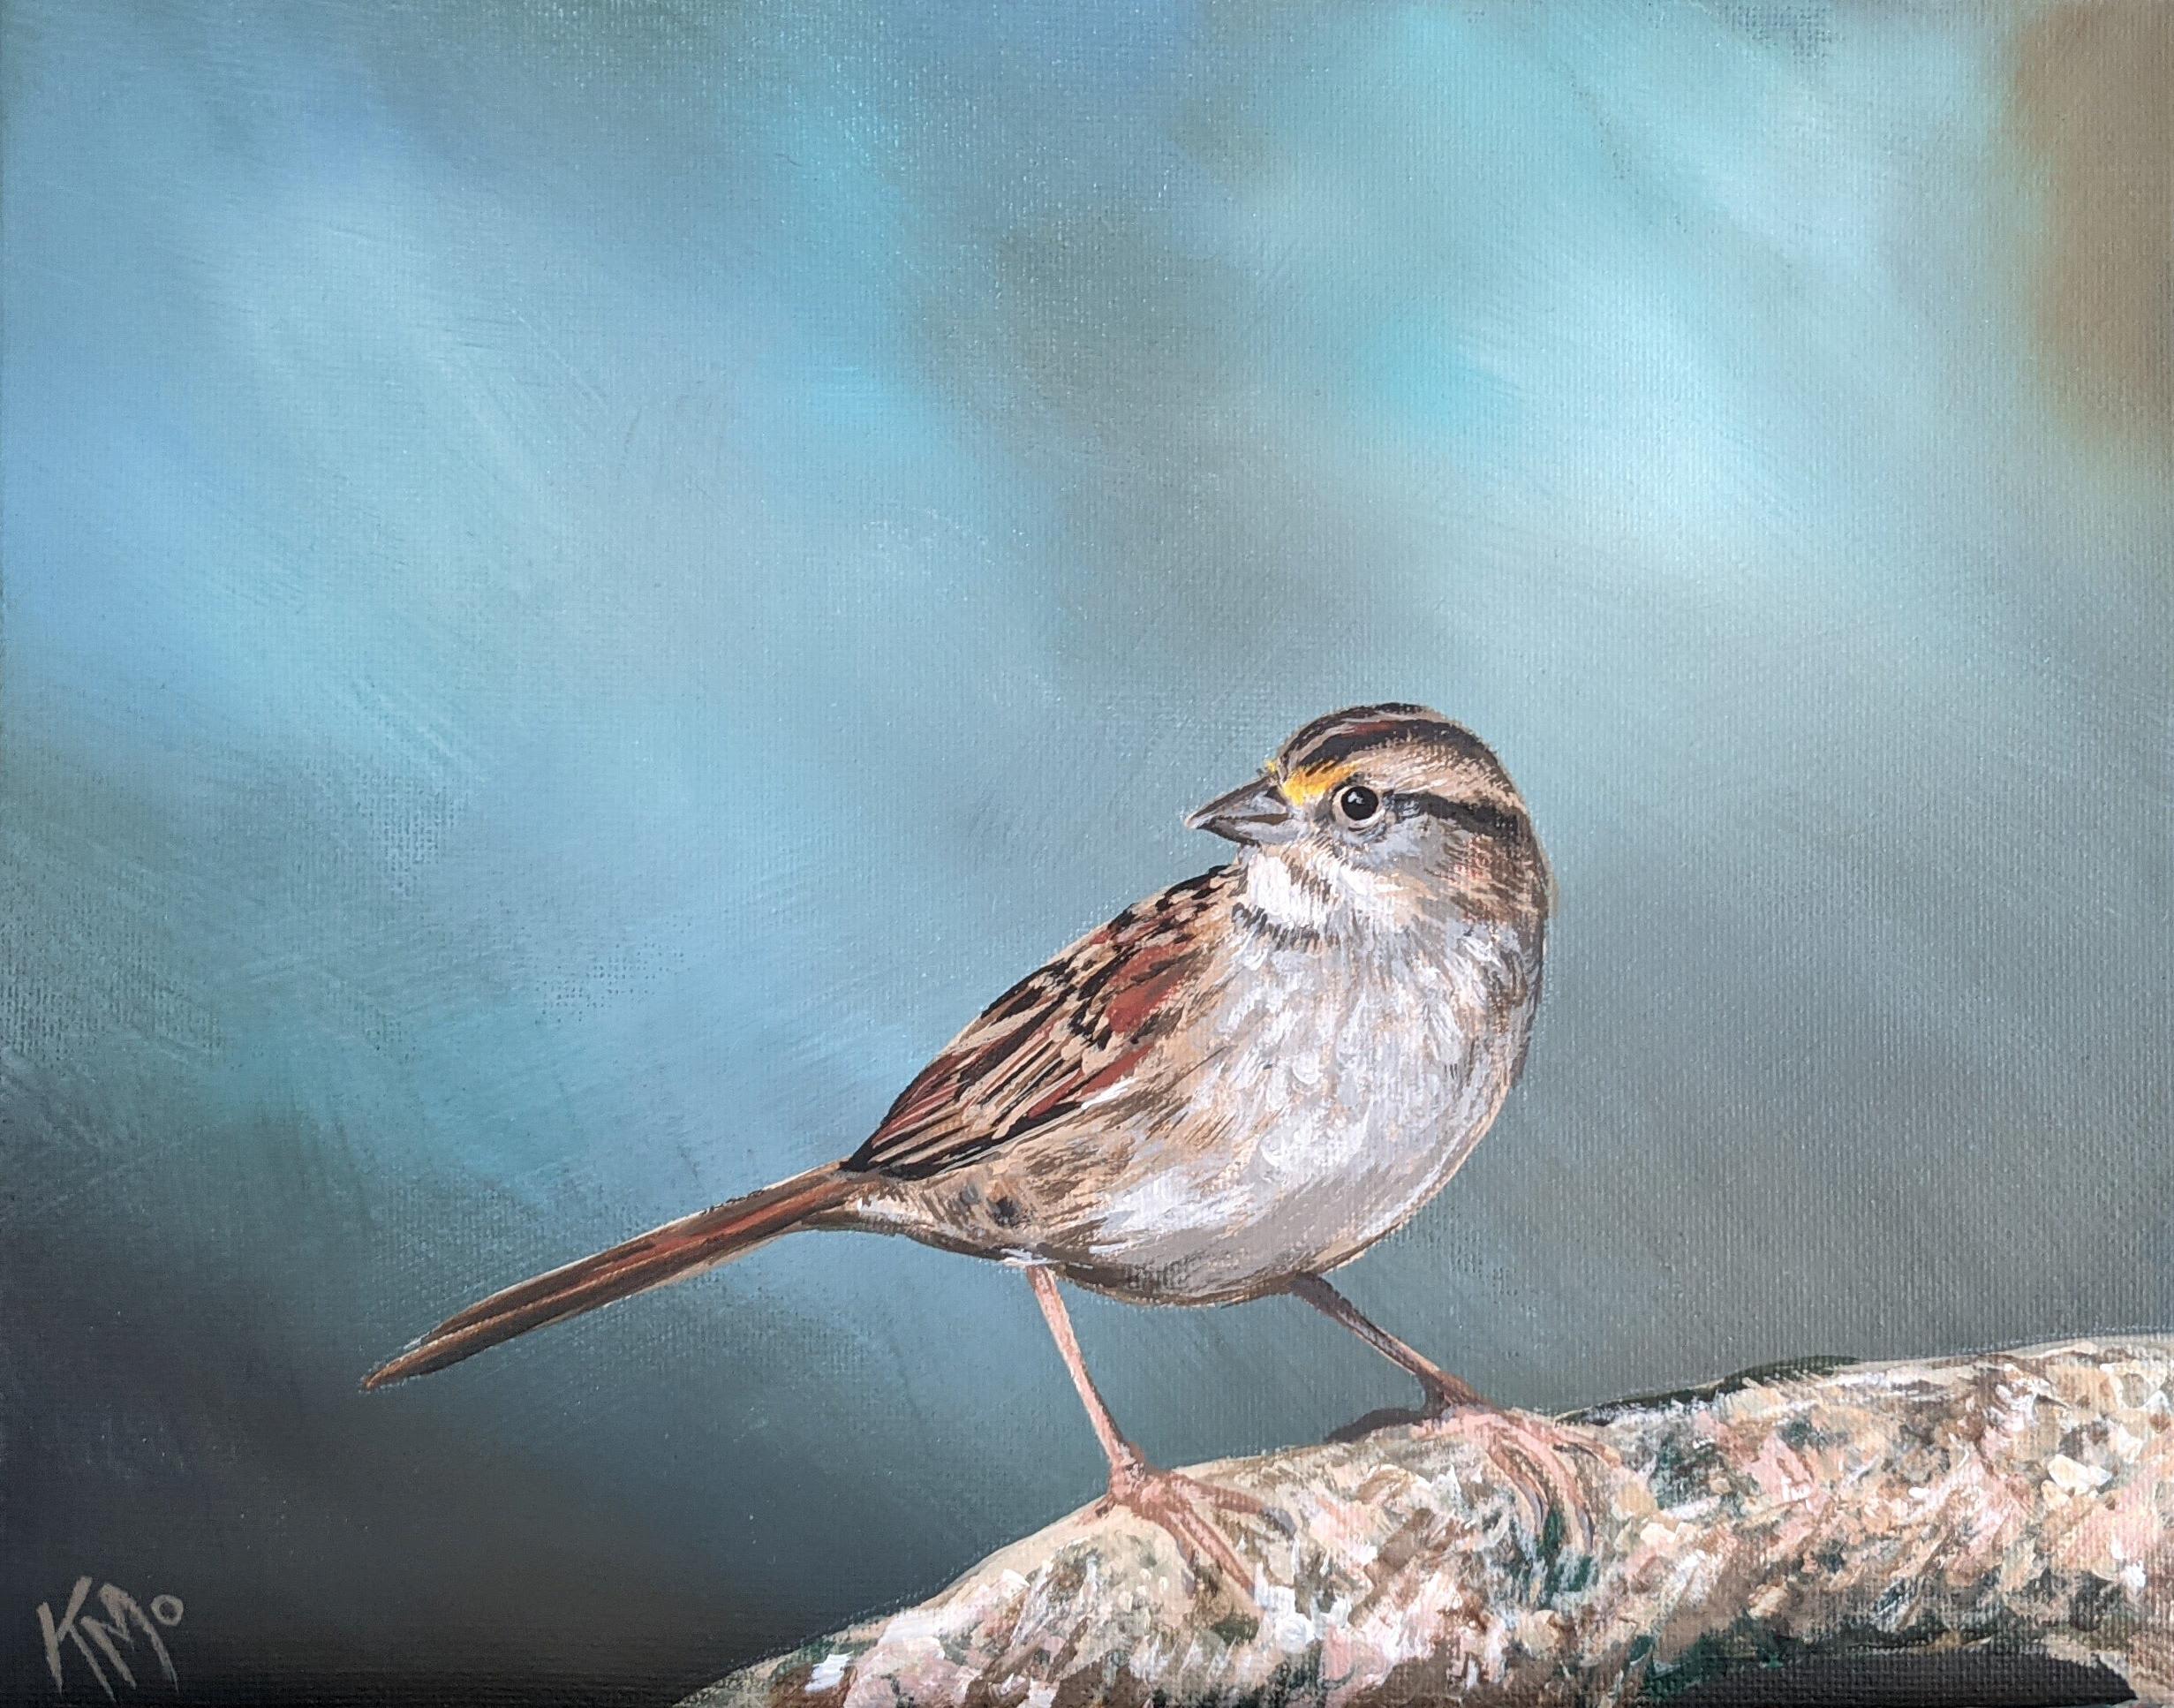
1. Intro video: Hello and welcome to my class. My name is Kristina Moyor, and I'm a two-dimensional artist here in Turner Valley, Alberta. I'm so excited to have you join me in this acrylic lesson. We'll be painting a picture with a foreground and focus and a blurry background. The emphasis is really learning how to create that blurry background. But it's no fun if you don't have any picture in front of it, because that's where we're focusing in on. But having a blurry background really gives it that contrast. We're going to learn how to paint that with acrylics. If you've had a little experience with acrylics, you know that they dry so quickly. That's one reason I love them. But it's also what makes it challenging to create that blended soft look. We'll look at some skills like blending color, and we'll do it right on the Canvas. That'll be fun. We'll also be looking at, how to blend your brushstrokes. Because of that quick drying process, we've going to get those brushstrokes hidden away so it has that smooth effect. We're not looking for texture in our background. Then the last is where we want to add texture through layering. Getting those details through layering is what our last skill will be, so we can complete a whole image. I'm so excited to get started. Ready set. Let's art.
2. Class Project: Today's class project is an acrylic painting on canvas with a blurry background. Here are the materials you'll need to follow along and complete the project. Don't worry, it's also listed in the project description. This project will be focusing on the technique of creating a blurry background effect. We'll practice that a lot with various layers, as you can see in this video that's showing the quick time lapse. We'll go slower in the other class lessons so you can see how I'm creating those brushstrokes, and really follow along. This is just a quick overview of the project in its entirety. You're going to be using a canvas of a smaller size just so we can practice blending those acrylics before they dry. If you're more confident in your skills, you can try a larger canvas. Please feel free to select whatever subject matter suits your interest so that you can stay motivated to complete the project and work on it. If you're not really interested in the subject, it's a little bit harder to complete the project. Find something that inspires you and work on that. With that, just make sure you have all the materials ready to go before you get started with painting the background so that you can work quickly and in a timely manner without the paints drying. Then from there, just be sure to have fun. If you're ever finding yourself feeling frustrated, then take a break and come back to it. There's no point if you're not having a good time and enjoying yourself somewhat.
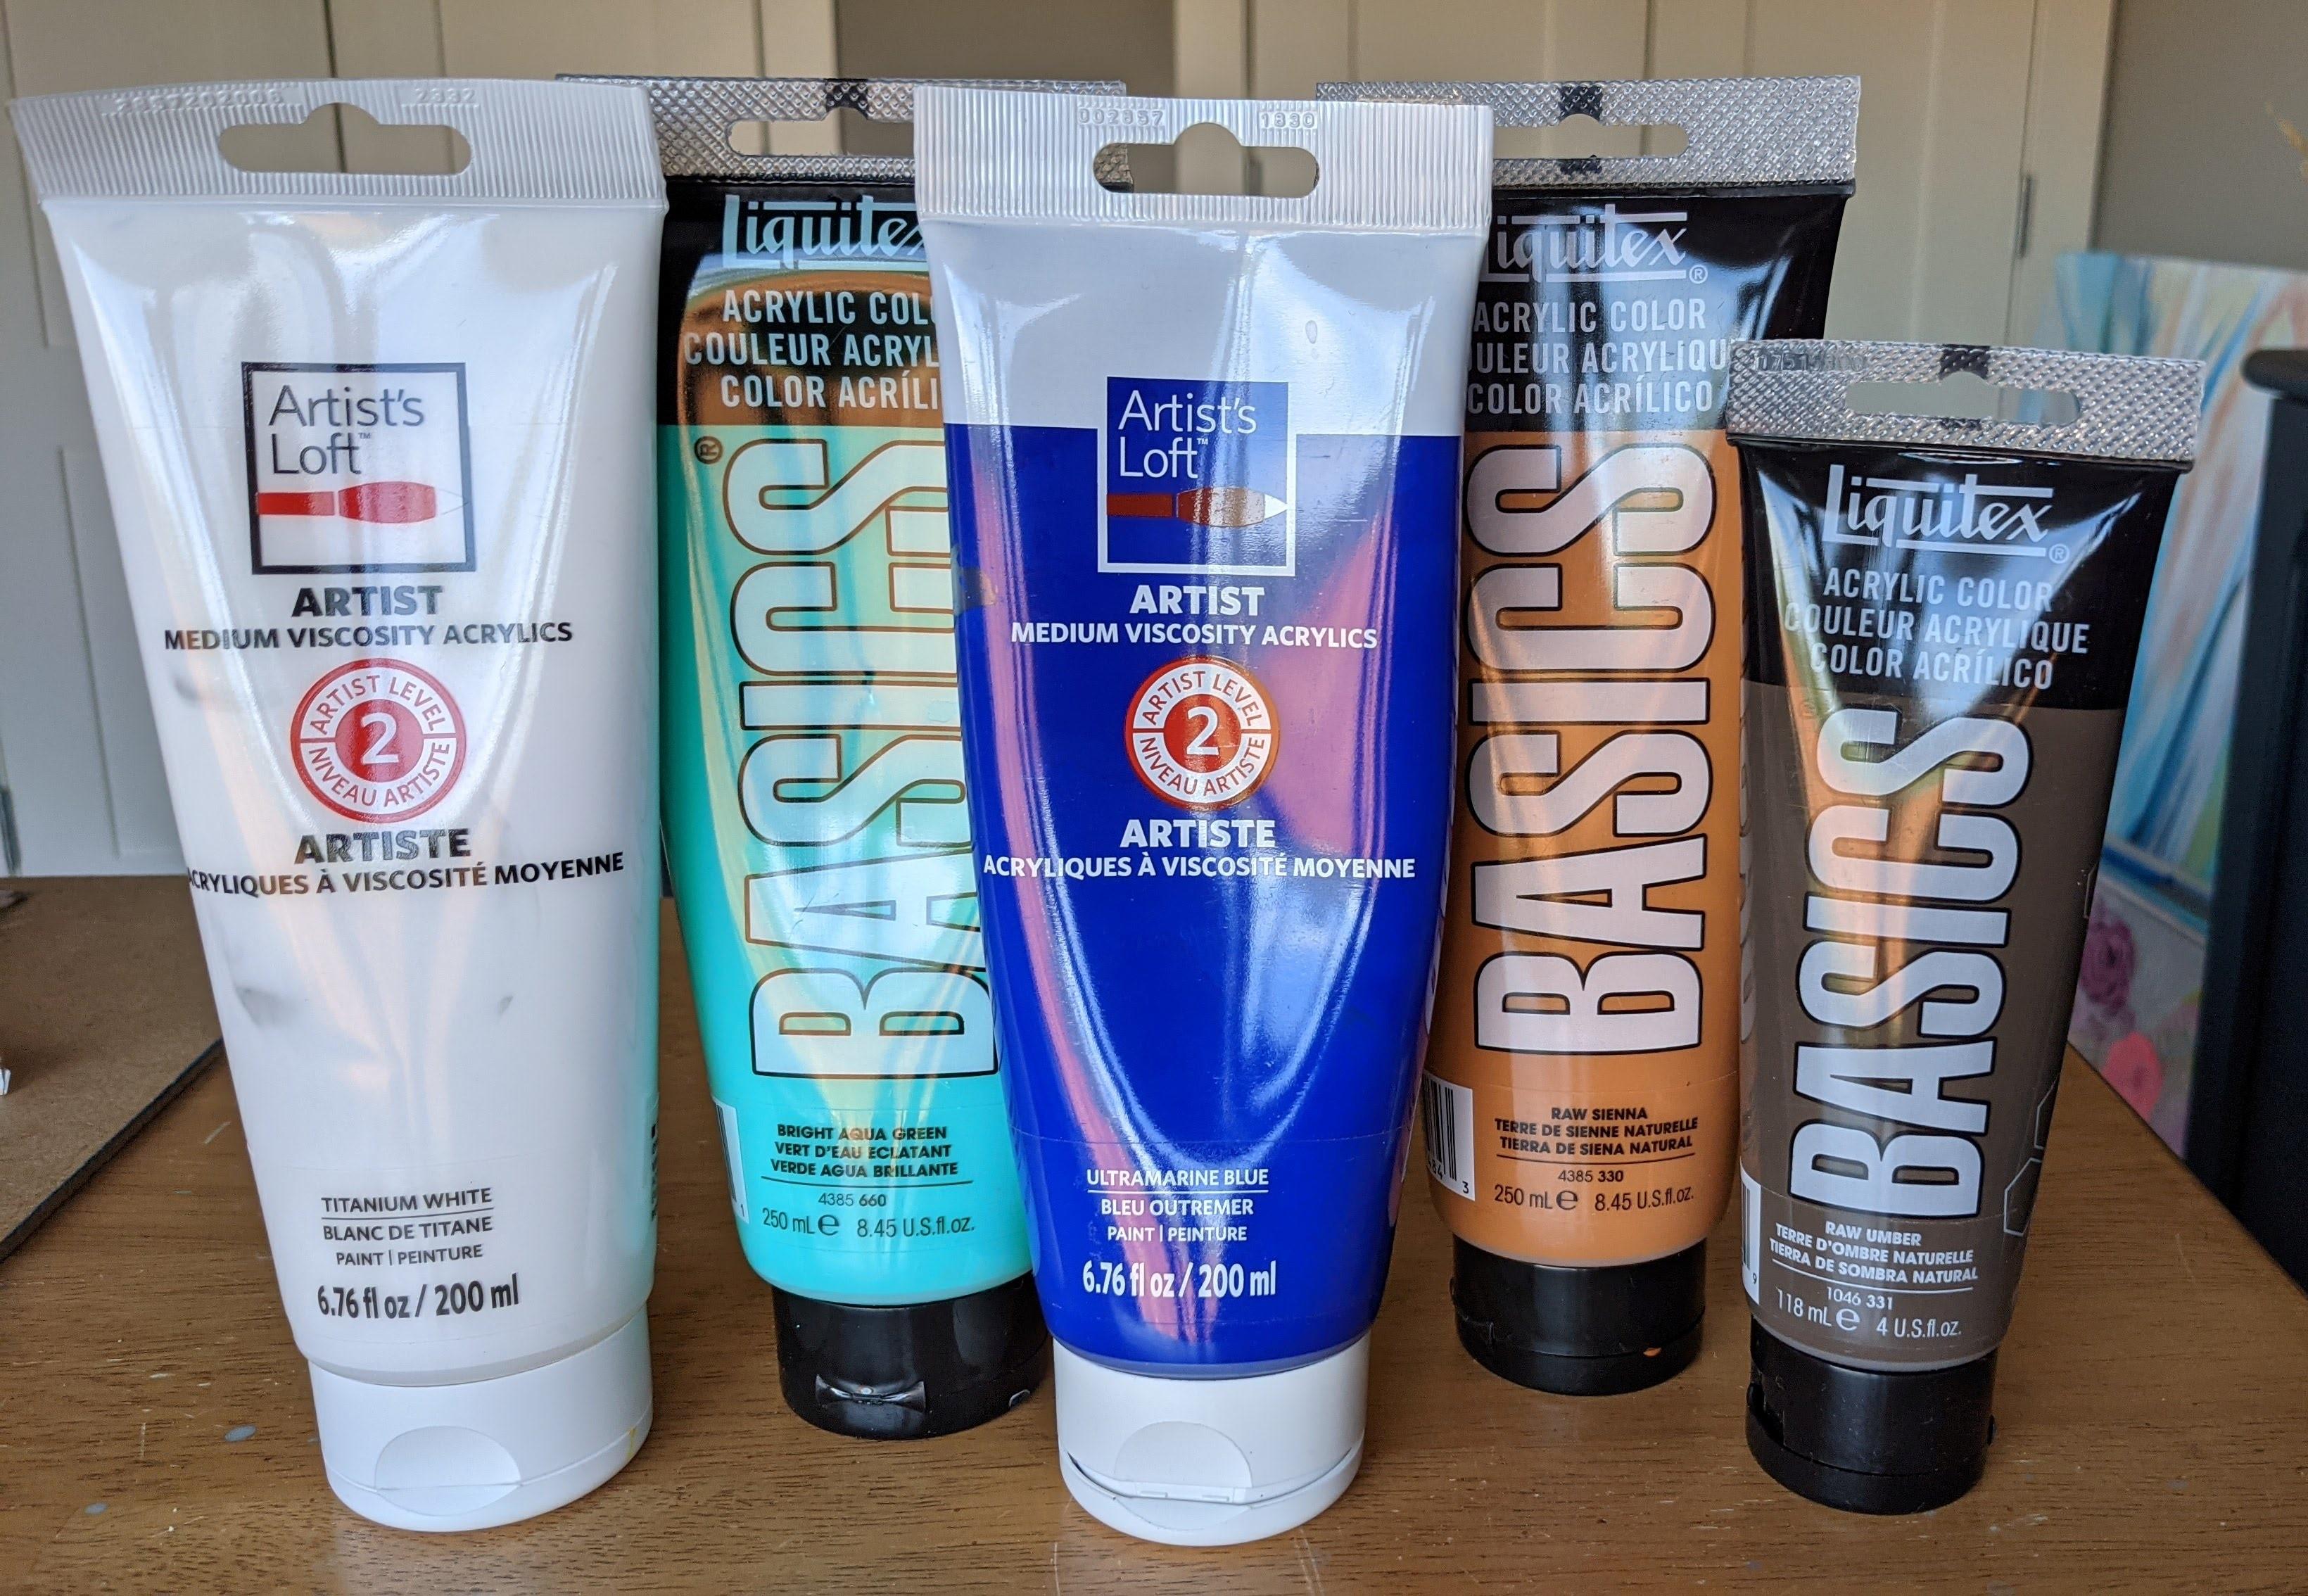
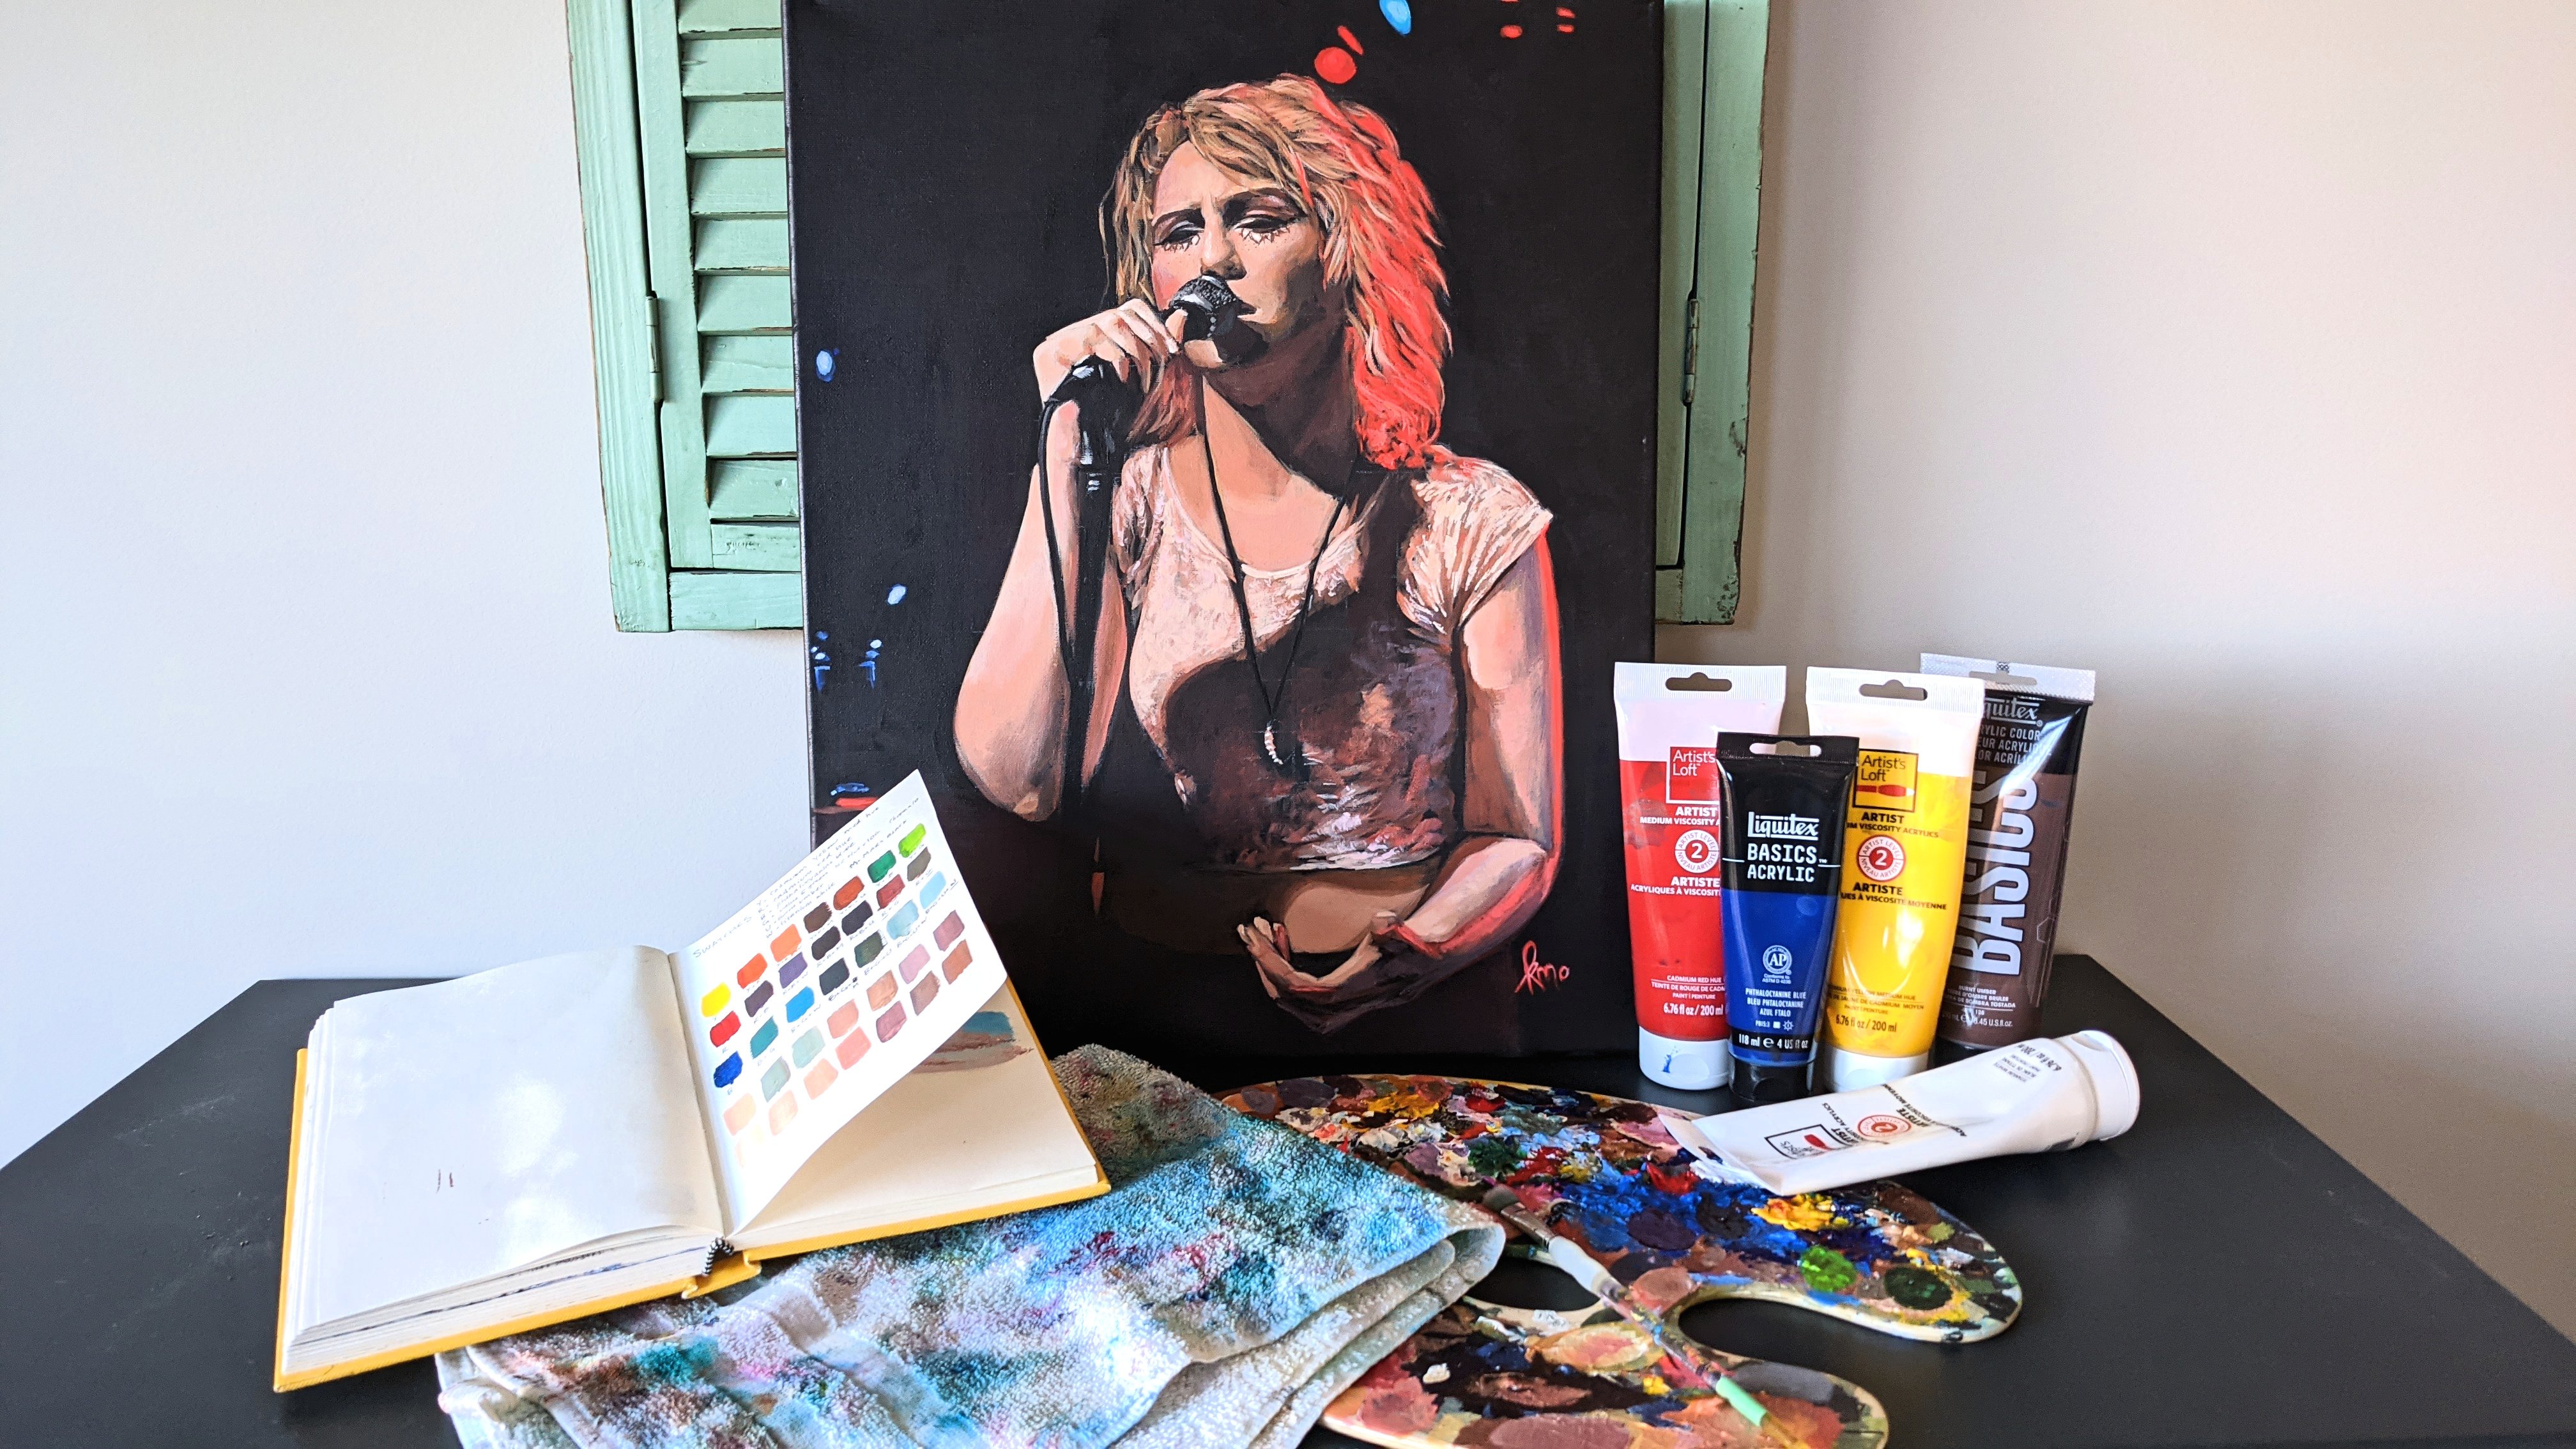
3. Materials: Let's talk about what you'll need to do this project. You'll need something to paint on. I'm using the pre-stretch canvas. This is an 8 by 10. I suggest something around the size, maybe 11 by 14 inches would be fine too, and you need something to put your paint on before you put it onto canvas, which is a paint palette. You can use a plate. Be creative if you want, but mine's just a wooden one. You need a cloth for wiping off your brush, wiping off your hands, picking up messes when you need, drying off your brush. That kind of stuff. I like to use glass ones because they're easier to wash off, two glass jars with water. But you can use other plastic containers as well. As long as you don't confuse it for your drinking water, then we're good. I like to use two because I use one for my dirtier water and then I do the last wash with my brush in the cleaner water so that it really helps clean the brush a bit better than if you just have one. You're going to need some paint. I use a medium viscosity for this project. You can use a heavier viscosity as well. That just means the paint is thicker. We need to mix with water if you use a thicker one. You could even use a liquid flow type of paint as well, then you just wouldn't add any water to the paint. Then you wouldn't need the next thing that I'm going to mention, which is a spray bottle. Spray bottle to wet the canvas to keep that acrylic paint wet longer. For color choices for acrylics, I'm not going to tell you the exact colors you need because you don't have to follow an exact color scheme. But what I would suggest is using a white because it helps lighten things up and create a good blending effect, and then let's say you want it to be a bright color, then stick to closer colors on the color wheel. Let's say I want yellows and greens for my background, then I'll choose a yellow and maybe a green or just a blue. Along here I stick to areas that are close on the color wheel so that I can have something harmonious. If you want a more muddied, muddled background, then you can choose colors on the opposite sides or I would suggest maybe just adding one color on the opposite side and just using that one sparingly. You also need brushes. Let's talk brushes for a second. The first brush you need, it's a medium. This one's a round curve, stiffer bristle brush, but it doesn't have to be stiff brush. This one is just getting the paint on and so just make sure it's not too small. That's really my only suggestion for the first brush that you need. The other brush is more important, you need something that's going to blend well. Mop brush blends larger areas quite well and we want to eliminate brushstrokes, so you want something that has a softness to it. Even the blending brushes for your makeup, something like that actually works quite well. These are mop brushes, this one's an oval mop brush. I find that this one hides the brushstrokes better. This one, you can see a little bit of brushstrokes, but you might like that. You just need one. Optional is a blow dryer. It just speeds up the process if you want to get onto your next layers quicker so you're not just sitting around waiting for paint to dry, but it's good to take a break sometimes anyways. That's it.
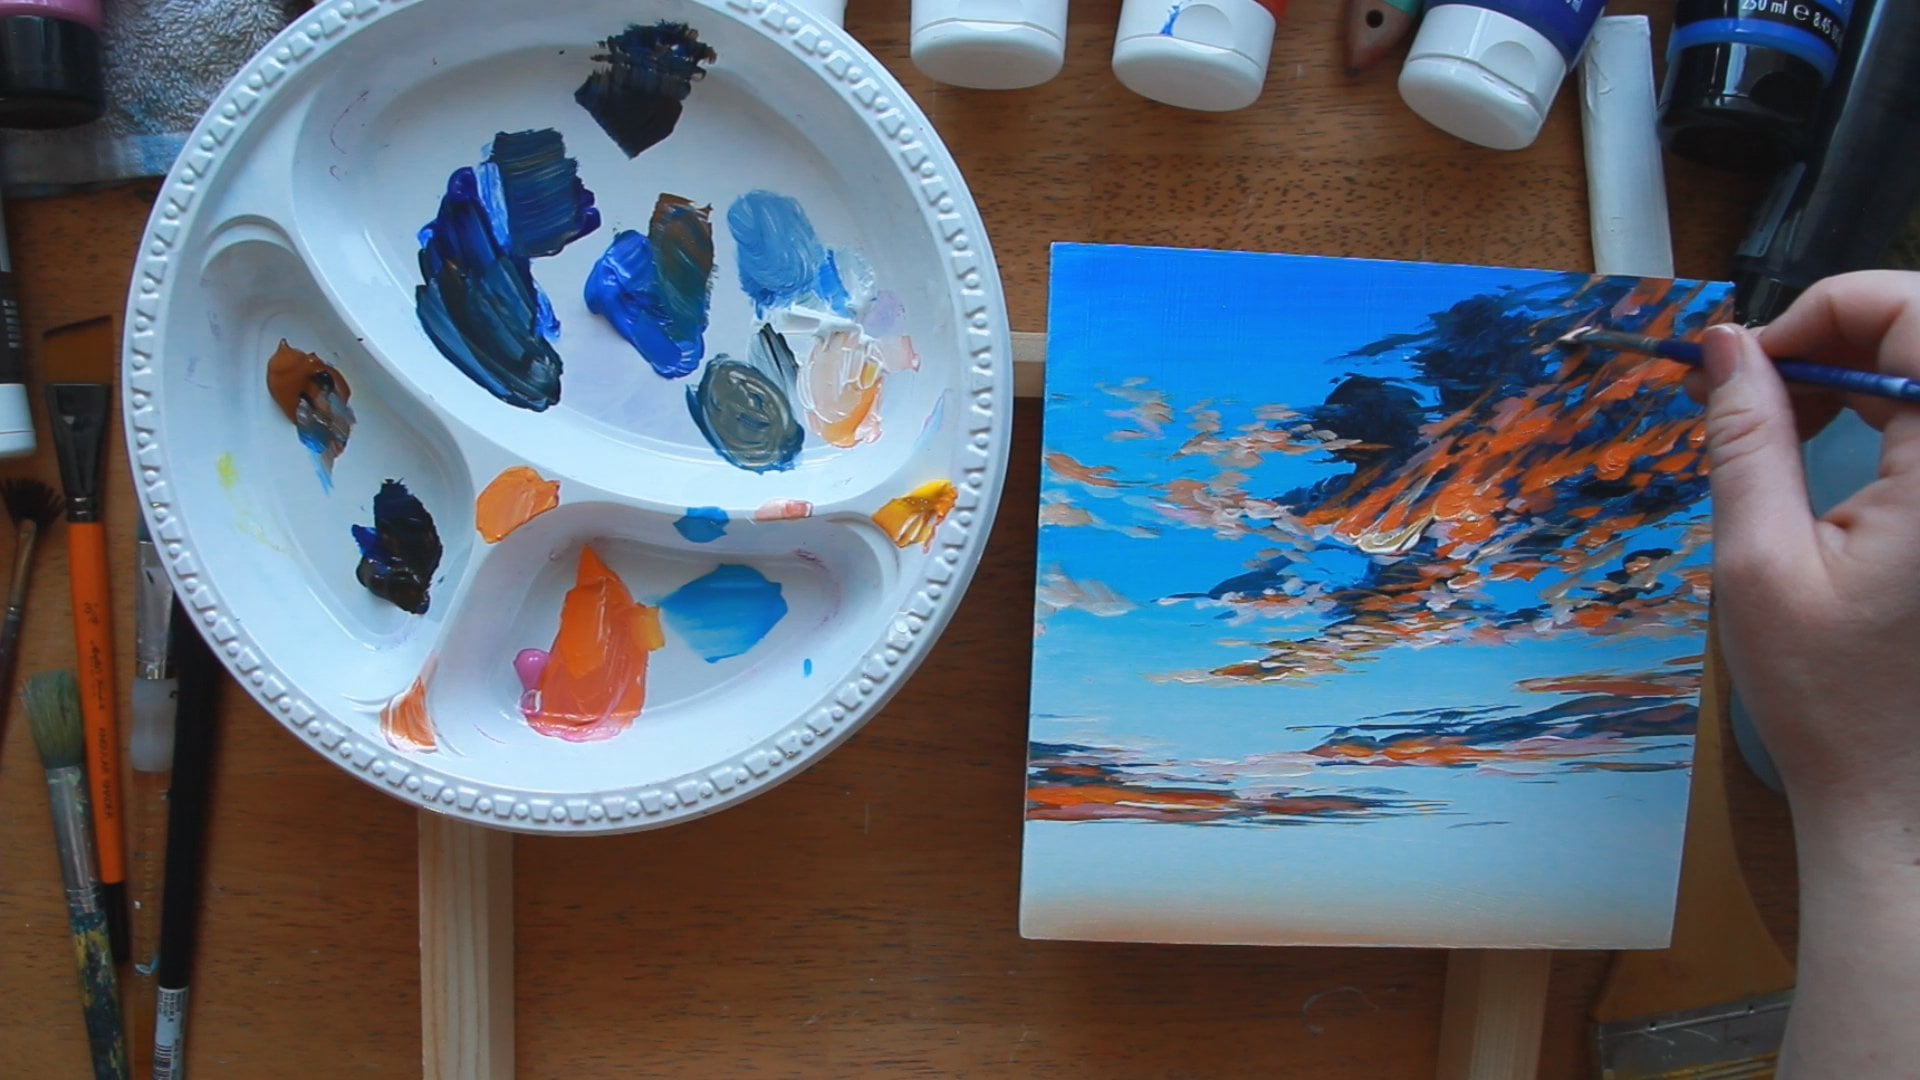
4. The Background: You have all your materials and you're ready to get started. Let's paint the background first. I know some artists don't do an underpainting, but I like to do an underpainting, and I'll tell you the benefits of it. First of all, it can be scary, intimidating when you're standing in front of a big white canvas, and it can almost be blinding and it can even stop you from getting started. One reason I like it is it gets that ball rolling, gets those creative juices flowing, and it just gets you ready to do the real layers. The first layer is not a scary layer because you're not really going to see much of it or any of it. It's really non-intimidating part, and you can just really let go and go for it. The other reasons I like it is because it gives you a first layer that prevents any white from showing through, if you have any specks of paint. If you are painting the sky and you painted this cloud and you love the cloud, but then there were specks of white showing through in other areas because you didn't do an underpainting, then you're going to have to go over that, and that can be really hard thing. The other reason is because like I said, it's so white and stark and hard to visualize the values that you're painting on. [inaudible] is popular for underpainting because it's a neutral tone, so It allows you to work from there to make better judgments for your tonal value. It helps with that regard in some way as well, and so I think there is value in doing an underpainting. We're going to do an underpainting, but we're not just going to do one solid color. We're going to do multiple colors, like a practice for our next layer. It's going to be a great way to practice the techniques of blending. Let's go. I like to have my canvas set up on an easel, but you can also just have it on a flat table with something to protect the table underneath. I'm going to spray a few sprays with my water bottle. I think I might have done a little too much. I would suggest doing a little bit less than I did. Just one spray is pretty good. I'm going to dive into some of my paint and start with the lighter colors, and just start in one area with one color or two colors and just start adding more color. This is the time I want you to really play. Don't go wild and crazy, but be loose. Go with the flow. I'm creating an area where I want a light spot to be. So I've started with lighter tones, or lighter hues really, and then bringing in the deeper hues in the base area as well as randomly in the middle or on the side. I'm going to create another light spot area on that side. Maybe there's a tree in the background, maybe there's a person. Who knows what it is? It's going to be blurred out, so we don't know. These brushstrokes don't have to be any particular direction. I'm just being loose with my brushstroke. They are just happening in this diagonal motion. I'm just trying to get paint on there. It's pretty watery, so I'm adding more paint so it's more concentrated, and just keep brushing. I'm also brushing the sides a little bit too. Get those sides if you want them. You don't have to. That's an optional thing. I'm going to add some white to blend it. You're going to see how the white helps create an opaqueness that prevents the background from showing through. There's something special about white that does that affect. It also will dull your colors a little bit too. You'll notice they were very bright when I first put them on, and now they're looking a little bit more subdued, and that's what I want. You can do a brighter background. There's no problem with that. I do encourage you to go with the colors that you enjoy and how you feel. Now here's the fun magical part. Grab your mop brush and sweep in motions that are very light. I'm not pushing on my canvas at all. I'm barely touching it, just letting it lightly sweep across the top, and I'm just doing a side to side motion, just again, feeling very loose, relaxed, and just trying to have fun with it. As you're continuing to blend through, you're going to start using different direction in your motion. Otherwise, it just looks one way. You're going to want to start moving it into different directions. But as you do that, you notice how I got that brown streak across the white. I'm going to want to wipe my brush off. We can't clean it with water at this point. Otherwise, we're not going to have that fluffy brush, so I'm just wiping it on my cloth or paper towel, whichever one you have. Trying to get some of that paint off my brush on my paper towel. You're not really seeing me do that action, but I'm moving my brush aside. I'm having fun here. So just for fun, I thought, let's just see what it's like if I just dab. I'm just dabbing to see. This is like play. When you're doing your background, sometimes you can just be free and see what happens. You never know in the future if you want to have some kind of textured effect and this might have helped you figure out how to create that. Having fun with it. Now I'm just going to go back in and sweep across. Again, I'm keeping it very loose and relaxed because I'm not worried, because there's going to be another layer going on top of this. Just being very free with it. I'm not worrying about the direction of my strokes right now because it's just the underpainting. I'm going to blow dry it so that it gets dry quicker, and then I can get onto the next layer sooner. You can blow dry it or just let it dry, go take a break, whichever one you like, it's fine, and then we can get onto the next layer once that is fully dry.
5. The Blurry Effect: Once you've finished that underpainting or background layer, let it dry completely. Go take a break, wash your brushes, make sure they're clean in-between while you're waiting for things to dry. Acrylic paint dries really quickly and you don't want paint stuck on your brushes, it ruins them, especially those lovely mop brushes, they're not going to be of use to you if you let paint dry on them. Don't let paint dry. After we're done that, watch this next process of how I build on the layers and then give it a go. As we get started with this 2nd layer, you're going to see how that underpainting really gave us a good foundation to build upon. We're not dealing with as much streakiness as the 1st layer and I'm not spraying water on this layer. I'm just going to use thicker amounts of paint and I'm going to follow a similar pattern to the colors I chose in the 1st layer. You can see already how much stronger it is, how much more vivid it looks, and it has this velvety strength to it. That's how I'm going to try and describe it. Again, I'm going to follow in with some white to create more of a subdued look rather than bolder colors. Can get gray if you mix too much. You can see mine is a little bit gray. I'm okay with that. But just keep in mind the more you blend different colors, especially around the color wheel, you're going to get this gray color. Sometimes it looks too muddy, so just be careful with that. That happens when you're just using, like if you're using red, yellow, and blue, you're going to get that gray or a brownie gray color. It's okay, it works for this piece, but just keep that in mind. If you're wanting bolder colors, you want to blend less. Keep it with those hues that are close to each other on the color wheel like we described in the material section. I also want you to see how it looks when I use a different brush for this blending effect because you might have a different brush or one that's more similar to this. I wanted to demonstrate using both. You don't have to use two different brushes. Go ahead and just use the one brush that you have and try to make it as dry as you can. As I'm going, I'm wiping in-between a lot so that I don't have color that's dark blending in my light areas, unless I want that. You want to keep areas that are darker more distinct than another. Then make sure you're really wiping your brush in-between because you can see how the darker areas get onto my lighter ones and you seen those brushstrokes and we want to make those brushstrokes disappear. As the paint is starting to get a little bit drier but not fully dry at all, just getting a little bit drier, not super wet, not dripping at all, you're going to brush in different directions. This is where we're getting more of a blurred look. If we hadn't done an underpainting, not as easily get this effect because we're worrying about covering the background. Right now I'm not worried about covering my background because we already did that underpainting. I'm focused on color blending and really getting that blurred effect through that blending. Making sure my brush is clean, dry, and wiping it constantly and making sure I give good coverage. You'll notice that I keep brushing over similar areas again and again and again. This is the process. It keeps going. While your paint is still wet, you can still work with it. It is starting to dry. Even as it's on the canvas, it will be drying. I'm still continuing to work with it until I get to the point where I feel really happy with the blurred effect that I'm trying to achieve. The base is a bit harder for me to access because of my easel. You might find it a bit easier to work on a table. But I will flip the painting soon and work on a 3rd layer. Why I'm doing a 3rd layer is because the base part is getting a bit of a streak happening and I think that's because I didn't get enough paint on it in my 1st layer. It is good to make sure you have good 1st solid foundation. I think part of it was I got it a bit too wet. My 1st layer was a little too wet and I did mention to just spray once. I sprayed a few times so that caused me to have to create a 3rd layer. But that's okay. You might want to do 3rd layer anyways. There some areas of the painting I was really happy with and so I want to keep those areas intact while I try and work on a 3rd layer. You'll notice most of my brushstrokes are kind of a side to side and then I just change which way I'm going side to side. Then right here I've also been doing a bit of a round, circular type of brushstroke effect. I do encourage you to try different methods with your brushing. Again, it's very light. You'll notice when I'm adding paint, that I'm using that 1st brush we talked about in materials. I'm not using the mop brush for that effect because I want my mop brush to be clean as possible throughout the process. As you can see, my painting is now flipped and I'm adding more paint because it was showing some streaks which showed a little bit of the canvas underneath. It's a little bit harder to tell on this video. It looked like it was okay, but I could see streaks and so I wanted to cover that with more paint. I did a 3rd layer. I made sure that my 1st and 2nd layers were dry as I worked on this 3rd layer. You'll notice sometimes there's little bits of bristles that gets stuck on the canvas and I try and pick those up quickly. You can use a palette knife to scoop them up and then you probably still want to blend over top of that so you don't have any bristle lines stuck. I found this part a little bit challenging because I wasn't doing the whole canvas. I was trying to blend from a wet section to a dry section, which is a challenging thing to do with acrylics. I guess with any medium it would be hard if it was dry in one section and then wet in another. I'm just trying to use all the techniques of a light brushstroke and also adding paint where needed. I felt like I wanted it to be a bit lighter. That's why I added that white in that middle section. As you can see, I'm using mostly a side to side brushing effect. Sometimes I will use circular as well to try to move the paint where I want it and guide it into certain directions. You might have noticed I'm switching between mop brushes. If you're doing multiple layers, it is handy to have extra mop brushes because they get dirty and you've just used them and had to wash them so they're a bit wet which is harder to use. Blow dry it and you're done your back layers.
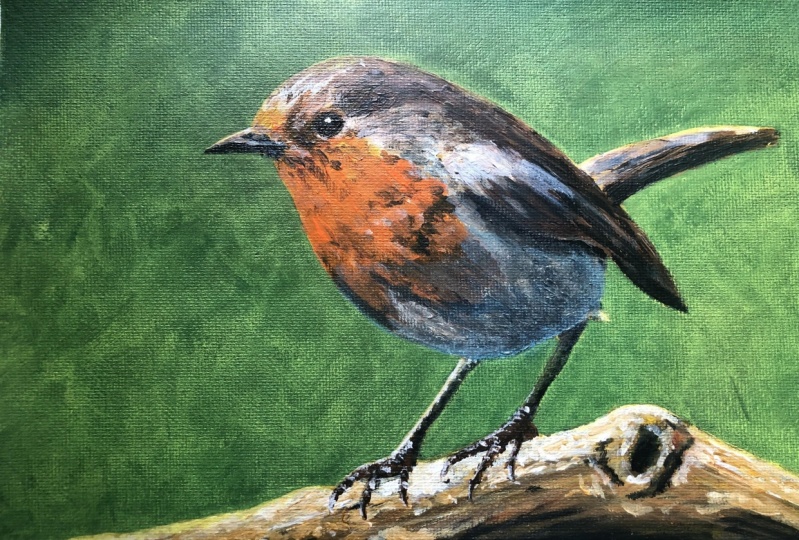
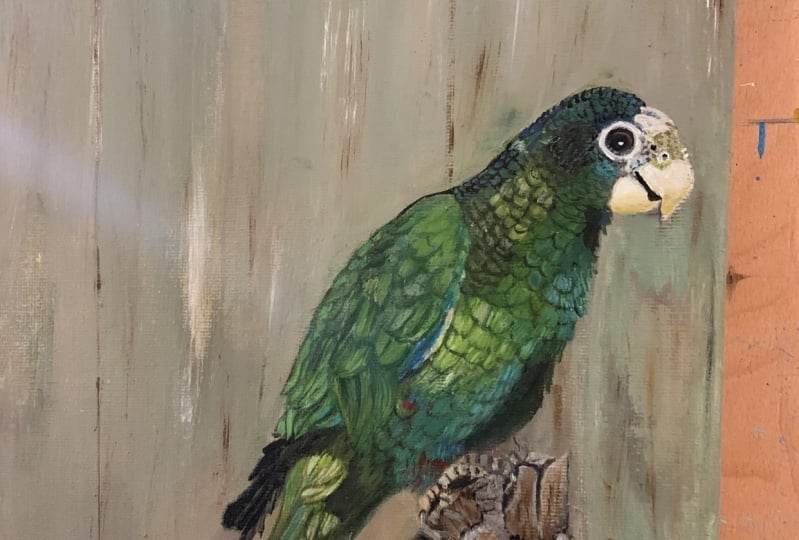
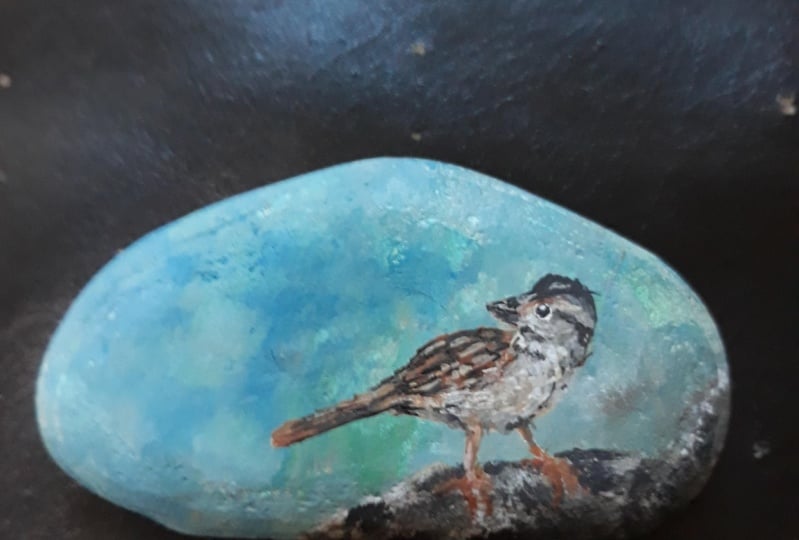
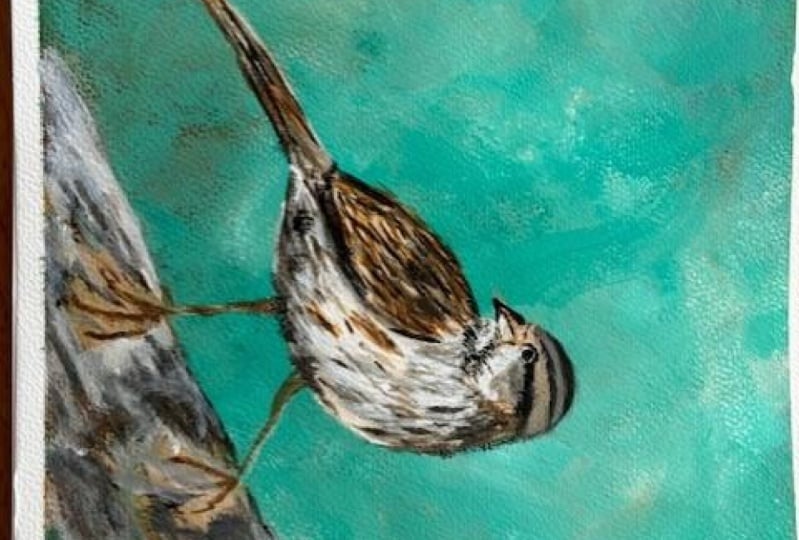
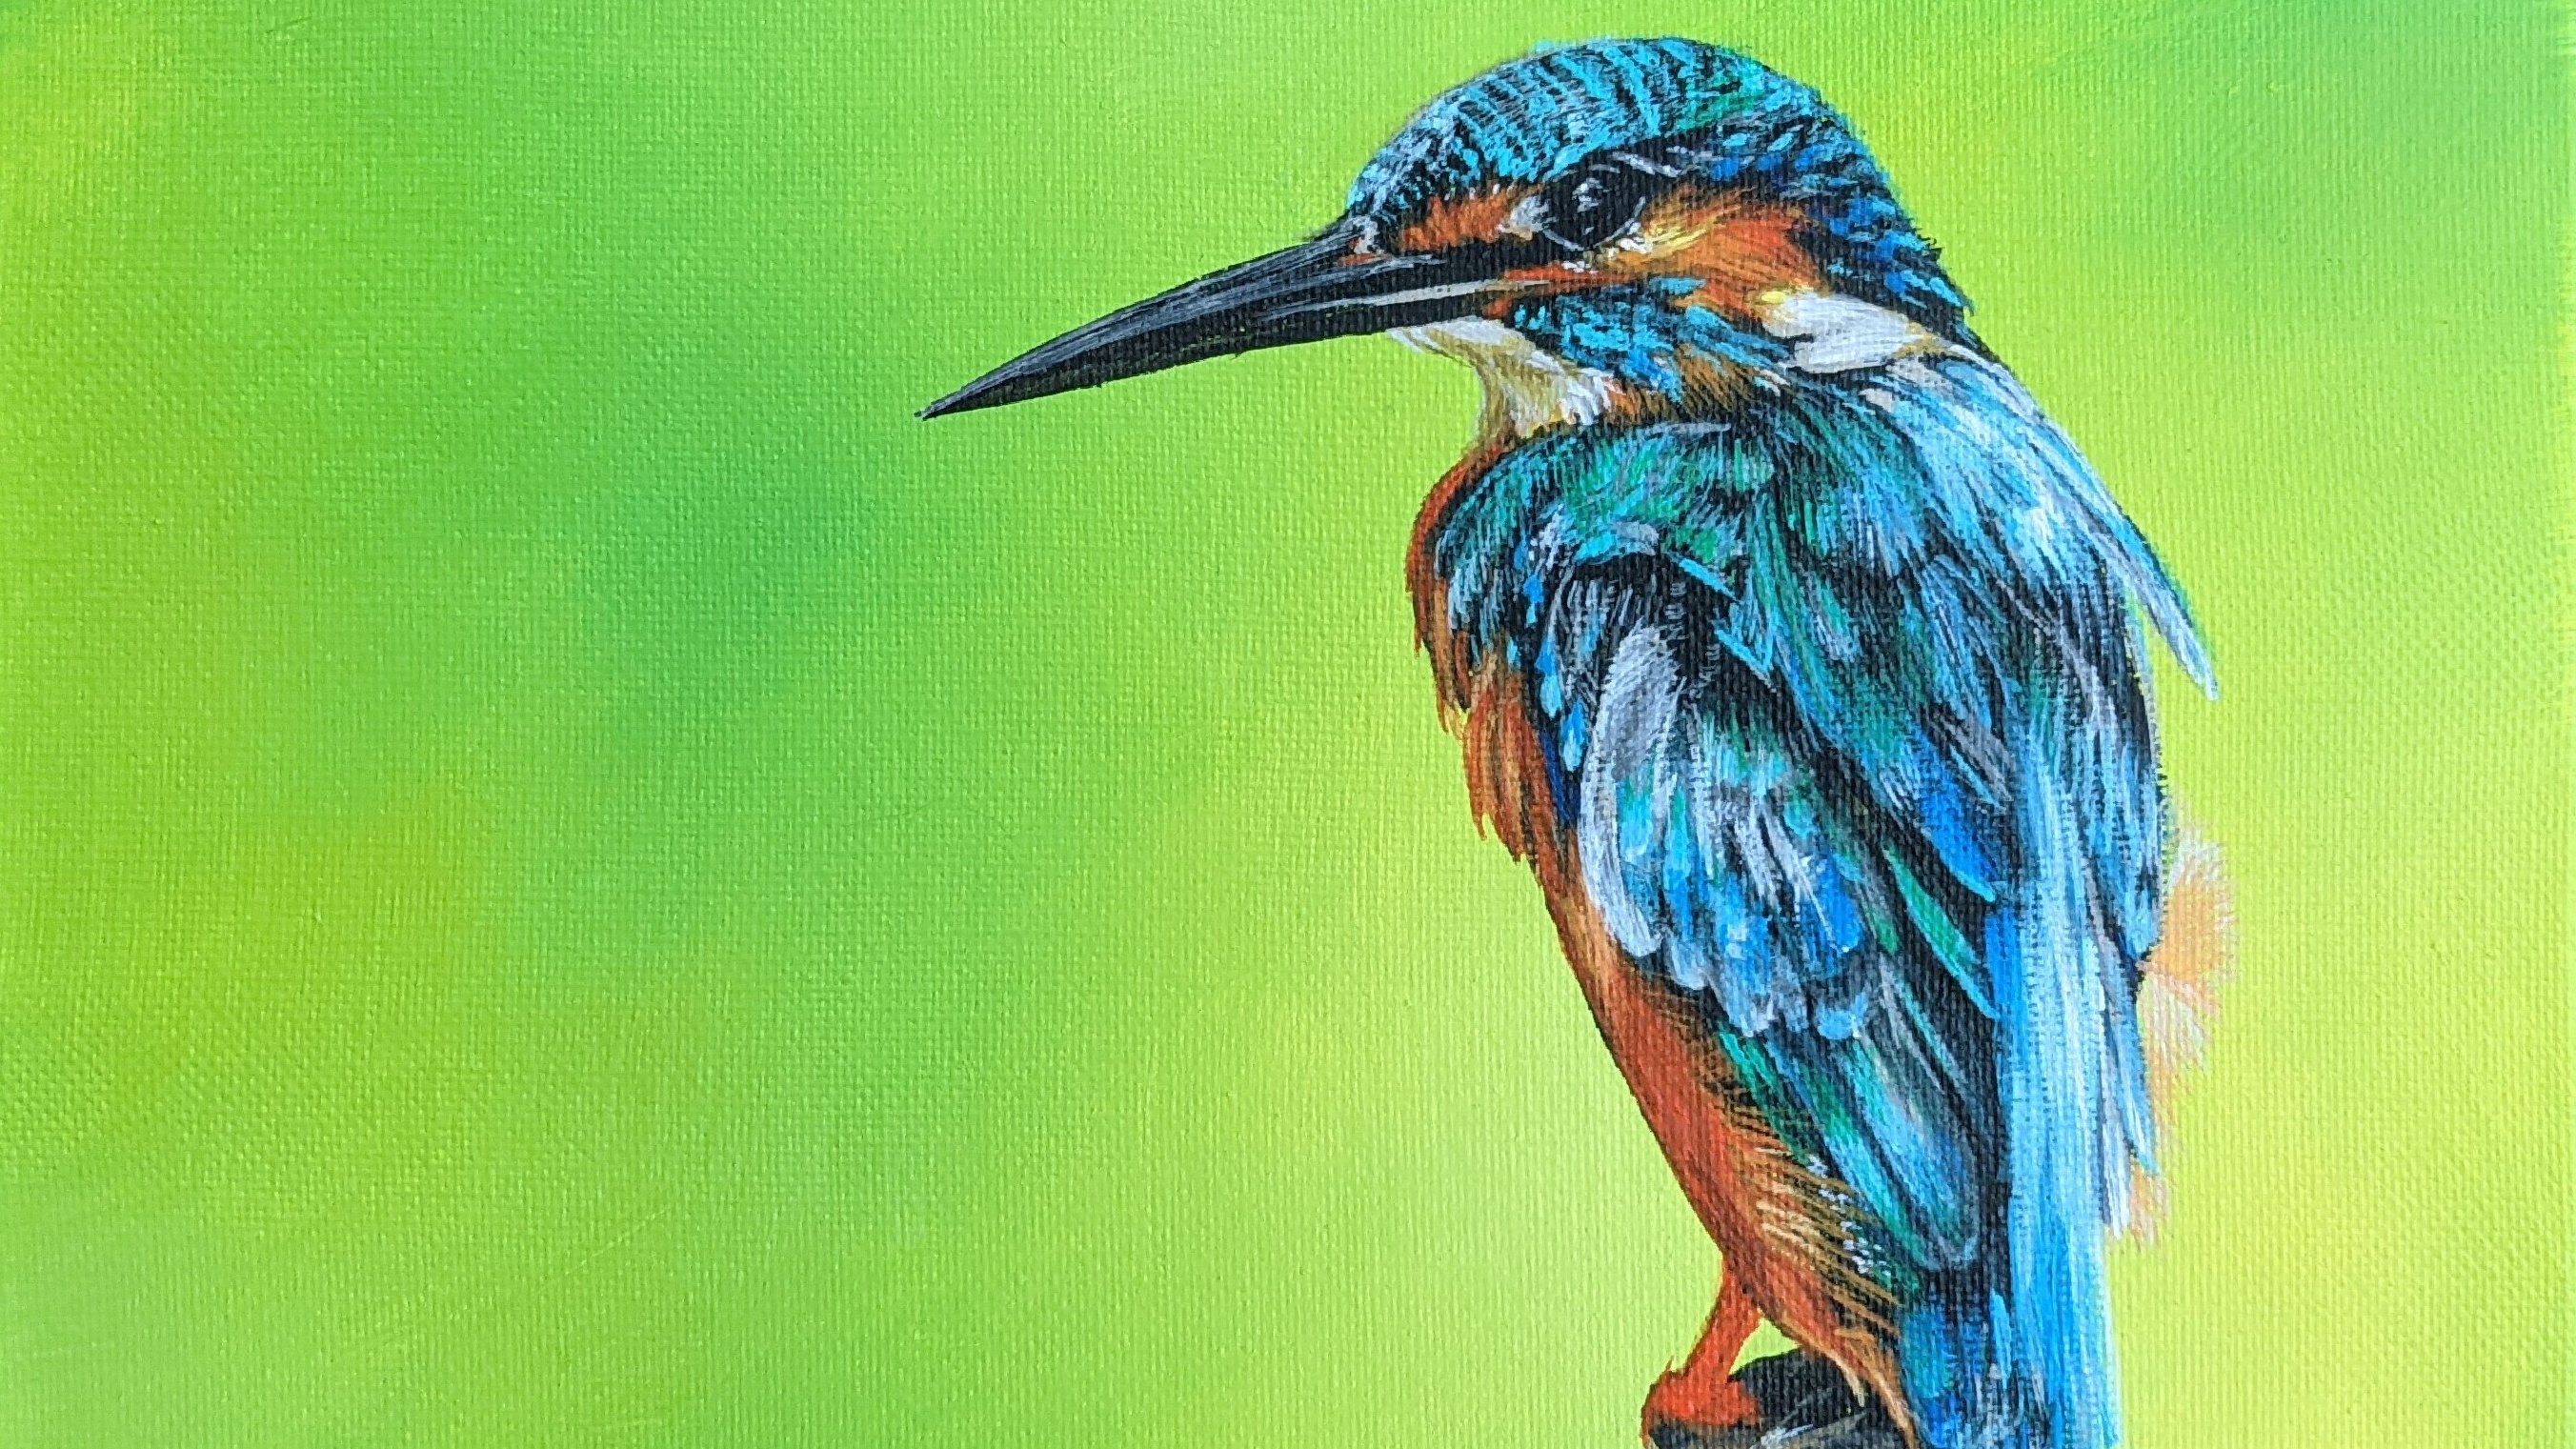
6. Layering Process: Okay, now you have a beautiful background. It's all blurry and lovely, and it has variations in color and you're so excited about it and it's dry. Now I'm going to draw your subject matter onto the canvas. You can use transfer paper. You can sketch onto it carefully. Just make sure you're not using something permanent unless you're really confident in your drawing skills. Once the picture is on, then you can begin the Laying process. Something to take note is I'm using a small brush, actually two small brushes in this process. You can use a variety of brushes depending on what your subject is. This part really isn't the focus of our lesson, even though without this part of our image, it's not really going to be much of anything, just a background. As you can see, I've started by creating a silhouette with a neutral tone. This bird is very neutral, so it works out, but you can, even if your bird has lots of different colors, you can start with a neutral tone and then build on that. In building on it and creating layers, I'm starting with that neutral mid-tone. Then I'm adding some lighter tones, and then I'm adding some darker tones till I get the details in the right place. Then when I feel more confident, I'm adding those super dark tones. Then I'll add the really bright tones as well. I'll start shifting color and adding texture. By doing this layering effect, I'm having confidence in placement. Then I'm building on it so that I can get detail. It adds depth and it makes it look more realistic. It's a really fun process. This is the way I do it. This isn't the only way to do it. Some people like to draw things out, almost like paint-by-number effect plantings very meticulously like that. I prefer to work with my canvas and layering, as you can see in this video here. I'm switching between the two brushes as I need. If I'm using a larger area or I need a larger brush stroke, then I'm using my angled brush that's a bit bigger. Then if I just need a small detailed line, I might be using or dot, I may be using that smaller line brush. You can see I'm adding in more color, getting it more accurate with the image that I was using to look at. There are many areas that you can go to find pictures if you haven't taken one yourself to use so that you're using a picture that you're allowed to paint from. Making sure we're giving people the credit they deserve. Getting this bird, its fluffy feathers. This is a part where it's good to step back and see if you're making the right decisions. Going to add in those feet, claw-like, try when you're doing this to see the subject in terms of tone, shape, color, rather than this is a bird. I'm painting a bird because your mind will throw you off. It's the mind games. Now I'm painting the branch and I want it to be very loose because I want it to have this textured look, a bark that's scratchy maybe or just textured and fun. I'm not blending it too much. I'm just leaving blocks of color and having some areas blend and some not. Then go ahead and sign the piece. In the next video, I'm going to give you some tips on how to know when a piece is finished. That's coming up next.
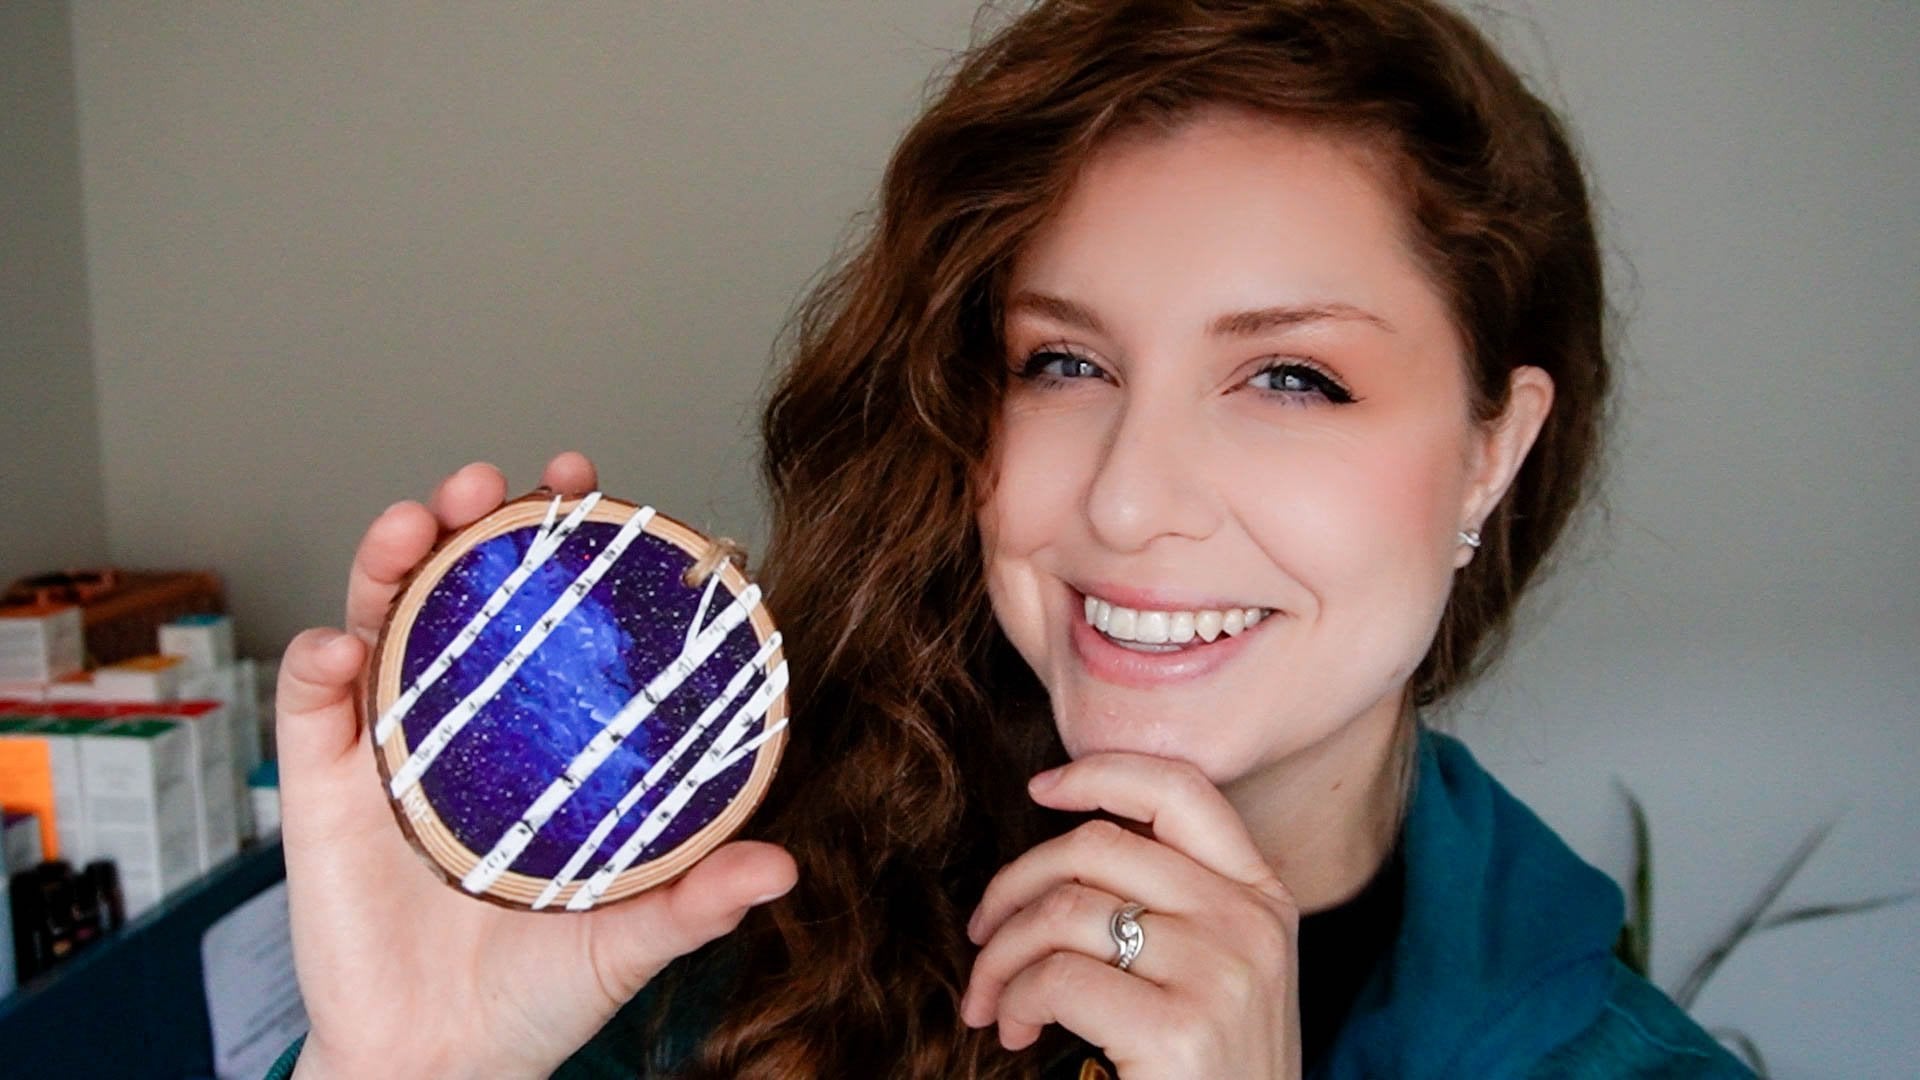
7. Finishing Touches: Okay, great, you've finished the learning process and now you're wondering, is it finished? Have I done everything I could to make it the best I can? Can I sign it? Now, what do I do? Well, I'm going to give you some tips on what I do to find out whether I am finished my piece and if I'm happy with it. One thing you can do is make sure you take a break. Walk away, get a drink, have a snack something, and come back, and feel refreshed. Just like when you're in a scented store, like you're buying candles, and you have all these candles you're smelling, and your brain is getting all confused, and you're not sure what you're smelling or thinking, and what's good or bad anymore. Then you smell those coffee beans and it clears your senses and now you can understand scent again. This is the same thing as walking away and coming back. Once you've taken a break, it gives your brain a break from what you've been staring at for so long to recognize if there are any parts in your painting that bug your eye. You might look at a piece and say, your eye might be focusing on one part of your painting and something is off about it. That's one way I know that it's not quite finished. Another tip I can tell you that I like to use is if I think it's finished, nothing's bothering my eye, sign it. After you've signed it, you're telling your brain it's finished but then sometimes when you tell your brain that, suddenly you see things you didn't see before that bother you. This often happens in paintings that I thought I was finished and then I realize, I just need to add a little more detail. I just need to add a little more highlighting or I just didn't that little bit, it will make it that much better. That's some tips about how I know. The other part is a feeling. It feels finished even if there are parts that bother you a little bit, and know that this is a journey, and you're not going to be perfect. Just accept where you're at as an artist as well and know that it takes time or practice to get to where your brain really wants it to be. Make sure you do accept yourself where you're at, but also push yourself to get those finishing touches that are bothering your eye. I hope that helps with those finishing touches, and that you can have yours ready, and you feel proud of it to be able to present it in the gallery so I can see it too, and participate in your celebration of your success. Congratulations, you've completed the project. You've completed this class, I'm so proud of you. Thank you for joining me and while being that, if you enjoyed this class, that you'll take a moment to give me a review and let me know what you enjoyed most, and where I could improve so I can make my next class that much better. Thank you so much and we'll see you next time.
 Kristina (Moyor) Choy, fine artist