Transcripts
1. Introduction: Hyam Nadine, thanks for
joining me for a lesson today, we're going to be painting
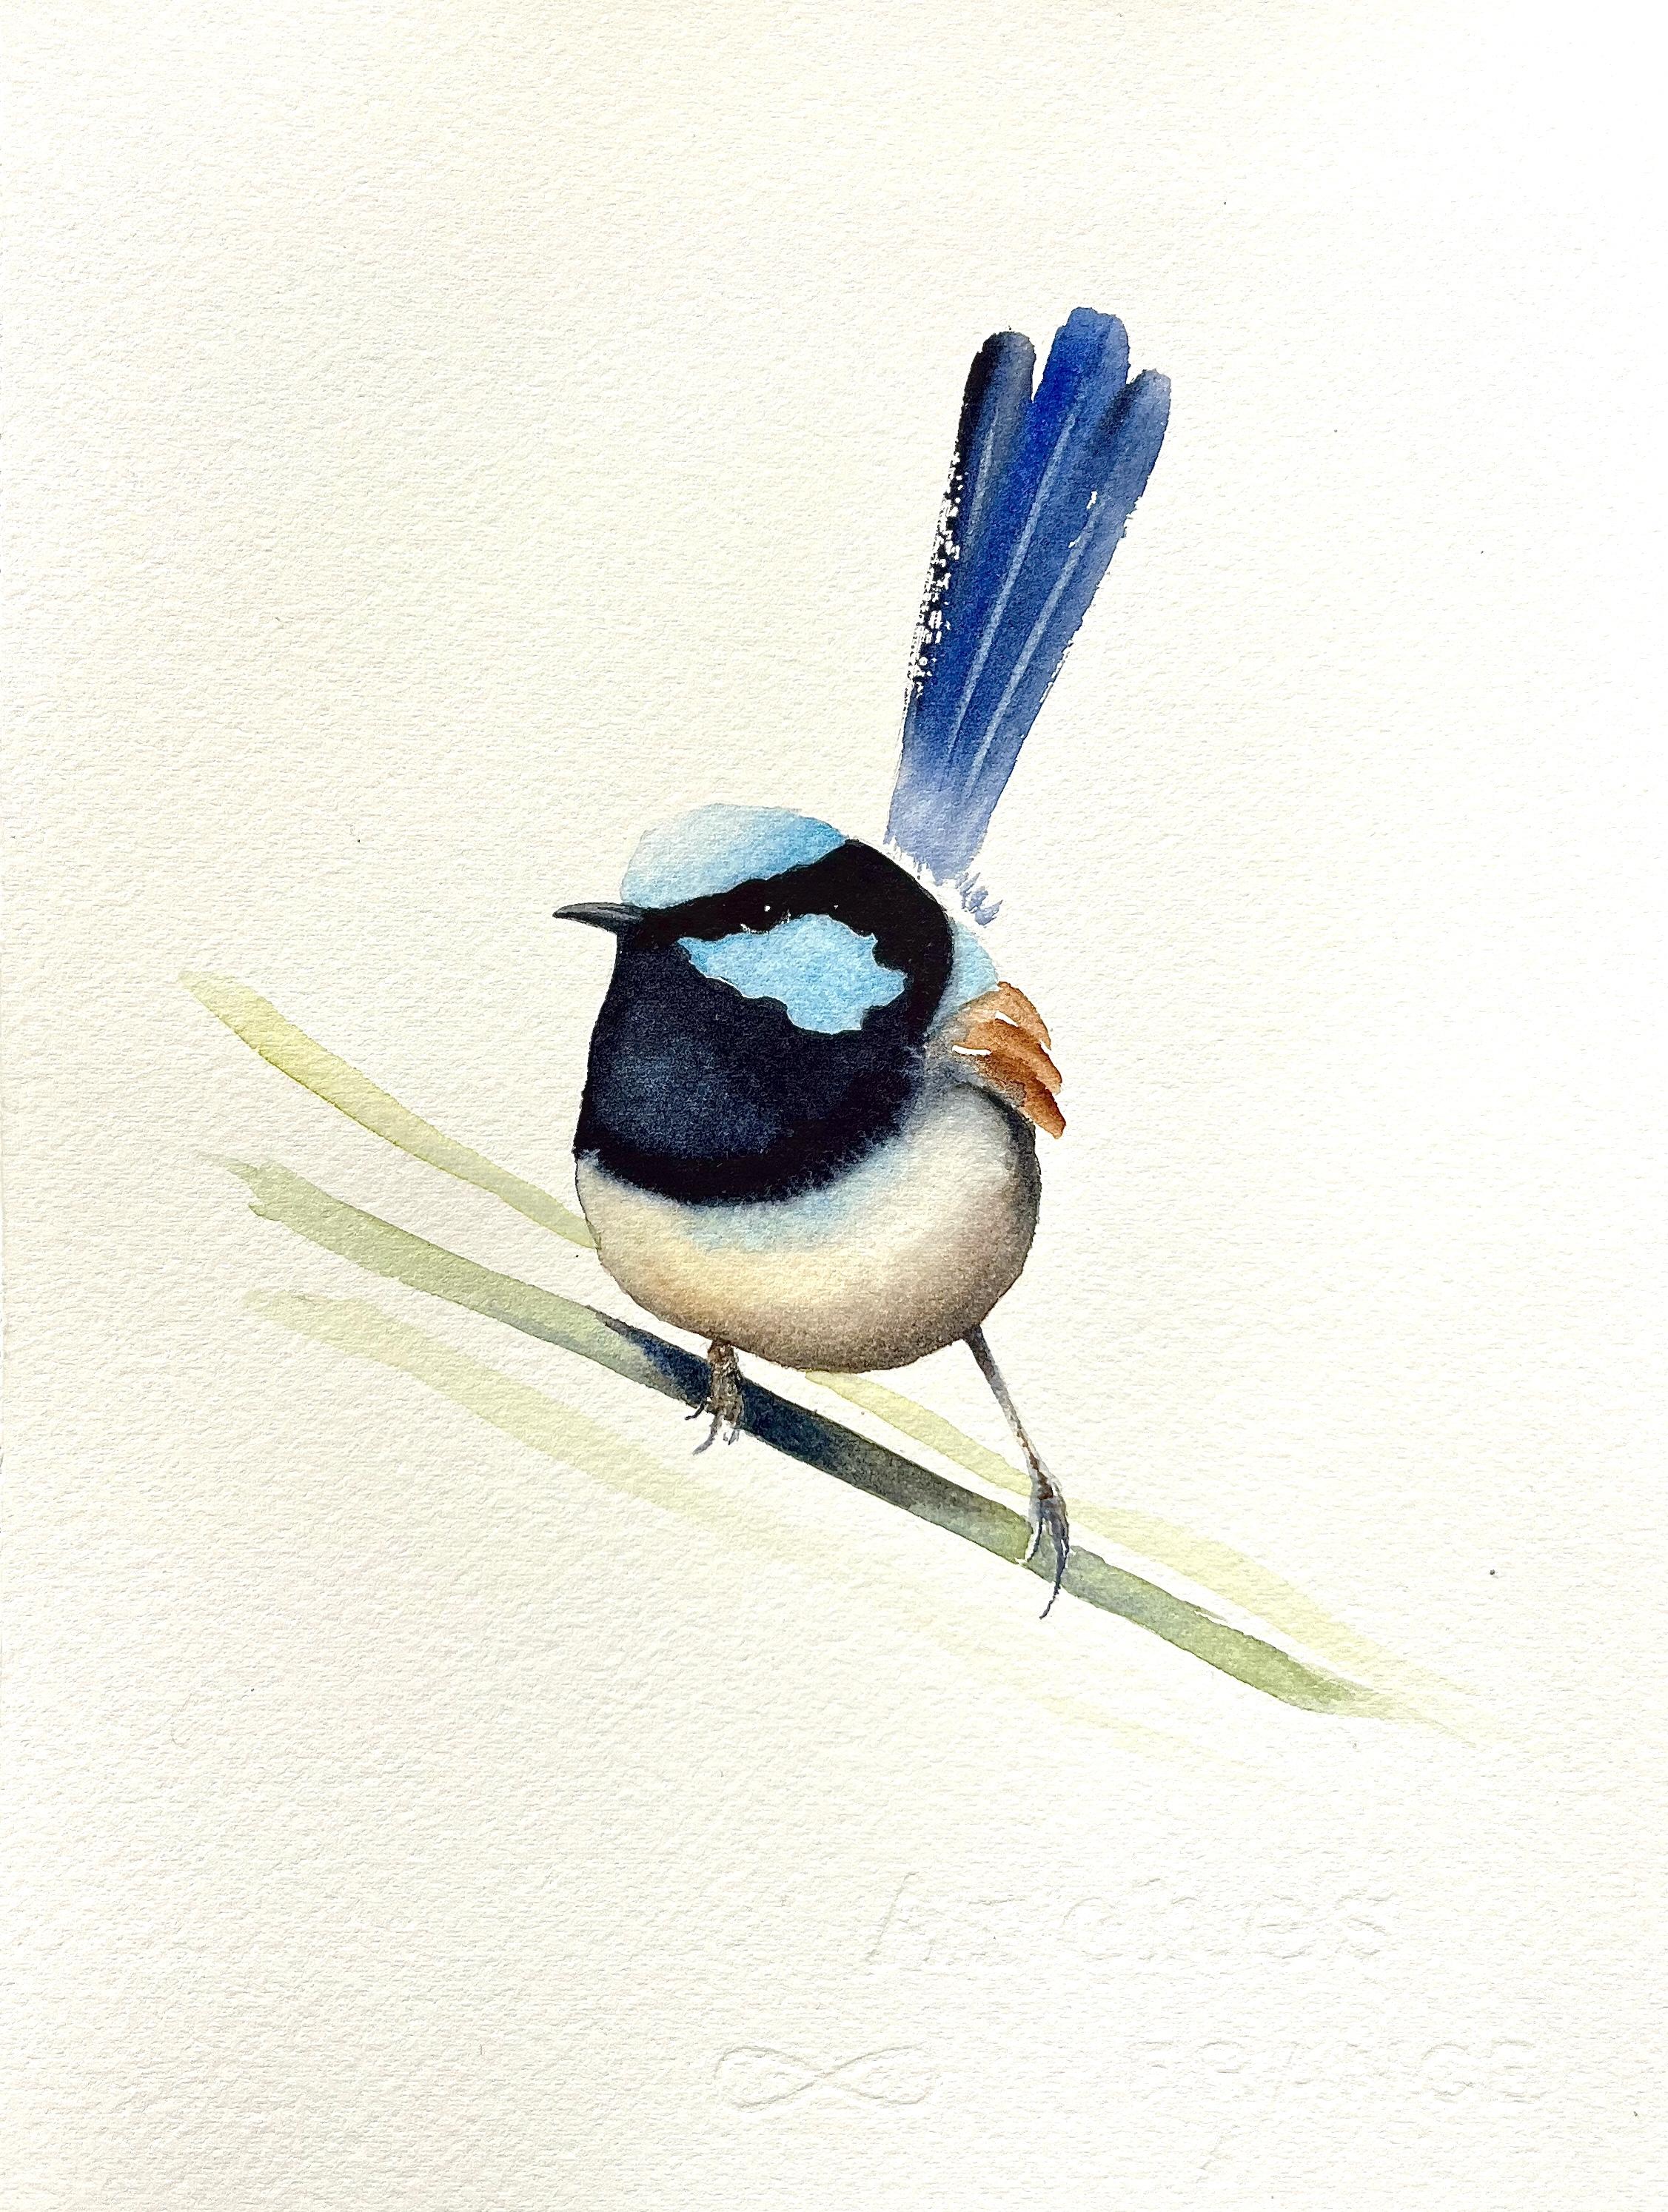
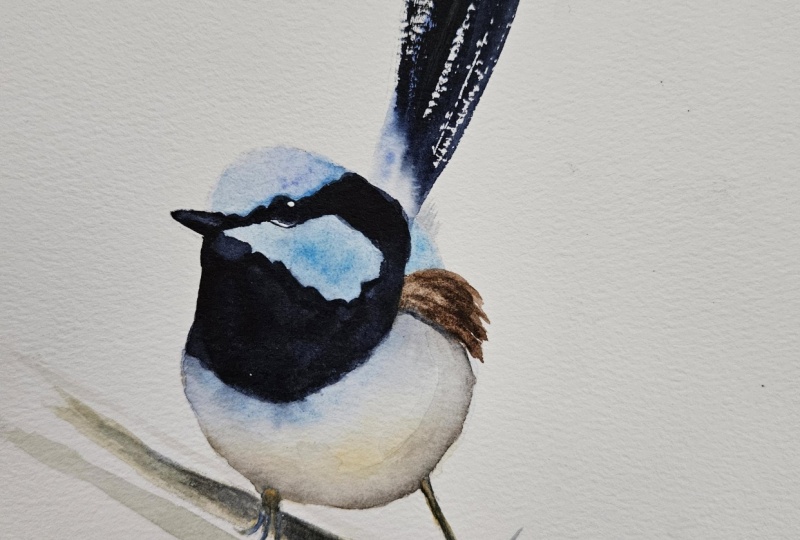
a little blue wren. So this is probably geared a little bit towards my
Australian students, because if you
live in Australia, you'll know that everybody
loves a blue wren. So it's a very simple painting
really, really quick. And what I'm wanting to show you today is to get you
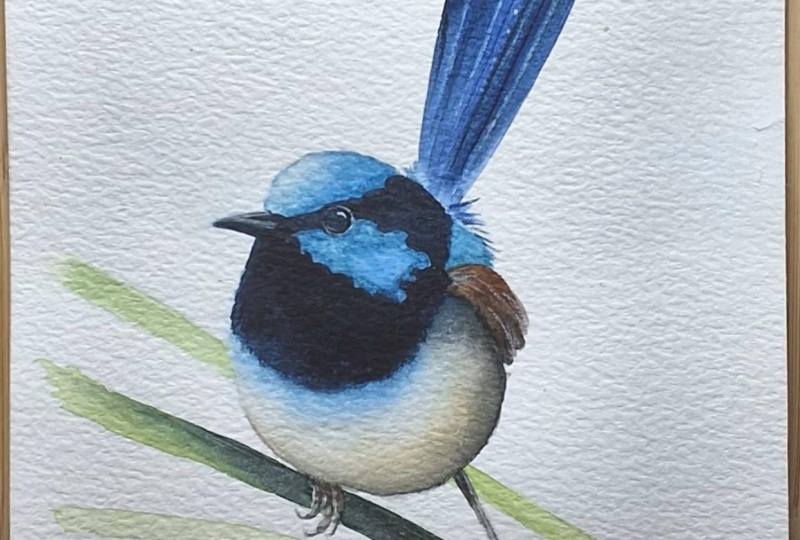
to practice the shading. So building up the um, dimension, the depth
of the bird in this. So it's just layering a couple of layers with a small brush. So really quick paint. We'll go through
the materials to sketch and step by step
through the painting. And if you're happy with
what you've done at the end, I'll get you to upload a picture for me to have a look at in the project section. So no fancy introduction today. We'll just get straight into it.
2. Materials: Okay, materials
for today's class. So the reference photo is mine. You can download that directly
from a Skillshare site. I'm painting on Arches
cold press paper. It's 300 grams. I'm
painting flat on a board, but I'm not taking it down. You'll need regular pencil
and eraser, just a HB pencil. In terms of the paint. So I'm using Daniel Smith Indigo.
I don't have the tube here. I lost it about 20 minutes ago. That's what I'm using for
the dark here. The blues. I've got some Cerulian and some French tra both
from Winsor and Newton. I'm also using some Yellow Ochre or you could use
some Raw Sienna, and I've got some
transparent brown that I'm using in the shadows
and in the wing here. Now, for the green, I'm using a mix of
some Daniel Smith, Hansa Yellow, and some of the French Otra that
I've got in the tail. For the brushes, I've got a few. Um I've got this tiny one
for getting the beak. I only ever paint wrens or paint this small when
I've got a new brush. This is brand new,
so it's nice and pointy and I can get
this small shape in. This is slightly larger, synthetic for getting around the bulk of the bird
and then this one I've picked because it's
got a nice round tip, which will give me the
shapes on the tail. And then the other
thing I'm using, I've just got this
stiff synthetic for lifting out the
highlight in the tail. So the details of these
are all materials. Oh, I'm also using some white gas just for
the highlight in the eye. The other thing I did,
I did a little bit of scraping out in
the foot here with a scalpel blade, but
you don't need that. It's just because I messed up. Other than that, you'll need
your palette, jar of water, and some tissues,
and I think we're good to get onto the sketch.
3. Sketching Up: Alright, for the sketch, there's really
nothing much to it. The only thing you really
need to pay attention to is the shape of the beak. I don't know why, but these
beaks are really tricky, possibly because
they're so small, but it's really easy to
get the shape wrong. So make sure you pay attention
to the shape of the beak. I haven't really drawn
the full circle into the eye because I'm probably just going to
paint through that, so I've just given
myself the little curve. Here and just a little bit of an indication on the feet
and I'm only putting in this one bit of grass here. I've put a template if you want to use it on the Skillshare site
that you can download. Otherwise, just have
to go sketching it yourself and we'll
start painting.
4. Painting the Beak and Body: Okay, so we're
going to start with the beak so that if I
mess up the beach shape, I don't keep going
with the painting, so you want to get that right. So that's where we're going
to start with some Indigo, and I've got my small brush, so I'm gonna pick up really
milky Indigo initially. Turn it around to get
where you're comfortable, and I'm going to start in
the bottom of the beak. Pick up a bit more
and do the top. It doesn't matter if the
top and the bottom touch. Sometimes I'll
leave a little bit of a gap. I don't know
that I'll bother. This one I'm just
trying to make sure. I get that little curve right. I'm going to put that
down for a minute and go to I think maybe I'll try this. This is a size five
coming onto dry paper. So now I'm just going
to whack on paint, come into that beak. Push down, come around. Now, the Indigo
will dry lighter, so it doesn't matter that I've got that bleeding into the beak there because I'll have to probably put on
another layer anyway. Now here where the blue is, I'm just dragging my brush
roughly around there. Pick up a bit more
creamier Indigo. I've got hair. There. Now you could paint, you could paint the Cerulean that
we're going to use for the light blue first. The reason I don't
is simply because I always like to paint
the beak first, and there seems I'd
rather just keep going with the
black to make sure I've got the basic shape. Right. I'm going to switch
back to my little brush, and I'm just going to tidy up. In here a little bit. Okay. Now, this
will dry too light, but that's fine, and I'm not gonna worry about
that beat just yet. What I am going to do
now wash my brush. I'm gonna with clean water, paint the page. Is tummy. Up to the wing. Show in
a minute how wet. I am. There. There's he got a reasonable amount
of water on there. Then I'm going to come
up, and I'm just gonna touch to the edge of that
Indigo just a little bit. Wash my brush and then just kind of flooding
it with water. Just want to start. To get a little bit of that
Indigo to bleed down. If it doesn't move at all, you can just grab a
bit more indigo and throw it onto that join. It depends how
warm your room is. Yeah. Then I'm going
to clean my brush, run a little bit of
water underneath there. And then I'm going
to go into some got some transparent brown. You can use burnt sienna. Yeah, I'm just going
to paint my brush my tissue because I
don't want too much. I'm going to push down and pull into that little bit of water. I want a little bit
of a wing there. I can see that this is
dried really light. While this bit still wet, I'm just going to take
a bit more Indigo. I'm going to paint
through that black. Now you can leave a little
bit of light on this chest. Sometimes I leave the light and then I end up going back
and filling it back in. If you want to leave the
light, I've whacked that on, but I can clean my brush and just take out a bit of pigment to get that
highlight in there. I'm not sure yet, I might decide
later what I want. Alright, I'm going
to let this pigment bleed underneath that wing. Then I'm going to grab,
while it's all still wet, some Yellow Ochre or raw
sienna. Throw that in. Then I'm going to get
some serlem which I can't squeeze out because I
lost the lid some time ago. Hopping a bit of
serlem in there. And I just want that
to bleed wet and wet. I've got lots of water on there. Now, before I let you stop, I'm going to tidy up the beak. I've gone back to
my little brush. Keep your hand out, I don't
want to touch in there. I'm just going to drag darker paint through
darker indigo through the bottom
half of that beak. And put in the little um, nostril. Alright. I'm gonna stick that. Now,
before I let you stop, I can see that my order hasn't quite come
to my pencil edge, so I'm just going
to drag that down. And I'm just going to
my room is really warm. So I'm drying really quickly, so I'm just chucking
on a bit more water. I just want a bit more
movement in there. And then before I know I kick saying I'll get you stop, but this is
the kind of thing. Because it's so small,
you can just keep working around without having to stop, which is what I tend to do. So I'm going to paint I got
really thick, creamy Indigo. Now, pop that. I, I don't have to do this now. I could let this dry
and then come back and do it after. May as well. Largely, I'm doing this quickly because my son has
just bought a new amp, and any minute now, I reckon it's gonna start up, so I have to paint quickly. Alright, so I've still
got that on my brush, rather than waste it, I'm
just going to throw it. In there. Wash my brush. And I'm just gonna let it. Just throwing a bit more water on to let it do its own thing. And actually, you probably
notice I'm not actually paying attention to the
light in the reference. I'm just doing
what I want to do. Alright. If you sit
here and watch it dry, I sometimes I sometimes will stick there
and as it's drying, just keep chucking a few
little dots of water on. I like there to be
blooms in here, and I'm not sure if you'll be able to see
it. I'll take a photo. See this when I throw the water and you can
see this water pushing up into that Indigo and get
in the little spidery bits. And that sort of effect
is really nice. I think. I like it. That's what
I'm always aiming for. So getting a little bit of
that in there is always good. All right, I'm going
to come out of that and let that dry for 10 minutes.
5. Adding the Blue Feathers and Tail: Okay. So I'm pretty dry. I'm going to start
with the blue now. I'm gonna keep with
my little brush. Normally, I would
back this pencil off because I want to keep
it pretty light up here, but I'm going to leave it there so that you can see
what I'm doing. I'm gonna paint it with water first coming out to
that pencil edge. And when you do this, don't paint on the pencil
first and then come down because your chances are you'll push
further than the line. So I always start in
the middle of the shape and push out to that edge. Then I'm going to grab
some Cerulean milky, if you can squeeze it out onto your palette into that wet page. And I'm doing that to
keep it nice and light. It gives me time to work the paint around because
it's nice and wet already rather than going onto
the dry page because I want to be careful to push up to the edge and
not go bigger. All right. Then when I get I've just dried my
brush on the tissue, and I want to join it
to this Indigo edge, and I don't mind if the indigo bleeds in
to that a little bit, I don't want it to shoot off, but it doesn't matter
if I get a slight. Bleed along that edge. Okay. And then I'm going to
pop up a bit more pigment, I think, down low. Strengthening up the pigment at the back here and just
the touch the front. So I'm keeping most
of my light here. Not really paying attention
to the reference, just doing what I want to do. Alright. Something
that's quite often use for these blue rends is some Daniel Smith Lavender
is nice in here as well, often just in this
little back of the head. I didn't put it in here today, so I don't want to give
you too many colors a little bit through here. It's just a lovely
touch of purple. Then we're going to do
the same thing here. Again, check on a little
bit of water first, maybe in here too
at the same time. And then just throw some pigment in and
then move it around. I'm going to move it just to the edge of the black, and then
I'm going to touch. I don't want to get
too much water onto the Indigo. Both sides. Okay, so touch to
the black there. That's fine. Nothing
dramatics happened. Okay. So now here I'm going
to walk it up to the edge. Again, if I get a little bit
of bleeding, that's fine. They we're going to do before we do any kind of shading
or anything like that. We're gonna come in
and do the tail now. In the tail, it's quite it's
probably more French ultra. In an awesome cod.
We're probably more likely to
have French ultra, so we'll do a bit
of French ultra. I'm just going to stick. A little bit of French
ultra in my Indigo well. Let's see what that looks like. I've got to pick a brush, quite a curved end to
the feather there, so I want to pick that. Now, I'm just mixing
a little bit of my I've got something else
in there as well as Indigo. Yeah, don't mind that,
so I might go with that. Alright, so I'm going to make it easy for myself and pop
just a little bit of water. Just at the base
of the tail here. Then I'm going to pick up my
French ultra and my Indigo, push down on the page
in the middle feather, pull down into that water. All right. Then I'm going to turn my page and just tidy up. Want that a bit straighter. Now, can I see any? I've usually got a little bit
of a fluff happening there. Now, what I want, these little broken
bits are always nice. So if you get
those, that's good. Of course, this is really nice
on my scrap bit of paper, but, yeah, we know how
that's how it rolls. So going to let that dry and
not fiddle in there for now. I might darken off down
here once that's dry, but I don't want
to touch that yet. They're going to come
into the legs and a bit of stem. Might
do the legs first. So I'm going to go back
to that tiny brush. Now, the legs have got quite a bit of pink
and a bit of ochre, and I don't want
to again, I don't want to give you too
many different colors. So I'm just going to
I've got a tiny bit of Yellow Ochre that I'm going to touch onto the top
of those feet, come down, just drag a
little bit of that paint. Then I'm going to
grab some Indigo. I'm just going to drag
the brush through. So really messy. This side Just a suggestion. I'm going to make that a
bit darker at the top. We'll see how that dries before I do too
much more fiddling. Actually, what I might do, I'm going to let that fully dry. Then we'll come back in and
do the branch because I can't really do the grass
while that's still wet, come out of that for
ten and let that dry.
6. Making the Tummy Round: I'm fully dry now.
Looking for my size five, I'm just going to
throw a bit of water into this grass stem. And then I'm gonna
throw a bit of. I'm going to use some French tra and some hearse yellow,
I think, my green. I just drop that in maybe
a bit more of the blue. Now, 'cause I'm not
doing a background, which I know some
of you will do, and that's great,
but because I'm not, I want to be lighter
at the ends here, and then darker through here. I don't want to
really solid chop at either end of the branch. Okay, and then I switched
to a small brush. I'm just going to pop
slightly darker paint probably along the bottom. So I've picked up a bit
more my French ultra. Just kind of chiseling out. I've got lots of different pencil lines and things in here. It makes it slightly
tricky to see. I'm not gonna worry
too much about that. For now. Alright.
Now what I want to do I want to round
it up a bit because it's still very two D. So we want to come
into this tummy. I think what I'm going to
try and do is rub off, see if any of this
will come off. It might not come off
because it's my pigment, but I just want to
make sure that it is pigment and not the pencil. Be careful of that wranch. I've got a, I'm just going to get myself
a little sip of a rubber. I can't get in there.
This is not ideal. I would normally wait
until this was dry, but I don't want to. I'm gonna stick with
this little brush, and I'm gonna throw water
everywhere, apparently. I'm gonna throw some water
down along this bottom edge. And I might I might use a bit of I think I'm
going to use a bit of French otra and bunt Oh, sorry, Transparent
brown initially. So a bit of the blue,
a bit of the brown. See what kind of a black, what kind of dark that gives me. Wash my brush because that's a lot of pigment on there now. Well, I didn't get
any of the blue then. So that's right. There we go. That's
a bit darker. So I've got to come right to that the edge
of the first wash. I need a bit more. I have
enough French ultar in there. It's a bit brown. So I can let them
mix on the page. That's completely fine. All right. So done that. Then
I'm going to grab water. This brush holds a
lot of this brand new brush holds a lot of water and a lot of
pigment, evidently. So what I'm trying to try
and do flood that a bit. Just wanting that wet and wet. So I'm kind of putting it
on and moving it around, taking off the excess water, being trying to be really
careful of that edge. Flooding it with more water. If you get too much water
on, you get into strife. You can touch the tissue to it. Just leaves a bit of a pattern. So that there is what I'm after. I'll need a little bit of
that over here a bit too. So it using the French ultra and the Transparent Brown
Oxide gives you a n gives you a bit
of granulation, gives you a nicer shadow,
I think, for this. I'm in dangerous territory
here. I'm going. I haven't switched the
right glasses over, so I keep going over the line, so I'm making them a bit
fatter, but that's okay. I think I want a bit
more Yellow Ochre in there because it's kind
of disappeared a bit. And I still think it needs to
be slightly slightly more. So while the page is still
wet, I'm adding on more. I'm just being careful
that I've got less water on my brush now than in my page so that I don't cause blooms. I want a bit of a shadow. I want a bit under here. I'm worrying the
edge of the indigo. I just want a bit
of color there. I just taken my wet. Damp brush. I'm just running along
the indigo edge just to get a bit of something
happening there. And I think I need to define. It's tricky in the reference
because this is sort of a little bit fluffy
and messed about, but I'm not going
to worry too much. I'm just going to
pop a little bit of a dark underneath that wing. That was a bit of the brown
and a bit of the blue again. So I'm sort of pushing
that wing on top. Okay. Nearly there. All right. Then I want to darken pop a little bit of
that blue and the brown. Um, really creamy top of this leg because
there's a bit of a shadow. Wash my brush, tease
that down a bit. And then this bit on
here, here, it's darker. So I'm just messy
strengthening up that dark. Bit of the blue,
bit of the brown, letting it mix on the page, but it probably needs a
bit more brown in there. Here, I need a bit more
stuff on that foot. So I just drade a couple of
bits of blue and the brown. Okay, I think I want I'll come
back in there in a minute. I'm going to pop the
little highlight in the eye. This isn't the eye. It's this second one here, which is a little bit deceptive. So I'm just going to take. I'm going to just do
a really simple I and just pop a
little bit of quash. On the back there, and I might. Also, I'm just going
to paint my tissue. So now I'm going to
got a tiny bit of gouache and just more
gouache than I thought. Drag. Just a fraction. Oh, gouache, just to give a slight indication of bit more of an indication
of the eye there. I'm going to darken
this a little bit. I'm going to take my
blue and my brown. I'm just going to pop a
little bit more pigment on that branch where the birds
casting a bit of a shadow. So what I can see I've done now, I've got more brown in that foot than I have in that foot. Trying to decide which
maybe I'll just pop a bit more in these feet. Just popped trying
to match it a bit. I didn't quite
get. So my problem here is that my tummy doesn't
come quite down enough. I should be covering
that foot more. There's not a lot I
can do about that now. But what I am going to do,
I take my scalpel blade, and I'm just going to scratch. A little bit more
light back into I kind of lost I've kind of
lost my where my toes are. I just got too brown for me. So I have to wait
for that to dry. I'm going to come
out, let that dry and then rub off the pencil. I think I quite like
the light there, so although that's not what the reference is, I think
I'm going to leave it. Come out of that
and let that dry, and then I'll come and just
add a couple more bits.
7. Finishing Off: Okay. I don't know that I'm
going to bother I'm dry now. I don't know that I'm
going to bother too much about that foot. It still annoys me
slightly this is browner. But anyway, I'm just going
to grab I'm just going to restate this little claw here. I've rubbed off my pencil
and I can see that I need to fix that one up. Then I want to come, I just would like a slightly
rounder here. I'm going to do the same process that we did with the
blue and the brown, but just in a slightly
smaller area. I just under here. I just want to make
that slightly darker. So I'm coming onto
dry paper now. This is actually the
painting is a little tighter than I would normally do just because I'm filming, it's really hard to be
messy when you're filming. But you can be messier with this than I am being and
it'd still be fine. Just strengthening
up that shadow underneath here as well. Again, I'm going now I'm
going onto dry paper. I picked up my
Transparent brown and my French otra I'm just coming on to dry
because I want it stronger. That's why I haven't
wet it first. I'm just going to drag a bit of a vein through that tail collar. So I've got my big oil brush. I'm making sure it's clean, wetting it, taking
off the excess, and I'm just going to rub
a vein through there. Maybe another one
through this one. Go to press pretty hard. A little bit through that.
You might not need it, but you can certainly put
it on. Just sitting back. I think probably it needs
to be darker under here. I'm just going to
grab some Indigo now, I think onto dry paper. Just want to strengthen up. Shot change keep saying I've got the wrong glasses on and then I don't change them. Just tidying up. Bit darker. So I've gone with the Indigo
because that's going to be nice strong black. And probably I can I
might just strengthen. I go Indigo straight
Indigo there. I'm just going to really push
that one a little bit more. Then the last thing I'm
going to do before I stop because I'm really
starting to fiddle now. I'm just going to pop a bit stronger color
at the back here. And I just want to back off the light maybe a bit
too much light there. So I just come onto
dry paper and just chucking a bit more Cerulean in. Definitely starting fiddle now, so I'm going to stop.
8. A Final Brush Stroke and Word: So now that we're done,
this is, as I said earlier, this is a little tighter than I would normally paint just
because I'm filming. So you can be a bit sloppier with this,
and it will be fine. And I kind of think it
might actually be nice with the other a couple of bits of green through there,
the other branches. I wonder if I can risk it while I'm talking
about finishing up. I just sort of needs,
I think, something. Alison, you can do it
lightly just a couple of lines and get away
with it, I think. Maybe it needs to be darker. So just just a little
bit of something else. So really what I wanted
you to get out of this is the shading. I want you to really, it's tedious and it takes
a little while, but it makes a big difference to getting that depth
to the painting. So if you're happy
with what you've done, upload a picture for me on project section,
so I can have a look, always happy to comment, and thanks for joining me. A
 Nadine Dudek, Professional Watercolour Artist