Transcripts
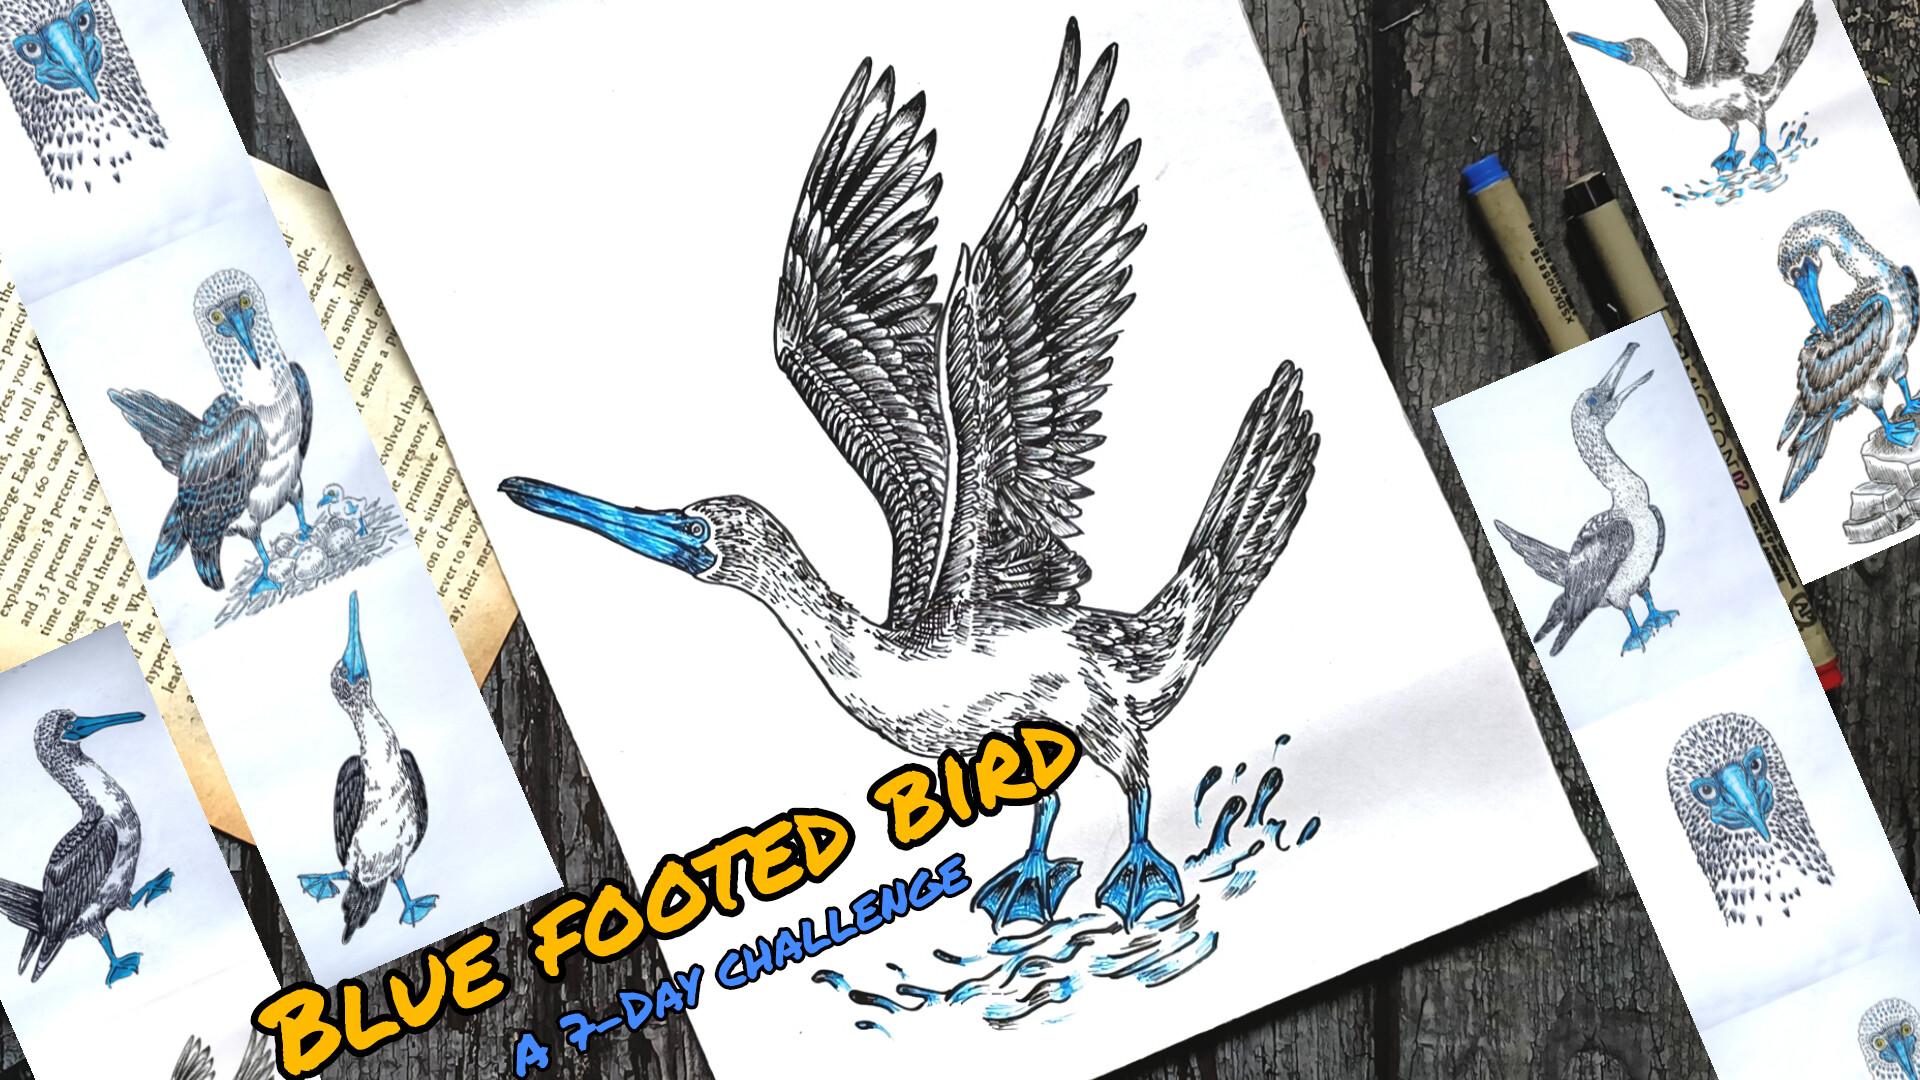
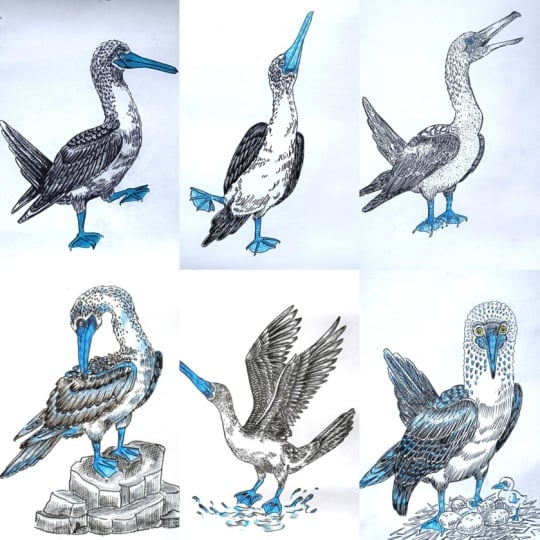
1. Welcome and Introduction : Hi, everyone, and welcome to my new class Blue footed Birds, a seven D ink and Breast
pen Illustration challenge. In this class we'll be creating seven beautiful illustrations of blue footed birds using fine
liners and breast pens. We will start with
the simplest sketches and gradually move towards more detailed and
expressive illustrations as we progress through
the challenge. As you can see, we'll explore a variety of poses and styles focusing on capturing the unique characteristics
of the birds. Each project is
designed to help you build your confidence
step by step. We'll begin with the
basics where I'll introduce you to essential ink techniques such as hatching, cross-hatching, line
variations, and seating. I'll also show you
simple guidelines to construct the bird form
before adding details. Then we will move on to more advanced techniques
to enhance texture, depth, and overall compositions. Hi, everyone. My name is Vishal. I'm an artist from India
and a sculpture teacher. I create easy and approachable
classes on oil pistol, watercolor and ink illustration. You can also find more of my work on my
Instagram and YouTube. So all the lesions in this
class are taught in real time, so you can follow along
comfortably at your own teas. This class is completely
beginner friendly, so anyone can join, even if you are new
to ink illustration. As for the projects, I'll be uploading a project each day. So if you enjoy birds, ink drawing and building a
consistent creative habit, join me in this class,
and let's create this beautiful blue
footed birds illustration together and have lots
of fun along the way. O.
2. Class Project : For your class project,
you will complete the seven day blue
footed bird challenge by creating one bird
illustration each day. We will start with the simplest
sketches and gradually move towards more detailed
ink and rs pen illustration. Focus on building clean
safes, adding line texture, and experimenting with
sading techniques like hatching and
cross-hatching. You can follow my
exact steps or add your own creative touches to
the poses and the details. Once you have completed
your illustration, upload your favorite pieces or your full seven day collection
in the project gallery, I'd love to see your work and how you have
interpreted each bird. You can also see
your practice seats in the project gallery. And
3. Supplies : For this class, you will
need very basic supplies. Pencil and research to do
the simplest sketching. Then I'll be using the bras
paints and the fine liner. I'll be using the Sakura
micron fineliner, Tombos breastpin. I've got two variations
of the Tombos breastpin. Apart from this,
I'll also be using blue and red color Sakura
micron fine liner. This is optonal and I'll
also be using green colored and white to add details and highlights.
This is optanal. Apart from this, you can
also use colored paints. You can also use
colored breast paints. I won't be using it,
but if you want, you can include coloring
in your project, masking tape to
secure the paper. Tissue paper will come in handy to avoid smudging
of the colors. And yeah, that's
all the supplies that you will need
for this class. You don't have to use
all the supplies. You can create all
the projects only using the Sakura
micron fine liner, or you can only use
the wallpoint paint, normal wallpoint paint
into all the projects.
4. Basics : Welcome to the basics in here. We'll be discussing
about hatching, cross-hatching, uneven line,
scribbling and curb line. First, we have got hatching. Hatching is basically
a seeding technique made using parallel lines. You can do the
seeding or you can just keep it plain
and simple like this. So these are simple
hatching lines. The lines are parallel
in this manner. There's a lot that we can
do with the hatching lines. So I'll be showing
you what we can do with a different
kind of spicing sines, line weight, and icon
for the hatching. First, we have got spicing. For this one, we have got lines very closer to each other. And the first one we had
lines farther apart. Lines that are closer together
will create a dark tone, whereas the line with wider gaps will
create lighter tone. Next we have siges long line feels smoother and sort of strokes
create texture. For smaller regions
and to create texture, I'll be using the smaller one, and for the larger areas, I'll be creating these
kind of large lines. Then we have the
weight by weight, I mean, the thickness
of the lines. The thick lines will
appear bold and dark, whereas thin line feel
light and delicate. Mostly, I'll be using the
blue colored file and create the delicate and
thin lines like this. And if you have normal wallpoint pen
and you are using that, you can just do two
or three layerings to make the lines
a bit more bolder. We'll also be playing
a lot with the weight. For the outlining
section, generally, we'll be creating more darker
or more thicker lines. And for smaller details, we have got thinner lines. Next, we have got the direction. We have got direction like what you call diagonal
horizontal lines. Stanes the feel of the surface. So we'll be using all kinds of lines in different direction. In here, we have
got density block, so layering more lines, gradually building
sado and depth. As first example, we
are not doing that. Or the second one gradually
building the sado and depth, rows and rows of hatching
lines in this manner. And to make it more darker, here's the third example with more layers of hatching
lines in this mender. So for some of the section
and sports of the project, we'll be using this
kind of technique, the hatching to create
a little bit of darker region as well as to
do a little bit of shading. Here's another example of density block for
some of the section, to create a bit of
rougher example. To create a bit of
rougher texture, we'll be using this kind
of small hatching lines. Apart from the normal lines, you can also do this kind of
bed broken hatching lines. You can make it
uniform like this one. You can make the
upper part longer and the remaining
section bit smaller, or you can create the uneven ones like the
one that we did earlier. So basically, it deals
with the consistency, even spacing and
rhythm to create a setting uneven
stroke swing love, so you can play with it. And lastly, we have got
curve hatching lines, just lines that follow
the sep of an object. This kind of lines
generally follow the seep of an object
to so form and volume for the beak and for its face or for some of
the section of the foot, we'll be using this kind
of curve hatching lines to add the details. So these are some of
the techniques and things that we'll be doing
with the hatching lines. Next we have got cross-hatching. Cross-hatching is another
layering technique that builds upon hatching. So we have got hatching in multiple layer that
is cross-hatching. In here, I'll be creating a few grids to show you
the cross-hatching. Basically, when you
start with the hatching and then another layer of
hatching in this manner. This is classic two
direction grid. Next in here, we have
got another grid. Is called angled overlaps. Like the earlier
one density block, you can do the cross setching in this man too in
different blocks. And you can experiment with the different angles of
the line as you see fit. And here's an example of three layers of hatching
to make it more darker, multilayer cross-hatching, more layer makes it more darker. Generally, I'll be using the cross-hatching for
deep shadows and aromatic lighting or for some
of the textured surface. Now to do a little bit
of seeding with it, just add more and
more layers in here. I made this lower section
a bit more darker. Like Earlier, we can
use this kind of broken hatching lines to
do the cross-hatching. To create this kind
of detailing and texture for some of the
section, you can use it. I'll be using for one of the project this kind of
broken cross-hatching. These are just simple
irregular cross lines. It give it a little bit of natural and organic
sadose effect. Next, we have got uneven lines, this uneven masks creating organic texture and
natural variation. In here, we have got
scattered strokes, this random texture line
this for grass or the fur This is an azure burst of effect that concentrating towards the center or
coming out from the center. Next we have got loose
directonal strokes, so a little bit of curved lines
like this in this manner. You can use it to sew the wind
motion or rough surfaces. For a few more examples, I'll be showing you
random processes. Dense natural texture
like some stone or bar. Basically, I'll be using the
uneven lines for texture, expressive mark or natural
elements like water or stone. Simple kind of
this random cross. You can also do the
same thing radiating lines and cross it
in this manner. Somewhat similar to
the second example. To make it more denser, you can just
decrease the spacing or you can increase
the line weight. For the third one, we
have got, once again, loose directonal
strokes, and instead of simple and plain line in
here, we have got crosses. These are some of
the examples of uneven lines or uneven
strokes that you can use. I'll mostly be using
one or two of them. But if you want, you can include more of it in your projects. Lastly, we have got scribbling. Scribbling is basically a free, continuous line
movement for expressive sddingF some of the sections of the feathers and the firm
will be using scribbling. You can create this kind of
tight circular scribble with soft cloud like textian Next, we have got loose tangled ops, just increasing the density
a little bit in this manner. You can also create this kind of organic blob lib scribbles. Here we have got what
we call scribbles. You can also do this kind of horizontal scribbles to
create grown or soft sados. You can also use it to do a little bit of dense
layering in this manner. This is somewhat similar
to the hatching technique, just layers and layers of it. And you can use this to also do the seeding
in this manner. Generally use scribbling
for expressive seeding, foliage, soft texture,
or quick tonal work. And yeah, that's
all for this feed. I'll be seeing you in the
next part of the basics. Mm.
5. Stippling Scallops and More: Welcome to the second
part of the basics. First, in here, we
have got a stippling. A stippling is yet
another seeding technique created using dots
instead of the lines. The same thing
applies in here like the hatching, spacing matters. The closer the dots are, the darker it will appear. The farther apart they are, the lighter it will appear. Size and weight also matter. You can increase the size of the stippling dots and you can
also play with the weight, making it a bit more
bolder and thicker. The first example
that we created, we have got lighter stippling, so the spacing in between the
dots are quite far apart. And in here, we have got the dots that are quite
closer to each other. To make it more darker, we'll be adding lots
of dots in here. For some of the sections
of the project, I'll me using the stippling. With the stippling, we can
create subtle seeding, texture, organic surface,
and soft gradient. The main disadvantage of the stippling is that
it takes a lot of time. So that's why I want
me using a lot of it. And since it's a
seeding technique, let's do a little bit of sading creating this kind of
simple spherical see, and we'll be giving it
a little bit of three dimensional by
concentrating a lot of stippling dots on the
one side while following the curve sip of the sphere and adding the stippling
dots in that manner. First, just filling
the entire section with this kind of
simple stippling dots. And then for the insides, particularly on the
bottom left side, we'll be adding lots and
lots of stippling dots to make it more
darker to give it a little bit of three
dimensional seep and using the stippling
dots to do a little bit of sading concentrant
more dots in here. So you have got the rough
idea what you can do. With the sparse
dot, you can make the light tone and
eerie texture. With the dense dots, you
can create dark values and heavy shados and using this
kind of clustered dots, you can create form and depth. Without any
outlining, I just use the simple dots to create
this spherical scene. And as I was mentioned,
you can play with the sizes as well as
the line thickness. So in here, instead of
creating small dot, I'm just using this
kind of simple, small circular sieve
to do the stippling. Or some of the sections, I'll be using this kind
of simple stippling dots, not dots, but this kind of
simple circular sieves. You can also use the
stippling technique to create a bit of different kind of texture or detailing,
like in here. Yeah, I'm using
this tots to create a little bit of different
kind of textion What I mean, I'm not able to
clearly explain it, but let me know what I mean. Using the dots to create a little bit of outlining
in this manner. Random strands of lines
in here like this. We don't use lines
for the stippling, presence and dot control. Use stippling for
subtle seeding, texture, organic surface,
and soft gradient. You can start with lots of
stippling dots for the region, and then to make some of the section bit more darker
and bit more apparent, you can just add more
dots for those regions. In here, I'm just creating
few lines that are coming into existence because
we are adding more dots. Next we have got flowing lines. Flowing lines are smooth, continuous curves that
source movement and form. This is somewhat similar to
the curve hatching lines. Let me show you some example
of the flowing line. The first one is
parallel flowing lines. You can use it to create
gentle surface seating. Next, we have got arced line. You can use this to
create rounded forms like domes or the
head for our bird. We have got directional sweeps, wind motion or fabric folds. Mostly, I'll be
using it for some of the sections of the wing. For this one, the fourth
one, we have got lads, curves, depth and Cantu. You can use it to create
the depth and contour. For some of the section of
the wings or the feeders, I'll be using this
kind of lines. Lastly, we have got
swirling lines. You can use it to create or so dynamic motions and energy. I'll only be using two or three of the kind of flowing lines, but if you want, you can include more of it in your projects. Moving on to scallops. We'll be using lots of
scallops of different kind. Scallops are
repetating curved or pointed arcs that create
decorative and taxial pattern. Many will be using it
to create feather like appearance and the texture
for the firm here, I'll be showing you example of six or seven different
kind of scallops. First example is very simple, soft rounded scallops, variation of this
kind of scallops. It's somewhat of tall
and narrow scallops. I'll be using it to
create a little bit of either in scales or
layered pattern. Next, we have got this
loose wave like scallops. With the scallops, repetition creates rhythm and overlapping adds here we have
got arc scallops. I'll be using it
to create a bit of stylized dextion and patterns, especially near the head. For all the project,
I'll be using it this kind of sharp arc scallops. You can just connect
it in this manner. We have got scallops. Now I'll be showing you
some of the ways in which we'll be using this
basics that we have learned. First, we have got a
single feather in here, simple hatching line in this manner to
create the feather. Here's another
variation of the feeder instead of adding it
for the entire section, using the hatching
lines in this manner to create this kind of feather. Next, using the
large hatching lines to create the feather, a little bit of sding
using the hatching lines. Few more variations of the hatching techniques that you can use to
create the feeder. In here, I'm using this kind of tall narrow scallops and
doing a little bit of seeding at the bottom with the
hatching lines to make it more darker and dividing
into two sections. For the small feeders,
you can use it. Here's another example of tall narrow scallops and starting with the hatching
lines at the top, then smaller hatching lines, dividing into two sections
and for the middle section, we have got this kind of
angled hatching lines. To make some of the
section darker, we'll mostly be using
the hatching lines. For uniform regions, I'll be
using simple hatching lines, and to make it a
bit more darker, we'll be doing a little
bit of seeding and just layers and layers of
hatching lines in this manner. A few more example of the
scallops that we'll be using for the smaller sections of
the feather and the wings. Another example of
tall narrow scallops that are quite closer
to each other. Apart from this field to experiment on your
own mix and match different techniques and create different kind of
texture and pattern. That's all for this feed I'll
be seeing in the next one.
6. Birds Guidelines : Welcome to the birds. In here, I'll be showing
you different ways in which we can create the bird. So first, let's start with the simple ways you can create the different perspectives
for its head. So in here, I'll be
showing you a total of five or six examples of
the head of the bird. Just create this kind of very simple circular
see for its head, and as for the B, simple
triangular see like this. A bit long and elongated
triangular C like this. The third bird is
looking at an angle. This bird is looking downwards, and here's another one. This is also looking
towards the sky. So these are the simple
pencil sketches for the five birds in five
different perspective. Now, let's make it a
little bit more detailed. Here a very simple
variation of the birds B. Just read this kind of
simple triangular C. You can consider it to be combination of two triangular C, a little bit of bulge like this. And simple circular
see for the eye, going in with the
fine end to make the outlines a little bit
more defined and detail. So basically, we'll be
starting with the simple saps, and then when we'll be doing the outlining
with the fine liner, we'll be making
adjustment as well as adding more detailings
in this manner, doing the same kind of
outlining for the beak, adding the eyeball
in this manner, doing the outlining
for this beak. I'll be making the beak a little bit curved
at the end like this. The same thing for the lower
side a little bit curved. Doing outlining for this beak and simple circular
C for the eye, doing the same kind of
outlining for the beak. The same thing for the lower
side, a little bit curved. Now, for the front
facing bird in here, starting with this kind of
curved line now for its eyes, a little bit of this kind of electrical see follow along with me and create this
kind of simple outlining. As for the beak, we'll
be creating a bit of triangular see extending it, extending it in this
manner for the beak. This is the front view of the. Since we want to make it
look three dimensional, that's why I ended
mon line at the top. Adding the eyeballs, simple
circular eyeball like this. For this one, and as
for the outlining, a little bit of rougher
texture like this to create the appearance of the fur and the
feather for the burn, a little bit of curved zip for the eye extending
it for the weak. Simple circular seeps for
the eyes and eyeball. Here's another one.
It's looking downwards, creating this kind of bit rougher texture for
its feather and the fur. And the same kind of outlining for its beak and the
eyes in this manner, a little bit of curved or
bulge for the eyeballs. Extending it. And
as you can see, I am not following the pencil outlining that I did earlier. You don't have to stick
with the outlining. Feel free to make
changes and adjustments. With this, we are done
with the fifth one. Now for the sixth
and the final one, I decided to make a little
bit of more changes to it. I'll be making it looking
towards the downward direction. Making it looking towards
the downward direction, another triangular seep like this in this manner
for the week. Now, continuing on with the
fine liner for its phase, extending the line
in this manner to create the weak eyeballs, simple circular set
for the eyeballs, a little bit of rougher
texture for its head. So this is how we'll be creating very simple variations
for the head. Ensure that the ink has dried up and lightly erase
the pencil marks. You don't have to
stick with the pencil outlining that you have created. Feel free to make changes and adjustments when you'll
be doing the outlining. Apart from this example, if you want to
experiment, you can create other variations
for the head. Now let me show you a simple way in which we'll be
creating all the birds. So simple basic guidelines that I'll be following
for most of the project, starting with
simple circular sea for its head and the beak, a triangular seep
in this manner, a bit of cylindrical
see for its neck, another elliptical
seep in this manner for its stomach and
the rest of its body. As for the wings, we have
got three sets of the wing. We have got tail feather, the main wings and the
wings on the other side, simple elliptical and triangular set for the wings
and the feathers. And as for the leg, a
little bit larger leg, create this kind of
cylindrical C. And this is a simple guidelines that I'll
be using to create the bor. Now going with the
fine line to do the outlining as
usual, if required, I'll be making changes in adjustment to the
pencil sketches, a little bit of rougher
texture for the outlining. Adding the circular
saves for the eyes. For the feathers in here. For this section,
I'll be creating lots of individual small fether. Now, for its chest
and the stomach, a small section of the feather on the other side
will be visible like this for the
upper part of its leg, making it a little bit fluffier. Other section or
the other side of the wings will be
visible in this manner. The tail feather standing
upright tail feather like this. Lastly, another set of cylindrical s for the middle
section of the feet and creating this kind
of triangular save a bit curved triangular saves for the webbed feet of our burn. Following the simple guidelines, I'll be creating multiple
birds for our main projects. I'll be making some
changes if required, but mostly I'll be using the simple saves to
create all the birds. Now, let me show you a little
bit more defined versions of the leg that
we'll be creating. For the upper part of the leg, we'll be making it a
little bit floffier, a little bit of curve
seep like this. As for the middle
portion, we have got cylindrical same for
the weaved feet, just create this kind
of simple structure and divide it into
different sections to create the perians
of the weaved feet. Generally, I'll be dividing into three or four
different sections. So this is a very
simple way in which we'll be creating
the lakes of our pn. Now going with the file
to do the outlining. Create this kind of
fur like texture. I'll be using small
hatching lines, lots of small hatching lines. Now doing the outlining
for the webbed feet, creating the appearance
of the clause at the end, connecting all the webbed
feet in this manner, doing the same thing
for the second one. Generally, I'll be
following this kind of guidelines to create all
the feed for our bird. Feel free to make changes
in adjustment if required. Otherwise, you can stick with
the simple guidelines to create the bird's
body and bird's leg. Let me show you how be creating the main feathers of its body. A bit of curved seep like this, and then I'll creating
rows and rows of small feathers
in this manner. The feathers will
be a little bit more detailed and defined. But here's an rough
example how you can proceed in this
manner to create it. Nap stomach and the
rest of its coding. Adding a little bit of
detailing in this manner, using the hatching lines
to do the reading. This is just a simple example. Apart from this,
I'll also be using different techniques to create different variations
of the feather. To show you what I mean, let's create a few
feathers and then we'll be using different techniques
to add the texture for it. Here's a very simple
variation using simple hatching lines in this
manner on both the sides. For the second one, a little bit of
variation and leaving a little bit of gap in between the hatching lines
in this manner. For the third one, only doing the seeding
for the upper part, making that region a
little bit more darker. The fourth one, the
same kind of thing. But instead of single one, we are adding more rows of
hatching lines in this manner. For the small feeders, just simple hatching lines in this manner. Here's another one. The lines are facing towards
the middle and for this one, the same kind of hatching lines that we did for the first one. So this is some of the
different ways in which we'll be creating the texture and detailing for the feeder. Apart from this, I'll also be using some other techniques. But mostly you can create all the project using the simple techniques
for the feeders. Now let me show you
a little bit of detailed example for
the head of our Bird, starting directly
with the fine liner. I decided to use
the pencil squech to make the process
a little bit easier. Circular C for its head, triangular C for its beak. I decided to extend it a little bit and make
it a little bit larger, so Another oval see
inserting the smaller one. And yeah, this is going to
be our simple pencil sketch. Now going back once again with the fine to do the outlining. I'll also be making the weak a little bit larger since
it's looking quite smaller. Extending the side of the weak a little bit in this manner. Set of two oval seeps for
the eye and eye ball. Let's do the outlining for its head a little bit
of rougher texture in this manner with broken lines to do the outlining
for its head. For some of the sections of
its head, as you can see, I have used the broken
lines. This is option. If you don't want to use
this kind of broken lines, you can use the plain
simple and normal lines. I see that the ink has dried up and lightly erase
the pencil marks. Redefining the sep of
the beak a little bit. Adding texture in this man, using this kind of scaling
technique, simple, small triangular seam, open triangular seam
in this manner. The region just beside its eyes, I'll be making that region
more darker by adding more lines or more
scaling in this manner. And apart from this, the region where I want to
soothe the shadows, I'll be adding a little
bit more detailings with lots of this kind of
simple triangular seam. For the beak, mostly
I'll be using stippling technique, simple
stippling technique, and mostly making the region
just beside its eyeballs a little bit darker as well as the end of the beak
in this manner. So this is how I'll be
adding the texture and detailing for the head of
our bid and for the beak. Now, let me show you
some of the paints that I'll be using
for our project. So we have got Sakura
micron fine liner, then I have got Tombos bras pen. With it, I can
create a little bit more darker variation
for the lines. Here's another one, another
Tombos breast been. This is a little bit thinner, but it's a bit more darker. Apart from this, I have got
this ikura takis bras been. With this, I'll can this kind of bit lighter
variations of the gray. I'll also be using a little
bit of blues and the red. Simple Sakura micron fine
liner. Here's the blue one. Apart from this, if you
want, you can also use the other kind of fine liner
or other colored fine liner. In here, I have got this
colored ballpoint pen. If you want, you can use them, but I won't be using it. Orange colored ballpoint pen. And that's all for this video. If you want to experiment more, feel free to do that, and I'll be seeing you
in the next video.
7. Azure Watcher: Hi, and welcome to the
Azure Watcher Project. This is one of the easiest
and the smallest one. Let's start with the
pencil sketching, starting with somewhat of OLC for the head
of our own bird. Create this kind of oval se
or egg like s for the head, extending it somewhat of
cylindrical see for its neck. The whole weed us in real time, so you can always
follow along with me. This will be the
neck of our bird Just its increase the weeds
a little bit like this, creating this kind of s
for the remaining portion, its body.This kind of
simple s for the wings And the wings on the other side? Simple set like
this for the wings. This bird has eased
one of its leg. The left leg is
raised like this, the upper part of its leg, and now the right leg like this. This is just a rough
pencils sketch. If required, we'll be making
adjustment and changes when we'll be doing outlining with the fine liner or
the breast paint. This simple see like
this for its leg. Now for the second one, enricle see for the upper
part of its leg. In here, we have got
a large polygonal see like this for the padded foot. Now let's create the beak, a little bit of gob
seep like this for the eyes and extending
it in this manner, a bit of large triangular
see for its beak. This is our duff pencil
sketching for our bird. Feel free to make some
changes in adjustment. Now we'll be doing
the outlining. So once again, in here,
I'm using the breast pain. You can use the fine liner,
whatever you prefer. But with the breastbin I get a little bit more darker and
with more broader lines. So that's why I choose to use the breastpin to do the
initial outlining like this. We have got circular
C for the eyes now extending it in this
manner for the beak. This kind of curvy C for
this part of the beak. We have got two or three
sections for the beak. This will be the middle portion. Now for the lower
half of the beak, a little bit of curved
soap like this, curve triangular
seep in this manner, and a little bit of the other side of
the beak is visible. So only a small line like this. Doing the outlining for
the head and the neck, a little bit of
rougher texture to sow the fur and the
feather of the bird. Simple rough lines like this, a little bit curved
in here on the side, and now doing the outlining for the remaining
section of its neck, the same kind of line. Now moving on to doing
the outlining for the bids wings and the
tail feeder and the legs. In here, I forgot to sketch the guideline for
the tail feeder, but we'll be creating
it later on. So now just going
over the pencil and sketched outline
with this fine linen, feel free to make changes
and adjustments in here. I have decreased the width
of the wing like this. Now for the lane,
I'll do a little bit of rougher texture for the
upper part of the lane. And here we'll be using
a bit of curve line to set the three dimensional
curved tip of leg. For this part, a little bit
of curve line like this. Now for the patted food, we have got three
or four divisions of the class like this. If you're not that confident, you can start with the
simple pencil sketing and then use the fine liner
to do the outlining. Now connecting all the
sections of the web feet, small and tiny claws like this. Now in here for its tail, this kind of rougher texture. Using this kind of hatching
lines to do the outlining in this manner for the
second leg in here, mostly using this kind of hatching lines to
do the outlining, connecting its neck to
the remaining section, and finally doing the outlining
for its wing on the side, we have to create its
tail feather as well as the second foot going over
the outline like this. Now creating the patted foot in the same manner that we
did for the left one. Dividing into four
different section and then we'll be
connecting them. I've created very
small class like this and connecting it now. A small portion is
not visible in here, but I've included
the different image. This is how this
project will turn out. And, we are basically done
with most of the outlining. Now let's add detailing going in with the
black for the eyes. This portion, the lower
portion of its weak. This portion, the lower
portion of its weak, a little bit of hatching lines, making the region
beside its sides a bit darker with more hatching
lines in this manner. Let's erase the pencil marks first and then we'll be
doing the detailing. Ist that the ink has dried up and lightly erase
the pencil marks. This bird will be one of the
easiest bird in this class. I'll be keeping it quite simple. We won't be adding more details for its
wings and feathers and the region just beside
its eyes, the chest. So mainly we'll only be using the hatching lines
to do all the things. So this will be quite simpler, and this is the smallest
project of this class. M erasing all the pencil
sketches in here. In here at the bottom,
I'll be creating its tail either four
or five tail f there. This is how our
sketch turned out. It's quite simple and easy. I decided for this
one to only use the brass paint to
do the detailing. If you want to use the fine
andr, you can do that, too, but I'll only be sticking
with the bras paints. Starting with the wings, simple hatching lines like
this to make it darker. I'll be adding rows and rows of hatching line in this manner. I'll be keeping the
pacing quite similar. So this kind of spacing like this and using the rows and
rows of hatching lines, we'll be creating different
layers to the wings. This is the second layer. So you've got the rough idea. How we'll be creating
the texture for the feeder. Third row like this. You can easily see
that in this way, using this kind of
simple hatching lines, we can create the appearance of multiple layers of the
feeders for this wing, adding it for the upper side, and this is going to
be the final layer. Now, creating division in here. Just create bolder and darker
lines in this manner to so different feathers
present here in the wing. Just go over the lines twice
or thrice to make it more dark to create appeariance
of separate feather in here. It's one of the way
we can simply create the appearance of the
feather on the wings. Now, on the other side, it won't be that
much detail since only the front portion of
the wings are visible. But here, too, I'll mostly
using the same kind of hatching line and
same kind of spacing. Just rows and rows
of hatching line. In here, I'm not going to
sew the individual feather, but just simple rows and rows of hatching line in this manner
to feel the entire section. Padding it at the bottom. So with these, we are done
with the coloring for our two wings on both the sides. And as I was mentioning
the tail feather. In creating four or five
large tail feather. One more on this side. It's a simple pencil
sketching like this. Going back once again with the mirrors paint to
do the outlining. In here, I'll be using both
simple hatching lines and then I'll be using straight lines to divide
the feed into two sections, and on both the
sides, I'll be adding angled hatching
lines the way that I showed you in the
demonstration video. So simple outlining
like this in here. Erase the pencil and sketch, Insure that the ink
has dried up and then lightly erase
the pencil marks. Now let's do the coloring
in here, extending it. Extending the line
in here to create a separation in between
all the large feathers. Starting with the hatching lines using the hatching line
in this manner to do the sading Same manner
of hatching line. Same manner of sading
using hatching line. For the larger
fether add more for the smaller one for the
smaller ones, add less. If adding into two sections
and on both the side and on both side using this kind of angled
hatching lines. And with these, we end
with the tail feeder. In here you can
use the scallops, but mostly I'll be using
the hatching lines, simple and plain hatching
lines in this manner, adding the lines in this
manner just beside its face. O we'll be mostly
concentrating near its head, and as we progress, we'll be decreasing the
number of the lines. Simple, small parallel
hatching lines in this manner. Add lots and lots of
hatching lines near its eyes and just below its be a little bit on the
sides of the neck. And as I mentioned, you can
always use the scallops. You can use the
triangular see of the scallops or you can
use the curved ones. I'll be including a little bit of scallops later on
triangular set ones. But for now continuing on with this kind of
hatching lines. Now, we'll be
creating the texture of its fur for the chest. For some of the section, we'll be creating this kind
of broken hatching lines. And as we progress, we'll be decreasing or increasing
its length for the region near its
stomach and the chest will have bit smaller
line near its wing. We'll be increasing the size of the hatching lines like this. Now in here at the bottom, just a bit stale fether. We have got lots
of lines in here. Broken hatching lines
in this manner. For this leg, since it
lies behind its body, so more hatching lines in here. Now, for the remaining section, more hatching lines
in this manner. Just beside the wings create bit larger and as we
move away from it, decrease the sizes a little bit. Using a little bit of scallops, triangular scallops in here, very tiny and very small ones. And you can add
more hatching lines if you are not
satisfied with it. I'm somewhat satisfied with it. If required, I'll be
adding a few more. But for the upper part,
I'm satisfied in here. Adding few more
lines just to create a little bit more rougher textia for the remaining
portion of its body. And with these, we are done with black now going
with the blue. We are going to cover
the entire section, the beak and the padded
foot with the blue. This is option if you
don't want to use it, you can simply use
the breastpin. You can just simply
use the breastpin and add a little
bit of texture and detailing for the beak in the
manner that I showed you, you can add more lines just beside its eye and at
the end of its beak. And for the other side, the small side of the
beak that is visible, you can you can make that region bit darker
with more hatching lines. You can do the same
thing for the leg. You can use curved
hatching lines for the padded foot and
for the upper part, you can use stippling along
with small hatching lines. And if you are using the blue, just continue on with adding the color for the remaining
section of its weak. A little bit of sading in here to make it a
bit more darker. So just layers and layers of hatching line in this manner
to make it quite darker. Now moving on to
the padded foot, using this kind of curved line to give it a little bit
of three dimensional. If you want you can also use the vertical lines for the leg. In here, I'm using large
hatching line in this manner. For the remaining
section, the padded foot, I'll be using the curved lines. Combining these two
regions in here. Now, for the padded regions, so simple and plain curved lines in this manner
for the entire section. This beside the joints, make it quite darker
with more lines. A little bit of curved
hatching lines in this manner, and for the last
section of this leg, adding it for the
remaining section. And with these, we are
done with the first one, doing the same thing in here, curved hatching lines
in this manner. Here I forgot to
add a little bit of detailing using
the breast pin. So if you want to make
this a bit darker, you can use a little bit of
curved hatching lines with the black continuing on
with the remaining section, a different close
that we have created, completely filling
it with the blue. Padded region. Once again, we'll be using the
same kind of lines, curd hatching lines
and completely filling it and completely filling the three sections
that we have created. We are done with the first one, moving on to the second one. Simple and plain curved
lines in this manner, and for the third and
the final section, more lines in this manner. And with these, we are done with the beak and the padded foot. If you want to add
a little bit of detailing for the wings, you can also use a little bit of blue for some of the
sections of the wings. You can also include
a little bit of blue for its taste
and the tail feather, a little bit just
beside its head, a little bit for the knee. If you want, you can
proceed with that. And yeah, with these, we are done with our
easiest project. And with this,
we're done with our easiest project, Azure Watcher. I hope you enjoyed
painting this. This was quite fun to create, and it was very easy. And I'll be seeing you in the next project,
Happy painting.
8. Blue Eyed Bird : Welcome to the blue
eyed bird project. Let's start with a
simple panza sketching. In here, I'll be doing
the sketching twice. So first, we'll start
with a simple sees and then we'll be defining
it and adding more details. And finally, we'll be
going with the fiander or the breast pain to
do the outlining and add the final detailing. Start with this kind of curve
triangular seep in here. This will be the
head of our bird. So a curved sheep like this, this will be the
length of its body. Now for its neck, a little bit
of curved cylindrical sea. So it has got a long
neck like this. For the remaining portion, just below its
neck, a little bit of this kind of curved see. A cylindrical seep with
a bulge like this. As for the remaining
portion, it's a stomach. A little bit of curved
oval seep like this. This will be its main body. Extending it a little bit. Extending it a little bit. And here, we'll be including its tail fether As for its foot, just create this kind
of small oval sees. Another set of
cylindrical seep like this triangular seep like this for the bottom of its foot. This is a simple sketch for the bird's body
using simple shapes, extending its head a little
bit and creating beak like this for the wings in here. For the wings in here,
extending it a little bit. This is just a
simple rough sketch. We'll be making changes
and adjustments, so I decided to extend
it a little bit. Wings on the other side, and this is going to
be the tail feather. Wings on the other side. Only a small port into the
wings is visible like this. For its face, I'll be
gritting this kind of seed. So this is a very simple
pencil sketching for our bird. You can just add more
detailing and change a little bit of saves and
dimension of this phase, or you can just follow along
with me and erase it first, and then three to eight. In here, I'm going to erase it. The CP and the
proportion will be changing a little bit
now for its head, for its head, the face, it has got a little bit of this kind of curve
C for the face. Follow along with me and create this kind of simple outlining. Extending it a little bit. This will be its large beak, making it a little
bit more longer. Circular C for the eyes. Extending it for the
upper part of the beak. Its mouth is open or
it has open weak, the under portion of
its beak like this. Now for the remaining
portion of its beak, another straight line,
and now connecting it with a little bit of
curved line like this. This is going to
be a simple face, simple weak and simple
head for our bird. If you want to make
a little bit of changes and adjustment,
you can do that. You can make the beak a bit
more larger or bit smaller. Now continuing on with going over the outline for its neck. We'll be creating
a little bit of rougher texture for
the side of its neck. But for now, just going
over the pencil sketch, and if required, I'll be making a little bit of
changes in adjustment. The lower parts of its
neck is a little bit carvianF the veins
and it's the stomach. From next projects onward, I won't be reading the sketches. I will be I'll just be adding more details on top of
the rough pencil sketch, and then we'll be using
the fine liner or the spin to do the outlining in here since this
was first put it, so I decided to remove
the sketches and redo it to make this
process a bit more easier. Just going over the same pencil sketch that we did earlier, but we'll be making
a bit of changes to the seats in the sign and a little bit more
detailing like this. So we have got a bit more detail as well as the
placement of some of the larger wings ing this portion and we are going to make it a little
bit more longer, and we have changed the
angle a little bit. Slight change in the angle. We'll be creating this
kind of feather in here. Now for the tail feather, erasing it completely,
and we'll be making it a little bit straighter and have four or five large feather. Simple curved set like this, extending it and
adding it in here. If you want to make it a bit
smaller, you can do that. Now moving on to the
tail feather at here. Using a set of parallel
straight line like this, a bit larger and a bit smaller
one like this and a bit of curve C from the placement of the feather that we'll
be adding later on. Moving on to its leg. This is
going to be the first leg. A small portion of the
upper part of the leg will be visible in here on this side. I also extended the side of its stomach or
chase a little bit. Now, I'll be making a little
bit of change to the foot. It's quite smaller.
So erasing it. In here, too, I decided
to make it a bit larger since it was looking quite small compared to
the other wing. For the foot, making the upper
parts a bit more larger. The other side, small portion
is visible like this. Cylindrical see for the
upper part of its leg. Now for the class in here, the padded food, a little bit
of curvy lines like this. So we have got
weaved fit in here, bit of more details with
the class like this. Simple and small
class like this. Now doing the same thing
for the second leg. Creating the same kind of outlining in it
for the first one, a little bit of this
kind of polygonal scene, now dividing into different
section and a small clause. For this two, a little
bit of changes, I decided to make it a bit more thicker and
bit more larger. So this is going to
be our simple pencil sketching for the first one. If you want to make some changes and adjustment, feel
free to do that. Now in here, I'll be starting
with doing the outlining. Basically, I'll be starting with the breast paint
to the outlining. Then we'll be using the fine
liner to do the detailing, starting with doing the
outlining for its weak. You don't have to stick with the pencil sketches
that you have created. Feel creek to make
changes in adjustment. As you will see in here, I'll be making a little bit of changes to the pencil
sketches that I did. Doing the outlining
for the eyes, simple oval shape like this. Open week If you want to
proceed with the fine, and you can do
that, but in here, I have breast paints, mostly I'll be using it. With this breast paints, I'll be able to get a
little bit more thicker and wet more darker lines as
compared to the fine liner. And apart from that,
for all the detailings, I'll be using the fine liners, Sakura micron fine liner. A little bit of more
detailing for the inside of the beak for its head. As I was mentioning, we'll be creating this kind
of bit rougher texture for the head to sow the resemblance of the feathers. Just create this kind
of simple lines. Instead of this, if you
want, you can also create plain and normal
curved lines for its head and the
rest of its neck, doing the same thing, outlining in this man for the other side. So basically in here, I'm using a little bit of plain
and normal lines. Now for the eyeballs like this, simple circular seep like this, a little bit of detailing
in form of curved lines, following the curved
sweep of its eye. Now, moving on to doing the outlining for the
remaining portion, it's wings, tail,
weather, and the foot. For some of the section, I'll be using a little bit
of broken lines. For others, I'll be using
normal and plain lines. With the broken lines,
I find that I can provide a little bit more characteristics to the painting, and it looks a little
bit more organic. So for some of the section, I'd prefer to use this
kind of broken lines. This is optional. If you
don't want to use it, you can just create
simple and plain lines. Now for the wings
that lies beneath it, curved seep like this
and simple set of parallel lines like this or
the wing on the other side. I'll be making it a
little bit thinner, comparatively
thinner, like this. And as you can see, I'm
making a bit of changes to the pencil sketches
that I created, so you don't have to stick with the outlines that you did
with the pencil sketching. Now for the tail either. Once again, bit of
curved lines like this, extending the side a little bit. So this is going to
be the tail feeder. A few more feathers on
the other side like this. And with these fee are done
with the wings for now, we have got one more
wing on the other side, only a small portion is visible. For now, continuing on with doing the
outlining for its leg. Small broken lines like
this for the foot. The other foot. A bit of this kind of lines to sow the rough texture
of the wings, outlining the second wing, simple plain
outlining like this. And finally, moving
onto the foot. Going over the
outlines and making a little bit of changes and
adjustment as required. I'm going to extend
the side a little bit, thus making it a bit larger as the leg was looking
comparatively smaller, so I decided to extend
the side a little bit, small clause like this. Now for the second leg, simple outlining in this manner. For the eyes and
the leg in here, I'll be using the blue colored fine liner
to do the coloring. Apart from that,
I'll only be using the black to do the outlining
and adding the details. Instead of it, if you want to use other colors,
you can use that, or you can just keep
it simple and plain, monochrome painting
with only the black. Now we'll be going to add the
detailings for the inside, a little bit of cop see
for the folded wings feed this inside the wing extending it a little bit to
make it bit larger. We'll be creating two or
three rows of either in here. Simple set of curved
lines like this. Or you can consider it to be a little bit of larger scallops. For the upper part, but smaller curved line like this and mostly for
the upper part, I'll be using a bit
of broken lines. Per part of the wings, more curved lines like this. For the tail feather in here, we have got large
feathers like this. For some of the
feathers, we'll be dividing into
different sections, and for others,
we'll be keeping it plain and simple
one or two lines. O. And with this, we are done with a simple outlining for
most of the parts. If you want to make changes and add more detailing,
you can do that. But I'm satisfied with the
simple pencil sketching. Now, let's slightly
erase the pencil marks. Let's lightly erase
the pencil marks, and then we'll be
adding more detailing. Ensure that the ink
has dried up properly, and then lightly erase it. We don't want the
ink to be smuged. Removing the erasers dust. Now going into the
Sakura micron fine liner for the insides of the big, the upper part, just simple
plain hatching lines like this to make
this fight darker. So mostly we'll be using the hatching lines
and a little bit of stippling technique. In here, we are going to add a bit more detailing and making the beak a little bit more
darker, a bit more detailed. For some of the
sections like this, we'll be using stippling
technique to make it darker. For the other section,
we'll be using hatching lines or
curved hatching lines to make those section darker. In here, we are going to add a bit of more
detailing and making the week a little bit more
darker, a bit more detailed. We'll be doing the
same thing for the area beside its eyes. Making it bit darker and
for the remaining portion, we'll be keeping
it quite lighter. Now moving towards its eyes, using lots of stippling dots, we are going to
surround the eyes with lots of stippling dots. Apart from the stippling dots, we'll also be using these dots to do a little bit of shading. The region just below
and beside the eyes, we'll be making it quite darker. And as we move away from it, I'll be adding more dot. The placement or
the spacing between the dots will be a bit
larger, comparatively larger. Extending the dots in this
manner and increasing the spacing to make it quite lighter,
comparatively lighter. Adding the dot just beside
the lines that we created. Now for the lower half
of its big, more dots. Instead of using
the stapling dots, you can also use small
broken hatching lines, very small and tiny
hatching lines. For now, let's continue with
adding more dots like this. In here, for its eyes, I'll only be using the blue. Apart from that,
if you want to use the blue for its beak,
you can do that, too. Stippling dots in here to
make this quite darker. Now, on the other side, doing the same thing that we did for the upper part of the beak, making it comparatively darker. Now in here, this curved portion mode stippling
dots like this. And with this, we are done with the beak and the head for now. Now let's do the
detailing for its head, continuing on with doing that detailing for its
head and the neck. In here for the upper part,
a small lines like this. And for the remaining section,
mostly for the upper part, I'll be using this
kind of scallops, but triangular saves like this, triangular seeps like this. I'll be wearing the sizes
a little bit and also wearing the specing in
between the lines like this. For the regions near its weak, we'll be adding the
scallops bit more closer, and as we progress, I'll
be increasing the spacing in between it and I'll also be wearing the
sides a little bit. More scallops like this, mostly on the sides. For the middle region,
we'll be making it smaller as well as increasing squeezing
in between the scallops. Mostly, I'll only be using the scallops for the
head and the neck. I won't be using it for
the remaining portion. Just follow along with me and add scallops till you
are satisfied with it. You can also make
some of the scallops a bit more darker like this. Another row of lines
in this manner. I'm not going to do it
for all the scallops, but for most of them like this, good for smaller scallops, just use smaller
lines in this manner. Adding a few more
scallops in here. Continuing on with
making the scallops a bit more darker with
more lines like this. Instead of this
kind of triangular see the scallops, if you want, you can also use the curved
see ones moving in here, the smaller feeds in here, a little bit of hatching lines just beside the outline section. Simple and small hatching
lines in this manner. Add few more hatching lines. Set of curved parlor
hatching lines like this, extending it towards its neck. I'm also wearing the
spacing a little bit. Instead of this kind of
hatching, if you want, you can also use the
same kind of scallops, or you can use the
curved scallops. And with these, we are done
with this section for now. Now for the wings in here, the tail feeder, mostly I'll be using hatching lines
like this on both the side, divide the larger wings into
two sections and then on both sides to create a bit of either a perio just simple and plain hatching
lines like this. For some of the sections, particularly the lower end, I'll be using a little
bit of sading along with the hatching to
make this bit darker. But for most of the section, this dividing the vent
into two parts and then using the hatching
lines on both the sides. For the smaller ones,
I'll also be leaving a little bit of gap in
between the hatching lines. So we'll have rows and rows of hatching lines with
a little bit of gap. Now for the lower part in here, using lots of hatching lines to make this a bit more darker. I have divided this
project into two sections. This is the first section, and I'll only be
covering up to here. In the next section
of this project, we'll be adding more detailing. I'll be seeing you in there.
9. More Details : Continuing on where we left top. In here, we are
adding detailing for the wings for the feathers, dividing into two sections and adding hatching lines
on both the sides, curved hatching lines for
the upper part in here, using weight of broken
curved hatching lines to make this region
bit more darker. Set of hatching lines
like this in this manner, extending the scallop in here. Me hatching lines like this, another row of hatching
lines in here to make the upper part bit more
darker, comparatively darker. For the entire
upper part in here, lots of hatching lines. Now for the remaining
section in here, I'll be filling
it with this kind of bit broken hatching
lines in this manner. I've increased the piecing in between the lines like this. We are making it a bit lighter. More sets of hatching line in this manner, small
hatching lines. Extending the hatching lines
of the wings like this to meet with the
broken hatching lines. Now we are going to do the same thing for the wings in here, dividing the wings into two
section with this kind of line and using the hatching
lines on both the sides, angled hatching lines like this. Instead of this, if you want
to leave a little bit of spacing in between
the hatching lines, you can do that, too. I like I saw you in that
demonstration video. For the smaller
feathers in here, the same thing, dividing into two section and hatching
lines on both the sides. In here, since we use
the breast paint to do the outlining, the
different section, the different parts
of the wings and the feathers are quite
distinct from each other. Since the thickness
of the lines that we created with
the breastpas are more darker as compared to the lines that we are
creating with the fine liner, continuing on with adding the more detailings
for the feather. For this side of the
feathers in here, instead of using the
angled hatching lines, I'm just using simple
and plain hatching lines and doing a little
bit of seeding, making the lower regions
a bit more darker with more hatching lines
and reduced spacing. And as for the upper part, simple and plain hatching lines. Just add more lines
for the bottom section to make it a bit
darker like this, doing the same thing
for the wings in here. Since this wing lies
on the other side, we won't be adding that much of detailing rows and rows
of hatching lines, a little bit of white
spaces in between them. And with this, we are
done with the swing. Add a little bit of more details wherever you think
it's required. I decided to make this
region a bit more darker, more hatching lines in here to make it a bit more
distinct and different. Using hatching lines to do
the seeding in this manner. More lines in here to
make this more darker. Now for this side of
the wing, same thing, like we did for the other wing, simple hatching lines, rows
and rows of hatching lines. And this beside the larger wing, making it a little
bit more darker, making the outlines a bit
more darker with more lines. And with these, we are
done with the wings. Now for the remaining section, it's leg and the
stomach and the chest. So basically, we
are going to use curved hatching
curved and broken hatching lines for
most of the section. We are not going to cover the entire section with
the hatching line, but for the region just beside its wing and near the
outlined regions, as well as for the foot, we'll be making them quite darker. For most of them, we'll
be adding the lines, but we'll be increasing
the spacing in between them as well
as reducing the side. As you can see for this leg, I added more lines to make it more darker since it
lies on the other side. A bit of more detailing
for the neck in here. If you're satisfied with yours, you don't have to
add more detailing. Now in here just beside its leg. Bit of curved broken
lines like this. The wings on the other side, rows and rows of hatching line. Rows and rows of hatching line like this to make it bit darker. The region just below its wing, using a bit of a
stippling technique to make it bit more darker. Simple stippling dots like this. Instead of using
the stippling dots, you can use the
hatching lines too. Tining on with creating more stippling dots
in this manner. In here, too, I decided to use a bit of a stippling
dots for this region, the neck and upper part of
the head. This is optional. If you are satisfied
with your object, you don't have to
add more details in this form of stippling dots. Moving back in here, continuing
on with adding more dots, reducing the spacing
in between them. For this region, the chest, upper part of the chaste,
more stippling dots. We'll be keeping it
comparatively lighter, but if we want to
make it darker, you just have to add more dot and reduce the spacing
in between the dots. Now adding the.in
here just above the leg as well as in
between the hatching lines. For the remaining section, I'll be adding more of this
kind of stippling dots. Earlier, my plan was to use the hatching lines to
add the detail in here, but then I decided to
use the stippling dots to give it a little bit of
different kind of texture. Lots and lots of
stippling.in this manner. With the stippling dots, it creates very beautiful
and defined texture, and it looks more elegant, but the main disadvantage is
that it takes a lot of time. So I'll only be using the smaller section for
most of the project. The the foot in here will be using both hatching lines
and stippling dots. For the padded regions
of the foot in here, making this region a bit more darker with stippling
dots in here. The triangular parts in here, add more stippling dots. And as we move away from it, we are not going to add
the stippling dots, or you can just increase the
piecing between the dots. Adding in this beside
the outline sections. More stippling dots
in this manner. A bit of more detailing
in this manner. We'll be covering it with the
blue fine liner later on. With these, we are done with a simple detailing for the foot with stippling dots and a
little bit of hatching lines. Now, in here, I'm going
with the blue fine liner, and I'm going to cover
it entirely with it. P rows and rows of hatching
lines in this manner to fill the entire section with this
blue. This is optional. If you don't want
to use the blue, you can leave it as it is. You can just use the
black and do a little bit more detailing with
the stippling dots and bit of hatching lines. Adding it for the
webbed feet in here. Now for the second
one, the same thing, rows and rows of hatching lines. We are making it a
little bit of uniform, so we are maintaining
the spacing in between the lines for the
smaller regions like this. I'll also be doing the
coloring for the waived with. First, we'll be
completely feeling it and then we'll be using the curve line to add a little bit more
detailings in that manner. Add more blue lines wherever
you think it's required, making this region
bit more darker. Now for the remaining section, following the seep
of the waved feet and adding the lines
in this manner. As you can see, I have increased this piecing in
between the lines, and these are
comparatively lighter. The same thing for
the second one, curved hatching lines
in this manner. The final portion like this. A little bit of
blues for the eyes. If you don't want to use it, you can just leave it as it is. And also add the
blues for the beaks. Yeah, with these, we add
in with our first project. This is one of my favorite and one of the easiest
projects of this class. I'll be seeing you in the
next project, Happy painting.
10. Blue Foot Wanderer : Welcome to this project,
Blue footed wondro. Let's start with a simple pencil sketching for our words head. Starting with somewhat of
circular C for the head, extending it in this manner, a little bit of curb
cylindrical C for the neck. In here, we have got
another s curve triangular se for its bony, somewhat of this kind
of elliptical seam or you can say I like
C for the body. In here, we'll be
creating its wings and chest. This is going to be. This is going to
me the tail feel there and the upper
parts of it foot. Adding it in here too.
Simple shape like this. It has raised one of
its leg in this manner. Making a little bit of changes, adding a little
bit of detailing, creating a rough
guideline for the wings. The folded wings in here, extending it a
little bit in here, the wings from the other side, that will be visible
in this manner. So this is very simple
sketch for our bird. Now a little bit more guidelines for its face and the beak. Couch seep in this manner. So we've got somewhat
of slanted angle line, as well as a little bit of
curve shape on top of it for its face and a long triangular
shape for its beak. And this is our simple pencil sketching for our
Blue foot adventurer. Let's do a little bit
of detailing in here. I'm starting with embrasp. In here, I'm starting with a breast pain to do the outlining. Starting with doing the
outlining for it freeze, curved and straight
lines in this manner. The beak in here, I decided to extend the side of the
weak a little bit. In here I decided to make a
little bit of changes to the weak making it a
little bit thinner, dividing into two sections, the aparent lower
part of the beak. Simple oval shape like
this for the eyes, dividing the weak
into more sections. Let's do the outlining for
the remaining section. In here to create a little
bit of rougher texture, I'll be creating this
band b creating this kind of lines to do the outlining
for its head and the neck. This is o if you don't want
to use this kind of lines, you can always use plain and simple lines to
do the outlining, doing the same thing
on the other side. The same kind of line to do the outlining on the
side of the neck. Now, let's do the
outlining for its swing. For the folded wings in here, we'll be dividing into different sections and we'll be creating three or four different rows of the feather
present on the wing. As for the extended
portions of the wing, we'll be dividing
into more sections, doing the outlining
in this manner. Going back with a
pencil once again to draw a little bit of more
guidelines for the outlining. We have got three rows
of feather in here. Using these kind of lines, a bit larger scallops
in here to create the appearance of the
feather in the wing. As I am progressing, I'm
decreasing the sinus, now doing the same thing
on the other side, decreasing the side
in this manner. This is going to be our
second set of the feather. Instead of this kind of
scallops, if you want, you can use other
variations of the scallops, you can use the curved one, you can use the pointed one. So feel free to experiment. And the final one. Now,
moving on to the final one. This is the third
and the final row of the feathers on the wing, making it comparatively larger. Once again, as we
are progressing, I'm decreasing the size a
little bit comparatively less as compared to the
first and the second rows, the decrease in the
size is very small. Now, for the extended
portion of the wings, following the curved shape of it and adding lines in this manner, concentric lines in
this manner to add the detailing for the inside
of this extended feeder. Now for the tail feeder, start with a straight line. This will be the largest
feather in here now. We'll be dividing into
more and more sections, mostly using this kind
of curved lines to create the rough outlining
for our feathers. In here, I'll be creating mostly four or five feeders
in this manner, and a few more on the side, smaller ones like this. Extending the lines
in this man to sow a clear distinction between the different feeders we
have created in here. The other side of the wing, only a small portion is
visible in this manner. Now, let's do the outlining for its chest and
the lower portion of its body to give it a little
bit of texted look in here. We are using these
kind of lines. This is going to be the
upper part of its foot. Here, too, once again,
use the same kind of lines to give it a little
bit of texted look. Now for its stomach
and the chest. The simple and thin lines. If you want to include
the raffle texture, feel free to do that.
Now for the foot. Dividing the leg into
different sections. As for the foot and the beak, I won't be creating
or adding any kind of detailings in the form of hatching lines or the
stippling technique. Since I'll be using the blue colored Bros pin to
do the coloring, but if you want to include
and add but if you want to include detailing and hatching or stippling feel
free to do that. The second leg in here,
as I was mentioning, this was raised to
lay cylindrical sip in this manner for
the middle portion. Now for the remaining portion, going back with a
pencil to do sketching. Now going back once again with a breast ping and going over the pencil
sketch that we made, you don't have to stick with the pencil sketch that
you have created, feel free to make
changes in adjustment. Now connecting all the portions with this kind of curved lines. Adding the insights for the eye, a little bit of highlight
in the form of white. So this is our simple outlining for the blue footed vendra. Ensure that the ink has dried up and lightly erase
the pencil marks. Lightly raising
the pencil marks. Mostly I'll be using the breast paint to
do the detailing. I'll also be using a
little bit of fine liner. You can do the same thing that I'll be doing with
the fine liner. You don't have to stick
with the breastpin. Or if you want, you can also use the normal wallpoint paint
or jail pen to do this. I'll also be using
a little bit of gray colored breastpains
to do the coloring. Removing the erasers dist. And this is how our
sketch turned out. Let's start with the gray. Let's start with the gray. A little bit of green in
here just beside its size and the front part of its
beak, keep it on the edges. For the small feed
that's in here, the rough texture that
we'll be creating, just using gray in this manner, creating small strokes
in this manner. The region just beside its face will be making it quite darker, so more strokes in this manner, simple and plain
strokes with the grey. And as we move away from it, we'll be decreasing
the intensity of the gray in this manner. Now for the wings,
Now for the wings, just filling some
of the sections with the gray in this manner, completely filling it
for the upper part. And as for the
rows of the wings, leaving a little
bit of white piece, otherwise filling
it in this manner. A little bit of
more lines in here. The regions where I'm adding this kind of lines with
the green will be making those region quite darker with hatching lines of the stippling technique or cross-hatching. Also, to make it more darker, you can do two or three
layers in this manner. So for this section, I
decided to make it darker. Now for the tail either, a little bit of gray extended with the same kind of thing. We also used a little bit
for its foot and the leg. This symbol is gray like this. I mean if you want
to include more gray for some of the section,
feel free to do that. In here, I'm going with
the blue colored bus pen, and I'm just going to completely fill the entire section with it. I'll be making some of
the regions a bit more darker by doing two or
three layers of the blue, particularly in here just beside its eyes and at the
end of its beak. Just simple layering in this manner to make
it quite darker. A little bit on the other side, too, a little bit more
layering on this side. And with these, we are done with the beak. Now for the foot. Completely fill
it with the blue. Put the sections in here, the webbed food, add more
layers to make it quite darker. With these, we are done
with the first web, moving on to the second lane, doing the same thing, completely peeling the insides
with the blue. And for the patoot region, adding more layers in this
manner to make it more darker. And with these, we are done with a blue colored breast pine Now, in here, instead of using the breastpin and decided
to use the sketch pin, it will create the
same kind of effect. Feel free to use any other
supplies that you want. You can use the
normal ball pen pen, you can use the file line and
you can use the breastbin. So whatever you want to
use, feel free to do that, starting with this kind
of small hatching lines and surrounding its
freeze in this manner. More stat of hatching line
in this manner just below its beak rows and rows of
hatching line in this manner. Another row of hatching
line just beside the beak. Small hatching line
in this manner to make the regions
quite darker. Apart from the hatching line, we'll be using lots of scallops, triangular seeds
of the scallops. But for now, continuing
on with this kind of small hatching line in this manner to make some of
the regions quite darker. Creating small triangular
see in this manner, small scallops in this manner to feel the remaining section. As usual, we'll be making the upper portion and
the sides bit more darker with lots
of hatching lines or this kind of scallops. Continuing on. So on the left side, we'll
be adding a lot more. And for the right side, we
have lots of hatching lines. So for the right side, I
won't be creating that many of the scallops
in this manner. But in here, we have
got lots of scallops, particularly creating
the scallops on the areas where we use
the gray to cover it. Now for the upper part of
it, more hatching lines, just more hatching line on top of the gray
that we used earlier. I decided to use the sketch pen since the sketch
pen is quite cheap and you can create the
same kind of effect using the sketch pin as
compared to the breast pan. That's why I decided to use it. Using the black to
redo the outlining for the beak to make
it quite darker and to create a clear
distinction between the separate section
of its face, the beak, and the eyes. Now, continuing on with
the remaining section, we have got its
chest and the wings. In here, just dividing into different sections
using this kind of small scribbling
technique or you can say, hatching lines to create this kind of feather
like appearance. So this kind of scallop pattern, Instead of this, if you
want to create other kind of pattern or designs for the
feather, you can do that. But in here, I decided
to include this. Adding more blacks
in here to create a gate separation to create a little bit more
appearance for the feather, creating smaller lines in here to be divided
into two sections. Now for the upper part, more hatching lines
in this manner. Now also going over
the outlines to make it quite bolder
and more darker. So for most of the
outlines in here that we did with
breast pin earlier, we'll be going over
with this sketch pen and making it quite darker. This is optional. If you
don't want to do this, you can just leave it as it is and use the black
to do hatching lines, or you can just simply use it to do a little
bit of shading. Continuing on. As you can see, I'm making one side of the
outlining a little bit more darker by adding
two or three layers of the black in this manner. And with these, we are
done with the second row, moving into the third
and the final one. Just simply going over the
outlines in this manner. As usual, I'm making one side a little bit more darker
by going over it twice. And with these, we are done with the third and
the final row. Continuing on with the
chest and the stomach, a little bit more detailing
in the form of hatching line, curved hatching lines,
just above its leg, making this region
quite darker with more curved hatching
line in this manner. Beside its wing,
more hatching lines. So we'll be creating lots of hatching lines
of various saves, mostly starting from smaller to larger to make this
region quite darker. Now for the chest, rows and rows of hatching
line in this manner, covering the grease
that we used earlier. And yeah, this will do the work now for the leg on
the other side, more hatching lines to make
it more darker for this leg. Just using rows and
rows of hatching lines. So feel it entirely. If you want to do a little bit of setting, you
can do that, too. Now for this portion,
just completely filling it with this
manner of hatching lines. The lower part of the
wings in this manner, making it quite darker. And with these, we are done with the chest and the stomach. Now for the tail either, doing the same thing, outlining the one sides and
making it more darker. Here for some of the sections, we'll be dividing into
two sections and using the angle hatching lines to create the appearance
for the feather. And for some of the section, particularly the lower section, I'll be completely feeling it with the black in this manner. This feeling it with the
black in this manner. I'm also firing the sizes a
little bit in this manner. For the extended
portion of the wings, just go over the outlines. Here to make some
of the sexton more darker on this side,
doing the same thing. And with this, we are doing the outlining for
most of the sections, a little bit of more
outlining for the upper part. If you want to do
the outlining for the entire section,
you can do that, too. Doing the outlining
for the food, it is not visible in here, but I am just simply going over the outlines of the
food that we created. I did not do the outlining for the upper section
with this sketch pin. Since with the variations
of the line thickness, we have created somewhat of dynamic lines and it looks
a little bit more pleasing. This compared to if I have gone and do the outlining
for the entire section. That's why I did not do the
outlining for the upper part. Going in with the fine to
add the final detailing. With a fine liner, I can create comparatively smaller
lines using it to add small and finer details in this manner on both
sides of the wings, creating this kind of
small hatching lines to create a pariance
of the feeder. For the smaller ones, I'm only adding the
lines on one side. This is quite large one, so
adding it on both sides. Simple hatching line
in this manner, adding it for the
last one in here. Now for this portion, more hatching line
in this manner. Moving on to this one, simple hatching line in this manner, and also doing a little bit of sading using these
hatching lines. For the upper and the lower part of the feathers that
we have in here, simple hatching lines
in this manner, also a little bit of
sading making the upper or the lower part quite darker by adding
more lines in here. We'll be doing the same thing
for all the three rows. For the larger ones, I'm adding it for
both the section, the upper and the
lower sections. But the smaller ones,
I'll only be adding it for the lower part
or the upper part. The first one, simple small
hatching line in this manner. More hatching line
in this manner. We are going to add it
for all the feather that we have created in here. Also for some of the sections in here for the chest
and the upper part, if you want to create this kind of detailing,
feel free to do that. I have not added any detailing
for its foot and the beak, if you want to add
detailings and make it bit more darker using stippling
or hatching technique, you can do that with
the fine liner. I won't be adding any
detailings with the fine liner. And yeah, with these, we are done with our Blue
Foot Wanderer. I hope you enjoyed
painting this one, and I'll be seeing you
in the next project.
11. Potrait of a Bird : Welcome to this project. We have got a portrait of the bird. This is going to be a little bit different from all the
projects that we have created. In here, we'll be creating a very detailed
piece for our bird, starting with this kind of curve cylindrical C for the head. If you want, you can
make it bit more larger or more smaller
as you see fit. Now, in here for its face, create this kind of curve. Somewhat of semi oval s, dividing into three curved
section for the upper part. For the middle
portion, we have got its beak and on both the sides, we have its eyes extending the lines in this
manner for the eyes. Basically in here,
we'll be creating lots of curve for the outlining. Just follow along with me so that you can
easily create it. Curved seep in here. On
both the sides and here, we'll be creating a beak. This is going to be a simple
C in here we'll be creating a beak Since we are
viewing it from the top, the beaker P is a
bit more broader. This kind of curved triangular
c. Simple outlining in this manner for the eyes will be dividing the beaks
into different sections. The sides of the beaks
will be visible. That's why it's looking a little bit
comparatively broader. The two lines on here will be the sides of the
beak that are visible. Second eye in here, simple oval C. This will be the lower
portion of the weak, more lines in here to sow
the sides of the weak. So the weak the weak is somewhat of three
dimensional in shape, so the three sides will be
visible in this manner. Since we are viewing it from
the front and the top view, so this kind of divisions, it's not looking
that much apparent, but when we'll be doing the outlining and
adding the detail, it will become more clear. In here, I'm using the brass
paint to do the outlining. You can also use the fine liner. The main advantage with the
breastman that I have is that I get a bit more darker
and a bit more thicker line. Going over all the pencil
sketches that we did, feel free to make
changes in adjustment. I have included the
reference image so that you can get the rough
idea how we'll be creating it. Not the reference
image, the final image. So this is how the project
turned out. Now for the beak. Mostly in here, we'll be using the small hatching
lines to create the shadows and add the texture. Not for the sides.
As for the eyes, creating a little bit of
elliptical set like this. Instead of it, if you want to continue with the circular
seat, you can do that, too. But in here, we are creating a bit detailed portrait
of the bird's face. So trying to make it
a little bit more real Oval saves for the inside the eyes oval save
in here for the eyeballs, a little bit of detailing. In here, we'll be
grading lots of line to make it look a
little bit textured. This kind of simple this kind of simple lines in here following the curve sweep of the eye. Now, broken hatching
lines in this manner. Court broken hatching lines. Now, the sides of the beak. Simple plain small hatching
lines in this manner. Now for the lower
portion of the beak, extending it in this manner, doing the same thing
on the other side, a little bit more detailing for the lower
portion of its weak. This is how we are
attempting to sew a little bit of three
dimensional view of its beak, add another circular sap in this manner to sow the
highlights of the eye, doing the same thing
for the second one, now completely filling
it with the black. A little bit of
texture for the bee. For the upper part in here, we'll be making it
look a bit textured. So simple lines like this. Enough on the remaining
section of its side, the same kind of lines
that we have used so far, this kind of sharp edges. On both the sides, we'll
be doing the same thing. In here, I'll also using
a little bit of gray, and we'll be creating
a little bit of texture detailing in here. So for now just
continuing on with the outlining in this manner. In here, the space is a little bit tilted
towards the right. But if you want to make
it a little bit standard, you can just increase
the width in here. As you can see on the left side, we have more width and
in the right in here, a little bit less width in between the outlining
and its space. If you want, you
can increase it. Lightly raising
the pencil marks, ensure that the ink has
dried up properly and then lightly raise
all the pencil marks. After doing this
for the insides, we'll be using the blue. For the outsides, we'll be using the raise and lots of
detailing in between. And this is how our
sketch turned out, removing the E research test. Now, let's do the detailing. Continuing on with the
breast paint for now. Now going in with the
grey colored paint that I have grey colored breast pain. For some of the section
where I'll be sewing the sados or the section
that will be darker. I'll be adding the green
in here in this manner. You can just follow
along with me. A one below the eyes,
the sides of the B, the lower portion
of the weak and a little bit at the edge of
the beak in this manner. A little bit of more gray
on the sides of the beak. Now for the remaining section, just create small and larger
streaks in this manner. We are spreading from the
center near the faces, create bit smaller ones, and as we move away,
increase the sizes. Lots of lines in here, just beside it space. As we move away, we'll be increasing the size and
decreasing the spacing. One or two more rows in here. Make it a little bit more
denser near its face, and as we move away, just increase the spacing and increase the number
in this manner. For the upper part of the head, I did not add it that much, but if you want, you can include more lines in there with a gray. Now, going in with
the breast pane and creating this
kind of scallops, the scallops are not connected, but for all the grease
that we created, I'll be creating this kind
of triangular or this kind of other variation of the scallops for the entire section. Apart from the gray areas, I'll also be including
and creating lots of this kind of scallops
for the white regions. In here, adding a little
bit of detailing for this part just above its
beak in this manner, small hatching lines like this. Now, continuing on
with the gray regions, creating this kind of
triangular seed scallops. For now, we'll just be going over all the gray regions and creating this kind
of triangular seeds, the triangle scallops. Then in between the scallops I'll also be creating smaller, multiple smaller ones
on the white regions. This besides its fees
in here creating a bit smaller streaks
in this manner. So smaller scallops, smaller triangular
seep in this manner. Now for the remaining section, just create multiple
ones like this. As you can see, I have created a bit smaller ones
for the white region. And for the remaining section, just continue on
with this manner. The sides in the upper part and this beloved beak will be
making it a little bit denser. So more smaller and larger
ones in this manner, in the white regions, as
well as the gray regions. After doing this,
we'll be adding a little bit more texture
and detailing using the fine liner and we'll
be creating lots of hatching lines for some of the scallops that
we have in here, especially the larger ones. Getting more scallops in here
to make it bit more denser. Entertaining on with the
lower section in this manner. As for its beak and the
remaining portion of its face, we'll be using the blue. Mostly we'll be doing
the hatching lines and cross-hatching and
we are going to completely cover the entire
section with the blue. Is the regions beside its size. Creating more scallops in
smaller scallops like this. If you want to make
it more denser, you can add more, but I think
I am satisfied with it. In here for the sides, I'm
making it a bit more denser. Small scallops in this manner
to make it quite darker. Na fur the head, once again, a little bit of more scallops in this manner, but smaller ones. And here, with these, we
are done with the scallops. I'm satisfied with the
number of the scallops. If you want to give
more, you can do that. And if required,
I'll be adding more, but for now going
with the fine liner. And in here, we'll be making
some of the scallops, a little bit texture. Feather like appearance in this manner using
simple hatching lines. To avoid smudging of
the color in here, I'm using the tissue
paper underneath my palm, and for some of the larger one, the larger scallops in here, just greeting this kind of texture, using the
hatching lines. This is optional if
you're satisfied with the grease and the black one,
you don't have to do this. Or if you want to include this, just follow along with me. I'm not going to add it for all the scallops that
we have in here. Minly I'll be adding
it for the larger one and a little bit for the
smaller ones in this manner. I'll also be creating
few smaller ones using the fine lender for the regions where we don't have
that many scallops. Now on the side, simple
hatching lines in this manner. This process is going to take a little bit of
time since we'll be adding this kind of texture for
a lot of the scallops. Continuing on with
creating this kind of texture for the scallops
in this manner, particularly added
for the larger ones. For the smaller ones, it
will look a bit darker. For the smaller one, it
will look more darker, so I'm only focusing on
the larger one in here. If you want to include
this kind of texture food, all the scallops, you
can do that, too, but I won't be doing it, continuing on with more
scallops and here, simple texture in this manner. I'll only be creating this kind of detailing for this scallop. For this project, I won't be using it for the
other projects. So this kind of detailing
takes a lot of time, and for most of the project, the sizes of the scallops
will be quite smaller. In here, since this is a
big portrait of the bird, we have got larger scallops, but for the other project,
we'll have very small ones. If you want to
include the hatching lines for those projects too, you can do that, but I
won't be including them. In here, we are continuing on creating more textured
scallops in this manner. After doing this, we'll be doing the coloring for the fees. I'll also be using a little bit of grey to create
a little bit of detailing for the eyes
beside the black eyeball. We'll be using the grease
and create simple dots to give it a little bit
more text appearance, the eyes of the word. Once again, I would
like to remind you that the whole
video is in real time, so you can always
follow along with me. A little bit of
detailing on the side, so small hatching lines in this manner for the
outlined regions. Now for the head, a little bit more hatching
lines in this manner. I'm also creating few
smaller ones in here, wherever there is a
lot of empty spaces. Now add more wherever
you think it's required. You can also create smaller
scallops like this. Et's do the detailing for
the eyes using the file and make the upper regions of the eyes a bit more
detailed and texture. Since in here, we
have got a little bit less thickness as
compared to the breast pain. So using this to create a little bit more texture
look for the face, Just simple and plain curved and curved hatching lines
for some of the section. This will be a
little bit darker. The sad is casted by
the upper portion of its beak in here too, doing the same thing in here. Try to maintain the symmetry to make it more darker
using cross-hatching. A little bit of cross-hatching
just beside this portion. On the sides of the eyes, more hatching in this manner, since we'll be overlaying
the blue on top of it, but the intensity of the
blue will be quite lighter. So all the blacks that we have in here will
remain visible. The grease will be visible
too with the blue. So we have got the blue in here. The fine liner that I have in here has a little bit
of less thickness. So we'll have to create lots and lots of lines to make
it quite darker. I'll be doing the
coloring in layers. This is going to
your first layer. Following the curve sweep of
its eye and using this kind of rows and rows of hatching to feel the entire
section beside its eyes. This process is also going
to take a bit of time around four or 5 minutes to completely create its squeeze. For the beak in here, mostly we'll be using the curved lines as the first layer, then we'll be using made of more hatching lines as
for the third layer, we'll be doing a bit
of cross-hatching to make of the section more darker. The curve sections in here just create curve line
following the set, the contour of the
different sections. And for the remaining section, you can just create rows and rows of hatching
lines in any manner. The regions where we
created this kind of hatching lines and add
the blue in that manner. So just following
the hatching lines and adding it in that manner. Make this bit more darker, doing the cross-hatching,
for this origin, completely filling
it with the blue, continuing on with the beak, a little bit of sading
using the hatching lines. This is our first layer. We'll be doing the same
thing on the other side. And then we'll also be adding it for the entire section,
the middle portion. For that, I'll be applying less pressure with
the breast pain, and I'll also be changing
the angle so that we can get more lighter lines
for the middle section. Starting from the top, making the upper part
comparatively darker. Now continuing on
with this kind of curved hatching lines and using it to do a little bit of sading. And yeah, with these, we are
done with the loose in here, a little bit of hatching
in this manner, angle line in here to make
it a little bit more darker, comparatively darker on
the sides of the beak. Now, moving on to the eyes,
the second eye in here, the same kind of hatching, rows and rows of hatching
lines in this manner. Adding it for the lower
portion of the eye, simple plain hatching
lines in this manner, the side of the week, following the curve shape and adding the lines in that manner. Once again, in here,
following the tu, the curved shape of the beak and adding the line
in that manner. Plain simple hatching
lines and now cross-hatching the side
portion of the beak, cross-hatching here too
to make it quite darker. Put the beak in here,
a little bit of cross-hatching to make
the sides more darker, doing the same thing in here, a bit of cross-hatching and extending the lines
in this manner. Now for the remaining
section, as I was saying, changing the angle of the pen
and creating and creating bit of lighter lines
in this manner and completely feeling
the entire section. We'll be using the lighter lines like this for the
remaining section. We are going to cover the
entire section with the blue. Just tan the angle
of the pen and feel the remaining section
with the blue in this manner. Making the sides more darker, do the same thing
on the other side. Me lines to make it more darker. And with these, we are
done with the blue. If you want to make
some of the section more darker, you can do that. If you have other darker sits with the blue, you
can also use that. Now, going with the gray, creating this kind of detailing with this kind of
lines for the eye, doing the same thing
for the other eye. And with these, we
add with our project. I hope you enjoyed painting
this portrait of the bird. And this was quite fun
and refreshing to paint, and I'll sing you in the next
project, happy painting.
12. On the Rock: Welcome to the
project on the rock. Let's start with a
simple sketching. Once again, in here, I'm
starting with a circular s, somewhat of circular
or somewhat of ovals for the head of a bird. You can create both the ovals or the circular
see for the head. Somewhat of this kind
of circular see. Now its head is turned
for this project. So a little bit of different
kind of neck in here. Somewhat of angled cylindrical
seat in here on the side. This is going to its neck. Now for the remaining
section in here, we'll be creating somewhat
of elliptical seam. To make it more simpler, you can divide into
different section in this manner and then
do the sketching. We have got a
cylindrical seat and two curve triangular see Now
for the rest of its body, as I was mentioning, somewhat of elliptical see like this. You can create just
a large eye in here like this for the
rest of its body. Now for the wings in here, a little bit beside its neck, curved, curve line in
this manner for the wing. The wing on the
other side will be visible to only a small
section like this. And we'll be creating
a little bit of textured look for the
feather and the wings, the tail feather tail
feather like this. For the ends of the wings
in here, in this manner, same thing on the other side, somewhat of triangular set
like this on the other side. This is going to a
simple past sketching, making changes and
adjustment as we go. So feel free to make
adjustment as you see fit, and this is going to be our leg. So the upper part of
its foot on the leg. The leg on the other side, simple cylindrical sap like
this for the middle section, and for the padded foot. Is create this kind
of simple curve drawing in facing
towards the right. Doing a scene for the other one in here a little bit
of square like scene. This bird is resting on
top of a small rock. The simple outlining
in this manner. This is optional. If
you don't want to create this, you don't
have to do this. We have not created any kind of background or any kind
of surface for the bird. So this is optional, you don't have to create it, or you can just follow
along with me and create very simple kind of
rock in this manner, and divided the rock
into many sections. Now moving back to its phase. Gritting this kind of curves for its eyes and the start of its wing. Now, extending it. The beak of the bird
is urate in his wing. Circle C for its eyes, circulo its eyes
and for its weak, simple straight line
in this manner. This is going to be our simple pencil sketching for the bird. Feel free to make
changes in adjustment. You can increase or
decrease the length. Here, once again, I'm using the br bean to do the outlining, starting with doing the
outlining for its freeze. A bit of rough
textet for its neck. I'm dividing this project
into two sections. This is going to be the
first one in here and only doing the outlining
in the next section, we'll be adding that
detailing as well as doing the coloring for the rock
and the remains portion. I kind of bit texti
outlining for its neck. We'll be creating
texted outlining in the same manner for its
wings and the feather. Starting with the wing in here. Some of the feathers
in here are like this. The beak is buried in
here in this manner, doing the outlining
for the beak. A small section of the beak is covered in here by the
fur and the feeder. Create this kind of scallops for the entire section
just above its wing. As we progress towards the neck, I'll be decreasing the
sizes of the scallops. Simple curved scallops in this manner for
the entire region, wearing the sides as we
move towards the neck, making it quite smaller. More scallops in
here on the side. For the feathers on the
wings of this bird in here, I'll be creating three
rows of the feather, starting with creating this
kind of simple curved shape, simple scallops in this manner. This is going to
be our first row. And this is going to
be our final row. Create one beside other. Other side of the
wings is also visible. So this will be the center, and now on the other side, just creating this
kind of scallops and increasing the size and
changing the angle. This is going to be
the middle or you can see the second layer
of the feather. Extending the lines
in this manner to create a clear
distinction between each separate feeder We'll be keeping it quite simpler and only doing the sading
to do the coloring, we won't be adding the details in the manner of
simple straight lines and then adding the angle hatching lines
on both the sides. Instead of it, we'll
only be creating the simple hatching lines
and doing the sading. Now for the extended
portion of the wing, going over the pencil outlining and dividing it into different
sections in this manner. Not for its steel feather. Here, too, I'll mostly doing the sading using
the hatching lines. For now, just do the
outlining in simple manner. We have got four or five
large feather in here, so dividing into different
stucture in this manner with simple straight
lines, not for the link. Let's do the outlining for
its stomach and the chest, and then we'll be
adding the detailing. A little bit of texture look
in here just beside it line. Doing the outlining
for the second leg, the upper part in this manner. Now the padded foot dividing
into three sections. If you're not that confident, you can proceed with the pencil sketch first and then
do the outlining. Going through the third one. Small curve shape like
this for the claw, now connecting the three, doing the same thing for
the second one. Changing the angle a little
bit since it lies on the other side to a large portion of it will
be visible like this. Creating the panded food by doing the outlining
in this manner, simple smart law like this. Let's do the outlining
for the rock. I have created a very
simple rock in here. For the rock, I'll be using cross-hatching and the
hatching to do the detailing. And I'll also be using
a little bit of gray, dividing the rock into
different sections. For the sections, I'll be using the hatching line for the
top sections of the rock, I'll be using cross-hatching
to make them quite darker. This is going to
be the top rock. Just below it, I'll be creating
two or three more layers. Creating the best for the
top one and now extending it in this manner. This
is all optional. If you don't want to create it, you can just leave it as it is, or you can just create a
simple layer of the rock. One more extension of
the rock in this manner, a bit square like seep in here. The lower section of the
rock is not visible in here, so I've included the image. You can just pause the video and create the outlining
for the rock. Me rocks in here, more
extensive in this form. And yeah, this is our simple
sketching for the rock. Creating the eyeball
inside the eye, extending the beak a little
bit in between the feather. This is our simple
pencil sketching as well as the outlining
for our board. Ensure that the ink has dried
up and lightly erase it. I'll only be covering up
to here in this video, and in the next section,
we'll be doing the coloring. We'll be creating lots
of small scallops, triangular see scallops
along with simple, small hatching lines for
the region just beside its head for the neck and a little bit beside
the small fre them. Creating the outlining
for the second wing. And then for the wings,
apart from the black, I'll also be using a little bit of blue and doing the seeding. As for the rock that
I see, we'll be mostly using the
cross-hatching and hatching. I'll also be using
a little bit of green to do the
coloring for the rock. The coloring and addition of the detail will be quite easy. So that's all for this
section of the video. I'll be seeing you
in the next one. We will be starting with
creating the scallops.
13. Rock with Gray Brush Pen : Welcome to the second part
of the project on the rock. Let's continue
where we left top. This beside its eyes and
the upper part of its face, creating this kind of
small hatching lines simple, small scallops. We'll be using combinations
of both simple, small hatching lines as well
as small triangular shapes like this for the scallops and primarily adding
it near its eyes, a little bit on the
other side of its neck. You have got the rough idea
of what I mean to say. We're going to concentrate
it in here in this manner. Later on, I'll also be
using a little bit of light blue to do a little
bit of seating in here. For now, just continue on
with creating this kind of small hatching lines
or small scallops, simple, small triangular
sap in this manner. The curved portion in here, the other side of the neck, will be concentrating a little
bit more scallops there. For now adding more
scallops just beside its weak a simple, small, open triangular seat
like this for the scallops, a little bit of small
hatching lines too. Add the lines as well as the scallops following the
curved sweep of the neck. Now in here for this region, we'll be concentrating
more scallops and more hatching lines to make
this region quite darker. Comparatively more scallops and small hatching
lines in this area. Here, too, we'll be
creating lots of hatching lines and scallops
to make it quite darker. More scallops. If you
are satisfied with the consistency of the scallops or the darkness of the scallops, you don't have to add more continue on with creating more scallops on the
sides of the neck. A few more scallops
on the other side, the right one, and for
it just in the stomach, I won't be creating
the scallops. Instead of it, I'll be creating curve, small hatching lines. Now for the wing
on the other side, a little bit of detailing
in this manner, small feather like outlining. And for the entire section, I'm just going to cover
it with this kind of simple small hatching lines or even consider it
to be scribbling, completely filling
it in this manner. Now, a little bit of detailing
for the scallops in here. I'll be doing a siding in
this manner and creating small single straight
line for the larger ones. You can use the file liner
to do the detailing since the sides of the scallops
are quite smaller in here, but I decided to do
a little bit more detailing using the bras
pen so that I can make it a bit more
darker and bit more bolder since we'll be
using blue later on. So that's why I'm sticking
with the bras pen for now. Continuing on doing
the same thing. Simple sading using the
hatching lines in this manner. For all the scallops in here for the upper part of the wing
doing the same thing. And in here just creating more smaller hatching
lines to completely fill this entire region for the
upper part of the wings, small curved hatching
lines in this manner. A bit of broken and small
curved hatching lines to make it quite darker. Now in here we'll be
doing the same thing, Sading using the hatching lines. For all the three sads of the feather that
we have created, simple hatching lines in this manner and using
the hatching lines to do the sading Instead of it, you can create other
variations of the feather. You can create a simple
straight lines in the middle and then proceed
with doing the sading. Apart from that,
you can also create a simple straight
line in the middle. Then on both the sides, you can create the angled hatching lines like we have did so far
for most of the projects. Whatever you feel
comfortable with, but in here, I'll be
continuing on with this. I switched to the fine
liner since creating the seeding using the
brastpin was quite difficult. And I can create the seeding using fine line quite easily, and the intensity
is quite lighter compared to the one that we
created with the breast been. So sustaining the angle of
the fine and I need to create this kind of sading doing the same thing for
the upper section, creating this kind of light
lines to do the sading, doing the same thing just below the first layer of the feather. My light sdings like
this in this manner. The region just beside it's
me in a small scallops. For this side too, just
simple small sading like this Now moving on to the third and the final layer of the
feather that we have created, do the same thing. If you want to make
it a bit more darker, you can just add one more
layer using the breast pain. So on top of it, for
the lower section, you can create the
simple seeding lines using the breast pain. Continuing on with
creating this kind of simple small lines and doing the seeding for the
remaining section, the remaining feathers in here, the third layer of the wing, the third layer of the feather, the third row of the feather. The third drop of the feather
in here for the wing, making this region quite darker. Making this region quite darker, more sating in this manner. With these, we are somewhat
done with the wings, a little bit more
detailing in this manner. You can do a little bit more seating for some of the regions. For the tail feather
and extended feather in here, I'll be
doing the same thing. Simple setting using this
kind of hatching lines, doing the same thing
for the other side. For some of the regions where
I did not add the settings, I'll be using the blue later on for now containing
one with it. We are done with
extended portions of the feathers and the wings for the tail feaer
doing the same thing, creating this kind of shedding
using the fine liner. Now, on the other side,
doing the same thing, simple hatching lines and doing the seeding in the
simple manner. To make it more darker, you can just do another layer of it or you can also
use the breast spin. Now in here, just
simple hatching lines, nose and nose of hatching line two or three to make it more darker for the upper
part of the foot, following the curved shape and creating this kind
of hatching lines, more hatching lines
in this manner. Just below the wings,
we'll be following the curve shape of the wings and creating more
hatching lines. For now just concentrating on the region in
between the two foot. Making the second one bit more darker since it's
lying on the other side. Now for the chest, as I
was mentioning earlier, just simple rows and rows of curved hatching lines for
the upper part of the chest. And as we progress
from left to right, I'm increasing the sizes for the region just
below the wings, simple small curved hatching
lines in this manner. So in here for the chest, we have got four or five
rows of the hatching lines, a little bit of detailing for the middle portion of the leg. Making this quite darker, just the region
between the two legs. A little bit of seeding
in here for the chest to make it more darker,
comparatively darker. This is optional. If you're satisfied with it, you
don't have to do this. Also, for some of the sections, I'll be making it more
darker using this kind of simple sading light seeding in this manner just beside
its eyes and the beak. The regions where
we have created a bit concentrated look of the scallops and
the hatching lines, a little bit of seeding
on those regions. Once again, I would
like to remind you that this is optional. If you don't want to
proceed with this, you can just leave it as it is. More hatching lines extending it towards the upper
section of the neck. For the beak to a little bit
of sading in this manner. The lower side of the weak. Now in here too, a little bit of sadingEtending the line a
little bit in this manner. Add more detailing wherever
you think it's required. So the region is
below its swing, a little bit of sating
using the hatching lines. And with this, we had done with the detailing for our bird. Now let's do the retailing for the rock that we have created. As I mentioned in here, I'll be using simple cross-hatching, starting with the
hatching lines. And then we'll be adding
two or three layers to make it more darker and convert
it into cross-hatching. I added more lines just beside the legs to south the
shadows casted by the legs, creating another set of lines, another set of hatching lines in here, converted into
cross-hatching. Now to make it a little
bit more darker, more more sets of the hatching lines for some of the sections to make
it more darker. You can also use the sading
technique to make it more darker between the
two padded foot, a little bit more
cross-hatching lines in this manner to
make it quite darker, doing the same thing
on the other side. Third layer of hatching lines in this manner to make
it more darker. A little bit of detailing
on the other side too. Now for the straight section, starting with the
hatching lines. For the larger section, create large line for the
smaller section with smaller lines. Now,
cross-hatching. I'm not going to do two or three layers of
the cross-hatching simple another layer
of hatching in this manner to make it
a little bit darker. Now for the remaining section, the extended
portions of the rock will be doing the same thing
for the upper section, we'll be doing a little bit of cross-hatching for
the lower section. We'll be using the
cross-hatching tube, but it will be
comparatively lighter. As you can see the
lines that I'm creating for this
straight section are comparatively
lighter and we are just doing a rough cross-hatching
in this manner. Now for this flat surface, following the seep of it and creating these kind
of curve lines. You can also do a little
bit of scribbling in here. To make it more darker, just simple cross-hatching
in this manner, doing the same thing
on the other side. The extended portion
of the rocks on this side, more cross-hatching. For this section,
making it quite darker, simple setting, simple
hatching lines in this manner. Sorry, it's not visible, but I did the simple
hatching in this manner, and now going in with the blue, we are going to completely fill the entire beak as well as
entire foot with this blume. This is optimal if you
don't want to do this, and if you want to
keep it monochrome, you don't have to use the blume. But I'm going to fill
the entire section with this kind of
simple hatching lines, rows and rows of
hatching lines to fill the entire section
in this manner. I'll also be doing
a little bit of shading just beside eyes and the starting of its beak to make those resin
bit more darker, continuing on with
the lower section, nose and nose of hatching
line in this manner. For the upper part of the beak, more hatching lines like this, another layer of hatching
lines to make it more darker, particularly near its eyes
and the start of its beak. With these, we are
done with the coloring for the beak, now for the foot. Here we'll be doing two or three rows of
hatching lines to feel the coloring for
the entire section with this light blue color. Now, for the padded
region of the foot? For the straight ones, just following the soeptating this kind of comparatively
long hatching lines. Doing the same thing
for the first leg, simple and long hatching
lines in this manner. And adding it for
the middle one. Now for the padded
region of the foot, following the curt shape
and creating this kind of mid carved hatching lines to feel the remaining
section in this manner, extending it like
this near the claws, doing the same thing
on the other side, following the curve shape and creating this kind
of hatching line. Now for the right leg, we'll be doing the same thing, following the following
the curved sweep of the padded foot and adding
the lines in that manner, doing the same thing
for the remaining two regions, completely filling it. And for the third
and the final one, once again, curved hatching
lines in this manner. With these, we are done with it. Once again, I would
like to remind you this is optimal for
some of the sections, I'm going to do a little bit
of seating using the value, particularly for the wings, the feathers a little
bit for the neck to small hatching lines
in this manner to do a little bit of
shading for the chest. For the upper regions
of the wings, a little bit of shading
in this manner. Two actituency again creating
a bit of lighter lines by applying less pressure as well as changing the
angle of the fine liner. Put the second row of
the feather in here, doing the same
thing, a little bit of treading using the blue. Making this region
a bit more blows. Now for the chest
and the stomach, a little bit more sdingF the leg too, a little
bit of sading. The region is beside
the tail feel there. A little bit of sading for the extended wings as well
as the tail feel there. I've included the image since it's not visible
properly in here. Put some of the white sexon a little bit of sading
in this manner. Now for the smaller
scallops in here, making it quite darker, comparatively darker for each individual scallops in here, mostly the larger one, a little bit of coloring
in this manner, moving on to its neck and
the head a little bit of sading for the
concentrated region, the regions where we did
the sading with the black, a little bit of sading
the middle region too. Do the seeding wherever
you think it's required or wherever you
feel comfortable with, do the experiment on your own and add your
personal touches. Creating a little bit of curve siding for the bend
portions of the neck, making it more darker than
here for the middle portion. With this, I am
satisfied with the view. Now, a little bit
more detail for the lower portion of
the tail feather, simple siding lines
in this manner. Making this is bit more darker this beside
the tail feather. For the other side of the wing, a little bit of setting
in this manner. And with these, we are done with the Blue for the seating
and adding the detailing. If you want to do a little bit more detailing,
feed to that. As for the rock, in here,
I'm using the gray. And for the regions where we
did a lot of cross-hatching, just adding the gray, particularly on those regions. Once again, I would like to
remind you this is optional. If you don't want, you
don't have to do it. You can also do a third or fourth layer of the
cross-hatching to make the section bit
more darker instead of using the grey
colored buts pen. Now, for the sides, concentrating it more towards the
cross-hatching sections, a little bit of detailing in this manner near the
outlying regions. If you want to do a little
bit of coloring for some of the sections of the
bird, you can do that, too. I won't be doing it, and I'm satisfied with
how it turned out. So this is our bird on the rock. I hope you enjoyed
painting this. This is a little bit different. And yeah, this was
quite fun to paint.
14. Guardian of the Nest: Welcome to the guardian
of the Nest project. This is a little bit different, and in here, we'll be
creating a mommy bid, along with two chicks
and four or five eggs, starting with a simple
circular seed for its head. So instead of this kind
of seed, if you want, you can also create
a bit of egg like seed to make the head a
little bit more elliptical. Extending it in here
in this manner, creating this kind of somewhat cylindrical see for the neck. This porton, its head
and the neck will be somewhat similar to the
project that we did earlier, the portrait of the bird. So we'll be creating the
face in the same manner. We'll be making it a
little bit less detail, but most of the things
will remain somewhat same. Now for its main body, its stomach and the chest, creating this kind
of simple same. In here, we are going to
create somewhat of elliptical or you can see oval
see for its body. I here for the wing,
the wing in the front, creating this kind
of very simple see a little bit a little bit curvier ptical see for the wing. But it's a little bit difficult. You can divide it into more smaller section and
then create the wing. The tail feeder in here, it's not the tail feeder. It's the wing on the other side. And for the tail feeder in here. This is going to be the tail
feeder for our mama bird. It making it a little bit more longer and increasing
its width a little bit. As usual, this is our primary
sketching if required, we'll be making changes and adjustment when we'll
be doing the outlining. Now for the leg, the
front leg in here, extending it in here to
create a stomach and the chest a little bit curved in here for this
portion, the stomach. This will be the upper part,
the chest and the neck. The other leg that lies
on the other side. Here too, I'll be creating a
small portion of the wing, knowing on the other
side that will be visible only a small portion. Here I decrease the width
of the neck a little bit, since it was looking a little bit more bigger,
comparatively bigger. Now, for the wing
on the other side, only a small portion of the
wing is visible like this. As for the foot or the leg, Slandca seep in here
for the middle section. Most of the portion
of its footed feet will be covered by the eggs. But in here, just for
the demonstration, I'm just creating a small
resemblance for the feet, the lower part of the feet. As for the eggs in here, I'll be creating a total
of five or six eggs, simple oval seeps like
this for the eggs, and apart from the eggs, I'll be creating two cheeks, one will be smaller and one
will be comparatively larger. These are all
optional. If you don't want to create the
eggs or the cheeks, you don't have to do this, you can just create the
simple and plain normal feed that we have created so far. So the choice is yours. In here, I'll be creating
the larger cheek. This will be quite simple. We have got circular
C for its head and a little bit of
curve seem like this. Or you can or you can consider a combination of two
oval saves for its body. Simple triangular
see for its week. So this is our simple
sketch for the chick, adding a little bit more
detail for the bond. As I mentioned, it
will be somewhat similar to the portrait of
the bond that we created, dividing it into three sections, one for the beak another two
curved section for its eyes. So the bird is
facing towards us. The front of the beak
will be visible and to create it will
be dividing into different section
so that the top as well as the other sides of
the beak will be visible. Simple circular
shape for the eyes. The front portion of the
beak and the side portions. So this is our simple
pencil sketch for our bird. If required, we'll be making
changes in adjustment, and if you want to
add more elements to it, feel free to do that. Now we are going to
do a little bit of outlining using the
Tombos breastbin. You don't have to
use the breastbin. You can always use
the ballpoint pen or the sakura micron pen. Generally, I use this since it provides a little bit
of more darker tones. Creating this kind of bit
preferred taxion to create a appearance of the fur or the
feather body for the body, or you can see the head of
our bird instead of this, if you want, you can also
use the broken lines or simple and clean normal
lines to do the outlining. Moving on to its face, starting with doing
the outlining for the sides of its eyes, upper part of its big, a little bit of rougher texture. The lower half of its eyes. Circular eyeballs. This will be comparatively
less defined as compared to the portrait
of the bird that we. But if you want to make it resemble it like that,
you can do that, too. Adding the eyeballs
for the inside while leaving a little bit of white
piece for the highlights. Now for the beak, this is
going to be the upper portion. This will be visible
from the top. Make the outlines a little bit
more darker so that we can create a clear
distinction between different or separate
sections of the beak, the sides of the beak. The middle portion of the beak, this is going to be
the middle portion, extending it and connecting
it to the edge of the beak, making it a little bit more longer by extending
it in this manner. So this is the side of the beak, the front beak, or you can
see the top part of the beak. If you want, you can
add two more lines on the sides to sow the lower
portion of the beak, but it will do the work,
so I won't be adding it. Now continuing on with the
remaining portion, its body. So in here, I'm started
with the wings, a little bit of this kind of carbon lines for the
upper part of its body. As for the wings, we'll be creating rows and
rows of feeder. I just created a
small resemblance for the fether that we'll
be creating later on. And in here, this going over the outlines and making a
little bit more changes, I extended the side a little
bit by increasing the width, doing the outlining
for the lower portion of the wing like this. I have included the image. Doing the same thing
on the other side, the other side of the
wing that are visible. So since it's not
clearly visible, you can clearly
see the different image that I have provided. Here, too, we'll
be dividing into different sections and
creating lots of feather. Now for the tail feather, it's looking
comparatively thinned, so I'll be extending
it and increasing the width as well
as the number of the feather that
we'll be adding. For now, just do the outline. I'll be creating a total of six or seven feather in
here, larger feathers. The whole video is in real time, so you can always
follow along with me. And I have divided this
project into two sections. This is the first
section in here. We'll only be doing
the outlining and adding the
detailing for its free. And in the next section,
we'll be adding more finer details
for its wings, as well as doing the
coloring for the cheeks. And apart from that,
we'll also be using the blue color for now continuing on with the remaining section of the tail feather, as I was mentioning, increasing its width by adding
multiple feather. One more smaller feather in
here to increase its width. Once again, sorry, it's
not visible in here, but I'm just doing the
outlining for the lower half, the two portion of the
legs that we created. And now, it's just neck. Simple outlining with clean
normal lines like this. Do the outlining
for the wings, too. The small portion of the
wing that is visible. Now, extending it like this for this middle
section of the feet. Let's do the outlining for the eggs, put some of the eggs. I'll be increasing the
size a little bit. And you can also create the resemblance
of the broken eggs or a little bit of crack appearing on the
top of the eggs. You know, for the cheek in here, the smaller cheek, using small hatching lines to
the outlining for it. And this way, we are creating a little bit of fluffier
texture for the cheek, using the same kind
of guidelines that we have used so
far for its face, this kind of somewhat of
circular see for its eyes, and now extending it in
here for the small meat. Adding the eyeballs with
simple circular see. And for the remaining portion
of its body, once again, using the same kind of small hatching lines to
do the outlining, a little bit more
detailing like this for the small wings to add a
little bit of more texture, a little bit of more
small hatching lines. A small section of its eyes
on the other side is visible. So this is our
small little chick. Now, continuing on
doing the outlining for the remaining eggs
that we have created. One more egg in here,
just beside the check. Now, let's do the outlining
for the larger check, starting with its beak, a little bit larger weak as
compared to the smaller one. The same kind of
guidelines that we have used so far for the
faces of other bids. Simple circular
see for the eyes. And once again, I'm using small hatching
lines like this in this manner to create a little bit of fluffier
texture for our cheek. Small hatching lines
in this manner. Making it a little bit curvier the upper portion of its body. Small wing like this, a little bit curved and bends up like this for
the wing here too, I used bit of broken lines and small hatching lines to do
the outlining for the wing. Continuing on with
more hatching lines for the remaining
section of its body, the upper part of its leg, and a little bit of resemblance like this
for the tail feeder. One more egg in here. So only a small portion of its leg will be visible in here. The other leg,
what I mean to see the small portion of the
other leg will be visible. But for this leg, the front leg, it's visible like this. It's completely visible. The egg that lies
behind its leg, doing the outlining for the
other leg of our mother bod. Simple cylindrical
shape like this. A small disemblance for the
lower section of its feet. For this feet, the front wing, small section is
visible like this, creating the appearance
for the claw in this manner, the middle portion, small claw adhered to, and the other regions are
completely covered by the eggs. As for the background, or
you can see for the surface, I'll be creating small
appearance for the straws, simple plain lines like this to create the
appearance for the straws. Just add as many as you want. Instead of this,
if you want, you can keep it plain and simple. You don't have to add the straw. Follow along with me and treat
multiple straws like this. This is quite
simple. Create a lot of straws near the eggs, and as we move away from it, I'll be decreasing
its intensity. What I mean to say is that I'll be decreasing the
number of the straws. More straws on the other side. These are quite easy to create. You can create as
many as you want. You can completely fill
the entire section, the lower half with it. You can completely fiel
the entire section, the lower half with
multiple straws. I won't be doing it. I'll be focusing near the eggs
and then near the chicks. But if you want,
you can add more a little bit more detailing
for the larger chick. Now let's add a little
bit of detailing for the eggs to give it a
little bit of volume. I'm using a combination of hatching lines and a
little bit of cross hatching to give it a little bit more three dimensional s. Two. So the curves that are
present on the eggs, simple plain lines or you can
say I'm using combination of broken hatching lines and a little bit of
curved crosshatching, some simple circular seeds to sew more highlights
and detailing. The eggs that lies on the other side add
more lines to sew a little bit more darker
tone like this for this one, using comparatively
more lines like this, a little bit of cross hatching in here to make it more darker. Now for this egg, once again, combination of both cross
etching and hatching to give it a little bit more three
dimensional look and making it darker to add more
characteristics to the egg using this
kind of somewhat of cubicular see on top of the egg. The last egg in here, the
same kind of detailing. With these, we had
done with the eggs. I decided to create few
more straws simple lines like this in here to
create multiple straws. If you're satisfied
with your painting, you don't have to
add more straws. You want, you can add a
few more eggs or you can also add one more chick
on the left side, since we have got more
blank space there. Now moving back to its space, we are going to add a
little bit more detailing. So for this, in here, I'm continuing
with a tomboprspen for the upper part of its weak. More smaller hatching lines to make it a little
bit more denser. In here, mostly I'll
be using the scallops. So simple triangular saves for the scallops for
the entire region. I'll also be wearing the
sides of the scallops that we are greeting for
the upper part of its head. For the upper part in here, I'm keeping it somewhat uniform. For the sides of the eyes, we have got somewhat
smaller scallops surrounding its eyes and the
beak with a smaller scallop. And as we move away from it, I'll be increasing the size
of the scallops. More Icalop. As you can see, these are comparatively
larger. More callop. For the upper region, we are
going to completely cover it with multiple escalops
and for the lower region, we'll primarily focusing towards Sunegg and a little bit near the weak Me simple scallops like this on the sides. So you have got the rough idea, but we are going to
do the same kind of thing that we
have did so far. Apart from this, if you want, you can also use the hatching
lines to add more texture. You can also use
triangular seeds from the scallop instead of
this kind of curvy one. And in near, as you can see, I have increased the size of
the scallops a little bit, and mostly I'll be
focusing near the neck. I won't be adding that
much near it's me. But if you want to add more near it's B, you
can do that, too. More scallops in here. Adding few more smaller ones
in between the larger ones. Now, to add a little
bit more detailing, I'm just adding one or two
lines in between the scallops, the middle section.
This is optional. If you're satisfied with it,
you don't have to use it. You can also do a little
bit of sading that I showed you in the earlier
demonstration video. You can use the breast pain. You can use the Sakura
micron to create smaller strokes and do a
little bit of seeding. But mostly in here,
I'll only be using the Tombos breast paint to
add the texture like this. And later on in
the next section, we'll be using a little
bit of blue to add a little bit of more coloring
for some of the feeders. Using broken lines to add a little bit more
texture for its eyeball. Using a little bit of
broken curve lines to add a little bit more detailing
for the region near its eye. And as for the
beak, I'll be using broken hatching lines and cross hatching to add a little bit of detailing and to sew
the sides and to create a little bit of
clear distinction between the top and
the sides of the beak, two or three simple broken lines to do the cross hatching. The whole upper section in here, I'll be doing a little
bit of seeding. So first row of the hatching
lines, the second row. And one more row in here, making it quite darker. Third in the final
round like this. For the upper part,
small hatching lines in here for the
upper part of its eyes, doing the same thing
on the other side. And yeah, so these are the
simple detailing for its fee. If you want to add a little bit more detailing the projectile, like the portrait of the
bird, you can do that. More detailing for its meat, making it quite darker. So these are all
optional detailing. If you're satisfied
with your project, you don't have to do this. And I'll only be covering
up to here in this part. I'll be seeing you
in the next part.
15. Coloring Chicks: Continuing on where we left top. And here we are going to
create more scallops in here for the upper part of its
wing just beside its neck, somewhat of curved
scallops like this. Apart from this, if
you want, you can create a few more smaller
one in between it. In here, I decided to add
a little bit of detailing for the scallops in form of this kind of small
hatching lines. For the upper part
of the scallops, adding this kind of
small hatching lines. As for the lower part, we'll be dividing into two
section by simply adding a single line in the middle like this.
These are all optional. If you want to keep it plain and simple, you don't
have to do this. Later on, I'll be adding
blue on top of it. A now moving on to
the tail feeder. So in here for the lower
portion of the tail feeder, we'll be doing a little bit of hatching and making that
section bent darker like this. So simple plain normal
hatching like this. For some of the smaller ones, I'll be doing the hatching like this for the
upper part two. But for the larger
feathers in here, we'll be using the angle hatching lines on
both the sides. What I mean is this dividing the feather into two section, and on both the sides, we'll be doing the hatching like this. So angled lines like
this on both the side to create this kind of foot
tag for the larger feeder. Apart from this, if you want, you can create other kind
of detailing for the feeder that we have practiced
in demonstration video, making the regions lower
regions a bit more darker, dividing into two
sections and using the angle hatching lines for the detailing
for the feather. Apart from this, later on, I'll be adding
blue on top of it. Now, for the feather in here, the same thing, a little bit of shading using the
hatching lines. And in here, for the feathers, we'll be adding a little
bit more lines on the right side as
compared to the left, since the middle portion
lies in here like this. Continuing on with adding more hatching lines like
this in this manner. As you can see for the feed
that's on the right side, I'm not adding it on both sides since a small portion of the feather is covered
by the larger one. That's why I primarily
added it on the right side. In here, I was not able
to record this section, but I added multiple scallops in this manner for the wings. Very simple and easy
scallops in this manner. So I've created a total
of three rows of scallop. Now continuing on with
the lower section of the wing with larger
scallops like this. The other side of the wings, using hatching lines to do a little bit of sating
in this manner. So for the upper and the
lower part of the wings, use hatching lines like this. For the curve section, use curve hatching
lines to do the sading. To get a little bit
of thinner line, you can always use
the ballpoint paint or the Sakura micron fine liner. I'm not going to do the hatching
for the entire section. I'll be leaving some
of those pieces plain and simple with white. We are going to do
the same thing in here for the lower
section of the wing. We'll be doing the seeding using the hatching lines for the
upper and the lower part. As for the middle section, we'll be completely
leaving it as it is, and later on, we'll
be adding blue on top of it in
between the blacks. Now doing the hatching lines
for the lower section. Doing the seeding using
the hatching lines, a little bit more detailing for the side with
more hatching lines. Now put the upper
part of the wings. We are going to
make the outlines a little bit more darker. Adding another line in
here like this to make the scallops a little bit more distinct and a bit more
separate from each other. I'm also trying to
leave a little bit of empty species empty
whitey species like this. Now, in here, once again, we'll be doing the hatching. So two or three rows
of hatching like this and using the hatchings to do
a little bit of sading too. I'm also leaving a little bit of empty spaces in between the
rows of hatching lines. Later on, we'll be
adding blues in there. Doing the same thing
for the third row of the scallops that
we have in here. For the remaining two rows, I'll be leaving a little bit
of white ties in between the scallops to create
a clear distinction. So I'm not able to
clearly explain it, but when we'll be
doing the detailing for the two rows
of the scallops, I'll be explaining it a
little bit more better. More hatching lines
while leaving a little bit of empty
spaces in between. And with these, we had
done with the third row. Add a little bit more
blacks in between the scallops like this
to make it quite darker. Now for the second row, as I was mentioning, try to create a little bit
of clear distinction. So leaving a little
bit of white is piece in between the
scallops like this. We'll be leaving it as it
is simple and plain white. And for the insides
of the scallops, we'll be doing the same kind of thing that we did
for the third row. We'll be creating
two or three rows of hatching while
leaving a little bit of white piece in between. Using hatching line
to do a little bit of seeding while leaving a
little bit of white space. Apart from this, if you want, you can always use the fine
liner or the ballpoint tin to make it a little bit more
thinner a bit more lighter. Continuing on with the
remaining scallops that we have created for the feather
in here for the wing. As for some of the smaller
scallops that we have created, I won't be leaving
empty species in there. Mostly, I'll be covering it completely with the
black like this. Continuing on with
the larger one while leaving a little bit of
white species in between. And as I mentioned,
for the smaller ones, you can just completely
cover it with the black. Covering it completely with
the black in this manner. We have got two
more smaller rows of the scallops in here. Mostly we'll be covering
it with the black. But for the larger ones
like this in here, starting with doing
the outlining in this manner while leaving a
little bit of white space. In here, I'll only be
doing the hatching. So I won't be leaving that
much of empty spaces. Simple and plain hatching line this making the lower
region quite darker, whereas the upper
region bit lighter. Later on, we'll be feeling it
with the blue, but for now, just do the simple
and plain hatching like this in this manner. I saw the smaller scallops, completely filling it with the black hatching lines
in this manner. The smaller rows of the scallops
that we created in here, carefully filling it with
the black like this. Now for the empty
spices in here, we'll be doing hatching and
a little bit of shading. We'll be making
the upper region a bit more darker for doing that. I'm extending the sizes a little bit using
somewhat of broken lines, a little bit of
curve broken line. And as for the upper
part, a little bit of shading using
the hatching lines to create a clear separation in between the upper part and
the lower part of the wings. And with these, we are
done with the wings. For the remaining section, it's just in the stomach. Mostly in here for this
region, the chest, we are going to do rows
and rows of the hatching. I'm not going to do the
sanding, but if you want, you can make some of the
regions a bit more darker, especially near the wings
and near the upper part. For the leg, once again, using the hatching lines in here for
the lower part of stomach, following the curved
sip of its body and adding the hatching
lines in this manner. We are making the lower
region bit more darker, and as we progress we are
making it quite lighter. More hatching for the leg, the upper part of the leg. As for the remaining section in between the stomach
and the neck, we'll be doing two or three more rows of
the hatching lines, moving into the second
one, second leg, and doing the same thing, hatching, making it
a bit more darker. Now continuing on
with its stomach, two or three more rows of
hatching lines in this manner, following the curved
shape of its body. Also the sizes of
the hatching lines, you don't have to create
all the lines larger. Use the combination of both
smaller and larger line to add more
characteristics to it. Using small hatching lines in this manner for the upper
part near the chest. Now for the wing
on the other side, I'm not going to
add any detailing. I'll mostly be doing
the hatching lines. I'll be making the lower
regions quite darker, comparatively darker, and
for the upper regions, I'll be making it a
little bit lighter by using simple
curved hatching lines like this in this manner. Just rows and rows up
the hatching lines. And as we are progressing, we are increasing the spacing
in between the lines, thus making it quite lighter,
comparatively lighter. Make the upper
region a little bit darker by adding more lines. And with this, we had done with the side wing for the middle and the lower
portion of the leg, I'm not going to
add that much of detailing simple and plain
curved lines like this, a little bit of
straight lines in here. And with this, we are
done with our bird. And with these, we are done
with the black fur our bird. Now going in with
the blue fine liner. I'm going to cover most of the lower part of
its beak with the blue You can just follow the seep of the
curved section and add the rows and rows of hatching lines in this
manner to color the beak. I'm going to make
it quite darker. So if required, I'll also be doing a little
bit of cross hatching. The main goal for
me in here is to do the coloring for the lower
section of the beak. But if you want to
do the coloring for the remaining section
to the upper part, you can do that, too. Continue on with creating more rows of hatching
lines to make it darker. Oh another layer of hatching lines to
make it more darker, extending the lines
a little bit. Now for the leg, once again, we are going to add
rows and rows of hatching lines to do the
coloring for our leg, the lower section of its leg, following the seep and doing the hatching lines for the
padded region of the foot, adding rows and rows
of hatching lines to do the coloring
in this manner. The other leg in
here, For the cheek, too, adding the coloring
for its beak and the face. A small portion of
it was not covered, so adding the blue in here, the larger cheek, filling the entire section of its beak
and the mouth with a blue. Adding the coloring for
it feet with the blue. A small section of the feet is visible like this
on the other side, making it a little
bit more darker near the curved section by adding a little bit of curvy
lines like this. Make it more darker by adding more lines for the lower
section like this. If you want, you can also add a little bit of coloring
for the eggs with the blue. I'm going to add the blue
in between the blacks. We are just going to completely
cover the white with the blue like this using
the hatching lines. For most of the
section, I did not add the color where
the white is visible. We are going to cover
it in this manner. As I mentioned, for
most of the section, I'm not going to cover the
entire section with the bloom. I'll also be leaving
a little bit of white spaces in between
the blues and the black. Do the coloring in any
manner as you see fit. And if you don't want
to use the blue, you can just leave it as it is simple and plain
monochrome painting for the mother bid for the
lower section of the wings, completely feeling it the bloom. Now, continuing on with the
scallops that we created, using the hatching lines to
feel the blue in this manner. Apart from the wings, we'll also be doing the
coloring for the tail fither the upper
part of the wings we created somewhat of
larger scallops. I'll also be using a
little bit of blue for the scallops that we
created near it space. And also, I'll be using a little bit of blue for
the other side of the wing for now continuing on with the remaining white
section that we have created in here in between
the black hatching lines. If you want you can
also use the blue for the outlines that we
created with the black, the white spaces in between. For the larger scallops in here, completely feeling
it, the lower section of the scallops with a blue. Doing it for all the
scallops in here. Just overlay this blue on top of the black and cover the
white in this manner. To make some of the
section a bit more darker, you can just add more rows
of them blues on top of it. Now, in here for the wing, I'm not going to cover
the entire section. I'll be leaving a little bit
of white pieces in here. Right now, I'm just
overlaying a little bit of blue on top of the black
for the lower section. Now doing the same thing
for the upper section, overlaying a little
bit of blue on top of the black that
we used earlier, while leaving a little bit
of white pieces in between the two rows of the blues
that we are using in here. And with these, we are
mostly done with this wing. Now for the tail feather, overlaying a little bit of blue on top of the black like this. So I'm not going to add the
blues for the whites pieces. Mostly I'm overlaying
this blue on top of the black that
we used earlier. And mostly I'll only be using the blue
for the larger one. For the smaller ones, I'll only be adding a
little bit of blue, comparatively less blue
like this in this manner. If you want to cover
the entire section with the blue, you
can do that, too. Or you can just keep it plain and simple without any blue. For the lower section, I won't be adding
that much of blue, but if you want, you
can also do that. And as I was mentioning,
for the scallop, for the lower regions
of the scallops, a little bit of blue, a
little bit of blue like this. You can just add three or
four lines or you can do a little bit of seeding for the larger scallops
using the blue. Once again, I would like to
remind you this is optional. If you don't want to
do this, you can just keep it plain and simple
with the black only. All the larger scallops,
I'm going to do this. For the smaller ones, I
won't be adding any blue. As for the chase, the neck and the lower portion
of its stomach, I won't be adding any blues, but if you want, you can use
a little bit of seeding. If you want, you can do a
little bit of shading using the cross hatching
lines and add it in between the black hatching
lines that we did earlier. A little bit of
more detailing for the cheeks with the
blue for the wings, using small hatching
lines in this manner. A little bit for the lower
section of its face. Doing the same thing
for the smaller check in here for its wings. And with this, we are done with the scallops for its face, using the yellow
colored ballpoint pink to add the
oring for the eyes, adding the yellows
for the mother bond. And yeah, with this, we are done with the yellow. If you want, you can
use the yellow for the eggs or the straws. But I'm satisfied with it, how this pointing turned out, the Garcin of the nest. This was somewhat
different and difficult as compared to the other project that we have covered so far. I hope you enjoyed
painting this, and I'll be seeing you
in the next video.
16. Blue Ripples : Welcome to the final
project blue ripples. This is one of the longest and the most detailed
project of this class. Once again, we are starting
with the simple sketch to draw the guidelines
for the bird's body, circular C for its head. Now, cylindrical C for
the neck of our Bird. Making it a little bit curvier extending it a little bit now for its chest
and the stomach. A little bit of semicircular
see in this manner. As for its steel fen, a little bit of curved
triangular sein. Instead of it, if you
want, you can also create I see for its
body and then later on, add more detailings
For this project, both of its fether will be open. This follow along with me. Feen in the front will be a little bit softer as compared to the fether
on the other side. Sketching the guideline for the feather on the other side. So mostly I'll only be
creating the outline for the one side for the
other side of the wing, we'll be creating
numerous small feathers. Making a little
bit of adjustment to the lower part of its body. You don't have to stick
with the same outlines and the guidelines that I am creating feel free
to make changes in adjustment as you see fit. Now for its legbt of
curve shape like this. And the other leg, triangular and cylindrical set like this, simple triangular
set for its beak. So this is going to a simple
pencil skis for our word. Adding a little bit of
more detailing for it. Making wings a little
bit more detail. In here, I'll be
creating three or four different rows of
feather for the wing. I'll also be changing
the orientations of the feather as well as wearing
its seeps and the siges. This is just a rough
demonstration of how I'll be creating different rows and
rows of feather for our wing. We'll be doing the same
thing for this side, rows and rows of feather. I'll be wearing the seeps in
the side for this one, too. Now, a little bit more
detailing on its head. The beak that we have put in
here does not look natural. Hanging a seep a little bit and extending it a little
bit in this manner. A little bit more
adjustment in here. Creating the lower
part of the peak, a little bit curvier
see for its e, making a bit of more
changes in here, extending it for the
remaining section Simple circular sin for the eye. And with this, we attend
with a simple pencil sketch. Now going in with the Tomos breast pain to do the outlining. You don't have to use
the Thomas breast pin. You can always use
the fine line or the simple normal
ballpoint paint to do the outlining and
add more detailing. Dividing the beak into upper
and the lower section, making it a little bit
curvier for the bottom part. Simple circular O C for the eye. Now, for its head and the neck, if you want to create
a bit rougher taxa, you can use small
broken lines so you can create a peians of feather with different kind
of small scalings like this. Simple outlining in this
manner on its neck. Now, let's do the
outline for its wing, starting with a
wing at the front. As I have already mentioned, you don't have to stick with the outlines that you have created. You don't have to
stick with the pencil sketch that you have created. Feel free to make changes
in adjustment as required. Doing the outlining for the
wing on the other side. Right now, I'm only doing the
outlining on the left side. For the right side,
we'll be creating numerous small projections
for the feather. Simple outlining in this manner for the upper part of the wing, the wing on the other side. Now, let's divide the wings
into different section, and then we'll be creating multiple small feathers
and larger ones. Let me show you how I'll be
creating simple feathers. So just rows and rows of
this kind of scaling lines. A bit curved scaling structures like this for the feather. So using scaling
technique in here in this manner to create
the appearance of small feather like
we have already created in the same manner that we have created
the other wings. Now, for this
second row in here, making it a little bit larger, you can also vary the
thickness and the length, as well as the seep in the
sizes of the scaling that we are creating in here since this part is a little
bit bent in here. So I change the direction a
little bit for that section. And depending upon the region that we are creating
the scalings, I'll be wearing the sizes. As you can see in here, I made the sizes a
little bit smaller. But in here, I'll be
creating larger feathers. Quite larger feather
in this manner, start with creating
the outlining for the upper part
of the feather and then we'll be
extending it and doing the outlining for the
remaining section. Making it a little bit
triangular in the upper part, extending the lines
in this manner for the remaining
feathers in here, the upper part of this wing. I'll be dividing the
feather into two sections and then then we'll be adding a little bit
more detailing. As for the section in which
we did not add ifeen, we'll be adding it later on. Quite smaller feathers. But for now, let's do somewhat of same thing for this feather, the feather in the front, not the feather, the
wing in the front. Small projections like
this for the scaling, a little bit of outlining
for the upper part. Now, in here, I'll be creating two or three rows of
feather for this swing. In here, too, we'll be changing the direction a little bit. Starting with simple curved
structure like this. Now extending it a little bit to create a little bit
of rougher texture, the rougher version
of the scaling. We are trying to make it look a little bit complicated
and bit compact, adding this adding the
feather in this manner. The second layer of
the feather in here, a little bit of refined and bit uniform scaling in
here for the feather. In here, we'll be
changing the directions of the feather a little bit. So this place, the lower part will be a little bit complex. Doing the same thing,
creating large lines, creating long lines for
the larger feathers. As you can see,
I'm also changing the angle of the
lines a little bit. For the upper part, we have
a little bit skewed angle, and as we move downward, we are changing the direction
of the angle a little bit. Now, doing the outlining for the remaining
section of the feather, making it a little bit of
curved rinlar see like this. Doing the same thing
for the remaining smaller feathers in here, making it a little bit
sharp in this form. Now, in here, as
I was mentioning, changing the direction
a little bit. A bit larger feed that's in
here, another row feather. Now for the tail fen, right now, I'm just doing
the simple outlining. Later on, we'll be
making a little bit of adjustment and add
more detailings to it. Doing the outlining for the
lower half of its body, making it a little bit more
curvier for its stomach, the other side of its tail fan. Now for its tail fen, starting with the
simpleort lines. This will be the largest
tail feeder in here, on both sides,
we'll be decreasing the sides of the tail feeder
a little bit in this manner. Adding one more on
the other side, making it quite smaller,
comparatively smaller. This is a simple outlining for our tail either for
our bird and fan, doing the outlining
for its legs, making it a little
bit more rougher. So small hatching
lines in this manner, doing the same thing
for this side. For the webbed feet
and the upper part. Simple saves like this, simple rittle seep like
this in this manner, for the middle part of its leg and fine knee
creating the web feet. Creating small projections
like this to create the resemblance for the claws, now creating the entire
section for its scraped feet. And with this, we
turn with this one, doing the same thing
for the other one, dividing into four
different sections and then we'll be
connecting it all together. So connecting it in this manner. And with these we turn with a simple outlining for our bone. In here, I'm creating
resemblance of small water toplets And
just below its leg, I'll be creating ripple effat. It's not visible in here, but I have included the picture. As you can see, I created simple wavelike pattern using simple curved lines
in this manner. This is optimal. You can just
keep it plain and simple. Creating the eyeball
for our bird. And with this, we are
done with the base now a little bit of
detailing for its head. Is that the ink has dried up and lightly erase
the pencil mass. For this project, we'll be adding lots and
lots of detailing. This is going to
be comparatively darker than the other
projects we have created. And for the finer
and smaller details, I'll only be using the
Sakura micron fine liner. Removing the eryths dust. Continuing on once again with the wings, the wing on the side. Here I'll be creating
one or two rows of feeder, small feather, extending the lines
in this manner to create the resemblance of another row of the feather
in here for the wing. I have also changed
the direction a little bit for the
upper part we have. For the upper part, we had
different kind of angle, and in here, we have
changed the angle. In here, once again,
extending the lines a little bit and making the edges
a little bit curved. Liter on will be connecting it, but for now just extend the
lines in this manner to make it a little bit more
compact and bit more dense. Right now, I'm continuing with the breastbin but for the
minute and smaller details, I'll be using the Sakura
micron fine liner, doing the same thing
on the other side. Now in here, starting with
small hatching lines to create a clear separation
in between the two wings. In here, I'll be
keeping this region, the region in between
the two wings, quite simple and plain. I won't be adding any
detailing for that. I'll be keeping it
plain and normal white. More tiny projections like this, small hatching line
in this manner to make it a bit more denser. If required, we'll be
converting it to scalings, but for now, just
continue with this. Moving on to the beak, adding
a little bit of detailing for the beak in the form of small hatching lines like this, the kind of hatching lines that we use for the other projects, making the region just beside its eyeballs and
a little bit for the lower section of the
beak and the other end of the beak bit more darker
with more hatching lines. Now moving on to its head, rows and rows of
hatching lines in here, I'll only using
the hatching line. If you want, you can
always use the scaling, different kind of
scalings to add the detailing and
texture for its head. A little bit of scaling in this manner,
triangular scaling. Feel free to experiment
on your own and try different scaling manner to add the detailing for the head. As usual, we'll be making
some of the sections quite darker by adding more lines
or more scalings there. And for the regions where we want to keep it a bit lighter, we will be increasing the spacing and adding
less lines there. Sorry, this region
is not visible, but you have got the
rough idea how you have created all the
projects earlier. So I'm doing the same thing
in here for the lower part, the chest and the
stomach of this bird. Just below the wing, a little bit of
detailing in the form of cross hatching and bit of
curved hatching lines, as you can see in
the picture in here. Lots and lots of hatching lines, a little bit curved
hatching lines to make those region bit more darker
as you can see in here. A little bit more
detailing for the neck. Adding more detailings
for the lower part, more hatching lines
in this manner. Now, the region just below
its springs, once again, using a little bit of
curve hatching lines to make this region
a bit more darker, rows and rows of hatching
lines in this manner. And we have decreased this
piecing in between the lines and using the hatching lines to do a little bit
of shading cube. So the goal in here is to
make the regions bit darker. As you can see, I use curved hatching lines in this
manner for the lower half, following the curved
shape of the body and adding the hatching
lines in this manner. Now for the legs, once again, rows and s of the
hatching lines to make it quite darker and to create a little bit
of rougher texture, a little bit of heather
like appearance. At the hatching lines in
the same manner that we have used so far for
our earlier projects. We'll be making
this region darker. So more hatching
lines in this manner. Also, this angu starting with a little bit of
scaling lines and then we'll be surrounding the
scaling lines with lots of hatching lines and making
this region quite darker. Small hatching lines
in this manner, and I'm not completely covering the scaling line that
we used earlier. Surrounding it in this manner. In here, I'll be
creating somewhat of curve triangular same with lots and lots of hatching
lines surrounding the scaling structures
that we have created. More hatching lines
in this manner. In here, the other side,
more scaling lines. If required, I'll
be adding more, but for now, moving
back to the leg, a bit of hatching lines for
the upper and the lower part, a little bit of detailing in the form of curved line
for the webbed feet, more detailing with more lines. Making the lower part of
the beak a bit more darker. Me hatching lines,
small hatching lines to make some of the
sections a bit more darker. Now, as I was mentioning
that we'll be making a little bit of changes
in adjustment in here. So in here, I'm
making the lower part of the lines a bit more darker. Just increasing the weight
of the lines in this manner. Doing the same for
the remaining lines that we have created
on this side. So by doing this, we are
making this section a bit more darker and by doing it, we'll be making it a bit more clear and a bit
more distinct from the other rows of
the feather that we'll be adding or
creating later on, more hatching lines
at the lower section. Converting all
this into scaling, creating this kind of curved
set for the upper part. And on top of it, we are creating more
scalings like this, rows and rows of scaling
to make this region quite compact and a bit
more darker, not darker, but increasing the volume and
making it a little bit more compact by sewing the
resemblance here that here, we have gotten lots
of small feathers, compact feather,
more hatching lines, more curved scalings
in this manner. For another row of the feather in here,
doing the same thing, making the edges a
little bit more curvier, the upper part bit more
curvier in this manner. Now in here too, connecting the two scaling lines
that we have created. In here, I will
decrease the spacing in between the lines to make it more compact comparatively more compact than the wings
on the other side. This is going to be the
first part of this project. I have divided into two
section, and then here, I'll mostly be covering
up to here and a little bit of more detailing for some section of the feeder. But in the next section, we'll be adding the final detailing and add and use mostly the
Sakura micron fine liner. In here, I'm just adding
more small hatching lines for the section where we change the direction of the feeders. Now as for the tail feather, we'll be dividing
some of the tail feed into sections or otherwise, mostly we'll be using the angle hatching lines to make it quite darker to create the resemblance of different section
present in the feather. For now, just create
this kind of bit curve hatching lines to divide
into different sections. And yeah, that's all for
this section of the project. I'll be seeing you in
the next one. Good
17. Minute Details : Welcome to the second
part, continuing on where we left top. In here, we'll be mostly
adding more details. Right now, I'm continuing
on with the Tombos breastpin and we are adding additional line
for the scallops. Adding simple curved line a little bit curve line like
this inside the scallops, dividing into two
different sections. We are also going
to make the we are also going to make it a little bit more
thicker like this. So the upper portion
of the scallops, making it quite thicker
in this manner. These are the scallops,
not the scaling earlier in the earlier video, I just mispronounced
it as the scaling. I did the same mistake for
the wings and the feather. We have got feather
inside the wings, not the other way around. We are done with the first wing, doing the same thing
for the second wing, making the outlines a little bit more thicker and
a bit more darker, as well as adding a middle line inside the scallops
for the feathers. After doing this,
I'll be going in with a fine line sagura
micron fine line, and do a little bit of
seeding as well as hatching. For now, just continuing
on with making the outlines a bit more
crisper and a bit more clear, as well as add the middle
lines in this manner. Apart from this, as you can see, I'm also making the second
row of the scallops a bit more darker by adding
more black in this manner. And with these, we are done
with a raspin for now, going in the Sakura
micron fine liner for the larger feather that
we have created in here, adding the hatching
lines in this manner, particularly only on
one side like this. If you want, you can add
it on both the side, but I decided to only use it for one side so that the other side will remain
a little bit whiter. And apart from
that, I'll also be adding a little bit
of black and to the seating using
the hatching lines for the tips of the scallops
that we have created. For some of the sections, the upper section,
as you can see, I'm also doing a
little bit of shading using the fine liner.
This is optional too. If you don't want, you can just leave it clean and simple and only and only do the
hatching on one side. The tips, doing a little bit of sading using the
hatching lines, making it quite darker
to recapitulate it for each individual scallops that we have
created in here, we'll be doing a little
bit of sading for the tip. For now, for the second
row of the scallops, using simple hatching lines and doing the seeding
in this manner. You have to apply a little
bit of light preset towards the end to make it
quite lighter in this manner. So for all the rows and rows of scallops that we have created for the feather on the wing, we are going to do the seeding. Moving back to the scallops in here, doing the same thing, a little bit of hatching
lines on one side, for the other side,
we have got sding. As for the tip to, we'll
be doing a little bit of sading making it quite
darker in that manner. Let's do the same thing
for the remaining feathers or the remaining scallops
in here on the side. Extending the sins of the
seedings a little bit more in this manner for the upper wings or the upper feathers in here. Now continuing on with
the remaining one, we have got four
or five in here. Since these are quite smaller, I'll mostly be using
the hatching lines or a little bit of seeding. I'm not going to make it that much detail as the upper ones. I'm using the tissue
paper underneath my palm to avoid the smudging
of the ink by my palm, continuing on with the
remaining smaller scallops. A little bit of hatching and a combination of hatching and sading for the
remaining one. Since this region
is quite smaller, completely filling it with
hatching lines in this manner, and with these, we are
done with a larger one. Now for the smaller scallops, only doing the seeding using the hatching lines to decrease the preacher
and change the angle to get this kind of bit
lighter seeds of the black. Now for the third row, we are going to do
the same thing. Make it quite darker
near the other scallops and as you move away,
decrease the intensity. Doing the same thing
for the remaining one. Moving on to the scallops, bit more curvier
scallops on the sides, just completely filling
it with the sding lines. As you can see, in here, I am maintaining the pacing, and I have decreased
the intensity. So with reduced presser and
the angled lines in here, I've created a little
bit of lighter son of the sading For the smaller
scallops that we have in here, I won't be doing I won't be
adding any detailing for it. But for this one, the fourth layer the fourth row of the scallops, doing
the same thing, a little bit of shading
using the hatching lines while leaving a little bit
of white piece in between, doing the same thing in here
for the remaining section, using the hatching lines to
do the sading in this manner. And with these, we are
done with our first wing, we are going to do somewhat of the same thing for
the second wing. Making the outline
a little bit more distinct and a little
bit more uniform. So using the fine line to make the outline
in this manner. Now for the heather,
the scallops that we created for the heather. We are going to do
the same thing, hatching lines on one side, a little bit of
sating on the top, as well as one side of
the heather that we have. Once again, this process is
going to take a little bit of time since we are creating
lots of minute detailing. For this wing, I decided to do the hatching first and then
we'll be doing the seeding. For one side of the
feather or the scallops, we are going to do the
hatching and then we'll be coming back and do the seeding
using the hatching lines. For this one, I forgot
to add the middle line. For the smaller ones, I did
not add the middle line, so I'm going to add the middle line and then
do the rest of the thing. Creating the middle line and then adding the
hatching lines in this manner for the
smaller scallops that we have at the bottom. Now we are going to do the
seeding on both sides, the upper side, as
well as the tip. For this project,
I'll only adding the blue for its beak
and for its leg, as well as a little bit
of blue for the water. I won't be using it for
the wings on the feather. If you want to use
that, you can do that. You can use the blue
and do the same kind of seeding that we did
for our earlier project. For now, we are continuing on doing the seeding for
the larger scallops on the feeder, adding
it for the tip. This project is one of my
favorite from this class. Let me know which
one was your and how much time it took you to create this one and the other one. Continuing on with doing the seeding for the
remaining feathers. For some of the smallest ones, I'll be completely filling
it with the seeding. Now we have got three
or four more in here, so just reducing the
intensity of the ink and completely filling it
with the seeding lines. And this is the last
one. With this, we are done with
the first row of the scallops for the feather. Now for the second one, we are going to do the same thing. Doing the seeding in here in this manner while living a
little bit of white species. This white species adds a lot of characteristics
as well as create a clear distinction and
create a clear distinction between the different rows of the scallops that we have
created for the feather. Continuing on with
the remaining five or six scallops that
we have in here. In here, we have
got few larger one, doing a seating for the tip of the scallops for
the larger ones. And with these, we are
done with this one. Now for the scallops in here, I decided to make it a
little bit different. So for each alternative
scallops that we have in here, I'm using this kind of
straight hatching lines and completely filling it
with it. This is optional. Instead of this, if you want, you can do the normal sading that we did for
the earlier wing. Now in here, we have
got quite a lot of scallops with
different direction. So using a combination of both hatching lines
and the sading for the scallops that we have in here for the scallops in here, the first row, a little bit of sading now doing the
seeding on the other side, the tip of the scallops. And with these, we are mostly
done with the front feeder. If you want to add a
little bit more detail, feel free to do that. Moving on to the
head of our bird, a little bit of hatching. So in here, I have reduced the intensity of the ink
to make it quite lighter. A little bit of sading for
some sections of the neck. The upper section of
the ks like this, doing the same
thing for the beak, particularly on the edge, making it quite darker, making it quite darker with a little bit of sading
in this manner. Now, this region was
looking quite lighter, so I decided to do
a little bit more sading and with these, we are mostly done
with the two wings. Now for the tail feeder in here, I'm just going to
do a little bit of seeding as well as a
little bit of hatching. For the upper and
the lower part, we did a little bit of sading
and for the middle section, we did the hatching lines. For the tail feeder in here, for each individual feeder, I'm going to do a
little bit of sading on the sides like this
in this manner. As you can see, I have reduced
the intensity of the ink to the earlier outlines that we did with the tombosbstbin, so it remain visible. That's why I have reduced
the intensity to make the sading lines quite
lighter, completively lighter. Do the same thing for
the remaining feather that we have created in here, make the upper and
the lower regions quite darker by
doing the seeding. And as for the sides, use a little bit of seeding
or the hatching lines and overlay it on top of
the earlier lines that we created with
the tombos bras pane. If you want, you can also leave a little bit of white spaces in between the lines
that we created earlier with the
Tombs breast pane. Feel free to experiment
on your own and add more characteristics
where brasnel touches to it. And with these, we are mostly
done with a tail either. For this region, making
it quite darker, a little bit more sading in here in between the smaller scallops. I'm not going to make
it completely darker, a little bit of sading to
make it comparatively darker. This region too a
little bit beside the tail fether making this region just below
the wings quite darker, doing the same thing
for this region, just above its leg. More seeding to make this
region quite darker. For the sections where we
added more hatching lines, make it quite darker by doing
a little bit of seeding. You can also use simple hatching
lines to make it darker, add rows and rows of
the hatching lines. The other foot, making
the upper region darker. Put this section of the neck, making it more darker by
doing a little bit of sading. The chest a little bit
more hatching lines. So we are adding more
hatching lines to add a little bit more
characteristics and add a little bit more
detailing in this manner. If you are satisfied
with your project, you don't have to do it. For the wings, too, I decided
to make it more darker, so a little bit more
sading in this manner. And in here, the white
spaces that I left earlier, I decided to do the
sading in here. So instead of using the
vertical lines in here, I'm using horizontal
line to do the sading. So we have got alternative
vertical and horizontal lines in here for this
section of the wing. So mostly we are done
with the upper part. Now for this section of the
feet, the padded region, a little bit of sading
in this manner to make the curved regions
a bit more darker, doing the same thing
for this region. Now, moving on to the second
feet, doing the same thing. Also making the droplets of the water that we have created
a little bit darker wide, doing a little bit of
sdingF other droplets on this side, do the same thing. If you want, you can also add
a little bit of sading for the ripples that we have
created in this manner. I decided to extend it a
little bit for some of the section of the ripples
that I have created, as well as doing a little bit of seeding and using
broken nines or cross hatching or hatching to make it a little
bit more detailed. Once again, I would like to
remind you this is optional. If you're satisfied
with your water, you don't have to do this. Once again, I'm using
the tissue paper to avoid smudging of the ink, a little bit of more seating
for this region of the wing. And with these, we are
done with the black. Finally, going with the blue
sakura micron fine liner, and as I mentioned, I'm going to feel
the entire region of its beak and the leg and a little bit of the
water with the blue. So rows and rows
of hatching lines in here to do the
coloring for the beak. Adding it carefully
near its eyes, following the curve sweep
over this eyeball in here and adding the
blue in that manner. Now another layer of the
blue to make it more darker. And with these, we are
done with the beak. Now for the leg, we are
going to do the same thing, falling the seep and
adding the color in here for this
cylindrical region. Now for this region,
once again in here, I'm using somewhat of vertical
lines to do the coloring. For the pattern regions, I'll be using somewhat
of curved lines to add a little bit more
characteristics to it and to change
the direction, doing the same
thing for this leg. Using somewhat of vertical
lines to do their coloring. Now for the curve portion
of the padded fit, using curved lines to do their
coloring in this manner. I was not able to
record a small section, but I did the coloring
in this manner, as well as I added the coloring for some of the water droplet. I overlaid a little
bit of blue on top of the black and added the
coloring in that manner. And for the water ripples
that we have created, a little bit of seeding using the blue. These are optional. If you want, you can cover the entire section with the blue. I'm only going to add a
little bit of blue and doing the seeding on the sides of the ripples that
we have created. More seeding with the
blue in this manner for the water ripples
that we have created. Here, as you can see, I have decreased
the intensity of the lines to get a little
bit of lighter tone of the blue extending the blue in here for the water droplets. For this section to a little bit of shading in this manner, adding more blue in here, overlaying a little bit of
blue on top of the black, extending the blues a little bit more for the water
droplets on this side. If you want, you
can add few more water droplets using the black. And yeah, with these, we are mostly done with this region. Add more blue wherever
you think it's required. I decided to make the beak
a little bit more darker. So this is our third layer
of the blue for the beak. And with this, we are done
with our flying bird. I hope you enjoyed
painting this. This is one of the
most detailed and most time consuming project
of this class. I had a lot of fun
painting this, and this is our final project. So I'll be seeing you
in the next video. M.
18. Conclusion And Thanks : Congratulations on completing
this blue footed words a seven day ink and pen
illustration challenge. Over the seven days, you have explored different
ink techniques, improved your line
work, and created a beautiful collection
of word illustrations. More importantly, you have built consistency and confidence
in your drawing process. I hope this class inspired you
to keep experimenting with ink and breast pain and to
continue creating regularly. If you enjoyed this class, please here your project. E will review and follow
me for more classes. Thank you for joining me, and I'll be seeing you
in the next one.
 Vishal Munshi