Transcripts
1. Into: Have you ever had a model you're super happy
with in Blender, but then you get completely lost in the texturing process? Well, that's okay. It's
a complicated process. And in this class,
we're going to look at building
your confidence in your texturing skill
set. So it off. I'm Southern hotty,
and in this class, we're going to walk
you through the basics of texturing and Blender. We'll be going through
the process of how to UV Unwrapping model and use tools like
Node Wrangler. We'll also look at PBR textures
and how to apply them. After that, we'll
demystify some of the most commonly used
Shader Nodes and then use those same notes to create a procedural material
entirely within Blender. And finally, we're
going to go through the texturing tools
themselves and how you can paint textures
onto your objects. Now, this class is
intended to take you from a beginner to a
professional level, and we're going to walk through every piece of the
process step by step. However, if you've never
opened Blender before, you might want to go
ahead and take a look at my getting started with
Blender course first, which will walk you through
how to use the interface. Now, I've spent over
a decade working in the industry of
Fortune 500 clients, and now I want to help you build that same creative career. Blender has become a major
player in animation, visual effects, and tech, and it's only growing from here. Now, whether you're
aiming to work in games, films or interactive media, this is one of the
most valuable tools you can learn to jump
start your career. So, let's get started.
2. The Material Tab: Blender has a material tab
that can be applied to any object which also
includes material slots. Let's take a look
at the material tab and break down how it works. Let's talk about how to even apply materials to our object. When you click an object, a
material tab will open here. When you click this,
this will take you to the material properties. And your only option here is to add a material or
add material slots. Let's click New here.
Let's call this blue. Now, I'm going to
change the color, the base color here to blue. Now, if I open up this menu here and I open a Shader editor, we can see that we
can do a lot of edits to the materials that have
just appeared on our object. Cover this in later lessons. So I'm going to
close this for now. But we can add additional slots here to have multiple materials. Let's say that I want the
eyes to be a different color. I will go here, add another
material slot. Click New. I'm going to call these eyes, and let's say that I want
those eyes to be black. But nothing happened. And that's because
I need to apply it to that part of the model, which we do in edit mode. I will tab into Edit mode I will grab the portions of the topology that I want
to apply this material to. So I'm going to grab the
center dot on the e here, hit Control plus, just
to grab the faces there, and then click Assign. Now if I tap back out
in the object mode, I now have one material
here on the eyes, and then I have one for
the rest of the body. If I click this button here, what I will do is open materials that are all within
the scene already. So if I actually wanted, I
could change this to blue, come up and change the entire
robot to the eye material. So these are just slots that you can insert any material in now, it's worth noting that
when you close Blender, it will delete any unused
materials you have. So let's say you create ten
materials in this scene. If you save Blender and
only two are in use, it will delete the
other eight materials. To prevent that from happening, we can click this
option right here, which is fake user. And by doing that, it will trick Blender into thinking
that this has a user whether it is on
an object or not and will not delete
it on Pan saving. There's also another
button here, the new material slot. Let's come down here to blue. Let's say that I
changed my mind. I don't want the
eyes to be blue. I want them to be red, but I'd like to keep
the blue material. I'm going to turn on
the fake user here, and then I'm going to
click new material because I want it to be the same exact material, just red. So I'll click new material. It'll make a new version of that and add a
number at the end. So I'm just going to
rename this to red. Then I can change
this color to red. And if I change my mind again, I can click back and go
to the blue, as well. Now, when I go to this
list, you may notice the next to some of these.
That stands for fake user. That's just letting
you know that you have this button toggled on. Let's say that I want to clear
the material of this slot. I can just click the X here, and that we'll remove
all materials. I can then select another
material from that list. Likewise, if I decide I don't need this
material slot anymore, I can just delete it up here. So I will just remove
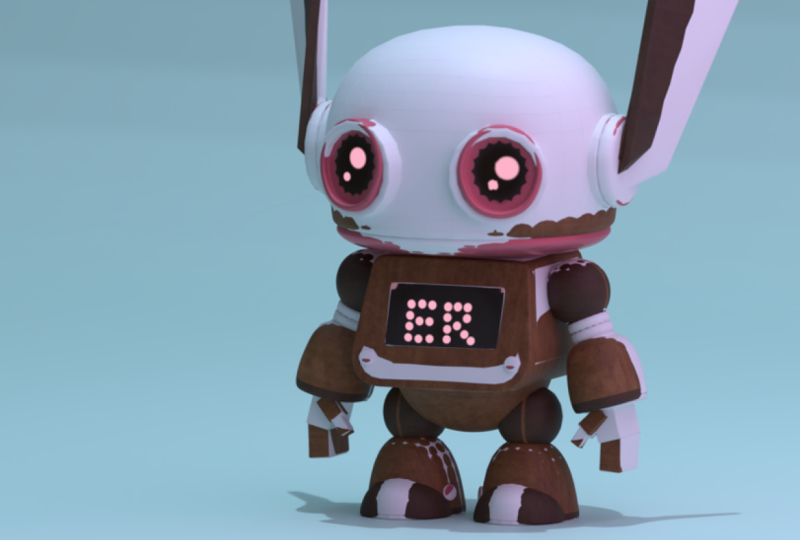
that material slot. If I come over here
to this character, you can see that for
the final texture, I have several materials
on this character. I have one on the battery, which is the screen right here, the eyes, the head, the ligaments, and the body. Let's see what happens
when I tab into Edit mode. If I want to see what these
materials are assigned to, I can grab the
head, for example, and click Select, and we'll select everything that
has that material on it. By, let's grab everything
here and do deselect. If I wanted to grab everything
that was not the head, I could do deselect that
will deselect the head, and I'm going to
deselect the eyes, and let's say that I want to use my body material from before. Well, I could grab a new
material slot, grab blue, and click Assign and make
the object body blue. And that's a basic overview of the material properties panel.
3. PBR Materials: Let's take a look
at PBR materials, which is the industry
standard for material pipelines across games, film, and visual effects. This was actually developed
in part by Disney to create a consistent result
across all their toolsets. So let's dive in and look at how we can use this
pipeline and Blender. Back in the early
days of three D, we didn't have realistic
lighting or materials. Instead, the lights in
the materials were a bit more abstract and artists and animators had to
change lighting and materials every scene to try and get them
to match visually. This was the problem that
Disney was trying to solve and where PBR came from. Stands for a physically
based rendering. It's a way of creating
materials that follow the real rules of how light
behave in the physical world. So instead of faking how things look in each scene, instead, your materials will react realistically to the lights
placed in your render engine. Now, the power of PBR comes in the fact that
it's consistent. A material you make
in Blender will look nearly identical
in unreal engine, unity, or any other
PBR based render. They're also
extremely efficient. You don't need to hand paint
shadows or highlights. The lighting system will
take care of it for you. And they offer a severe
amount of realism. You can create anything
from shiny wet mud to frosted glass all based
on the same rules. Now Blender has a
great universal node called the principle BSDF node. And this node allows us
to plug in image maps. So when you download
PBR materials, it'll come in a
set of image maps, each controlling a different
property of the surface. Let's look at some of the
most common maps you'll get. There's the base
color or the albedo. This is the pure
color of the material without shading or
lighting baked in. This plugs directly
into the color socket. The metalness map tells Blender if a surface in metal or not. Again, it's a black
or white image with everything being black, non metallic, and everything
white being pure metal. Now there's normal maps
which are cyan and purple or bump maps which
are black and white. Both of these will add
fake surface details by telling light how to
bounce off of the object. But this doesn't
alter the geometry and it's very fast to render. When plugging this into
the normal section, you will need a
normal map node for normal maps or a bump
map node for bump maps. Both will plug into the
normal socket, however. The roughness map controls how shiny or matt a surface looks. It's a black and white
image that goes from everything being perfectly
smooth at black. To perfectly matt at white. This plugs directly into
the roughness slot. Lastly, there are extra
maps you'll sometimes get, including a displacement map, sometimes called a height map. This works like the normal map, but it actually
displaces the geometry. This plugs into a
displacement node, which plugs into
the displacement on the output node here. The problem with these is
that they are extremely CPU intensive and will
take forever to render. So only use these when
absolutely necessary. Lastly, is an
emission map, again, going from black and white,
black being no emission, one being full emission. If you plug this into
the emission socket, you can then set
the color here and determine how the
object will emit. This is actually
something we'll do with the screen on the
front of our robot. Now, ambienc is a great place to get a bunch of
free materials. I'm going to link to
this in the description, and what I want you to
do for this lesson is to pick one material
and follow along. I'm going to click this
rock material here, and I'm going to
download the PBR maps. Going to download
a two K file size, and I'm going to use
this in Blender. Talk about how we can
apply a PBR material to our object and
Blender super quickly. Now, here I have an object here with a PBR default
material on it. I will save this as a template, and I will split my
screen into two. The view port here set to render mode with the
scene world turned off just so that we have the generic HDRI lighting the scene. And then over here, I have a Shader editor window where I can see the
Shader of my material. We'll be going
over some of these controls and upcoming lessons, so don't worry if
this is intimidating. Come up here to
edit preferences. Under add ons, I want you to
search for Node Wrangler, and Enable Node Wrangler. This is included with
Blender for free. What this does is enable a bunch of shortcuts
in the Shader Editor. We'll be going through all those shortcuts in
an upcoming lesson. Now, what we're
going to do is hit Control Shift T
with this selected. So hit Control Shift
You're going to navigate to the files
that you downloaded, and you're just going
to click and drag and grab all these color maps. Don't need the
ambient inclusion. Now we're going to click
this button to import it, and we can see
it's automatically apply the texture
to our object here. Let's look at what each one of these maps does individually. G to click and
drag this up here, and then I'm going to grab
the image editor here, and we can look at these
objects one by one. First, we have the color. This determines the
color of our rock. I was to unplug
this, you could see that we would have all
the remaining details, but no color, which
I can adjust here. So I'll plug that color back in. Next, we have the roughness map. And one thing I want to make clear is here that you can see all the remaining maps for their color space are
set to non color. And that's because
all the remaining maps are not viewed as color, but just pure data to blender. So if you don't use the
Control Shift T method, make sure you change the
color space down there. Next is the roughness map. Let's take a look at
what that looks like. Can see here that this is
a black and white image, and that is plugged into the roughness socket
here on our Shader. And what that is
doing is determining the roughness of our object. Everything black will
become shiny and everything white will
have a value of one, and we have maximum roughness. So if we plug this back
into our stone here, you can see that overall,
it's relatively rough. Next we're going to take a
look at the normal map here. You'll notice that this map here is purple and cyan colors. And Blender is actually
looking at this and trying to fake
lighting data. So let's take a look at
what that looks like. We can see here
that if I were to come up here and
rotate the scene, how it is simulating light
moving across the object. But if I switch back
to solid mode here, we just know that this
is a flat sphere. So normal maps are
used to simulate the idea of depth on a
surface that has none. This is a great way to add lighting detail to your object without increasing render time. Now, displacement maps can
actually change the geometry, but they're much
slower to render. Let's take a look at
what that looks like. I'm going to mute the normal map and enable the displacement map. And you'll see here
that at first, it just looks exactly
like the normal map. It's not really changing
much and just looks like it's kind of barely simulating
some lighting data on it. Look at how we can make this actually affect the geometry. First, we need to change a setting under the
material settings. We will come down here with
the material selected, come to the settings,
and on the surface, we can see that we can
change displacement. Right now it's set to bump, and a bump map is very
similar to a normal map. It just uses black
and white data instead of purple Sian data. It's not quite as accurate. Let's go ahead and change this
here to displacement only. And you can see
that now our object is going to kind of
splurt in all directions. If you don't see any difference, your displacement scale might be set to something super low. So I'm going to set this to one. This doesn't look
realistic at all. Let's set this back to zero and see what our displacement
map looks like. We can see here that it's a relatively realistic
crack texture. So what's wrong here? I'm going to go ahead and re enable everything here and
turn this back up to one. Well, the problem is, we
don't have enough data. If we look at our object, it's very low poly and a displacement map needs
a high poly object. So let's add a subdivision. We'll come here to the modifier, search for a subdivision, and we can see that
helped a little bit, but it's still not exactly
the look we're going for. So there's actually an option here called Adaptive
subdivision. What this will do is look at
the displacement map and add geometry as needed in order to allow it
to displace Greci. Now, I want to
warn you that this will slow down your
renders dramatically. You should try and avoid using displacement maps unless
it's your only option. But already, we can
see we're getting a much more realistic
stone texture. Now, unfortunately, our
scale is set to too high. So let's just lower this
to something like 0.1. Now you can see we're getting actual geometry that is
bouncing off of our object. Let's re enable our normal map. When we combine
these two together, can get a relatively realistic looking stone effect
with a combination of a normal map that has
micro details and a displacement map that is actually changing the geometry. Let's take a look at where it plugged in all of
these textures. The base color was
plugged directly into the base color of our
principal BSDF node. The roughness was plugged directly into the
roughness node. The displacement map needs an extra node here called
the displacement node. You can access that by hitting Shift A and searching
for displacement, and it'll be under
vector displacement. See here this was
plugged into the height, and then the displacement was plugged up into the
displacement here. Here, under the normal map, you can see that the normal map also has an additional node. It's plugged into the color and then plugged into
the normal here. There's also another
thing called a bump map, which does the same thing, but a bump map has less data in
it and is not as accurate. So always use a normal
map when you can. You'll also notice
that when it imported, it changed a lot of these
color spaces to non color, and that's because
only the color map is recognized as color
data by Blender. The rest is just
recognized as pure data. So if you're not going
to use Node Wrangler, make sure that you set the
color space to non color on everything aside from the base
color when plugging it in. You'll also see here that on the normal map and
the displacement map, we can control the strength with these strength settings on the normal map and
the scale settings on the displacement node. For now, I'm going to disable
the displacement node. We're going to
take a look at how this PBR material looks.
4. Node Wrangler Shortcuts: Let's take a look at
all the shortcuts associated with the
Node Wrangler node, which makes it much easier to
work with nodes in Blender. Pressing Control T on any node with a vector
node on the left side will automatically plug a texture coordinate and mapping node into
the vector slot. Control Shift click will
preview a Nodes output. You can see here I'm looking
at just the base color, just the metallic, or
just the roughness. If I click it again, it will go down to the
next socket below, so in this case, the Alpha. I can control click
the original node, and it'll bring it
back to default. Holding control and dragging the right mouse button will cut node links just like that, and you can do this
to multiple at once. Shift clicking and write dragging will allow you
to add a reroute node. You can then just grab
this node and press G to move this around and
organize your lines. Control Shift T on a principle
BSDF node will import multiple PBR textures and automatically place them
into their collect slots, which we saw in a
previous lesson. Pressing M on a node
will mute that node, and pressing M again on a
muted node will unmute it. If you select multiple
nodes and hit Shift P, you can add them into a frame. With that frame
selected, you can press F two and name it and call this anything you want with a name at the top to
keep things organized. If you want to remove
a node from this, you can hit Alt P with
the nodes selected, and it will remove that
node from the frame. Now, of course, these keyboard shortcuts
aren't necessary, but they certainly
help move through the Shader editor much
quicker and efficiently. I will also put all the keyboard shortcuts I just covered in the class resources so you can
use that as a cheat sheet.
5. Common Shader Nodes: You open the Shader menu and you see all of these node options, it can be absolutely
overwhelming, especially if you're new
to texturing and Blender. So what we're going to do in this video is look at some of the most common nodes used in material creation,
how to use them. And then in upcoming lessons, we're actually going to
use these same nodes to create some procedural
materials together. Now, with that being
said, Shader creation is an incredibly
complicated topic. In fact, there's entire roles dedicated to this on
full feature pipelines, which is why I'm recommending that after you
complete this class, maybe come back and rewatch
this lesson specifically. The fact is that after you have more hands on experience
with these nodes, coming back and understanding their purpose and intent might actually give you a
deeper understanding of how to utilize them
in your own material. Enough talking. Let's
dive in and take a look at some of these
commonly used nodes. Now, you can access
all the Shader Nodes in the Shader Editor menu, which is where you can build out your materials in Blender. To access these nodes, you can either hit
Shift A just like you would with primitives
in the Viewport, or you can come up here to
the ad menu and look here. If you're struggling to find
what you're looking for, when you hit Shift A, click Search and you can
search for it. For example, I can
search for bump Node and click and
get that node here. You can also drag off of nodes, and it will automatically
give you a search menu. So if I wanted to look
for A image texture, I could do that in
that way as well. And when done this way, it will automatically
connect the two. And delete nodes by pressing
the delete key or the X key, which will automatically
delete it and its connection. Now, let's take a look at the most commonly used nodes in Blender and what
they're used for. Layer wait, lets
you control effects based on the viewing
angle of the camera, useful for things like lighting
or fresnel reflections. This is actually how to get
that fake rim light effect you see in supermoGalaxy. You can control
the strength with the blend option
here at the bottom, and you can choose to
output either the fresnel or the facing faces as
the determining factor. Bevel node simulates adding
bevels to the edges, softening sharp edges by
faking a small bevel which helps catch highlights and adds realism without extra geometry. This will not replace
the bevel node, but if being can be great for adding small details
to sharp edges. Now, geometry nodes a
bit more complicated, but it's great here because it gives us the normal information, which we can then mix with
other nodes, for example, in this scenario here, to create a edgeware mask. The light path node provides information about how light
rays reach the surface, direct, indirect
reflections and. Sounds complicated,
it's because it is, but I want you to
pay attention to the top one here,
the I camera array. This one's super simple to
use and extremely useful. Let's take a look at
a sci fi object here. I can determine what objects are visible to the
camera or not. So we're going to plug two emission shaders into
a mix Shader node here, and then to determine
how to mix those, we will plug the I camera ray. Now, with one of these
emission shaders, we can control the strength of the emission in terms of
how it lights the scene. And with the other
one, we can control the visuals of the emission. This is great because sometimes to cast a lot of
lighting in your scene, you have to turn the
value so high that it completely turns all of your
emission elements white, and that's not always
what you want. The texture
coordinate node tells Blender how to map
textures onto your model, whether it be by object space, UVs or camera projection. The generated node
here will try and generate coordinates with
blender's best guess. This yields mixed results unless if you have
super simple objects. The UV will default to your UV maps that you've
placed on your object. The object node allows you to use an object selected here, to control the coordinates
of your texture. This is great for
animating textures. I actually use this to animate the displacement noise map on this fire here to generate
this fire animation. Camera will project the
texture from the camera view. The problem is, if
you are animating your characters or
moving the camera scene, the textures will move around. However, if you
have a still scene, this can be a really
simple and fast way to project complex
patterns on objects. The mapping node lets you move, rotate or scale textures
after they're applied. So you can fine tune how
they sit on your surface, including tiling your textures
by increasing the scale. Oftentimes, these
are paired with a texture coordinate
Object info outputs data about the object's position,
rotation, and scale. But what I use it for most often is this random
option down here. What this will do is when a material is
applied to a object, it will randomize per object. So if I take this random, plug it into a color ramp here, choose several colors, and plug it into the output of
the base color here, and then I duplicate these
books around my scene, you'll see that it is
randomly choosing colors from that color ramp for every
new object duplicated. Is a great way to add variety
to your scenes quickly. The ambient inclusion node adds an ambient occlusion pass to the objects with the
materials applied. It adds shading to small
crevices and corners, making them look
darker and giving surfaces extra
depth and realism. This is great for things,
for example, like brick, where you want to
darken the shadows in the crevices and bring a little bit more
attention to the depth. Brightness and contrast adjust how light or dark your
textures look with the brightness or how strong the differences between light and dark areas
with the contrast. Hue saturation and
value lets you shift the color and the hue
or make it more or less intense with
saturation and control how light and dark it appears
overall with the value. Curves give you fine
control over color and brightness by adjusting the
curve here in the middle. It lets you brighten mid
tones, darkened shadows, or tweak individual color
channels here at the top. The mixed node
blends two inputs, usually colors, shaders, or
textures into one output. The factor slider controls how much of each input is used. Factor zero would
be 100% of input A, factor one would be
100% of input B. Factor 0.5 would be a perfect
blend between A and B. Think of it like
layers in Photoshop. You're deciding how
much of the top layer shows versus the bottom layer. Kind of like mixing
paint, slide towards one color for dominance or leave it in the
middle for a blend. You can also plug masks
into the factor here. For example, we could plug a grunge map in and mix
two colors together. This one is used
quite frequently in procedural materials, as it enables a lot of control
and mixtures between maps. The color ramp node remaps
values into colors, letting you turn black
and white data like a grani mask into a
custom color range. Can also use this to adjust and alter maps by
crunching the contrast. This one's used quite
frequently to alter image maps or to inject random
colors into your object. Map range takes an input value and shifts it from one
range into another, like turning numbers 0-10 into a new scale of zero to one. The map node performs simple
math operations like add, subtract, multiply
or more on values. This is useful for fine
tuning textures or combining effects or
altering things like noise. Vector math does
the same thing as the math node but just
operates an entire vector. If you don't know,
vectors are when you have a X Y and Z
numbered together. Useful for things like
measuring distances, normalizing directions,
or combining motion. This one tends to be a bit more complicated than anything
you're likely to use, but it's good to
know that it's here. Separate XY, Z splits a three
D vector into individual X, Y, and Z components, so you can control one direction at a time. Now, that might
sound complicated, but a great use case of
this is to plug this with a color ramp node
on a gradient node. You can control the
direction the gradient goes, whether it goes in
the X direction, the Y direction, or the Z direction by changing
the input here. The brick texture
procedurally generates a repeating brick like pattern with control over brick size, mortar thickness, and colors
with plenty of options here. The checker texture creates a simple checkerboard pattern, great for testing UVs or
making stylized surfaces. The gradient texture produces a smooth transition between
values useful for fades, masks, or stylized
shading effects. Bone texture generates
organic cell like patterns based on distance
between random points. This is great for
things like stone, skin or abstract effects. The wave texture
creates a repeating wave patterns in lines, bands, or rings, often used for stylized surface or
distortion effects. This is great for wood
patterns or creating stripes. The image texture loads an external image
file like PNG or JPEG and maps it onto your three D model using
UVs or other coordinates. You can also create
new image maps here, which is great for creating
things like UV grid. Or texture paint maps. The principle hair
BS node is a shader designed specifically for
rending realistic hair. Now, hair isn't a flat surface. It's like a thin cylinder. So when light hits it, it
doesn't just bounce back, it bends around,
scatters throughout the strands and reflects. This aims to do that while not taking very long to render. It has a color and
melanin section to define natural hair colors such as blond brown black by controlling the
pigment concentration. It has a roughness and
randomness option. Adjust how shiny or
matt each strand is and adds natural variations
from strand to strand. It also has a radial roughness, which controls how light spreads along and
around the hair strand. There's also the IOR selection, which fine tunes the strength of highlights and
reflections in the hair. Now, just like the
object impo node, we also have a curve impo node, and we can use this to plug
things into the hair BSD, and generate some pretty
cool effects on our curves. For example, we can randomize some of the color
hair strands with the color ramp or we can change the color from the root of the hair to the tip of the hair. The principal volume
Shader node plugs into the volume output instead
of the Shader output, and it's designed for rendering materials that aren't
solid surfaces, but instead fill up space. Things like fire fog or clouds. The density will
control how dense that object is or how
thick the volume is. The color will tint
what that looks like. A common trick is to add
a noise into the density here and get a much more realistic looking fog when
placed in your scene. You can also place
this over objects with lights and get volumetric lighting in your scenes as well. Now, there's another model
type called VDB models, and simulation
software for smoke and fire will export VDB models. If you buy or download some of those models and import
them into Blender, you can plug them
into the volume here and use the black
body intensity to control the intensity of the fire or explosion simulation
that you've imported. The principle BSDF Node is
blenders all in one Shader. It works on almost
every surface, and it combines many shading
models into one easy node. So instead of building
complex networks, you can just create wood, plastic, glass, skin or metal with just a handful of
sliders right here. It's the Swiss Army
knife of shaders. Let's look at some of the key
controls, the base color, which will be the main cutler
of the material, metallic, which will tell
Blender if the surface is metal or not, roughness, which will control the shininess
or the mat of your obj. Secular, which will adjust the strength of non
metal reflections, higher values equal
stronger highlights, the normal sump input, which adds surface detail for
fake lighting information, the transmission here,
which is used to make materials see through
like glass or water, the index of refraction or IOR, which controls how
light bends in transparent materials
such as glass or water. There's a clear
coat option here to add an extra shiny layer on top, like car paint or
varnished wood. There's also a
subsurface option. This simulates light
scattering under the surface, useful for skin. Wax or marble. You can plug image maps into all of these for PBR materials, or you can utilize all of these individually to build out procedural materials
within Blender. Let's take a look
at how we could create a simple wax material. First, we'll choose
a color up here. I'm going to choose a color like a darker yellow or orange. I then want it to have
light passing through it. So we will turn the subsurface scattering up to one, as well. The problem is that the light is passing through
my entire object. I just want it to pass through the thin bits or the edges. So we will take a
layer of weight node, plug a color ramp on it, and then we can plug this
into the subsurface strength. We'll only get that pass through lighting around
the edges of our object, giving us a more realistic
wax looking texture. This is just one example. Now, we just covered
a lot of nodes, and it might be hard to digest, but I encourage that you return to this video after completing the class and watch it one more time after you have a better understanding of
some of the nodes, and it might help you
think about how you could use these in
your own projects.
6. Procedural Materials: Strength of procedural materials
is in the name itself, the fact that they
are procedural, meaning that we can make
adjustments to the Shader Nodes, and we can tweak our materials
per object as needed. For example, in this video, we're going to be
creating a wood material, and because we're creating
a procedural wood material, it's very easy for
you to adjust things like the wood grain
size, the color, or the amount of grunge, something that we're
not able to do with PBR materials very easily. Download the wooden
Blender file here, you'll find a great little starter file that
we're going to use. We have a object here with
a wood material on it. You can also view the
final wood material we'll be creating as well. So let's take a look
at how to create this using entirely
procedural nodes. So by default here, we will have a basic material with a principal
BSDF to get us started. So let's start by
adding a noise texture. I'm going to hit Shift A and
search for noise texture. I grab that noise texture, I'm going to hit Control T, since we have Node
Wrangler add on Enable, it's going to add a texture coordinate
and a mapping node. This will allow us
to control the size and scale of our noise
texture a bit easier. But first, I'm going to grab this UV and plug it
into the vector here, so that instead of
generating coordinates, it's using the UV maps that
we'll use on our character. Let's take a look
at what these noise texture controls
do because we're going to be using this for a
lot of our wooden material. I'm going to hit Control
Shift click here, and this way, we can use
the noise on the object. I'll be using Control
Shift click a lot to preview our materials
to see what we are doing. So it's good to get comfortable
with that shortcut. Go to hit Shift A here and
search for a color ramp. If I drag this here, I can
bring the black down and bring the white to add some
contrast on our object here. Now let's take a look at how these controls affect our noise. If I adjust the scale here, you can see it changes
the size of the noise. The detail here will add
more detail to that noise, smoothing it out or not. The roughness value here will change the roughness
of that noise, and the distortion here
will distort that noise. Over here, since we
have the mapping node, we can rotate things or we can add scale here
and stretch it out. You can see how already
it's starting to look like now to
reset the values, all you have to do is press
backspace over a field. So if I just go down
here tapping backspace, it'll reset all these
values to default. So let's create the first
section of noise we have here. I don't want this to be
quite so contrasted, so I'm going to set it
to something like this. So we can see our noise, but
it remains with some detail. Now, I want to scale the noise. So let's take the scale
here on the y axis and scale this up so that it stretches out our
noise vertically, kind of looking like wood grain. I'm going to set mine
to something like ten. Now, I want to turn
the roughness up, giving it a little bit
rougher of a look. And I also want to introduce
a tiny bit of distortion. So I'm going to put about
two distortion here. And you can see already how
this is starting to give us a base wooden look.
But we can do better. Now, I'm going to zoom out here, click and drag to
select everything, press the G key to move it
and move our noise over here. Now, with all these selected, I'm going to hit Shift D and drag this whole setup
back down here. I'm going to hit Control
Shift click here, and now we are previewing
this node setup. I'm actually going to set this
to something more extreme, like 20, that'll give us
a much more refined look. Let's introduce the
scale of the noise, too. Set this to something
around ten. Then we'll leave the rest
of the settings here. But instead, we're actually
going to crunch this down and try and create
small little speckles. So I'm actually going to
flip the color ramp here, dragging the black past the
white, all the way down here. If I zoom in here,
you can see how I'm starting to get
little dark lines, kind of like little
wooden and grain mints, variations of color. Great. Now we want to mix
these two noises together. Let's look at how
we would do that. I'm going to grab both of
these and move them over. Go to hit Shift A and
search for a mix color. That's going to give us
this node right here. Now, we can plug these
values into the A and B here and adjust the opacity
between those layers. Gonna grab the first
noise we made, put it in A, the bottom noise
we made, and put it in B. Now I'm going to control shift click here and preview this. You can see that if I
move this factor here, it is shifting from either A to B. I'm going to leave
this all the way to one, but I'm going to change
the mix mode here. I'm going to change
this to multiply. What this is going to do is take the black information
from the bottom layer, which is B and multiply
it on top of the A layer. So it'll get rid of all
the white information and save the black information. That looks like this.
And you can see that now those small streaks are mixing in with our previous
noise layer. If I were to turn down
the opacity here, you see that they disappear. We're going to be using
this trick a lot. So let's actually create
another noise texture layer. We're going to grab
these two right here. We don't need the texture and the mapping coordinate
nodes for this one because we're not going to
be adjusting the mapping. We'll bring this up we
will preview this layer. I'm going to reset all these to the default settings
by pressing backspace, and I'm going to
lower the contrast ever so slightly by
bringing this further out. Now, for this one,
what I want to do is create a really fine, small noise because
if you look at wood, there's just thousands
of colors mixed into it with all these little
kind of micro details. So we're going to try
and simulate that. Let's bump this up to
something really high. I'm going to try 500. I'm also going to bump the
detail all the way up to 15. I'll raise the roughness
a tiny bit as well, too, maybe something like 0.9. With that, I've created a
simple noise layer that we can now multiply back
over our previous noises. So again, we will take this
mixed color node here. Let's just duplicate this here. We'll plug this color
here into the top, this color here from our
previous one into the bottom, and let's see what
we're doing here. Now, I've left it at
multiply with a factor, and now you can see we're
getting a general noise that is applied to our overall wood adding a little bit of realism. Now, let's do that
same thing and add another layer of noise. So we will duplicate
these up here by hitting Shift D. Control Shift click here to view
what we're doing. And I'm going to reset
all of these nodes here. I'm also going to reset the color ramp by clicking the drop down menu
and resetting there. So now we're back
to default values. Now with this one, I want to
create a broad, grungy look. So I'm going to reduce the
scale to something like one, and it's hard to see what
we're working with here. So it's really
crunch this down and create a high contrasted.
Just like that. I'm going to up the detail maybe to something
around nine or ten, and you can see we're starting to get a
better look there. I'm going to turn the
roughness up here, and you can see how
now we're getting kind of a splotchy grunge look, which is exactly what I want. I'm going to come over here to the mixed color
note, hit Shift D, and then I'm going to drag the color ramp we have
here and to the A, and then I'm going to drag
the color we have down here. To B. I'm going to
Control Shift click this, and we can see that now we are multiplying this
grunge onto our wood. Now, a lot of wood
has scratches on it. So let's actually import
a grunge texture. So if you downloaded the
project resource files, you should see this grunge map scratches that I've
included for free, and this is the map
we're going to use. So if we add a image map above
here, by hitting Shift A, looking for image texture, you can click Open here
and select that file. I already have it imported, so I'm just going
to click Grunge Map scratches right there. I'm going to grab this
and hit Control T, which will add a mapping node. I'll Control Shift click there, and we can see
what the scratches look like on our object. Now, I want to change the scale these so that there's
more scratches. So you can go ahead and
increase all of these, but a simpler way is to hit Shift A and search
for a value node. This allows you just to plug one number into all three
of the scale values. So let's say that I want
to scale it by five, and now we can see that I have scratches appearing
all across my object. However, we've been multiplying and doing the black over white, and this is the inverse
of what I want. So if I hit Shift
A and search here, I can find a invert color node, and that will invert the color. Now, it's very subtle. So we're going to add a color ramp node. Click that here, and then we're just going
to bring this black all the way down
until the scratches become visible again. Now we have scratches
all over our wood. So again, we will grab
the multiply node here, Shift D. And I want to put
these scratches on top. So we'll drag this into the B, and we'll drag the
previous one into the A. Let's take
a look at that. Now you can see we've got a pretty good base for
our wooden color there, but we need to actually
add some color. So it's time to start
using our principle BSDF. I'm going to drag this node
over here onto the surface, and we're going to start
working with our details. First, let's do the colors. I'm going to shift a here
and add a color ramp. This time we're
actually going to use the color ramp to
add some colors. So let's add a few
extra colors here. Just going to add a
couple extra nodes there. Now, if I click
this dropdown menu and distribute drops evenly, it will spread across the
entire color ramp evenly. Now all we need to do is pick some colors that we want
to mix into our wood. So I think for this color here, I'm going to pick
kind of a darker brown with a little bit of purple mixed in for
some stylization. For this one here, I'm going to start bringing in the
base of the brown there, but I want this to be
the darker portions of the brown, like that. Here I'm going to
start bringing in some warmer browns mixed there
into the mid tones here. Here we'll start working
towards our lighter values, again, bringing in a little bit more of a desaturated brown. So for this last
color, I'm going to pick a lighter tan brown, maybe introducing a little bit of yellow just for stylization. You can play with all
the colors you want here until you get a
stylized wood you like. Now, if you want to just
make minor adjustments and not change all your colors, you can actually use
a curves node here. So if I search for
RGB curves and drag this over, I
could, for example, darken the darks
there and lighten the lights and pull
in some more colors. So if I drag down
on the red there, I can pull out the reds and maybe introduce them back
into the highlights. Really just play with the colors until you find something
you're happy with. But next, let's look at
the roughness value. So everything we plug
into the roughness value that is black will
be a value of zero, and everything white
will be a value of one. So we're going to create a semi glossy wood material here. Utilizing our other
noise textures. So we can grab this
final texture here, and we're just going to drag this off and search
for a color ramp. What that's going to do is
plug it into a color ramp. We'll hit Control Shift
T to look at this. Now, you can see
here that we have a lot of blacks and whites. So if we plug this directly
into our roughness, you can see we get a
pretty unrealistic result. So let's actually take a look
at the roughness map here. We don't really want that much glossy on this type of wood. So we will grab the black here, which is going to be pure
glossy and we'll just raise this value way up
reducing that contrast. If we plug this back in, you can see that we have
some roughness variation, but overall, it's pretty matt, giving us kind of a nice
varnished wood look. You can also add a
coat, if you like, to make this almost look like
a wooden table or floor, and you can plug this into the roughness as well
and play with that. But I'm going to leave mine looking a bit more natural like. Lastly, we're going to use a bump map because
a bump map does the same thing as a normal map but uses white
and black information. So we're going to grab the
multiply node here at the end, drag this off, and
we will search for another color ramp node. We can take a look at that
and see our mask there, but let's add a bump node. So we will search for bump, and now we need to plug
this color into the height. This will take the black
and white information and turn it into a bump
map for our object. Plug this into the normal and our color here
into the height. Now I'm going to
bump the strength up to something like 0.25, and you can see how now
we're starting to get a bit of variation on the
surface of our object, giving us a somewhat nice
looking wood material. Now, this is the one we
created together during class. If you like, you can also see
the one I made previously, which has adjusted settings little bit more warm
or of a stylized look. Now, keep in mind
that you can go back through and play with
all of these settings here and the colors and keep adjusting until you find a
wood that you like to look of. So as I said before, I had this wood previously
in the scene, so I'm actually going
to call this one wood, warm, and then I'm going to
call this one wood dark. And the only real big
difference between these two are the color and the
color ramp settings here. Everything else is
pretty much the same. And I'm going to use both of these wood materials
on our robot. This is the advantage of
the procedural materials that we can just come
in here and tweak any of these settings
and completely change the look of our wood.
It's fully procedural. Now, I encourage you to
make a couple variations of wood that we can
use on the robot, or if you want, you can use the two variations that I've
included in the file here.
7. Group Nodes: Awesome thing about using Blenders Shader
note tree setup is that we can actually
create groups and then reapply these to materials, speeding up future
material creation. In this video, we're going
to look at how we can add some simple edgewar
to some objects. Now, to start this lesson,
I encourage you to download the metal
starter project file, which has the final
metal Shader in it and the starter
metal Shader in it. It also has a basic
object we can use to kind of show off some
of the effects that we're. First, let's take a look at
the metal starter material, and we're going to look at the values on our
principal BSDF here. We want to create
a metal object. All we need to do is turn
the metallic value to one. Now our entire object is metal. If I turn down the
roughness here, we can see that a bit better. I'm also going to choose a
warmer color for bimetal here. Give us something more like
a kind of bronze or L. Now, this gives us a very
flat looking metal. So let's create something a
little bit more interesting. We're going to use some
procedural nodes to create some natural wear and tear that will occur
across the edges, and we'll also add a
bit of interest here with some grunge across the
overall metal material. First, let's look
at how we can do a natural edge wear and tear. Well, first, what I'm
going to do is hit Shift A and look
for a beble now, the bevel node is searching for edges to try and
create a bevel effect, which means it's a
really great way to detect the edges
on an object. We're also going to
add a geometry node. The geometry node will look at all the information we have
about the geometry here. We're looking for
the normal data, which is the direction that
the faces are pointing. So if we combine some of the normal data
with the edge data, we can isolate that and use
it to drive a few effects. So we're going to search
for a vector math. We're going to do a dot product here and combine
both of this data. Now, if we take a
look at this data, we can see that
everything looks white, but we're getting
faint edges here. But what we need to
do is map the range. So right now, we have data that's kind of
sprawling out there, and we need to condense it down. So we can use this to
one input that data, and now we can see
our edges a bit easier by flipping
the data down there. Also want to crunch this down so that the value
range isn't so wide. So I'm going to
type in 0.99 there. You can see now we're getting a much stronger edge
highlight there. Now, I just want to
pause because we did a couple nodes there that
are a little complicated. So dot product math has to deal with normal math in the
direction it's pointing, whether it'll be a 01 value. So essentially, what
we did is take the normal or the
direction the faces of the object are going and take that to combine
with the bevel data. Just looking at the edges, as you can see in
this mask here, and combine that
into a map range. And the map range node can
just remap that information. So we basically
took a wide breadth of information and crunched everything down 0-1
down to 0.1 to one. And then down here, we
inverted that information. I understand this may still be a bit complicated to follow, but that's what's going on here. And hopefully, as time goes on, the stuff will start
to come to naturally make a bit more sense as you
get more experience with. From here on out, this jaders pretty simple and
straightforward. So let's look at how
we can adjust this. By adjusting the
radius of the beble, we can actually
make larger edges, which is exactly what I want. I want the edge wear and tear to move all along the object. So let's go ahead and plug
that into our node right now. By plug this into the roughness, you can see that
now the edges are rough this doesn't
look that great. So let's introduce a
bit of noise into it. We're going to add a mixed color node and drag
that over the top node here. And now we're going to mix
noise into the bottom. So let's grab a
noise texture node by hitting Shift A and
searching for noise. And let's grab this factor and search for a color
ramp like that, and we will plug
that into the color. Now we're starting to
get better of a result. Let's mix this factor up to
something like maybe 0.7. I'm going to do a
multiply mixture, and you can see
how it's starting to mix into our object there, but it could be a
bit more contrasted. So it's maybe bring the black down here and the white up here. Now we're starting
to get a bit more variation in our edges. However, the noise
is super large. So it's maybe bump the scale
up to something like 15. I'm going to add
some detail there, maybe increase the roughness. And if you want, you can
copy my exact values. Now, if I plug this back
into the BSDF node, you can see that
we're starting to get slightly better results, where's just adding
some general wear and tear across the object. I want to control this further, what I can do is add
another color ramp here, and then I can play
with the values here until I get
something I like. I'm going to bring
the whiteness up, and you can see how
we're starting to get some wear and tear
along the edges. But I feel like this
could still be better. These large faces
are just broad and flat and have no
information on them. So I've actually included this grunge map. You
can download it. I'salled Grunge
map number seven, and we're going to add
a image texture here. You can click Open here,
wherever you downloaded or it's included in this file,
so we can just click here. By plug this into the roughness, you can see that we're getting a pretty great look overall. Let's actually grab this, bring this down and hit Control T. I'm going
to hit Shift A, look for a value node, and plug this into the scale. I'm going to bump up the
scale to something like three and give us a
nicer look there. Now I want to mix this
with the edge information. So let's click Search and
do a mixed color Node. We'll drag this into the B slot and our
edge into the A slot. We'll turn the factor
up to one there, and then we can search for a
multiply or a screen node, depending on the
results you want. This is looking pretty extreme. Really don't want my metal
to be this rough looking. So I'm actually going
to add a color ramp after this grunge map here. So I can actually
just duplicate one of these color ramps and
drag it over there. Then I can begin adjusting this until I have a setting
that I'm happy with. This gives me kind of
an overall grungy look, but still some
shininess to the metal. So what we can do is we can add a bump node here to
add some more details. So I'm going to add a bump note, drag this screen mixed
color into the height, and drag this into the normal. This is making all
the grunge pop off, but I'd actually like it to look like it was worn into the metal. So if I click Invert,
you can see that now it looks a little
bit more natural. If you want, you can play
with the strength there and continue to adjust
the settings here. But now we have an
overall grunge metal look that takes into
account the edges. Now, it would be great
if we could reuse this node on other materials. For example, if we
wanted to add edgewar to our wood and this
general grunge. So there's a simple
way we can do that. First, let's unplug
everything from the screen. I'm going to hold Control
and click here and let go, and that's just going to
remove all the nodes at once. Let's click and drag to select
everything here and hit Control G. Will move us into
a new screen called a Group. We have the group output
and the group input. So let's drag the things we
want to adjust in the input. Maybe the scale of the noise and the radius
of the edge there. If you press the end key
and open this panel, you can change those
names with that selected. So I can say noise
and edge size. Now if we come over here, we can determine
what's outputted. So let's output this
final screen result. If we press tab, we'll
tab outside of the group. Now you can see that we
have a note group here. And if I hook
Control click this, we can see that this is
the map that we had. We can change the noise size
there and the edge size. Feel free to plug in more things into the input if you
want more control. We can also name this Edgeware and then we'll be
able to use this on any material we want. Now we can plug it into the roughness and our
height of our bump, and you can see that now we have this dynamic edgeware group, and we can use this
across other materials. For example, here, if I go
back to my wood material, I can input the
edgeware group here, plug that into a mix shader with the original color and a color going through
a altered curve, and you can see that
this is driving the mask there or how those
colors are being produced, giving me a grungy
looking wood very simply. But next, let's look
at how we can apply these materials to our
actual robot character.
8. UV Unwrapping Explained: Video, we're going to
look at how we can UV unwrap our models. Now, this tends
to be the tedious first step of texturing, and luckily, with
Blender, we have some tools to do this
automatically for us. So we're going to first look at how to do it manually ourselves and then some of
the automatic tools with the pros and cons
of both approaches. Let's talk about
why we even need to UV unwrap our objects. So when we're
working in three D, our objects exist
in three D space. They can move in the X, Y, and Z coordinates. And just like in edit mode, our objects are
pieced together with elements that exist in
the X, Y and Z space. Our objects are three D and
have three coordinates. However, when it
comes to texturing, we're working with a
two D image texture. This only has a X
and Y coordinate, and in fact, that's
what UV stands for. U stands for the left and right, and V stands for
vertical up and down. And we need to think
about how can we apply this TD image to
this three D object? Well, that's where things
like seams come into play, and we can actually break
apart our object in a way that we can wrap our
tote texture around it, almost like if we were placing a sticker on a toy
to add some texture. In this cube example here, you can see that
each face has been spread out here and
it is almost laid out like a piece that
we can fold back on top of our object
to apply this texture. Let's take a look at a
more complicated example. You can see a beautifully
textured character from the Blender open source game
they recently released. Now, this file can be downloaded
for free Blender org, if you'd like to take
a look at it yourself. Over here, you can see the texture we have
for the character. And we can see the hat here, pieces of the coat that
the characters wearing, the shoes, the pants, the hair, and the
face, and the nose. If I turn on the overlays here and select the
topology of our character, we can actually see what
that looks like over here, and we can see how our
model has been cut apart and pulled
apart and placed over here so that
the textures can be then reapplied to the model. Blender know where to cut
and split up these objects? Well, it's with a
feature called UV SMs, which we can place manually. If I rotate around this object, you can see that there
are various portions here marked with red
lines in edit mode. Those represent SMs. And that's telling Blender, Hey, you should cut and split
the model from this point. You'll notice that a
lot of these points are placed in portions
that are hidden. Bottom of the face here
or the top of the scarf, which won't be visible or on the back of the object where you're less
likely to see it. If I select an object
here, for example, the top, you can see
exactly where they are cut. We can see here that
the top seen up here represents the top of the scarf we're
seeing right there. And we can see this line
back here occurs here. So the front of
the jackets here, and it moves around to the back where it is cut down the middle. If you're wondering why
a lot of these seams are placed in hard to see
areas, for example, here on the back
of the hat, that's because when your seams
don't match perfectly, you can sometimes end
up with seam artifacts. And by hiding these
in places not as likely to be
visible to the viewer, you can prevent these
artifacts from being seen. Now, you might notice
that the character over here is spread across
several sections. There's one section
for the face, one section for the nose,
one section for the hair. You'll notice that when I look at these objects while selected, they sit in their
retrospective areas. If I grab the nose, it sits
over here in a selection, and the hair sits over
here in a selection. These are called UV islands. Now the reason we
look at creating clean islands like this is to prevent something
called UV stretching. UV stretching happens when the flat map doesn't match
the three D surface. Causing textures to warp and distort across
the three D model. The best way I can
think to describe it is that if you were going
to sew a shirt together, you would cut the fabric pattern for your shirt into a sleeve, a collar, and a torso and then sew all those pieces
of the fabric together. Just like that, that's how
UV maps fit across a model. And clean islands with low
placed seams give Blender a better pattern to work
with in reducing distortion. So what makes a clean
island or a good seam? Let's take a look at how
they unwrap this torso. I'm going to zoom in
here on this torso. We can see that they
have one top seam, one bottom seam, and one
seam right down the back. We look at how Blender
breaks it apart, it makes it so that
we have one top section, one bottom section, and that allows the torso to unwrap into just one
long horizontal block, making this very
easy to texture. Now, Blender actually has
a great tool to help us see the amount our
UVs are stretching. If we come up here
under the overlay menu, we can turn on angle. And what this will do
is show a map over our island from blue
to red with blue, meaning there is no stretch, and red, meaning there's
a maximum stretch. You can see here, this is very nicely unwrapped and
it's entirely blue. Let's redo this
torso but poorly so we can see an example of what that stretch might look like. With this model selected, I'm
going to press to bring up the UV mapping menu and I'm
going to clear all seams. Now I'm just going to
add a simple line. Let's say that we want to add a UV seam right along
here on the back, but we don't want to take
off the top and bottom. Let's see what that looks
like. Going to press, Mark Sm, grab everything. Plus U, and then I have
various unwrap options here. I'm going to focus
on these three. This will unwrap it with
an angle based thing, trying to maintain the angles
of your object in space, great for things like wooden
planks or minimum stretch, which will try and minimize
the amount of stretch. Let's select that option. Here, you can see that it has smeared my object
all over the scene. I'm starting to see
blue transition up to green and red with a
lot of poor stretching. And you can see
here that because the object hasn't been broken apart into pieces that would be easy to
sew back together, we've kind of created a mess. This shows the importance
of placing proper seams. And we're going to look
at how to do this on our robot character and teach
you the entire process. Let's take a minute
to talk about overlapping with UV Highlands. You can see here that none
of my islands are touching. There's a space
in between these, and this is called
the island margin. If I were to take this island, which is the front piece
of my bird over here, and I move it over we now have what is called overlapping UVs, and you can see here that's
creating artifacts as both of these UVs are fighting to use the same piece
of the texture, leading to
inconsistencies visually. This can also be problematic if your margins are too close. If I grab this object
here and just move these ever so slightly
close and zoom in here, you can see how I'm starting
to get artifacts that appear where the edges overlap
and create bleed through. However, overlapping is actually sometimes used on purpose, especially in things
like video games. Or example, we'll overlap
UVs to reuse things like grass blade textures to populate across many
objects in a scene. I want to talk about one
more thing before we begin unwrapping our
character together, and that is the
texture resolution and how that relates
to textil density. So we can see here on these
two flamingos I have here, I have a four K texture, and this texture looks
relatively high resolution. However, if I were to zoom
in way on my character here, we can see that things
become blurry and low Rz. Just as if I were to zoom in
on the image itself here, how things would become
blurry and low rez as we got super close it. The problem is, if you take your UV islands and you
place them incorrectly, you can end up with low
resolution looking sections. Let me show you an example. Right here, I have this
portion of the body selected. And if I were to come over
here and look at the texture, I can see that this has about
a 200 by 200 pixel area. However, if I were
to scale this down, it would only have
about 20 by 20 pixels. And you can see how
over here, inversely, that is making it look low
resolution and blurry. Even though we're
viewing from far away, because it has so
little resolution to work with the texturn. And this is called
pixel density or the pixel density of the UV islands as they
apply on the texture. Now, I understand this may be a very foreign concept
or complicated to understand if this
is your first time UV Unwrapping or working
with texture. Fear not. It's a pretty simple
problem to solve. Blender has a UV grid
texture that we can apply to our object and
use while UV Unwrapping. We'll be doing this together
while working on our model. And as long as you
keep the UV grid relatively the same size
across your entire object, you will end with a result
that has good texil density.
9. Unwrapping Our Model: Now if you've been doing
the entire series, you should have a project
file that you can start with. However, if you are
only taking this class, I've included a
robot starter file that you can use
to follow along. Likewise, if you're concerned
about your final results, I will also be including
the final unwrapped object, so you can reference that
as well as an example. Now before we begin,
we're going to apply a UV grid material
to our character. A UV grid is just a
generated grid image that will assist us
in the process of UV editing to ensure that our UV islands are clean with
the proper textil density. So we will grab our model here. Click Nu. We'll name
this material UV map. Come down here to the
base color image. We're going to
click this socket, choose Image Texture, and then here we
can create a image. I'm going to click New
and name this UV grid. You can set whatever
resolution you want here. I'm going to do a two K
texture of 2048 by 2048. Now, down here on
the generated type, you can choose blank,
color or UV grid. Choose UV grid and
click New Image. Now we want to make sure
that our texture is visible. So we're going to come up
here and we're going to go to the material Viewport setting. Now, it's going to look
just gray right now, and that's because we
don't have a UV unwrapped, so it doesn't know how
to apply this texture. Next, what we need to do is
click and drag up here and we're going to open the
UV editor view here. Now, if I tab into Edit mode
here and select everything, we can see what
our UVs look like. Since we haven't
unwrapped everything, you can see it's
just a mess of data. Now I'm going to switch back
out into object mode here. I'm going to click the
negative Y up here, which will snap me
into front view. Let's take a look
at a few shortcuts we're going to be
using together. First, I want to
teach you the key. The key will select everything linked to the
face that you selected. Here you can see how it
selected the entire object. If it doesn't select
the entire object, open your linked menu here
and select by normal. You can see here how I
am grabbing each object individually when I press L. If I want to
deselect an object, I will hold Shift L. I'm going to twirl
down this menu here as I don't need it anymore. I'm going to press A to deselect everything
that I have selected. We'll be using that quite a bit. And I can also press A to select A when
nothing is selected. The other menu we'll be
using is the Unwrap menu. And this will be
very useful because here we can press U to
get the Unwrap menu. You can also access
that up here under the UV if you can't
remember that shortcut. We'll be using this menu to not only actually
do the unwrapping, but also to Mark and clear SEMs. Now, to Mark and clear Seams, we're going to be working
in the edge mode up here. Is the easiest mode
to grab scenes. We can grab edge flows
by shift selecting, or we can Alt click and
grab entire edge loops. Now, one more thing
I want to show is that if we have
an object selected, for example, let's say this I, we will select this I with L, hold Control I, and that will invert the
entire selection. And then we can press H to hide. That way we can just
focus on our I. When we're ready to
unhide the selection, we can hold Alt which
will undo the hiding. Let's begin by doing
the legs first. So I'm going to snap into
the front view here. I'm going to press L and grab all the pieces
associated with the leg. Now I'm going to hit Control I and We're going to
hide the body there. Let's focus on the right side here and look at how
we can split this up. We can see here
that with our feet, we have a bottom piece that would probably
be good to cut off, and then we want to
unwrap the entire sphere. So maybe we should look at doing an unwrap line on the back. So let's start with
these calfs first. I'm going to shift click
and grab these lines here, and then I'm going to Alt
click on this seam right here. And that'll cut
off the bottom of the foot and then open
this to spread it out. Now, I'm worried
that this line right here might cause it to
do a weird stretch. So I'm going to
click this as well. Now if I press the UK
and click Mark Sam, we can then deselect
by pressing A, L, to select the item to unwrap. And if I click Unwrap
minimal stretch, we can see that we're getting a pretty good result over here. Where the UV grid looks even
across our entire object. Now, this is where the
UV grid becomes helpful. We want this UV grid to look relatively the same size
across our entire object, and we also want it to move in relatively the same direction to ensure that if
we have anything, for example, a wood pattern, it will move in the correct
direction across our object. See here that we're getting
a UVCM in the back, which is exactly why we put
it back there so that it shouldn't be viewable to the viewer very
often, if at all. We're going to tab back
out into Edit mode here, and we're going to do
this sphere now as well. Let's Alt click here
and Alt click here. This will split
the sphere in two. But we have these
kind of inside lines that need to be cut off as well. So let's click around this
loop and around this loop. Going to press U, Mark SEM and then I'm going to
select both of these. Press Unwrap with
minimum stretch. Just as a reminder,
this is trying to unwrap while minimizing the
amount of stretch of our UVs. So let's click that, and you can see that we get a
pretty good result. And we can see that the UV grid is almost the same
size as our calf here, meaning that overall this
is looking great so far. Now let's do the front
of the foot here. We're going to hide these
two pieces of the leg. So let's press L over these
pieces and hit H to hide. So now we can see what
we're doing on the foot. So let's add a seam across
the back of the foot here, and then let's
also take the seam around just a bit here to
allow that top to split. We'll hold Alt click
and click here, press, Mark seam, and then we
will grab this here, press and minimum stretch. And we can see that we
got a pretty good result with the back being
invisible to the viewer. If I tab out back in
the object mode here, we can see that our grid is looking even across
the entire object. I'm going to move back
in the Edit mode here, press H, and then we're going to move with the feet
objects we have here. You can see that we
have two objects there, and let's Alt click this loop
here and this loop here. Now, let's Alt click
the middle loop there and the middle loop. That's going to do is cut off the top pieces here and
split it down the middle. We'll press and Mark SM. Now, I'm going to click off
away there and deselect that. Let's do this bolt next. Let's do the top
of the bolt like this and add one line there. So I'm just going to shift click and select
that line there. We're going to do Mark S. Now we can do all
these objects at once. You don't have to do it
one object at a time. So I'm going to switch
into wireframe mode here, which you can do by
clicking up here, and then I'm going to have
the box select selected, click and drag and select
all of the topology there. I'm going to press U and
Unwrap minimum stretch. You can see here we had
a successful Unwrap. I'm going to switch
back to material view and see how that looks. By tab on on the
object mode here, we can see that our UV looks relatively clean and similar in size across the
entire object. The calf here is slightly
bigger in its grid, but I don't think it's
enough to be problematic, and we can look at ways to
fix that later if we need. Now, let's do the same
thing to the other leg. So I'm going to tap back
here into Edit mode, and I'm going to deselect by
clicking off to the side. I'm going to hold Alt H
to unhide everything. And I'm going to grab one
of these seam lines here. So I'm going to grab
this line right here. I'm going to come
up here to select, select similar and Seam. And what that's going
to do is select all the seams and
the scene here. Now what I'm going
to do is do select, come down here to select Mirror. You can see now it's grabbed all those same exact areas
on the legs over here. So I'm going to press
Mark Seam. Perfect. Now we'll grab all
these leg pieces. We'll press U, unwrap
minimum stretch. And you can see we're
running into an issue. Now that we've
unwrapped it, this grid is much larger than this grid. And that's because when you
unwrap a piece of an object, Blender only focuses on
that piece of the object. So we'll unwrap it as what
it thinks is best for that. So if I were to re unwrap this foot now with
a minimum stretch, you can see how
it's much larger. So what we need to do is
select everything at once. So I'm just going to grab
everything here on the feet. I'm just mashing L
across everything. What we need to do is
unwrap it all together. Unwrap minimum stretch. And you can see that now Blender is doing
its best to match the pattern and the size of the grid to minimize the
stretch across all of these. We can also see what it
looks like at angle based. If we do angle based,
it's going to do its best job to try and maintain the direction
and angle of that grid. However, you can see that the grid sizing is
a little bit off. So it really depends on what your priority is
for that unwrap. This is looking nice and
everything's looking even. Let's go ahead and unwrap
the rest of the body. Let's do the arms next. We'll click here, press L to select all of
these pieces here. And we'll do that on both sides. Pick Control I and
H to hide the body. I'm going to switch to
front view by clicking the negative Y up here
and zoom in on our arm. Now, I'm just going to do the same thing for these
that I did on the leg. I'm going to add
one edge loop here, one edge loop here,
one here and one here. Just as a reminder, I am Alt clicking those edges
to select that loop. Go to press and mark Sam. Next, let's do the forearm. In the meantime,
I'm going to select both of these and hide those. So next let's
unwrap the forearm. I'm going to come
up here and select this edge loop here by Alt
clicking and this edge loop. I'm also going to
select this edge loop here on this piece
of the forearm. Now, I'm going to add the seam here on the bottom so
it's not as visible. Going to shift click across here and grab that seam
until it goes up there. Now I'm going to
press, Mark Seam. Perfect. I can grab
both of these, press, and just make sure
there's no problems. Now I'm going to hide that
piece of the forearm. Let's do this little
compression piece that exists between
the two arms, as well. We'll take off the tops and
put one seam down the middle. So we will click this, Alt click this,
and then we'll put our seam on the bottom
by Alt clicking. Press, Mark Sam and let's take a look at
what that looks like. So I'm going to unwrap this, and you can see we have a very nice horizontal texture here. With two caps at the
end, just what we want. So let's hide that and
focus on the hand next. Now, these are cubes, let's look at how we can split
these up easily. We'll grab this seam here, and I'm going to grab the bevel edges that go down just like this
on both sides. Then we will grab
this bevel edge right there and this bevel
edge and right there. Let's mark seam and
see what that looks. Going to grab the
object here and unwrap. You can see it's
kind of working, but we're getting some
stretching there. So let's actually
add one more split. I'm going to grab the seam here. We will come up on both
sides, just like this. Let's add a seam there
and re unwrap it. And you can see
here we're getting a much more natural shape that looks like it won't stretch
or cause issues as much. Now, all of these are cubes, and we're going to
do the same exact pattern on all of them. So I'm going to fast forward
through this section, but just do the same exact
thing on every cube. Want to call out
here that if you accidentally select
edges like this, all you have to do is hold Shift and select them
again to deselect them. Now, I have set all
the seams on those, so I'm going to press Alt
H here to unhide my arm. Then what we're going
to do is just grab every piece of the arm
by pressing L there, and we're just going to
unwrap with minimum stretch. So you unwrap minimum stretch, make sure that
everything looks okay. I don't see any major problems. So I'm going to deselect that. I'm going to grab the seam here, select similar seam, and
we'll do select mirror. And now it's grabbed
everything over here, so we're just going
to press U, Mark SM. Perfect. Now we have equal
seams on both sides. Next, let's do the
ears and the eyes. So I'm going to grab
both of the eyes, all these pieces of the ear. Then I'm going to hit Control
I H. Now for the eyes, we will grab a loop here, and we will grab one
more loop up here. And that'll allow us to
split this into one section, this inner bevel
into one section and the entire eye into one section. Now, I don't want to create a line down the
center of the eye. I'd rather keep
this in one circle. So I'm going to grab this
top edge here, Shift select, and then just grab
this down until we get into the inside
here, right by the eye. I accidentally grabbed one here, so if I hold Shift Click
there, I can just undo that. I'm going to press U and Mark. Let's look at the
ears over here. Let's alt click add a loop here, add a loop here, and then we'll just add
one down the middle. Alt click, add a loop
there, Alt click, add a loop there.
Let's add Markem. Now, the ears here are a
little bit more complicated. So what I'm going to do is
hide both of these earpieces. And with this, we're
going to focus on how we can kind of cut this. Going to treat it almost
like we did the cube. So let's add a seam right here. I'm going to click here, we can see that seam
goes all the way around. And what that's going to do is split this ear into two pieces. Let's also give it some
breaking points here. So we will shift click along
this edge corner up here, along this edge corner here. We'll give it a breaking
point here as well, and one down here. And then we'll go and do that on the reverse side as well. Giving it some points
for the ear to kind of break and open up. Let's mark the seam and take a look at what this object
looks like when we unwrap it. So I'm going to click
away to deselect, Hold L, unwrap minimum stretch,
and we can see that we've essentially split
the ear into two pieces, which is exactly what we wanted. Let's press Alt H, and we will grab the seam here, select similar seam,
select mirror, and then we will
press U, Mark Sam. Everything that's mirred
can be mirrored across. And next we're going
to focus on the head, the body, and the hips. Let's do the head next. So we'll select the head here, hit Control I and H. Now, the head here is a
pretty simple one. We're just going to click
these loops here and press U Mark Sam and then we're going to grab from
the back of the head here, go down a middle
seam just like this, and we'll do that across
both of these pieces. For the bottom piece
here, I'm only going to break it down to
the halfway point, allowing that to
split and open up. Also add one seam here, allowing this to open up a
bit and not stretch as much. We'll press you, Mark Seam. Let's test what this looks like. And we can see here that things are opening up and
stretching pretty well. There is a bit of a concern and that this is a little bit tight, but that's going to
be on the inside of the character and
not really visible. So I'm not terribly
worried about it. Let's hit Alt and
unhide everything. Next, let's focus on the body. So we'll grab the
bolts on the body here and the body pieces itself. And then again,
we'll hit Control I H to hide everything so
we can focus on the body. First things first, let's get these bolts out of the way,
as they're pretty simple. So let's just click
here on these edges of the bolt and also grab
one edge on the top each. Don't forget there's some
bolts up front as well, and we'll grab these
same exact edges. I'm just going to use,
Mark Sim then I'm going to grab all those
bolts and just hide them. So with those bolts selected, I will just press Now
let's focus on the body. I'm going to view the
body in a few sections. The big front section
that's very important. The big back section and
the flat piece here, and then we have
this middle section. So let's begin by grabbing a few basic edge loops based
on what we've been doing. Going to click this
edge loop here, this edge loop, come over
here and grab these as well. Going to press U, Mark
Sem to get us started. Now, we should split
these up a bit. So let's grab this edge
loop here and Markem, and let's grab an edge loop down here on the back and Markem. We should also split this
big object up as well. So let's add a seam
down here as well. Now, the screen, I want to
treat a bit separately. So I'm going to grab
this edge loop here, and I'm just shift clicking with the Alt selected,
just like that. And we're going to
mark a seam there. And that way, we can kind of get this screen section
out in its own thing. I also want to grab the
screen itself just right here and turn this into
its own seam, as well. So I'm going to mark seam and later when we go to
put a screen on, that'll save us some time
because we will have this as its own island. Let's
see what this looks like. Let's grab everything,
do and unwrap. Now, up here under
the overlay mode, I'm going to turn on
the angle stretch, and you can see
that we are getting a ton of bright blues, meaning we're getting
a lot of stretching. But it's a bit difficult
to know where this is coming from just by looking at the object and the island maps. So we're going to
scroll over here. I'm just middle mouse
clicking to scroll, and I'm going to click away, and I'm going to
turn on this button here, UV sync selection. Now when I press
this, all the UVs remain on here even when
the object isn't selected. If I press L over here, I can select islands. So if I grab these three here, that are the problematic
ones stretching and hit Control I to invert, what I can do is hide everything that doesn't
have any stretching issues. And right away, we see one
of the problems is that our body actually has
an inside piece to it. You've been following along to this point with the chorus, you'll know that's
because we used a solidify modifier
with our model. What we're actually
going to do is just delete the inside
of this topology. So I'm going to click the X
here to snap in a side view, go into wireframe mode. I'm going to switch over
to face selection here, and I'm just going
to use the box select to grab all
of these faces. Go to press X and delete faces. Now if I hit Alt H, you can see here that it hasn't changed the look of
our body at all. We only deleted
faces on the inside. So what I'm going to do is
grab that body again so we can focus in I'm going
to press L to select, and you'll see here it didn't
select the entire object. That's because the L
shifted back to Sam mode. I'm just going to click
normal, twirl this down, and just grab those object
pieces again, just like that. It Control I, H, and we can look at
our body again. I'm going to switch
here to material view to make that grid a bit cleaner. I'm going to grab
everything here, do UV minimum stretch, and you can see we have
much less stretching here. There's no longer any stretching around the basic of the object. How, we're still getting
some stretch here, and that is this
front face here. So let's look at how
we can fix that. We'll hit Control I and
hide everything else, and we're going to
focus on how we can split this up a bit more. This two had a solidify
modifier, as well. So we can delete
these faces inside. I'm going to switch to
the edge loop mode here. I'll click this edge loop right here and hit Control plus twice. That'll delete some
of the faces in the inside and fix
some of our issue. Let's unmap this one more time, we can see that we're still getting a lot of stretch here. So let's come over
here to the UV editor. Click the face button here. This will allow us
to select the faces and grab these ones that
are the most problematic. We can see that they're
along these edges here. So I think we may actually be having an issue because
it's not cutting here. So I'm going to switch
back to edge mode there. Going to Alt click
this one here, press and actually
get rid of that seam. And instead, I'm
going to Alt click these corners here
and add a seam. If I grab and press U to
do a minimum stretch, we can see that we've gotten rid of the majority of
the stretched blue. Now we're ready to unwrap
our entire object. Let's hold Alt and our entire object should
come back into view. So next, let's focus on the hip. I'm going to press Alt H
and bring everything back, press A to deselect everything
or click off to the side, and then I'm going to press
L to select the hip here, and I'm going to press Control I and and we can
focus on unwrapping this hip. First of all, I actually
kind of want to split off these areas here. So I'm going to grab this
seam all along the edge here. So I'm just going
to shift click, and this one will
just take a bit. And I'm also going
to do the same for the edge loop
here on the inside. With those selected, I'm
just going to press Mark Sm. Go to click off
to deselect here, and I'm going to click there down the center
of the sphere, and I'm going to
click down here in the center of the hip and
I'll click down here. So we have one line
moving through it all. We will press U Mark SM. We will press A to
select everything. We'll do a minimum stretch. We can see we're
getting a tiny bit of stretching around
some of these corners, but most of that
will be unvisible, so I'm not going
to worry about it. So now we're ready to unwrap
our entire character.
10. UV Packing: We will hold Alt H. We will select everything at
once by pressing A, and we're going to do U
Unwrap minimum stretch. Now let's tap back out in object mode and see how this looks. We can see that
the UV grid looks relatively the same size across the entirety
of our character. Now, where I might
be concerned with textil density is if I saw
something, for example, the head here, I
just scale this up, where the UV grid was
much smaller on the head and everything else
was much larger. But in general, everything looks relatively the same
size, so that is great. Now, we're planning on doing a wood material
on our character. So one thing that does matter is the direction of the UV grid. And we can see here
that everything's moving relatively in
the same direction, except for these four arms here. Which are going off on
an off canted angle that doesn't match
the flow of the arm. So let's grab this
in edit mode here, and we're going to press L over our forearm there and
locate that over here. We can see that the piece of our forearm here is actually
this piece right here. So if we select this piece here, we can grab it in this view
and press R to rotate. So I can rotate this until it gets relatively in
the same direction. That's great. Now let's do the same thing with
this forearm, as well. So I'm going to grab that piece, find where it exists up
here, press L over here, I'm going to R to
rotate until that's kind of moving into relatively
the same direction. Now we have an issue. These
islands are overlapping. I could try and scale these
down and move them over, but then now the
texiltnsity doesn't match, which is also an issue.
So what should we do? Well, Blender has a tool
called Packing Islands. If I select all these
islands by pressing A and then come up
here to the UV menu and click Pack Islands, I'm going to get a
bunch of options. Packing islands is
when Blender takes all the islands we have
here in the UV and tries to pack them in the best
way it sees fit for textil density and
avoiding overlap. So what I'm going
to do here is turn off rotate and leave on scale. I'm going to hit pack, and what that will do is not rotate any of
our directions, but instead, rescale everything
so that it fits here. Now, if I tab back out
in the object mode here, you can see that we have a relatively general
direction that all of our grid is going and everything matches
here on our size. Let's return back to
that Pack island tool and talk about its
importance a bit more. By default, if you leave
all the settings on, Blender will just try and pack the UV islands in the way it sees most efficient to
fit inside that image. But we also have the
option to control, the ability if it affects
the scale or the rotation. With rotation, it
can try and match the object's rotation
and give you the correct rotations
or with the scale, it can try and move things
around and make sure that the textil density
is correct, as well. We also have the option down
here for the island margin. And with the island margin, what we can do is
increase that margin, which will increase the space
between islands and prevent bleed through when working with lower resolution textures
as we showed before.
11. Auto Unwrap: Earlier, I mentioned
using the Auto Unwrap. So if we tap in edit mode
here, select everything, going to press U, and we're going to use
Smart UV Project. Now, there's a couple Auto
Unwrap options down here, but Smart UV Project is
the one you're going to use 90% of the time.
So let's click that. I'm actually just going to leave the settings here at
default and click Unwrap. Let's tab back out
in Object mode and see how it did
in comparison. At a quick glance,
it looks fine. The textil density and
the direction is great. However, if we zoom in here, we can see that because it added scenes just
automatically at random, we're getting portions
where things are not lining up as nicely as they are
and are original here. So when should you use Auto
Unwrap versus manual Unwrap? Well, if you're planning
on having patterns that are going to move across
your character, for example, a checkerboard, a
fabric pattern, or a wood pattern, you probably
want to manually unwrap. However, if you
have generic colors or if you're planning
on texture painting, everything, then
using Auto Unwrap is usually sufficient enough.
12. Applying Our Materials: You've been following
along to this point, you should have a fully
UV Unwrapping model. However, if you've
skipped ahead or you struggled to do the UV
Unwrapping process yourself, I've provided a project file called robot UV
Unwrapping Complete, and you can start with
this project file. Here we will see we have our robot character
here in our object, and there's one UV map material. Let's look at how we can
take the materials we've created and apply them
to our character. Now, first, we're going to want to import them into our scene. So if you've been
following along, you should have a
few project files. We're going to go
to File Append. This allows us to import
parts of other projects. I'm going to click Append here, and I have a folder with all the projects we've
been working on. So I'm going to go into
the wood blend here, grab the material folder, and I'm going to import the
wood dark and woodwarm. And now if I click
here, I can see that it can apply
those to my character. Let's also append
the metal Shader, as well that we did
with the wear and tear. So I'm going to click up
here to go back up and go to the metal material and
import metal finished. So now we're ready to begin applying materials to our robot. Let's grab our robot here, and right now we just have
one material on the object. Let's grab the woodwarm. That's going to be
the main material I want to use on our character. If you're not
already, click here to switch into the
material view. You can also take a look
in the rendered view. If your scene is dark, you can turn off the
scene world temporarily, and that'll allow you to
select a preview HDRI. Just keep in mind that you'll
want to turn this back on to see accurate lighting
results in your scene. I'm going to work
in material view. I'm going to drag
this open here, and I'm going to open the
Shader Editor menu here so that we can make adjustments as
we see fit to our materials. So I'd actually like
to make this wood, a tiny bit more brighter. So when we mix it with our
dark wood, it stands out. So let's come here
to the RGB curves. I'm going to come to
the blue channel, and right now I think
it looks a bit purple. So I'm going to pull the blue
down here ever so slightly, and you can see that's pushing
us to a warmer yellow. Then I'm going to
come to this tab, which does the curves for
all three colors at once, and I'm going to raise
the black value here very slightly and then bring the white value over
here. Little bit. And you can see how that's
giving us a little bit more of a brighter
and warmer wood. And that's the
advantage of having this procedural material setup. In fact, let's come back
and look at our noise. I'm going to come to this
noise setup right here, which was our main streaks, and I'm actually going to
change the scale here a bit. Let's come here and change
to maybe something like 15. And you can see
how we're getting a finer grain wood
over our robot. I think this looks
nice, and I'm going to move on to adding
another material. Let's apply a secondary
wood material. I'm going to add a new slot
here and tab in the Edit. Going to use the key to
select some pieces that we think could be a different color just to add some accents. Now, when I hold
the key over here, I want to open the
select link menu and make sure this
is set to normal. That'll make sure I'm
selecting the entire object. I'm going to grab the
front of the fore arm here and this forearm
over here as well. Then let's come here and
grab the bottom of the feet. And then inside of the hip, let's grab these two
pieces right here. Now let's assign
the secondary slot. We're going to tab back
out in the object mode, and we can see that now we have a few accents.
Choose a material. In this case, I'd like to use
the wooden dark material. And you can see how
that's starting to add just a few variations of color. Let's add it in a
few more places. I'm going to tab back out
in the edit mode here. I'm going to click off
to the side there. I'm going to grab our joints here and I'm going
to grab the ears, as well, and then I'm going
to assign that wooden dark. Let's come back out, and
you can see now we have a little bit more color
contrast across our character. I zoom in here, I can see that the wooden grain across the
ears is going this way. Actually, I think it would look nicer if it was going this way. So let's come over to our
wooden dark material. And if you remember,
we'll know that this noise texture right here is controlling
the wood grain. And the way we stretched it
out using the scale here. So if I reset this to one
and I instead use the scale, you can see how it now stretches
that direction instead. So I'm going to come
back over here, reconnect this VSDF node, and now you can see we
have the wood grain moving in that direction,
and it looks much nicer. Also gives us a contrast and direction just bringing
a bit more interest. Now before we move on, I think the head looks like
one solid color, and we can maybe add a bit of
visual interest by grabbing the bottom of the head here
and applying that dark wood. I think that looks
nicer. Next, let's look at how to apply
our metal material. We're going to click Plus
here and create a new slot. We're going to tap
into Edit mode, and we're going to
decide what pieces we want to apply our
metal material to. I'm going to grab the bolts
on our leg and our body here, both on the front and the back. Think the ear base here
should be metal, as well. So I'm going to grab
both of those pieces. And then I want the
eyes to be metal, too. So I'm going to grab those eyes and I'm
going to click Assign. Now we can see that
we have all of our pieces selected, and
I think that looks nice. So let's come down here
and grab the metal finish. We can see now that we have a nice warm bronze
across our character. I have a bit of a
golden effect here, and I'd actually like to
make that a bit darker. So I'm just going
to come over here to the material and drag these down to a little bit of a darker and a warmer color. You can choose whatever
color you want. Now, if you remember,
we used kind of H mask and a grunge map to
create this metal material. But let's alter this so that we can actually make
a rubber material. I'd like to apply that to this squishy part of the arm between the
forearm and the joint. Let's click A plus symbol here, create a new slot, tab in
the edit mode, click off. We'll grab these
middle pieces of the arm here and
assign that slot. We're going to tab back
out to object mode. Going to grab the metal finished here and
click new material. Let's rename this Rubber dirty because it's going to be
a grungy looking rubber. Now we can just tweak our VSDF here and make it look more
like rubber instead of metal. Let's zoom in here.
First things first, we're going to turn
down the metallic. Next, let's change
the colors here. I'm going to click
this color here, lower the saturation
down on both of these, and then drag it down so that we have a black looking rubber. Now, I don't want this
rubber to be so shiny. Now, this is a bit hard
to tell a material view, so I'm actually going to hold
Z and click Rendered there. You can also click
rendered up here as well. Now, right here, this is
controlling our roughness. So let's click Shift A search
and look for a color ramp. Going to drag that over
that line and click. Now I can use this to
control the roughness. I'm going to grab
the black value here and just raise this. As we raise this towards white, it will become more
matte, as you see. And I want a pretty old
dry looking rubber, so I'm going to bring
this all the way up. And just like that,
we've converted our metal material into a
usable rubber material. Going to switch back up to
material view over here, and next we're going to begin
working on the screens. So I'm going to apply a screen here on the
center of the body, and then also I'm going to
use screens for the eyes. So let's create a new slot. I'm going to tab
into Edit mode here, click off and make sure
everything is deselected. Grab the screen here,
I'm just going to click the Face Selection mode up here and shift click
these two faces. But I almost want it to
look like the bevel of the screen there
is going back in. So I'm going to hit Control
plus on my keyboard. What that's going to do is grow that selection until I've
selected that entire piece in. I'm going to assign the slot. Let's do the same
thing for the eyes. So now we'll switch
to a vertex mode. You can see that we have one
little center vertex here. So if I grab that on
both of these and again, do Control Plus, I can
grow that selection. I'm going to grab a few faces
there and click Assign. Now I'm going to tap back
out in the object mode. Again, let's start
with our metal finish. A great procedural shader
that we can alter again. Let's click New here and
let's call this screens. Let's look at how we can
alter this material to work. Again, let's change the color. I'm going to use a
black for the screen, so I'm going to bring
both of these colors way down with B being all the way black and this being a
kind of very, very dark blue. I don't want this
to be metallic, so I'm going to turn
the metallic down, and I actually want these
screens to be shiny, so I'm just going to
leave them as is. If you want, you can
switch into rendered view and see how that looks. This might be a bit
too grungy, actually. So what I'm going to do is
grab the bump node here, and I'm going to
lower the strength of this down to
something like 0.15. And you can see how that removes some of the wear and
tear from the screen, giving it a little bit
more of a glossy look. Now, there's also the
clear coat option. If I come over here
to the principal BSDF and go to the coat, we can add a clear coat on
top of our entire material. The great thing about this
is it gives the appearance of almost a protective screen sitting on top of our screen, which is pretty realistic to how screens are
normally made. But I don't want it to be too shiny because I still
like this grungy look. So instead, I'm just going to set the weight to
something like 0.25, and you can see here how
that is now giving us a nice little reflective
material on top of our material, but still retaining
a lot of the grunge. So now we've applied
materials to our characters, but we could still use
for some more details. I'd like to add some
pupils to the eye, a little battery
symbol for our screen, and maybe some additional
wear and tear. Let's look at how we can use Blenders Texture Painting tool.
13. Texture Painting Toolset: Video, we're going to dive into the Blender texturing tool set, and we're going to use it to
add some grunge and wear and tear to our object and add
some expressive details. But I want to call
out that the tool set here is actually
very simple to use. Really, the primary limitation is going to be your
painting skills. Now, this is not
a painting class, but I am going to teach you
how to use all the tools. And in fact, with what
you learn in this class, you could even
produce arcane like texture quality with
enough practice. Butler's texturing tool
unlocks a whole world of creativity and applying
textures to your model. So let's dive in and
learn how to use them. Let's take a look at the
Texture Painting tools in this simple setup. Here, I have a plane
with a material on it, and over here, I have a window
called the image editor. You can see here I have
it set to paint mode, and we can actually paint
here if we like, as well. Let's create a new
image texture. We can do that here or up here. I'll create the image here,
so I'm going to click New. I'm going to type Texture. And here we can set
the resolution. For now, I'll leave it at 1:24, which is a one K texture. Here I can choose the color
that it's going to use, and I can also set
the Alpha here. This will not be active if the Alpha button
isn't checked on. You can also choose Ja type, so you can do color grid or UV grid if we've
seen in the past, but I'm just going
to leave blink, set it to a pure black color, and click New Image. Now we have a black texture. Let's apply it to our object. I'll come up here, hit Shift A, search for an image texture. Then I'm going to drag that into the base color here and
select that texture. Now, if I come over here to the UV editor tab
into Edit mode, we can see that the UV is just a simple square
over our object. But let's look at our painting tools over here in the Viewport. I'm going to drag
this over this way, and we're going to tab into
Texture Painting mode. You can hold tab and
switch to texture paint, or you can come up here Object extra paint. Now,
conveniently here at the top, Blender has the most
common settings that you'll be using
while painting. Over here, you will
have the tool menu, which you can open and
close with a T button. And over here, if
you press the N key, we can click the tool tab, and we'll get a bunch
of advanced settings. Let's take a look at some
of these basic settings. Here we can choose our color. So I'm going to choose a bright
blue and a bright green. And if I paint here, you'll see that it'll paint
with the left color. If I press the X key, that will allow me to
switch between colors. Is a quick way just to have two colors within your palette. You can access that
here or you can access that over here
in the color picker. Underneath that, you'll
see randomized color. By twirl this down, you'll see that I can adjust
things like the hue, the saturation, and
the value at random. Now when I paint, you'll
see that it'll add a little bit of variety
into my paint strokes. Below that, you'll
see a color palette. Here you can create
a new palette and you can begin saving colors. Just like that, it will
save the leftmost color. You can create a
custom color palette and return to those
colors as needed. We can set the radius of
our brush here or up here, and we can set the strength
of our brush here or up here. You see the radius will
increase the size of the brush and the strength will increase
the opacity of the brush. You can also toggle
on this option here. If you have a Walcom
or drawing tablet, you can use this to use pen pressure to control the
radius and the strength. A great keyboard
shortcut to remember is that left and right bracket
will change the radius. Or if you press F, it will
open this little menu where you can click and drag to decide the size of the brush. Now, if you come down here,
we'll have the stroke. This is getting a little
bit more advanced. Here we can look at the
stroke method. This is space. So what it's doing is
looking at your brooch, which in this case is a circle, and it is looking at the
spacing between those. So if I click and drag here, we get a seemingly
straight line. But if I was to increase
the spacing here, you would see that it
would start to spread out the spacing of those dots. And if I reduce this
all the way down to 1%, you can see that
there is no space as I drag through.
The jitter option here will jitter the
position of your brush. So if I turn this
up a little bit, you see that as I
click and drag, it's jittering along that line. I drag this up more, see how it's starting
to spread out more, we can do this all the way into a seemingly spray
paint type effect. Now, if you come up here
to the stroke method, we've been working in space,
which is the default. There's a lot of options here. I'm just going to show
you the ones you're most likely to use. Let's
take a look at. Line allows us to
click and drag lines, and the spacing and the
jitter work here as well. Anchored mode allows us to click and drag our brush
and leave it in spot. This is great for applying
things like logo textures. We'll actually look at how to
do this on the robot later. I'm going to reset
this to space, and we're going to look
at the next option, which is fall off. Fall off here will control
the fall off of your brush. In this case, we have a sphere. If I click here,
you can see that it is mostly sharp and
then starts to blur. Let's look at some of the preset options we can click down here. If I click this here,
you can see how our brush starts to have
a more gradual fall off. Whereas if I click this here and it's flat all
the way across, you can see that we get
a hard edged brush. Experiment with this curve here, but I recommend just
using the presets. Symmetry allows us to
symmetrize across our object. It will work at the origin
point of the object. So if I click X here, the origin point of my
plane is right here. So if I begin drawing here, it will draw a mirrored image
across the origin point. Now, there are some presets. We have paintbrush
hard, paintbrush soft, and then most of
these are just tools. Honestly, there's not
many presets to start. We'll look at how to
create some on our own. You can access those bottom
down here in the shelf. You can access them
up here in the top. Or you can access
them over here. Let's take a look at the
tools on the left here. We have the blur tool, which will just blur the edges here. You can see how that's
beginning to blur the edge. We have the Smear tool, which
works just like Photoshop. This is great for blending. We have the Clone stamp tool, and you'll see that the
three D cursor has appeared. If you shift right click, you can place that cursor, draw and paint the clone
stamp, just like Blender. We also have the fill
bucket tool here. Now, it's important
to note that when you switch from the paint
brush to the fill bucket, it has its own colors. So if I click with
the fill bucket here, it will fill the entire object. It is also where you
can use a gradient. We click gradient here
with the fill bucket, we can click and drag and draw
gradients onto our object. Now, down here is a mask option, and this allows you to
paint custom mask so you can determine where you can and cannot paint on your character. However, I find it much easier to use the paint mask
selection up here. If I click this, you'll notice that my object
starts to wash out. And currently, I
can't paint anywhere. But if I tab into
Edit mode here, I can select the faces that
I want to be the mask. So I'm going to click and
drag the centerfaces here, going to tab back to
the texture paint mode, and now I can only paint
within that section. Find this method much easier
than using the masking tool. If I want to turn
this feature off, I can just click this up here and begin
painting anywhere. Let's take a look at
the texture here. This allows us to apply
a texture to our brush. You can download bony of
these for free offline, but I've also
included one myself. We will click New here.
Let's call this paint brush. Now, if we come over here, we'll see that there
is a texture menu, and we can grab the image here. So I have already imported it, but you can open it here. It's included in
the class files, and it's called Bush
Texture Painting. Take a look at this
paint brush texture. We'll see here that it's
just a simple brush texture on an Alpha background. Now, below texture,
we have texture mask. And the reason I say this
isn't super useful is because the texture mask just masks
out the texture up here. So, for example, if
you put a circle here, it would mask out
this texture up here. However, you can build that into your textured image with Alpha. So it's not super useful unless you're doing incredibly
advanced brushes. Now, if we click and drag here, you can see how we can begin painting with that
texture applied. Right now, though, it's
just repeating the texture infinitely and doesn't
look all that interesting. Look at how we can
change that up. If we come down here, we can
actually turn on random. Then we can set
the random angle. I'm going to do
maybe 90 degrees. If I start to click
and drag here, you can see how
now it's starting to feel like a paint brush. And if we combine
these with some of the other options we've already shared, for example, stroke, we can turn the spacing
up ever so slightly, and we can jitter
ever so slightly. We can maybe turn on
randomized color here. I'm just going to change
the value ever so slightly. Now as we begin to
click through and drag, you can see how
we're getting a much more natural and
interesting brush. Now, we've made a few changes. Let's actually save this brush. We'll use it later on
our robot character. Let's come up here,
click the Down arrow. We can duplicate the asset here. I'm going to choose
current file, and I'm going to name
this paint brush grunge. Now, if you want, you can
play with the textures and the stroke settings until
you get something you like. But I'm going to
leave mine here. Now, you'll see here
it says unsaved. So we just need to make sure that we save our project there, and it should save into
our project permanently. Great. Now we have the
paint brush grunge brush that we can use as a preset. Now the last thing I
want to point out is that when you're done
Texture Painting, you need to save
your texture image. So under the image editor, you'll see that there's
an asterix here. That means that this texture
paint has not been saved. Many Blender beginners will spend an hour painting
their texture, forget to save the texture, and then lose all
of their progress. So before closing Blender, always take a look and see if your image
has these asterix. You can come up
here, click Image, Save or Save As, and save your Texture
Painting image. That way, next time you open Blender, your work
will still be there.
14. Painting in Details: Let's take a look
at how we can add some details on our robot here. We're going to add
some elements to the screens that
glow with emission, and we're also going to add a little bit of wear
and tear on edges. Let's start with
the screens first. So I'm going to grab
the object here. I'm going to grab
the screen material, and I'm going to come over
to the Shader Editor here. I'm going to search and
look for an image texture. Go to select that, click New, and set a resolution here. Going to set at something
higher like 2048 by 2048. I'm going to name
this robot emission. Now an emission Shader works
off a black and white image. Everything black will not emit and everything
white will emit. So I'm just going to start
with a black background. Going to click new image there, and then I'm going
to drag this into the emission color here and I'm going to turn
the strength up to one. Now, nothing will change because we just flagged
black into there, so there's nothing emitting. However, if I were
to, for example, make this all white, you'll see that
everything is emitting. Let's plug this back in
and begin painting on it. We're going to drag
this over here, and let's come up here to object mode and grab Texture Painting. Now, if I begin
painting in here, you'll see that it is working. And that's because I open texture paint with
this image selected. However, you have a
lot of images in here, and if you don't have
this one selected, when you open it, Blender might try and guess what
layer to paint on. So if when you begin to paint, you don't see
anything, don't panic. Come up here and we can select a layer we want to paint on. So here we can see that we
can see all of our materials, and below that, we can select all the images in
those materials. We are on screens, and we want to paint on robot emission. So I'm just going to go
ahead and close that there. I'm going to reset back
to a black image here. So I'm going to zoom
in here and I'm going to address my
brush size here. I'm going to use the F key, and I'd like to do two
little eye highlights. I'm going to open
the fall off here. I don't want a soft
fall off like that. I want a harsh fall off
to make it look digital. So I'm going to click there, and then I'm going to drag over here and do it on
this side, as well. I'm going to move left
on my bracket key there, create a smaller highlight, and click there just to
put that underneath. And you can see how now we have two little eye highlights. Now, I'd actually
encourage you to put something custom here just to make it a little
bit more your own. But if you'd like a Paul
along with me exactly, we're going to use
a battery logo that I have included in the
project resources files. We'll come here to Texture. We'll click New. I'm going
to name this battery. I'm going to come over
here to the texture, and I'm going to open that battery logo that
I have included. Like, open image there. And now we're going to twirl this up, come down to stroke, and this is where anchored will
come in very useful. Like, click Anchored
here and click and drag. You can see how we can get our logo here and just
drag this into position, rotating it or just going up
and down to change the size. I'm going to set mine to write about that
size right there. I'm going to switch back to object mode here and zoom out, and you can see we have some nice little details
on our character. I don't really like the
bright white emission. I don't like these being
bright white, though. I'd actually like to maybe
have a yellow emission shade. But if I shift click here, we'll see that we have a
black and white image. But we can actually use
a color lamp for that. So let's take the
color ramp here. We will search for color ramp. I will grab that and
put that over here. And we can actually just remap the white here to be yellow. I'm going to click here
and maybe make this just a nice warm
yellow, just like that. If you have any issues, you can click linear here
and go to constant, and then just drag
this out a little bit, so it appears and
drags over the white. Perfect. That just gets rid of the gradiation in case
you have some blurs. So let's make sure that
that image is saved. We can do that in
two ways. We can come up here to
the image editor, grab that robot emission and
see it's not fully saved. So we can save that or in texture paint mode,
if I come over here. If I click up here at the top, there's an option here to
save all modified images. If I just click that, it
should automatically save it, and the asterix disappears. Now, you might be wondering
why this emission shader just has these
random spots here. Well, that's actually
going based off our UVs. If I grab the UVs
of our character here and switch into
UV editor mode, we can see that the UVs here of the eyes are actually appearing
where the highlights. So this is another
important part of U Vs. It allows us to
texture paint properly without accidentally
painting onto other islands. Next, let's paint
in some wear and tear on the edges
of our object here. Now, this gets a tiny
bit more complicated. So let's grab our material here, and let's paint in
on the wood worm, which is going to be this
main one right here. I'm going to come up here
to the Shader Editor, and what I want to
do is paint into the color and kind
of add a bit of wear and tear on the
so we could just paint color in manually or we
can use it as a mask again. I'm going to vote for a mask. So I'm going to hit Shift D, search and look for
image texture here. Go to click New,
leave it on black, leave the resolution as before, and I'm going to do grunge
edges and click New Image. Now we have a black image, and we're going to
use the white to determine the mask
of mixing colors. So I'm just going to
remove this from the color here and I'm going to
search for a mix color. Now I'm going to plug this
into the base color here. And just to make this obvious
what's happening here, I'm going to make this bright
green and this bright blue. We can plug our color
into the factor. You'll see that everything
black will show A, and everything
white will show B. So let's drag the
color here into A. This will be our base material. Let's grab all this, and we're going to
move this up here. So let's just unplug
our color here. And I'm going to drag this here and we're going to
create a worn out look. We're just going to search for
a hue saturation in value. I'm going to drag
that over here. I'm just going to lower
the saturation a bit, raise the lightness, and maybe set this to something like 0.51. That's just going to give us
a slightly washed out look, which is what generally
happens to wood over time. Now we can plug this into the B and we can plug this back
into the base color. We'll see our normal color
load back here in a moment, and now anything we paint white will make this
color come through. Now let's begin
Texture Painting. But first, we need to import that brush
that we made so we can get a little bit
more of an easier grudge to rub across the edge here. I'm going to go to file, append. I'm going to go to
the Downloads folder of everything that
I have provided. I'm going to find the
paintbrush blend. I'm going to go to brush
and import paintbrush grub. Now if I grab our
object here and I go to the texture paint mode, I need to make sure that I
have the correct map selected. So I'm going to
grab the woodwarm material, the grunge edges. Go to press the end key to open my tool panel just in
case I need it here. And now I'm going
to click this brush preset and look for
paint brush grunge, which we can see is right here. So I'm going to click that one, now we're ready to
begin painting. So I can begin painting here
and see that it's starting to add some wear and tear,
but it's very subtle. So let's go ahead
and amplify that. Let's look at our
grunge map edge here. You can see here that
we have a nice mask. We just need to make this effect a little
bit more extreme. So I'm going to reset this
to the full material, and let's adjust
the settings here. I'm going to set this
to something like maybe 1.5 and the saturation
2.5. There we go. That's looking a
little bit better. I might also do 0.525
to yellow it a bit. Now I can begin painting
around the edges. This is a great way to
add a lot of character. Now, where I recommend kind of painting in these
details is around things like edges or where things might be
grabbed more often, for example, like bolts. And this can really help add a lot of realism to your object. Now, I'd like to
show you one more. You can actually paint
into the other maps. Let's take this grunge
edge map here and maybe plug it into our bump map. So we will grab
the bump map here. Let's take a look at this
color ramp we have here. We'll use a mixed color. We can just grab
this one up here, duplicate this, grab
this on the mixed color. I'm going to change
this color to white, and then I'm going
to drag this all the way down into the
factor down here. That we have white
on the bottom, we want to make sure that
this is mixed on top. So let's just take a look at what this bump node
is looking like, and we can see how that
is beginning to paint in. So if we look back at
our final material here, we can see that
with this bump map, what we're actually
doing is painting in some additional bump detail. You could do this
on the roughness, the metallic value, or any
other value you see fit here. Now I'd like to show you one issue you might
run into here. Let's say that I start to paint around the
edge of the screen. We'll see that this
is also painting on our screen material, which, of course,
we do not want. So I'm going to hit
Control Z to undo that. We're going to
come over here and look at why that's happening. We'll see here that
we have woodwarm and grunge edges selected. So why is it also affecting
the robot omission? Well, that's because
up here, you'll see that the mode is
set to material, which will work
across materials. So to make it so that we're only painting on that one map, we can come to
single image here. And then we will just search for the image that we're
painting on currently, which is grunge edges. Now if I come back down here, you'll see that I
am only painting on the grunge edges material. Of course, when you're done, make sure to click Save all
images to save your changes. Now, in this case, we're
using procedural materials, but you could also
mix other woods. Now, we opted to use our
procedural material setup. But if you look at
my final result, you'll notice that it looks a little bit more like realistic. That's because we can do
the same exact method, but with the techniques we learned earlier
with PBR materials. For example, on
this website that I'll be providing
in the resources, there's a ton of free wood materials that
you can download. For example, you could
download this PBR material, put it on your
character, and then use the mixed color node to
paint in the wear and tear. So feel free to
use more stylized procedural materials that
we created together or download PBR
materials and try and create something unique
to your own style. You now have all the skills you need to texture your character. You could use the procedural material setup
that we used here. You could include PBR materials. Or if you want, you
could start with a completely blank site and paint your
character from scratch, creating a more stylized
painterly look. Regardless of what
direction you take, I'd love to see your results,
so please share them. If you'd like to see the
final results I have, I'll be including that
project file so you can take a look at what
I settled on as well.
15. Outro: Congratulations on completing
the texturing class. One of the biggest hurdles
in three D and one of the most important parts of
the production pipeline. Texturing plays an
extremely large role in the final result of your three D render and
how it will look. I have to say, as somebody
with a painting background, it's also one of my
favorite parts of the production pipeline
being very fun. However, if you're looking to improve your
texturing skill sets, I'd say there's one
or two pathways moving forward for you. If you're more
interested in realism, I would look at Blender
shaders in more depth and continue to practice
with those in creating procedural materials. If you're interested in
taking the PBR workflow, there's a lot of third
party tools such as the substance suite
that are worth learning to help improve
your skill set here. However, if you'd
like to take more of the stylized approach, rather than focusing
on blenders tools, I would instead focus on your painting skills and
trying to up level those as that will play
a large role in the final outcome of the shaders you create
for your character. Whatever your path may
be around texturing, what I do encourage you to do
is to continue this course. We're going to go through
the process of rigging, animating, and lighting
this character, trying to take you from
a Blender beginner to a Blender professional by the
end of the entire series.
 SouthernShotty3D, Motion: Design, Direction, & Animation