Transcripts
1. Modeling - Intro: Have you ever tried
learning Blender, and then as you go to open
a blank project yourself, you just don't even
know where to begin? Well, then this
class is for you. We're going to be going
through the process of modeling and Blender and
all the various techniques. Sure. Hi, I'm Southern Shadi. And in this class,
we're going to walk through the
basics of modeling. I'm going to show you non
destructive workflows, destructive workflows, curve modeling, and also walk you through the
basics of topology. After that, we're going
to go ahead and create a simple robot character
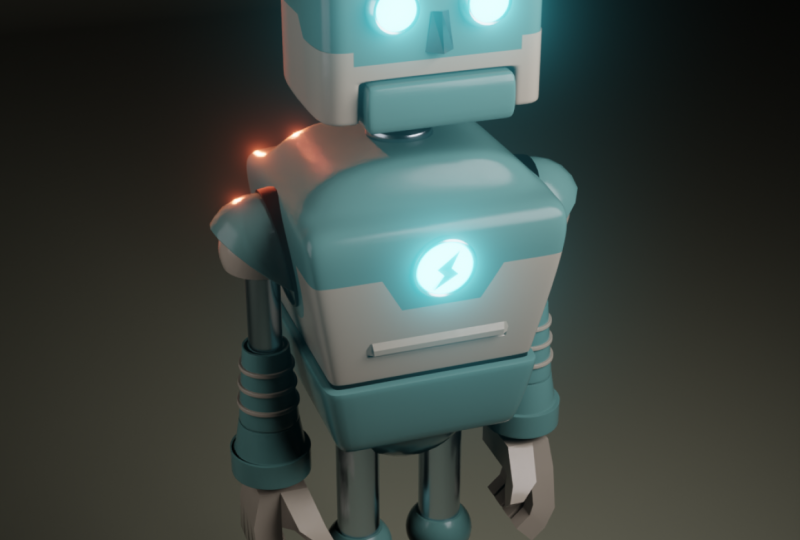
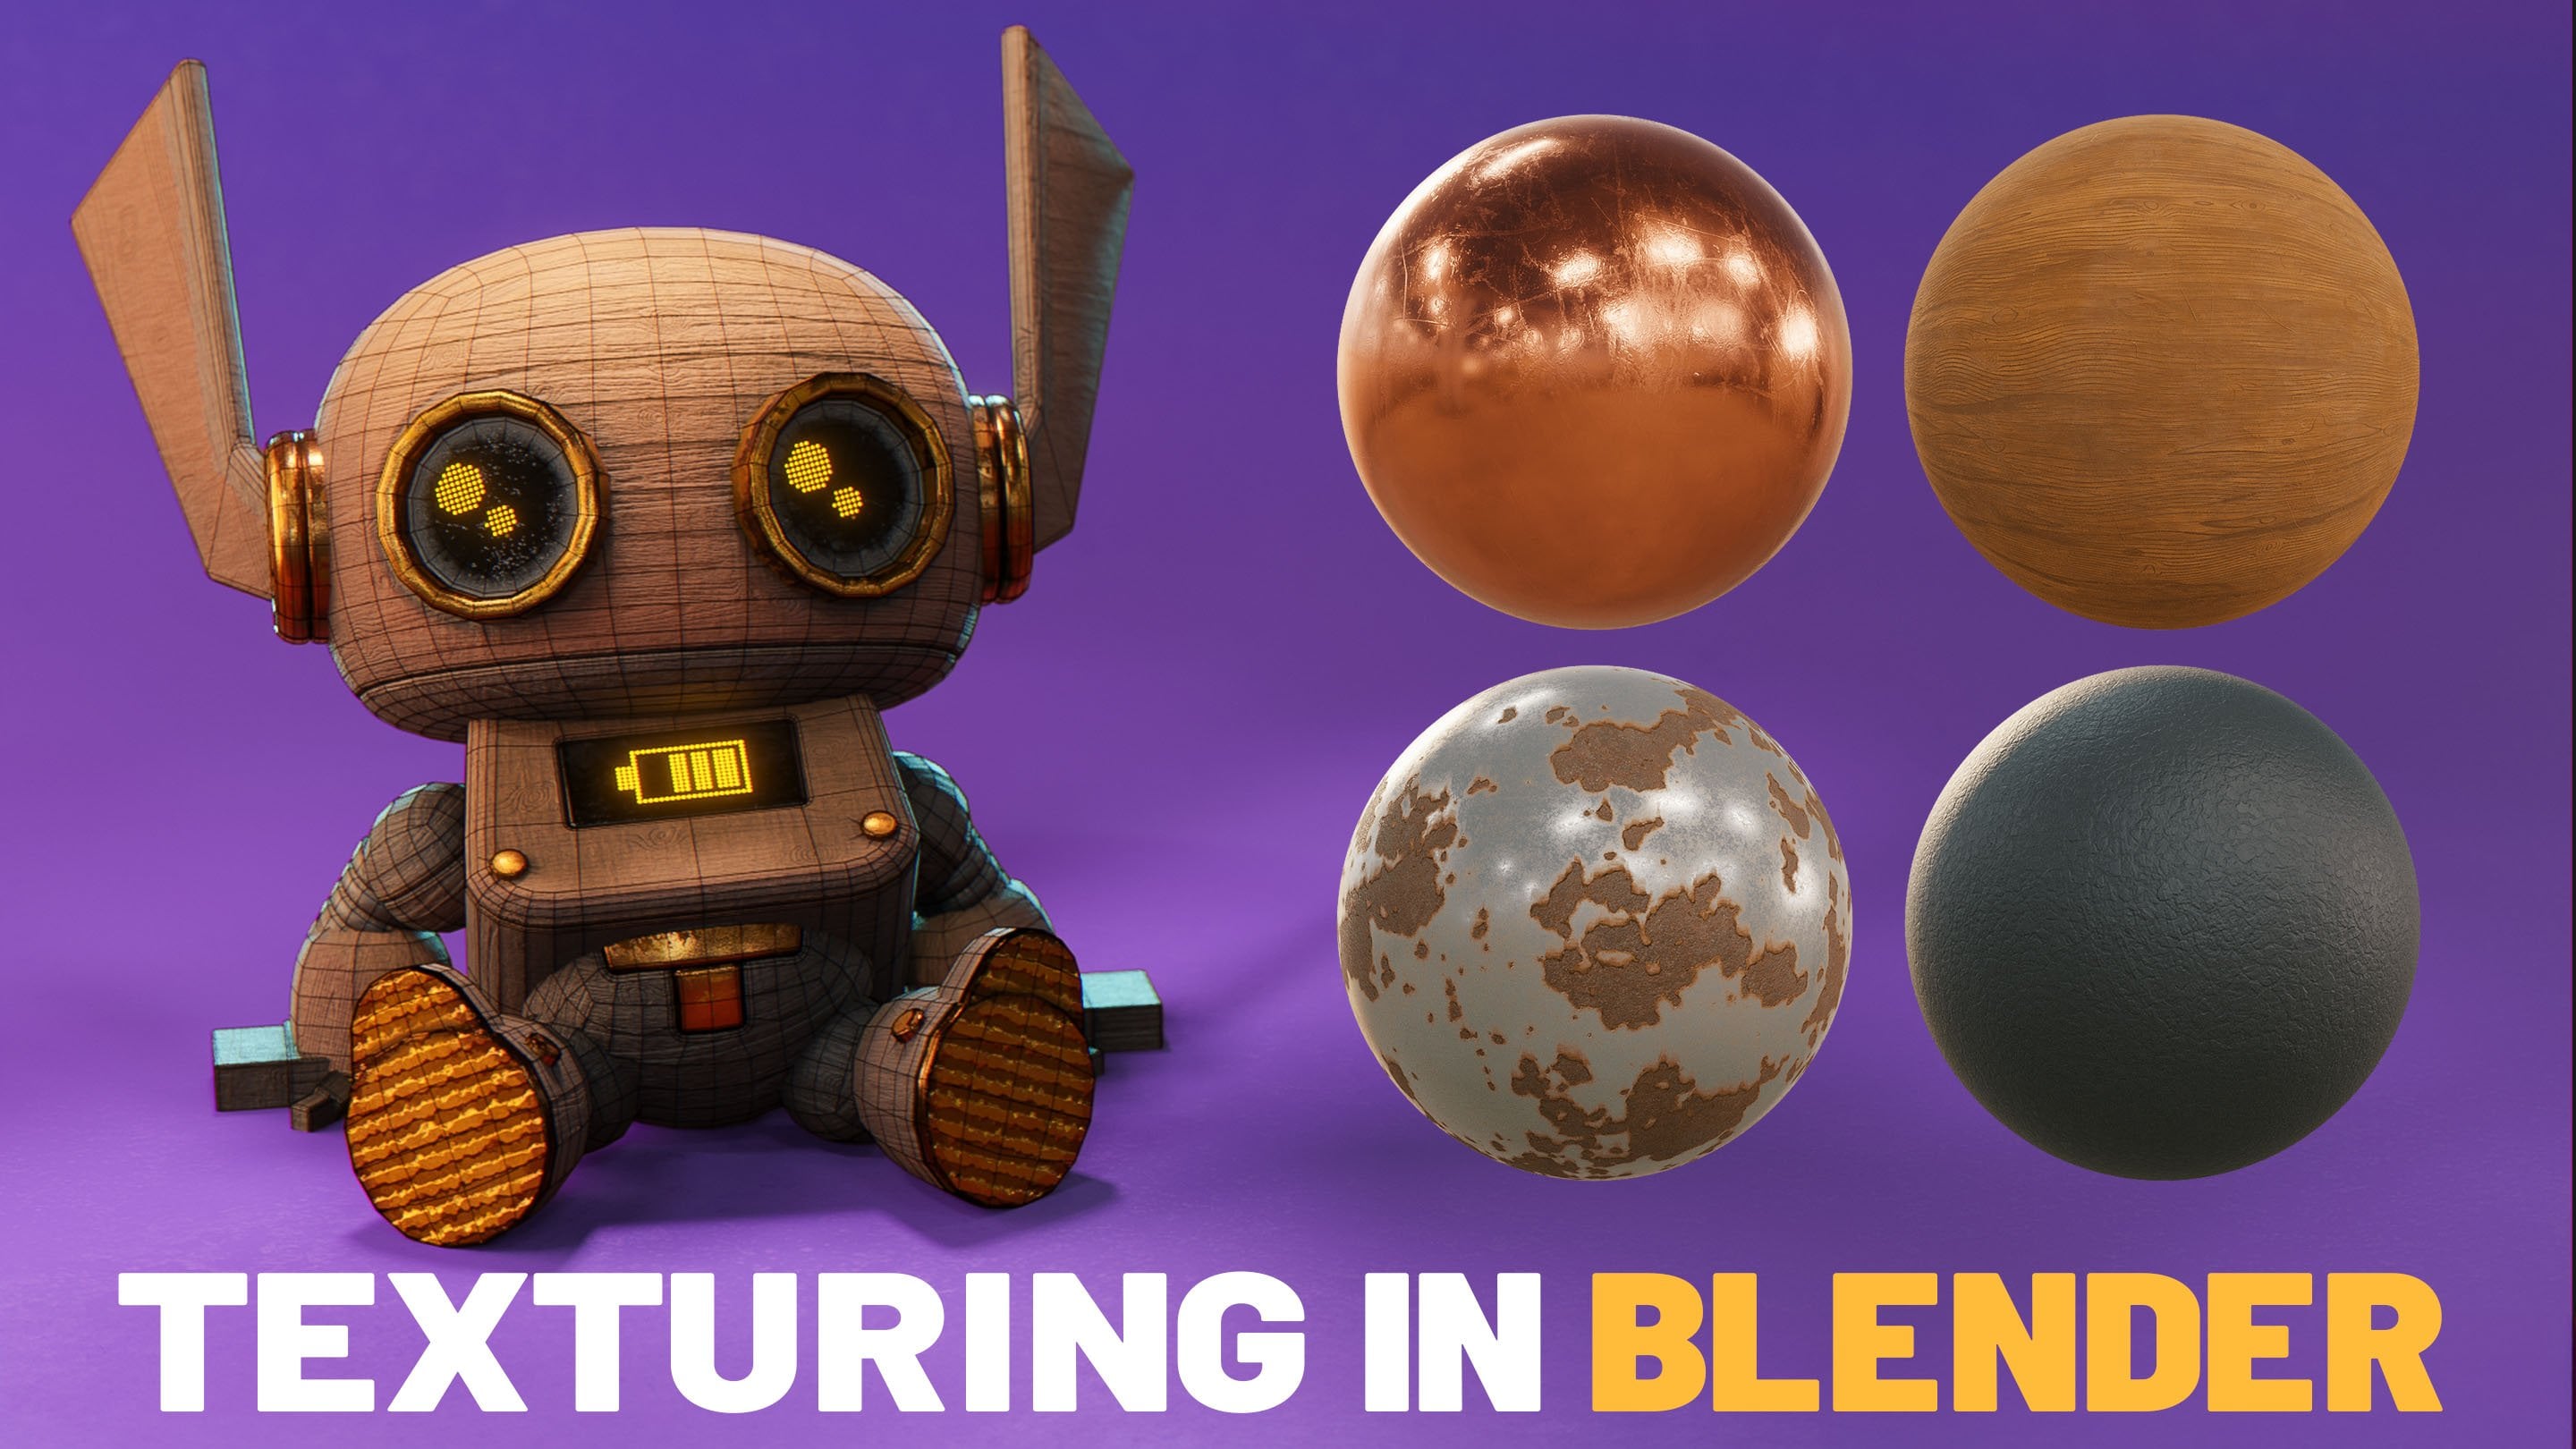
like the one you see here, which we will texture
in future classes. This class is part of a series that I'm doing for Blender aimed at taking you from a beginner
to a professional level, and we'll walk through
each process step by step. How, if you've never
opened Blender before, you might want to go
ahead and take a look at my getting started with
Blender course first, which will walk you through
how to use the interface. Now, I've spent over
a decade working in the industry of
Fortune 500 clients, and now I want to help you build that same creative career. Blender has become a major
player in animation, visual effects, and tech, and it's only growing from here. Now, whether you're
aiming to work in games, films or interactive media, this is one of the
most valuable tools you can learn to jump
start your career. So, let's get started.
2. Modeling Workflows: There are actually multiple
approaches you can take when starting
a model in Blender. This includes things
like curve editing, non destructive
editing, sculpting, box modeling, and more. In this video, we're going
to walk through some of the most common
modeling workflows and try and demystify the
process for you a bit. Mesh modeling and Blender
refers to anything that revolves around you
editing the mesh directly. And this is the most common and beginner friendly workflow and Blender when modeling. You're working directly with
primitive such as cubes, spheres, cones,
cylinders, and more, and you're editing
the vertices, edges, and faces using simple
straightforward tools, such as extrusion, loop cut, inset, bevels, or more. We'll go through all those
tools in this course. Now, the advantage
of this workflow is the simplicity of it, how quickly it is to
grasp the tools and how easy it is to
produce simple objects. However, as you create
more complex objects, it can be really easy to
create messy geometry, which will cause
you issues later. Another big disadvantage of mesh modeling is this is what we call part of a
destructive workflow. This means that all the changes you are making to
your model are. Now, of course, Blender
allows you to undo, but only a certain
amount of times. So if you run out of undos, you will actually
just have to go back and re edit or start over portions of your
meshes if you find out that you need to fix
or change something. This is why when you're
working on a mesh, I recommend that you save
versions along the way so that if you make a mistake or feel you need to restart, you can just revert back to
an earlier project file. Curve modeling is all
about shaping objects with smooth paths instead of
editing every single vertex. With just a few
points along a curve, you can manipulate and alter handles and define an
entire surface or path. Blender will
automatically fill in that data in between
the geometry for you. The advantage of
curves is that they're incredibly flexible
and non destructive. You can build entire shapes
with only a few points, adjust them at any time, and even use them as a guide
for other objects. The limitation is
that curves alone don't really give you
much fine detail. If you need animation ready
geometry or complex editing, you'll usually have
to convert them to meshes and edit them later. Curves are really perfect for things like motion graphics, emborting logo vectors, or
working with fonts and text. They're also great for spinning symmetrical objects like
vases, glasses, or pillars. And with the curve drawing tool, you can easily snap
ropes, cables, or stylized hair right onto
another object's surface. Blender also has a host of tools for using
booleans, as well. When it comes to
working with booleans, we would call this
hard surface modeling. And hard surface modeling refers to anything
that's man made, mechanical, or kind of rigid, things like cars, weapons,
tools, or machinery. Boolean modeling is about
combining simple shapes to make complex ones using operations like union, difference
or intersect. For example, you might cut
a hole into a box using a cylinder or merge two
separate objects into one. Now, the main advantage
here is the speed and creativity at which you can
quickly combine objects. To edit these shapes
manually would take an incredibly long time with traditional mesh editing tools. You can experiment
a lot more quickly. It's not destructive since everything is in
a modifier stack. But the downside here is that after you're done
creating the geometry, the booleans can
get really messy. And if you need a clean
or optimized model for things like
games or animation, you're probably going
to have to go through a process of re topology. This means that after
you've created them, you then have to redraw the faces on top of
the model again, which is a really
tedious process. Sculpting is another
major form of modeling, and Blender has an amazing
sculpting tool kit. It's like working
with digital clay, and instead of carefully
moving around points, you're kind of using
brushes to push, pull, smooth, and carve
out high resolution mesh. It feels much more like draw or sculpting in real life than it does traditional modeling tools. The biggest strength
here with sculpting is that it's very
artistic and intuitive. It's the best way to create organic shapes like
faces, creatures, or cloth folds, and to add expressive surface details
like wrinkles or pores. But the limitation here
is that the models are extraordinarily dense and
they're not animation ready. Usually, once you're
done sculpting an asset, somebody will have
to go through and topologize the entire asset. Now, one thing that remains
true across all forms of modeling is the idea of
blocking versus detailing. A good mindset is that you should start with
big shapes first, medium shape second, and
move on small details last. For example, blocking or working with large
shapes means you'll start with big simple primitives to kind of define
the overall form. Think of it kind of like
the sketching phase before you move on to
your final drawing. If I were to create a
chair, for example, I would first start with
some basic cubes to block out the general size
and form of the chair. After that, I would move
on to the medium details, adding things like arm
rests, brackets or more. Lastly, I would focus
in on small details, adding things like
knots in the woods, nails sticking out
or engravings. Now, the advantage of
working this way is just like a painter,
starts with broad strokes, moves into the details, is that you can define your
form as you move forward. And by doing this,
you can gradually shape the objects to
be the model that you want and prevent yourself from having to do a
lot of revisions or backtracking to fix or
change things you could have caught along the way if you had a started with
the bigger picture. I want to make it
clear that none of these workflows are
intended to be isolated. In fact, as you progress
in your modeling skills, you'll find yourself
switching workflow seamlessly all to
deliver one object. For example, it's very common in a character workflow
to start with mesh modeling to
block out the basics, move in the sculpting
to add the details, and use curves to
add various cables, ropes or hair onto your object. So as you move forward and get more familiar
with this workflow, start thinking about
which workflow works best for what type of
object you want to create. Now I'd like to point
out that in this class, we are going to be focusing in on mesh modeling
and curve modeling, as they're the easiest for
beginners to approach. Both sculpting and
hard surface modeling could demand entire
classes on their own.
3. Mesh Modeling: Comes packed with a full suite of tools for mesh modeling. The problem is that
as a beginner, it can sometimes be difficult to know what tools
right for the job. So in this lesson, we're going to look at
some of the tools you can use in Blender for mesh
editing and how to use them. So we're going to use some
basic modeling tools here to make a little crate
like you see here. Now, first, what we're going to do is I'm going to
grab my object here. Now, by default, you should
have a cube and Blender. If you do not, you can
come and hit Shift A, mesh cube or you can add
it up here, mesh cube. After that, I'm going
to grab the cube, and I'm going to tab
into Edit mode here. Here in Edit mode, we can manipulate the mesh
of our object. So if I grab the vertex here, grab the G key for move, I can move this around
or use my Gizmo. And up here, we can see that we can change
the select mode. So right now we're
in Vertex mode. If I click here, I can go ahead and I can move
the edges there, or if I click here, I can grab the faces and move those around. You can also turn
all these on at once by holding ShiftClick
and clicking them all. Now, this can be a bit messy for selection on denser models, but for a simple model
like this, it's perfect. I also like to just
use the one, two, three keys at the top of my keyboard to switch
between these modes. Now, over here we
have our tool bar. If you don't see
that, you can press the T key here or click
this little arrow, which will bring it in and out. Now, here are the primary tools
that we are going to use. So I'm going to turn
on Face mode here. I'm going to grab this here. And here you see I have
the extrude region. If I click that, it's going
to give me a little gizmo. I can click this plus icon here and drag out to
extrude that face. Now, if I come down here,
I have the inset tool. I can grab this
little circle here in the center and drag
and shrink that down, and that will inset
that face there. Now, if I wanted to
bevel this edge here, I would switch to edge mode, and I'm going to shift click and grab these edges right here. Going to grab my bevel tool here and pull on this
little yellow tab here. And you'll see here that it
just begins to bevel my edge. Now, if I roll up and down
on the mouse keyboard there, you'll see that it will
add additional segments. Now, beneath that, we have what is called the loop cut tool. Now, if I click this,
you'll see that it is highlighting a yellow line. What that is doing is going to draw an edge loop around there. By default, it will click
there in the center, but if I click and hold, I can then drag it and
offset that just like that. Over here, we have
the knife cut tool. With the knife cut tool,
we can actually snap onto our vertex here and begin just drawing around and cutting
geometry as we see fit. Now, if I hit Enter will then introduce that
geometry permanently. Now, for IST, all I
have to do is press I. So if I grab this
top face up here, I'm going to press I and I can just move my mouse back and
forth to shrink that in. I'll click there to set that. And if I press I again to NSEt, I can actually hold Control and almost do a simple
extrusion, as well. I'm just going to start
with a fresh cube here. Now, I just showed
you how to use all these tools in
Gizmos, which is nice. They're a little bit easier
to use with the Gizmos, but I actually prefer
the keyboard shortcuts. So here with this edge loop
selected, if I hit Control B, that would be the same
as doing the Bevel tool, and just like before I can rotate up and down on the mouse. I want you to pay
attention to something. When you're using these tools, look down at the bottom
of the screen here. You'll see all these options
associated with a letter. So you can see here
that if I press I, I can affect my inner sharp and change the type of
bevel or if I press O, I can change the outer sharp. I can also right click
to cancel the action. Now, one thing I want to note
that is important is that scale will affect some of
these tools like the bevel. So if I switch back
out in the object mode here, come over to the item, I'm going to set my scale to something really small like 0.1. And I'm going to zoom in here by pressing the period
key on the Numpad. If I tab back out
in edit mode with that edge loop selected
and hit Control B, you can see that it's
actually changing the way the bevel works. So if I wanted that to work, I would just hit Control
A to apply the scale. You can also do that up
here, object, apply, scale. What that will do is
zero out the scale. Now, a lot of beginners get stuck on having issues
with certain tools, and almost always it's the fact that they haven't
applied the scale yet. For extrusions, if you press E, you can
just extrude there. And if I press X, Y, or Z, I can determine what axis
I want that extrude on. Now, if we hit Control R, we get access to the loop cut. If I roll up and down
on my mouse wheel here, I can actually insert more cuts. Now when I press click there, it will allow me to slide before confirming
by clicking again. Next, let's look
at the knife tool. I'm going to switch
to Vertex mode here, and I'm going to press K
to access the knife tool. You see here at the bottom,
we have quite a few options, and I use the options on
the knife tool quite a bit. The ones I like to use are the C for cut through and
the A for angle constraint. So if I come down here, I can
snap onto my vertex here, and you can see here I can
drag in any direction. But if I press A,
it will lock me into angle constraints
based on my screen view. Now, I can go ahead
and click here or if I press C cut
through and click, press Enter, you'll see that it's cut all the way
through the object. If it was transparent.
Now there's a couple tools that
are really useful that are not over here. You can access all those
tools up in these menus, or if you want, you
can search for them. By default, the
search key is F two. I have mindset the space bar. I'd like to show you a few. First, I'd like to
show you how to merge two vertex points. If I go ahead and grab this point here and
this point here, and press the Mkey
or search for Merge, it will bring open
this menu here, where I can merge at center, cursor, collapse, first or last. The ones you're most
likely going to use are at cursor at center. So I'm going to move
my cursor here and I'm going to press the
Mkey and do at cursor. What I've done is connect all the selected points
into one point here. Now, this may not seem
useful at the moment. However, I promise
this will be very useful when we're trying
to clean up geometry. I'd also like it to show
you how to edge slide. So you can see here I
have an edge selected. If I grab that edge
and move around, you can see how it distorts
the shape of our object. However, if I double tap G, I activate edge slide, and now it will only move back and forth
across the object, making sure that I maintain
the shape of my object. This is even more
obvious when working on something like a sphere where
it tries to keep the shape. Snapping mode also
works in edit mode. You can enable that
by toggling Snap up here and choosing what
you'd like to snap too. For here, for
example, on the grid, I can grab my vertex point and snap along all the
various grid points. This is great if you're
doing things like architectural rendering and need really precise grid placement. It's up to you whether
you want to use the tools or the
keyboard shortcuts. However, I do
recommend you learn the keyboard shortcuts
for these tools, as long term, it will make
your process go much faster. But we're going to delete
this cube and restart. Now, you can delete portions of the cube or the
entire thing at once. If I hold L, while
hovered over this, it will select the
entire object. If I had another object
in this scene here, you can see that clicking
L will select each object. And also hit Shift L
to delete each object. That will allow me to select
an entire object piece. So any piece that isn't
connected to another piece. Now, if I want to select everything inside
of this object, I can press A, and that will select all mesh objects
inside of this. Now, when you press delete, there's two ways you can do it. You can press the delete
key, or you can press X, which is a little
easier since all of your keyboard shortcuts tend
to be near your left hand. Either way, once
you press delete, it's going to bring up
a delete menu here. Now, we're going to
cover these dissolves a bit later in the course.
Don't worry about those now. But up here, I want you
to take a look at these. You can see that we can
delete the vertices, edges, faces, only faces,
only edges and faces. These all do exactly
what they say. If I go ahead here,
grab just this face, press X, you can see that I
can delete the face there. However, if I wanted to, for example, add a
couple edge loops there, and I grabbed this face here
and press X, delete edges, you'll see that it will
delete all the edges from the selection that I have,
which is quite different. In the case here, we just
want to delete everything. So we're going to press X, and we're going to click Delete
and then select vertices. Now we have an empty object. We want to reset our
object to a basic cube. So we'll come up
here and add cube. Now we're going to take all the tools that
we just learned, and we're going to
make a basic crate. And I'm just going to
double click up here and name this cargo crate. So next we're going to
tab into Edit Mode here. So I'm going to tab
into Edit mode, and I'm going to use
Face Selection up here. I'm going to press A
to select everything, and then I'm going
to press I to Inset. Now you'll see here
that as I drag down, it will inset each
of those faces. If yours isn't doing that,
make sure to press I again, and that will turn on
individual selection. You can see the options
there at the bottom. I'm going to drag mine
in here just a bit. Now, we're going to
make these look like they're kind of support boards. So I want these faces
to be inset slightly. So I'm going to press
I again for inset. And if you remember, I
said, if you hold control, which you see down there at the bottom is labeled as death, we can go ahead and
bring this in slightly. I'm going to hold control
and bring that in. Already, we're starting to get something that
looks like a crate. Now let's use the loop cut tool. What we want to do is
add some boards here. So I'm going to hit
Control R and rotate up once and give myself two loop cuts there
and click to confirm. I'm going to do the
same thing from this side as well and
from here as well. Now you should have
about nine faces on each inset section. Now, to make these
look like boards, I want to have a small gap here. So what I'm actually
going to do is hold Shift click while in edge selection mode here and grab these
edges right here. Then I'm going to hit
Control B, the bevel. Going to just bevel
these in place. Now, if you don't see
three lines there, rotate up on your mouse
wheel at least once. Now I'm going to click,
then I'm going to deselect and grab these here
by holding Shift Click. Then with my move Gizmo there, I can just move these
in ever so slightly. And you can see how this is starting to get a boarded look. Now I'm going to go ahead and do that on all the other sides. So I want you to go
around and select all the edges that you want
to create the board lines on. Then I want you to
hold Control B, do them all at once, and now hold Control and
press the minus key. And what that's going to do
is deselect the outer ring. If I hold Control minus, it will deselect everything, and if I hold Control plus, it will keep adding
to the selection. That's one simple trick we
can do to easily select that. Now if that's selection,
come up here, make sure that your transform pivot point is set to median, and it will scale to the
center of all of these. So if we press the Sky and
just drag in a little bit, we can see we can create all
of those boards at once. Now I'm going to tab back
out on the object mode here, come up here into
the viewer node, and turn on wireframe just to make this a little
bit more visible. This still looks
a little simple. So let's add a bevel modifier. So we'll come over here to the modifier panel with
our objects selected. We will search for a bevel, and we will turn the
segments up to two. And now you can see
that we've given our box a little bit
more shape and realism.
4. Curve Modeling: Comes to editing
curves and Blender, it has a whole different
suite of tools. And we're going to walk through those tools in this video. If I come up here to the
add menu and add a curve, you can see I have the option
of a bezier or a circle. Now, by default, the curve
menus pretty limited, which is why I
recommend going to edit preferences add ons and
searching for extra. Here you'll see the option to
enable extra curve objects. I'm going to click
that on come back. Now when it comes
to the curve menu, you can see that I
have a lot of options. I'm going just like the Bezier. Wh will give me a
single bezier line, which you can see is drawn
here in the viewport. Now, if I tap into
Edit mode here, you can see this looks quite
a bit different than a mesh. Than having vertex points
all along this curve, I only have two points, and it is drawing that
curve between those points. If you've ever worked in
an Adobe application, this should feel right
at home for you. However, this is your
first time working with a curve, let me
explain how they work. First, we have our point, and I can move this
vertex point around, and you can see that
that curve is trying to draw itself between
those two points. What determines how that curve
draws is the handle type. So you can see each point that I select here has two
points next to it. This is what we call a handle. If I grab this point here, I'm going to click and
drag and select all that. Now I have the entire
handle selected. If I press the ar key to rotate, you can see that by
rotating the handle, even though the vertex
point is staying in place, the curve is changing its shape. Likewise, I can scale that
handle as well to exaggerate the length of the curve or to tighten the curve to be
closer to the point. Now, by default, this
handle is set to automatic, meaning that the handle
will automatically move no matter what point
of the handle I grab. But if I grab the
vertex point here, I come up here to the
curve control points, set handle type, you'll see
that we have various options. The two I want you to focus
on are automatic and vector. Vector here will allow me to control each side of the point. So if I were to press E and
extrude a new point here, you can see that I can
control the sharpness and the distance between
these two curve points and adjusting the
handle on each end. If I go ahead and
grab this here, come back to control points, set this handle type
back to automatic, you can see that it
automatically tries to smooth out the curve in between
these two handle points. Let's take a look at
that circle object. Now the circle object on the curve differentiates
from the Bezier, that it is one single
continuous line. So if I tap edit mode here, you can see that there's
no break in the line, and that as I move this around, it will try and adjust to
match the entire shape. Now if I wanted to break this,
what I can do is come up to the curve and
hit Toggle cyclic. And what that will do is
turn off the cyclic nature. So when cyclic is on, what it will do is try and
connect the first and the last points
of your drawn line no matter where they are at. Let's take a look at some
of the tools over here. I'm going to select all
my points by pressing A, hit Delete and
delete the vertices. Now what I'm going to do
is look at these tools. One, we have the draw tool. And the draw tool here
allows us just to draw a curve in any
shape that we like, automatically adding
as many points as it thinks it needs. Now, a really cool thing about the curve pin tool is that
when it is selected here, you have the option to
draw by the cursor, which will draw
wherever your cursor is located in three
space or on surface. This is incredibly helpful when you're trying to
draw curves onto more complex objects
for things such as hair, roots, vines, or. Also have the curve pen. If
you've ever worked in Adobe, this works in just the same way. You can click a point and drag before letting go to set
the handle position. Now, below the curfpin we
have the extrude option. However, I actually
don't recommend using the extrude
tool in the curve, as I feel it's a
bit unintuitive. Instead, I recommend you just press E. Grab the point
you want to extrude, press E, and you can
just drag a new point. It in spot, and you
can just rotate that point to get it
wherever you want, and then press scale to
adjust the handle size. Keep pressing E and
rotating around. Now, one of the real
powers of curves comes when you start playing
with its data tab. Whenever you have a curve
selected and come over here, you'll see that now you have
this little curve symbol. And under that tab, we have
a bunch of options here. Up here, we have an
option for the shape. Here, you'll notice we
have the resolution. What the resolution
does is determine how many points are
along this curve. So if I lower this down to
something like three points, you'll see that it's
only going to use three points to draw
in between these. However, if I set
something like 24 points, you can see that that curve
gets much more smooth. So look at this next option
down here called fill mode. You'll see here that by
default, it is set to front. If I come up here and
switch my shape to two D, you'll see that now that film
mode fills in the object. Is incredibly useful when doing things like
creating logos. Now if you're following
along with the class files, I've included a project
file called Logo Starter. And what this file has is a simple HDRI in it and
a material included. I'm going to show you how
we can import an SVG file, which we'll import
as a curve file and allow us to
create a simple logo. So I'm going to come
up here to file import SPG, and if
you don't know, SVG is just a vector
file that you can export from pretty
much any vector software. I'm going to import the
included flame SVG logo. We'll just import that there, and you'll see that
it is loaded into our scene as a curve object. By tab into edit mode here, we can edit it just
like any other curve. I'm going to tab back out
into object mode here. Now, default, when you import
a SVG file into Blender, it's going to try and apply materials based on the
colors of the project file. I've never really
seen it work well, so I just recommend deleting the materials there
and starting over. We're going to come over
here to the curve data tab and take a look at the
geometry options here. So now in the geometry
options here, you'll see the
ability to extrude. If I turn this up, you might not notice anything happening
here in the top view. But if we rotate
over, we can see that our object is
actually extruding. So I'm going to set this to
a small number like 0.025. Now, I've put a
camera in the scene, which you can view by going to view cameras active camera. And we can see here that
our logos quite small. So I'm actually
going to press S, scale this up, use the
rotate gizmo here, and then just rotate this down. Get this into a position
that I like here. Now, whenever you do scale
on an object like this, I recommend applying your scale. You can go to Control
A, apply scale. Let's look back over here
in the curve options here. We have the extrusion, and we can set this up
and down just like that. So I'm going to find a thickness
here that looks nice to. Down here, you'll see that
we have the bevel option. What the Bevel option
is going to do is bevel the edges here and give
it a nice rounded look. I'm going to hold shift
and drag on here. By holding shift, I will work in smaller values because
you can see here, if I work in larger values, it will break the
model quite quickly. So I'm going to hold
shift and just move this up to something
like 0.01 or 0.02. Great. Now we have the
beginnings of a logo. As I said, we've included
an HGI in the scene. So if I switch up here
to render mode here, you can see that
we're already getting some unique lighting
from our abstract HGRI. I'm going to come down
here to the material, grab this here, and add
this RGBGGlass shader. Now we have an abstract logo. Now, you can do this
with any vector shape. I recommend you import an
SVG logo or create your own, and I'd love for you
to share the results. If you're curious how I
made this glass shader, I actually have an entire
tutorial on it on my YouTube. I'll make sure to link to
that in the description. So that's how we work
with the geometry options on a filled icon. But let's take a look at
how this works on a line. Can see here that if
I opt to extrude, it just extrudes it up
in a singular plane, which may be the effect
you're looking for. I'm going to zero this back out and tab back into top view. But you can see here down
that if I take the bevel, I can actually input
the depth here, and you'll see that we
will get a rounded curve. This is perfect for creating
ropes, cables or more. If I turn the wireframe
view on here, we can see how it is drawing the geometry around our curve. We can adjust the
resolution in two places. Just like before, we can add additional resolution
along the curve here. But if we want to add
resolution to our befel shape, we can adjust that setting here. Make sure to always use about the bare minimum you can get with getting the
result you want. This will ensure that your
scene is always performing. Now, below the resolution,
you'll see the fill caps. And what this will do is just fill the end of your tube here. However, you can see
the geometry is not. Recommend doing this manually after you've converted to mesh. I'll show you how to
do that in a minute. So one nice thing
about working with curves like this is that
they're non destructive, and we can just
make adjustments to our geometry along
the way super simply. So here in the edit mode, you can see that we
have the radius option, and the radius
option will give us a circle that we can click
and drag the thickness. Alternatively, you
can also just press Alt S and scale
things that way, too. So here you can see I'm
getting a nice taper. Keep in mind that we can also move these around
in three D space, which is where this next
option comes in place. We have the tilt here
which will allow you to tilt the direction
of the vertices. So if I grab the tilt option
here and click this circle, you can see that I'm
able to rotate that. This will be more visible if I turn on the wireframe mode. You can see how it is
rotating the geometry. I'm going to tab back
out an object mode here and show you an
advantage of curves as well. We can actually
change the shape of the curve along this
path here, too. So if you remember earlier, we did the extra curves add on, so I'm going to come
down here to curve and choose shape from this list. I'm going to choose
the rectangle. It'll automatically
tab me into Edit mode. I'm going to snap in
the top view here, and I'm going to press S and scale this down here on the Y. Go to tab back out
into object mode. We're going to grab
this curve here, come over to the curve data, and on the bevel,
instead of round, we're going to change
this to object. You'll notice it disappears, and now we can select an object. I'm going to click
this little button here and select our rectangle. Going to see here that the
results are pretty broken, and that's because
our rectangle is far too big for our small
curve line here. So I'm going to tab
in edit mode there, press A to select everything, and just scale this
down, and you can see how we're altering the
shape of the curve here. Now we can bevel any
shape along this line. This is great for
creating things like stylized hair, cables, ropes, and you recall earlier, I recommended you not
use the fill caps, and that's because it generates some pretty nasty geometry. So instead, what I
recommend doing is waiting until you have
your curve complete, and then we can
convert it to mesh. That's pretty simple
to do. You can just search for curve to mesh. So press F two, or if you follow along with my
keyboard shortcuts, use the space bar, and
search for Convert two. That will bring up this menu, and you can convert
from a mesh to a curve or from a
curve to a mesh. This case, we want to
convert to a mesh. Now our curve mini
disappears and is replaced by the mesh data icon, and you can see if we
tap into Edit mode here, we now have a normal mesh. What I recommend
doing is selecting this edge loopeer by Alt
clicking and pressing F to fill. Now, this is going
to give you an gon, but what you can do is now press Control B and use a bevel. We'll drag that down there and rotate up on
our mouse wheel, and you can see
how we can create a nice soft little rounded cap.
5. Basics of Topology: Topology is very intimidating for beginners, I've noticed, but really to make it
as simple as possible, it's how your vertex
points, edges, and faces come together to
shape your three D object. And there are good ways
and bad ways to do that. And the reason it
matters is because in certain scenarios, for
example, animation, characters need extra edge loops around joints like
elbows or mouse, so that when a character bends, there's actually
geometry there to shift around and
create a natural bend. Or, for example, it's
very common to work on lower geometry and then to add a subdivision
modifier at the end. And if your geometry
doesn't have good form, it can lead to some
pretty weird results when it tries to smooth
out that object. Lastly, it really
matters for performance. Having clean geometry means fewer polygons and fewer faces, meaning that overall,
you will render faster and have a faster
viewport performance. Let's talk about some
basic topology terms. First up, I want to talk
about triangles or tries. This is just faces
with three sides. They're stable and usually flat, but they don't
subdivide smoothly. A few in your object are okay, but too many can cause
some shading problems or messy deformation
with animating. I see a lot of people
get confused with this because they'll hear that
game engines use tries, and that's okay, but
the engines usually automatically convert
your quad topology. So there's really no reason for you to model with these in mind. Another type of face we
have is called quads, faces with four sides. These are the gold standard for modeling because
they subdivide cleanly and allow edge loops to flow nicely
around your model. Most good topology
is made up of quads. Engons are faces with
five or more sides. These can look fine
in still renders, but they can break easily
when subdivided or animated. It's best to avoid
these except on flat surfaces when
they won't deform. I actually have one of these
on the robot with its ears. You can see here we
have an gon at the end, but since it won't
bend, it works. Edge flow is how the edges of your topology follow the
natural shape of your model. For example, if we look at the
mouth on a character here, we can see that the shape of the mouth slowly moves out in these loops around
the mouth until it naturally dissipates into the shape of the
rest of the face. A pole is just a point on your model where an unusual
number of edges meet. Normally at every vertex, you're going to have four
edges meeting. However, if it's three edges, five edges or more, that
would be considered a pole. Now, poles aren't mistakes. Every model is
going to have some, but they can cause weird bins or artifacts if they're
in the wrong place. For example, a safe
place for poles will be on the back of the hand here. Or a bad place for
a pole would be in a bending area, like an elbow, because when we go to bend
or to form this mesh, it's going to create
some weird artifacts. Now that we understand
the terms of topology, let's define what
are some signs of good topology and bad topology. Some signs of good topology are that you have mostly quads. You have even spacing between your edge
flows and polygons. Nothing's too
stretched or too tiny. You have edge loops that flow with the shape of your object. Your lines of your edges
should wrap naturally around features like
eyes, mouth, or joints. You only have poles
and safe spots. The occasional pole of
three or five edges meeting should be kept in flat
or non bending areas. Your object is
subdivision friendly. Adding a subdivision
surface should make the model smooth without
any weird glitches. And your model
should be efficient. Don't have any
unnecessary faces, edges, or vertex points
where you don't need them. Use the minimum amount to
keep the shape you want. Let's walk through some
signs of bad topology. You don't want too
many tries or engons. This will lead to shading
or deformation problems. You don't want stretched
or warped faces, long skinny polygons that
look uneven when smooth. Cause issues. In general, you're going to want most
of your faces to be square. You want to avoid
messy edge flows. You don't want a
ton of edge loops around small details that
wrap around the whole model, and you also don't
want edge loops that move or clash over one another, even overlapping each other. You want to avoid poles
and problem areas. Clusters of edges meeting at
joints like elbows, knees, and mouse are going to cause some bad artifacts
when you try and bend. Also be mindful of how
your shape is subdividing. If you notice that when you toss on the subdivision modifier, it's destroying the
shape of your character. You probably don't have
enough edge flows, and you should add more
to help define the shape. Be aware of hidden geometry. Sometimes things
like extra faces or holes can happen
in your object, and these can lead to glitches. Now, here's top ten
tips from me on how I think you can fix or
avoid bad topology. Loop cut tool to add new
edge loops to break up long or stretch polygons
into evenly sized quads. You can access this by hitting Control R or selecting it
on the left tool panel, and once you click, it'll automatically center
the edge loop, and then you can drag it up
and down before confirming. Use Edge slide when trying
to reposition slides. By tbl tapping G, when you have an edge selected, you can slide edges
along the surface to balance spacing without
actually changing the shape. Use the merge vertex function. If you press M with one
or more vertex selected, it will weld those together. You can choose to do it at
the first vertex selected, the last, or the center. Welding these together, you can remove unnecessary
vertex points. A great time to do this is
after you do a Boleon cut, you will oftentimes be left with a bunch of engons and you can quickly combine vertex points together to create
a cleaner geometry. When you have a point,
face or edge selected, you can press X to dissolve. What this will do is try and
remove that edge or face without altering the
rest of the geometry. This is most commonly
used on edges. If you have a bunch
of extra edge loops, go ahead and click that edge loop and then
press X to dissolve. Now, this is a simple
one, but one of the easiest things you can do when cleaning up your geometry is learn how to select loops by holding Alt click and
clicking at either the top or the side of a face, you can select that face loop. Likewise, if you are in
edge mode or vertex mode, you can use this to
select edge loops. Use the knife tool. The knife
tool is a versatile tool, but what it allows you
to do is click and snap to various vertex
points to cut in new edges to help redirect loops around features like
eyes, mouse, or joints. This is really great if you're
trying to fix or remove a pole or if you're trying
to convert a quad or a try. Take advantage of
the grid fill tool. You can access this under
the menu or with Control F. You select a border of edges, for example, with this
hole on the object here, and I do a grid fill, Blender will do its
best to try and automatically fill this with
the most appropriate grid. It doesn't always
get it perfect, but a lot of times it
works really well. Use the bridge edge loop tool. If you have two objects with similar amounts of faces
and they're separated, you can select the
edge flow at each hole and hit Control
E. Select bridge, and this will
connect the two open loops with clean geometry. You can add
additional edge loops here as needed, as well. Another way to fix
your topology is to add support loops
for subdivision. So the point of
subdivision is to smooth out your object without
adding additional geometry. Allows us to create
detailed or smooth objects without too many faces that'll slow down our
scene or renders. Now, one mistake I see is people adding too many support loops. This just leads to messy
or uneven edge flows. So be careful of that. But one tip I'd like
to say is that you can come to the subdivision
modifier on your object, enable it in edit mode, and this will make it visible
while working in Edit mode. This allows you to
see exactly how your support loops are going to affect the final subdivision. So if I want to tighten
up an edge here, I would just need to make these edge loops closer together, so it could add an additional edge loop with the
loop cut tool, drag this down and tighten up that edge to
maintain my form. Sometimes the best thing
you can do is just delete. If you see a bad portion of your mesh and you're
struggling to fix it, just go ahead and select
all the surrounding faces that aren't good topology, delete them and work your way inward from
the good topology. Can do this by dissolving
vertices, edges, or if you have a hole, you can grab these
surrounding edges, press F, and it'll
automatically put in a face. You can then go through
and add faces one by one until you filled the hole and cleaned up the bad area. An add on that makes this
easier is the F two add on. This comes free,
packaged with Blender. Go to edit preferences
and enable F, and this allows you
to automatically fill in these holes a little bit easier when pressing F by just selecting one single vertex sometimes you won't be
able to avoid tries or gons and that's okay as long as they're not
completely around your model. But what is important
to know is to understand how to
transition down from a quad to a try or
from a quad to an NGO. Here's a very helpful guide laid out of what that edge
flow should look like. And here's an example of me using the dissolve
functions and the knife tool to go from a quad to a try and
from a quad to an end. At this point that I see a
lot of beginners give up, they get overwhelmed
by all these rules and these technical details that it's too much, and
they just stop. I want to say that I
just want you to get in there and model to the
best of your ability. Your first few objects
are probably going to have pretty bad topology,
and that's okay. I'd say my objects had
bad topology for years. That's just part of
the learning process. Right now, do the best you
can to get from A to B, and over time, you will learn
and improve your topology.
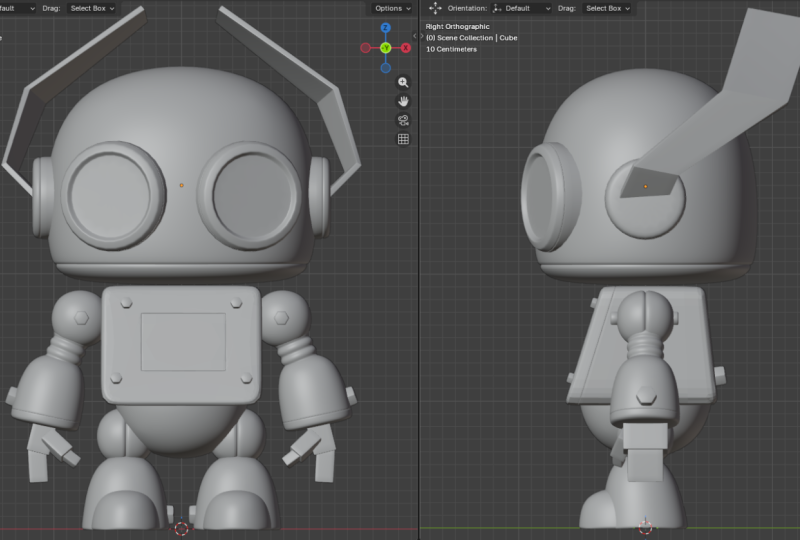
6. Modeling our Robot: To this point, we've
covered a wide array of tools in Blender, and it's time that we
take all those tools and apply them to a
singular project. Now, if you follow
along in these lessons, we're going to be making
this little robot character that I've provided
sketches for together. Now, the techniques I'm about to teach you in the next
few lessons are the same that I use to create all of my characters
and models as well. I'd love for you
to come back with your own designs and create
something unique to you. Once you're done,
make sure to share it because I'd love to
see what you create. Now it's time to get to
the fun part and actually begin modeling our
little robot character. Now, if you open the
starter file that is included in the
example class files, you'll see up here there is a collection
called reference, and I've put two collections
in one is two D. This is the original
two D sketch of my little Robot character. If you like, you can use
this to model alongside. However, since this
is a beginner class, I've included the final model in this three D sketch here. I've made it so that you
can't select the model. The wireframe is visible
and it is see through. So this allows you to
almost trace alongside my model if you would like
to follow along this way. Do keep in mind, though, that the reference file has
the selection turned off. If you have the reference
file selected and you add a cube and
you can't select it, you've probably accidentally put it in the reference file. Just move it into
the scene file, and then you can
select things again. With that being said,
let's get started. I'm going to snap back
into front mode here, turn on Xray and turn
back on my reference. I'm going to select my
scene collection up here, and we're going to
go to add mesh Cube. Now we're going to do
something called box modeling. What this means is that
we're going to apply a subdivision surface modeling
modifier to this box, which will give us
extra geometry, and then we'll shift
the box around until we get it into
the shape we want, adding just a little bit of geometry as we go along the way. There's two ways
you can do that. You can go to the modifier
panel and search here, or I recommend learning
the keyboard shortcuts and hitting Control
one, two, or three. By hit Control one, you can see here it heads a
subdivision level of one, two will up that
to two and so on. I'm going to set mine to three. So hit Control three
with your keep select you should have a cube
with three subdivisions. Now, before I get
started modeling, I'm going to turn on this
mode uppe called Xray, and that's going to make
everything see through just so that I can see all
of my elements at once. I'm going to grab the cube
here with the move Gizmo on, I'm going to move this up until the top of the
head matches there. Now I'm going to
tap into Edit mode and actually begin
editing my cube. I'm going to click
off here to the side. Now, because I have
X ray mode on, when I click and drag, it will not only select
what is in the foreground, but also the background.
Keep that in mind. If I were to toggle X
ray off and switch back, grab here, you'd
see it would only grab the front facing ones
visible to the camera. But I want all these selected. So I'm going to
grab all of those, and I'm going to use
the move Kismo here. I'm going to bring the
bottom of the cube here up to the bottom of
the head of my character. I'm also going to grab the top here and bring this down until the top of the visible mesh here matches the
top of the head. Now, you can see here
that we have more of a rounded with a flatter
bottom of the head. This gives us a much more
natural looking head for our robot character. And the way we can
achieve that is by adding additional geometry. And this is why it's
called box modeling because we start with a
box and just keep adding edge loops and
moving things around until we get a general idea of the shape we want
with the subdivision. So I'm going to hit Control R, or you can use the loop
cut tool over here, add a loop cut there
in the center, and then I'm going
to drag this down. And as I do that,
you can see how it is tightening up the model at the bottom and how
we're dragging that subdivision down.
Is exactly what we want. Now I'm going to grab
everything by pressing A, and I'm going to press X. Now, what that means is I'm
going to scale on the X axis, and then I'm going to drag
this out and move this along until I widen out the
face of my character here. Perfect. Just like that. This is looking good, but
it's a little boxy. I'd like it to have
more of a rounded taper as it comes down like this. So I'm going to grab these
bottom two lines here, and we'll use the
scale Gizmo this time just in case that's what you're
more comfortable with. We'll grab the
scale Gizmo there, and we'll just scale this in just on the X, just like that. Now, I want to make sure that this looks good from
the side view, too. So I'm going to click up here, drag till it snaps
here in the middle. And then over here, I'm going to switch this to the side view. Now, you can use
the gizmo up here. I like using the Numpad. You can also come up
here to the view, viewport, and do right. And now we can see our
model from both angles. So here we can begin playing
with the shape a bit. I recommend just clicking and dragging and using the
move Gizmo here just to move these around and
give a little bit more of a rounded and less boxy
shape to your head. There's no right or
wrong answer here. You can match mine exactly. I encourage you to go ahead and differentiate your
character a bit. Now, if I tab back out into
object mode here and I'm going to click off my reference
and turn off X ray mode, you can see how now we have a very simple model with
pretty even topology. Next, let's take a look at
creating this body here. Now I'm going to hit
Shift A this time, at a mesh in a cube. I'm going to drag this cube up to around the
center of that body, and then I'm going to
tab into Edit mode. Now I'm going to grab
these top points going to bring this down to
the top of the body there, bring these bottom points here, bring this up, like so. Now I'm going to drag
over everything, selecting the entire model. Going to turn on the
scale gizmo here, and I'm going to bring
this in so that we're relatively close to the
sides of our object. I'm going to grab
the top ones here, scale those in so that we get a nice little kind
of body taper. And now you can see that we have our object matching along. Do the same thing in
the side view here. Now on the side view,
you can see that we have a nice little
natural angle, and this just gives
us a little bit better shape language,
and profile. So I'm going to click over
here, grab these top ones, grab the move tool
here, and just bring this on the Y axis. Likewise, I'm going to
do the same thing for the bottom until I get an
angle that I'm happy with. You don't have to match
my angles exactly. Just do whatever
looks nice for you. Now we have a very simple
box shape to work. You'll notice here that we have this nice kind of rounded edge, and that's something
I'd like to get. Well, that's pretty simple.
Let's do the top two first. I'm going to switch
to edge mode up here, grab these two edges
by shift clicking. I'm going to snap back into
the front view here with the one on my Numpad just to
make it a little bit easier. Remember, you can always use
the Gizmo or the view menu. Now I want to use the bevel
tool to round those edges. You can use the tool over
here or hit Control B, and I'm going to drag that down until I get a small
bevel at the top. Then I'm going to rotate up on my mouse wheel and just add
a little bit of geometry. Two or three lines should work. Now let's do the same
thing for the bottom. I'm going to grab
just these two here, switch back to the
front face mode, it Control B, and drag in there until I get a
slightly bigger bevel. Now you can see
that we're getting a nice rounded shape for
our character's body. However, I think it
looks a bit weird to just have a harsh
flat edge here. So it's bevel that edge as well. I'm going to click off
and deselect everything, and I'm going to switch
to face select mode. Now, since we're in X ray mode, we can't just click and
get the correct face. So instead, you need to point to these little
points right here. So if I click that point there, I'll select
the front face. But come around and shift
click this point here, I will select the back face. Now if I hit Control, we
will only bevel those edges. So I'm just going to add a small bevel there, just like that. Now, if I tap back
out into object mode and turn off X ray and
turn off the reference, we can see that we're
starting to get the shape of our robot's body. We'll go ahead and
add more details to this in the next lesson. But for now, let's
move on to blocking out the rest of
the basic shapes. But I'm going to turn
X ray mode back on, turn on my reference, and snap this back into
the side view here. Now, I'd like to
point out that on the front of my character here, I have a very large end gon, and this is a flat surface
that isn't going to bend, so it shouldn't pose any issues. However, it may cause potential
shading issues later, and if so, we'll make
sure to fix those. Now, you can see up next we have several spheres that
are very simple. Let's go ahead and
add those next. I'm going to hit Shift
A at a mesh and a cube. Now I'm going to hit Control
three to add a subdivision. I want to use a similar
subdivision level as the head to try and maintain a similar
size in terms of topology. This is so that at the end,
most of the topology is even. I'm just going to move this up here to the bottom
of the body there, and then I'm going to
press the S key and just drag down and
scale this down a bit. I want this just to fit
inside of the body, and I'm going to
drag this up just a bit so that it just
kind of pokes out. This will serve as our hip. Now, now you might be
wondering why we're keeping this entire sphere up in
here even if it's invisible. And it's true, that's not exactly the most
performant option. However, in a future lesson, we're going to be
learning how to rig and animate this character. So I'm just thinking ahead. The body will pivot around
the sphere like a joint, and it's possible that pions
of this will become visible. So I'm going to leave the entire geometry in there for now. You might also be wondering, why did I just apply
a subdivision to a cube instead of using the UV sphere option?
Well, let me show you. If I add the UV sphere option here and move this over here, you can see what the way
that the geometry is. I'll turn on the wireframe
to make it more visible. All comes down to a single point and there's a ton
of engons here. So when I try and add a subdivision to this
later to smooth it out, what ends up
happening is you get these weird pinching lines here. And that's a problem
with UV spheres that you don't have with cubes. So I'm just going to leave that for now and delete that sphere. I'm going to snap back
in the front view here. Next, let's add the joints here for the arms and the legs. Now, we've already
made this cube sphere, so we might as well
just reuse it. So let's grab that hip sphere, and we're going to hit
Shift D to duplicate it. And then I'm just
going to center this over here over
the leg joint, press S and scale down. Now, we don't want to have
to do everything twice. So what we're going to do
is add a mirror modifier. I to click Search Mirror. And you'll see here
that nothing happens, and that's because it's
using its own origin point and duplicating on itself. Instead, we're going to use the body as our mirror object. So if I click Search
here and do body, you'll see that it's using the origin point of the body there. Now, if yours doesn't
match up perfectly, what you can do is
grab your body. Use the search function and
look for origin to geometry. What that will do is recenter
the origin on the geometry. And as long as this is
sending center on the line, your object should
mirror over correctly. Now we have this
shoulder joint up here, and we can actually just
grab our cube here. And if we hit Shift Deep, not only will it
duplicate the cube, it will also keep those
modifiers applied. I can just drag this up here. And you see that it has all the same modifiers
as the cube down here. Next up, let's work on this kind of calf
or leg piece here. Well, actually use
this cube again. So I'm going to hit Shift D
and then just drag this down. I'm going to press Z so that I maintain that on the axis there. And I'm just going to
bring this down so just the tip sits up
inside of the sphere. Now, if I tap into Edit
mode, don't forget. This is actually just a cube. So again, we can move
with box modeling from. I'm going to switch over
to Vertex mode here, and I'm going to grab
these bottom to here. I'm going to drag these down to the bottom, just like that. And then I'm going to
use the loop cut tool. You can use the tool over
here or press Control R to click in there and give us a little bit of extra
geometry to work with. I'm going to drag this down here to about that
line right there, and I'm going to grab both of these and press S to scale out. I'm just going to flare out
the bottom of the foot. Take a look at the
side view here. I think we can make the shape a tiny bit more interesting. Let's grab this top point up here and just move this
forward ever so slightly. If you don't see this Gizmo, just remember click
the move Gizmo. I'm going to grab
these back pieces here and move this in forward. I'm going to turn
off my reference here so I can get a
better look at my foot. I actually wish this
portion was flatter, and you might think
that you just want to add another edge
loop and drag down. That is one way to do it. But if I switch out here
to the wireframe mode, you'll see here that I am adding a bunch of
extra geometry. I'm going to turn off optimal display there
so you can see. You can see how
we're just adding a ton of unnecessary
geometry there. So I'm going to undo that. And instead, what we're
going to do is control how much strength
the subdivision has over this edge loop. The subdivision is smoothing
out our entire object, and we can actually
add creases to certain edges to reduce how
much it's smoothing it. So I'm going to switch
to face mode here, grab this bottom face here, and then we're going
to open the end panel here by pressing the end key. Up here, you should
see the item. So I'm going to grab the item
tab here, and down here, you'll see that we have
some various data we can. Including mean crease. And if I move this
all the way to one, you'll see that the subdivision has no effect on these edges, and it's completely
sharpened out the edge. I don't want it to
do that, per se, but I'm going to set it
to something around 0.85. And now you can see we
have a nearly flat edge, and we haven't ruined it by
adding too much geometry. I'm going to snap back
to the front view here and I'm going to turn back
on my three D reference. Let's actually copy this
shape to work on our forearm. So I'm going to swap out
into object mode there. I'm going to hit Shift D
and move this over here. I'm going to close my
end panel by pressing N so I can see what I'm
doing a little bit better. I'm going to press R and rotate. Remember, you can always use these gizmos if you're uncomfortable with the
keyboard shortcuts. I'm going to rotate
there so that the lines are in
line with my arm. And then I'm just going to
make some simple adjustments. For one, I don't think that the forearm should have
such a harsh edge there. So I'm actually going to
grab that bottom face again, open the end panel. Maybe lower this something
like 0.5, maybe even lower. 0.25. And you can see there how it's softening
up the edges. Great. Now I'm going to go back here in the front view mode here, turn on the vertex, and then I'm just going
to begin moving those in. I just want to give this forearm a little bit of a smaller look, not quite so large,
like the legs. You can do whatever
shape you want here. I'm just giving it more of
a little bit tapered look. Switch back out to
object mode here, since we still have that
mirror modifier on, you can see how everything
is transferring over. Next, let's do these arms here. So if you zoom in here, you
can see that for the arms, I was kind of going for
this rubber pump type look. So I'm going to hit Shift A, and I'm going to add a
mesh and a cylinder. Now, down here in
the Adminu we can control how much
resolution we have. I'm going to half this
and go down to 16. And that's because we'll
be adding a subdivision, and I don't want the
geometry to get too dense. I also don't need these
caps on the bottom or top, so I'm just going to turn off the gon and switch
this to nothing. I'm going to snap back
into front view here. What we're going to do is
rotate this into place. I'm going to press the key
to move out the end panel, and I'm going to
press the S key to scale this down
and make it small. I'm going to press the
G key to grab there. And remember, you can use the gizmos here if you
feel uncomfortable. I'm just going to zoom in here, and I'm just going to rotate
this into place here. So I'm going to rotate
there, move this around, press S. So again, I'm just using the S, R and
G key to move things around. Now I want to scale this out so that it's a little
bit longer so that it sticks in the arm
a little bit more securely for when we're
trying to animate later. So I'm going to grab
the scale Gizmo here. However, you see that it's going to scale kind of
in an oblong way, and I want to scale this way. So let's come up here to
the global, select local, and you'll see that
now it snaps to the original coordinates
of the object. Then I to just grab the
scale gizmo here for the Z axis and do this
until we elongated now, thanks to all of
our moving around, our scales are pretty oblong, and I'm going to be using
a bevel modifier on this. So I'm going to
hit Control A and apply the scale, just
to zero that out. I'm going to press the
end panel to close that. And now we're going to
tab into Edit mode here. Now the problem is, we have
a lot going on on our scene, and there's a lot of
things overlapping. I'd actually like to just
focus on the cylinder. So what I'm going to do is
press the forward slash key. What that's going to do is isolate this single object
that we are in edit mode. You can grab the loop cut
tool or you can press the Control Rkey and just
roll up on your mouse wheel. Let's just add a couple
subdivisions there. It click and let go to
leave them in place. Now I'm going to
switch over to Edge Select mode, click away, Alt click here, and I'm just going to grab
a couple of these. Then I'm going to hit Control B and drag with the bevel there. And since we've already
used the bevel, it's remembered how
many segments we have. I'm going to rotate
down one so that I only have one line in the center.
I'm going to click there. Now we're going to
do Control minus. And if I do Control minus, that's going to reduce the
selection to just the lines, which is exactly what we want. Now I want to press S to scale. You can see we have
a problem here. Everything's scaling in
on the medium point here, which is leading to
some really kind of weird and uneven distortion on the bevel that we're
trying to create. Now I'm going to press Alts. And what Alt S will do is scale along each object based on
its own normal position. So if I do that,
you'll see that it instead will scale
and place correctly. I'm just going to move
it in a little bit there and click. Perfect. Now if I press Ford slash again and tab back
out to object mode, you can see that we
have a little kind of rubber pump for our arm. In fact, let's grab that
object in object mode, forward slash so we can see it, and you can see here that
things look pretty low poly. If we want, we can go ahead and preemptively add a
subdivision surface. I'll hit Control
one. You'll see here already how things are looking smoother, more like
a rubber pump. Going to press forward
again to back out here. Next, let's focus on making
the front of our feet here. To do the feet, we
can just go ahead and grab the leg here, and
we'll duplicate that. But this time it's
duplicated and the side view, so we can
drag it forward. We'll hit Shift D and
bring this forward. Now, I want to keep
these at the same level. So I'm actually going to press Y and lock that on my Y axis. And I'll bring the front of the leg to the front
of the foot here. Now, if you remember,
this is a cube, so we can tab in edit mode and begin playing
with our shape here. Switch over to the vertex mode, grab these top ones
here, bring these down. I'm going to grab all
of these here with the Scale Gizmo and just flatten
those out on the Y axis. Then I'll grab the move Gizmo
here, bring things forward, grab this top one here,
and bring this back up a little bit just to
give us a foot shape. You can continue to play
with that if you like. I'm going to grab the
front of the foot here, bring these in and scale
them on the x axis here. Just give us a little bit
more of a tapered look. I'm pretty happy with that,
so I'm going to stop there. Let's tap back out in
the object mode here. Next up, let's add the
ears on our character. Now, the ears are going
to be a simple cylinder. So let's add another cylinder
that Shift A mesh cylinder. Now, let's drag this up here and we're going to
rotate these 90 degrees. Now you'll notice here that
we have a hole in the top. That's because we
previously turned it off. Let's look at how we
can simply fix that. We're going to tab
into Edit mode here, and I'm going to switch to edge mode there
by pressing two. You can select the edge loop
here and press F for fill. Now, this is
technically an end gun. However, it's a hard surface
that's not going to bend, so it shouldn't
cause us any issues. Let's go ahead and do the same
thing on the bottom there. Going to click there
and press F. Nice. Now I'm going to smack back
out to front view there. I'm going to switch back
out to object mode, and I'm going to
scale this down until I get a size that I think
looks good for about an year. Now I want to rotate
this 90 degrees because I want the circle
facing outward here. So I'm going to press R, and then I'm going to type
in 90 on my keyboard. I'm using the Numpad here, and I'm going to type out 90, and now we have our
object rotated. You could also do it up here under the item panel
on the end panel. Just rotating this 90 degrees. In fact, you can see
that my got off kilter. So I'm just going
to zero this out. Great. I'm going to
close the end panel. I'm going to drag this ear over here and put
this into place. I'm going to tab
in edit mode here, switch over to vertex, and I'm just going to grab these and bring these in a bit. I don't need the ear to
be quite that large. Let's switch to face mode here. Let's grab this face right here, and then let's hit Control
B to create a bevel. I'm going to leave just
about two segments there, and that'll just prevent us from having sharp, unrealistic edges. I want this to mirror. So just like before,
we'll come over here, add a mirror modifier. This time we'll select the head, and you'll see here
that it mirrors to the other side. And
now we have our ears. Next, let's do the eyes. For the eyes, we're
going to reuse the ears. But first, I want to turn
off the reference here, and I'm also going to
turn off the X ray. We're going to use
our face here so that we can snap the
eyes into position. So I'm going to grab
the ear here and hit Shift D to duplicate. Now, if I switch out
into the top view, I'm going to press
seven on my numpad, or you can click the Z up here. I'm going to press the G
key and move this around. Now when it comes up here, I'm
going to turn on snapping. I'm going to click
the options here. I'm going to toggle surface
snap a turn on face project, and then I'm going to
align rotation to target. Now, when I grab this
in the top view, you can see here how it's
snapping to our object. Once it's gotten into
a good position there, I'm going to switch back to the front view here and get this somewhere
I'm happy with. Right there, it
looks good to me. Now I'm going to turn
off the snapping. And now, if you've left your
option on local up here, you should see your
axis like this. If not, just switch it
from global to local. And now we can grab the Z
here with the moves Git most selected and then just drag this inside so it sits
inside of our face, just as deep as you
want the eyes to go. Nice. Now let's
add an inset here. We'll tab into Edit mode here, make sure everything's
deselected. And with face select mode on, we'll grab this
front and face here. Again, you can use
the Inset tool over here or press the eye key. I'm going to press the eye key and drag in ever so slightly, press the eye key again, hold control, and move back. And just like that, we have
a nice little eye offset. Great. Now, I'm going to tab
back out to object mode, turn back on the X ray mode, swap into front view here, and turn back on the
three D reference. Now, if you want, you can play
with the eyes here and get them into a position or size
that looks nice to you. I'm going to make my eyes
just a little bit bigger. I'm going to snap in
the front mode here, and we're ready to
begin making the hands. And for the hands
here, I've just done a simple box with a bevel. So we're going to hit Shift A. We're going to add a cube, and we're going to
scale this cube down. Drag this over here and just
begin rotating it in place. So I'm just going
to rotate this hand here, scale it into place, switch over to
wireframe mode here, and just begin kind
of placing things. You can shape the hand
however you want. However, I know hands
can be intimidating. So you may want to just fall along and copy my
shape directly. I'm going to go and scale this here just to
widen this out. Now, I'm going to stay
in edit mode here, and I'm just going to duplicate the hand itself
within edit mode. So I will press A to select
everything, hit Shift D, rotate this down here, and
I'm just going to scale this down for the front of
the hand ever so slightly. Then I'm going to
hit Shift D again and just rotate this
around in space. Duplicate this here. I'm just going to shrink
that back down and begin kind of rotating it over
to create a little thumb. And then once more, I will
duplicate that for the tip of the thumb and make that
kind of poking out there. Going to tab back out
into object mode here. I'm going to grab this
object, and first, we're going to apply the scale, so hit Control A scale. I'm going to press Ford numb
slash so we can see what we're doing here and turn
off the toggle X ray. I'm going to adjust this
thumb ever so slightly. So it's a little more
of an angle like that. Now what we're going to do
is add a bevel modifier. And you'll see here
that it's going to completely envelop our object, and that's because
the bevels too big. So we just need to set this
to something really small. I'm going to do 0.01, and I'm going to up it
up to two segments. Now that's giving us
a nice little kind of mechanical looking hand. I'm going to press Ford slash so I can see my entire
object again. Now, at this point, we have
everything but the ears. And before we move
on to the ears, let me turn off the
reference collection here. Currently, our arm and our hands are missing a mirror modifier. So if you like, now
would be a good time to go and add those your objects. Just mirror them over the body. And finally, let's
make the ears. Now, things are
getting a bit messy, so I'm just going to
turn off both the reference and the scene here. With this top seen
collection selected, I'm going to hit Shift A
and add a mesh and a plane. This is going to be
flat in our front view, so I'm just going to hit R 90 X. That'll rotate at 90
degrees on the X axis, or you can open the end
panel and type that in. I want to apply
this rotation so I get control a apply rotation. Just like we've been
doing with the scaling, that will zero out the rotation
in its current position. Now I'm going to press the
key to close that panel. Over here, we're going
to use a new modifier. We're going to use the
solidify modifier. Now, what the solidify
modifier does is solidify the faces here. So you can see that it can
make this thick or thin. Let's start with
something like 0.05. Now we're going to tab
in edit mode here, and essentially, we're
going to draw our ear. So I'm going to scale everything down here
by pressing the S key and move this up so that it is zeroed out on the
origin, just like. This ear, we're going to create
almost like a rabbit ear. So we will grab these
two points here, press E or use the extrude tool, and move up on the Z axis there. Now I'm going to
use the scale Gizmo and just scale these
out ever so slightly. Grab the move gizmo here
and move this forward. This kind of gives us almost
a robotic rabbit ear. On the side view,
if you want here, you can actually
angle this off to the side a bit and give it
a little bit more shape. We can actually stack
modifiers here. So if I were to search and
stack a bevel modifier here, you can see that that would
actually round out the ear. I'm going to add two segments, and then I'm going to lower
this to something like 0.005, and that just gives us
a nice rounded edge. I'm going to tab back out
into object mode here, because we kept this
origin point down here, now wherever we rotate our ear, we can rotate around that
base point of the ear. So let's turn back
on our scene here. I'm going to put my
robot back in here, and I want the ear to
be located right here. So I'm going to rotate around
here, grab the ear here, tab into edit mode, switch to face mode here, grab this face, and then we're going to snap
the cursor to there. So if you hold shifts, you will get all these options, and we want to snap the
cursor to the selected. Perfect. Now we have
the cursor here. Let's tab back out
an object mode. Let's grab this ear,
let's hold Shift S, and now we want to
snap this selection we have to the cursor. Nice. Now the origin
point of our ear is centered around the ear
circle that we have here. I'm going to snap back
here into front view. Then what you can do is begin rotating and playing with
the ear in the position. You can make these ears
look however you want. I'm going to scale
mine up a bit there, and then I'm going to snap
to the top view here, rotate those ears back, move this around a bit, and I'm going to snap
back to front view here. I want those ears to
be standing up a bit. So in the side view,
I'm going to grab this kind of rotate
up just like that. I actually want the ears
to bend the other way, and thanks to our setup,
that's super easy. I'm going to tab
into Edit mode here. I'm going to switch to edge selection here and
grab this ear edge. Now I'm going to
switch this to normal, and what that will do is snap the gizmo here to the normal. So I'm going to just grab the Z key there and
just drag this out. Now you can see I'm
starting to get a similar ear shape to what
I have in our example. Feel free to keep playing with this until you get a
shape that you like. I don't want my ears
to be too large, so I'm going to
scale those down. But I think this
is looking nice. Feel free to keep
playing with these. You might also want
to make sure that you switch this back to
global or local. Otherwise, it might be a bit confusing when you
grab objects later. I'm going to add a
mirror modifier to this and choose the
head as the center. And now we're ready
to begin moving on to detailing our object.
7. Detailing our Robot: That we've laid out
the basic shapes and proportions of our model, let's go ahead and begin
adding our details, which is where the real
character comes in. First, let's add some
bolts to our character. You see here that
I have bolts on the front and the back
on the side of the feet. We can actually just
cheat and use these ears. They'll work fine just as bolts. So let's grab the ears here,
hit shifty, drag this out. Now, we want to rotate
these 90 degrees, so we can also just
zero out the 90 there, and we're going to add 90 here. Now, I want to apply
that rotation, so I'm going to apply rotation. I'm going to drag this
over into the front view, so it matches here and
just scale this down. Then in the side view here,
I'm going to bring this out. I'm going to rotate
this so it matches the angle of the
panel, just like that. I'd also like some on the back. So I'll hit Shift
D, duplicate there, rotate that around, and just move that into position,
just like that. I also want it on the
inside of the feet. So I'm going to hit
Shift D drag down here and move this into position
on the side of our feet. Now, if we want to
reset the rotation, we can zero this
out or hold all R, and that will reset the
rotation completely. I'm going to snap
in the top view here and rotate from
this angle here, bring it into the
side of the legs. Now I just need to make sure
I rotate around a C. Now, when you're rotating
around your viewport, it won't always rotate
around your selection. You can fix that by
pressing the period key on your numpad or on the
right side of your keyboard. And what that will
do is zoom you in on your selection and make
you rotate around it. So I'm just going to drag this and move it inside
the ankle there. Now we have some simple
bolts on our characters. Next let's take a look at how we can create these cutout panels. And for now, I'm going to
turn off the reference, and I'm going to turn
off the X ray mode. Then I'm going to snap back
out into the front mode here and get both of
my viewports set up. So if you haven't,
I would recommend that you save a new version, and you can do that
by save incremental. What that will do is
take your project file and save it with an
additional number at the end. So here it's saved as file one. Now we can revert
back if we need to. So up until this point, we've been working with modifiers, boxes, subdivisions, and more. We've also been placing
our objects in random. Now I have the objects
I want in space, and I want to work with this
geometry, not just a box. So we're going to apply
all the modifiers at once. I'm going to show you a really
simple trick to do that. We're going to click and
drag and select everything. Then we're going to use
our search function, and we're going to
look for Convert two. You can also find this
up in the object menu as well down here under
Convert and select here. I'm going to select to mesh. What that does is
convert everything, including the
modifiers into a mesh. Now, if I click my objects, you see my modifiers are gone, and if I tab into
Edit mode here, now I can work with
all this geometry, which is exactly what we want. The other thing that our
object looks really flat, and that's because
it's low poly. Well, if we right click here,
we can change the shading. Right now, it's set to flat. If I right, click everything and shade smooth, it'll
smooth everything out. You can see we get
some weird looks here. If I undo that, it's because there's not really much
geometry there to smooth out. It doesn't know what
to do, which is why we have the option
to auto smooth. What that will do is smooth
everything based on a degree. So any angle above 30 degrees or below 30 degrees
will be smoothed out. You can go ahead and change this option if you'd
like a different look. But for now, I'm going
to leave it as is. Now that everything's
smoothed out, we can actually take advantage
of a function and Blender, allowing us to sharpen
specific areas. So if I tap into Edit mode here and select an edge
loop and go to edge, mark sharp, and then tab
back out into object mode, that edge will be sharp no matter what. I'm going to undo. Going to use this to our
advantage to create some panels. Let's start with
the joints first. Now, we're going to use
a couple modifiers, but this is a fun
trick you can use when adding insets to panels. We're going to come
to the joint here, grab a modifier here, we're going to search for a
modifier called Edge split. What this is going
to do is split edges based off of an angle. But we don't want that. We just want it based off sharp edges. So go ahead and check this. Now our object will be split wherever we have a sharp edge, which we can add manually,
as you just saw. So let's go in here and add one. I'm going to tab into Edit mode here, deselect everything. Make sure I'm in edge mode here. I'm going to Alt click and
grab both of these edge loops. It should wrap all the way
around just like that. Now I'm going to
mark these as sharp. Remember, you can do that
up here under Control E, or you can use a search
function and look for mark sharp just like that. Now if I tab back out
into object mode, you can see that we have a
line here and it's been split. So let's take advantage
of that split. Now I'm going to add
a solidify modifier. Going to search for solidify, and the order of these
modifiers matters. They will stack on
top of each other. So we want the solidify modifier to be under the edge split. I'm going to set my thickness to something like 0.05 for now. We can always adjust
this later if we want. Now we're
going to bevel. And what's going to
happen is that because we have a split here and
an object beveled, it's going to bevel
along that edge and create an indent.
Let me show you. I'm going to search for a
bevel and add that there. Now you can see we're
getting a nice line there, because as far as
blenders concerned, these are two separate objects, and this has a wall in between. Now, you can change the size of this bevel or add
segments if you like. I'm going to leave mine simple and just add two
segments like that. Now let's do the same thing
to our shoulder joint. But we don't want to
add all these modifiers again. That's kind of tedious. So what we're going to do is grab this shoulder joint here, grab this one with Shift click, make sure this is bright orange, hit Control Evel,
and what we can do is copy modifiers
from one to the other. So now I'm going to copy
modifiers to that shoulder. If I deselect those and
grab just the shoulder, you can see all the same
modifiers are here. So now if I tab into Edit mode, grab and edge loop here,
mark those as sharp, you see that I have also
created some lines. Perfect. Now, you can
change the size and shape of these by
adjusting the solidify, and that will make it bigger
by making it more solid. I'm happy with it as is, so I'm going to leave
mine at that size. Let's do the same
thing to the ears. I'm going to grab the ears, grab the shoulder
joint, hit Control L, copy those modifiers, and then I'm going to add
an edge loop in here. I'm going to do this edge
here and this edge here. Go to mark those as
sharp and pop out. And now you can
see we're getting nice little robotic lines
over our character. Again, let's do this to the
head. Let's grab the head. Let's grab this ear, hit
Control L, copy modifiers. And then I'm going to add
one edge loop around here, and that'll almost make it look like he has a little mouth. Now, let's do the same
thing to the body. But this is going to
take a few extra steps. So let's grab this here, grab the head, hit Control
L, copy those modifiers. And now we have
those here. I'd like to do a panel here
in the center. So let's add an edge loop. I'll hit Control R. You see, immediately we run into an issue because we have this giant
engon in the middle. We can't do an edge loop
around the whole character. In this case, we're actually
going to use the knife tool. So I'm going to press K,
and then I'm going to press C. That's going to
activate the cut through. And I also want to
lock it onto an angle. So I'm going to turn the
angle constraint on, click here, move across, click again and hit Enter. Now, what that I'll do is add in line around the entire object. Just like that, it cut through. Now we will repeat
the same process. So press K or
selected over here. Press C and A, click through there
and hit Enter. We have edge loops here
that we can work with. Now again, let's do
that two more times, but this time from the
top to the bottom. So again, that's K, A, C, click, drag down,
Enter. Same thing. K, A C, click, drag down, it Enter. Now in the edge
mode, if we click, we have an edge loop that wraps all the way around
that we can select. But if I try and move
this up and down, you can see that
it's going to alter the shape of our character. This is where we can
use the slide function. So you press G to move, but if you double tap G again, it instead will try and maintain the shape
of your object. So what you can do now is grab these edge loops here and get them into the shape
that you're happy with. So I'm just going to do
these here so that I have a rectangle kind of in the
center of the chest. Now in Edit mode here, we can grab this face
and face select mode, search for Mark Sharp again, which is there in my recent. I'm going to tag back out
into object mode here. I'd like this to be
a little bit more prominent since it's more
important on the chest. So I'm going to come to the
solidify modifier here, and you can play this
moving this up or down. If I move this down to a really
tiny kind of value there, see how it gets ever so
slightly bigger there. Then I'm going to
move this up and play with the bevel option here. You can see on the bevel here that we're getting
a sharp line there. Now, if we twirl down the
geometry on the bevel, we have options to play with how it connects the corners here. By default, it's at the sharp, which is giving us
that sharp edge. I'm going to switch
this to patch, which will give us
a rounded edge. However, you see that because
we have these kind of ugly geometry here
on the outside, it's creating some
shading hardifacts. Well, they have a solution
for that built in. We'll come down here to shading. Click on hard and normals,
and that should fix that. Just like that, we have a
little panel on our character. Now, it's worth noting,
if you rotate out, you might notice how it's trying to add a bevel to everything. Can just change the limit
method here of the angle. Right now it's set to 30. We can set this to
something higher like 75, and then it will only
bevel the angles here that are sharp
90 degree angles. Now let's check our model
and see if it's good to subdivide because we've
created a low polity model. When we go to the final renders, we'll add a
subdivision on top to smooth out rough edges
like around these eyes. Well, I'm going to
grab everything at once here and hit Control one. Most things look
okay, but we can see we're getting
a few artifacts, for example, around the body
here and in the eyes here. Let's fix these eyes first. Let's tab into edit mode here, and I'm going to press fdlash
to zoom in on that eye. First of all, we
can see here that the back of our
object is broken, and we're getting this ugly
shading artifact here. If I come over here to the
subdivision and click this on, we can actually see
what the subdivision is doing in edit mode, and you can see it's creating
this really ugly GOD. For the back one here, we can
switch to face select mode, press X, and delete that face. We don't even need that
face, and by deleting that, we maintain our shape
with the subdivision. We need to fill our e.
So how can we fix this? Well, I'm actually going to turn the subdivision off here so
we can see our initial thing. We can actually
add a bevel here, and it will solve this issue. So I'm going to switch to
edge selection mode here. Click, I'll click here, hit Control B and add a bevel. But remember, we have this eye here and we're no
longer in mirror mode. So let's grab this base as well, and we're going
to hit Control B, add a very tiny bevel there. Likewise, let's also grab
the edge loop around this edge as well
and over here, too. Let's hit Control B.
Just add a tiny bevel. If we tab back out
in the object mode, we can see here
that we've cleaned up the ugly artifacts inside. So I'm going to press forward
again Return to My model. We can see that we're having some issues on our body here, so let's fix that next. So to understand why
we have this problem, let's take a look
one piece at a time. If I turn off the beple up here that is
holding it in place, we can see that what's
actually happening is that it is trying to turn our limited geometry
in here into a circle. If you remember before,
we can just go ahead and turn up the mean crease so it doesn't affect those lines. So I'm going to turn that up to one with that face selected. When I turn everything back on, our panel is restored to normal. Now we're ready to join
our objects into one. But I'd actually like to apply these dents before joining them. But if you recall, we added
a subdivision to everything. So if we apply everything now with our convert
to mesh method, everything on the
subdivide will also apply and we'll get really
dense geometry, which isn't what we want. But here's a simple
little trick. We'll grab everything,
we'll hit Control zero, and that'll essentially nullify
the subdivision surface. So now we can grab everything again and use the same
method we had before, which is go to object,
convert, mesh. Now all of our
modifiers are applied, and we can join them
all into one object. I'm just going to
press A to select everything and pick a random
object, maybe the head. Now we're going to do
the join operation. You can do this by Control J. You can search for
join, or you can find it up here under
the object menu. Now everything is one object, and we can apply a
subdivision surface modifier. I'm going to hit Control one, and now everything is
applied to one object here. I'm also going to hit right
click, shade Auto Smooth, change the angle here to 60, and now we have our final
little robot character. But I want to show
you one way we can actually clean up
the geometry a bit. We're going to tap
into Edit mode. Generally, what we
want is even topology. So the head here is a good
example of how the head, the eyes, and the ears
all look pretty even. Now, certain things like
the body, the hands, or the ears are
not going to have as much quads just because they're large flat
surfaces. And that's okay. However, certain things here, like the feet, the arms, or the legs seem that
they have too many faces, and we can actually reduce those and get better topology overall. I'm actually going to
combine these windows. I'm just going to
drag this over here and show you how we can do this. Now, if you recall, we can
click to select edge loops. And if we click an edge
loop there and press X, we can do this thing
called Dissolve edges. What it'll do is
try and dissolve that edge loop without altering
the rest of the geometry. And you can see here
that dissolving that edge loop had zero effect on the shape
of the object, which means that that edge
loop was not necessary. This is actually pretty
common when working with box as we add edge loops, what it does is add a bunch
of unnecessary geometry. Now in edit mode here, turn
on the subdivision over here. And what I recommend
you do is go through your object
and try and remove as many edge loops as you can without altering the
shape of your object. What you're aiming
for are good, clean, almost square like edges that move evenly
across the surface. Now, in certain areas
where things are tighter, you will need more edge loops. But as you can see here,
I can already delete a ton of geometry and not
affect the shape at all. So we want this
object to be as low poly as we can without
affecting the shape. This ensures that it'll be
as performant as possible. Now, I'm not going to
show this entire process because it can take
a very long time. However, just move around your
object and experiment with what edge loops
you can delete and try and reduce the
geometry overall. I would leave the body, the
head, and the ears alone. I would focus on just
the arms and the legs. Those are really the only
ones that are a bit denser, just by the way that
we modeled them. Now, if you'd like to
continue the class series, I'll walk you through
how to texture, rig, animate, and light
this character, as well.
8. Modeling - Outro: Congratulations. From here,
I'd say it only gets easier. Now, with the tools and techniques you've
learned in this video, you have the
capabilities to go and model your own original designs. I'd love to see what
you come up with, so please share those along
the way as you complete them. Now, if this class was hard to get through, don't
be discouraged. Modeling itself is an art form, and every artist models
in a different way. So as you create more models, you will learn tools
and techniques that work for you and your
design specifically. So just get out
there and practice more with what you've
learned in this class, and I promise it'll
get easier as you go and it'll
become a lot more fun. I recommend checking
out the rest of the series where we'll
walk through texturing, lighting, rendering,
animation, and more. All this on your path
from moving from a Blender beginner to a Blender professional that can
work in the industry.
 SouthernShotty3D, Motion: Design, Direction, & Animation