Transcripts
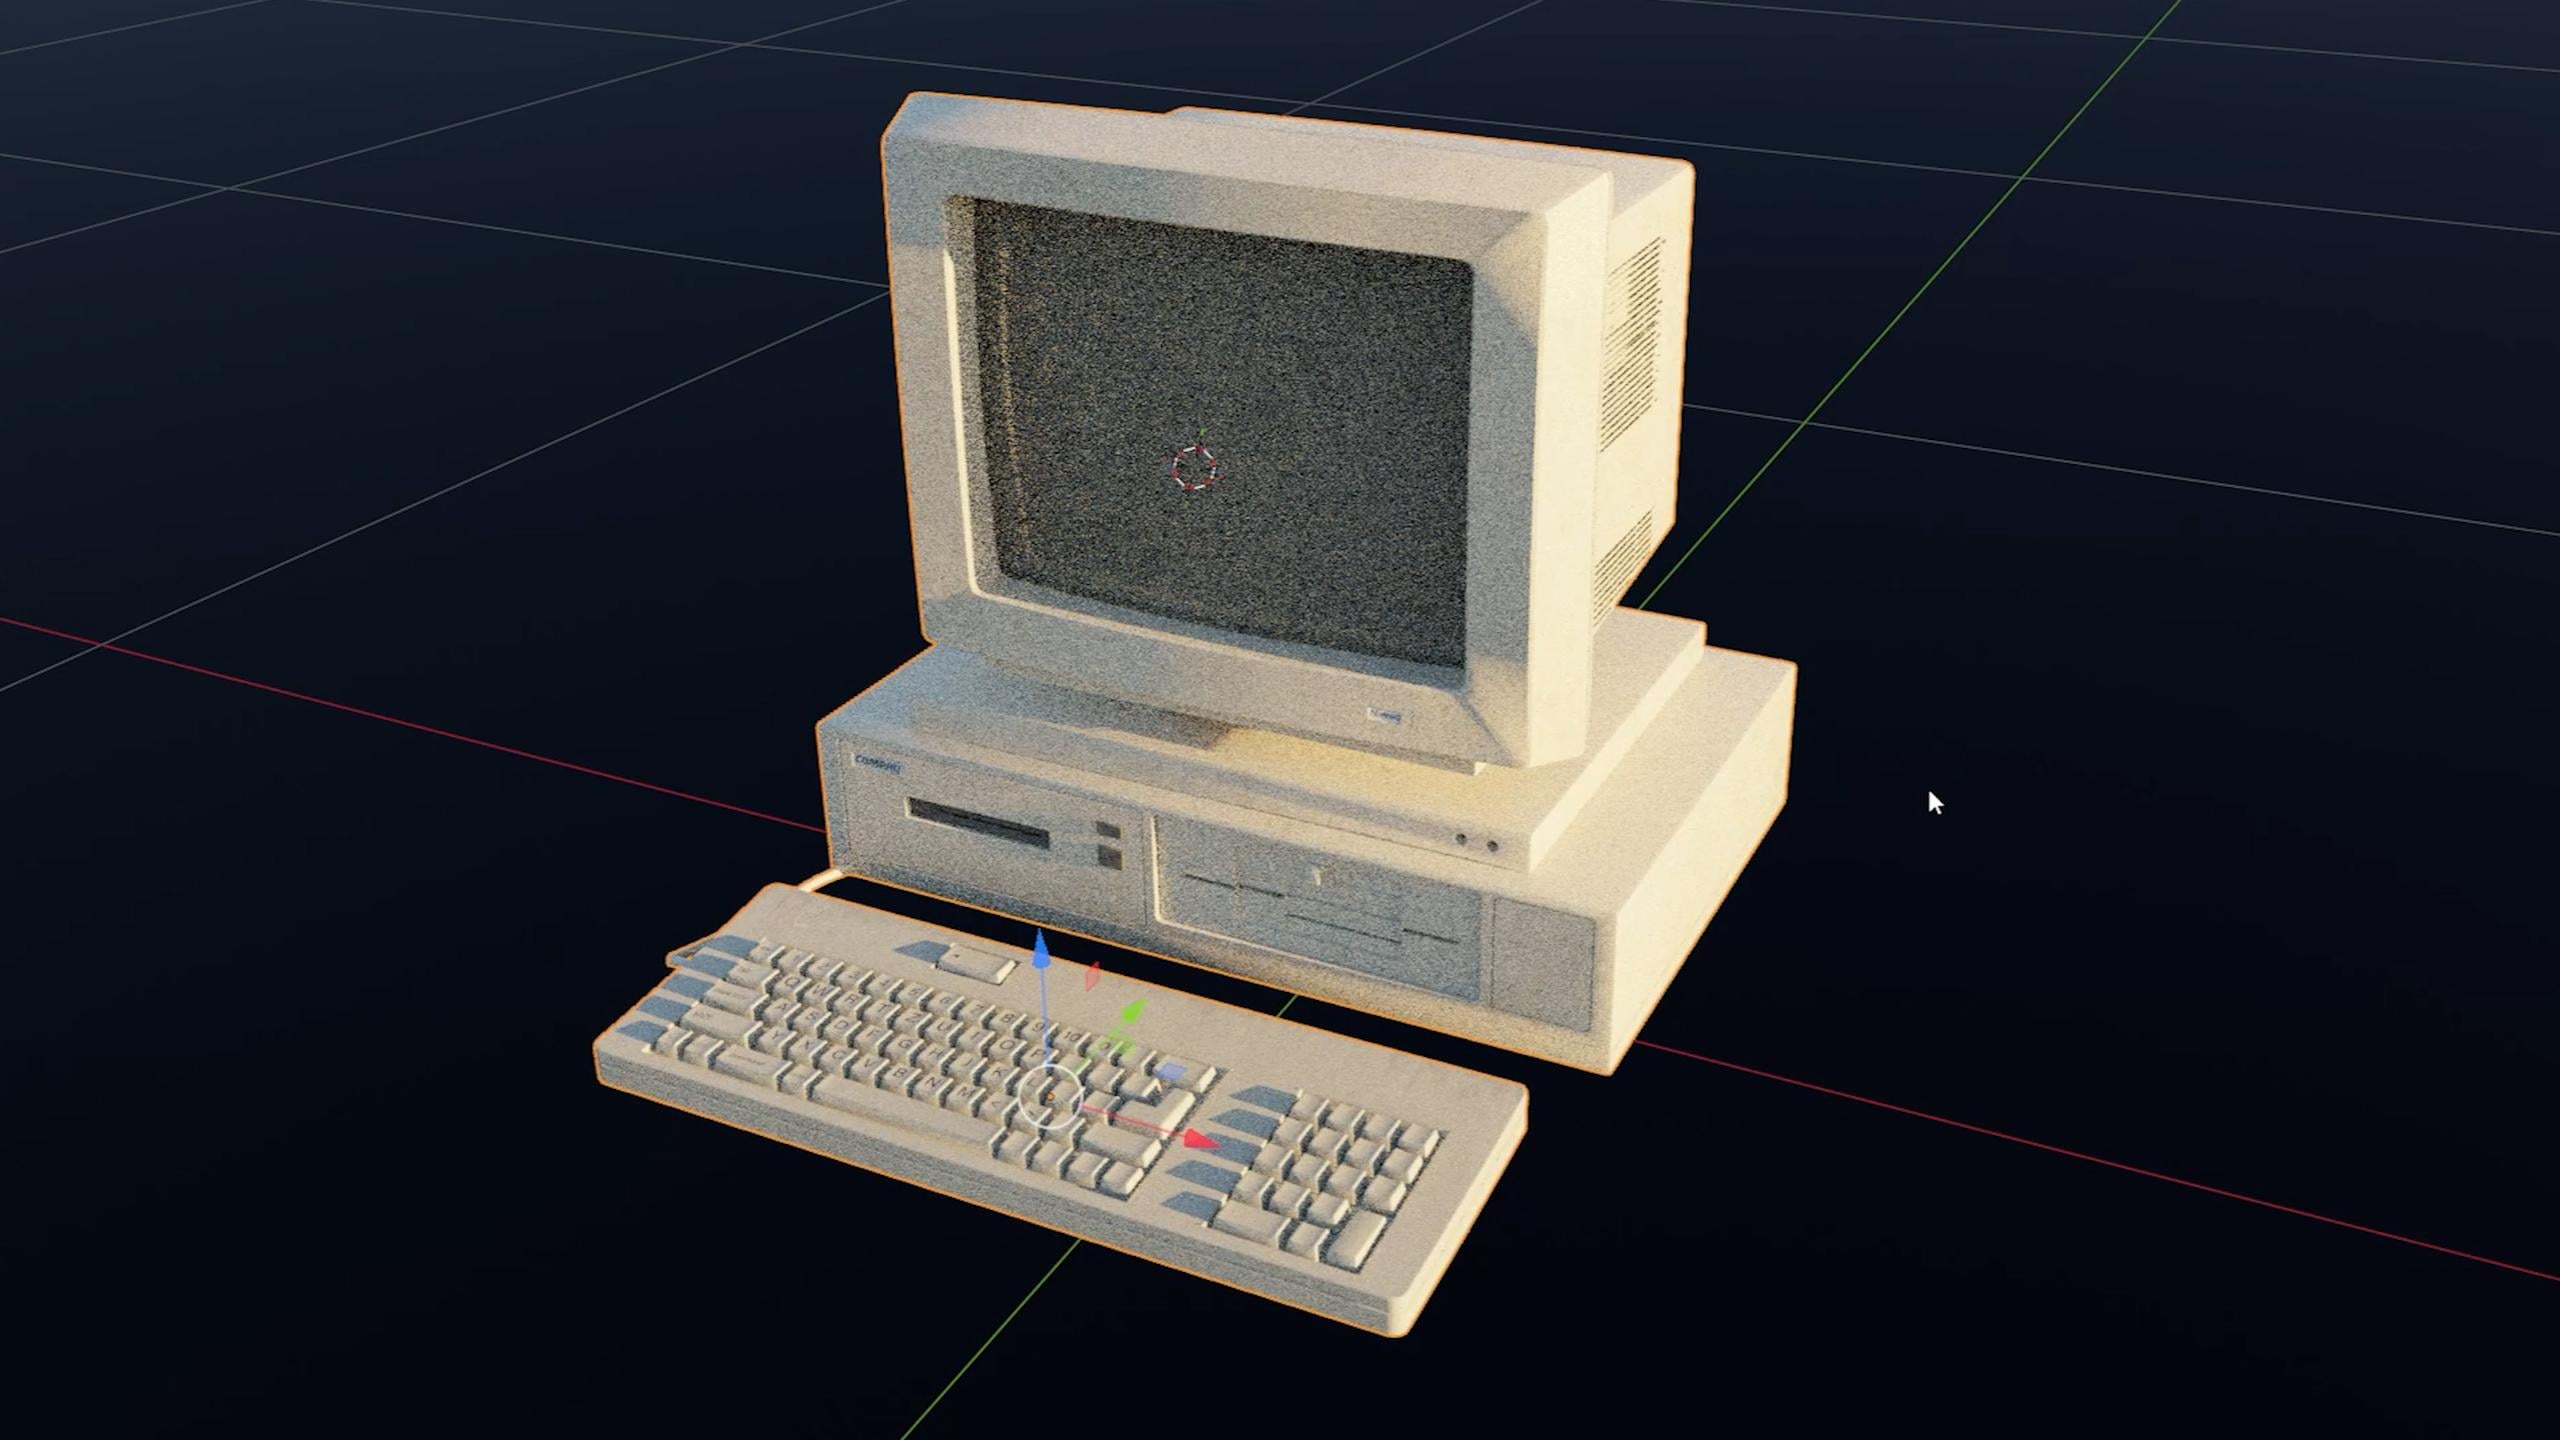
1. Introduction & Tutorial Project Overview SKILLSHARE 1: Hello, and welcome
to New tutorial. This tutorial will be about modeling and
texturing in Blender. So we back to core of three
D and core of Blender. I think most of three D artists start with modeling
and texturing. This will be tutorial series. Y series? Because we will
model more than one objects. I think we will start
with this PC, but later, we will choose a few more
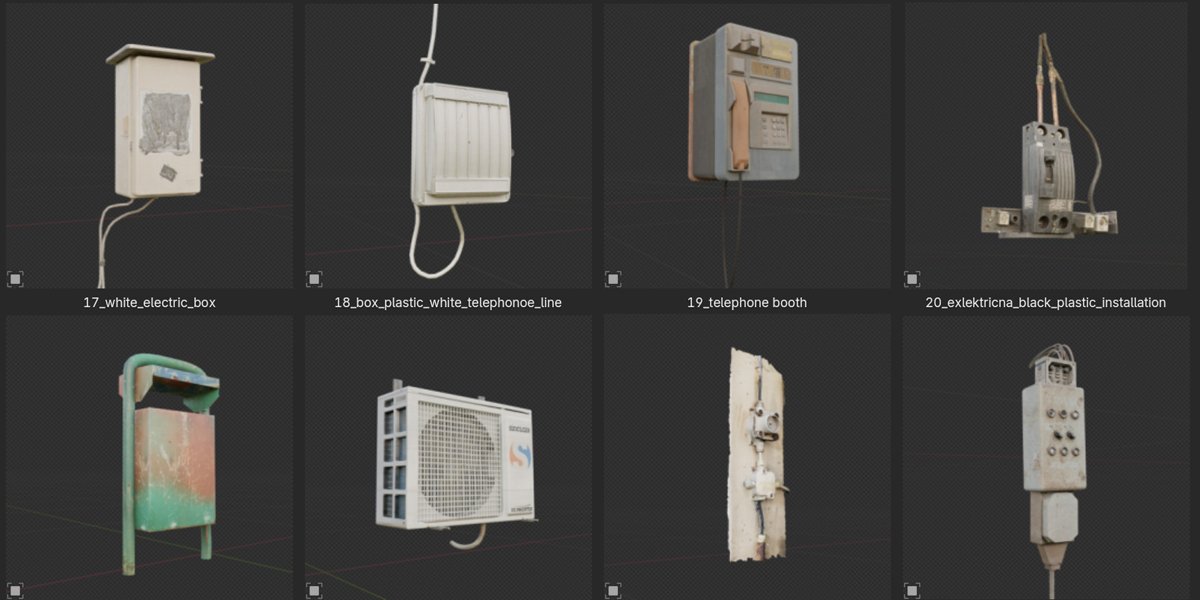
objects from this list. And if you wonder, what is this? This is my new
asset browser pack. So I call this vintage
LimularPb spec, and we have here 127 assets. For example, I think
we will maybe model this model here because
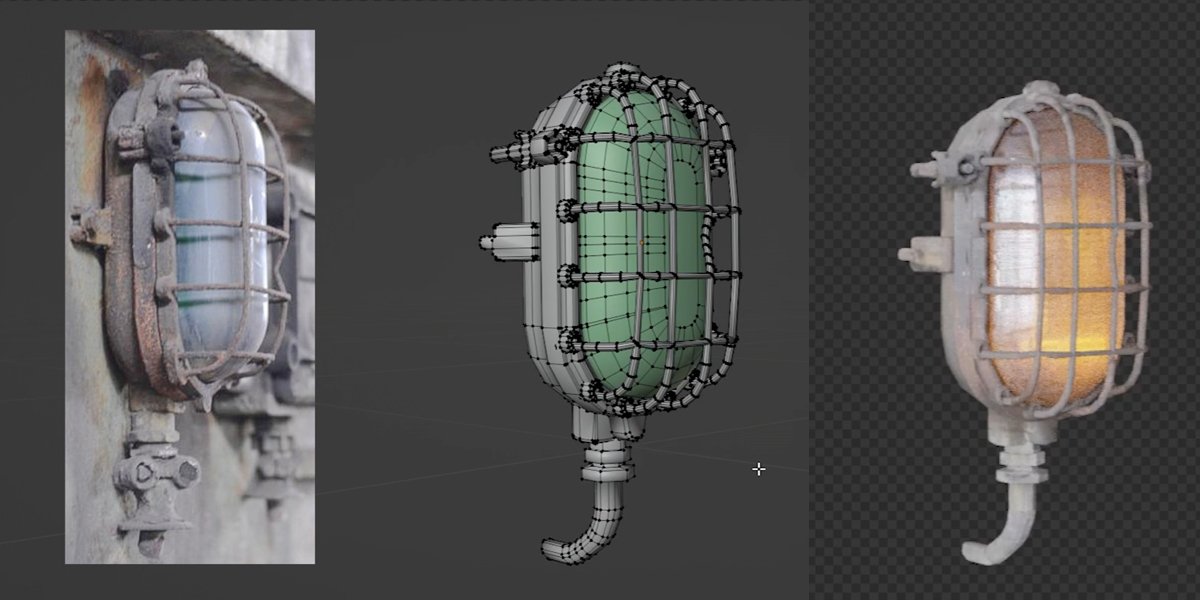
in this sojct here, I also use a lot of curves. And we will see actually later, maybe we can model this one. You can see that all these
objects have a lot of details, especially in
texture, but you can also know that they
have clean topology. So if you go to edit mode, you can see that they
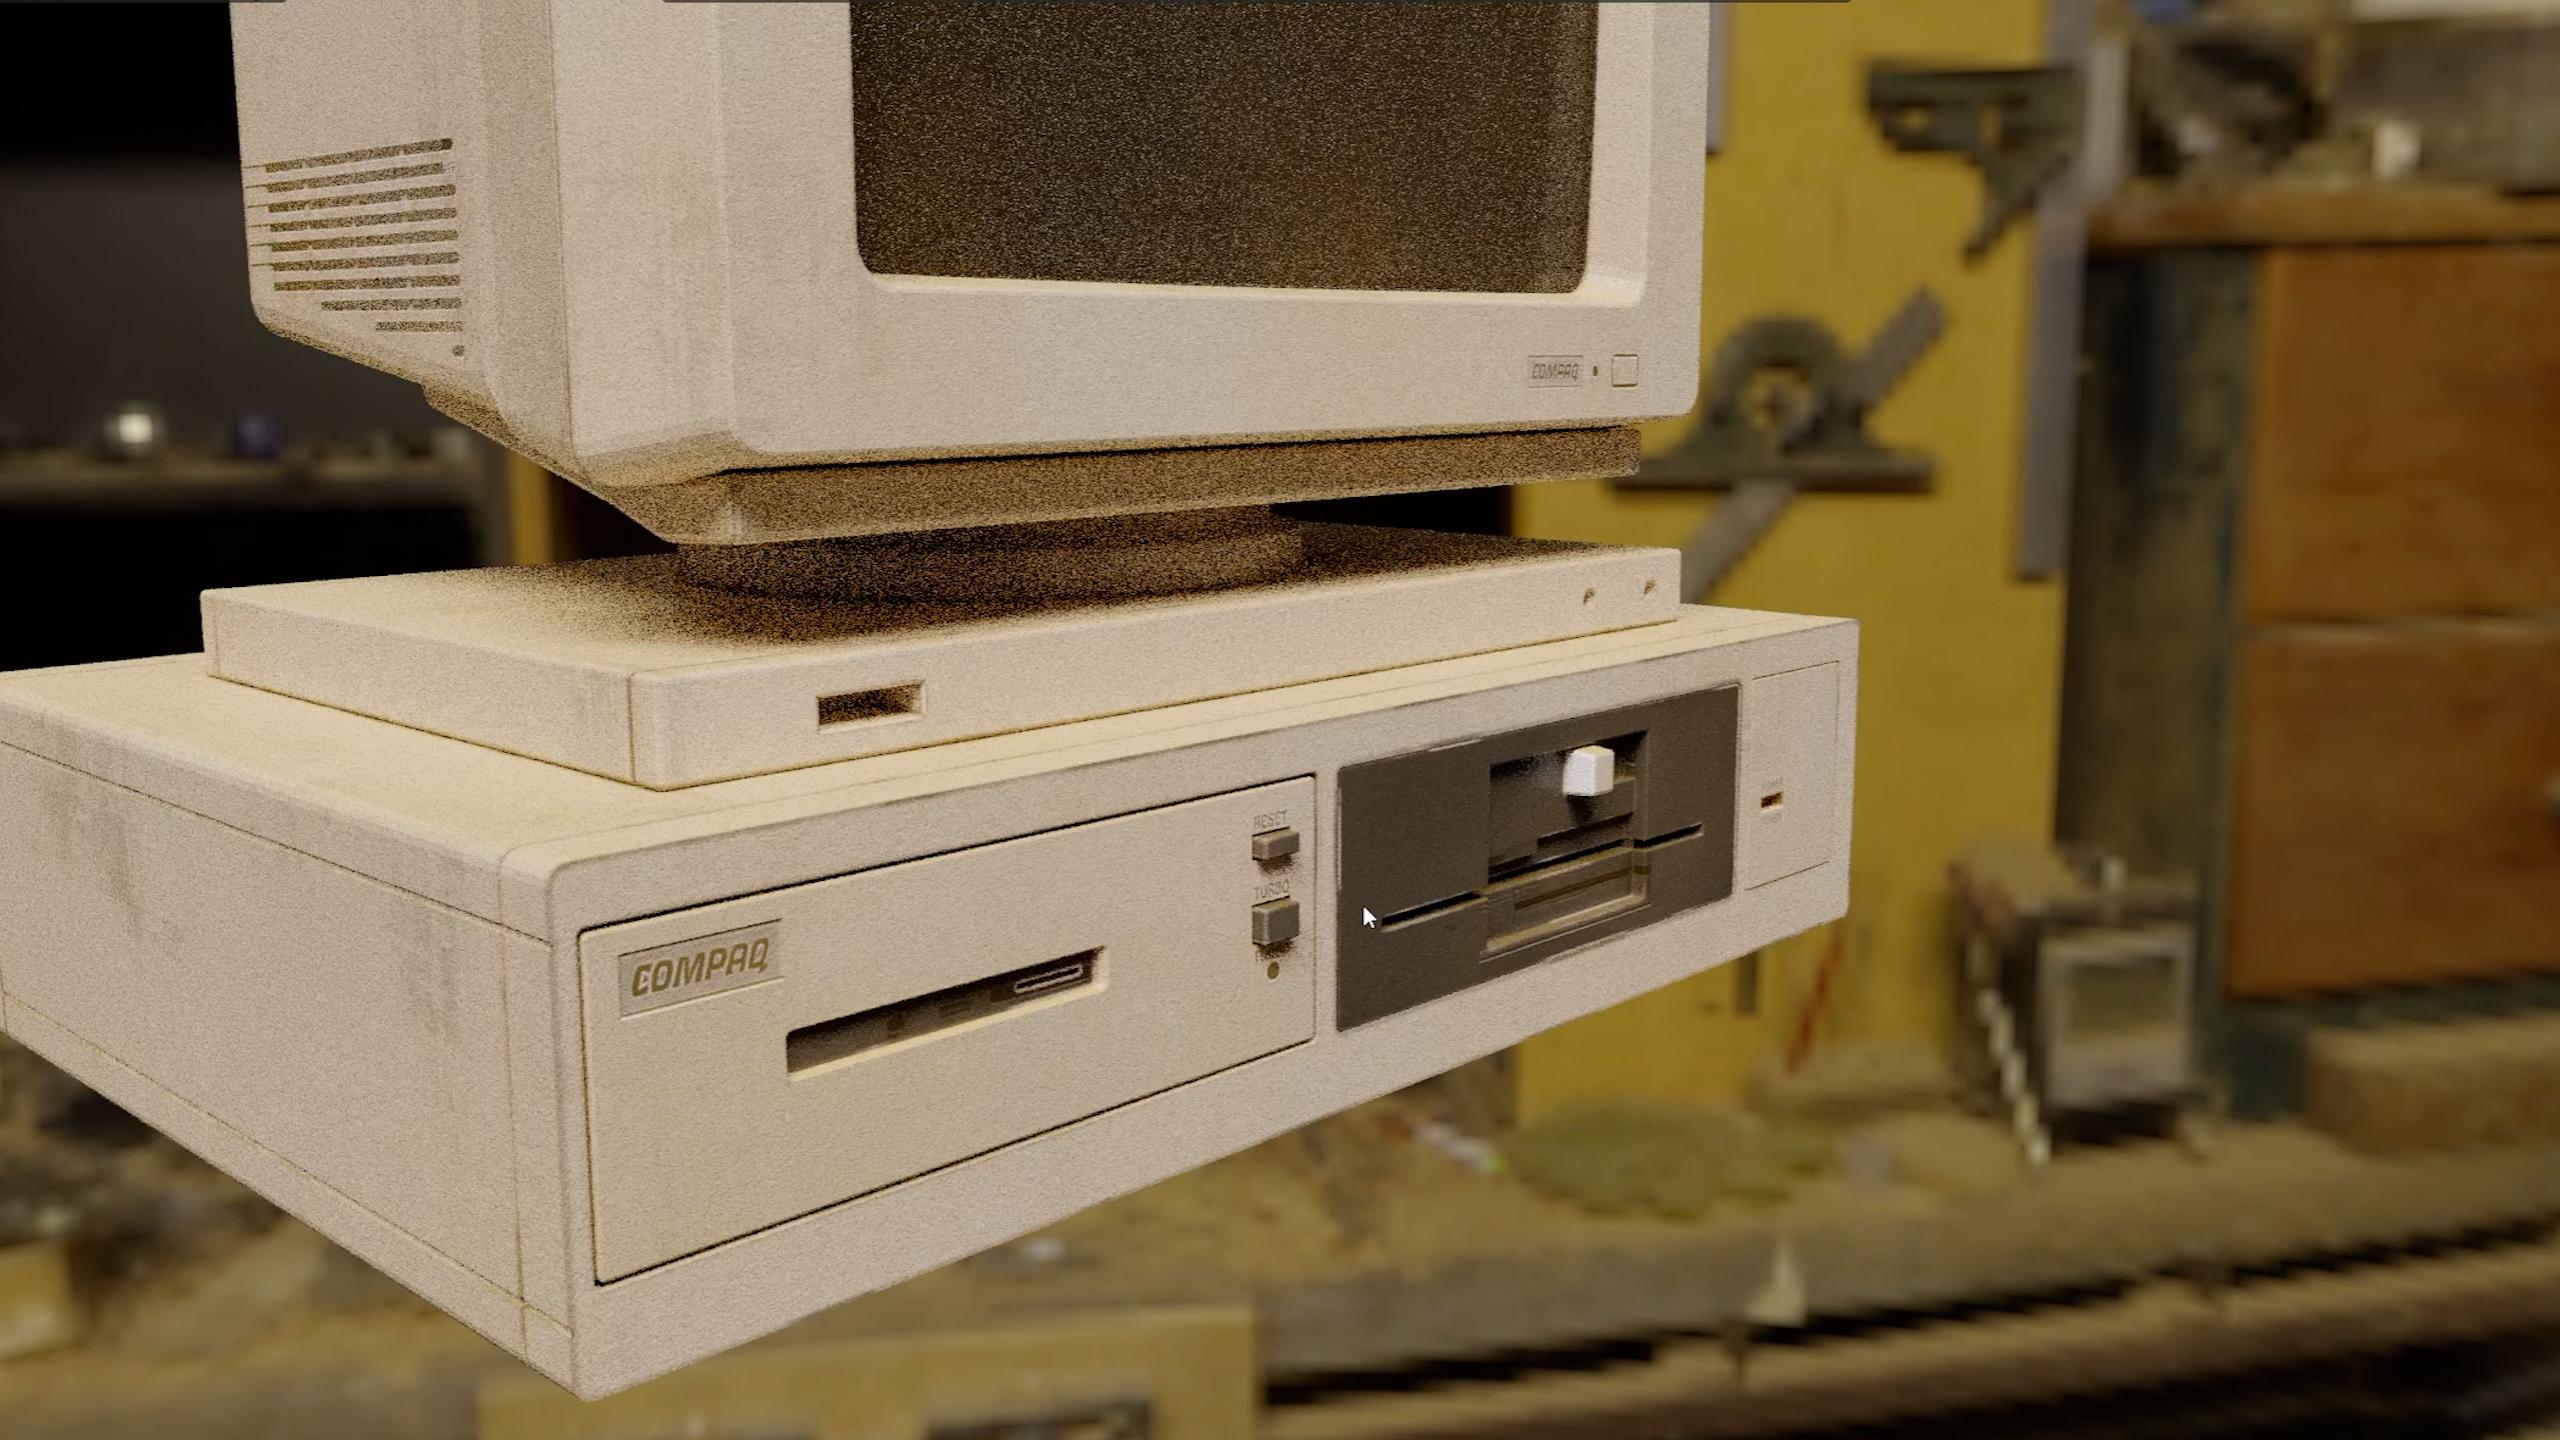
look pretty clean. But in the same time, they look pretty realistic. So after modeling, we will
also talk about actioning, and if you go to Shader Editor, you can see that these PC have a lot of
different materials. For example, if I just
bring this edge scale. And if I move this to left, we can add quickly dirt here
or we can fade the dirt. I also build this
dust shader here, so we can quickly add
dust to this object. We have all these maps, bump, roughness, and in
different materials, we have glass shader and
all the alpha shader, for example, here
and a lot of things. But before we continue with
tutorial and modeling, because we are living in AI era, you probably wonder did I use AI here because I need to
build a lot of models, and I need to build this
as quick as possible. So I don't have six
months to build all this. I try with AI and how I
can speed this process. And at the end, I back to
modeling. I will show you why. I buy this 343d subscription. Here is when I try, get model of this. C. So basically, what I do, I go to chat GPT, which is something I
recommend from AI. So instead of searching
for each of these models, so it is not problem when I
need to model one object. I can maybe find
blueprints for this PC. But when I have list of
more than 100 objects, I will lose days and
days just to find blueprints and I will not
be able to find blueprints, for example, for this object, which is from 80s or 90s. So what I do first, what is first step, I find
maybe one reference from this. I don't know. We
can go to Google. What we can do, we
can maybe bring this model here into chat GPT, and we can ask, can
you create view, front orthographic view
side view and top view? You can also describe that you need this for three D modeling. I get these references. And if I open these references, you can see that
this is not perfect. For example, I don't know if
I can find on this subject, but sometimes this
object is not same. For example, in this
reference here, we have this keyboard, and in this reference
we don't have. And sometimes I get these
holes here and in front view, I get this here. So it is not perfect, but good thing here
is that we don't need perfect references, I
think this is enough. So chat GPT or similar tool is actually very useful in these things when we
need find references. Okay, I'm faster when
I'm typing in Croatia. So I ask, actually, can you recognize some of
these objects and separate them and you can create one photo and put
all them together. So we will see what we will get, but last time I typed
something like this, and I get this reference image. So this is not perfect, but it is very useful. It works. It is similar, like
what I get last time. Next thing is I import
this image and then I ask, Okay, can you bring
resolution up? And after that, I ask, can you create a front
view after that side view, back view or top view depend what I need.
This is what I get. So this is front, left, right, and this is reference image. And I spend few
days just prompting and later I create same for
all these objects here. Front side, you can see that
this is clearly not perfect because you can see how tall is this object here
and how tall is this here. It is not perfect,
but I get enough. So I have all these
details which I like, and I can later
model these details. And you can see that this
is not same like here, but AI actually understand
how this object should look. Last thing for
which AI is useful, for example, I will find
maybe some wooden object. And we can bring, for example, this here, and we can ask And later for
some of these materials, I also ask, can you create
roughness map for this? And you can also ask
for bump and normal. I have here some of these maps. So you can see this
is almost perfect. So we get this map for one
of these fabric objects. This is color input. This is the bomb Color material. After that, I also need
fot this Alpha value. It is not perfect because it
should be black or white. But with using color ramp, we can make this perfect. So this is roughness for
this bombus material, and this thing is very useful. So I don't need
subscription to any to polygon or some similar
sites where where I can download all these textures
because I get everything I need from one Jet
GPT subscription. This is not what I want, but I think I need to
describe this better. And one thing which is good
when I make better prom, I don't need type
anymore, this prom. For example, for this one, and I can just type
now for this one, but it will not create good results because
this is not good result. But I can maybe type And you can see that this
is clearly good result. Okay? You can now
type, for example, can you make bigger scale, and can you make this seamless? But I think you understand
how this works. So let's back to another AI tool which I try to use to
speed up this process, which is this 33d. And you can see that
this is not successful. So even I use these multi
view images, for example, what I do, I don't have
this subscription anymore, but you can approach here, front, left, right, back, and it doesn't work how I expect because you can see
how this back look, this is clearly bad topology. I don't have this
wire for mode here, but this high resolution model actually create
millions of polygons. It looks similar like PhotoScan. But you can see that
this is not useful. I cannot upload or
sell this anywhere. It will be disaster. But there is also one
option which is Smart mesh. I think maybe this
one is Smart mesh. You can see how this looks. So if I have here
this one remote, this is now a little
more optimized, but you can see
that this is still disaster and this is not useful. I think for these
organic objects, in some cases, this
can be useful. For example, this
mina sterit like, I'm not sure how I
will model this. I'm not so good in sculpting, and if I am, it will take like days to
scalp all these details. But, for example,
you can use this and scatter like grass, rocks, mountains, stones and
some similar things, and you actually have good base. And even with these couches, which sometimes look good, you need to spend a
lot of time to make these objects use this
look pretty realistic now, but you can see in
this color input, we have all these
shadows which are baked. This is actually a
big problem because when you put your
lighting in the scene, shadow will always be here. I will show you how we
can fix this and how we can use some of this
mesh from this here. But for all these
hard surface models, I didn't find this useful, so I need to model
everything from scratch. So Most of the, like
all of these models, I actually model from scratch. What is actually conclusion, AI will not take your job. You cannot just go here, make prompt and
download these assets. Actually, you can,
but you can use maybe this for somewhere
in background. And you also need
spend a lot of time to optimize all these because
all these textures are big, mesh is heavy and you
need spend a lot of time. And sometimes it's easier to model some of these
objects, not this one, but for example,
this model here, I actually can
model very quickly, and it will always look
good when you model this. You will not get the
artifacts and bad topology. Okay, so this is my model. If I go to Edit mode, you can see clearly this mesh, all this is how it should be And we also get a lot of
details here in texture. For example, we can
control this edge dirt. We can choose
different color here. Okay, I should put
this 20, not one. You can clearly see all
these bump details, roughness and all these
tiny imperfections. What I started
talking before, A, I will not take your job, you still need skills. So you need to know
modeling and texturing to get these models
and objects done. And without skills of
modeling texturing, you will not be able to create something similar like this. Of course, you can
always buy this ASE or you can find similar
assets on Internet. But you can maybe use these
skills to earn some money, so you can maybe create something
similar and say online, or you can always model something specific you
cannot find online. If you don't need
high quality objects, you can, of course, use AI. Let's previous a few
more of these objects, and then we can
actually start with this tutorial or with
modeling this PC. So you can clearly
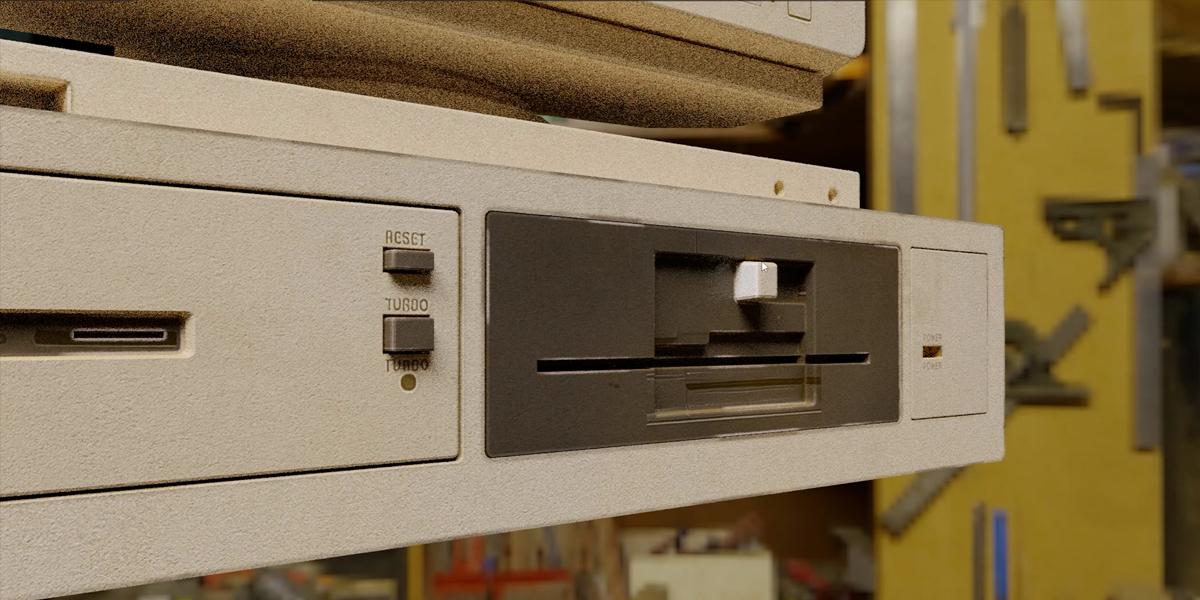
see all these bump, scratches, all these
imperfections. Sometimes I use even like ten different shaders to
get all these details. And we can maybe add some
more of these imperfections. And if you want more
shiny rough objects, you can play the
roughness values here. Now, it's more shiny. Okay,
so basically you have full control over
all these objects when you do all the manually. Let's try with this one. So you can clearly see
this leen topology. So I need to take care about two things to make
this as much as realistic I can and at the same time to keep this optimized and fast. Let's see how this look
when I add some dust here. Now, they look
like they are from the same space of
these three objects. Let's add some dust maybe here. Okay. I have instructional video how to install this asset peg, which is actually just 1
minute you just need to edit preferences and paste links
here under Asset Library. But in this video because
it will be too short, I also make some test renders and preview of all
these objects. So if you are interested,
you can find that video. Because we don't
have enough time to go through all these objects. I also modeled some
of these houses, and in one of these
tutorial series, I think we will model
one of these houses. Actually, what I do, I just make these modular pieces because there is no sense
to model one house, and then later when
you need this window, I don't I need model
window from beginning. So what I do, I model these modular things, and later, I can
build any houses. For example, we have
these big houses, and you can see that all these have nice details in roughness, color input, and all the dirt. For example, this is one asset, and I can then just do
this and I have this fence or another fence or I can
just bring this garage door, this wall here and in edit mode, I can quickly invite a mode. So like this Then I can make
this bigger or smaller. Okay. So we will talk
about this later. I think this is all
for introduction. And we can now start
actually with tutorial. And just to show you
this model here, we have all these
details imperfections. This wood texture look nice. And here is how this
topology looks like.
2. Getting Started in Blender – Basic Shapes: Let's now start
modeling this PC. I will share all these textures
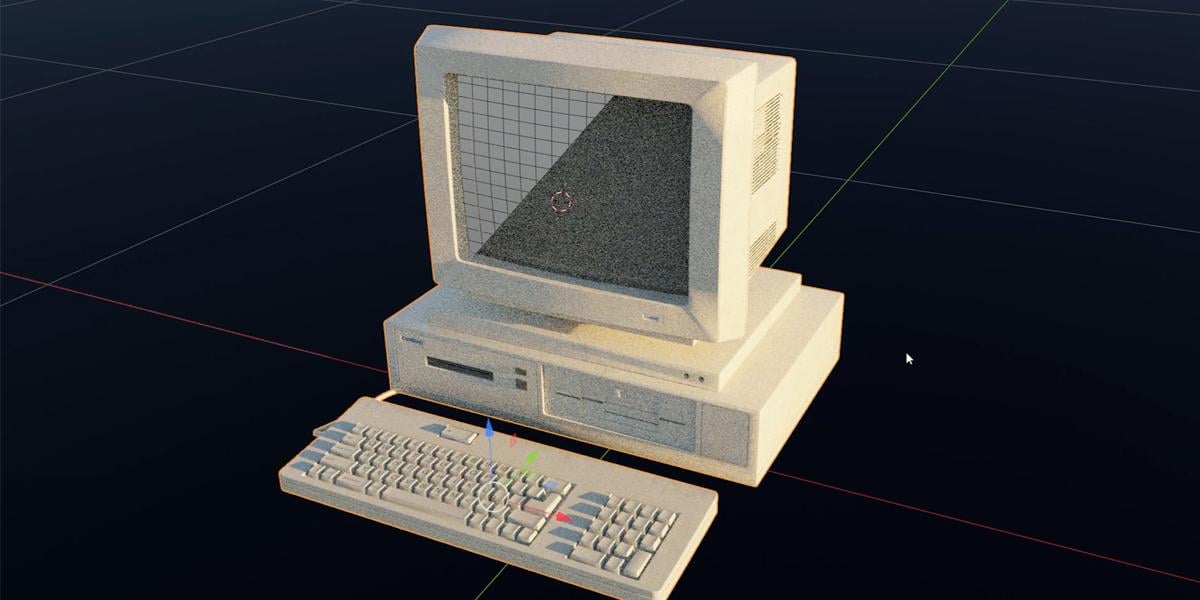
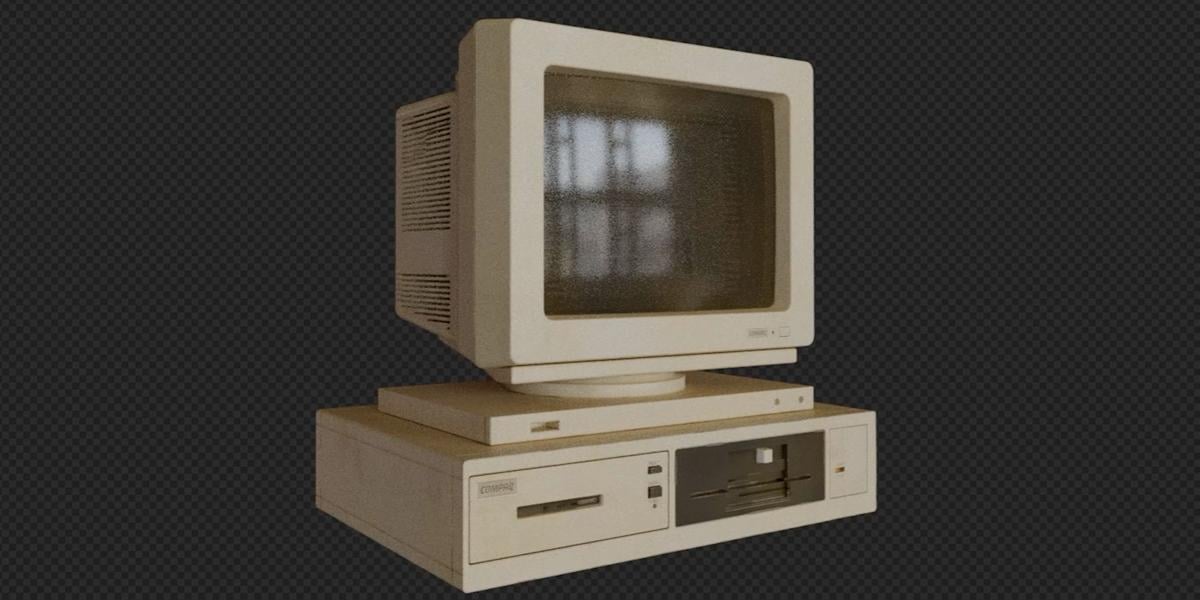
and references with you. This is what I get last time. And we should now build
something similar like this. I will go with new Blender file, and I will delete all
these subjects for now. What I will do first, I
need reference image here. So you can use programs
like Pure ref, but I like to keep these
references inside Blender, so I can always take a
look to reference images. What we need here, we need image editor open. And references, I will
put here reference, but I can also load any of these images here because I will load them inside Blender. So I always have this nice
reference image here, but I will also put reference inside this
three D viewport. What we can do here,
we can go with Shift A. I will enable
this green cakes. I have here, this works. So it is tiny, but
you can always stop and you can
take a look what I'm typing if I forget to tell O N to remove this tab and shift A. So Shift A here,
image references. I can now navigate to
this folder front. One thing, which is important, you don't want this
camera angle because when you import this image here, it will be under this angle. So you need to be in
front orthographic. So you can see here
front orthographic and shortcut is numb at one, or you can go with
view viewport front. For example, view
viewport front. Shift A image reference,
reference and front. Now three is for side view. Image reference. T is, I think, left. So we can choose this left. But I will not go with right
because I will see later. I think this is correct and I can maybe just go with Shield x. A Y minus one to flip this. If I need this, but I
don't think I need this. Let's see what we
have more back view. You can also use this Gizmo,
click, another click. And we are now in orthographic shift image reference back. Okay, and now I will just
move this to about here. So this is front,
left, and back. I think this is enough. Now we can maybe rename this
so this should be back. Front, and this is side or
left, we can call this left. What I want to do now, I put this in
separate collection. So if I press M, I can
create new collection, and I can call these
references. Okay. Now I can quickly click here to hide this in viewport if
I don't need or here. And what we need to do we
need to save this file. So file save I will just
call this tutorial. I will start with
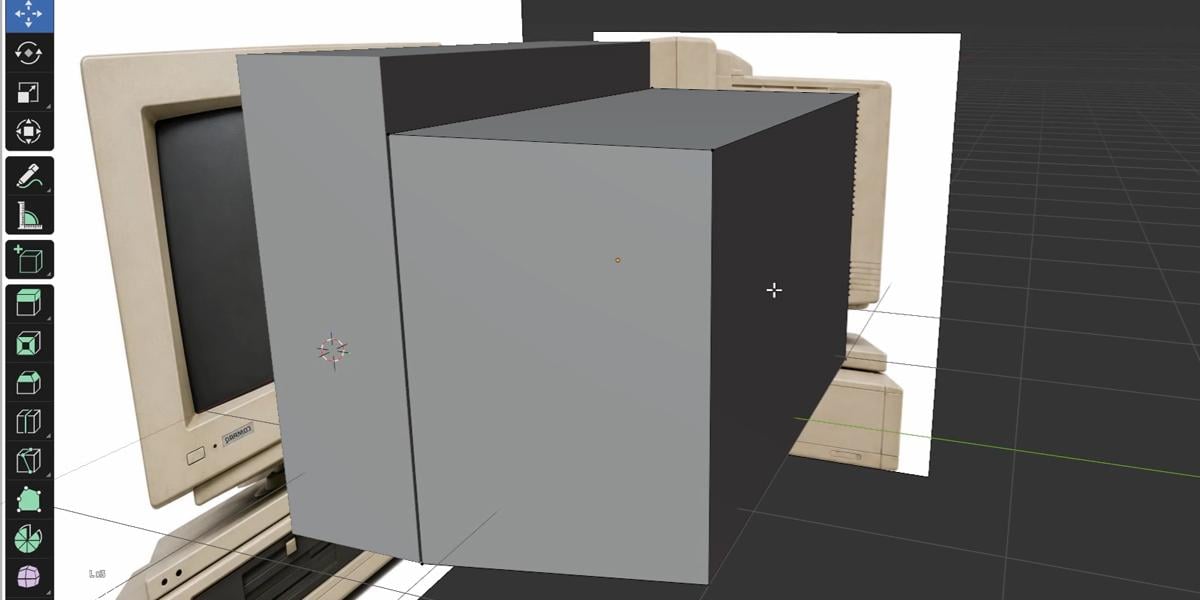
front orthographic, so numb at one, and let's see. For this, I will start with Q. We can bring this cube here and we can scale this on X axis. One more disclaimer. So this is not real
world proportions. So this is 2 meters big cube, but we will fix this later. For now, I just care
about proportions. So SX scale this on X axis, and we don't need
to be perfectly precise because this reference
is not perfectly precise. Let's now go to side view. I think I want to flip
this S Y minus one. Okay, this direction. Numb at three to side view. I want to go to maybe X
ray mode, and let's see. I see these lines.
So this is good. But if you, for example, have this reference
here and if you go to sideview, yes,
this still works. So we can still clearly
see this object here. And now, when I
back to numpth one, you can see border of
this monitor here. So this should follow
this object here, but we will not scale this object because when we scale this and if we
now go to number one, we also scale this here, so Control Z to undo this. What we need to do we need to
scale this reference image. You just one set this monitor here to about these dimensions. So something like
this. So this is good. This here is also good enough. You can see difference between this part
here and this one. I will scale this
on Y axis so a Y, and I will place
this about here. And for this part here, I think I will go with Shiv
D because we will go a lot to solo view
or the local view, which is actually this
view view to local view. This is actually shortcut, so naped K. So we
will use this a lot. What I say before we can actually go to Control
R and extrude this, but I will not do this now. I don't want to create extra
topology where I don't need. So what I will do, I will
go with NAPE key to back to our references Np
three to side view, and I will go with hit the X. Okay. I will go with Control Z. What I do, I actually
do this in edit mode, but we can do this
in object mode. Shift D Y. Okay. I press X before, but I need Y. I will
go to iframe mode, X ray mode, actually.
This is Wireframe. And there is also one
thing you can do here. I think we can lock this. So if you enable this togal, you can log this because
we don't want move this reference or accidentally
select this reference. This front one, you also want. Lo so disable in
selection, actually. And now we cannot
select this anymore. So we can still select this one. But with this back, we will actually hide. We don't need this
for now, maybe later. This is front view. This is side view, and let's
see where is our object. We can select this also
here in view layer. And let's see. So I will
go with number three. Now I will set this part here. So I will go with SZ. Actually, I want just
grab this top part. So I can go here in edit mode because we have this X ray mode, we can actually just do
this and select this part. Maybe this one here and we
can move to about here. And now I need vertex select. W one, two or three,
your keyboard, you actually switch between
vertex edge and face select, or you can just click
here and grab this edge. So be sure to enable this
because if you don't can just click here and move
this and you will get this because you
didn't select this one. But in Xray mode, you always select
both. You can see. We can also maybe go here with left, which
is actually side. I think I need right, actually. To get say perspective here, what we can do, we can press
L to select lose part. But if this don't work, you need to be
closer to vertices because the select
based on vertex weight. So if you don't have enough
vertices here, just face. You will not be
able to select VL, so just put mouse
here and press L. Now we can go with x,
something like this. Let's create this part here, Control R. Number three, let's see, EZ about here. Now we can go to X ray mode. I can select all
these parts with edge select or what
you can also do. You can basically
go with actually, here is how things go. So selection is a big
part of modeling. So we have modeling shortcuts and we have
selection shortcuts
3. Selection Shortcuts & Building the Basic Shape: We have a few very common
shortcuts for selection. So one of these are shift
with shift, we add selection. So one, two, three, four. With control, we actually select short at pat
between two edges. For example, if I click
here and call Control, Blender will pot and
select all this. For example, if I
now click here, Blender find this pot here, if I click here, Blender
will select all this. Or if I hear Blender, this is not same objects, so that's why I get
this selection. So I select this
one with control, Blender will select
everything here and now here. But if we use shift and control, we can, for example, select this line and
then shift this one, and then we can use control to select everything between,
which is this one. And if we need switch to
another area, we can again, hold Shift and now
click here and now we can go with Control
and select this line. And with Alt, we
actually select loop. For example, this is
not so good example, so we can go with maybe,
I don't know, cylinder. And for example, if I hold Alt, it will select whole loop here. Here, we don't have any
loop, but for example, if I add here with shift, we can add selection one, two, three, with control, we can select shortest line, which is, for example. This one here or this one here, but with holding earth, we can select whole loops. So one loop, another
one, or this one. Okay. So I will delete this. L is shortcut for
selecting loose parts. For example, we have this
loose part and this one, but they are not
the same object. What we can do, we can basically join these two
objects with Control J. Now, when we go to Edit mode, we can actually edit
both of this object, but if you want to
select only this one, we can press L here. If you want to select this
one, we can press L here. Okay, what I do, what I want to do,
actually, I want. Maybe select all these things. So I can move this. But maybe best thing to select
this is when we go to side view Xray mode and we can just drag this and now we
select everything here. Okay, but you can
see what we get. We actually stretch
this line here. I think if you go with G twice, yes, we can actually slide. If you go with just G and Y, this is what we do before. We actually move this and we get this angle
here we don't like. But if you slide
this along normals, you can press G twice. So G G. This is actually
what we want here. And now we can select only this thing here and
move this to about here. If you want maybe
be more precise, we can make this more part here. And now we can bring this up. Okay, but this is not important. So we can now clearly
see how all this look. I can now go here
with maybe reference. So we can maybe now
model this screen. Let's see how we can do this. You can clearly see
this edge here, so we have this part,
which is thicker. What we can do here,
we can go with Control R. We can
press S to scale this. And I think this part, we can create this C. It will not affect
what we will do later. So how to create Control B. And withholding shift. So without shift, this
is very sensitive. It is very hard to be precise, but withholding shift,
we can be more precise. And now, all E
extrude alongnrmals. A is for extrusion, but T is to extrude alongnrmals. Because I press E
and A T a few times. I'm not sure. Maybe I create double vertices,
what we can do here. We can press A and we can go with F three
merge by distance. I create a double
vertices because I delete or remove
eight vertices here. So be careful because if
you create double vertices, you will run into
problems later. Now I will go with all T
extrude along normals. Move this to about here. Okay, now we get this n S. We also need create bubbles here later because this
is now too sharp, but I think we will
do this later.
4. CRT Screen & Monitor Base Modeling: Let's now create this I will search for reference,
this screen here. What I will do, I will select with phase selection. This part. Now I can go with Numpad one and numpaK
back to our scene. Let's see how much I
want to scale this. Now, I will press
I to insert this. You can see this
blue gizmo here, so you know that
this is the axis. So you can press SZ
to scale this on Z axis. Something like this. And now I will back
with Napeq to solo you, and we have this part which
we can extrude on Y axis. E Y. Something like this, you can see this edge here. I think if I press S, we will get this angle here, which maybe we can
see here. Not sure. This may be too much, but
I will go with a little. One thing I will
do, I will close this timeline because we will not do any animation
so join down. Let's see how we can
make this screen part. You can clearly see
that this is rounded. I don't want to create
cuts on all the object. I just want our look
cuts on this object here so we can be separate
by selection. Now we can right click sect origin to geometry
and we can go with Nampa key twice to work
only on this object here. And what we can do now, we can add with
Control R loop cut, move this to about here, and with Control R one loop cut, move this to about here and with holding shift and ltlick here. Now we can with Control
B, smooth this. I'm not sure is this best way Alt to select this
loop cut, Control B. Maybe we can first fix this X axis and old
Control B now axis. Okay, something like this,
we can go with Shade Smooth. And we can back to our scene. Now we can select both
of the object with holding shift in Napa key. If you want, you can join this, or you can select like
this one and join this. Let's now create this
bevel here in this one. This is very important to get this round that
look and with all. We can click here now shift because we want to
skip to another part. We can go with shift or shift all and we can
now go with Control B, and now we can now smooth this. I think we can now
also bevel this part. And one thing you can note, I will go with ControlZ
because I need to check scale. So scale is not uniform
and scale is not one. Actually, we need to go with first Control A, apply scale. Now we can go with
Control B and we can expect bevel to work correctly. Something like this OT
to select this loop, Shift T to select this one, and maybe this one, Control B and add
one bevel here. Okay, you can choose how
much loop cuts you want, more loop cuts you add. It will be more smooth, but I want to also keep
this low poly tab here. I also want to go with
old and old here. And now I want to
go with Control B, but here I will add
maybe just one loop cut. This is not so visible. This is what we have for now, and let's see if
I go to nape key. We can now go with nupt one. I will select here front. Let's now create this part
down and this rounded part. Nape key, let's see. What if I just grab this part? Because I want this to
follow this edge here. So I can go with Shiv D, maybe move this a little easy and we can maybe
extrude this on Y axis. This is not perfect,
but I think this should follow this part here. So maybe SX,
something like this. Actually, I will
extrude this two times. So first time here, SX and EY. Let's see how this look
in right orthographic. So this is not sure. I think this part and just
blend with this part here. So we can maybe do
something similar here. This will not be visible, so it is not so important. Let's see if I just
go with Control B, to bevel this and to
smooth all these things. I will go with ControlZ. This thing here is
not how I expect, so I will go with x this inside. So hell and let's
now smooth this with Control B. Numpad one, and let's go with front. Now we can build
this rounded part. This we will build
with cylinder. Shift A. Cylinder, by default is 32 vertices and I think this is good enough. SZ scale this on Z
axis, maybe like this. And, numpad seven, let's place this in middle of this
PC, something like this. Let's now back
references with numpK. This should be even smaller. S Z and S. Now select
both of this object, Nampa k, and let's
bring this here. Actually, we have this
smaller cylinder here, and we can create this with
tab to edit mode three, to face selections like this. I, to insert this E Z. To extrude dist on Z axis. Okay, something like this, and I think this is good enough. With holding Shift and Old, we can select both of
these loops. Control B. Okay, we need apply scale, control B, something like this. And let's place
these to position. If you want smooth this, you can go with shade out of smooth. Now this is actually modifier. You can actually choose
after this smooth work. But because we will later join this with Control
J or we can do this now. Now, this apply to
all these subjects. We will play with
this at the end. You can also in same
time, have this modifier, but you can also, for example, only this phase, go with
right, click shade flat.
5. Top Panel Modeling: Let's see what is next. So we have here just
one stretch cube. We can go here with Shift A. So if you don't have selected this object and create new one, it will be separate object. But I think if we have selected this object and we go with cube, it still separate object. But if we go to edit
mode and create cube, it will be part of this object. So this have sense. And let's see now SZ to
scale this on the axis, aX, let's go with Number three, and let's see scale of this, this should be something
like this set Y. So it will not be perfect, but something like this, and this should go here, Shiv D and Z. We need another one here. S Y S Z, something like this. Let's see this in
front view Sex. Now we can go with numpK and
we can see how this look. I think I want W L,
select this one. What you can also
do, you can select one phase and then press L to select this and S Y,
something like this. Because I want work
only with this object, I will actually go with
B separate by selection. Now I can focus only
on this object, and I can go with set
origin to geometry, and later we will join
with all these objects. We don't have too much here, but let's see this reference. We have the two circular holes and this one square holes and this edge or this thing here. Let's see how we can do this. I can press L. I can first bevel this Control B,
something like this. And now, if I add
Control R here, I actually add this cut
over hold this object, which I'm not sure if I want. Keep this as clean as possible. I can just go with numbed one. I can go with K. And now
we get this knife tool. Now, if I click here, I stuck to the vertices, and now if I hold Z, I will stick to Z axis. And when I snap to
another vertices I can press, click and Enter. Let's see what I get if
I now go with Control B. I get actually place where
I can put this hole, and now I can go again with K. If you don't care about this, you can just go with Control
R and create Loop cut here. But let's just go with K X. And now with Control B, If you want, you can now with old control and control
here. You can move this. You can go with SZ to slide this and now we can actually
want slide this a little SZ or scale
this a little with SZ and now EY maybe
something like this, has to scale and what we can do. With select this loose part, Control B to add one
small bevel here. We actually create minimum
vertices or edges here. And let's see how we
can create these holes. So there is a lot of ways
you can create holes. In Branda, you can use Boolean, modifier, but let's
do what we do before. I will go with K, Z, stick on the axis, select this edge, Control B. Let's now select this
and let's go with Control B. K and X. Cut to this part G twice to slide this
Control B to bevel this, and now we have these
two holes here. And I think a new Blender, 5.2, this loop tool
is by default here. But if for some reason, don't see this, when you
click with right click, you need to go to
edit preferences, get extension and
search for loop tool. Hello, it is me from future. I was right when
I think that they build loop tools inside Blender. So you need to go to edit mode, and if it's like
this and press I. We need press N, and you
will see this edit tab here, and here we have loop doors. For example, we subdivide
this and we can out. Before you click anywhere, you have all these options. So you can play
with these options. Okay, I'm not sure
how this works, but you can play with all this. With this here, we
can play with radius. And we can also change
rotation on X, Y, and Z. So you have all these options, and after choosing
one of these options, you will always get
properties here. Now, if I go with Right Click
and first I need subdivide, Right Click subdivide, but
I also subdivide this part. So I will go one by one,
subdivide, subdivide. And now subdivide subdivide. Now I need select this. You can go with Control and
just drag select all this. Or you can with C, enable this brush here, which you can scale with
middle mouse button and you can maybe just
select like this. Loop tool, click Loop
tool and circle. Okay. If you press a, you actually scale this based
on this middle point here, but you can change this and you can set this to
individual origin. And you can now scale this
by individual origin, which one is here
and another is here. So by default, this median
point, which is here. I will go with EY we can again scale
this a little delete, limited dissolve because we don't need these
extra edges inside. Now we can go with Alt. Okay, with Alt, we cannot select whole loop, how I expect. So we need shift and lt.
Just click a few times and now shift and Alt to select
all this, Control B. And scroll mouse up
to add cut more. Now we have these
two small holes. We have this detail here. There is more than one way. You can create this, but this is how I create this last time. Let's now create this edge here. How we can create
this control R, scroll mouse up because we need to Y to scale this on Y axis, but I think now I need median
point Y to about here, Control B and only one loop
cut so scroll mouse down. And now old T extrude along
normals and move mouth down. What I will do now
with holding Alt, select this loop cut,
shift lt this loop cut. So with shift, we add selection, and with Alt we select loop cut, Shift Alt and now Control B, you can add two
loop cuts or one. I think I will add one to keep this as much
as possible of ply. Okay, now we have this
nine SM and we can now maybe join with
this object here.
6. Computer Case – Front Panel Modeling: Let's now see how we can
create this bottom part. Because of this keyboard, I don't see too much, so I will go with front
orthographic view. First, what I will do, I will select this face and then press L to
select this loose part, B separate by selection. Select only this object
set origin to geometry, nape key twice to
isolate this object. You can go with Control R and add one cut here and one down, and then isolate this,
but then you also create a lot of
unnecessary edges here. So what I think I do last time, we can actually split this
in three different sections. So one is this one, another one, and third one. How we can do this. I
will go with Napk to back to our scene numbed one to go to front
orthographic view. And let's see how
we can do this. I will actually select
only this front phase, which is a little
hard to select now, but I see here that
I selected this. So what I will do, I will
separate this by selection. We can now select
this object okay, what we can do now, we
can select this object. We can enable this
front for selection, and we can now maybe isolate
only these two objects. If I now go to Xray mode, I can see these edges, and I can go with Control. No, tab to go to edit mode. Okay, I select both
of these objects, so I just need two
of these objects. Okay. Now I need to
go to Edit mode, so we are in object mode. So tab or go. There is one confusion. So this object is not
selected. This is selected. So you need to click here. Now you can go to Edit mode. So one to go to
front Orthographic. And let's now add loop
cuts on these edges. So one here, another one here. And let's see. One edge here and we can also separate
this object, this part. And also this one. Okay. Now, I think this
will be easy to understand. So I will now go with Napk and I don't need
RFra mode anymore. Okay. Now I can separate this in three
different selection. So we can go with P
separate by selection, P, separate by selection. And let's see what
we will do here. Let's go also with P, separate by selection. Okay. We can also set
origin to geometry. And we can start
first with this one. I will go here with
tab, Control R, and wallop cat here, Control B. And we want also with
Control, select. So shift control to select
this part, Control B. Okay, now we can maybe
extrude this on YX EY. If I scale this just a little, we get this seam here. And what I will do, I will
select this out edge and EY. And maybe now, it's not
so easy to select this, but actually it is
from another side. I will select this edge
with holding Shift, this one, this one and this one. Now I can go with Control
B to add bevel here, maybe three loop cuts. What we can do here,
I actually think that we need with shift
select this loop cut, and we can go with EI
extroud this and we actually need Bel
this edge here. With control, you can dis select if you select something
you don't want. Okay. Control B,
something like this. Let's now just go
with Control B. O L cut to a small bevel here. Now, I will go with T because
this is separate object. I need to select this
separate volt Sef sheaf told here. Okay. Now, add one bubble
or two bubbles here. If you want to make
this even more visible, and we actually want
one bubble here. Shift told Control B. Bubble here. Now we are
done with this part. We can now focus
on this part here. Again, just as just a little to get this theme
here and let's see, first I will select
all this and EY. I will now extrude this. I will delete this pace here, delete phases with tab to object mode,
select this object. Now I will select this loop, and I will go with Y. Now I will select
this edge here. This edge control be here to add on bevel
and probably I now need a similar bevel here. Okay, maybe I
overcomplicated this part, but I think you
understand point, create similar bevel here. I think I need to scale
this little on Z axis. Now we can create
some details here. And I think I make one mistake. I should not create this bevel
before I create loop cuts. Now, it will be a little hard. But let's see if you do
this, one thing you can do. You can go with nap K to
isolate this NumpdO let's see. Now I cannot add loop cuts with Control
R. This is mistake. I do, but one thing I can do, I can go with K, fork knife tool, Z, and stick this down. Now I can go with Control B to split this,
something like this. What if you go with
I S Y about here, and if you go with E
Y. Move this inside. Numb at one, let's
go with K here. Z. Stick this on Z axis, and let's add similar here, KZ. And what I will do now, I will go with K, X and cut all to here. I will dissect these edges, Control B to bevel this
and what we can do now. We can now go with EY
extrude this on Y axis. If you get this
view perspective, I think I click
numbed five maybe. So view perspective
orthographic. Okay. What I will do here, I will just press to
scale this little. Because if I go with numbed one, I cannot see this edge inside because I see this
one and if I use K, I will stick to this first
one and nothing happened. So what we can do
just press S Alita. Now we can go with K, click X, we here, Enter. Maybe we can bevel
this and don't know. We can just maybe go with
K X here, K, Z here. And let's hiate this button. Quickly, Shive Y E Y L
because this is lose part, SX and let's maybe
stick this here. We can extrude this Y.
I can again go with K, maybe one loop cut here
X, maybe one, here, stick to here, and
now I can actually add loop cuts because
we have here squares. So Control R. Let's see. Now I want extrude this
with EY and this part, EY. Now, we get this edge here, but if we click dissolve
orthogonal edges, we actually can
quickly delete this. We just want maybe
create one bevel here. Actually, we want create
few bevels here. Control B. To get this edge,
this detail here, we can maybe select this
and move this inside. Select this tel, Control B to smooth this button or what
we can do as to scale. Now, L Control B to smooth this and we
can now start beveling. Control B here. To
smooth this a little. Let's go with Control B here. Actually, I want
select this loop. Maybe this one and Control B. Now I can go with bevel, select all this with
shift shift here. Control B, and
maybe two segments. Okay, I think this
will be good enough. Actually, we want
more bevels here. And we also want this side here. Okay, Control B one more
bevel, square mouse down. Now, I think this
is good enough. We will later add more
details inside Shader Editor. I think I overkill with this. This is not so important. Let's see. Last thing here
is this one and this one.
7. Computer Case Modeling & Details: Again, what we do
before as to scale, a little SZ, a little. Let's see, scale is okay. First go with Control R. We will not make the same
mistake as before. SZ. One look at here,
maybe one here. I will make space for this logo. Up. So here will be our logo. We can go with EY. We need more space. E Y S
to scale this a little, maybe a Z a little EY. And let's see, we need
space for these buttons. Something like this
and I will go with Control R actually here. Okay, this should be
one and another one. What I need to do here,
I will go with EY. I will be the individual
I to insert and EY. Now we can go with
Control ump plus, Control B to bevel this. And what we can do here, we can go with Lt.
Not this part, but I just want del.This
part shift to switch to another area and t
shift Control B level, this part a little this is
good enough, and let's see. We actually want
this phase here. I can go with Shift
Y. Let's see. If I go with I ax I can
move this to about here EY. Okay. We want BgleT. So I will grab this
edge Control B, like this and the old to select this loop and this edge here. And now, Control B. Control B. Let's see
what we will get. I think this will
be good enough. Okay. Now I can select
all of these objects, one, two, and these three. Let's see. Okay. I
forget middle one. If you now just join all this, this should work correctly, and now we need
join this object. I think we can go with
Control J. Hello, this is me from future because I make one beginner mistake. So we have this part and what we do we separate
this by selection. And later, when we
join these two parts, this phase is still separate. And what I do, you will
see later in video. So I grab all these and
I go with Control B. Okay, you need to apply scale. And I go with Control
B and I do this. And later I figure out that
I forget to join this. So what you need to do
before I join this, before I go with
Control B or Bevel, you can select all
this and you can press F three merge by distance. Now, this is not separate
part. All this is connected. And when you go with bevels, you can actually bevel this and later, you
can bevel this. But I forget to do this and I don't have
enough undo steps. And I also forget save
backup with save increments. And what happened now, we didn't touch this part. We didn't add any loop cuts, but we get a lot
of details here. You can go with side view, control R, maybe two
loop cards, S Y. Let's back these two
median point S Y. Control B. Paul,
extrude along normals. And let's see we want here also. To edges, Control B. Volt and t to select
this whole loop. Control B, Alt D,
extrude along normals. Now we want also bevel,
these loops here. Control B to add one segment here to make this more
visible. And let's see. Now we want bevel this edge. This one and Control B. But little bigger be here. I think I made a mistake. I forget to join this
before I bevel this. But let's see what we can do. Sorry, I make one big mistake. I forget to join this plane
with merge by distance. And now I should do this before. I bevel this. Let's see. Maybe we can fix this. What if I go with ControlZ? I think I don't have enough. On those steps, I forget
to enable more on those steps and not
sure what I do now. A what auto save does. This is before 15
minutes, if you see this. So I cannot I make big mistake. Let's see how I
can fix this now. The only thing we can do now
is little complicated thing. So we have here one,
two, three, four. We can go with not Control B because we need
bevel edges here. We can select with
holding shift, all this, and we can go with Control Shift BT Bwel vertices now I need to move mouse up and scroll mouse until I count four Control Shift B five. I think we need five. Okay,
now what we can do here. What we can do now, select
this one and this one here. F three. F three, merge at last. F three, last. F three, last. Okay, we can merge this. F three, last. And let's see. Actually, we need one more. So what I can do here, I can create one vertice
more F three, last. Okay. So now we actually
get to the point where we should be before I
make this big mistake. Actually, this is my suggestion
to avoid this problem I run into every when
you finish some part, for example, when you
happy with this part, you can go with file,
save incremental. And what Blender does, Blender actually
create new version, Blender create backup. So this is one, and we are now working with second
version of this. But if you run into some
problem and you need backup, you can always open
this old version. For example, if I made this
here and I cannot undo this, I can always open this
old version without this. I think I will
manually fix all this. I learn election to say backups in hard
way, but I'm done. So I connect everything
and I can now go with EY. Let's see. We can now
just create begls here. We actually want
go with EY here. And now we want maybe
select these edges. And we can now go with
Control B to bugle this and all Let's see. And now we can go with
Control B to bevel this Control B to bevel this. I think we are almost
done with modeling parts. Next part will be texturing, but I just want to join all
this together. Let's see. I think this give
sense to move this up like this, Control J. Actually, we have two objects Control J to join this together. Later, probably we will add a little more details,
full of textures. One thing here about
this keyboard, I will open now. I will say this Blender
file and I will open this Blender file
just to show you that actually this keyboard is from before three or four
years I made also. Similar tutorial like this one, but this tutorial is little
outdated old Apple Macintosh. And because this model
is actually good, I just copy this keyboard and I paste this keyboard
here and I just adjust some textures
to match this. So I think we will not
modeling this tutorial, but if you are interested, you can also find this my old tutorial in which I
model this Apple Macintosh. Before I make more mistakes, I will stop here because
I'm a little tired and if you go to Edit mode, you can see this mesh, and we have good
base for texturing.
8. Texturing Basics – Color, Roughness & Normal Maps: Hello, and welcome to second
part of this tutorial. After modeling, it is
time for texturing. I talk about these textures, how I get texturing, first part. But let's repeat this. So what I do last time, I just, for example, bring this into chat
GPT or similar tool. You can use any similar tool and you can ask, for example, can you generate Last time
I typed something similar. Not sure if I type same, but something similar and I should get something like this. Later, I also ask, can you
generate roughness map? You can also ask for bump map, normal map or any other map. But I think for bump, I use this map, but just to know that you
can ask for any maps. Let's now see how we can
start with texturing. We need here open,
Shader Editor. You can maybe jump here. You have set everything here. And then we'll jump to
material preview here, you have space for Shader
Editor. Here you can open. Maybe UV Editor, but
this is how I work. I split this window in two. Here will be Shader Editor. Here, we can play
with UV Editor. This is not good, but
we can just repm this. Please, only color map. So sometimes you need
to re prompt something, but after you get right prompt, first time for next time you
just need another model, and it will follow last result. Let's jump to UV editor, and here should
be Shader Editor. But you can organize how
you like this word space. Now we need to create
first material. You can click here plus or
you can click here plus. It is same, and I will call this beige plastic because this will be our main material. What you can do, you can jump to material preview
or shader preview. If I click here, we get this bad lighting
because by default, Blender use this gray color, but we have here
this high texture, and my recommendation
is to switch to cycles and GPU because
with this option, you will get this
multiple scattering, which is a little more realistic
than single scattering. Okay, maybe this is too
bright and I also like maybe bring sun down to get
this golden hour atmosphere. You can also play
with sun rotation. I think I like this
shadow part here. Let's check chat GPT. This now look better. It looks very similar,
what I get first time. Okay. And now we can bring
these two maps inside, Blender, and we can put
both of these here. So first one is color input so Bs plastic and second
one is roughness. For roughness, you always
want say this to non ch. And for this, we can
plug this to roughness, but I like to put
here color ramp. So with this, I can
control how much I want this to be shiny or rough. You can see that
now, this is shiny. And now, is rough. But obviously, this texture is stretched to fix this we
need. Select this object. Let's just check scale. Let's go to tab with tab to
edit mode, A, projection. Now we can press A on left and we can press
S to play with scale. It is now a little hard to see, but let's see these
details are too big, so we can scale this even more. Okay, in some cases, it is easier to see this
in material preview. If I go with tb and
scale this all down, we see a lot of this
low resolution texture. We can remove these overlays here to make this even cleaner. Let's actually bring
reference here. Let's see how reflective this is should be a little
more than we have here. So we can go with
control shift here. I think this is for this
before you need not wrangular but I think in Blender
5.2, this is by default. But for any k, just check this. Node, rangular don
and activate this. Okay, so a black part will be more shiny and white
will be more rough. So you can see when we
increase the blacks, we get more shiny part here. Okay, because we don't have
too much contrast here, it is all these pixels
they're very similar. I think I also generate
some concrete texture. I have here from before, I will also share this with
you. Let's see how this look. Okay. And one thing
which is important here, we have only one UV map for now. So I didn't plug anything here, but because we have only
one UV map, for example, if you go with Control you
will see that by default, it's UV Map and because we have only one UV
map, it is this one. Okay, let's see how we can
use this concrete texture. So I didn't play
with this last time, but let's see how this look now. If you want change
UV Map for this, you need to generate new
ones. We will do this now. So concrete because I don't
want to touch this one, which I said how I like. So we can go with UVM and we can set this
concrete UV map. How you know that this
UV map is plug here. If you don't have anything, plug here by default is
this first one. But to avoid confusion, you can just duplicate
this and plug this here. Because we have selected concrete UV map,
you can, I think, with middle mouse button, see this somewhere in UV Editor. In edit mode, you
can see this here. So because we have
selected this one, we actually edit this
one, how we can see this. If we click here, we can now
scale only this concrete. Maybe we can This is
not perfect texture, but let's see how we can use
this in roughness input. For example, if I
plug this here, you can see now this
roughness input is based on this
concrete texture. And what we can do, we can
go with Control Shift, try click to mix these
two textures together. Now, if we go all to left, we actually use only this one. If we go to right, we use mix
of this or if we go to one, we use only this one. Let's see if we said
this to multiply, we will just take black
parts of this texture. Or opposite is screen. So we will make this more rough. So if we go to right, we will actually use
only this white color. It will ignore
blacks. So let's see. Yes, now with this, we actually make
this more rough, but let's set this to multiply. I just want to take
these black parts. Let's choose
something in middle.
9. Adding Texture Details & Material Variation: Let's see how we can use this concrete texture in
color input, just a little. We can go with another RM. And we can use this one, but let's plug this here. Now, what we have, we
have this texture. Let's now maybe keeps only
a few of these parts. And now, control shift
and right click. And let's make this shader
by clicking on last node. We want here multiply. So we will only add
this black color over this over here. Okay. But I want also mix this with some noise texture
because I don't want this on each part
of this computer. I want maybe only maybe on this area and few
areas on this PC. Let's go with RAMP
and let's plug this I think we can
go with color input. I need more contrast here. Let's say, maybe
only black area will be this concrete dirt. So we need high contrast area and maybe a few smaller areas. For example, this one
here and on these areas. Let's see, maybe roughness. We can bring maybe roughness up details, something like this. Now we can go with control shift right click to mix
these together. Let's now preview this.
So I will set this to multiply or screen. Okay. I think screen is right. So now you can see that
with this color ramp, we can actually control
where we want this dirt. Let's choose another area here. Let's preview, actually this. If you click here, we can see that where is this black area, we actually get this dirt. So we can now focus
on this area. For example, like this and maybe make a little more
contrast here. Maybe we want dirt
only on this part. Let's see, this now should work. So this is before and
after we go to write, we get only on this
area, this area here. Now, it's all about playing
with this noise texture. Let's say this is good and now we have dirt only
on these few areas. But I will not use this influence all
one, but almost one. So we also get some dirt this
area, but barely visible. And now we also want to bring
strength of this coal down. So this is when we
said this all one, it is too intense. Maybe
something like this. Okay, if we select all this and press M,
we actually mute this. So this is before,
this is after. We clearly get some dirt areas
around here and also here. Next map, which is
really important is bump map or normal map because we want really
tiny details here, we will go only with bump map. You also have displacement. So bump, normal
and displacement. So for this species,
actually, bump enough. So bump. And let's see
if I see how this look. Okay, we actually want
more tiny details here. So I will go with
another RAM plug this to color and this should
go too high. Let's see. So this is preview of this. I will make a little
more contrast here. And let's see if you
plug this to normal. What happened here. By default, this is not so visible because this is by default set to 0.001. I will remove 10, and this is now
much more visible. Again, you can ask Check GPT to generate bump map for
this texture. Let's try. I get normal map from GPT, and I ask this is normal
map. I need bump map. But because this is tutorial, let's see how we
can use normal map. I will rename this to normal, normal, and we can
rename this to bump. So this is tutorial and
we can play with this. I will show you how you
can set up normal map. When you have normal map, you need to set
this to non color, and you need also
go with normal map. Not normal, but normal
map and plug color here. Now, let's see scale of this. If I review this, let's set this to
this first UV map because this normal map
is very similar to this, but we can just review scale. So this one is let's see if I plug this instead
of this bump map, what result we will get here? I think I will change
scale of this Control T. I will unplug this. Let's now go with
control. Let's see. If I said this to two, we
will get smaller details, which I think is okay, maybe 1.5 or something. Okay. Now, how we can
combine both of these, so we have this for bump. Let's increase this
and we have this. Let's say we want to
use both of these. I think this one is
little more realistic. So what we can do, we
can basically just plug this here and we
can plug this here. Now we have both of these, and now we can play
with strength. I don't want overkill with this, maybe just a little,
and of course, you can play with strength here. Okay. This is how you can combine normal maps
with bump map. But one thing you also
need to know when you add bump details and
this normal maps, you make this object more rough. So if you want to
make this more shiny, you can, of course, play with roughness value,
increase this a little. This is maybe too much. I think all this is
maybe too mumpy. Something like this is okay. You can also check this render
preview, and of course, you can add more
dirt if you want, for example, like this. Let's overkill just a little with this because this
is texturing tutorial. We need to see all
these details.
10. Front Panel Texturing & UV Unwrapping: Okay, now we have
this and let's load here from this reference here. Now, we want to actually
get all these details here and this logo and
also this text here. So basically, I want to
use this texture here. But I see one problem. This text is a
little too blurry. It will be a little
too low resolution. What I will do I will upscale
this just for a second. So we have this front. I have this new Photoshop. You don't have photoshop. Of course, you can upscale
this in any other program, or you can just cut
this part and ask GPT, can you generate this more
part with higher resolution? But I have this
generative upscale. Let's see which one maybe we can upscale this two time and
let's see what we will get. This is result, but I get and I'm not happy
with this result. You can see that this
text is little weird, but this is like
one K resolution. This is two K. So we
definitely get more details. And I think I will not lose
too much time fixing this. Now, I will fix this at the end. So after I finish this storial
I think I will manually maybe type this text
and replace this. But definitely we get
much more details. Because I will not touch this
part and all these parts I actually just want change this part here and
maybe this part here. What I will do, I will
create another material. So we have here base plastic and I will go with
Control C. Actually, I don't need Control C because I can select
this from here. So I create new material, and we need edit or separate
this material from this one. Click here and I will
call this throne. Okay, I will go to
material preview. It will be a little faster for preview and what next I need, create new UV map. I will call this front because I don't want
touch this main UV map, and we actually want to change
only cooler input for now. So what we need to do here I think we want replace
this material here. So what I will do Shift D UV UV map and I
will load this front, UV, plug this here, and I will replace this texture. No, I put this on the
references front two k. Okay, let's review now. This here. Now, nothing happened because this PC use only
this beige plastic. How we can this
Because for example, I will go to VUPor display and I will send this color here. So this is actually
viewport display, color, and we can preview this only
in this viewport shading. Okay. But now I will change color here to maybe
bluish or something. And you can see that basically only this material
is applied here, but we can edit this edit mode. You don't see anything because
we disable this overlays, but now I will maybe
let's see if I go with. Actually, we want just
these three pieces. So with L, we can easily select
these three pieces here. Second one because
these are loose parts. If you remember Big plastic
front assigned this here. You can now clearly see that
we apply this texture here. We also want in this
part here, let's see. I think I will maybe assign
to all this part here. So I will also assign this here because we have this
detail which I like. And let's see. I think this
is for now good enough. Now we clearly need to
fix this projection. We have selected
this front UV map, you can also in edit
mode, see this here. Now, I will select
this and I will just reproject this here because
this is a big part. I will loop cut
here and let's see. This should be okay. This part here, we
can project a little better, something like this. But now we previewing
just color input, so we don't have
any bump roughness. Details, let's
back this material with Control sheet, click here. And now we just want to
replace color input. So this is old Color input, this will be new one. And we get these details. You also get little
offset from this texture. So this one is darker because we don't use
same image texture. This one is little darker
than this one, which we use. But we just in this case, need try to metch this
as much as possible. So maybe with huge
saturation value node. Maybe 1.2. Let's see what if I go with Okay, we
preview all this, and let's see if I what
I do I play with vector, so we need to play with 1.5. No, too much. 1.1 is okay. Okay. Now we get this
nice detail here. Maybe we should model
this detail manually, but I think this
will also be okay. Now we need to fix
this part here. So I select this lose part, and here I will say
this two K texture. And now we can project this
with project from you. Aspect ratio of this
model is not the same as model. We
model manually. But I don't want
to stretch this. I can stretch this, but then we will stretch all these text. So what we can do here, I will basically play manually. So first, let's see. We actually model this part. So what I need to do here, I just want to adjust
this text better. Something like this, let's
now go to material preview. And I want now avoid this
part which go to this side. So just grab this
reproject this here. I don't want to touch this
black part, so just manually. This part is okay. And this is also okay. Let's see. Same with this part. I actually want move this. What we can do, we can
basically move this on this area without texture. And now, this one is good. Now I want also select this loop here with holding Alt and control amped plus
expanse selection. We can project this here. Maybe we can go with projection. To unstretch this texture, plug this here,
and now I will go with tell because this
should also be a loose part. What I will do here, I
actually model these details. No, I didn't this one. But if you model all details, you can just scale
this all down and just project this
to this gray color. But because we maybe want
to get these details, this whole and this part, we can maybe just
project this like this. And one thing I also note, we have too much this
bump on this area, this one is more smooth. What you can do now, you can make you can create another
variation of this texture. So click Plus and now choose this front front and create
new variation, less rough. Now we change this variation
here and now I will say this to maybe green and now
I sign this texture here. Now, if you go to solid view, you can see that we have this less rough variation
applied here. Okay. Let's back to
material preview. Now we can make adjustments. So what I do here, I want to make this more rough, but I will add black color here. I don't want these
imperfections, just more black color here.
You can see that now. This become more
rough. And what else? Let's bump. So
move this to left, and let's move this. Okay, so we have now
this third material, and let's fix this part here. Let's bring our reference here. Here, I will fix this part. Here I want this text. Actually, let's select this
place very well this text. Now we can adjust this and
the second text should go here like this and the
third one should go here. Something like this. Okay.
Now we need project this. This is not lose part. If you go with that, you
select everything. So click here and here and Control umptPlus
we can expand selection. What I do now, I just want project
on this area here. On this area here, and this should be say
material like this one. So let's up sign. Let's rough material here
and you can see difference. Okay. And last thing, we just need to fix
this projection, move this outside on this text, and now this should
look good enough. This is how this look now, and let's go to
material preview. This look good enough. Now we just need fix this part. So let's go to material preview, number one, project from you. And I will assign this
less rough material. Now we have problem
with this button here. So we can now clear
this new editor. This is loose part, so we can project basically
on this base part. Like this, we need to
clearly fix this projection. Let's project this
somewhere here. Let's see if I scale
on this texture here. Okay, I think this look
good enough. Let's see. We also need fix this part. What if I just move this right? And if I now try
adjust this hole here. So this should go up this down. And we have this part here. But if I just move this right. We only get this problem
here. Let's see. Yes, we have something here. This part here, we
can keep this detail. If you want, you can
keep this detail here. We have here hole mesh, which is actually
a little problem. What I can do, I can
duplicate this part she divY and I will just go. Just scale this on X axis. Scale this on the axis. Okay, now we should not
see through this call. And let's see what we
can do with this part. Now, just be sure to
clean everything, and this is how this
look in render preview. This part is a little too dark, so you can also maybe separate this material and make
this more bright, but we will see later. So we just need this third part. We can actually load
here k texture image. Let's back to material preview, edit mode, select this part
and assign this front. Okay, it is already front, so we just need go with Project from you and fix
projection a little. Like this. And let's see
where we have this hole. We have this hole about here. We don't need to be
perfect, but later, we can just reproject this
better little better. So this is okay. This power to about here. This should not touch this
letter here, and this ho. But this should be
bigger maybe scale, just a little on Xxs and
somewhere in middle. Something like this. Okay, I
think this is good enough, and let's now see how this
look in render trick.
11. CRT Screen – Glass Shader & Alpha Map: Now create this glass
material, what I will do. Let's see which one B plastic, I will duplicate this. I will call this glass. So another variation and glass. Now I will assign this glass here to make sure you
assign this correctly, you can just change
this viewport color, and you can now clearly see
that this is glass material. Let's see what we can do. What if I don't touch anything from this here except
this roughness. Actually, I need
touch this color. But I will keep some
of these details, and I will go with
hue saturation value. I will bring saturation, and I will make this more dark. Like this, I clearly need
remove bump to almost to zero. Something like this,
maybe tiny, tiny details. So 0.00 something. Okay, something like
this and roughness. Let's see if I increase this, I get this glossy part here, but I also keep some
of these details, roughness, their
something which is good. Something like this,
and I also want mix this with glass shader. BSDF mix these two together. This should be like black glass. I will say this to
one to see how this look if I change color here, a little more dark glass
and now we can basically choose how much we want this
first input and second. What we can also do, we can maybe use this roughness
in this glass roughness. I don't want change
normal map for this, so this should be smooth glass. Okay, and we have maybe
too much contrast, too much details here. So I will basically bring
this closer to black color. Okay, but I also want to make this more rough
little more rough. Now, it is all
about playing with all these settings until
you are happy with result. Let's see how this
look in render prev. In render prev, this
look a little better. Maybe I just want to bring
some more graph details here. Okay. For now, this
is good enough. And let's see what is next. Let's now fix this side
view or back view. Let's go with This
should be left. Okay, this side view. Maybe I also need upscale this, but we will see later. For now, I will not
play with this, but maybe in final results, I will improve this
what we need to do now. We need to go to this front. We can copy this plus front, create another variation
of this material. This should be side. And the side material we want
apply to this part here. So I will make this overlay tab to go to edit mode, side assign. Again, we should change
viewport color here. Now we can clearly see that we have different
material on this part. Okay. Now, we should
change this texture here. I will load here, left. And let's now preview this. We also need left here. Left and let's see, Numpad. We can just play with this
Gizmo project from you. And we can now
reproject this here. Again, proportions
are not so good, but I will stretch
this a little. Okay. And let's see
what we need to do now. This should be hollow. We have actually holes here. I don't have in mind to
play with bullion to cut all this because this will
create unnecessary geometry, thousands of new vertices faces. So for this, we
can use alpha map. How we can use Alpha up here. Actually need this
texture because these have this black
and white information. So I will go with Rum. So this left texture here, control shift and here to
preview this black color, we want tell Blender, Okay,
make this transparent. So we actually want pretty
high contrast here. Again, this is not
perfect texture, but it will work. Now we can just
plug this to Alpha. I think this is Alpha. Yes. Okay. You can
see that this work. Basically, we make
this part transparent. And if you play with
this color ram slider, you will see how
this actually works. Okay, I will not be perfect, but we can try to
get best we can. Let's now apply to
another side, same thing. So side view, we can
go with number three, U project from X mis one. Flip this another
direction, I think. As six to scale this Okay. Now we have same course
on another side. And there is one problem
because this is transparent, we can actually see that
this computer is empty, which is not case in real world, so this should not be empty. But what we can do here, we can make something inside. What if I duplicate
this shift the Y? And if I go with EY, now I will press
L U Q projection. And I will assign this side. Actually, I will rename
this with Alpha. With Alphanl we know that we have alpha assign
this material here. You can see what results we get. Maybe we can load here. We will make another
variation with this texture. Alpha, maybe we have
better texture for this, maybe this part here. We have a little
more details here. And now we need to
go to edit mode, assign this material here. We actually get a little
more details here, and I will load this
back texture here. Go to edit mode. We
can project this here. But this is still too hollow. So I will go with Shift
D. Scale this a little, and I will maybe project
this to this part here. You can actually look
these as gribbles. We get another layer
of details inside. **** scale this one more time, and I will maybe project
this through this part. And what we get now, we get something which
we can put inside. Computer, we can maybe bevel this one bevel. And let's see. I want to select all this, but we can select all this
maybe only in X ray mode. Okay, what if I now place
this side, this PC. Actually, I follow I want
follow shape of this PC. So I will maybe bring this
down maybe like this. And that's now again, select all this
and bring inside. We can go to top view. What you can also do here, maybe I will need
this selection later. I will create this vertex
group and call this inside. Assign this. For
what is this useful? For example, if I
select this again, I need to go inside and it will be really
hard to select this. But because I save
this Vertex group, I can just go with Select
and with one click, I can always select this, maybe adjust this
a little better. Okay, but this will
be better visible inside in a vender preview. Okay, what you can do now, I just want select this, maybe just this phase. Okay, and what we can do
now, we can select all this. Maybe we can I don't know, play with editor until
I get something I like. Okay, you actually
understand point. It is important to not make
this completely hollow, just make something for inside. And also, this ramp here is
actually pretty important. So this is what we have now. But of course, if we
make this opposite, now it's more hollow. This is what we have for now, and I think O, PC look much better than before.
12. Imperfections – Edge Wear & Dust Shader: We are actually close
to be done with this, but I will show you how we
can improve this even more. If you watch my YouTube
video about dus shader, I record how I made
this dus shader. You can doload this
for free here. How this works, you get
Blender file and you need append this file inside
your Blender project. Have, I think, video
instructions how to or in this YouTube
video, here you have. So just watch this tutorial. And because I have this inside my default Blender startup file, I can just search for
dust shader, too. So this is maybe second version. And let's see how
this is visible. I see now why this
is not visible. This is visible inside
our PC. So let's see. Okay, another way you can select save this selection here, but we have different
material here. So you can just
select this part, go to edit mode, then select. We actually apply this dust
shader to this material. But we need this material. We actually apply this to each of these materials separately. So dust shader. This is influence of one. We just want maybe small
amount of this dust. And this is complex
formula, so we have dust. We add more dust
on World Z axis, so it will add more
dust here than, for example, on this area, we have the ambient occlusion, so we add more dust
in these creases, gaps, holes, camera facing. For example, if
you look from top, you will see less dust. But if you look from this angle, you will be able to
see more dust here. Let's increase this a little. So when you look from
top, not so visible, but from this side, you are
able to see more of this. And last, this randomness. So just little noise texture. You can also, of course,
play with color of this. But we need to apply to
all these materials, and I will also go
with dust shader here. And we apply dust to this. You can clearly see that
we have more Z axis, we have this ambient
occlusion more on these parts where we have
the course creases gaps, but this is too intense, maybe just a little. And so, this is a material. Now, this is less
rough material. So we need apply dust here. Okay, this is
obviously too intense, maybe just a little And glass. Let's see how this look
if we add dust to glass. Okay, look pretty good, but still too intense. And the last one
is this side part. Dust shader, too, just
a little of this. Now we have dusty PC. This is actually
example how you can use other people's nodes to improve your shaders.
This is what I build. But I also from
time to time when I watch YouTube tutorial
find something useful. And in this folder, I save some other nodes. For example, I have link for this or mask nodes
and this mask node. Not sure which one, but let's see how
we can use this. I will try find links online, and I will try and share
links where you can download these node groups. So let's select this
plastic main material. File, paint. I think last time
I use mask node, but this is also very similar. My goal is to select
these edges of this to add dirt on these edges. And I think both
of these do same. And have much more. So let's see which
one mask node. You need node three, mask. And what happened now, we append this to our scene. So we should be able to
find this mask node here. Okay. And this edge
mask is cycles only. Why cycles only? Because I
think this use bel node, which is cycles only feature, but we can review how this look. With this, we select
these edges here. I can now play with
all these settings. But if you need this, for example, ground dirt, you have this option, leaking
moss and these damages. And this is procedural, so you can play with
all these settings. But I need this mask node. With this, I actually
select this mask and you can play with all these settings,
maybe something like this. This edge scale is
actually important. So if you make this bigger, you add more of these edges. I don't know. I
think I like this, maybe some randomness and
how we can reuse this. I will use this in color input. So what we can do here,
I will make this note. Here, I will go with mixed
color, actually, edge mask. I will use this for factor, and now I will say this to, for example, black collar. You can see that we
add this black color to these edges here. Now we can play with
this edge scale. And all these settings. You
have a lot of settings here. I will not lose too much time, but I will maybe move
this to about here scale, closer to one, just
a little dirt. And if you press now, this is before and
this is after, maybe just a little little more. So before after, you can see clearly all the
dirt inside these edges. This also defined shape of
this object, a little more. And of course, you can
change color of this. Maybe we can add some brownish tint
here. But not too much. How we can now control this. I think if we go
here, mixed color. And if you say this one to black, when we go all to right, we fade this effect completely, and if we go to left, we see this effect completely. So we can use this
as controller, how much of this we want. We can press F and rename
this to edge dirt. So this is our controller how much we want of this effect. And what now, just copy
these three nodes. Copy and we have
this material here. If you don't know which material
is applied to this area, just click here with
phase selection and we see that we have
beach plastic front. Less rough. Okay. Now we
can control V. I will scale this and here should
go our color input. So this color input, we need plug to A
and this this here. But because this
is already black, maybe we can add some
white edge dirt here. Maybe this have more sense. Now, we maybe fade this effect and maybe play with
this edge frequency. Okay, but this is too much, so I will bring this
scale down maybe. Okay. So you can clearly
see these details. And we have this aging
effect on this button here, which is really nice.
13. Final Preview & Lighting Test: And step by step, I think
we are done with this PC. Of course, you can
play all day with all this with control space. You can zoom only this
window in viewport. So we can preview our PC and
let's disable this here. But let's just for
end of this tutorial, let's maybe play with some rotation to see
all these details. This is too strong. And of course, you can play whole day with all
these settings. But we can also load
the R here to see how this look in with
another lighting. So Shift A environment, texture. I have a lot of HGRI
which I download from HGRI here and you can
find all these for free. We can just quickly preview this in different lighting situation. We can set this film
to transparent, so we can focus only on our PC. And with Control T, we can rotate sun here. We have maybe too
much bump here, and you can always
adjust all these things. So object and what we
have plugged this to normal maybe 0.30 0.02. But we also have this roughness, too much maybe dirt
roughness here. This go to roughness. So you can maybe play
with this volume. To make this more shiny, you can also play
with this slider. Okay, this glass shader is by default, a little transparent. So we see what is behind. You should not see this,
but maybe you can just set one plane behind this. For example, I don't know. Just duplicate this
Shiv D Y and assign. I don't know. Big plastic here. Now, we should not be able
to see what is behind. Okay, so this is another
lighting situation. Let's see. If I play with this, let's see another Not big difference. Snowy environment. Okay, when you make
all these correctly, you can see that the respond to all lighting situation
and looks good. But this is set to 0.5. So we need maybe more
lights here. Let's maybe. I have here, side. So PC is usually inside, so this should have
even more sense. Maybe too glossy and too bumpy, but you know how to fix this. And maybe too much
dust on this screen. Okay, this is all
for this tutorial. Thank you for watching and
see you in next month.
 Sime Bugarija, null