Transcripts
1. Trailer: If you have ever wanted
to create a planet, you must be familiar
with the roadblocks. You cannot use a texture because it's not
detailed enough. You cannot turn a plane into a sphere because of the seams. And this is where
discourse comes in. In this course, you
will learn how to create the perfect
sphere and how to Sculpt a planet with VDM sand brushes that there
will provide you with. We will create an Oasis. We will also create
palm trees, bushes, and scatter them around
the oasis and the planet. Not only that, but
you will learn how to like scene to the
best of your ability, as well as Creating the Clouds and setting
up your camera. In under 2 h. You will
learn all of this anymore
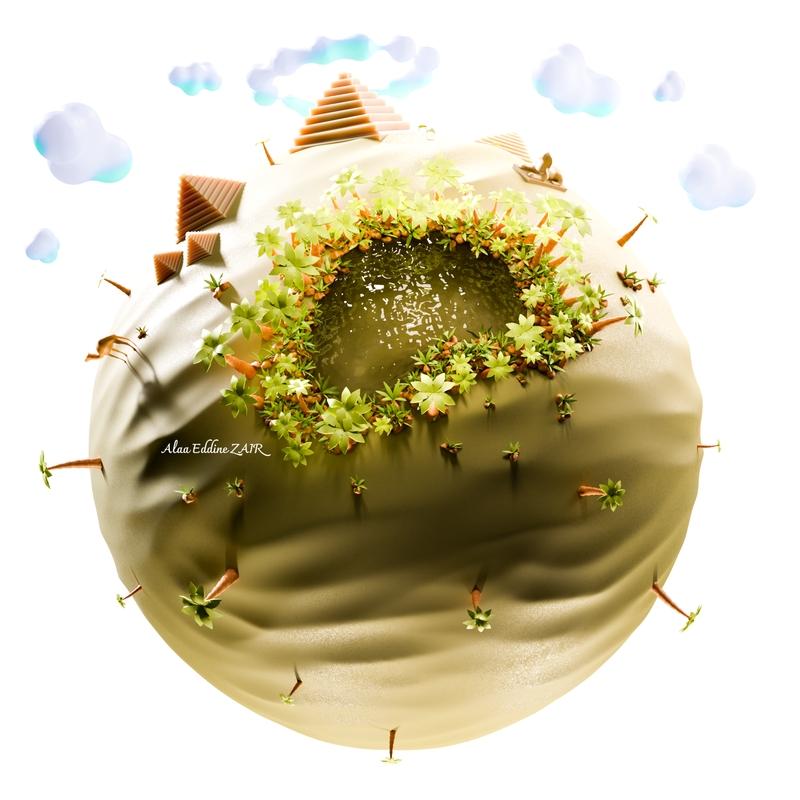
2. 00 - Intro: Hello and welcome
to this course. In this course, I'm
going to teach you how to create a
miniature planet. Namely how to Sculpt one
with real sand brushes. How to create an oasis, how to create palm
trees and bushes and scatter them around the
oasis and along the planet. You will also learn how to
create Pyramids, Clouds. And finally, how to
perfect the Lighting for this particular scene and
set up your camera. Also
3. 01 Sphere Creation: To create our planet, we need to create a sphere, but we cannot do with the
regular way which is Shift a, Creating a UV sphere because that can
cause shading issues. So if we subdivided a few
times and go to the top view, you can see we have
shading issues here and that will be
problematic for us. Not to mention, this is not a clean topology that
we want to work with. So let's delete this sphere. Instead. Let's create a cube. And let's sub-divide this
cube, maybe five times. Let's bring up the search menu. Shade smooth. Let's
center the view on the cube and
rotate the camera. If you pay attention
to the edges, you can see it go
up and down because some places are protruding
more than others. How do we fix that? Let's go to Edit Mode. Actually, let's apply
the modifier first. Now let's go to edit mode. Let's press Alt,
Shift S and type one. No, it's a perfect sphere. Before rotate the camera, we don't see any
parts protruding. Now this sphere will
be used for sculpting. And to get it ready
for Sculpting, we need to add the multi
resolution modifier. Let's subdivided a couple of
times. That should be enough
4. 02 Vdm Brush Setup: Now we can start sculpting. But before we move on, I would like to tell
you that you have to be on a recent
Blender version. Because we are going to Sculpt
using what's called VDM. Brushes do require a
newer version of Blender. I'm currently on
the version 3.5. If you have that or
knew where you will be fine if you have older, you might need to update it. If you don't have the version that has this new feature added. So let's go to the
Sculpting tab up here. And on the right side
of my screen you can see that we have
Brush Settings. We are on this icon here. It's how new icon that
has been activated. Among the first Brush. I would like to make
a copy of this brush. Let's name it our brush. Now you can follow along
how to set up a Vdm Brush. Let's go to texture,
create a new one. Let's open browser and browse to where we
saved our VDM brushes. I'll be including
them as a download. You can download
them and use them. So I'm going to
use the sand VDM. Before we can use these, we need to set
them up correctly. For some reason this
takes us to this icon. We need to go back up here. Let's change the mapping
to maybe a area plane. Let's enable Victor, vector displacement, stroke,
maybe anchored. Let's try to Brush
to Sculpt now. Networking. But one last thing we need to do is
checking the strength. Vdm brushes are designed, designed to work with
strength of one. So let's input that we can start Sculpting.
As you can see
5. 03 Sculpting The Planet: Let's make our conscious
strokes with our brush so that we end up with
coherent looking sand. You make a mistake, you
can always go back. Alright, let's, let's continue. Looking good so far. Control Z, go back one step. Not bad. Now let's go
back to the layout view. And that's all we have to
do to Sculpt The Planet. I don't recommend that you and sub-divide the
multi-resolution modifier because you will lose details. So if you set it up to, for example, couple
of subdivisions, you want to leave it there. If it gets too heavy on your
C and you can toggle down the level of subdivision
or the viewport. But you don't want to ask
sub-divide because you'll lose details doing that. That's it.
6. 04 Texturing The Planet: Okay, Once we have The
Planet, Sculpt it, we need to figure out where we want to Sculpt the oasis itself. So you need to actually rotate The Planet and find a view
that you want to work with. Maybe rotate the camera. This is the front view. Maybe keep protonating, find
a good view that you want. I think I like this view. Yeah, let's keep that
texture The Planet. All you have to do is
use the textures that I have included in discourse. So to apply them, Let's go to object. Let's select the planet. It's create a new material. Let's call this planet. If you have the Node
Wrangler add-on enabled, you can scroll down
principled Setup. And let's actually find the textures that
you have downloaded. Let's select all of
these principles. Setup, can go to the
material preview. Let it compile. There it is. Now a few things to
make sure of is that your normal map and displacement
are setup correctly. So normally you have to
bring the shrink down. I'd like to use 0.3. And for the displacement
I like to use 0.1, sometimes you need to
go lower than that. Depends on the normal map and displacement map
that you are using. What you can also do is remove
the normal map altogether. Let's go to the shading of preview to see
what we are doing. I'm going to increase
the contrast too high. I'm going to rotate
the preview HDRI. What I wanna do is make
the grains look smaller. And how we can do
that is by removing the vector connection here. Let's select the
displacement Control T. If you have the
Node Wrangler add-on, and that gives it
its own mapping. So let's increase this to seven. If you pay attention, the grains are actually
a lot smaller, but I can see that they are
displacing a bit too much. So maybe we can go to
the scale and reduce it to 0.01. That will fix it. There we go. The
Planet looks great
7. 05 Lighting The Planet: Once we have setup
the materials, it's a good time
to start lighting the scene and create a camera. So I'm going to go to the world Tab Control T. If you
have Node Wrangler. And I'm going to look
for studio small 71k. And let's go to the
render preview mode. If you get this
message here saying updating lights and it
stays for too long, then you might want to
reduce the level of the subdivision on the planet. And I'm going to rotate the HDRI roughly 160 degrees to get
this lighting effect here. Once you have done that, let's height the HDRI by
going to film transparent. Now, let's create
a new window here. And we're going to use that to control the lights that
we are going to Create. Let's create a
point light there. I'll maybe bring it
a bit to the front. Hold the to make a copy of it. But rather an instance. Let's create another lamp. Make sure that your lamps are white close to the planet to get better. Glare effect. I didn't mean to create a sun, but we will do so in a while. Now I would like to
create a sun lamp. Move it up a little bit. It doesn't matter where it is, but for visibility reasons,
I would like to move it. And we can go to the side
view and rotating this this some lab so that we get some
illumination on the front. If you want softer shadows, I think you can play with
the angle of the sun I'm not quite happy
with this look here, so let's fix that. That looks a lot better. So it can keep playing
with the lamps until you get a
result that you like. So we have done a few things, mainly increasing the size here. And I also moved a lamp up here. This lamp also needed
some size increase and I reduce the strength
on the bottom ones, and it looks a lot better. Now what do we need to
do is Creating a Camera. So shift a. I'm going to create a photograph or Camera because they
have this add-on. If you don't have that, you
can use the regular Camera. I'm going to use
the square frame. But also I'm going to increase
the focal length to 60. And you might find that your camera is now
stuck to the planet. And you can simply
take the camera back. Planet looks a lot better with this high-value focal
length. And that's about it. That's how you set up the
light and the Camera. Something else you
might want to know is that I have redone
the Sculpting of the planet with
smaller brushstrokes. So if you find that you're sand is a little bit too
big, not much detail. You can simply Sculpt by,
make smaller strokes. That will give you a
lot of dynamic shadows and pretty look to the planet. At this stage, we have
started to get it to get a lot of clutter
in our scene. So maybe it's time to start
to organize our scene. Let's select the lamps,
for example, press M, and create a new
collection called Lights and the camera as well. Cameras. And also the planets. I'm going to name the
old version V1, V1, V2. And I'm going to move
these to a new collection called planets. There it is.
8. 06 Pyramids: Now that we have
the Lighting done, we can basically start
putting the prompts and getting the oasis
ready and stuff like that. So I would like to start with the Pyramids at the top here. For this particular object, I think you will need
an extra add-on. It's called, I think
extra objects. Let's see if we have
it here. Extra. So yeah, it's, it's
called extra objects. I think it comes with Blender. Once that's enabled, you can
create a simple pyramid. I believe that the
default settings are fine for what
we are going to do. So I'm going to move
this pyramid to crops. And then I'm going to
create a new collection. Pyramids. I'm going
to move this there. Once we have the
pyramid are created, we can use the snap
tool on the planet, so enable the snap tool, change it to face up project. And we want to enable
a line rotation to target and also enable
this button here. Now that we have the pyramid, I'm not sure if it's
working as intended. But we can fix
that by creating a empty and moving it to the
bottom of the pyramid. So now we parent the
pyramid to the empty. I'm not sure why the
sudden is selected. Okay, Control P and heritage. Like so. Maybe the, the empty is a bit too large, so I'm going to Alt P clear
and keep transformation. I'm going to scale this a
little bit. That's better. Now you can re-enable the snapping and
position the pyramid on top of the planet. If you want to move it down, press G and Z twice. You will have to
do some rotating. Good. Now, all we have
to do is duplicating. And let's do the same
for the second pyramid. Like so. Let's duplicate. Sometimes when you
want to rotate, you want to disable snapping. That looks good.
Another duplicate. Not too bad. Actually,
it looks really good. Now we need a pyramid here. I now want to rotate
this a bit like so. Shift D to duplicate. We want this a bit smaller Maybe put it there. Perfect. Let's see
how this looks like. Now we need to add lecture
is to the Pyramids. And we're going to
use a palette picture that I will be including in the resources that you can use. So let's do it together. In order to texture D is
with the same material, we will have to create at least one material
that's called Pyramids. Then select all of these. Make sure that the one you
are attached to material two is re-select it, made active link materials, and now they all share
the same material. And you can see the
number of users here. So it doesn't matter
which one you click. Now, all I'm gonna do is
create an image node. And I'm going to open and try. Sometimes Blender doesn't
show me the folders. We've got the textures here. You will be able to
use them as well. And let's change this window
here to UV. Now let's click. Let's select all the Pyramids. Also, we want the
mapping nodes enabled. So let's Control T and UV unwrap. Know all the Pyramids
or UV unwrapped. And we can use any color
here that we want. So maybe discolored there. Maybe let's use
this one. Not bad. Can change this
anytime you want. I also like to increase
the subsurface value to something that we
see fit so that we get some light passing through
the Pyramids here. I also want the roughness
all the way up. Maybe a bit of
emission. I'm not sure. Actually, let's
disable the emission. Let's increase
this a little bit. Change the color. We can create a contrast
and brightness note here and manipulate
that however we want. Maybe that's too much. It'll blend 02. It looks better
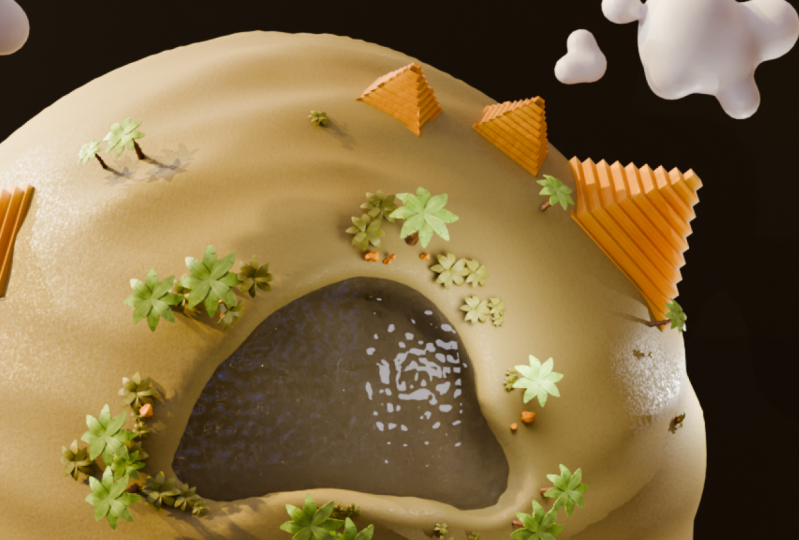
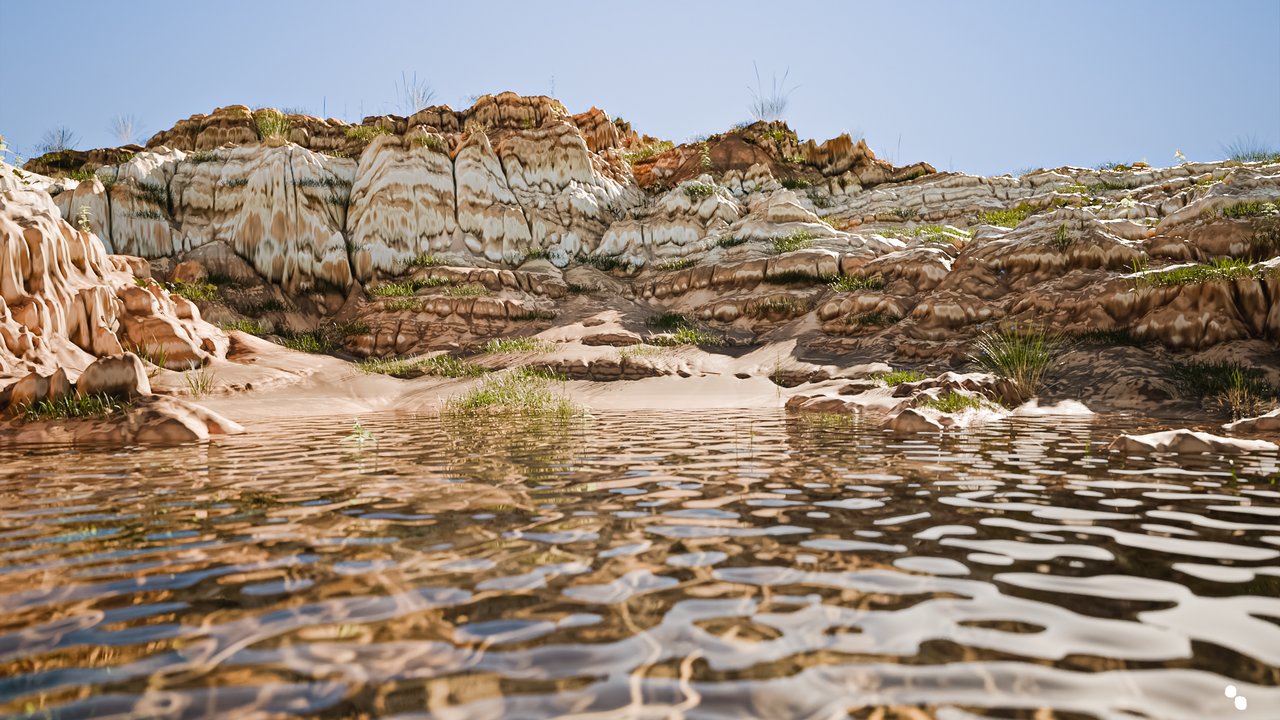
9. 07 Oasis And Water: Now I would like to start
working on the waste is and we will
have to Sculpt it. And for that reason
I would like to duplicate this
planet just to have something to fall back to
with The Planet selected Shift D. Then let's disable the old one
and rename this to V3. Okay. Let's go to Sculpting. Snap back to the camera
with zero on your numpad. You remember that we
created our brush without overwriting
the default one. And that's, that's
because we need it now. We will change the direction
to subtract and try to Sculpt and oasis. It might take you a few tries. Tried to make it as natural
looking as possible. Maybe. Let's go back. Try again. Let's change the
strength to one. That works worse. So I'm going to go back 2.5. I like the shape. I'm going to keep working with this. That's good enough. You can always use the planet that we copied
to redo the oasis. Let's, let's try again. You have a tablet, it will be a lot easier
than using a mouse. I would say that's a lot
better. That's enough. Now for the water, we are going to create
cube sub-divided control. Maybe three, not on your numpad, but on the keys that are at the top of your keyboard, I'm not sure how
they are called. Let's make this into
a perfect sphere using Alt Shift S at typing one. No, it's a perfect sphere. Let's preview how
that looks like That looks good, but it
will look a lot better with the water shader created. So how exactly do
we create a water? It's gonna be pretty simple. Let's create a new material. Call it water. And we don't need
the principal VSTS, so I'm going to delete it. We're going to create
a volume absorption. We're gonna make it 0.1. The surface. Let's
create a glass node. Let's change the IOR to 1.33 and create a
displacement node. Now let's create
a noise texture. And let's create a bump node and connect the noise
to the height as well. And the water is
starting to appear. But to better, better
see what we're doing, I think I need to make
some adjustments to the Lighting, namely the sun. I want to change the angle
to maybe something like ten. And let's observe the water and see what changes
happened to it. Nothing so far. Let's bump the
height a little bit. Actually the scale of the noise. Let's try 100. Let's change the bump setting for this
particular object. Let's change this to
displacement only. And see what happens.
That's a lot. Okay, we're starting to
get something interesting. Tries it'll one. Let's, let's create a lab
here in the middle and get it to face the water. Let's try to adjust sun. We might not need that. So I'm going to delete it. Not bad. I'm going to change
the lamps and a little bit earlier I said that we should keep them
close to The Planet. I have had other thoughts. I'm going to move this to
the back a little bit. 0.1 will do. Because the larger
the lights are, the less reflections we are
going to get underwater. Probably this the only lamp
that they want to make large. We can also try to rotate the lacZ, okay? The HDRI a little bit. Let's see what kind
of results we get. Not bad. Let's create another lab. The one that we deleted from
the front of the water. Let's enable shadow cost X. The water we can
make it so that it casts a shadow cost X and
the planet to receive. Perhaps the sun can take
a bit more adjustments. Think the location
of the cell matters. We might have to make the water
or do Oasis less shallow. So let's see if we can
hide the water and Sculpt a little bit. Okay, Let's try now. With a shallower Oasis. See how the water it looks like. Actually I forgot
something really crucial. Never mind. I was thinking maybe the volume
absorption is too much. Buyer looks normal to me. Though, we can try to grease the value a little
bit, see what happens. Nothing special, really. Maybe the planets can
take a bit of rotation. That's a lot better. We can also increase the size of the water to kinda see
how that looks like. Just make sure it does
not reach the surface. I also don't till don't Lake
placement of this pyramid. Let's take it back a little bit. We don't want to dip
Pyramids looking weird when some angles are not. Deepen the sand. I believe
this is a lot better. Okay, So let's move on.
10. 08 Palm Trees: Now let's work on the palm tree. Let's create a cylinder. Let's make the
resolution maybe 11. Let's press forward, forward slash to go to the
isolated mode. Grab that face. It's bring it down. Let's change this
to back to global. We need to scale
this a little bit. So there is a pattern here that we are going to do and you want to keep doing it until you're Palm Trees high enough.
We're tall enough. So scale. After he Extrude. Extrude again, scale,
extrude again. Scale. Extrude again. Scale, extrude again. Keep doing this until you're
palm tree is high enough. Maybe one more time. Okay, That's good. Now, with the top
face, select it. I would like to enable
proportional editing. That's what it's called. And rotate. And use your mouse with
to expand this circle. And kind of flake. Make the palm trees
sway. Like so. Maybe Control plus. And that's good. Now we need to work
on the leaves. So the way I would do
that is by selecting top face cursor to select it. And then let's create cube. Let's create a cube. Let's make this cube ten. All like that, or
long like that. Now let's go to Edit mode. And let's create
some edge loops. And let's grab this face. And with proportional
editing still selected. Let's scale. Let's make sure that the
circle is not too big. And let's do that for
the other phase as well. Looks pretty good. Let's, let's select the
middle edges maybe. And try to make
the leave shorter. We might need to create
a few edge loops here. And maybe two edge loops there. No. I think one edge loops
is edge loop is enough. Now you want to
make some kind of like tears on the
leaves. On the leaf. And the way you would do that
is by selecting an edge, pressing V and
pulling like that. Maybe we can do
this here as well. Let's de-select
proportional editing. Now, let's select all
of these and press F. Did that work? I don't think it
did work the way we intended for it to work. So let's do it slowly. Looks good. Let's close this
section here as well. Now the leave is quite straight
and we don't want that. So what we can do,
again is select or enable proportional
editing and pulling up. Maybe I need to be looking
at the LEA this way. Looks good. So let's bring this down and we will need to
duplicate this a few times. So maybe shift D, Let's rotate it one at. But let's enable
transform pivot point, cursor, and then duplicate these and rotate 90 degrees. Then we can sort of
like duplicate all of these and rotate it this way. And if you want some
realism like or variation, you could rotate these
manually to Lake, give them an natural look. Looks good so far. Now after we have
made all of this, we can simply join them. Or if you prefer, we can texture it first. So let's say we need
to join the leaves, at least because they'll
be the same color. Now, let's create
a new material, call it palm tree, and create an image
texture Control T. Let's select six years. I went to work with this one. Again. Let's go to UV editor
and select all of these. Maybe it's not required
to UV unwrap them. We want to look
for a green color. That looks nice. Now, let's select the palm tree, the stem first, and
then the leaves. Whichever object
had the material created for first needs
to be the last selection. Or at least click
it again at the end so that it's active. Link materials control L. Now, the stem also
has the materials. So let's select a nice brown, maybe a brighter brown. We can disable the the overlays, see better, see
what we're doing. We can also UPN the
rapid differently. Now it looks good. Let's
try to shade smooth. Okay, that doesn't
work very well. So let's go back to shade flat. Let's try. Subdivision modifier. Doesn't look too bad by, let's keep it low-poly. Note that the palm
tree is created. Let's link or join the
stem with the leaves. And maybe make this
phase the origin. Set origin to 3D cursor. Now, let's go to normal view. So make the poultry
really small. Let's enable snapping. So the palm tree is not
quiet snapping correctly. Let's apply all transforms. I'm not sure if if, if the palm tree is not
snapping correctly, you can change, snap with two. Before you do one
snapping or anything, make sure that the palm
trees as small as you want it to be in the scale and
rotation are applied. So let's start snapping. That's a bit too big. Let's change this to active
element, individual origin. Okay, let's try that again. Origin to 3D cursor. That's still doesn't work even with the origin
setup correctly. So let's go back,
apply everything. Actually that applying
everything is the one messing up with the origin. So make sure that the origin is where you want
it to be after we apply. So that's the poultry. And that's good for now.
We'll leave it there. And we can work on their own, on the bushes and the rocks
11. 09 Bushes: Now we will work on the
bushes and the rocks. But first let's move this to
collection called palm tree. Make sure that it's belongs
to the prompts collection. Now let's create the rocks. And I got this entry in my menu. I think it's an add-on
that comes with Blender. I don't remember
installing this, so it must come
with blender with a rock created forward
slash to isolate. And if you don't like to look, simply delete again, it
will create a new one. And then you can play with the settings until you find something that you want. There has to be a
seed value here. The more you change
the the values, the New World seeds you get. So I'm going to go to isolated mode again
with forward slash. Going to make sure that
my rock is small enough. Then we can duplicate
this few times. Like so. And with all
of these selected, we can cursor to select it
and then create a new cube. And create a, excuse me,
create leaves again. So let's go to Edit mode. Let's try to create enough
edge loops this time. Let's keep that last,
the middle one. Let's do it later. Create an edge loop there. Actually, let's make
this even smaller. Now let's create an edge
loop in the middle. And let's grab one and use the proportional
editing to bend it. Perfect. Now we can change the rotation or
pivot points to cursor. Keep duplicating these. Alright, so let's give
this some variation. This one is overlapping
with the rock Okay, that's good enough. Let's delete all of these. Now let's select the leaves. Make sure that the
rocks are not selected. Actually, they were
not selected but we had the Never mind. I thought I had the
proportional editing on, but I did not. I was just going to select
these manually control J. And let's apply same
material as the palm tree. But let's make it
single user and call it RAR and leaves. Right, so let's
select all of these. It's good to material preview. And for the rocks, we can select them. Select the leaves. Last, Control, L, link material. Join these rocks. Actually, let's apply the
material, the modifiers First. I'm sure there is a
shortcut to apply all the modifiers first. I'm not aware of it as of
the time of recording. So let's go to edit mode again. But only with The Rock selected. Select any phase from each
rock and then Control L. And then UV unwrap. Let's try smart UV unwrap. Okay, that's good enough. Now let's go back
to object mode. Let's exit the isolation mode. Let's make this small enough. So basically we want the origin
to be at bottom of these. So cursor to select it. Let's try again. Selected. It doesn't seem to be working as we hoped. Okay, let's create
an empty there. Should select it and
then select the bushes. And origin to 3D cursor. Lay the scale rotation. Now, if we tried to snap it, it will or should snap
correctly, like so. Except it's a bit too big. But they think looks fine. I think it looks small enough. So that's about it. Let's move this to
its own collection called Rags and leaves
12. 10 Geoscatter: Once we have the assets created, we need to scatter
them on the planet. And for that, we are going to
use the GeoScatter add-on. I have it enabled here. It's a free add-on. And we can use this for
scattering the palm tree under rocks and it pushes
on the planet effortlessly. Once you have installed it, you will find it
on your end panel. So we have it here
because I'm using the simple tab add-ons to group my add-ons under categories. So I'm going to select an emitter and it's
going to be planet. Once they have
selected the emitter. And U menu will appear. And you will need to select the object
that you want to scatter and create a new system. Now once you have under
the system created, you can change the
distribution to manual. Then you can enter
manual mode and start using this brush to scatter where you want
a palm tree to appear. We can use these shortcuts
here to control the brush. That's too much. So let's press Control
F, reduce the, That's still too
much material F, that's still too much. Shift F to crease
the interval maybe. Yeah, that looks a lot better. Once you have something created, you'll notice that the
palm trees are a lot bigger than they
are supposed to be. You can go to scale and then shrink. And you can shrink
all of them together. So maybe 0.5. I think that that's,
that's good enough. Once you have shrunk
the palm trees, you can enter the
manual mode again. And maybe redo. So I'll click Control and press on my mouse
to erase what I have just created and make
can you attempt? I also want to reduce the
brush size a little bit. You can create on Trees
anywhere you want. Something else you can
do is Making the size of the palm trees randomized. So I think this DIY option where you can do that. So some palm trees
will be small, some will be big Once you have to Palm
Trees system made, you can create a new system. I'm going to remove this
because I did not select the Bushes before creating it. So there has to be a button here.
That's the button. Once you have the
Bushes selected, you can create a new system. And under distribution,
select men or wool, and start drawing where you
want the Bushes to appear. I don't want that. So I'm going to delete
that with Control. Press. Once that's created, we
can again fix the scale. Shrink. Maybe it's seven. And then random scale,
maybe 0.7. Again. If you feel like you have a bit, too few of them, you can draw. Bohr. Just like so. Now that we have created two
systems am going to preview once we have done squared good
13. 11 Clouds & Final Lighting: I would like to work
on the lighting a bit more because as the
project of defenses, you will find out
Lighting needs more work. The main thing I wanna do is
changing these the color of these lamps to
something like brown. So the bottom ones and
the one in the back. This one, I will not touch. And let's see what
changes we get. Its job, the level
of the viewport. So it looks more yellowish. And that's the kind
of look we are after. So we can take this
at any length T want. You can come up with
your own assets, own methods, own lighting,
especially Lighting. It's something that you
can experiment with a lot. And it can increase the visual appeal of your
final product a lot. So for example here, I would like it to be a
bit darker than that. So maybe we should work on that. So the way I would make it darker here is by
messing up with the thumb lab because it's the one responsible
for eliminating that area. So let's change
the pivot point to current object and maybe
rotate the sun a bit. But also we need to
adjust these two lamps here and move them back to let's make sure that
the sun is not selected. Let's move these to the back. That's a lot better. Now we need to
create the Clouds. And Creating the Clouds
is quite straightforward. All we have to do is
create metal balls. So how do you
create metal balls? You bring up this menu again. And I believe the option
for measurables is here. Yeah. Let's scale
this little bit. And let's disabled snapping. Now we can instance
these like so. And just try to imagine what
a cloud would look like. Once you have created something
that you are happy with, you can bring up the
search menu would F3 and convert to mesh. Now that's converted to mesh, you can Instance this with
Alt D instead of shift D, because it's the same object, doesn't consume more memory. As opposed to a unique object. How we can create a new mineable here and make a new variation. I'm not sure what
happened there. Alright. Instance. That looks quite good. Make sure that all of
them are selected. And now let's convert
the Michigan. You can achieve any
result that you want. If you spend enough
time with these. Now these needs and material, it will be quite straightforward
to texture these. So let's select all of them
and then select the last one. Now all of them
share same material. But it only says to users. So I'm not sure what the, what that is about. Let's go to render preview mode. We will not use an
image for this. Let's quickly change
the color and see if all of them change color. Sure enough, all of
them changed color. So let's give them a
bluish color here. Also, let's give them some
scattering and also make it. Actually that might
not be a good idea. It's also a good idea to
give it some emission. Let's make them a
bit more bluish. There it is. We have the Clouds and a
planet with everything setup
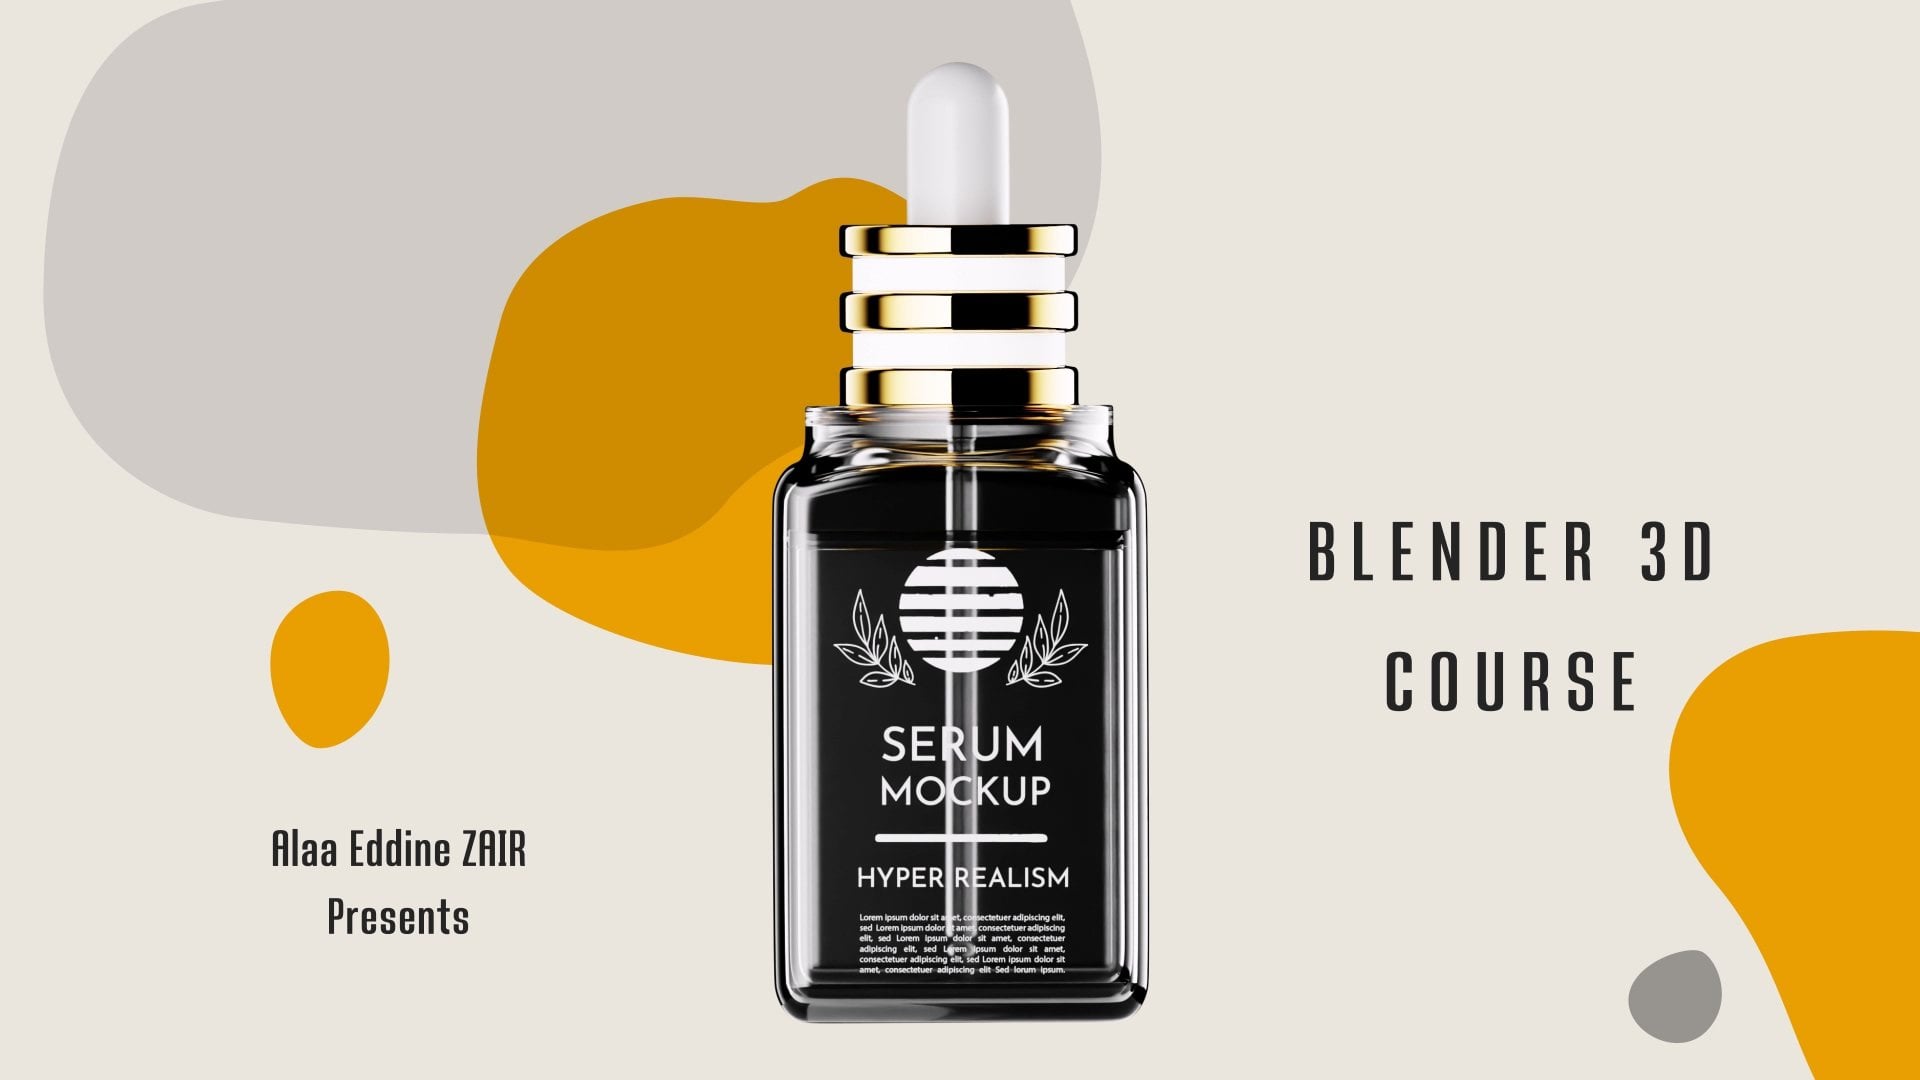
 Alaa Eddine ZAIR, CG Artist