Transcripts
1. Introduction: Hi, my name is Harry and I'm a professional 3d artist with over a decade of experience. I worked most recently as
the Studio Director of an award winning architectural
visualization studio, where you're seeing now
on screen are examples of my past professional
work on Skillshare. I specialize in clear and easy to follow
beginner's classes. We'll go through each process step-by-step to prevent as
much confusion as possible. In this course, I'll
walk you through the simple and beginner
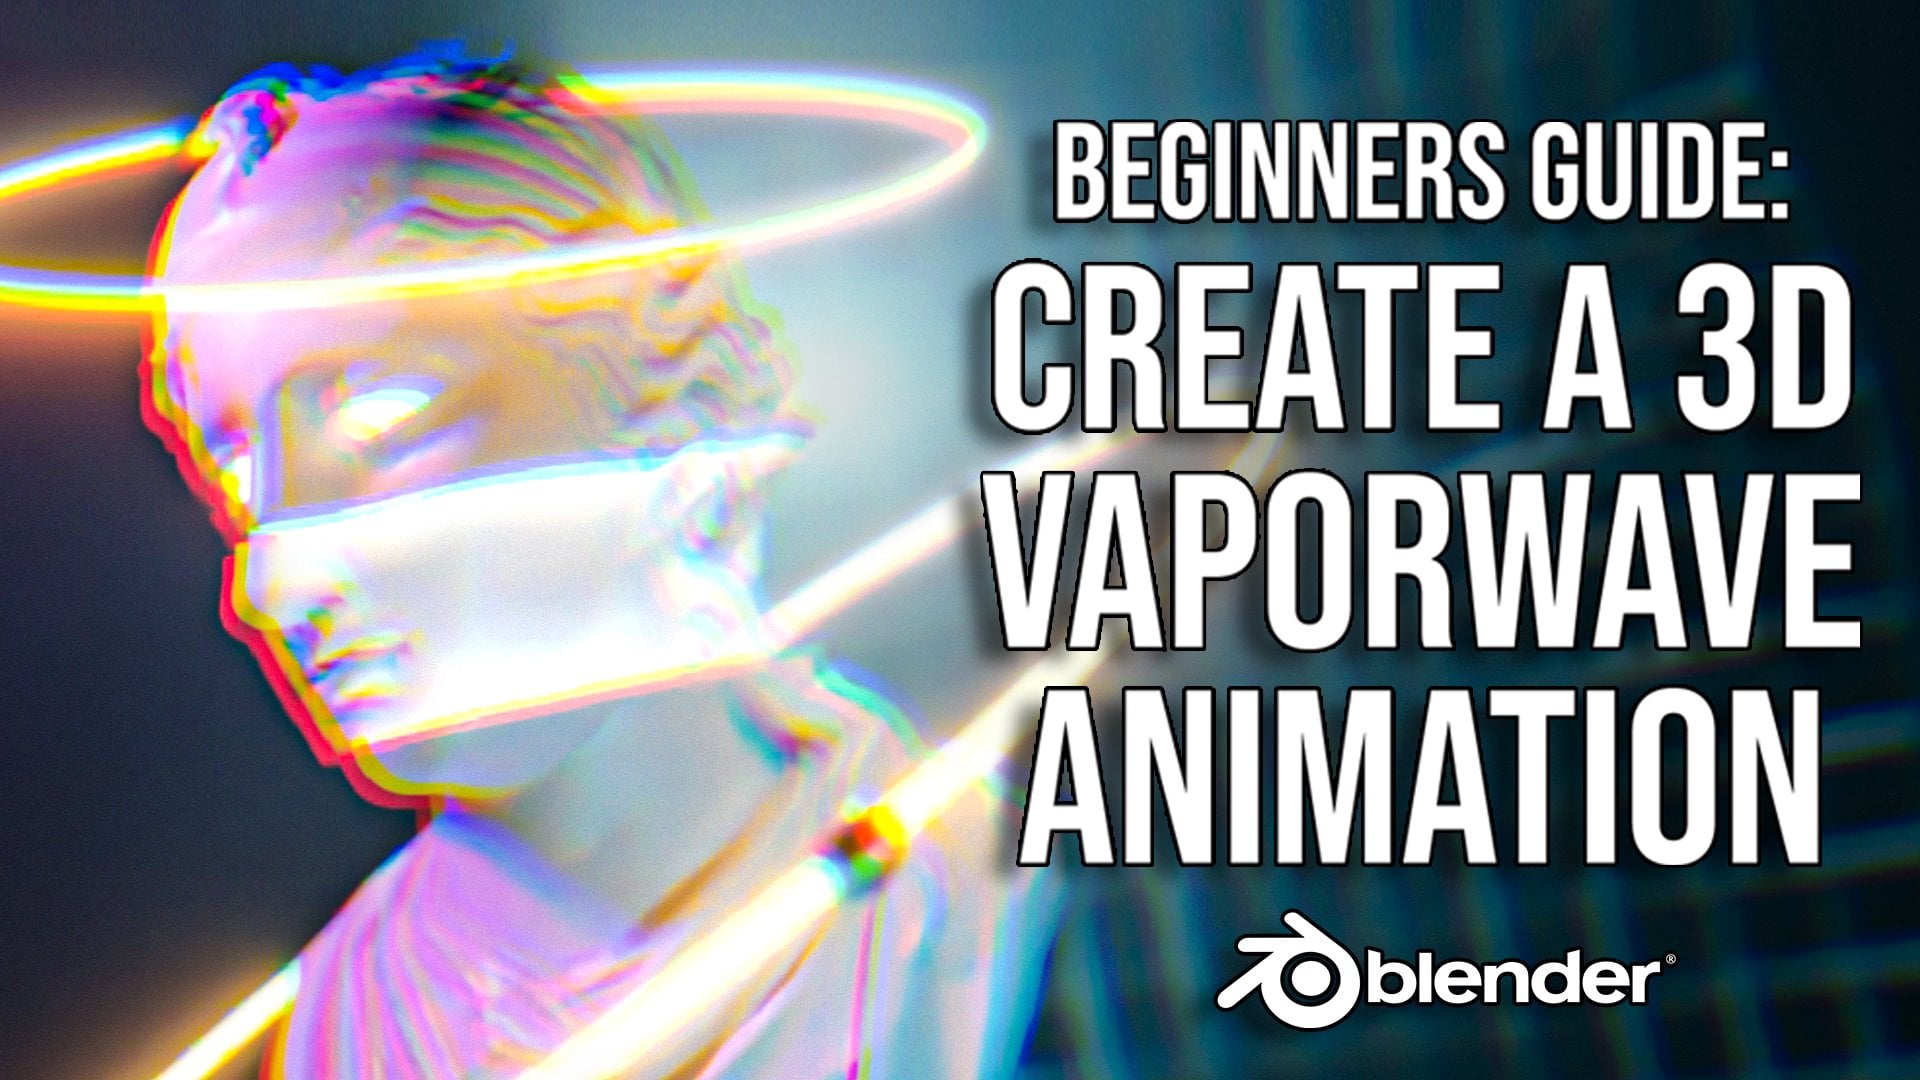
friendly process of animating a 3d
logo in Blender. We're using Blender
for this tutorial, which is an amazing and
totally free 3d software, the only barrier
to entry is having a computer to run
the software on. Animating 3d logos can be a really powerful skill to know, but it doesn't have
to be complicated. In this class, I'll
walk you through the simple process of recreating a 2d logo
inside Blender, as well as adding some
simple animation. In this class, you can expect to learn Blender Interface
and it's Tools. We'll learn about
the many basic tools and interface elements within Blender while building and
animating our logo Curves. To create our logo, we'll
be using curves and extrusion within
Blender Lighting. We'll be setting up an
HDRI lighting system to illuminate our logo Shading, which is Used to apply simple reflective and emissive
color shaders to our logo. Animating. We'll add a little
life to our logo by creating a simple
looping animation. Lastly, Rendering, we'll
render our final animation in Blender so you can share it with your friends and family
on social media. When we're done, you'll have
all the skills you need to create a 3d logo animation
of your variance. For our class project,
you'll be doing just that. I'd like you to create
a different 3D Logo and posterior render to
the project gallery. I'll review every
project uploaded to the project gallery and give you feedback on what
you've done fantastic, as well as anything that could use a little bit of adjustment. I hope you'll join me on this fund beginner's
journey through Blender by making your
very own animated 3d logo
2. Curves Crash Course: If this is your first time
taking a Blender class, I'd highly recommend
you start with my complete beginner's
guide to Blender first, this class was designed for the absolute beginner to
Blender and 3D Art in general, we cover every single
necessary topic in order to get you up
to speed and running in Blender will
accomplish this with short and focused
lessons that cover each topic from it
beginner's perspective, utilizing a well-organized
starter file, we end the class with an
easy project where you set up and customize your
very own cozy camp site. With that out of the way, let's continue with the lesson. In this optional lesson, we'll be going over a few of the most useful key binds and Tools in Blender from it
beginner's perspective, I recommend you watch this
lesson unless you have prior experience with
Blender and it's Interface. Let's begin. When you
first launch Blender, you'll be greeted with
the splash screen. Splash screen will
show you an image here and also show you
the version number. In my case, I'm using 3.2, 0.2. As long as you're
using three-point oh, or later, you should be
fine for this tutorial. To start with.
We're going to just choose the general file type. We can click on this. Now we can drag select over
the objects and our viewport. Now you can hit Delete
on your keyboard, which will just
delete the objects. Or alternatively, if I Control Z that so I bring
these objects back, you can instead hit X. And then that will bring
up a contextual delete, which in some cases We'll add more options other than
just delete the objects. If we had X that we can
just choose Delete, okay? It will also delete the objects. Now that we've deleted
those objects, Let's add some new ones. So we're going to
hold Shift and hit a to bring up our Add Menu. And then we can
go down to curve. We're going to choose Bezier. Now if we zoom in down here
using our mouse wheel, you can see that we've
added this curve here. Be option to move this
curve around or rotate it. So if I Control
Z, those changes, it'll go back to where it was. Then if I want to edit
the shape of this curve, I can hit Tab to go
into my edit mode. Up here at the top left you can see we've switched to edit mode. Now we can see that
this Bezier curve has some handles here. If we select on one
of these handles, and then we hit G, we can adjust the shape
of this handle, which will move the
whole curve with it. We can see as we move this, the curve will change shape. We can alternatively
select the center point, which will move that
entire point with it. While maintaining the
same handle shape that we had set up before. We can also hit R to rotate. We can rotate this
entire handle. Or we can hit S to scale this handle to change the overall curvature of
the spline attached to it. If we'd like to make
this curve a bit longer, we can hit E on our keyboard. That will begin extruding
off another vertex with a segment connecting
it to extend this curve. So we can move it over here and then left-click to place it. It's now our curve, you
can see has gotten longer. If we wanted to change
our curve here so that it's not so
perfectly smooth. And maybe we can
add a corner here. We can select this vertex here and then hit
V on our keyboard. Then we can change
the handle type. So by default it's
set to aligned, which means that each one
of these handles here, you can see we can make it a
different length, however, it always is in direct line with the
handle across from it, which means that
we can never make a corner using this method here. We can make the curves tighter, but we can't make
a sharp corner. Now if we want to
make a sharp corner, we can hit V with
this selected here. So we select this little dot here in the middle
of this vertices. Then we can choose
the free handle type. Now we can see they changed
colors here to a darker red. Now if we select this, hit G to move it. Now we can make a perfect corner here and they other handles
stays where it's at. So you can make a nice sharp
corner in the middle here. The last tool I'll show
you here for using curves is to connect these
two points together. So let's move this by hitting
G with this selected. We're going to
move it over here. I'm gonna hit R to rotate it. Now if I select
this other vertex while holding shift with
this first one selected, I'll add to the selection. I'll alternatively
I could just drag select over both of
them at one time. Now, have both of
these selected. And I can tell that
because I can see both the handles
for both vertex. Then if I hit F to fill, I will connect these vertices together to make one
contiguous loop here. This is a way that you can
connect two points on your, on your line here, on
your curve together. See the, you have one
connected circle. Again, if we wanted
to just select one of these, we can add V. Choose it to free instead. Select this handle. Hit G. Then we can make
this one a curve as well, or other corner. Then we have two sharp corners
and then a round edge. With this Crash Course
out of the way. Now you're ready to proceed with the rest of the tutorial. I'll see you in the next lesson.
3. Modeling the Logo (Part 1): In this lesson,
we'll start modeling the blender logo using
Bezier curves. Let's begin. Start by downloading
the blender logo dot PNG from the project resources. What logo could be
better to create for our first animation
than the blender logo. Before we import our image, let's go into the top
orthographic view. So there's two ways
we can do this. The first way is to
just click on this. If we rotate our camera around, you'll notice that this
interface up here, this little gizmo moves with it. So if we want to be
in the top view, we want to see it
from the z direction. So we can just click on this little z bubble and it will pop us
into the top view. Alternatively, if we
rotate our camera, it'll pop us out of that view. We can hit the tilde key or what's known in Blender
as the accent grave. You can see it at the bottom. And that'll bring up
a radial menu that allows us to pick
from different views. So if we choose top, it will also pop this
into the top view. The tilta key that I
just hit is the key to the left of the number
one key on your keyboard, and it's also above the Tab key. So it has a little
squiggle on it as well as a kind of an accent dash. That's the key that I hit
to bring up this menu. Now that we're in our top view, we can hit Shift and a to
bring up our Add Menu. And then we're going
to choose Image. And then we're gonna
click reference. Now we can choose what
image we want to import. So we're going to choose
the blender logo dot PNG. We can click this and then
load reference image. This reference image
is what we're going to use to trace the blender logo. So let's zoom in here. Now there's a few things in this file that we
want to delete. So we're going to
select this cube. So we can select
either from the list or just right in the viewport, going to hit X and
then hit Delete. We're also going to
delete this light because it will be putting our
own light and later. So we select the light
from the list over here, hit X and then hit Delete. Now select our reference image. Go down here to the
image settings. We're going to turn on opacity. Then we're going to
set this to point to. What this is going to do is just make this a little
bit more see-through. And that way when
we're tracing it, it's a little bit easier to see the curves that we're
placing on top of the image. With the reference
image still selected, we're going to hit G. Then we're going to place
this logo so that it lines up right in
the middle with this green line
and the red line. So our y-axis and our x-axis, we want to place it just
so that the blue circle is being cut equally by
all of these lines. So you want to have
our image here centered on the
origin of the scene. That doesn't have to be perfect. We just want it to be
as close as possible. I think that looks okay for now. We're going to leave it there. Before we get started modeling. Let's make a new collection for this reference image as well as all the pieces will be making. So we have two ways
of doing this. We can go up here to the
top-right and we can just right-click new collection. We can double-click on
the collection name. We're going to call
this blender logo. And now we can just
click and drag this reference image which
currently is called empty. We'll rename that
and we can just drag it into Blender logo. We can rename this referer. We go make sure I
spell it right. So that's one way we can do it. Alternatively, we can select an object either in our
view port or in the list. Then we can hit M
on our keyboard. And this is the four
move to collection. So we can choose a collection
that it already exists. We can move it back into a collection or leave it in
the blender logo collection. Or we can make a brand
new collection and have it move it into
it automatically. Just for the sake of testing, you don't have to
follow along with this, but I'm just going to
choose new collection. It'll ask me for a name. I'll just call this
one, test it. Okay. Now you can see that
it's moved at directly into the test collection. So I don't need to do that. I'm going to move it back to
the blender logo collection. And I can just right-click
on this and delete it. Then lastly, for these
collections here and make sure you have
these little box here. So this little white box next to it, make sure
it's highlighted. It's a pretty faint highlight. But that means that
anything you create now in the scene will
automatically be placed into the blender logo
collection rather than say, the Scene Collection or
the default collection. So just make sure you have
this little box here clicked. Now that we have all
that setup complete, let's make our first curve. We're going to hit shift into a. We're going to go up to curve. Now we're going
to choose Bezier. And the first thing we're
gonna do is just rename this, that way we know what this curve is actually going to be doing. We're going to double-click on the Bezier curve up
here at the top. We're going to call this outside because
the first thing we trace using this curve will
be the outside of this logo. So the perimeter of it. Now we can go down here and then we're
going to choose 2D. So what basically what this does and don't follow
along with this step. This is just me
showing an example. Is if our logo is RFR, Bezier curve is set to 3D, that means we are allowed to
move this curve in 3D space. So if I choose this
and I move that, you can see that now
my curve is going Into space rather than just
remaining on this flat plane. Now if I switch it to 2D, it forces it to stay just on this flat
plane here so it can never have any
three-dimensional value to it for our logo, and that's actually
what we want. So we want to make sure
that anything we do is just going to leave this
curve flat on this image. We don't want to accidentally
move this curve up. And then our logo is kind of flat here and then
it pops up over here by accident and then it's
flat again and then it goes under we're just going
to leave it on Tuesday. That way it ensures
that the stays nice and flat while
we're tracing the logo. I'm going to switch
back into my top view. And then over here from
the resolution preview, it starts out as 12,
which this number here determines how smooth
this curve is here. If I leave it at
12, I zoom in here, we can see that the curve here, it has a curvature to it, but we can see where the
curves sort of breaks here. There's a corner and
then it goes flat again, then there's another
corner, it goes flat again. So the higher this number, the more smooth
that curve will be. So I want you to
change yours from 12. I want to switch
it to 36 instead. We can see how much
smoother this is. Just basically
gives it 36 sort of internal hidden vertices that it's using to smooth
out this curve. So any lower value here? So if I switch
this maybe to six, you can see how much more
jagged and rough this is. For our tutorial,
we're gonna be using 36 that we would get
a nice smooth curve. So just in case your blender didn't automatically switch to this tab when we created
the Bezier curve, we're changing all of
these settings here in the Object Data Properties
tab for the Bezier curve. Now this is exactly the
exact same tab that we were in before for
the reference image. So if we switch this, it stays on that same
tab because this is the tab that we adjusted
the opacity on. Soon as you select your curve. And it will switch to the
object data properties for the curve instead
of the image. So just in case for some reason you weren't on the
right tab and you can find these settings
were in this tab here. And we changed it to 2D. And we set the resolution
preview to 36. With those settings now changed. Let's begin to start
shaping this Bezier curve. We're going to zoom out a little bit using
our mouse wheel. Now with the outside
curve selected, we can hit tab on our
keyboard to enter edit mode. Alternatively, if you want to,
I wouldn't recommend this, but you can switch to from object mode to
edit mode from here. But you can just do that with a simple key pressed by
hitting Tab on your keyboard. We're gonna go into edit mode. Now we're going to drag
select over this vertex here. So we can just drag
select over that. We're going to hit G. We're going to move this
all the way up here to the top of this and don't worry about getting it
precise right now, we're just going to roughly
place it here for now. We're going to take this one and we're going
to move this down here roughly to where the
apex of this curve is. So let's see, right about here. And again, this doesn't
have to be perfect either. Just kinda try to find
the middle of this curve. We'll say it's about
there for now. So we can see here
that our curve here doesn't really follow the, the curvature of this line here. And that's because we haven't
adjusted these handles. Let's start with fixing
this handle right now. We're going to
select this vertex. Now we can move in. Now
we can hit G again, and just as resumed
in now we can see the line of the logo
a little bit better. So we're just gonna
make sure it's as close to the line as possible. Now we're going to
click on this handle up here, this top handle. We're going to hit G. Now we can see that it's moving the
curvature of this line. So the longer we make this, the more it's going to
bend the curve outward. We can also determine
the angle of the curve through
actually going to line this red line up with the
orange line here of the logo. So we'll put it about here. Now we can go down
here to this one. Then we're going
to select the logo here are the vertex here. That's when I actually
got pretty close. So I'm just gonna make
sure it's right on the line as close
as I can get it. Then I'm gonna
select this handle, the left handle. Hit G again. Now we can see as we start
moving this one over, it starts really
getting pretty close to matching this curvature here. So the longer we make this, we can see that it's
stretching that curve upward. It's going to take a
little bit of finessing, a little bit of tweaking
to get this to match, but we're just going to try
to get it as close as we can. We can see here this curve
matches pretty well, but it gets a little
bit deviated here. Let's select this point up here. So we'll select that
vertex, select this handle. Now let's see, Is there
anywhere we can move this to make the curve
just a little bit closer. So it looks like making the
curve a bit longer is helping But it's still kind
of, it's deviating up here and it's still not
perfect, it's down there. So let's move it back
to roughly where we had we're going to pull it
back so it's still lined up. So the red handle here is still lined up with the
edge of the orange. I think what we're
going to need to do is add another point
here in the middle. So what I'm gonna do is drag select over both
of these points. Now I have both vertex selected. We're going to right-click and we're going to
choose sub-divide. When we choose sub-divide, it will add a point
here in the middle. Now we have another
handle here that we can use to help refine the shape. Let's move this in until
it reaches the line. Now we have more handles here, it's out further
refine the shape. Let's select this handle here. We're going to shorten it up a little bit because we don't want the curve to
extend too far out. The longer we make this line, the further that curve
is getting pushed. We're going to shorten
it up and try to get it to match this
curvature pretty well, which I'm pretty happy with. That actually doesn't
look too bad. Now we need to figure
out how to get this side to match
over here as well. So in this case, let's
see if maybe moving, this is what we need to do. Maybe stretching this
line out a little bit, keeping it still on the orange. And then again, we need to
adjust this handle now. Now we have to be careful since these handles are connected, we want to make
sure that we're not moving this handle
and fixing this side, but then messing
up the other side. We're going to try to
straighten this out. And it might be a situation, remember v, this point
where I replaced it, maybe this isn't exactly
where we want it, so it might be better to move this point further
down this line. To help affect this curve. We're actually going to
select the center point here. So the actual vertex
itself, not the handle. And we're going to slide
this further down this line. Because I think it
probably put it a little bit too far down. So by default it's
just going to find the midpoint of that
line and put it there. But not in all cases that
might not be what we need. Lastly, we can select
this handle here. And rather than
hitting G to move it, if I move it here
and then I don't like the movement, I
can just right-click. It'll undo that. We're
actually going to hit S. So I don't want to move this
handle at all vertically. I just want to scale it inward. So by hitting S, Now I can just make the handle shorter or longer depending on
which way I'm move it without actually affecting
the position of the handle. And that's actually working
really well for this case. So by scaling it a
little bit shorter. You can see now that our line
follows pretty well here. Since we're tracing this,
we're not gonna be able to get it exactly pixel perfect. And I wouldn't worry about that. Nobody is going to look at this. Once we're done and we're
zoomed out and say, Oh no, this, this curve over
here is one pixel off. As long as we get
it pretty close. Within a small margin of error, we really don't have
to worry about it matching up 100% Exactly. So as long as yours
is as close as mine. So like right here,
it peels off of this, this edge here just a tiny bit. I'm not super
concerned about that. If I want to adjust
it, I can select this, select the top handle, and then maybe I just scale this one in just a little bit. You can see since everything
is connected as we move one, it's starting to move
the others as well. Maybe we'll just
scale this back out. And now it's probably is roughly about where it
was at, but we tried. So let's not worry
too much about it being absolutely
100% pixel perfect. We just need to get the
general shape of this logo. So if we follow this line, I think everything here
looks pretty good. It all follows pretty well. So I'm happy with that. Now we can select this
bottom vertex here. And now we want to make
this line a bit longer. So we want to pull this vertex, we want to add
another one connected to it that's down
here near the bottom. So to do that, and
we're just going to have this one selected. Hit E on our keyboard. Then we can move it down. Again. Far zoomed out, so just get it as
close as you can. And we went to the bottom of this curve. Let's zoom in here. So we've already created this, so we don't need to hit E again, we're just going to
hit G instead to grab it and pull it up so that
it's roughly on this line. Now initially Let's
just rotate this. We're just going to
rotate it across. So we hit R and that allows us to rotate the entire thing. We're just going
to rotate it until the line is about flat. We can use the grid lines here to give us a bit of an idea whether or not it's flat,
that's pretty close. Now we need to make
this portion of the curve matched this
orange line as well. Let's start with
this handle here because it's pretty short, so maybe it just needs
to be a bit longer. So I'm gonna select this
handle and hit S to scale it. Scale that out already,
that's pretty close. Maybe we scale this out
just a little bit more The areas that you want to
worry about being the closest initially are the areas
closest to the vertex. So as long as these
areas here are pretty close over here as well, then that means that this
area here in the middle, we can further adjust by
just adjusting the handles. If this area next to the
vertex is really off, like our vertex is over here and the line is curving way
outside or something. This is the area you
want to focus on first and then when should
you start tweaking it? That'll fix the areas
between the vertex. Now let's select this handle. And I'm going to shorten
up just this handle. So we can see as we
shorten this one, it pulls it a little bit closer and gets that curve closer. That's pretty close now, This one's pretty close as well. Let me make this one just
a little bit longer. I can tell. I I guess I'll explain here. So the way I know I
need to make this longer is because of the
curve is cutting inward. So if my curve was
going outside of it, then I know my
handle is too long. If my curve is cutting
into the logo, I know my handle is too short. So by selecting his handle, then I can scale it out. You can see it's pulling
the curve out of the logo. So I'm just going
to scale it until it reaches about there. I'm pretty happy with this. It's a little off here, but I don't think this is
worth adding another point. You might think, why
don't we just add another point here
and pull this in. And in some cases you need to. So in this area here I had to, because this was a
relatively complex curve that we were trying to match. But really the less
curved points you have, the less vertex you have, the smoother your
shape is going to be. Because you're allowing blender to figure out this curvature itself without you adding all of these manual adjustments
in the middle of it, throwing off what would have relatively been a
perfect curve otherwise. Letting blender figure
out this curvature itself and then adjusting
it based on the handles. We'll get you a lot
smoother of a curve. If we add another point
here in the middle, we might accidentally make a flat spot that we
don't even really notice until we get to the
point where we're making the logo 3D for right now, we're going to leave
this just this small gap here that we have. Again, that's, I mean,
we're talking pixels here and the terms of the
difference and the curvature. So I'm going to
leave that as is. And I suggest you do as well. If you really want to, you can continue
adjusting these handles. But for now, for the purposes of this tutorial, we're
going to keep moving. Let's continue
extending this curve. So we're going to select this vertex point
in the middle here. Then we're going to hit
E to extrude it out. We're actually going to be
extruding this one twice. So the first one we're gonna place for it in
this little corner here, right, right here. We're going to place
this little point here. And then before we do
anything to this one, we're going to hit E again to
extrude out another point. Now we're going to place this
right at the end of where this flat part of the fin stops and then it
starts curving. So just try to estimate
where that is. I think it's about
somewhere around here. This won't need to
be perfect yet. We can always adjust it. So the first thing
we're gonna do is actually flatten this curve out. So right now it's
going horizontal. We want it to go more
with the thin for now. So first let's zoom in, make sure we got
it pretty close to the orange line.
Looks pretty good. Now we can select this G. I have this handle
over here selected. I'm just going to line
up the handle for now along with the
orange line here. So these flat area is
really the best thing you can do is just to line up your handle along with the flat area when the logo. So that's pretty close. Now the area in question
here is this one. So by default, right now we won't actually be able
to create this curve. And that's because no
matter what we do, these two, these two handles here are
attached to each other. So it doesn't matter
how much we move these, we won't be able to create
this curve that we want here. So it'll go into a curve
and then the corner, the corner is the issue. That's because of the type
of handle that we're using. Let's start by changing this handle type to
allow for this corner. Select the central point here, the actual vertex itself. We're going to hit
V. And that'll bring up a menu that lets us
choose the handle type. By default. For Bezier, It's going to start
out as an aligned handle, which means those handles are always aligned with each other. They can't be broken. If we choose free, we can see our handle
colors change here, it's to a darker red. Now if we select this
handle and move it, it doesn't affect the other
one, which allows us, as you can see here,
to make a corner. So let's quickly
line this curve up. Let's zoom in here and
make sure we actually got it in the corner. I'm going to select the
actual vertex itself. Please sit as close as
I can to this corner. That logo is a
little bit blurry, so we just have to guess. I think the corner
is about there. Now we can start adjusting
these handles here. I'm going to select
this handle here that's jetting out to the left. Hit G, and pull this one
down so it's straight. So these straight areas here
really are pretty easy. The only thing you really
need to do is just assign or rather
move your handle here so that it lines up with the orange line of the logo. So as long as you do
that on both of them We can do that on
this one as well. Now we have a nice straight line here and that's pretty easy. Now we just need to
adjust this curve. So I select the vertex up here
so I can see this handle. Now I need to move
this handle so that it matches the curvature
of this line. This one we're going to have to zoom out here so we
can see a bit more. Although that actually
wasn't too bad there, this lines up pretty well. And it starts deviating a
little bit inward here, but then it immediately
goes back outward. So I think we have
the center point of this curve really already here. Now, we can see here because of the
pixelation of this logo, the logo actually has like this little bump and then it juts out and then
it comes back in. I'm really just going to
cut that off for now. So this I can tell it's just an issue with the
resolution of the image. I'm not going to try
to replicate this. I know that's not meant
to be part of the logo. So I'm just going to leave it nice and smooth and
I'm just going to round off this little
bump that it's added. Then it goes down here, and then it matches this
curvature all the way down to this vertex. So now I know I've
matched this nice, gentle curve that it had before. Let's continue this curve. We're going to select the
last vertex that we created. We're gonna be making
a few more vertex here without any adjustments, just like we did
for the last time. With this one selected,
we're going to hit E. And we're gonna put
a point here in the center of this curve
around the end of the fin. So we'll put it there. We're going to mirror this side. So we're going to put one
right about here and try to make sure it's roughly
the same place. Just try to find where
the straight part ends and it starts curving back. I think it's about here,
which is pretty much in line. We're going to hit
E again and we're going to pull it
back to this corner. So first let's just
get this one set up so I can tell right now, and this might be
hard for you to tell. I can tell here
that this curve is actually rotated
backwards because I can see this black line here continues and it loops
back around here. And then it runs
into the vertex. I can tell right away that this vertex here
needs to be rotated. So I'm gonna hit R and rotate it so that it's
not backwards anymore. Now if I rotate it to about
here and if you hold Shift, it'll rotate a bit
slower as you're rotating it. I'm
going to rotate it. So it's about street with that. With this still
selected, I can hit G. I'm going to place it
right in the corner here. And now I can tell that this isn't looped back
around on itself. We have the same problem
here with this vertex. And this mostly just stems from the fact that it was using the handle structure of this vertex here as
we cloned it around. So every time we moved it, as we started
crossing over itself, it started flipping
these handles. So it didn't necessarily
flip the handles, but the line is going in a loop, the loop because of the
shape of the handles. With this one selected
and we're just going to rotate this one again. So we can see as we rotated, it starts looking like it's
less crossover itself. We're kind of fixing
that curvature. We're going to hold
Shift and just make sure that it matches
the orange line. Looks good. This line here is pretty much done already,
the straight line. And now we just have this
area here to fix it. We're going to
select this vertex. We're going to rotate it downward to help
straighten this out. We want this to match sort of perpendicular to the
straight lines here. So essentially we went as these lines go perfectly
straight this way, we own essentially
make this line go what you can think of
as horizontal this way. So this is the vertical. We want these to be
perpendicular to that. Random rotate at that
a little bit again. I think about here. And then we're going to
reposition this a little bit so that it's a little bit more
centralized in this curve. Somewhere about here. Now we have these little corners where it's looping over itself. But that isn't, isn't
actually because these handles are rotated
the wrong direction. That's because these handles are too long and the curves are running into themselves and kind of intersecting themselves. So let's start by pulling
these handles a bit shorter. So I'm gonna select
this handle here and we can see how
long this one is. With this vertex selected,
select this handle. I'm just going to hit
S because I don't want to change the
line over here. I just wanted to make this
shorter by hitting S. I can scale this in. We're gonna do the
same thing over here. Select this one, select
this handle, scale it in. And now it's these handles
that are too long. So we'll start with
this one down here. Select this bottom Handel, and then scale it in. You can see right
away that the handle, the length changing
the lengths here pretty much solved
the curvature issue. So we might need to
shorten this one, still just a little bit more. So as we shorten this one, we're going to probably need
to make this one longer. So you can see here
scaling it up. So I'm more focused right here. So I want this curvature to
meet correctly in the middle. And then if it
deviates a little bit as it goes back, That's okay. We can always adjust that. So I'm going to select
this handle up here. Scale that one down We can see as we scale it down, the curvature matches
up pretty well. I'm actually going to
scale this further end because I want this area here to be a little bit closer
to the line than it was. And now we can make
this handle a little bit longer to help fix the middle of the
curve. Alright. We're going to scale this
one in a little bit. You can see it's
just a lot of like little minor tweaks
because everything in a curve affects every
other vertex nearby it. So it's a lot of fixing one
issue and then that makes the one area that you just
fixed a little bit off. So then you have to
fix that quickly. So it's a lot of just
hopping back and forth between these and
just pulling handles, scaling them up,
scaling them down, and just getting it to match the line as close as
you possibly can. So I'm going to try to actually move the whole vertex here. I'm gonna select the
center of this vertex. I'm going to pull this downward down through the
curve a little bit. So I'm moving it
towards this direction. I think that'll make
the whole thing align up a little bit better. I think there. And
then I'm going to rotate it just a little bit. Because I think the rotation
might have been a bit off. Now I can select this
handle, the bottom. I'm just going to scale that in. Now I'm pretty happy
with that curve. I think it runs pretty close
to the line the whole way. Scale this one up just a little bit so that it meets this
line a little bit better. Now let's move on
to the next one. And we'll see you here
that these fins are all pretty much the same as each
other and they have to, to flat sides and then
a curve when the end. So I'm not going to
belabor the point here. We're gonna go
through, I'll just do a really quick run
down of this one. And then I'm going
to speed up my, my end of the camera. So I'm going to
speed up me working through finishing these and then you should just
be following along. It's no different this same
exact process you just did for this one will
be the same for this one. And then for this one. So let's select this last vertex we made here in the corner. I'm just going to hit
E to extrude out. I'm going to click here, which was the end of the street. It E again. Put a
point in the middle of the curve at E again. Try to get this one.
So in this curve here actually curves back
a little bit further. So we're gonna put the line
a little bit further back. So our vertex is going
to be about here. We're going to hit E again. Here you can see I'm
just tracing out all of these are going to place
all these points in. Put one on the corner, put money or at the
end of the street, were just hitting E to
continue this extrusion. The last point I'm going
to put his right here in the middle of the curve. Now, I'm going to speed up the camera here as I
straighten out all of this. Again, this is just the same
processes we did down here. However, right here. So when your urine here, you're going to stop
the last point here. And we're not going
to have a line that connects these yet. After I've done sped
up everything here and fix the curvature so
that it matches the logo. I'll explain how to
connect these two lines together so that we have one contiguous line
that's going across. So for now, just straighten
out and make sure all of these curves here
match the logo. And then we'll
explain at the end of that how to connect
these two points. So we're going to select
this handle here, hit V to get the
handle type menu. Choose free. Then just
follow along here. So this one is free. We can that way we
can make the corner. I'm just going to select
this one as well. Hit V, and then choose Free
for this handle as well, because I know both of these will need to be free handles. The other ones can
remain as aligned. I'm going to go through, wind up all these curves and then
I'll see you in a moment. Okay, so now that you
have your curves all aligned with your logo,
like I have here. Again, you should
have just been using the same process of
using the rotation tool, the grabber tool, and the Scale Tool to
move these handles. Now we can select
these last two points. We're just going to drag
select over both of them. Now we have both selected. We can just hit F for fill. We can see here that
it's now created a segment that connects
both of these vertex, making this one contiguous line. Now we just need to select
this vertex over here, select this handle and just scale this down
because it was so big. We're just going to scale this until it matches the curve. Let me move this one
down a little bit. So now all of our curves lineup, now that we have the
entire outside of the logo traced and
we can now save our file that we
can come back to the same file for
the next lessons, we're going to go
up to File Save, and then we can
navigate to where we'd like to save our file. So once you've found the folder that you'd like to save it in, make sure it's somebody
that you can come back to. I would suggest saving it
in your documents folder, on your desktop or somewhere that you can come
back to and know that you're going to
have your file here along with the image
that we imported. So you want to make sure
you put the reference image that we imported there as well. And then we're going
to rename this file. We're going to call this
blender logo animation. I'm gonna do underscore
01 at the end of this. That way if we ever have
to branch this file, we can just call it
underscore 02 and then we know which one is the most recent version of that file. With this named. Now we can hit
Save blender file. In our file has been saved, so we can see up here, well actually it down
at the bottom it says saved blender logo. And then same thing up here. We can see it's been named. In the next lesson, we'll finish tracing the logo and make it 3D. I'll see you there.
4. Modeling the Logo (Part 2): In this lesson, we'll finished tracing the Logo and
then we'll make it 3D. Let's begin. Now that the outside of
the Logo has been traced, let's focus our
attention on the inside. First, let's go back into our top view, the
orthographic view. Again, we can either
just click on this little bubble
here at the top, or you can hit the Tilde
key and then choose top. Now that we're back
in our top view, we can zoom in a little bit. Then it's very important
that we're not in edit mode. So the way we were editing our curve
before where we can see each individual vertex we don't want to be in that
mode for right now. If you're falling directly from the last one, the last lesson, and you haven't
left edit mode yet, make sure you hit tab so that it says Object Mode up
at the top here. And then if you have your
outside selected here, it's orange highlighted
around the edges. We're actually going to be
making a brand new curve here that we were not making a
curve with inside this one. The reason why we
wouldn't want to do that and just don't
follow along here. This is just an example. If I hit shift and a
and I add another, say if I added a circle, the circle is actually a
part of this curve here. So I haven't made a new curve, I've only added to
the original curve. So I don't want to do
that. Undo that change. I'm going to hit tab and
I'm going to leave this so that I'm inside the object
mode rather than edit. Now I'm going to
hit shift and a, I'm gonna go to curve. I'm going to choose circle. Now we can see here
on the right side, I've actually made a
brand new curve for this. And this one's called
Bezier circle. So we're going to
actually call this, we're going to double-click
on Desi circle and rename this large circle. Then hit Enter. Before
we do anything else, let's adjust the settings
like we did for the last one. So we're going to
switch to 2D from 3D. So we have 2D selected. Then we're going to
change this 12-36 that weighs just to smooth
this, the last one was. Now let's zoom in here
using our mouse wheel. And before we go into our into edit mode and
we're going to stay in object mode and
we're just going to center this up as best we can. So I'm actually going to
click on the move tool here. That way I can see my gizmo. I'm going to slide this down. And you'll notice
right away that what you might have thought, at least I did, I felt that the white circle here was
actually a perfect circle. But on the Blender
logo, It's not because what we've just
created as a perfect circle. And what we can see
here is that it's actually a squished circle. We're going to slide
this down number. You're going to try to
just center this up the best that we can
with inside this. We're going to try to
make an even gap on the left and the right as well
as the top and the bottom. So I'm just going
to slide it so that it's about equal there. I'm going to start moving it
up and down and then hold Shift to get it as
closest I can too, even at least the gaps on
the top and the bottom. And then we're going to
squish this circle that we just made so that it
matches the Logo better. So now we can hit tab
to enter our edit mode. Now we can see our vertex. We can see it starts
out with four and they're all aligned as well. So I'm gonna select this
vertex and then I'm gonna hold shift and
select this vertex. I have both of them selected. And now I can hit S on
my keyboard to scale. And I'm just going
to scale these N holding Shift so that it moves nice and slow till they
just about touch the white. Right about there. Then again on the sides here. So I can just drag
select over these if I want or I can do the same thing. Click one, hold Shift,
click the other. I'm gonna start scaling
these and then hold shift after I hit
the scale button. So S to scale these up to their chest about
where the white line starts. Now let's zoom in here, see how close we got.
That's pretty good. They're kind of pulls
away a little bit here, but then again,
goes back this way. Again, it's actually, these
are a little bit too far. This one I'm just going to grab, just move this straight up. So it's right on the
edge and that fix the curve for the
most part here. Let's just make sure
the bottom one, I want to actually got
a little bit closer. Then this curve
on the side here, it's not quite touching. So I'm just going to move that
in so that it's touching. So as I look around here, the only one that I'm
seeing that might be a little bit of an
issue is this one. So I'm just going to select
the single vertex here. I'm going to scale it ends. That's actually going to scale
both the handles inwards. So it's going to
pull the top handle down and then the bottom
handle up towards the middle. And that's pretty much
fixed this side here. All that curve
looks pretty good. Same thing around here. Then maybe this one here, I'm just going to grab
this one, implode out. This circle here is actually
it's not particularly round. It's actually gotten
a little bit of a sort of a lumpiness to it, but For trying to
replicate the Logo, will, will replicate
it as we see it. So I think that looks pretty
good all the way around. Now, I'm going to hit tab
to exit this mode here, so I'm back in object mode. We're going to hit Shift
and D to duplicate this. And we can see as soon
as I hit Shift and D We can see we've made
a duplicate of this, but I don't want
to move this one. So I'm just going to
right-click after hitting Shift and D and that'll pop it right back
to where it was. Now I'm going to hit Tab to go back into the edit mode
for this new duplicate, the large circles 001. I can hit a to select all. So a for all. So it selects every
vertices here. Now I'm going to hit S to scale all of
these up uniformly. And I want to scale
them so that they're just kind of just outside
the bounds of this. This doesn't make
much sense right now. But once we make it 3D, we're going to need this duplicated because we're
actually going to be merging the original large
circle back into the outside. Once you've done this,
just hit tab to exit that. And we're just gonna
leave this one here, this large circle 001. We're going to leave that as is. Now while we're still
in object mode here, we're going to hit shift
and a gonna go to curve. Then we're going to
choose circle again. We're going to make
another circle. Now before you do anything, don't click, don't
move, don't rename it. Go down here at the bottom left. We're going to twirl
open this menu here, and we want to make this radius from right now it's set to 1 m. We're going to set this to
0.66 and then hit Enter. That way it's a lot closer
to the size of this. We don't want to scale this down because when we scale it down, it'll make the 3d process that we're doing next, kind of wonky. Some of the numbers
won't line up. So it's better to actually change it before we do anything. We don't want to just
scale the overall thing. Smaller, merge, just going
to set the radius smaller. Now with it's set to 0.66. We can go up here to where
it says Bezier circle. We're just going to
double-click that. We're going to call
this one small circle. Then hit Enter. Now that we have the
small circle created, let's zoom in here. Again. Let's just try to
centered up as best we can. Think the top and the
bottom pretty close. I'm just going to move
it down a little bit. Going to change the settings
for the small circle. I'm gonna choose 2D type in
so that it's nice and smooth. And then we can hit Tab
to go into the edit mode. Drag select over the
top and the bottom. It S to move them in. The sides are pretty close. So I'm going to just
move this one in, pull the bottom
down a little bit. In this case, if
you wanted to make sure you're only moving it perfectly in this
green direction, rather than just
hitting G and trying to move it up and downstream, hit G and then hit Y. And that means you can only move it perfectly up and down. I'm going to move it
here. Just double-check this side and that one
looks pretty good. I think these handles down here could be a
little bit wider. I'm just going to
select both the handles and then scale it up. Looking around. That looks pretty good. Now I can hit tab to exit
the edit mode for this. Now we have the
small circle traced, and we also have the
large circle traced. And then we have
this mysterious copy that we've made here that will be useful in just a moment. Now that we're done
with all this, we can zoom out and then
we can rotate our camera. Now that we can
see it in 3D view rather than just the
top-down orthographic view. Now we're going to start
adding some thickness to these elements to make them 3D. The first thing we can do, just select this
reference image here. We're just going to hide
both of these icons here. So when we do this,
it doesn't delete it. It just hides it
so that it doesn't show up in the viewport
or in the render. Now we can just see what
we have traced here. First thing we're gonna
do is select the outside. We're going to
make sure we're in the object data properties. So this little green swoop. And then we're going
to scroll down here. We're going to change
film mode from none. We're going to
switch that to both. Then we're gonna go
down to geometry where it says extrude. We're going to type in
0.2 and then hit Enter. We can see here that now are our curve here that
was perfectly flat. Now it has some 3D geometry
associated with a. The reason we changed this
from film mode from none. This is what it would
have done before. So this just extrudes faces
here just along the edge. It doesn't put a top
or bottom on it. So if we just done front, we can see it adds
it to the front, but it leaves that hollow in
the back, then vice versa. We could have just done back and it would have
left at a hollow, but we want to complete
it on both sides. So we're just gonna choose both So we'll notice here that while the outside looks correct, it looks like the
perimeter that we traced. It doesn't have a
hole in the middle. We're going to fix that
is by actually using one of these duplicates of
the large circle that we had. The first thing you
wanna do is just click one large circle over
here in this list. We're going to click
that. Now we're going to hold Control. And then we're going
to click outside and make sure that
the large circle you're selecting first is
that it's not the duplicate. We don't want to select the 0.001 because that's the one
we made a little bit bigger. Again, select large
circle first, the original one that we made. Hold Control, select outside. Now we can hit Control J and
we're going to attach them. So Control and J is
going to join them together into one single object. And by doing that,
we've now cut out the original large
circle though we traced out of this one. So any, any curve
that exists inside of another curve is going to
cut out that curve from it. Just for the sake of example, if I go into my edit mode, you don't have to
follow along here. I select one of
these vertex here. I select the rest of them, and I move these around. You can see as I
move this around, it's actually changing
what it cuts out. So if I move it outside of it, it's only cutting out the
part that intersects, but it's leaving the part
that's outside of it. So that's essentially what
this is accomplishing here. Now I'm gonna right-click
to undo that. And then I can
leave my edit mode. But that's just exactly
how that is working here. Now we have this large
circle that we had left. Now we can get rid of this 0.001 that showed up with
a copy if you want. Because the other one
doesn't exist anymore. We're going to
again go down here. We're going to choose fill mode. We're going to choose both. Then for the extrude, we're going to type in
0.07 and then hit Enter. Because we want this part
here to insert a little bit. We want it to go down so we don't want to make
it the full point to that we had for the
thickness of the entire logo. This is going to cut
down a little bit and then have this white
area here below it. Then lastly, we can select the small circle over
here from the list. We're going to choose fill mode. Both. Then the extra, this one
we can do point to again, because this one we want to be the same height as
the rest of the Logo. Now we can see here this
is all the same plane, all the same height. And then we have it cut down a little bit here for the white. So at this point now
we actually have a 3d Blender logo
that we created. Now there is one more
thing we can do to make this logo look
a little bit better, and we'll also look better
once it's textured, which we'll be doing
in the next lesson. Let's start by selecting
me outside here. We can zoom in a
little bit here. Then down here, if we
scroll down our list, we can see we have a
section called bevel, then there's a bevel depth. So if we make this higher, can see here it starts
rounding off these corners, which gives the Logo a little bit more
of a finished look. However, if you
make it too high, you will see it starts pinching these corners. And
we don't want that. We want to try to
avoid as much of this pinching as possible. The depth we're going
to use is 0.02. We're just gonna give it a
little bit of a rounding here. But you'll also notice that if we just showed you
this as an example, the higher the bevel, the larger the Logo
has actually getting, the really high bevels
is actually making our logo overall larger. It's puffing it up. So we don't really want that. With a depth of
0.02 for the bevel. We're gonna go up
here to the offset. And we're gonna be
offsetting this Logo back inward to make it the same width roughly that
it was before. The value we want for
the offset right here. It's actually negative 0.01. So removing an inward
about half the depth that we moved it outward
using the bevel. So we still get this nice
round kind of highlighting. We're getting on this corner, which makes it look a lot nicer, but we're keeping it roughly
about the same size. It's probably overall just
a pixel or two larger. But it's such a small change that we won't really notice it. The only thing we're going
to undo appreciate is this nice round corner which
will catch highlights. So the last thing we need to
do that one is the center. The small circle. We're going to again
go down to bevel. Change this to 0.02
to give it a bevel. Then the offset, we're going
to change this to negative 0.01 to make it just a tiny bit smaller
than it was before. We put the Babylon. Now that we've done that,
we have a nice round edge here and we have a nice
round edge on the outside. We don't need to do it on the large circle because the
edges of this are hidden. The only thing we're seeing
is really just the flat face, so we don't have to worry
about beveling the edges. That concludes the
modeling of our logo. In the next lesson, we'll
be adding some color. I'll see you there.
5. Texturing the Logo: In this lesson, we'll be adding some simple materials
to our logo. Let's begin. Let's start by switching to
the EV Rendering viewport. So we're gonna go up here. We're going to choose
the third one, N. Once you click that,
you'll notice that your, your view port changes and it has like a faux lighting to it. And then also just click on this little drop-down arrow
here to the far right. And make sure that you
don't have either one of these these boxes checked. We wouldn't have both of these
unchecked as I have here. And you want to have
this little circle here highlighted that We'll add some sort of lighting
to our viewport here. This is giving us
a preview of what the render will look like
within the EV render, which is what we're going to
be using for this tutorial. Now let's turn our
reference image back on. So we're going to click both of these ones
so it's visible. We're going to select it
over here on the list. We're actually going to
slide this off to the left now that we're done
with tracing it. Because we're gonna be
pulling colors from this. In order to pull colors
accurately though, make sure you go down here to the object data
properties for the image. And then we're just going
to turn the opacity all the way up to 100%. Let's start by Texturing
the outside portion of our logo. First select that. We're going to go over
here and we're going to choose the tab here just below the object properties
where we were adjusting the thickness
of the extrusion. We're going to choose the
material properties window. Now we can click the New button, which will add a new material. Now let's rename this material. We're going to call this orange. Hit enter. Then we can scroll down here to see some of the material properties. We're going to be making a
relatively simple material for this that we have
renders nice and quick. And it's also going to be a
stylized looking animation, so we don't need a lot of
realism in this material. Now let's change our base color by selecting this white box. And then we're going to
click this eyedropper tool so that we can sample
another color. I'm just going to sample
this orange here. We can see now that we've pulled the orange from this to that. We can see now that we've
pulled the orange from the Logo over here
to our actual model. You'll notice that there
are a bit different, and that's because
this logo here is completely unaffected by
any lights in the scene. For now, disregard the fact that there are a
little bit different, we'll be adjusting this later. The last thing we're gonna
do for this material and the orange material is
we're going to scroll down. And down here where
we see clear coat. We're going to turn the
clear coat all the way up. You can see here
it's updated with a clear code is doing
is actually adding a, you can think of it
almost like a car paint. A car paint has a
color underneath and then it has a layer of clear like enamel
paint on top of that. That's allowing the color
below to be visible, but it's adding a nice
shiny layer on top. So if we rotate
our camera around, we can see here we're
actually seeing reflections now or before they were
pretty dim before. So by turning our clear
coat all the way up, reading that nice
clear car paint, a look on top of this logo, which just gives it a
nice reflective look. We can adjust how
blurry or how sharp these reflections are by the clear coat
roughness down here. So if we turn this
all the way up, it makes it really rough, almost like sandpaper,
which means we don't really see
our reflections. But we're going to set
this somewhere around like 0.1 would look nice. So we can still see
reflections here. They're just not super sharp
and kinda distracting. So I think that looks nice. There are clear
code is set to one, or clear coat roughness
is set to 0.1. Then we have our base color
sampled from the Logo. Now, let's select our
small circle here, which will be the blue. We're going to click
the New button. We're going to rename
this material blue. When same process, select this white box
for the base color. Click the eyedropper. Sample the blue. Then we're gonna go down here, turn the clear coat up to 100%, change the clear coat
roughness, dew, 0.1. Then we can see again that
this is now reflective. Last thing we need to
texture now is the white. We can select the white. Click New. I call this white. Then for our base color of this basically starts
out as almost wait, we're just going to
make it pure white. Just by pulling this
little dot all able to the top and make sure
it has zero saturation. So we now have a
pure white there. We're going to scroll down,
turn our clear cut up, set our roughness to 0.1, the clear coat roughness. And then the last thing we're actually gonna do is
we're going to make this white glow for our logo. These parts here we'll
just be reflective. So the orange and animal
blue will be reflective. And we're going to
make this center part glow and emit light, is we're going to change
the emission color from black to white. Then we're going to
change the strength of this emission to ten. You can see here that makes
it a lot brighter here. And now we have this
sort of glowing area right behind the Logo. This area here, the white area isn't really all that reflective because it's so bright that you really don't see any
reflections on it. But just for the sake,
inconsistency here, we're just going to have
it set here just in case we catch any
reflections here. Now let me have
this textured here. In a later step, we're going
to make sure that this white here actually
looks like it's glowing. But for now, just make sure
you have your mission and value the color here set to one, and then the value
is set to ten. So the admission
strength is set to ten. Now that we're done
texturing our logo, we can select our
reference image. We can remove it
just by deleting it. We won't be using the
reference image anymore, so we don't need to
have it in the scene. In the next lesson,
we'll be creating the render scene and setting up the
Lighting for our logo. I'll see you there.
6. Lighting the Logo: This lesson, we'll be
setting up our render scene, as well as adding some lighting. Let's begin. I'm going to start
by switching back to our regular shaded viewport. While we work, we can just click this
little ball up here. I'll switch this back
to the gray version. The next thing we're
going to do is create a collection instance
while in object mode. Go up to Add, and then go down here to
collection instance. And then we're going to
choose the collection called Blender logo
that we created before. So this is the
collection that has all of our logo pieces
that we modeled inside it. So we're just going to
click Blender Logo. Now that will create a new
collection instance over here. If we uncheck this little
checkbox here next to the Blender logo collection that we had before.
With all the pieces. We can see that we can
still see our logo. And that's because we have
a collection instance. Now, this collection instance we just created is a single piece. If we just select any part
of this when we move it, it will move everything with it. While we can't edit this
instance version of our logo, it will make it much
easier to animate as it's a single object rather
than the multiple pieces. This one share our
original Logo pieces remain editable if need be, but still allows us to easily move and Animate
the Logo instance. Let's rotate this Logo upright. That way it looks
better in our render. So there's two ways
we can do this. We can hit R to go
into our rotate mode, then hit X to lock
it to the x-axis. Then we can type in 90 for 90, then hit Enter, and that'll
confirm our change. So again quickly,
you just have to hit our x90 and then hit Enter. And that's a quick way to do it. Or alternatively, you could just switch to your Rotate tool here. Grab it just on the red handle, and then hold Control
while you move it to make sure it snaps
to the 90 degree angle. I'm going to switch back
to our selection tool now that this has been rotated. Now let's begin adding
our lighting system. And this tutorial,
we're going to use an HDRI to light our scene. An HDRI is a
high-quality image that contains multiple levels
of lighting information. Blender can read this
Lighting information and convert it into actual
light for our render. I've already taken the
liberty of finding a nice free HDRI image for this tutorial from
Paul II haven.com. You can download this HDRI from the project resources
for this course. Feel free to look
around polyhedron.com and download any
HDRI you'd like. However, for the purposes
of this tutorial, we'll be setting up
the HDRI I provided. First, let's go to
the Shading tab here at the top center. We'll just click
the word Shading, and that'll bring up
a new viewport here. Now we can click and drag
on this top-left corner. So we're just going to
click here where our mouse turns into a little plus sign. We just click and drag that. You'll see it turns
to a leftward arrow. Then when we let it go and
hide this window here, we can leave this one
here on the left. Now, we're going to want
to make sure that we're in this third bubble here. So this will be our sort of
an EV equivalent render. And then we're going to click
this little drop-down here. Then instead of leaving
these unchecked, we're actually going to check these now
because we want to see the actual lighting
we're putting in our scene, not just this Blender
default leading that it has. We'll check both of these boxes. We'll see our scene,
we'll get much darker. And that's because
we don't really have any lighting
in it right now. If for some reason
you still have the default light that was in our scene
when we created it, make sure that's deleted now, all you should have
in your scene is just your logo and then your camera. Let's position or camera. That way we know exactly
what our camera is seeing when we
adjust our lighting. So first let's go
up to view cameras. Then we'll choose active camera. Now we can see that
it zoomed us into the camera that will
be left in our scene. So by default, if we
just rotate our camera, it will actually
pop us out of it. If we rotate our view
like we have been, it'll just jump us right
outside the camera. The normal way to move this camera is to
select the camera. We can open up this
little side menu here by clicking that
tiny little arrow. Then we normally
would have to click our camera and move our camera, rotate the camera,
and then go back into the view and then see where
the camera's positioned. Now, you could do this by think there's actually an
easier way to do this. So instead of doing that
normal default method, instead we're going to
hit N on our keyboard. We're gonna go over here to the View tab that
we just brought up. We're going to check
this little box here called camera to view. Now, when we rotate our
camera in this viewport, it actually moves
the camera instead So we're going to move
our camera and just position it just
like we have been rotating around the viewport. And we're going to
position it so that our logo is nice
and centered in it. We're going to put
it right about here. We just want to have
this blue circle here sort of centered
in the middle. It can be a little off.
We just want to have somewhat similar
space on the top and the bottom as well
as the left and right. Now in this case,
since this logo has these fins shooting
off the left, we're not going to have quite as much room here on the left, but we can see that
the circle itself with not including these fins
is pretty well centered. Now that we have our camera
with a rough placement here, make sure you uncheck camera
view because we don't. Next time you try to rotate
around your scene to see like the backside of your
viewport or something else, you're actually going
to move your camera. We don't want that once
we have our cameras set, we want to make sure it
stays where we put it. So make sure you
uncheck camera to view. Once you have a view
somewhat similar to mine. While uncheck this. Now we're gonna go back to item. Then there's a few values
here that we're just gonna wanna make sure that
they're nice whole numbers. So we don't want these
kind of 0.00 zeros here and these slight
negative values. So first let's just zero out the rotation for the Y. I'm
just going to type in zero. Then for the Z as
well, type in zero. Now we're gonna go to
the rotation for the EX, and we're here, we're
going to type in 90. Now we can see that the slight angles that we had here actually made a pretty big difference on where our camera was placed. Now that our cameras generally in the right spot
and we don't have to go back to the the view
camera to View Lock here. We're just going to use
these numbers up here and we're just going to slide
them back and forth. So the first thing
we're gonna wanna do is move our camera down so that the Logo is better centered
inside the frame. So we're just going to
use this value here. And we can hold Shift while we drag across this
to move it slowly. We're just going
to move it back. It's about centered
where it was. I think right around
there is. Okay. If you want to follow
along exactly, I guess maybe, and
we'll try to make these some nice numbers here. So we'll do point to
where the Z for the Y, That's essentially how
close your cameras. So it's almost like your zoom. Think mine is probably
fine where it was. I might just do negative
12 to make it easy. We'll leave it at a negative 12. Then for our X, this we
can just slide over. This value is going to
have to be a little bit negative because
we're compensating for the extra fins
on the left side. This we're just going to
have to visually line up. So in my case, let's just make
this a nice negative 0.2. So if you're following
along exactly, you'll have negative 0.2,
negative 12.2, 900.0. The camera placed,
Let's enable a free add-on built
right into Blender. So we're gonna go up
to Edit Preferences. Then we're gonna go
to the add-ons tab. And then the search bar
here at the top right, you want to type in node. Then I think it's the only one in here with the new
word note in it. If you just type in node and
I just put a W afterwards, we're going to have
Node Wrangler. So once you see this here, just check the
little box next to it that will enable the
Node Wrangler add-on. This add-on will
allow us to skip some tedious steps
while creating our HDRI by creating some
nodes for us with one click. Now that we have
this enabled and we can just close this box. Now we're gonna go down here
to this bottom portion. So this is actually
where will it be adjusting the nodes
for the HDRI. So by default, it's
set to object, which means it's looking for textures on objects
that we have selected. However, we're going to be
adjusting a world of texture. We need to click this drop-down here and switch it to world. Nobody have world open. We can see they're
already a few nodes here. In this node here is
the background node, which is actually
what's giving us this slight gray
background as well as this really faint flat lighting
that we're seeing. If we adjust this, this is actually where that
lighting is coming from. So I'm gonna leave
mine back at one. Now we're going to
make sure you have the background node selected, which is this green one. We're going to zoom
out a little bit. Then we're going to hit Control
and T at the same time. You right away, you can
see it turns bright pink. And that's because we just don't have an image loaded up yet. The reason we were able to hit Control T and have
it pop in all of these different nodes for us automatically because of
that Node Wrangler add-on. So normally we would have to go through and add
each one of these individually by ourselves and then relink them altogether. With Node Wrangler, it just
allows us to hit one button, creates all these nodes
that we're going to need anyway and automatically
links them up for us. Now with all these
nodes created, let's get rid of this pink. So the way we're gonna
do that is to add an environment texture here, which is actually our HDRI. We're going to click Open. And then once this
window pops up, navigate to where
you saved your HDRI. This is the one that
you should have downloaded from the
project resources. I would recommend that
this HDRI lives in the same place as the Blender logo image
that you downloaded, as well as this Blender file
that we've been working in. So let's select the HDRI, in this case, HDRI O1. Kind of click Open Image. Now when we do that, we automatically see
everything changes up here. And now we can see the
background of this HDRI image, binder logo, as well as some general
lighting that we have. The first thing we're
gonna wanna do is to rotate the HDRI. That way the lighting is
coming from a correct angle. So that way we can do
that is by moving over here and going to
the rotation node. We're going to adjust
the Z rotation. So as we just click
and drag on this, we can see that this
image behind it moves as well as the lighting
that it's generating. The value we're going
to one in here is 209, which gives us a nice watery background
behind everything. For this logo animation, we're going to have
the background be a blurry beach scene behind it. Number four, we go
too much further. Let's adjust the reason
why this image behind our logo and the
lighting in general and all the colors here look flat. So we're gonna go to
our render properties, which is the backside of this little camera
here, this little icon. Then we're gonna go down
to color management. Your file will likely have defaulted to a setting
that is making your colors and lighting look a little bit more flat
than we like them to. Then we can fix that just by
changing the view transform. And we're gonna
switch it from filmic to standard instead. You can see right
away soon as we switch back and forth between these huge difference in the saturation of our
color on the Logo, as well as the lighting in
the background as well. Then For now we can
leave the look on none. However, there are
other options here. So none is basically
equivalent to medium contrast. So we can make it lower
contrast if we wanted to, or we can make it
higher contrast if we choose one of
the higher settings. But for now we're just going
to leave ours on none. For the purposes of our render standard
actually looks better. However, filmic in some cases does look better
for certain scenes. So it's a matter of just
analyzing what you're seeing requires whether or not it
needs to be saturated or not. And then choosing
the correct look or the view transform
to match it. So first, we're going
to use standard. Now let's go back down
here to the bottom. And we're going
to add a new node here that will
allow us to adjust the colors and the contrast of the lighting coming
into our scene. We're going to drag select
over these three nodes. So the HDRI node, the mapping and then the
texture coordinates. We're just going to
move those over. Now we're going to hit shift
and a go up to search. Now we're going to type in RGB. We're going to
choose RGB curves. Now with this selected, when we hover over
this yellow line here, it'll turn white. And then when we place it, it will automatically
link it up for us. If for some reason when you placed it or when
you created it, automatically placed day without adding these connections here. The way you can
manually connect things is just by clicking
from one dot. It'll drag out this little
wire and then you drag it to another dot and
you can see it locks on, it, snaps in, and then you just let go and it'll
connect it to it. So the way these
nodes are working as they run from left to right, the furthest right
is the output with, so this is actually
what we're seeing. And then as we go further left, these things are affecting what we're seeing on the far right. In this case, these three nodes here are what are
creating the image. This image here is being
applied by this node. It's being told what
the rotation of that image is by this node. And then this is the
texture coordinates, which in this case is just
going to use generated. But we have other options
here if we needed them. The node we add here
is a curves node, which will allow us to adjust the, the perceived contrast. And in this case actually
saturation of this. So as we make it more contrasty, it will also become
more saturated. Then M is the image is
adjusted by the curves. It's put into this
background node, which is then pumped directly
into the world output, which is what we're
seeing in our scene. The way to use this curves node here is by clicking
on this line here. Then you can click
and drag a point. And then when you let
it go, you can see the image in the
background updates. So the higher up the point is, the more it's dealing
with the highlights. And the lower the point is, the more it's dealing
with the shadows. In our case here we're
actually going to use two different points. We're gonna have
one near the top and one near the bottom. Let's start with the
point here at the top. So make sure you have
two points in that you've got those just by
clicking on the line. So just click on
your top point here. Then down here on this value, we're going to type in
0.92 and then hit Enter. And then on this next value
here we're going to type in 0.81 and hit Enter. So that's the value
for the top point. Now let's select
the bottom point. For the first value here, type in 0.45, hit Enter. For the second it
0.15 and hit Enter. We can see here
that I've made the background a lot more contrasty, a good bit more saturated. But it's allowing this logo
to pop off this background. It's not also similar in tone. The Logo is the thing you
noticed first because it kinda jumps off
the page essentially. Then the background
recedes into the back, which a background should, and allows the Logo
to be the star, not a huge fan of
the colors that it's creating bacteria as we
increase the contrast. So let's add another node here to help deviate
these colors towards a slightly more
appropriate palette for our logo. Let's zoom out again. Can just drag select over
these two nodes, move them over to
make some space. We're going to hit shift and a, we're gonna go up to search. Men type in hue HUD, and then choose Hue Saturation. And again, just drag it
right on top of this line. It turns, wait. Now it'll auto connected for us. The only value we're
going to change here is actually
the hue of this. So as you move the hue, you can see it's sort of shifts all these colors and
pushes them further, further along the color
wheel essentially. Now it's a very touchy control. You can see here
if you hold Shift, move these colors a lot slower. But the value we
want here is 0.46. So when we do that, it changes
these colors here instead of being in that kind
of yellowy green color that it wasn't the background. Now it's shifted them
more towards orange, which complements our
logo a bit better. So now our background has these sort of
oranges and blues in it that complements the orange
and the blue of our logo. Now not a huge fan of how
obvious this background is, because it's taking some
focus off the Logo. Let's add some depth of
field to our scene to allow the background to get
pushed even further into the background and allow
our logo to be the star. With your cameras selected. Go down to this
little green icon here that looks like a camera, which is the object
data properties. Then we're going to
check on depth of field. We can twirl this down. We're going to choose
our focus object. So this will basically
you can pick an object from you're seeing and say this is the focal point, make sure this
thing is in-focus. And then the, the, it will set the focus distance
for you automatically. Normally you would
just have to type in a number here and guests exactly how far away that
logo is from your camera. We can avoid having to
guess or measure it exactly by just using
this little eyedropper. So we're just going to
select the Blender Logo. It'll select this
Blender logo instance that we made and place it here. Now we can go down
to the f-stop, which will affect
essentially how blurry the background is. And here we're actually going
to make it pretty blurry. So we're going to type
end point to it enter. We can see here that it makes
everything beyond the Logo, because we made the Logo, the focus object,
nice and blurry. So we can still tell it's water
back there with some sky, maybe some sand down here, but it's not the focal point, it's just a background. It's just meant to not just
be a solid color back there. It's a little bit
more interesting, but the logo itself
is the focal point. We can also adjust the
blade count to change the shape of these
sort of blurry dots. We get back here. I'm
just going to type in six relatively subtle change. Maybe we can see
back here now that this blur is actually six-sided. Whatever number
you type in here, it will change that
amount of sides on your blurs in the background. Let's add one more render
effect to our scene. We're just going
to be adding bloom around this white
ring that we added, which is glowing right now. Right now it just looks
like it's pure white, but it's actually supposed
to be emitting light. So we want to make sure that the Animation and the
render shows that. We're gonna go up to
our Render Settings, which is this little camera. We're going to check on bloom. So you can see
soon as we turn it on and it gets really bright. But we're going to adjust
some of these settings here. And each of these
settings here is going to adjust the different
part of the bloom. And to save you some of the time of playing
with these now, I suggest you do mess
with these on your own. But we're just going to go
through here and change each one of these values
to the number that I said. We're going to set the
threshold to one. Hit Enter. We're gonna go down to the
knee and type end point for we're gonna
go to the radius, type in to the intensity
2.03 and then hit Enter. Now if you'd like to
adjust this any further. So right now we're getting a
really subtle blur or sorry, a glow around this. But if we wanted to
adjust these any further, we can just adjust
some of these values. The first thing
you might want to adjust would be the radius. If you want it to be more
glowy or less glowy. This is the number
you can adjust. Maybe We'll set ours
a little bit higher. Let's see, maybe 3.5. I like that. That has a little
bit more glow if you want it to be a little
bit more intense, or rather further reaching. If we want to make
it more intense, we actually ingest
the intensity. The more we increase
this number, the more strong that glow is, the more it's going
to actually like overlap and overwrite
what's behind it. We don't want to and
are super strong. Maybe we'll do 0.4 or
rather 0.04 for this. Then hit Enter. Now with these values set, we can zoom back out so
we can see our camera. Now this is pretty
obviously glowing here. We have this sort
of glowy ring on the inside of this thing
where it's emitting light. And then the outside is our nice shiny materials that we created. Now that we have a
render scene setup. And the next lesson
we'll be adding some simple animation to our logo to give
it a little life. I'll see you there.
7. Animating the Logo: This lesson, we'll be adding
some simple animation to our logo to give it
some life. Let's begin. Before we begin any
animation makes you go up to Edit Preferences. Go to the Animation
tab here on the left. And then just be sure that
your default interpolation is set to Bezier. Now we can close this window. We're gonna go up to view
cameras, active camera. Or if you have the numpad, you can hit zero on your numpad. Now puts us into
our active camera. Zoom-in a little bit so
we can see it better. Make sure you have
your logo selected. Then we're gonna go over here
to this little orange box. So this tab here
with the orange box with these little
brackets around it, which was the object properties. Then these values here are the ones that
we're going to be animating in case
you haven't noticed, we're actually working in our
layout workspace right now. So make sure you're in that. Then down here at our bottom, we have the timeline. So we can click and drag this
up, this little line here. We can have two little arrows. We can make this a bit
bigger because we want to actually be able to see
our keyframes down here. Start with, we're
going to change the amount of keyframes
we have to work with. Right now a defaults to 250. We're actually going
to switch ours to one-to-five because
that's the length of the Animation we'll be doing. You can zoom in on this timeline
by just scrolling up on it and then click your
mouse button here to Penn. We can see down
here PAN your view. It's the middle
mouse button here. And now I have it centered. We're going to be making
a looping animation of our logo spinning
around in a circle with some secondary
movements added to avoid it looking
too boring or static. The first keyframe
we're going to be placing is actually
in frame zero, which is outside of our range. And that's important for
the looping to work. So if we have the exact
same start and end frame, actually within the
bounds of the timeline, will have two frames that
river repeat itself. So if we have zero rotation
here and zero rotation here, we actually have two keyframes, therefore two frames
that will be doubled up, both showing it at
the zero position. So in order for it to be
a nice seamless loop, we actually need to
hide one of these outside of the keyframe range. That way when it renders it out, it skips one of the
duplicates and just has it roll seamlessly
into the next. We're going to start
our frame here on zero. So this first keyframe
will be outside of the timeline with your
playhead set to zero. We're just going to go
over here to our rotation. We're going to click this
little dot here next to Z, which currently it's set to
zero, which is what we want. We're just going to click this. Now it will turn yellow. We can also see a little yellow keyframe down here
on the timeline. Which means we have
placed a key-frame. Key-frame is essentially
just telling some specific parameter what number or what value it should be using at that exact keyframe. And as we add more, we
can tell them to change the specific value between keyframes over a
certain length of time, which is essentially
just what animation is. We're just telling
different parameters to be at different values
at different times. Now let's move to frame 15. So we can see here blue 15. And then we're gonna
go over to our Z, which is now green,
which means it's ready to accept
another keyframe. There isn't a keyframe
already there. Here we're going to
type in 30, it enter. And then we're going to click
this little keyframe button again to place down a keyframe. Now we can Sylvia two keyframes. And if we move
back-and-forth between them, we can see that that value, which is the Z rotation, which is sort of that
central middle vertical axis for this is rotating 0-30 within 15 frames. Now let's move to keyframe 40. The z-value here, we're actually going to
type in negative 90 because we're really starting to speed
up the rotation. Now, once you type in negative
90, it'll turn orange, telling you you've
changed the value, but you haven't actually
plates the keyframe yet. So we're going to click the
little keyframe button. It turns yellow,
letting you know that there's a keyframe
president again. So that keyframe that
we just placed is the beginning of
our fast rotation. So we're going to have
our logo sort of wind up. So you can see here it
turns just a little bit. And then once it
gets to this point, it's ready to start spinning. It's the windup
prior to the spin. And then it starts turning
towards its Quick Spin. And then here in the
middle we're going to have to go really fast. So it's going to spend a
lot here in the middle. And then it'll start
slowing down here where it will spin past zero. Then it will correct
itself back to zero, which will match up to the
very first frame by the end. So we're going to
have its windup spin really fast over correct, and then go back to
zero here by the end. It's now let's begin this
really fast bit in the middle. So we're gonna go to frame 60, the Z value here, we're going to type
in negative 1080. Then make sure you click
your little keyframe here. So if you move off of this and you don't
click your keyframe, it won't retain any of the
changes you just made. So as soon as you
move the playhead without placing a keyframe It'll just go back
to whatever it was. So you have to
remember to actually place the keyframe
when you're done. Let's move over to 85. We're going to type
in negative 1470. It enter, click our
keyframe button. Then we're gonna go to
105, negative 1430. It enter and then click
our keyframe button. And then lastly, we're
gonna go to frame 125, which was our last frame. We're going to type
in negative 1440, hit Enter, and then click
our keyframe button. So you might think
it's kinda odd that we started out on zero, but we ended on
negative four for zero. But as far as we're concerned, that essentially is zero. So this is just, it's
rotated around so many times that it's gotten back to the exact same position visually, even though the numbers
aren't the same. And we need to have this
value instead of zero here, because if we type zero, there would be a massive
difference between the last frame at 01:05 in 125. So it would spin at Lightspeed
essentially to catch up back to zero when in
reality we just needed to settle back at a flat view, which This essentially
visually zero for us. Now that we have all of
our keyframes placed, we can hit the Play
button here on the right. So it's this little Play
button here on the right side. And we can see the
animation we just created. We have the if restart here. It's the windup, the
really quick spin, the over correction, and
then it goes back to zero. We can also see by letting the Animation play that
it does loop seamlessly. And that's because we cut
off that very first frame. So it still remembers what position it's supposed
to be in the beginning. But we're not actually rendering
that unnecessary frame, which would be a duplicate. So we can see as it runs, There's just a nice smooth transition rate from
the last frame, right into the first frame. Now we have the spin
animation done. Let's go through
and start adding a little bit of
secondary animation, which will be animating
on the Y value. So start by going
to frame 15 again, which we already have
a keyframe here, but we're going to be
king a different value. So it doesn't matter that we
already have a Z keyframe because we're gonna be
keying the y-value instead. So to start with,
we're just gonna leave this right at zero. Then we're going to
click this little dot here to place a keyframe, just letting it know that at this point it needs
to stay at zero. Now we can move all the
way up to frame 50. Here we're going to set
negative ten for the value. Then make sure we click
our keyframe button here. Then we're gonna go to frame at. I'm going to type in
ten for this value. So not negative anymore,
just positive ten. Hit Enter and then make sure we click our keyframe button. Now go to frame 95. We're gonna do negative
five for this value. Hit Enter. Then finally
we're gonna go to frame 113. So 113 down here. We're going to type in zero, the answer, and then click
our keyframe button. Now what we've added is
during this wind-up here. So as it corrects and
gets ready for the spin, we're adding a little bit
more rotation in the Y value. So we're actually rotating this bottom-left corner or retaining a downward
this direction. So it has a little bit of a, sort of a teeter totter
affect at, added to it. We can see here at add just
a little bit more character here, turns down. Then here in the middle
it actually turns upward. We can see it's spinning up. Now. It's actually rotated
past centers. So we can see this
is actually a lot higher than it started with. That's during the spin. So as it's spinning, it's kind of spinning out
and turning upward again. Then again, we have, during
the correction here of the Z axis rotation, we have an over
correction of the y-axis where it spends a
little bit too far down to correct itself. Then again, it's
settles back at zero where it should have been and gets ready for the next spin. So to see this in
motion, we can hit Play. Now we can see here that's just a little bit
more character to it, gives the Logo a
little bit more life where especially
at the end there, I particularly think it adds a lot right there
at the end where it spins up and then
rotates itself back down. Then gets ready
for the next spin, still keeping it
seamless because of the way we placed
our keyframes to avoid having anything different at the
beginning of the end. So while our animation right now has all the
movement we want, it's still a little
bit robotics. We added a little bit
of life to it with the over corrections and the
twisting of the Animation However, the actual keyframes placed right now are
very consistent. So every movement is almost looks like it's
been created by machine, not by sort of in this case, like a living logo that's spinning and doing
something itself. So we're going to
adjust the curves in the graph editor to make
this Animation have a little bit more
slowdowns and speed-ups during the Keyframing so that it looks a little
bit more intentional, a little bit more lifelike, and a little less robotic. Let's go up here
to the top-left. We're going to hover over
this top-left corner here until our mouse turn
the little plus sign. We can just click and drag
to add a new viewport. We can do this kind of
half and half here. So we're going to leave
this one as it is so that we can see what
our camera is seeing. However, on the left side here, we're going to click this little drop-down appearing in
the top-left corner. We're going to switch
this one to graph editor. Now we're seeing some sort
of squiggly lines here. And these lines here
are actually showing us how the keyframes
themselves are moving. So the rotation and how they're adjusting EQ between
the different values. And this is the
reason why we wanted to make sure before we started placing keyframes that we had
the default set to bezier. So right now you can see that we have Bezier handles here, similar to one we were creating our logo and
modeling and with curves, we have those exact same
style handles here, which gives us nice smooth, sort of rounded corners
here rather than sharp like value to value corners that we would have had
if it was set to linear. We can zoom out here. When this, we can
see more of it. So we can hold down Control and middle mouse button to adjust the kind of squish and
stretch of this array. Now we can see our
values are pretty high. So we have to zoom
out really far, or we can just hold
down Control and middle mouse button to squish them visually and
then zoom in so that they fit a little bit
better inside this. Alternatively, inside here, we can just hit the Home
button on your keyboard, which is above your number
carrier. Arrow keys rather. It's right above the End key. It's near where delete is. 3d just going to
hit home and home, we'll kinda default
everything to the correct zoom level
and just kind of squish everything until
it fits within this view. The specific curves
that we're actually going to be adjusting
here is this blue one? Blue will remember
is RZ color here. So that's the main bulk of this animation is It's
spinning around on the z-axis. All the other animation we
did was more secondary. And we can see appear
that curve is a lot more flat because of the values
didn't change as much. So the most bang for
our buck here in terms of adjusting values
will be for the Z values. So what we wanna do here is I'm going to zoom
in just a little bit. We're going to be
selecting these, these vertex points here. One thing we don't
want to do when we're adjusting these handles
here is actually move them. You don't want to hit G
and move these because this actually is moving the
value of your keyframe. So we can see down here
at the bottom left, if I move it left and right, it's moving it left and
right on the timeline, which will mess
up our animation. And if I move it up and down, it actually makes the rotation that we typed in there,
that value different. So we don't want to do that. If you accidentally
move something, make sure you
right-click or Control Z to set it back to the actual
position that it was in. What we do want to do though, is select these, the
central point here. And we can use are
our key to rotate. We can use our S key to scale. So let's start by rotating this. We're going to rotate this
upward a little bit here. So what we're doing
essentially here is making this curve a
little bit more severe. So rather than keeping it
kinda flat and lifeless, a little bit more boring, what we're doing
here is we're making this acceleration more drastic. The more steep this line is, the faster the
animation is moving, the faster that keyframe is
transitioning to the next. So if we have a nice
flat line here, It's not moving very fast. But if we have it flat and
then it quickly spikes up, that means that that animation starts out slow and then goes really quick during the
parts where it's more steep. So in this case
here, this is where the really fast spin in the
middle of our animation, as you can see how steep this line is compared
to say this one, we're gonna be adding more flat and more steep and getting rid of these kind of
middling flat ish values. So we wouldn't have it to be, they're going solo at certain
spots are fast and others, we don't want these
kind of middle fast, slow values because those
are the things that kinda just look a little bit too
boring for the Animation. At this handle rotated. We can also select
this handle here on the far side. So
this longer one. With a selected we can
hit S to scale it. So we're just going to
scale this up a little bit. That way we can get a
little bit more of a harsh, flat and then steep transition. Now this is a relatively
small movement. So we can only make it so
steep hour for this area here, we can make a pretty
big difference in the way this spins. So I'm going to select
this vertex here. It R to rotate. You can see as I
rotate this, now, it only let me rotate it so
far I can only go vertical, anything past vertical, it
starts actually squishing it. So I'm going to rotate
this basically vertical We can see that it's made
that line there more steep. So this thing, you can almost think of it as like
a roller coaster. There's not a lot of
roller coasters that are very flat and smooth. They have long snout
of sort of flat areas. And then they have
an area where you get to the top of
the roller coaster and then it drops
you really quickly because those are the things
that are more exciting. So that's what we're trying
to replicate with this line. Now let's select this
top handle here. And we're going to stretch
this one out just a little bit to help make this kind of top of the
roller coaster look here. You can select this bottom one. I could stretch that
out a little bit. We make this line
even more steep here. This is where the
spin really picks up. It's going almost full speed here because it's
basically vertical. And then it dies down
to this bottom one. We can rotate this one
just a little bit. This one's pretty good as is. Maybe we'll just
kind of curve it into that one a little bit. So very little adjustments we made on this one because
it's already so steep. Now on the bottom one here, we don't want it to
just hit and then flatten out and we
want it to hit, go below and then go
back up to the next one. We're going to actually
select this vertex here. We're going to rotate
this one so that that blue line continues a little bit past
where our vertex is, which means it's going
to be over rotating. It's gonna be
rotating a little bit past where we set it to be. But in turn, making the animation a
little bit more exciting. So we can select this handle, skill, this one up a little bit. So now we can see we
have a really sharp, steep line here that kind of
hits this sharp valley and then rockets backup
to this value here, which we can rotate
just a little bit more. Now we have a bunch of really sharp hills
that we have here. And then this one, we're
just going to leave as is because we don't want to
adjust this value at all, because this needs to
seamlessly run into this value. You want to avoid rotating
or doing really anything to this last in
the first vertex. Now with these adjustments made, Let's see how it's
affected our animation. So we'll have to remember what it looked like
before because there's no real easy way for me to jump back and
forth to show you. Now we'll just play this
and see how it looks. We can see there in
the middle how it whips much, much faster. It starts out a little slower. It's a little bit slower
to do the windup. But then a whips really hard
right here in the middle. Then that sort of
that correction here at the end is also a
little bit more snappy. So it whips back, hits that little slight over correction on and then
snaps back to zero for it. It's a subtle difference. Hopefully you can tell
the difference between the before and after that. It is a subtle thing, but it really does
change the feel of the Animation and makes
this feel more intentional, a little less just placing keyframes and letting
Blender do its thing. We're actually going in and kind of fine tuning and tailoring what Blender
has set up by default. And making these
intentional choices to make certain areas faster in
certain areas slower. In the next lesson, we'll be Rendering our final animation. I'll see you there.
8. Rendering the Animation: In this lesson,
we'll be Rendering our final animation and compiling it into
a sharable video. Let's begin. Let's start by cleaning
up our viewport from the last lesson. We're just gonna go up here to the top left of this
right viewport. So basically the
line on the center, we're going to wait until
our mouse turns into a plus sign that they can click and drag to the left to remove that extra viewport
that we dragged out. Also make this a
little bit smaller at the bottom because we're
not animating anymore. So we can make it just big enough that we can
see our keyframes. Now let's go up to our
Rendering tab at the top. We can click this
and it'll switch just to our Rendering viewport. We're going to start
by Rendering out just a single frame
of our animation. We're not going to
save it or anything. We're just using this as a preview and because
we're going to be adding something called
motion blur to this. So let's go up to frame 44. We can do that just by dragging this little blue icon down here. If you want to make it
a little bit bigger, you can. We're gonna
go to frame 44. Then we're gonna
go up to render. And then we can
choose render image. Now we can also just
hit F2 on our keyboard, or we can just click
this image here. Okay, so now we can see this is what are render
actually looks like. So this is the final
output visually at least of what are
render looks like. Now the reason we
went to frame 44, because this is actually
right in the middle of the fastest movement
of our logo. However, looking at this image, you would never know
that this is moving. So unless you knew that
this was animated, you would just assume
that this logo is sitting still in this position. The way we're going to
actually show that this is moving is by adding motion blur. So we can go over here to the right side and
we're gonna be in our render properties
tab, which is this one here. It looks like the
backside of a camera. We're going to check
on motion blur. Then we're going
to twirl this down so that we can see the options. Now that we have our
motion blur settings visible for two values that
we're going to change. The first one we're going
to change the shutter. And then we're also going
to be changing the steps. So let's start by
turning up the shutter. So as we turn this value up, making it closer to
one, in this case, that's essentially
leaving the shutter, the shutter speed for the
camera is staying open longer. So normally a camera
would take a picture and it would only capture like for a
certain amount of time. So if we make the amount of time that it's capturing
the light longer, we'll introduce more motion
blur because the light being taken in by the camera is also catching
some of the motion. So it's moving positions
during that capture process. The longer we have it, the shutter speed open, in this case one. So a higher number. The more motion blur
we're going to notice. Now let's hit F12
on our keyboard. And to see what this looks like, we can see here now that we're actually seeing
some motion blur, will notice it's a
little bit weird. So it's a little bit choppy
and it's kinda hard and some spots and really
kind of messy and others. And that's more or less
because of the steps. The steps is somewhat
of a fake thing that EV is doing to accomplish this motion blur look because
it's not true motion blur, it's trying to simulate
the motion blur. So what steps is doing
is essentially adding how many duplicated
images is a0b0 going to add to this render in order to
accomplish this motion blur, look, if we turn this
up to our final result, which will be 64, and then
give it another render. We'll notice how much smoother this motion blur result is. We should have one for
our shutter speed, 64 for our steps. And I'm going to hit F12 again. We can see how much smoother and softer this motion blur is. And that's because
of these steps. So if I lower these steps, so say if I have
these kind of say 32 and then render it with F20. We'll see that the motion blur, it's not a huge difference here. So if you find that the render is taking a
little bit too long, you might want to go
with a lower step. Maybe 32 would be fine for you. But if we turn on 64 here and hit Enter and then
render it again, will notice some smoothing of these jagged areas that we're
seeing on the motion blur. We can see here it's smoothed
that out a little bit more. It's a little bit more crisp and some areas and a little
softer and others. So this render is relatively
quickly on my computer, so I'm going to
leave mine at 64. But if you find for
some reason this is taking a while to render
on your computer, maybe 32 is a better
value for you. Now that we have our
motion blur setup, let's do a few chest frames here of the Animation
to see how it looks. Let's go somewhere a
little bit further. In this case, maybe
74, 75, let F2. That's actually looking
right down the Logo, but we can still see there is some blurring here happening on the edges and that's
because it's moving so quickly past the camera. Maybe go to an area
where it's a little bit more still to make
sure that we're not getting a lot of
motion blur when it should be relatively
motion blur free. I'm gonna move to
109 and render that. And just as I
thought, were getting nice crisp edges here because this isn't moving very fast. So that's what you want. You want during that
fast portions of your animation where it's
really spinning really quick. It should be motion
blur to accentuate the speed that this
logo is spinning at. But in the areas
where it's slow, we don't want to have
so much motion blur, so much exaggerated
motion blur that the slow areas are also being motion blurred because that
doesn't really make sense. It's just going to make
it look blurry overall. Let's just double-check here. So this is near the
very end where it's nice and licensed still. We're not getting a lot of
motion blur there at all. Let's just double-check
somewhere in the beginning here. So maybe 32 here. This is the area where
it's, it's done, it's little wind-up
animation here, 0-10. Then this is the
portion here where it's getting ready
to spin really quickly during this area of really intense speed
here in the middle. This is the amount of motion blur that I
would expect to see during that with our
motion blur finalized, let's make sure our Render
Output settings are correct. Before we actually
render the Animation. We're gonna go up here to
the Render Output Settings, which looks like
a little printer printing out a little photo. We're going to check
our format up here. So right now it's
sets your 1920s by ten at which is good. That's sort of default. Regular HD resolution. So I'm going to leave this. If you need to change gears, go ahead. You can
change it here. If you wanted it to be square, you could do 1080
by ten at however, you might find that your camera, like your logo animation, might go outside the
bounds of your camera. If you really adjust the resolution here and
change the aspect ratio, you might need to reposition your camera to make sure that the Animation stays within
the bounds of the frame. And then we're also going to
change our frame rate here. Right now it's set to
default, which is 24, are actually going to make it 30 just so it's a
little bit smoother. In this animation
doesn't have any sort of jitteriness because 24
is standard for film. However, most animations
nowadays are gonna be 30, some might even
be as high as 60. Next, make sure that your frame range is set
from frame start one, frame end one-to-five, and then just leave
this step at one. Now let's set up the output
parameters for our animation. The first thing we're
going to change here is the file format. So right now it's set to
just the plain image format. We're going to switch
this to FFmpeg video, which might sound
like an odd one. But we'll be changing
some of the settings here into something a little
bit more recognizable. We can open up the
encoding area here. We're going to change the
container from matryoshka. I'm not quite sure how
to pronounce that. We're going to switch that
instead of to MPEG-4. Mpeg-4 is something that you
probably are recognizing, hopefully if you've worked with any video
files in the past, but just know that this is a
pretty standard video file. Most platforms will be able
to work with an M Peg. And then down here
for the video codec, we're going to leave
this on H.264. If it's not default to that, just makes sure it's H264. For the output quality. We're going to change
it from medium quality to perceptually lossless. So perceptually lossless
is basically saying that it's going to output as
high-quality as possible. So the point where you almost can't tell that it's
compressed at all. But it actually is slightly compressed just
to keep the file smaller. If you pick lossless, it's gonna be a massive file for you and it's
going to take a lot longer to render and
things like that. So we're just going to use
perceptually lossless, which will give us a
really high-quality video without all of the
other downsides of completely lossless. Then lastly, we're
just going to leave the encoding speed when good, with all the settings done. Now we just have to
change where it's actually saving these files out. You're just going to click on this little open button here. And then you want to
navigate to the folder or the area on your computer where you'd like to save
this video out. Once you've navigated to it, you just hit accepts to accept the location
that you've chosen. Then we can see here that it's changed the location
for the render. With all these settings changed, we're now ready to
render the Animation. Now we can go up to render. And instead of
doing render image, we're going to choose
instead render animation. Once you hit this
button, it'll start rendering frame-by-frame. And then when it's done
rendering each frame, it'll compile that into
this MPEG-4 video. I'm going to click this. We can see here
that it's starting to render my animation. Now it might not update
every frame here. It might skip some visually, but know that it is rendering
every single frame. Then once this rendering
is done here and we'll come back and then we can look at the
video that it made. My render is now complete. We can see here it's saved
out this video file. And it gave it the name of just the amount of frames
that had had in it. So it just lets me know
that it goes from frame one to frame one-to-five. We can just click on
this and rename it. So I'm just going to call
this logo animation. It enter. Now we can watch our video. If I just double-click on this, it'll load up the video. This is what the actual
final product looks like. I'm going to switch
this down here. So if I just want to
see this to loop, now this is on Windows, I believe media player
that this is playing on. We can just click these
three little dots down here. I'm going to choose Repeat. We're going to click
these little arrows here to make it larger. Now I can hit Play. Now I just get to see this
thing looping as it should be. We can see here that
the motion blur added a good bit of speed
here in the middle. So it really gives you that sense that it's moving
really quickly as well as we can see now let
the blur that we put on the background is kind of separating logo off
of the background. We have the nice bloom that we added for that glowing ring
in the middle that really makes it look like it's glowing and emitting its own light. And then we have all
of the Animation smoothing that we did
using the Curve Editor. All this adds
together to make what I think is a pretty
compelling little, just kinda rotation
of the Blender Logo. Now that we have a
completed final render, you can share this
with your friends and family on social media. In the next and final lesson, we'll be discussing
our class project. I'll see you there.
9. Our Class Project!: Congratulations, You made
it to the end of the class. Now that you've learned how
to make a 3D logo with me, I'd like you to create a new one and share it with the class. This new logo can be
anything you'd like. Your own personal logo,
Your favorite restaurant, Your favorite tech company, Your favorite video game
or movie franchise, or a completely unique logo
design of your very own. For my class project, I created a 3d fox
logo that could possibly be used by a Twitch
streamer or Youtuber. I utilized all the
same techniques we discussed during class
to create my logo. It just has a bit
more complexity in the number of levels. After you've finished
your logo design, post the render to
the project gallery to share it with me and
all of the other students. I'll personally
review each project posted and let you know what
I love about your image, as well as anything that
could use some adjustments. I can't wait to see what
you all come up with. Thank you all so much
for taking my class. I really appreciate it. If you enjoyed the
class and want to know when I release new ones, click the Follow button
here on Skillshare, please consider leaving an
honest review for the class so you can let
other students know if it's worth their
valuable time. If you liked this course, please check out my teacher profile. You might just
find another class of mine that interests you. Thanks again, and I hope to see you in another class soon.
 Harry Helps, Professional 3d Artist