Transcripts
1. Course Introduction: Hi, my name is Darn and welcome
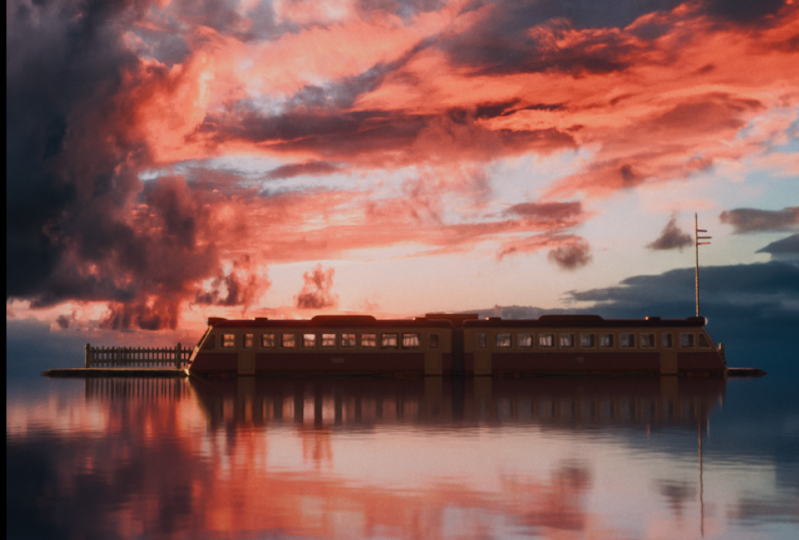
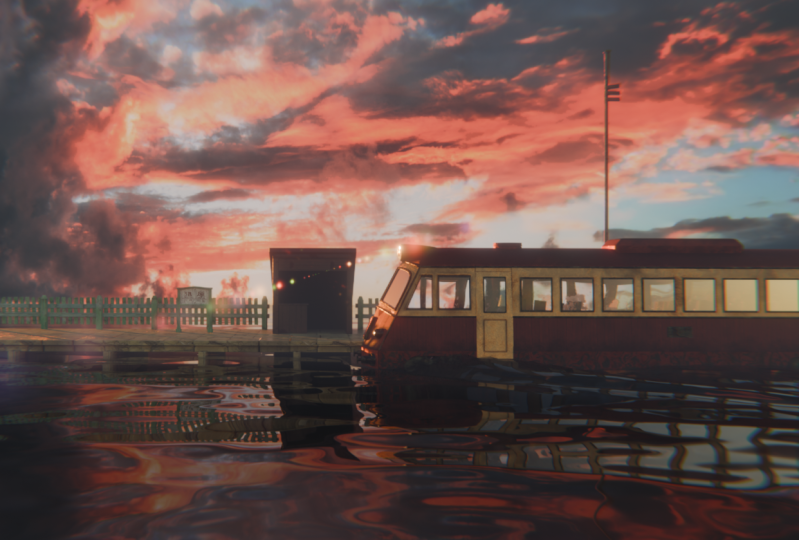
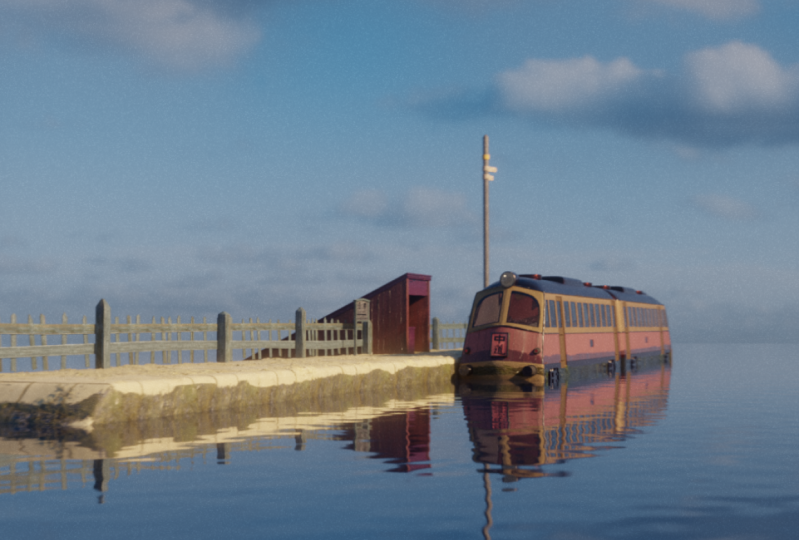
to my blender tutorial. This three day course, we'll be doing our own realistic take a, one of my favorite scenes
from Spirited way. This tutorial is intended for beginners that have
already watched a video or two and
are now looking to take their blender skills
to the next level. Everything in this course is completely built from scratch, and all the tools
plug ins textures that we'll be using
are free as well. I split this course
into three sections, modeling, texturing,
and animation. We'll start off by
installing free plug ins. And as well, I'll show you a few quick shortcuts that have come to adapt in my workflow in
order to speed things up. Once everything is set up and ready, we'll begin modeling. In this step by step process, you'll be able to
follow along and learn about modeling techniques, modifiers, how to
clean up your mesh, and even some simple
geometry notes setups. In the texturing phase,
we'll combine a variety of techniques in order to
bring our scene to life. You'll get to use everything
from PBR textures, making your own
procedural textures, to texture painting as well. I contain each lesson to be 10-20 minutes long on average, with a few exceptions,
of course. Additionally, since this
is a very long tutorial, if at some point you
wish to jump from modeling into texturing
or to animation, I've also added
individual blender files to help you switch
chapters just like that. So with all that out of
the way, let's begin.
2. Getting Started: Before we begin with
the tutorial itself, I want to take a few
minutes to talk about some of the tools, plug ins, and other stuff that you
might see across this video as we go along so
that you're not caught off guard
essentially by something. Talk about plug ins. All of
the plug ins that you'll see are basically
completely free. And I think 80% of them you can actually just
get by going here under Edit Preferences and
simply typing them in here. Let's just quickly
install or enable all of the plug ins that
you'll see me use across this video as well. Whenever I do come across
using a certain plug in, I am going to mention
it and briefly stop there for a
second to remind you. There's also that this is just to help us get
started initially. All right, the first plug in that actually comes
to my mind right away is if you type in
here, I believe copy. You'll see this one
here that I have enabled Copy Attributes menu. So essentially what this plug in does is you don't need to, you need to do what
I'm doing right now. You can just watch. So
I just want to clarify, all of these plug ins is let's
say you have this modify. Let's say you have
this cube over here. I have just now enabled two levels of
subdivision on this cube, as you can see in here, by pressing control two. And then if I go here,
let's say I'm going to add a ray modifier that's going
to go this direction. I'm going to add
like a couple of these guys like that, right? If I wanted to now
have this object have the same modifiers as
the one on my left side, I would either have to
manually go here and add them and then match
up these things here. Or by using the copy
attributes one, I can actually click
on the cube that I want the modifiers to
be transferred to. And then I can click on
the object by holding shift to one that has
the modifiers on. And I now press control C. And I can just go copy
modifiers immediately. It's going to copy the
modifiers as well. I mean, if you press control C, see there's a bunch
of other things that we can copy as well. But I believe in the
tutorial we're specifically mainly going to be using
the copy modifiers one like that. That's the copy
modifiers add on. Essentially, the
one that is yellow is the one that needs to
have the modifiers on. And then the one that is orange is the one that the modifiers are going
to be transferred to. I click on the one that
I want to transfer to, and then a whole shift click on the one I want
to transfer from. That's about it. It is a
bit confusing at first, maybe, but once you get a hand
of it, you get used to it. The next on the list that
we have is the Loop tools. This one here, what
the loop tools do, let me just go
actually to this key. While we have it here, let's say that I have this
face here and now I have this face selected.
I want to inst it. Let me add a couple of
loop cuts right here. Let's now select
this edge loop that, let's say I want to make this edge loop a little
bit more circular. That's exactly what
the loop tool does. If I go on my right click, I see that I have a new menu here available with
all of these options. And if you have your
mouse on each of them, it gives you a short
description of what they do. The one I'm looking for
here is called circle, and as you can see, it immediately changes
it to a circle. Like I said, there's a
couple of other ones, but specifically
in this tutorial, we're mainly going to be
using the circle one. All right, let me delete all of these things
from my scene. Now let's add a default cube. The next one is the most popular one that
I believe you've probably heard if you watched
already a couple of Blenders tutorials and
that is the Node Wrangler. If your first time hearing
about the Node Wrangler, you're in for a treat, especially if you come
from other tools. Me, myself, I initially learned
Cinema four D and octane. And when I learned about
this tool in Blender, it was like dark
magic game changer. For me personally,
if I go here under my shading tab over
here and let's say usually you want to add
a new material like this. Now if you wanted to add
textures to this material, you would have to go into
your textually file and then select which textures
you want to transfer. Blee Blender doesn't even allow to transfer them
all individually, so you'd have to go one
by one in here like this. Then you need to find
where your color is. The color goes into the
base color over here. You need to go manually
connect this one. Then you have the metallnus into the metallic
goes into here, and then so on and so forth in order to get your
textures going on. But with the node
regular add on, I can just press Control Shift and then find a texture
that I want to use. For instance, just something randomly, let's say like this. Okay? And immediately
it connects everything. For me, like I said,
it works like magic. And on top of that, this
is not the only thing that the Node Wrangler
is available to do. It does a bunch of other things that you'll see as we
move along in the video. But this is the primary function that I don't just blew my
mind when I first saw it, when I was watching my
first blender tutorial. Next on the list, we have
one called as planes. And this one, again, comes
directly inside blender. All you need to do
here is shift a, and it adds an image
as plane here, but essentially allows
you to create a mesh that attaches an image
directly on top of it. On a plane. Then we have, I believe, step in two. There we go, mesh two. This one is very useful when, let's say you would need
to add an additional face. So let's say I have something
like this and I can press immediately,
it fills this in. Additionally, let's say I have a verdict here that I select. And I press immediately, it does that. I think opposite. So if I press here, it's
going to do exactly here. If I press here, let's
see, it does that. It adds directly
all these phases. It's also very useful. Then we have two more add ons that essentially we
don't have by default. Here in Blender, we will need to actually download them through the Internet, but no worries. Both all of these
Ams, like I said, are completely free
if you just go, for instance, here to Google. And also I have
attached the links in the resource folder that includes the textures
and everything else. You'll find it there as well. You can just go to Google and
type in camera shake five. It should be the
first one here that pops up from eight to future. This one here, you go to
code and download the zip. Once you have the
zip downloaded, all you really
need to do, again, go into your edit preferences
and here under install, you find it and you install it. What does the camera shake? If I do well, as the name
suggests, the camera shake. If I go into my
camera allows me. Now if I go to the
camera settings, you see here this extra
window, if I click here, plus it has this investigation or a couple of other
presets that you can use. Let's say hand Cameron, and it just adds
this extra motion. Now this is obviously
way too jarring, but it gives you
also these settings to stabilize,
decrease the speed. Then you get this like nice
almost natural human motion. You can barely even notice it
here, but it's very useful. This just helps to sell the realism that
somebody is holding a hand, holding a camera when
recording this footage. Last but not least is another
add on called UV squares. Again, the UV squares add
ons is the one that you're going to need to manually
install this one. Here, let me just
first show you what it does before we go
about installing it. Essentially, when
you have an object, and this is going to come
in handy when you have objects that once
we unwrap them, they come in weird shapes. This one is obviously
going to come much nicer. Let me go into UV,
as you can see here. But the UV, UV squares
add on shows up here. And it allows us to
manipulate these UV squares, organize them a bit better. Let me just show you how
to install that one. Again, if you go to Google, type in UV squares blender, it should be this first
one under Github. There should also allow you
one for blender market, but this one is paid. You can get this one from Github just by going
code, download, zip, and redoing the same
thing that I showed you before under here,
edit preferences install. That's about it. Those are all the plug ins that you'll need. As I said, once we come across using one
of those plugins, I will always mention it so that you'll kind of
know what's ahead. So this is just kind of
even extra preparation. Before that, let's
talk about shortcuts. Now when it comes to
shortcuts themselves, blender is highly customizable. And as you can see here,
when I press letter Q, which is quick
favorite shortcut, it, it has a lot of
these that are added. And these are all done
by me personally. And you don't need
to add all of them. I think we only need
just three or four, so I'm going to go one by one. Explain which ones
you'll need the most. I think we can also
cover some of them, some of the other
ones here as well. Later on, like I said, blender is highly
customizable and you can change these
shortcuts as you want. These are the ones that
essentially I found work best for me because I use them the most instead
of having to. For instance, let
me just show you this one called here
face orientation. That essentially just
shows us whether our faces are pointing
in the right direction. So if everything here
is blue, that is good. But if you see here, if I go inside, faces are pointing here inside,
which is correct. But sometimes you'll notice in this sitorial that we'll have sometimes faces
looking like this. Then in that case, the
only way to find that out, whether our faces are
pointing outside or inside, is by going into the
face orientation where that is located over here. Instead of having to
every time go click here, checking out face orientation. I'm just going like this, changing the face
orientation and I see all my face
orientation is wrong. I can go and tab,
select everything. Shift to Recalculate Normals, and now everything is
good and turn it off. This just saves me a
lot of time and hassle in having to do manually going back and forth
here and there. And that's really what these shortcuts are
very, very useful. As I mentioned, in order to add a face orientation,
you just go here. Add to quick favorites and
that's about it, All right. The other one that we have
is called faces by side. So let me just show you
what that one does. I'm going to do a cut here, that's going to give me this
triangle or here. All right? So if you want to see, for instance in your mesh, how many quads you have, how many triangles you
have, and et cetera, What you need to do is go
under here and select, I believe select all by trait
and then faces by sides. And then here you can say
vertices equal to three, or let's see, equal to three. Then it's supposed to select all the vertices that
are equal to three. Let's just go one more
time. Equal to three. Let's see, greater than three. Now I'm going to select
everything that's greater than three equal to four in order to see whether you have
engons, tries, and quads. This is very handy. But again, having to go
every time in edit mode. And then going into here, select Trait, Face it by site. It can be a bit of a bit of
a hassle to me personally. Again, I had it in here. Then you go by Trait, right click Add to Quick
favorites and that's about it. All right, another one
that personally I use, and I think this is a
professional hazard coming from cinema for D, is when I go into
my camera view, I just don't like the idea of, you know, not being
able to lock my camera. And the only way to
do lock my camera is to go here under view and then I believe camera to view and then I can
move it like this. So to me personally,
this was very annoying. And so in order to kind of
bypass having to click here, I added this camera to
view as my quick favorite. And so this way every time
I go into the camera, I just press lock
camera to view. And I can move it like this
and then I can get out of it. That this is just something
I personally use. You don't necessarily need to, if you've learned it another
way from a previous Torial, go ahead That way where
it's probably fine as well. Then lastly, there is also one quick shortcut that isn't here that I
don't use from here, but instead is done by
pressing the Sem column key. And that is adding the wire
frames as you can see here. For instance, sometimes you have a couple of subdivisions now, you just want to see how your
viral frames are looking. Let's say you have the
optimal display turned off. I just need to press
the Sem column key, and I can see my wire
frame set up instead. If you had to do it manually, you would have to
go in here, press the wire frame and go like this. For this one I've pressed it, put it as a semicolon, so you just go right click here, and then add shortcut. And you press which
one you want it to be, That's how it works. In my case, I believe these
are all the shortcuts. And there's one more
final thing that you will see me use in this video. And that is my Moodboard
that you can see in here, which is done using
a Pf software. Let me just showcase it to you. If we go to here, you can download
Pureref directly from here. It is for free. So if you go to Google like this and just go in
here, download it. I will also attach my pf file, the one that you see in here. So that when you watch Tutorial, you can simply put it here either like this on the
side as I'll have it, or you can put it on your secondary monitor
if you have one, to help you use these
reference images to get the designs and
creative look as you want. That's pretty much it. Once
you have your Pf installed, you are good and ready to
go without any further ado. Good luck in this
tutorial and I'll see you guys in the
next video. Bye.
3. Adding Reference Images: Okay, so here I have a
new blender file open. What we want to start off is simply adding our
reference images. First I'm going to
click the letter A, and then I'm going to click X to delete everything
that we have here. You can see all my
keys. I'm pressing here, right down in the middle. If I click my tilda key, I get this pie menu
with the views so I can go into my front
view from here. What I want is simply to
add a image reference. I'm going to go here
to reference and where I have saved
my image references for the train, for the front. There we go. And here we go. Now from here, what I want, I want to match this line of
the train that's in here, in the middle to the line
here of the three D. Cursor. To do that, I'm just going
to click and then move this image along the x axis,
somewhere around here. We actually already
see that this line here with the waves
is also here, matching with the three D
cursor. That's perfectly fine. Let me just adjust it
a little bit more. There we go.
Something like this. If you want to copy the
exact coordinate locations, here are the numbers. X is -0.58 234. You can put that
over there to have the exact ones that I'm
using right here right now. Now, the next thing
we want to do is let's add back a cube. There we go. Now
let's match this cube also to be here in
alignment with the X axis. I'm going to press and then Z. Push it a little bit,
somewhere like this. It again matches with
the three D cursor. Something like this is fine. Now we want to scale this image reference to match
the height of the cube. If I click on the
image reference and I click letter, it
starts scaling it. But it scales it from
the center point here, from this origin point. And we don't want
that, we want to scale it from the three
D cursor point. The way we're going to
do that simply is by clicking full step
on the keyboard. Then clicking three
de cursor right here. Now it's going to
scale right from the three cursor
point. There we go. Perfect. Now the next thing that you might notice
is that, well, this train actually isn't
a perfect cube shape. The height of the train is quite larger than the
width of the train. To match this shape up, I guess it's a bit more of a cuboid or rectangular shape
from this perspective. We can just simply add a little bit more height
to our cube here. If I click Letter, I can go here into our z
dimension, our height. And then click 2.3 That's just going to give me a little bit more extra height. When I put the E again up
pressing on the E and then and then Z and matching it
right about here with this, we can see that now if
I go and scale this, we get a little bit
of a better shape. The edges match, everything
matches a little bit better. I think that's good
enough for starters. Now one thing to keep
in mind is because this is a drawing and it's
not a physical shape, there's going to be some times where we're going
to have to adjust, maybe even this
image or readjust. There's going to be a lot
of back and forth going in this project and that's just normal with these
types of situation. I'm going to explain exactly
a little bit better, why once we now add
our side image. To add the side image, let's
click tilta key again, going to our right view. Now from here, shift A again, let's go into our image
here, references. And I'm just going to
add this side image. We're going to repeat
pretty much the same steps. Now let's move this somewhere
around here, it matches. Xx is the beginning of the cube. There we go. Something like
that. I think it's fine. Then from here we just
need to scale it because we already have this
three de cursor selected as the pivot point. If I click scale now, it's just going to scale
from where we wanted to. We're going to scale all
the way until it touches. We actually have some
leeway right here. Let's just push it a little
bit more up. Here we go. This edge matches right here. This matches right
here. That is perfect. Now what we can do is just click Y and then move this a little bit
more towards here, just so we can see how
these lines match up. Here's what you can see.
What I mean by drawing, just because this is a drawing. For instance, if we look
at this angle right here. So if I go into my
right view and you see this here goes
pretty straightforward. There's no angle happening
from this perspective. There's a little bit
here, but there's not much on this side, there's
not much in this side. But now if we look at our
front view reference image, you can see that there's a much larger arc happening here. There's an arc happening
here, there's one here. We're going to be
needing to take some creative liberties when we're going to be
designing the strain. Modeling the strain just because the image references are
inconsistent with one another. The best thing that we
can do in here is I would say try to match up this
corner to this corner, and then this
corner to this one. We can do that simply
by pressing G, Y. Then let's just move this a little bit closer
to our first corner that we want to check out, X. We can see that these
two corners match up. And I think this is more
than good enough for now. We don't need to worry
about it too much. Let's just see if our
middle also matches. So I'm just going to press Y now and move it a little bit to see where does the top corner. The top corner is a little
bit lagging behind, but I think that
we should be able to handle that a
little bit later. For now, let's just
keep it as it is. The only thing that we
can do is let's click on this front image
and then go here into the data properties. Let's just click front. Now if I go behind, if I have ready to
go in the back view, this won't be there. I won't be seeing it. We
can do the same thing here. Click here, and
just put the front so that way you can only
see the front view. Now what we can do
also is press X. Push this here to the side,
that's perfectly fine. Let's go here. Click
our front view. Let's see if
everything works here. I think we should be ready
to start off modeling. Yeah, if you have your
image set up like this, more or less, I
think we should be perfectly fine to
start off modeling. Like I said, this is going to be a back and forth
process at times. We might even go
back and realign the images just so that we can match up better
with the modeling. They'll be all for
this part and I'll see you guys in
the next video by.
4. Modeling The Front Part of The Train: We're going to start
off by modeling the front part of
the train here. To begin that, let's first go by adding a cut right
here in the middle. I'm going to go into my edit
mode by clicking the tab, and then I'll make
sure that I have vertex points selected
this one here. I can click number
one on your keyboard. And I'm going to
select all of this on the left side while also
being in x ray mode. Because if I'm not in x
ray mode, that's all. And Z, if I go here
and I select this, it's not going to select
the back vertices. I want to have all of the
vertices selected like this. Then I'm going to click X
and delete the vertices. And now while we have this half, we're simply going to go
at a mirror modifier. The mirror modifier is
just going to allow us to not worry about anything that's going on on
this side here. If I move something here,
thing on the left moves. If I move something here,
thing over there moves. And I'm just going to
make sure that I have clipping here also selected. That way that these vertices
are glued to each other. Because if I don't have
clipping selected, they're going to get
separated and we want to have them
glued to each other. Perfect. Now from
here what we're going to do is we're simply going
to go into our right view, and let's start
matching up this cube. I'm going to select all
of these, and then click, let's start matching up this
cube with this point here. We want to have this
one match here. And then this one
I'm going to press, and then Y, this one match here. What we want is to have this aligned with this rail
right about here. We don't need to worry about
this sides at the moment. Now I'm going to go
into my front view. I'm going to this line
here, this edge here. I'm going to do that by clicking the number two on my
keyboard like this. Then I'm going to go and into my right view and
press G and then Y. And then I'm just going
to move it like this. I can move this one a little
bit more up like this. This line goes right,
follow this railway. This can stay here for now. Let's just look at how
it looks like here. We don't need to
worry about this one. This one is from the behind. This one is here at the top. We can see that this line here over here on the right
view is right at this corner. But then if I go here, it has a little bit more
room that's fine for now. Then this one here, let's
see if it's at the corner, we can see that
this side needs to be pushed a little
bit more to the left. We're going to press again, I'm going to press letter X
to move it alongside x axis. I'm going to push
it somewhere around here that's touching this rail. Then I'm going to the letter R. We're going to rotate
it just like this. I'm going to press
again and then press X. Push it a little bit outside. Press, push it a little
bit outside like this. Now, one thing that you
might notice that's actually causing a small issue
is that if we're rotating, we're rotating still
from the pivot point. If you still have the
selected, this is a mistake on my end. We need
to actually click. We'll stop here and just
select Active Element. Now we're rotating correctly. What we need to do now is to align these here because
we made a mistake. So I'm just going to press
and then z and then zero. I'm basically scaling
this towards the z axis. And I'm zeroing them
out so that way now everything here is
again perfectly aligned. I can just take this
one here and move it along this axis here. I can move it a little bit more down just so it matches
somewhere here. But what we'll see now if
I go into my right view, is that here, it's lower. This is the inconsistency
simply that's happening just because these two reference
images are exactly the same. Most of the train, we are
going to be basing it off of this image here
on the right side. So we can actually just
keep this here for now. Then as a matter
of fact, we don't even need this part
at the moment. What we can do is
simply press X, select vertices, press
X and then delete them. We can just focus now on
building this front part. Train to continue
building the front part. What we're going to now
do is add two edge loops. One is going to be here and
then one is going to be here. I'm just going to start like
this, add the first one. I'm just going to press
twice now to move these vertice across this edge. I'm going to move
this one a little bit forward to here if you want to, perfectly zero the amount we
can press S and then zero, they're perfectly
sharp and round. Then we can do here at one more edge loop by
pressing control R, making sure that it's
along this line here. And then pressing while
selecting these two vertices, then Y, then just pushing it, selecting everything here, and then just pushing
it again like this. Now if we look at here, we're starting to
get that first part of the train here again. For instance, as I said, you can look even
though this is aligned perfectly with this line
here in the middle. We see that the medal
isn't even here. Like I said, this is just one of those things we're going
to have to live with because of the
reference images being consistent and we're
currently relying on them. Let's just continue
working on this part here. This part is aligned perfectly. This part is aligned
perfectly. For now. I think this is pretty good
for the front part, perfect. Now, in the next video, we're
going to be focusing now on moving this all the way
to the side over here.
5. Modeling The Sides and Top: Let's start now to build this
right side of the train, but right up until
this door here. To start with that, all we can do is go into our edit mode. Click the number two, so we
have Edge select like this. And then click Alt on our keyboard while
clicking here on the edge. And this is going
to just select this entire side over here. Let's go again into
our right view. While we're in this
right, we can click to extrude and then y to
extrude alongside Y axis. We're just going to push this
all the way up until here, where this vertice is
next to this door. Now if I have these 1234
vertices selected and I click, and then Y, I'm
just going to zero them out like this,
it's all straight. And I'm just going to
match it right here. And I'm going to push
this one maybe a little bit more just to
match it over there. Perfect. Now, the
next thing we need is just to add a little
bit more here on the top. We can do that simply
by clicking this edge. Oops, there we go. We can click this edge here. I have this edge selected. There we go. Then
in our right view, what I want to do is start extruding it
towards this direction. I'm just going to
click one more time. I'm going to extrude 1234 times. Should be enough. I
believe I'm going to press Y N zero From here. We just want to connect
these vertices. I'm going to start by
adding edge loops. Now on this side, while
having this part selected, like this edge, for instance, I can press control and
letter R and then scroll my mouse 123 times like
this, I get four edges. I click, and there we go, now we have four edges here. I can then move this one, maybe zero these
ones out as well. I'm going to press
on these two here, vertices Y and then zero. And then move by pressing twice. Right about here.
Then if I do that, that just means I can go this. I might need to add
one more cut here. I forgot. Let's just add
one more here. For now. Like this, we might even
need to take it out later. We'll see from here, I'm just going to
select these four. Now I can just select these two, click once, twice three. Now here we have, we
have a triangle here, and we want to have all quads. To fix this, what
we're going to do is we're going to add
another edge loop. And that one is
going to go here. From here, I'm going
to add an edge loop. I want this edge loop to
match up with this line here. All right, perfect. Now everything should be quas
and we can actually even do a check up just to see
if while in edit mode, while I have these vertices here or edges or even
faces, doesn't matter. If we go into select and
select all by trait, we go faces by size. We can say here equal
to, it says number four. We see that everything
is selected. If I put equal to three, I think this one is only being selected like
because of that. If I have s, let's do one more time,
say equal to three. Or we can even put less
than, less than four. Greater than four, Nothing
is being selected. So that means everything is
in quads, which is perfect. Now the next thing
we want to do simply is add a subdivision surface. We can do that either
by going here, clicking Subdivision
Surface here, or you can just have all
of this selected and then press Control And then
one on your keyboard. And it's going to add one level of subdivision first surface. If I press number
two, control two, it's going to add two levels
of subdivision surface. For now, I'm just going
to stick with one. Then I'm going to go right click and then
shade auto, smooth. One thing that we haven't addressed yet is we
fixed this part here. We're going to have to
now adjust this again one more time because we just
added the subdivision surface. But another thing we need to do is go into our front
and go all to Z. We see that we have a little bit of space here that
we need to adjust, and a little bit here. Let's first focus on
that. I'm going to start by clicking here and selecting
these vertices on top, and then pressing Z to move
them a little bit more up. Then over here I'm going
to select these vertices. I'm going to push
them with the G and just manually move
them right about here. I'll select these vertices. I think it is just
one. These ones my put need to push these
guys a little bit lower. I just want to get approximately the right shape around
here. There we go. Now one more thing.
We see that there's this hard edge going
on on the side. And that is fine if we go
into our pure reference. Let me just open my
pureref reference here. There we go. We zoom in here. We can see there's
a little bit of that arch happening
right about here, where it goes
outside and inside. We can actually use this edge here to mimic
that by going here, selecting it, going a
little bit outside, and then selecting this one, the line here from here. Let's press this here. And then press while
holding control here. It selects the entire line, and then just go
inside a little bit. Let's just match everything
up, press this one, push it a little bit forward, There's a little bit
of that going on. If I add a second edge, loop, second subdivision surface, we get that a little bit going on there and
that's perfectly good. Let's just check
everything else, how it looks okay,
that looks acceptable. Let me just adjust a
little bit more here. As you can see, I think this is going
to be perfectly fine. There we go, We have
this part done. All right. Now, in
the next chapter, I'll be showing you exactly what it is that we're doing here. Because this isn't actually the model of the train that
we're building right now. What we're building is what's
called a smoothing mesh. In this next chapter, I'm
simply going to explain to you what this smoothing
mesh is and how it works.
6. Modeling the Smoothing Mesh - Front Part: All right, let's talk
about the smoothing mesh. As I mentioned
earlier, we aren't building the train
itself at this moment. As a matter of fact, what
we're building is you can think of it as a shell or almost as a container for the train if I go
into my right view, so you don't need to do
this, you can just follow along, you just listen along. If we look at the train, right, we see this whole
area right here. This represents one
part of the train. This is just a
piece of the train. Then if we look at this box area right here where
my mouse is going, this is another
part of the train. This store is a
part of the train. This here is a
part of the train. This whole yellow thing that wraps itself and then
goes all the way around. That's also part of the train. This train is made out a lot of different
separate pieces. What we're building,
the smoothing mesh, is what it's going to be holding all those pieces together, and we're simply going to stick those pieces on top of it. Let me just show you. Let's
just as a matter of fact, do the front part right now. Let's do the front
part right now so we can get a better idea
of what we're doing. Then we'll just keep it
as is and then focus on expanding the smooth mesh
later on in the next chapters. So let's start building this front yellow part of the train along with this
rails and this window. Okay, to begin, what we
need to first do is match up the face so that this face matches as closely as
possible to this yellow area. And we can do this
in a couple of ways. We can first start by
taking this vertice here, moving it a little bit more up, moving this one a
little bit more up. And then adding one
vertice right about here, one edge loop right about here. Then we can take these
parts here and just press twice to move them a
little bit more on this axis. So that we even out this here. If we look here, we need to
push this a little bit lower. We need to even these guys out a little bit more like that. We're going to push
this here a bit. Front, this here like this. We just want to keep the shape of the train as much as possible while still adding a
few more edge loops. Here we go. Let's look
at here in the front, I'm going to push these
ones a little bit more up. There's this perfect oval
shape for this edge loop. I want to keep this
edge loop right here, because this one is going
to be for my window. I'm going to push
this one above here. And then I'm going to add
one more, right about here. Okay, let's push these ones
a little bit more here. Let's push these ones here. Push this one here. I'm just pressing
twice and then moving them alongside the edge. These ones here, I'm
going to need to rotate. So I'm going to press
R a little bit. Just start slowly rotating
and then pushing here. What we can do with these
four, as a matter of fact, is instead of having
to do here one, I'm just going to press twice. I'm just going to select these and press twice,
and then move them down. Now I'm going to select
these three again, press twice, and then
move them down here. I'm going to put this one
down here. This one here. This one might even
need to go like that. Let's see what we have so far. Let's connect a little bit. We have this one,
maybe a bit too much. As I look at right now, I'm going to go into
the front view, all Z. Push a bit more here, push this one a little bit
more up and take this one, push it back somewhere here. Now if I go like this
and select this, have all of this selected, which isn't bad,
but I want to push this one maybe a little
bit more here actually. That this part now even better
in terms of selections. Let's see how
everything looks above. We might need to clean this
up a little bit later. Let's just this here twice, It doesn't stick out that much. We overdid it a little
bit, I would say. See how the rest of the train looks based on what we did here. All right, from here, this looks fine. Actually, I want
to push this one behind this one a
little bit more here. I might even push
it a little bit more then I push this one. That we do have a little
bit of this bump happening, which is what we want here. We have this, this line is
nothing to worry about. This is perfectly fine
because as I mentioned, now what we're going to do is we're going to go
into our front view. We're going to
click the tab O Z. Then we do need to add. Actually we don't. Let's add. Let's add for now. Let's see what happens.
As a matter of fact, let's add one more
edge. Look right here. Okay, let's select now all of these faces by clicking three, and it's going to
the face select. And then click all
of these faces. And holding shift, what I'm doing is simply,
I went into three. So this face select, clicking all of these faces
while holding shift, I'm just selecting
them like this. Now what I want to do is
duplicate these faces. I'm going to press Shift
and D to duplicate. Now they're still part
of the same mesh, so I want to separate them. So I'm going to click to
Separate by Selection. Now we have this part. What we can do, actually we can hide this large part
of this initial part. We can hide it for now. Let's just focus on what
we have here for now. Okay, what we have here
is this yellow part. If I move, for instance,
this goes everywhere. Right? What I want to do, I want to wrap this
part around this cube. And the way I'm going to do
this is simply by adding another modifier to this part. Here I'm going to go
into Add Modifier, and let's use shrink wrap. And then here under target, I'm just going to click Cube. And this is going to wrap everything around
this, our cube. Now if I move this, you see
it just follows the shape. And that's what I meant
when I said that we're going to be using this here as our base on which we're going to be adding on
top and it's going to be the glue that holds
everything together. I'm just going to go
back now in here, while I have this selected, I can go here into a Z. Press three for face select. Hit this face where
we have the mirror. Click X, delete this face. Now go into this face here. Click control R to
add a loop cut. And then push this loop
cut all the way here. I'll go here, push this
loop cut the way here. I'll go here, push this
one all the way here, one all the way here. I'm going to add one
more loop cut here, just to control the angle
that I want this to go. I'll add one more loop cut here. And then I'll add one
more loop cut here. There we go. Now we have this. Now I do want to clean up
a little bit here. We can just have this one here and just start cleaning
up a little bit. There we go. We can
take these two, push them a little bit here. We can take this
here, this vertice, and then push it a
little bit more, depending on how much we
want this angle to go. But then we can
also take these two and push them more on this side, and then we can push it down
this by pressing twice. I'm just constantly manipulating these vertices along these
edges by pressing twice. That's all I'm doing. This
a little bit more here. This one can go a
little bit more down just so we can see
what shape we're having. See, there we go. We can this one a little
bit more like that. Now we can go back into here. What we can do here
with these guys. We can, Let's go actually
select these edges right here. There we go. While I have
these edges selected, I'm going go into a right view. I'm just going to push and
then Y and then just push them a little bit
back. Not too much. I just made one more time. I'm going to press this
one just a little bit. Just here just to smooth out this part so that when I go into my yellow part of the front part that we
were just building, it's not as aggressive but it's still going
to be present. That is fine. Let's go here, let's see how this looks
like. It looks fine. I do want to manipulate
this a little bit more. I do want to push this
one a bit more up. Maybe these guys can push this one a little bit
more to the side here. I have control over here. I can push this one a
little bit more to the side here. I
have more control. It doesn't have to go to
stream, something like that. Let's see what we
can do here. We can. What happens if we
remove this one? Let's see, it's not
that bad actually. We can actually maybe
even keep it as is just need to push this
something like this. Then this one a
little more down. This is really a matter of personal preference
at this point. Now what just matters
is that we have disalgned somewhat
to here to die edge. This is going to be normal
because like I said, the images that were
reference images that we're using are a little bit
different in perspective. But even if we now move, press and move everything, you can see everything just sticks to our
smoothing mesh, right? So I'm just going to
pick escape, go back. I'm going to keep
everything as is for now in the next chapter. Now what we can do
is actually add also the rims of the windows and
the windows themselves. And then we're going to
add also some thickness to this so we can
get a better idea.
7. Cleaning Up the Front Mesh & Adding Details: I look at this mesh right now, I do think we can clean up some of the parts
a little bit more before starting to add
these rims and the window. What I'm going to do is go
here, select this vertice. Click letter K for
my knife tool, and then go from here to here. I'm going to create a new cut. What this allows me actually, is to remove these
two extra vertices. We are not going
to need these two, because now if we go
and dissolve this edge, and I dissolve this edge, this still remains straight. And I can just push
this a little bit more down and it just
works like that. I can push this a little bit more here
to make it tighter. Push this one a
little bit more here, and now this one
is a bit tighter. And we're just going
to repeat this process for this edge as well. Click here, here, and then take these two X
the solve these two edges. I can now even go and adjust this depending
on what I want. But I'm just going to
keep it as is for now. For this part,
we're going to keep it as is. This is fine. What we do want here
is to do the same. So I'm just going to
go knife this edge. Click Enter, remove this
one, Remove this one. I think I removed the
wrong ones. There we go. Remove this one.
Remove this one. And make this one a little
bit more tighter at the corner that there we go. Because if I added it here, what's going to happen is we are going to have that mesh
that's going to stay. But then if we
take this one out, this is later going to
become a bit of a hindrance. Even if we move this like this, I do want to keep this as is, like a quad here on this side. And these ones can stay
as they are right now. Now we have cleaned up
the mesh a little bit, definitely looking a
little bit better. We can even push this
maybe a bit more here and then corner
it. That's fine. I think that's perfectly okay. What we want to do now is
start adding these rails, these red parts or
whatever these are, I'm not sure what they're
called, to be honest. I'm just calling them rails. But the way we're going to do this is we're going to click Alt and make sure that you're in your edge select
mode number two. And then edge select mode. I'm going to click Alt and then click on this edge
with my mouse, it selects the entire
edge loop here. Then I'm going to
duplicate this by clicking shift D one more time. There we go, I'm
going to escape. So now I have it duplicated, but it's still the
same part of the mesh. So I want to separate
it from the mesh. I'm going to click to
Separate by Selection. There we go. Now we
have this part here. I can click in here in this dot. And that's going to
transfer this edit mode from the previous part to this new part that
we just created. If I click letter a, it's going to select all of it. What I want to do now, I
want to make sure that I have individual origins here. I'm going to click to Extrude, and then I'm going
to extrude inside. If I click Tab and all Z, we see that we have created
our rails. There we go. Now from here, what
we can do next, let's just add shade smooth. We can do shade smooth here as well. That's perfectly fine. What we need to do
is add window glass. To add the glass,
we can just repeat the same step one more
time, separate everything. Let's shift D to create
duplicate, escape and separate. And then click over here. Now click A and we have
the window parts selected. Now we just want to
close everything. I'm going to go
into my edit mode, make sure that I'm in edit mode. I can go even into vertices by pressing one
vertex selection. There we go. And I'm going
to click to close it all. But now we need to also
add some edges up here to make this a little
bit cleaner of a mesh. Because right now we
can see that we do have some shading
issues going on here. By the way, one more
thing that we can do is before we move along, let's just disable the selection so that we don't
accidentally select these image references
and then rotate by accident around them so it
doesn't jump off too much. What I want here is just
clean this up a little bit. I can click this vertice here, and I can click on this
vertice, and I can click J. And it's just going
to connect them. Let's, we can click here, here and click J, And then just
connect it, I think. We can move. Let's
see what we have here auto smooth. There we go. This part here is fine as is. Let me look because now if
we add another cut in here, just to show what would happen if we add
another cut in here. We get this look, we don't really want this. We could maybe try to
add one more here. Actually, let's try and see
if this is going to work. And then add loop cut here. And then remove these two. To solve this edge that is actually going
to work perfectly, we can just move it a
little bit more inside. There we go. Now we
have quads here, we have a quad over here. There's one here as well. Everything here sticking while we are also maintaining
the edge, which is great. Now, for the last part, let's just add some
thickness into this. All right? Because it's
pretty flat right now, right? And we want to give
it some thickness so it looks stronger. The way to do this
is we're just going to add another modifier. So I'm just going to start
here with this part first. I'm going to click this,
have it all selected. Going to add modifier. I'm going to add a Solidify. What is going to allow
me, if we look here, is it just adds thickness to it. If I go in here into my
solidifying modifier, we can see we can manipulate
how much thickness we want. But we don't want
to go overboard because then I'm going to
start destroying the mesh. We just want to go a little bit. I think 0.01 is fine. Perfectly fine for now. And then we can do the same
thing for this part here. Let's go here and add
modifier solidify here. We have this also
added perfectly, we don't need to add
one towards the mirror. Then for this one, when we can, we can also add a bevel modifier so that we don't have
such strong harsh edges. Now, we'll be adding also this bevel modifier to a
couple of other ones later on. I'm just doing this now to show you the whole principle of the smoothie mesh and how this is going to
function moving forward. Let's just go and
add a modifier. And add here able. Let's just find it. Where is
it always built de bevel. What the bevel is going to
do is just going to bevel out these edges.
That's why you want. Let's add one more
segment so it's a little bit smoother,
something like this. Now we see that we have a maybe of an issue with the glass. We could this a little
bit more inside, a little bit more inside here. Let's just a little bit
more inside this here. I don't think we have an issue
with this side over there. I think that looks fine. We do have a slight issue right around here
with the bevel, if I look at it,
this is speaking, barely going to be noticeable. But it wouldn't be bad that we just clean
it up a little bit. We just push everything a little bit more like
this. It doesn't. Let's have the double selected. There we go. Here selected. So we just push it a little bit. We have it all covered. We can push this one
for the thickness, and then this one
for that side here, we can push the glass. I think that's about it. Now for this corner, you can see it's a bit rough
here around the edges. You could go into
the subdivision and add one more level of subdivision
and that would fix it. There we go. We're going
to close this chapter. We're right at the ten minute
mark for the next part. What we're going to be doing
is simply continuing to build out our smooth
mesh all the way around. And then once we complete
the smooth mesh, we're going to start building all the rest of
the train as well.
8. Extending the Smoothing Mesh: Before we continue with
expanding our smooth mesh, let's first group all of this so it gets a little
bit more organized. What I'm going to do is I'm just going to click on
this cube here, hold Shift, and then
click all the way here. I select all three of them. I'm going to click the letter
M to move to collection. I'm going to create
a new collection which is basically just a group. And I'm going to
call this Train. And I'm going to take
all of these elements and then give them a name. If I double click here, then I can go and rename this. And I'm just going to
call it Front Yellow. Then on this one I'm going
to call it front rails. And then this one I'm
going to call it window. Now everything is
categorized by front so that I know what
is the front part of the train when I
look at it like this. Then this one here I'm
going to call Smooth mesh. There you go. What I can do now is simply click on this here,
Hide and Viewport. And if you don't have
this, you can just go here and then select which ones toggles that you
want to be visible. I'm going to hide all of these. I'm going to enable my smooth
mesh by clicking on it. And now I'm going to
go into my right view. What I want is simply to continue expanding
this smooth mesh. To do this, I'm just
going to click Alt. Select all this entire edge. I'm going to click Y
and then zero first, because I want to perfectly
align this edge here. I'll go into my
old Z x ray mode. And I can see here, there's a little bit of a extra
height happening. I'm going to lower this by
collecting these two vertices, clicking on them, and then just pushing
a little bit down. I'm going to push
this here as well. Just a little bit down. That's about right. And then I'm going to go back in here. Now, let's go and
start expanding. I'm going to be extruding it by clicking a letter E and then y, and then, and then Y and then y. And I'm just going
to continue doing this for all of these windows. When I got here, I'm going to
start here and I'm going to add one more here and then
one more to the very end. Okay, I have one extra
so I can delete it. Just to double check that
you didn't leave maybe an extra vertices duplicates
on top of each other. What you can do is click A
to have them all selected. Then you can go and
click the letter M and then go by distance
and just check. And here it says
removed zero vertices. That means that I didn't have any duplicate vertices really close next to each
other. That's good. Now what we want to do is
let's just go back here. Let's select all of this.
Going to my right view, I do want to drop this
a little bit down. I'm going to go all Z and drop this a little
bit more down, just so it hits all
the water like that. Then coming back here, I
want to drop this part here. But I want to do it
from this point. I want to select here,
make sure that I have my active elements
selected. There we go. So if you click period, you
can change the origins here. And we just want to point to be active
element. There we go. Now I'm just going to click and scale it all the way like this. But now if I look at it, it's a bit of a hard edge
happening here. What I want to do
next is I'm just going to click on this one here, a Z. There we go. A left click. There we go. Now I just want to drop
this one a little bit down, but I'm going to do
it by clicking twice, so it follows the edge. There we go, Perfect. Now from here, the last part is simply just connecting this
all the way to the bottom. Let's go into our back view. Let's click this edge. This edge, and then this edge. We're going to click to extrude. And then all the way to go down. Once we get here to around
the three de cursor point, we can click and
then Z, then zero. Then from here we
just go like that. Now we just need to add a couple of loop cuts
to connect all of this. I'm going to start
by adding lop cuts, one here at the bottom control. Or to add a loop cut
control or here. And then just move my
mouse, control our here. Then just move my mouse
and then control our here. Now if I start
connecting all of these, if I select all
these four vertices, there we go, we
fill in the face. If I collect these
two fill bill, now over here we
have a triangle. We want to get rid of that. We're going to add one
more cut right here. Now also to get rid of this, there's a bit of a hard edge happening here, as you can see. We do want to push this inside, so I'm going to
press G twice again. And I'm just going
to go and push this a little bit more inside. I'm going to even do
the same with this. I'm going to push this a
little bit more like this. And then I'm going to click here and push this a
little bit more inside. There we go. Now
when I look at this, it is much softer. I can take these
ones and maybe I can rotate them and
just a little bit more. Let me just have this
one selected because I want to use that one as a point. Let's see how that looks. I think that's fine. I
might even go back here and just break control Z a couple of times
till I get it back. Yeah, I'm going to just
select all of it and then push twice and maybe push it a little bit here
Y to get that going on. I think that's fine. I'm going
to push this a little bit more inside twice to push this one a little
bit more inside. This one. Here, here, here, and here. Perfect. All right, let me see if there's anything else
that we might have missed. So the height here is good. This one here is good. Everything here looks
good. Excellent. I'm going to close
this chapter off, but in the next one what
we're going to start doing is we're just
going to be aligning all of these edges to make sure they are the same as
they are on this side. As we can see, we have
these edges like this. Now what we want to
do here is just do the same thing with the edges. Then next what we need to do is as this align to this edge, we'll be doing that
in the next chapter and I'll see you guys there.
9. Cleaning Up the Smoothing Mesh: Let us now focus on fixing
up this part of the mesh. And also then this lower
part, I'm going to go here. What I can do is with this edge here selected
as a matter of fact, with this part all
the way to here, I can go like this person twice and
just pushing it there. Now, there we go. Let me see if I can do well
with this one, I cannot. I will need to add one
more edge right here. Then with this one here,
this vertice here, I can go here, here I can go. I have this window, that's good. Now I want to do also
this window here. I'm going to go twice here, here on this vertice, have these windows isolated. I have all of this
going on here. That's fine. Now we just need
to focus on this part here. For this part here,
what we can do is take this Tic, push it here. This one, push it here, and then this one push
it right about there. Now if we go into our face
select mode by clicking three, I can click on this face and hold shift and
click on this face. Now if I click on to inset them, we can see that we're instting. But I want to click letter
B for the boundary, now it's going to
inside, and I'm going to stick it
to this boundary. And that's exactly what I want. I'm just going to go a
little bit, not too far. Just I guess around here is going to be fine
around this height. And then we can push
it a little bit later. I'm going to click
here. There we go. I'm going to select
these two faces again. Shift left, click with my
mouse on them individually, and then X and then
delete these faces. Perfect. Now I can start
also cleaning this part up. So I can take this
vertice Y, push it here. I can take this one Y, push it here, closer
to tighten it up. I can do the same
on this end, Y, just push it, coy, push it closer like that. Then what I can do here is add another loop cut
just by doing this. There we go. Let me see this. All right, and then push this one to close
it, make it tighter. Then I can do the
same on this end, add a loop cut, do
this, push it tighter. I'm going to organize these ones here a little bit better. So that I have something
like that here, let me just push these
ones a little bit. Can let's just like this. There we go. Then here we
have the same situation. I do want to organize this, it's a little bit cleaner.
I want to push this. I'm going to take these three. This one, this one. And then I'm going to select
this one in the middle. I'm going to click now to scale
them over here to inside. As long as I have this
active element selected. And I'm just going to push
this a little bit higher, push this a little bit higher, then scale from this one again, closer to push it tighter twice, push this tighter, and then
select all four of them, and then Z n zero. Then I'm just going
to keep on tweaking it just as long as I can match
up with what I want here. I think that's about right. I can go here, select all of these over here. Let's
see what we have. I can click Y. There we go. And then here zero, just to make sure
everything is good. Okay. Now with this door, I'm going to click on this edge. I'm going to push this
down by clicking twice. That's good. Okay, I mean, I can go here just to make this a little
bit more organized. I'm going to deselect
this part by clicking control
and going over it, and then pressing twice just as well. A little
bit more cleaner. There we go. Now I have this entire edge that
goes all the way here. I can go and take this
part here with the door. You can push it down. There we go. Now we're
going to need to focus on working
with this part here. What I can do here
is just take also this edge from here all the
way to right about here. I can click, control the, oops. So that I Select this entire edge, and then I'm just going
to press twice to push it a little bit more
down like this. It's not too tight towards here, but it still follows this door. Still follows
there. That's good. From here, what I want now simply do the same thing I
did at the earlier phase, which is just take this part, push it up here, right
about this corner. Take this one, push
it right here, right about that corner. And then take this one, Y, roughly here. Select
both of them. Y one more time. Then take
this one right about here. Take this one, push
it right about there. I can select all three of these. Click z, and then
zero is them out. I can take this edge and just
push it a little bit here, so it's a little bit
cleaner on that end. Then I can take this one, maybe push it a little
bit more like this. So it's a little bit
cleaner on that end. Now, there is one more
edge happening here. We can see that it's a
bit of a harder turn. It's not as soft, it's not going straight,
it's a bit harder. I'm going to do is add one more, cut one here, and then I'm just going to push
this one right about here. Make it go like this.
It has this turn. And I'm going to do the
same right about here. So it has this turn. Now I can go and select
all of these here. And do the same thing
we did last time. Click to inset just a little
bit as much as I need. And then click X.
Let these faces, now we just need to make
this corners a bit sharper. I'm going to add
one more edge loop. I'm going to do it like that. There we go. Now I have
quad here, like this. Now I can clean this up. And I have one more here, which is great, because I can now clean this all together. And I'll show you how exactly
let me just push this here, it doesn't matter that much. Then over here we
added one more, which was this one here. Now we need to make this part
tighter so we can do this. Now we're going to have a quad here as well, which is good. Let's take a look at
how this looks like. That's good. I do want
to make this one a bit more like that. I think that's good. We
just want to get rid of these edges here
because they're pretty unnecessary somewhere up
until this point here. And we do also have, I
believe, four of them. I believe we should
be able to handle it. Let's just see what happens. Let's improvise
here a little bit. The way I can get rid
of this cut up until this point here is
that we see that we have 1234 edges here. Now if I just take
this one and I delete it now here, let's see, 123456. Okay, Now if I go from here and I collapse
all these edges, I can actually press this. Edges collapse and
dissolve edges. There we go. So
let's see how much. Now we have 123.4. There we go. Now what we have here
is basically a quad. I can push this, maybe
something like this. One can go a little
bit like this, one can go a little
bit like this. This here is a quad. That's what matters.
We can go here, so we can push it a little
bit closer to them. There we go. Now we just need
to do is do the same here. X collapse edges. Here is also quad
as you can see. Let's just keep this
a bit more cleaner. Push that one a little bit
too much, I would say. There we go. This part
here, that's fine. Let's see this part here. We'll worry about this
later. Let's just first clean up here. What we have, what
I need to do is just collapse edge,
collapse, edge. And I'm just going to
repeat this all the way here. There we go. I'm going to push this here. I think I can collapse this one. Collapse edge. Let's see,
What do we have here? We have this one.
We have this one. I think I can collapse two. I can even get rid of this one. The solve edge. And now here I have 12341234. I have quads. That's good. Okay, everything
here looks fine. We do have this side here. We need to do the same here. I believe if I collapse, let me see if I do this, I take this one out, even, oops, let's go back. I might even actually be able to collapse, because
we have four here. I just need to take this
one out to solve this edge. Then if collapse this group, now we have 1234,
Sorry about that. And then here I can just do the same collapse
this group collapse. Now we've cleaned up this part. Let me just go back here. Let's push this a
little bit tighter, push this a little bit tighter, push this a little bit more up, push this a little bit tighter. So it goes like this,
this can go here, this can go, this goes like
this, this goes like that. There we go. We're just cleaning it up a little bit
so it doesn't look so messy. And that's what we're going
to be doing the entire time, just going back and forth
and cleaning things up. I think we are pretty
much good with this side. I do want to push this like this and then this like
that to match up. I think this part is
good. Let me just go and take a look here,
how this looks. Everything just so we clean
it up just a little bit. That looks good. Let's
push this bit like that. That looks fine. This
looks good as well. Let's push this one closer
to this edge also fine. We can push this closer to
each other to tighten it up. I think that's about
it for this chapter. Perfect. We are actually now done with our
smoothing mesh. And what we're going
to be doing next is expanding what we
started building off here with our front
part of the train. We'll do that in
the next chapter.
10. Building the Front: Finally. Now go back to
building up our actual train. Let's finish up building
this entire front part. I'm going to go
into my front view, and then from here I'm going to, in my face select mode here, number three, I'm
going to click here, holding shift here and here. I think that's all
that I really need. And then 'minglic shift
D to duplicate it. Escape, and then to
separate by selection, I'm going to click on
this dot here to go into the edit mode of this new
part that we just duplicated. I'm going to put it into train. Dragon drop into train. I'm going to hide
the smooth mesh and make all of
this here visible. Then while I'm in the edit
mode of the smooth mesh, what I can do is
slick control R, scroll my mouse wheel
three times on this end. Then maybe we can even do
it one time on this end. I can take this edge,
push it over here. I can take this one,
push it down here. Can maybe spread out these two. It looks a bit better
then from here, let's see, we can put
it a little bit lower. But then we also
can go here into this mesh above, Take this edge, take this Ft, pardon me, and then go a little
bit up like this. There we go. Let's just
see how that looks like. Yeah, that looks pretty good. I would say we can
take this edge, push it a little bit more
here so it's not so tight. Let's see how it looks like
on the corner and okay, we should probably take this and then push it
maybe a bit more front. The issue here, okay, now I see the reason why it's
not a line as a matter of fact is because we did not add a shrink wrap
modifier to it. Let's go into our add modifiers, shrink wrap, and then add
here the smooth mesh. There we go. Now
it fits perfectly. That makes more
sense. Excellent. Now if I go into front view, everything looks
good on this side. We don't even need this one. I would say I can
solve this edge. Then here what I can do is I can push this a little bit more up. We can push this a
little bit more up. Maybe I can push this one
just a little bit down. Just get this warning. Let me see how this
looks like on this side. I think it is going to be fine. I can push, this may be
a little bit more up. Not too much is just like a little bit of tweaking here
and there that we're doing, but I think this is
going to be fine. Okay, now I just need to take, let's see, what are
we missing here? We're just missing the
solidify modifier. So this one here, we can
go in here and add it. Let's go into add modifiers. Add the solidify one. There we go. Let's see how much is
the solidify here is 0.01 negative one offset
0.01 negative one. They're using the same offset. They're identical
and that's perfect. That's great. Let me go
into my smooth mesh here. I just want to test out and see how this is going
to look like if I take this edge and I just push it a
little bit more here. And this is going to do is just soften this corner up
just a little bit. Let me go back
here. If I do that, I get this issue here. I don't really like
that shading going on. I'm just going to take that
as it was, to be honest. Even just push it
just a tiny bit. Yeah, there we go.
That's much better. Perfect. Now we just need for the final part to add this
yellow at the bottom. We can do this so that
we don't have to go and read all of the shrink wrap and the solidifying all the out. For this one, what we can
do is simply click on this final edge while holding
Alt, Selecting entire edge. And then shift to
Duplicate the edge. Click Cape, Go and Separate. And then click here. Click A to select All. And then now to ex Z, to extrude downwards.
There we go. I can now click and then
zero to flat it all out. I'm going to add one cut here, and I already have one over there, so I think that's fine. I might add one here
at the very bottom. I'm going to click on this edge. This new measure that I
created, Shade auto, smooth. There we go. What I can do here is
maybe put one more here at the very top just to
tighten it all up. And that's about it. There we go, we have our entire front part
of the train completed.
11. Cleaning the Front & Building the Top: Before we go and build the
top part of the train, I do want to clean this up. It has been bogging
me a little bit. What I'm going to do,
I think this is just going to be the best
and easiest fix, is I'm going to go into the
smooth mesh right here. I'm going to focus on
these four vertices. I'm going to start
off with these two. What I'm going to
do is just press Y and then push them a
little bit inside. And I'm going to
push them a little bit downward, like this. And I'm going to do the
same with these two. I'm going to take
on Y like that, and then I'm going to go G, G. Let's see how this is
going to look, clean up. It's not as aggressive. This part here, I think this might just fix it
up the amount that I want. I see it's not too aggressive and I
push them all together. Get one more time here and
push this one more time here. If I go with these two and then just push them a
little bit more down, a little bit more down
with these two as well. Ideally, what I would want is maybe this
one to go like this, then this one to go like this. Right? And then can movie
this up just a little bit. Let's see why we've done it now. Let's see if there
is any impact. Oh yeah, for sure
there's some impact. It's barely noticeable,
but it cleaner, I would say in total. When looking at it, it
just looks cleaner. What I'm going to do now,
when looking at this, there's a bit more
of a bump here. This isn't really
going to be visible, so I'm not going to focus
that too much on it, as a matter of fact,
looking at it Now what I do want to do is push
this even closer. I'm just going to go like
this and tighten the gap. As a matter of fact, even though this gap
isn't going to be visible because it's
going to be covered by the rail for now, I am more than happy with this. This looks great, to be honest. What we're going to
do now is then to focus on building the
top part of the train. We can do this in two ways. I'm going to, I'm not even
sure to be honest which one is going to work better
for the first attempt, what I'm going to do is I'm going to go into the
smooth mesh here. I'm going to hide the train. I'm just going to select all of these vertices and see
once I duplicate them, how that's going to look like. To speed up this
process of selection, I'm going to click, so I go
into this Select Circle mode. And while holding shift, I'm
just going to go like this. There we go. And I'm going
to do the same here. I just want to make sure that everything here is selected. And then everything here in
the back is also selected. This part we can keep as is. We don't need to do
that or anything. Let's just look
here on this side. Yeah, I would say this is good. Then here on top, I
would say this is good. Let's see if this
is going to work. I'm going to click, then I'm
going to go into separate, there we go, I'm going to
go into this one here. I'm going to push
it into the train. Now I'm going to hide
the smooth mesh. I'm going to make
the train visible. And this looks pretty
good, I might say. And we don't even have it yet wrapped around the smooth mesh. We need to still add our
shrink wrap modifier here, then put it onto the
smooth mesh there. We're going to need to
push this a little bit up. That's fine. We can
even do that right now. Let's see what are our options. Let me go click a
couple of times more, so I get back to the
box select mode, which is what I want this here. Let's first try by clicking on all of these and
just pushing them up. I think we even selected extra. We can select, actually select these all the way here at this edge and then
just delete the edges, or delete the vertices. There we go. Now we
can take this vertice, just push it here,
close this gap. There's also this one
here. Let me see. I think this is a
reagent over here, so we can even
delete this vertice. It's not going to kill us. There we go. I think that's more than good. We can make it
tighter if we want, but I don't see it's
making any impact. Now I'm going to keep it as is. One thing I do want to
add is the solidify. Let me go here and add
the Solidify modifier. That looks really
good. There we go. We have added the top
part of the train. Now this is starting
to look like, this is starting to take shape, is starting to look
like something. Let me see if I push this. There we go. Now we're
tightening it even up. These edges really aren't
going to be visible. Like this edge here isn't going to be
visible to be honest, because it's going to be
covered by this rail. We don't need to worry
about it too much, we just need the out
external part of it here to look good and to have
somewhat decent topology. Because that's the
part that we want to, that we need to worry about. To be honest, everything here now looks good to
go to the next step.
12. Building the Side - Part 1: At this point, it's up to us which part we want to move
on and start doing next. When I look at this
mesh right now, there are a few minor things
that do want to clean up. The first thing that
pops in my mind is this corner right about here. What I'm going to do is
go into my smooth mesh. I'm going to hide this
train. Going to edit mode. I'm just going to push this a little bit more up
somewhere around here to make this transition
a little bit smoother. Let me see how this looks. Okay, let's see now if
that made an impact. Did make a little bit,
but I do want to do it at this point
here at this cross. Let's go back here in the train. I think this is, this end here. If I move this little
bit more like that, maybe this one at
a little bit back, I think this is going to help me get what I'm looking for. Okay. I'll just need to maybe
clean up this portion here. Okay, Let's clean up this
portion right there. Perfect. Let me look here. That looks a bit better. Not too much better. Something is still a bit off, and I think it has to
do with this edge here. If I go into the smooth mesh, push a bit here. If I push a bit more, let me see, from the front view, push a little bit more. Okay, then now I go here. Okay, that does
help a little bit. Now I just need to
go back in here. What can I do here to make
this work a little bit better? This corner, just
pushing it here, I think is going
to do the trick. I think that's going to be fine. We could add potentially
one more edge loop here, but let's not do that for
now. Let's keep it as is. I think this is fine for now. And then if it bothers
us, if we see it, it causes any issues later or if we cannot
fix it or hide it, we'll worry about that then. Okay, let's now continue in expanding this
part over here. So we're going to start with something easy, which is this. To do that, let's just
go hide our train. Click on the smooth mesh and then go into
our Z face select. And then select
these 1234 faces. Five faces we have here. I'm going to click shift
to click by selection. Then I'm just going
to click on this one, push it into the train, and then hide the smooth mesh. Unhide all of the train
exit the x ray mode. From here I'm going to go
and add few loop cuts. We're going to push these
loop cuts all the way up. I'm going to push these
ones all the way down. I'm going to push these
ones to this edge. I'm going to push these ones, this edge and these two. I'm just going to spread out
somewhat evenly like that. Then over here, I
can decide whether I want to push this part
here closer to here. I can push this one closer here. I'm going to try and push
this one closer to there. We don't want to want too much, but just a little bit
to close it all off. I think something
around here is fine. We can push this one
a little bit back. We might even push these
ones a little bit about, right, I would say. I think just having
it, something like this is going to be fine. Let's push it maybe
a bit more closer. That's good. One more
thing. Sorry about that. Let me just, if we look
at the height of this, we do want to lower it down. Let's just go right about here. This matches to this part. Now, I can just push this
edge to tighten it up. There we go. We can do
the same here twice, putting it closer,
tightening it all up. Now last thing that's remaining is adding the solidify modifier. There we go, we have a solid. It looks good on this side, looks good on this side, looks good on here as well. We can lower it down
just a little bit so it fits better with this part here. We have it all a bit
better matched up. Let me just go here,
00 it all out, perfect for this part here. We're going to have rail
going through here. We're going to have this
thing going through here. These parts that
are not connecting. They're not going to be visible. The idea, it's not going to be visible that
they're not connecting. Having a little bit of this
space is perfectly fine. Even this, a little
bit on here is fine. We don't need to
worry about that. We can just hide it. It's not going to cause us
any issues in the long run. Having it all like this
for now is more than okay.
13. Building the Side - Part 2: This video, I want to focus on building this yellow
part of the train. And only up until
this point here, we're not going to be
building the rest of it, we're just going to be
focusing on this side here. The reason for that
is quite simple. That's because the
same technique that we use here for building this
side and these windows and everything here
is going to be pretty much the same
technique that we're going to have to reuse for each part
here of all these windows. For now, for this section, I'm just going to try to
do this slow and take my time with it so
that you guys can better understand why am
I doing certain things. Then this part, later on
in the next video where you're just going to go speed through or try to speed through. To get started with
this part here, what I'm going to do is simply go into my
smooth mesh right here, and then I'm going to
hide my train collection. I'm going to go Tab and then all see so I can see the faces. Before I start doing
anything else, I do want to push this edge, so I'm going to
go into the edge. Select here, and
I'm going to push this G little bit up
here just for later. This is going to just save
me a little bit time later. And no, I'm going to go
back into my face select. And I just want to select all
of these phases one by one. That, there we go. Now
we're just going to do the usual shift to
duplicate all the faces, click, escape, click to separate by selection.
There we go. Now we go here to change the object, the
current, there we go. And then drag this
one into the train. Go into our train collection, hide our smooth mesh,
and there we are. Now this is going to
be a great opportunity to actually use one of the plug ins that I
showed you how to install at the very
beginning of this tutorial. The plugging that we're
going to be using in this situation is going to be called the copy
attributes plugging. And we could have used it
even in this method here, but I did want to go
slowly at the beginning, but now we do want to
speed up the process. For instance, we see
here that this mesh that we just created has the mirror and the
subdivision modifiers. And we know how to add these
modifiers by hand, right? Even if I go here and
click on this one, we see that here we forgot
to add the shrink wrap. Or matter of fact,
I forgot to add the shrink wrap kudos to you
if you've already added it. A quick and easy
way to do this to the modifiers that are
here and transfer them to here is the copy attributes
plugging that we installed. The way it works
is quite simple. You just click on the mesh that you want the attributes
to transfer to. This one is now here. Then you click on
the mesh that you want the attributes
to transfer from. What I'm saying now is that everything that is in
light, red, light, yellow, transfer these
modifiers to this one here. I click here first, and I
hold shift, I click here. And then I want to transfer all of the modifiers
from here to here. I just press control C
and I go copy modifiers. Now if we look, we can see that all the modifiers that
we're here are also here. Now in this instance, we are missing the shrink
wrap modifier. I'm going to do the
same now. I'm going to click here, Hold shift, click here, rest
control, copy modifiers. Look, the shrink
modifier is right there. It copied everything perfect. Now from here, what
we're going to do, let's just clean this
part up a little bit. I'm going to go a Z.
I'm going to go into my edge select mode from here. I just want to push this
a little bit more down. I'm going to add one edge loop here to tighten it
a little bit up. I'm going to do the
same here on top. I'm going to add
an edge about here to tighten all up zero. I'm going to do one here, basically one to each corner and I'm going to tighten
this one up as well. Y zero. There we go, Perfect. Now, next I want to do is I'm going to take
these two edges. I'm going to just
push them down. 01 here. Push it zero. Now I'm just like cleaning
up my geometry here. Y zero. Oops, there we go. Y zero. I'm just pressing G twice. Moving the vertices, positioning everything to
be straight as possible. There we go. We
added an edge here. We added an edge here.
We did add one here, and we added one
here. That's great. Now we need to add one
here in the middle. Now we just need to
start tightening up, adding a few more edge loops. So we're going to add
one here to tighten this corner up one here
to tighten this corner. If you can see what I'm doing is basically what's
happening is this, as I'm adding the edge loops, they're tightening up
these corners right here. There we go. I'm going to add one here from the outside of
each of these corners. You're going to need
to add one edge loop. We're just going to
make sure that there's basically one on the
outside of each corner. Let me see. I think I don't
need this one here. Yeah. All right. I think these
are all that we need. Now, if we look
at this geometry, there is definitely room
for improvement similar to what we had here when we
were building this part. Let's improve the geometry
here a little bit. The way we're going
to do it is simply by clicking Do the Knife Tool, and then we're going to
start cutting in edges here. I'm just going to
create an edge here. Then I'm just going to sell, select this entire edge here
and simply dissolve it. I'm going to do the same one
with this here. Dissolve it. That's going to create
these two quiz. And everything is good here. Let's do the same over
here, except here. We're just going to go
like a V shape here. Now we can dissolve. We can dissolve, let me see. We can dissolve this edge here. We can dissolve this edge here. I think. We can dissolve
this edge here. There we go. Let's do the same here. This is the process that we're just going to be doing
all across here, which is adding loop cuts and
then cleaning up the mess. So you could really keep
it as it is right now, but you are adding
extra geometry then, especially if you, if
you have a larger scene. It's just a better practice because you do want
to worry about optimizing your geometry
and optimizing your scene, depending on what kind of a
PC you have just did here, was aligned these edges a little bit more
with the corners. What I was doing now I'm
going to go back to what I started initially to
remove these edge loops. Let me add one here
and then remove these edge loops. There we go. I think I removed
one wrong here. I should have taken this
one out and this one out. Then here I can
just do the same. Let me go and cut like
this, like a V shape. Then these inside ones out, I'm taking out this one here. Then the last one
is this one here. There we go. Take out this one, Alt, left click, take out. I think these are all that we can even
take this edge out. We don't need this edge.
All right, that's great. From here, what we can do now next is simply select these ones and push them
a little bit more here. We can try to match up these
corners a little bit better. They don't need to
be the same and identical as the
ones on the side, like these ones don't have
to be identical as these. They can be a little
bit different because we do want to
add a little bit of that imperfection and try to destroy the, how
would I call it? How do you say
proportional side of it? We don't want everything to
be quite identical, symmetry. We want to destroy the
symmetry a little bit, because nothing is fully
symmetrical in the real world. There we go, I can
see that there's this corner over here
on top, this edge. We don't need to fix this,
but we can later on. The reason why I say we don't
is because like I said, the rail is going
to go over this and it's going to
be barely visible. But we can spend some time
later on and try to fix it. Once we're done with
the rest of the train, let's go here into right. I am going to select
this edge here. Just push it a little
bit inside. So G, Y. And I'm going to push
it to close down this gap a little bit. And then I'm going to
select just this side here. These three edges. These
three vertices, my bad. Then just go y, try to close
it down a little bit more. I think that's perfectly fine. Let me see. Yeah, that
was good. Excellent. All right, I think this
concludes this video. We're not going to be
building the shield, the windshields, and again, I really have no idea
what this is called. We're not going to
be building that yet and we're just going
to be focused on building the yellow part. And then once we're
done with that, we're going to select
all of them and then build them at the
same time so that we don't have to go
and build one by one or two by two or et cetera. All right, so this is it for this video and I'll see
you guys in the next one.
14. Cleaning up the Side Mesh: Before we start building the
rest of the yellow side, we need to do a little
bit of clean up. Primarily, that's
going to revolve around cutting this part out. And then also we
need to clean up the smooth mesh
once we cut it out a little bit so it
all fits nicely. Let's start with the easy
part which is cutting. Let's go in here. Let's select all of this. Going to edit mode. Do this up to here, and just be careful
that you don't have any other
vertices selected. Let's delete here the
reason why we deleted this. I'm not sure if I
explained it that well, but because this wraps around, as a matter of fact, what
we had is this going down. Instead of going down, we
needed to have it wrap around. Which means that
also this top part, it needs to finish
up until this point, which is why we're removing the vertices all
the way up to here. We can even go and delete
this part for now. Then over here what we
can do is click Sz00. It all out. We notice we have a little bit of an issue
happening right about here. It's not an issue, but we can notice it's a bit of
distortion happening. I think what we can
do is if we push these two edges a
little bit more inside, that's going to help us. We might need to push
this one a little bit more inside then. Let's see if we push this one a little bit more
down, maybe more outside. This might more or less help us with the
issue, all right? We're probably going
to need to have this part here before we can really know how well
this is all going to look. Let's continue with a little bit of clean up with the
things that we do know. Another thing that
pops in my mind is if we go into the
smooth mesh, go here. We can take this edge here
and just push up like that. There we go. Now the next thing is we need to be able to select
this entire yellow part. We have everything
good up until, I would say this
point, here we go, and clean this part up. So we need to push this Ftc up, we need to push this vertice up. This one then I think from here I was meaning,
yeah, vertice edge. I constantly mix those things
up. Which I shouldn't do. I know, but yeah, from here, let me see. Let's take all the way up to here while clicking this one. And then control while
clicking this one. And that it picks the
shortest path, then S zero. Then we're going to
take this one here, this one, push it up. We take on this one, push it a little bit up. Let's push it a little
bit up like that. Okay, let's go
from here to here. Oh, this, It aligns
nicely with that. I think we're going to
need to do the same here. Zero. We can even
select this one. I think if we have this one as active element and
we press zero, it's going to use this active element to
zero everything out. Everything is going to zero out based on the element
that we want. And that's what we want
to do. There we go. All right, we can even try
this one active and zero, and then that's going to
give us a better idea. I think this is good. This looks good here. We can do this one. There we go, zero. Let me see how this
is all looking. Okay. We can push this side. Now if I look at it, we might be able to push it
a little bit more inside. Let me just select
everything, Go into, I can select all the vertices, then try to push this a
little bit more inside. Just so we have a bit of a better fall off
happening here. Let's push this here. Let's push this a
bit more inside. We can take this one
all the way to here, and then press X zero. And maybe even rotate it. It fits a little bit nicely. We can do the same
with this one. Make sure that the
top part is selected. Rotate a little bit. Let's
do here also clean up. Zero, Z zero. Let's see how this
is all looking. Let's do all the way here. Let's go from here
all the way to here. I think that's where
how we were going to want to have zero. There we go. I think from here
all the way to here, zero. And then from here
all the way to here, we can just go zero and
then push it just a little bit down this one. We can do the same
for this door. We can actually, we can just go this as zero. There we go. I think that's about it. I really hope I
didn't miss anything. If I did, we're probably
going to have to just deal with it later on. Let's just see how
our mesh looks like. Okay, How does it
look over here? Okay, there's this part here that's a little
bit bugging me. Let me see if it's causing
any issues over here. There is some minor issues
that it is causing. Let's little bit of
clean up here as well. I could probably push
thing like this. I'm not sure if this is going to help me
though that much. We'll have to see. Let's
go into the train mode. What I could do here is simply, let's see, Well,
I have this here, I can take do this, then maybe add one here and this is going to
help me close the gap. That's a great help.
That work great. Now from here, what
I could do is maybe just try to this
inside a little bit. I can use this one here as the pivot point and then
just rotate inside. Let me see. There we go, Z. There we go. I think
this looks good. All right. This tweaking is going to also depend
a little bit on how you have your scene set up
and how closely you followed the steps
that I've been doing. I'm showing you essentially what are the things
that I'm doing, but in some instances you might think about how
can you make this closer and you don't need
to worry about having this little bit hole here is perfectly fine
because as I said, we're going to be
having rails again, I don't know how to
name these things. We're going to have
these rails go through, this is going to go on top
and it won't be visible. As a matter of fact,
that is perfectly fine. All right, I think we have everything as ready
as it can be for now. In the next section,
we can finally start building this thing here.
15. Building the Side - Part 3: Now that we've cleaned up
our topology a little bit, let's start off by building this yellow part of the
train. Quick heads up. This video is probably
going to take longer than all the
other ones because of the amount of
windows and amount of clean up that we're going to
have to do as we go along. It might even become a bit
of a repetitive process. If it does, I might speed this
video up later on in post. But one key thing is that we
are also going to probably encounter some instances in which we're going to have to do a little bit of problem solving, especially at the
beginnings of here. Here. Without any further do, I've already wasted
almost a minute. Let's start off with
this right here. Let's go into our smooth mesh. Let's hide our train. And now o z. Go into edit mode and start
selecting these phases. Just make sure that you are
in the select box mode here. Then I click like this. And also if you want toggle between the modes,
you can click here. Kk allows you to click on different
types of Select modes, but for now I'm just
going to stick with the Select box mode. I'm going to click here, Shift click here, Shift click here. And then from here I'm just
going to click with my mouse. And then drag it
all the way here, click here, drag
all the way here. And then click here, here, here, there we go. This is just going
to be a bit of a faster process
here because we now also cleaned up all the
lines that we had over here. This is going to be
very easy to select, just make sure that you
are in the x ray mode by all Z, right? And then going like
this. And here we have everything that we need. As a matter of fact now
we can just do the usual, which is Shift to duplicate, click Escape to put it back
in the position where it was. Click to separate, and then
separate by selection. Click this here, the new
mesh that we created. And then drag it into the train. Hide our smooth mesh. And then unhide the train, exit the x ray mode. And here we are. Now this is
what we're starting with. Perfect. From here. What we want to do
is we just want to join these two
meshes together, this one and this one. If I click on this
one first and then click on this one, if I join, it's going to take the meshes from this one
and put them onto this one. I might want to do is click
this one and then go here. That way all the modifiers that are here are going
to transfer here. Let me just see if I click
Control and J, I was wrong. What you need to do
is click on this one, go here, and then control J. What I did was I
just did a couple of steps and then I went into here. And there we go, now
we join them and all the modifiers that were here got transferred
onto this one here. Now if I click on it, we can see that it has all become one mesh. I'm just going to
undo one more time. So you can see if we
have these two here, had them selected, click J, then that's what we got. It transferred the
modifiers as well before, but now I have to go like this. The control J, there we go. Okay, that was a bit
too much explanation for something very
simple, my bad. But the next thing
we want to do now is merge them also here
with the vertices. To do that, what we're going
to need to do is go into al Z and we need to make sure
that we have this vertice. We can put it somewhere. Actually, let's take
this one here and put it closer to this one over here. If I hover my mouse,
if I scroll over, we can see that even
though it looks like we have one
selected over here, it says that we have
two vertices selected. We can see there's
two right there. If I do this, select
those two vertices, just make sure it
says two over here. Click merge at center, It's going to merge them
over here over here. I'm going to do click like these two as well,
and then merge them. And there we go. This is our
starting point now that we have all of this
connected here like that. Okay, from here there's
going to be a little bit of, like I said, problem
solving that we're going to need to tackle primarily. It's going to have to
do with this part here. What I'm going to start
off with first is I'm going to start by
adding a edge loop here. I want to mirror everything, how this side looks to
everything on this side. I just want these two
sides to be pretty much identical in terms of how
the topology is done. I want to do this, then I also want to add one
here at the bottom. I'm probably going to
have to go and add one over here as well, okay? Now, what I want to
do next is we see that this goes here and it connects,
which is pretty much. It's the same thing as this one. This one needs to
go up like this. There we go. Then from here, let's see what we
need to do next. Let's see, this one goes
there, this one goes there. Okay? We need to add another
cut all the way here. It follows this structure. That cut needs to go from
this part all the way there. As a matter of fact, we need to take one cut and just
start going like this. Click it creates
the cut one more time into our knife
tool and start cutting. And then I press to my middle, tap, middle mouse button. I click here, sorry. One more time. There we go. Click. Click Enter. And then from here I go, I click, I'm going
to go all the way. I probably I'm going to
come up to here for now. There we go. I just
want to make sure that everything here
is just one perfect. Okay. I'm going to
come up to here because I'll deal
with this part later. For now, I'm going to
deal with this here. Okay, From here what I need to now do is add one more cut. It's going to go
right about here. And that cut is pretty much
mimicking what we have here. We can press S and then
zero G. Put it down. Okay, there we go. Now over here we can get rid of, let me see, this goes
all the way here. That part. But then this part
goes all the way also here. But this part we don't need. We can take out this part. We can add one more
cut like this. Then we can go Y0g. Put it like that. Now if I have four cuts
here, 123 vertices, 1234 forward vertices, four vertices
everywhere over here, I have four vertices, and this side looks
identical to this side. Now for here, it's a bit easier. We just need to go like this. Add one here, add one in here. Then we need to do this, I believe we need to just
remove this one here. We need to remove this one here. And this already
matches. Pretty good. Let's not worry about this, we're going to come
back there later. I just wanted to go back and see while we're here,
we can do this one. This one is really easy. We
can just push this here. This pressing twice,
push this one here, push this here again,
pressing twice. For now, what I
just want to check is this part here and
how to handle this. The way I handled
this here is I went all the way there and
then I connected it. I'm just going to go
all the way here. Then I'm going to
connect this, I think. I'm not sure. My bet. I'm not 100% sure if
I'm doing this correct. So let me just check. It does need to connect to this one, and then this one would
probably have to go here. And then from here I need
to add one more cut here. I need to add one more cut here. And then I need to take
out this one here. I think that solves
that part for me. Let me just make sure that this looks identical over here. If I push this here, then I
have something like this. I have two, and then this. Then if I go here, I would have to put this probably
like that to have that. But the reason I
don't do it here, I should probably do it here
as well that I look at it. And I should probably do it
here then I should probably do this. There we go. I think that's really
what I was looking for. I can push this one here if
I want to make it like that. Exactly. And this
could also go lower. But we want to keep this edge as is. Let me see if I do this. Push this down, there we go. It doesn't really affect
this edge, so that's good. We can do the same, probably. Let's see all the way there. We can also see here
that this one door is actually higher than
the one before. Let's just keep that as is. Okay. Now from here I can go even from this side
or from the other side. I'm going to start
from this side. While I'm here, I'm
going to start adding. Loop, cut here, loop cut here, and then with the knife. And then take out this
part. Take out this part. Loop, cut here. I
want to add one here. What I can do here is go
like this in the middle. And from here, go
like this, like this. Take out this part,
take out this part. Let me see. Do I need this part? Well, what was the point of having do need this part then? There we go. Perfect. Let's go continue. Let me just double check. Yeah, I'm doing everything
good on that end. Then here we just
need to do the same. We can start actually
by adding a loop, cut each middle part here. Now this is, like I said, this is the part where it's going to become a
little bit repetitive. I recommend you try
doing it on your own, but you can keep the video on, then follow and do your own the check if your
topology is okay, If the loop cuts, if you
have only quads and tries, we're going to be
doing a check up once. We're also done
with this process, there's no worry about that. Let me see, I don't
need this one. There we go. Because
sometimes mistakes can simply happen by default. For instance, right
now here I'm noticing I need to do this
because I forgot it. But then as I do that, I
need to do this, do this, And then I need to push
one more here because it becomes so repetitive and
sometimes a little bit simple. You think that I
notice by heart now, then all of a sudden you
just make a mistake. Which is why it's also good
to have some a process. In my case, my process was to practice this
video a couple of times. I wouldn't waste too much
of your time on trying to problem solve myself again. What we're doing
now is just making sure everything here is in
quads and connecting this one, It is pretty much the
same process that we did right here at
the very beginning. The cool thing is because
once things become a bit symmetrical like
they are right now, you start noticing it. And it's much easier to tell if something's
right or wrong because we see that these two are the same. Here is the same as this. Now, this is obviously different because
of how it's done. If I put this, these
two are very similar. These two are very similar. Things just start looking
pretty much the same. It does become a little
bit easier to notice if we make a mistake
somewhere like that. And then here I
just did a mistake. Instead of deleting
this one internally, this one and adding a cut here. And let this one internally
adding a cut here. I should have pushed this one. When you rush things, it just
sometimes doesn't end well, which is what I just did
now, rushing this one. And I didn't do
well because of it. Let's see, something's
not right here. I took that one out. I do
need to take these two out. There we go. But then I also
need to take this one out. Okay, there's
something wrong here. This one goes fine. But this here is
unnecessary ledges. Dissolve vertices. Let's see why did I
add. That's just odd. Let's start resolving
this edge first. Okay, let's solve this edge. Let's solve this vertice. Let's solve this edge. That's just weird, but like
I said, when you rush, sometimes things like this
can happen from here. I'm just going to push this
knife all the way here. Actually, here is
where it needs to go, then this one needs
to go all the way. Here to here. Then here. This one just should probably
go from here to here. Or starters, I just
lead this face, there we go, here. I just need to connect
to this one. Let me see. Then I need to connect this one and I just need
to push this one there. And then I need to take this
one out. Looks like it. Just make sure that
you have your edges. So I think the issue
that I just did before was I was in a
verdict select mode. And so when I was selecting
it deleted the vertices. Instead of just selecting
this edge, it extended. So it extended further than it was supposed
to essentially. All right, everything
looks good. I can just line this up
a little bit better. I can connect this here. This looks good. We haven't
done anything here, and we haven't done
anything here as it looks. So we can just need to do that. Do this, like I said, this is a repetitive process. I might even let me
see how far we are. We come three, I'm going to go all the way halfway
through and then I think I might speed things up up to here
maybe or something. We'll see we're not doing anything new
here, realistically. We're just repeating
the same old tricks, the same old tools that
at the very beginning, just now, we're doing them
in a much higher volume. A little bit, maybe
quicker, I would say. With a little less
explanations so that we can speed this process. Yeah, I'm more than
halfway through. I think these two, I guess three windows, I'm going to now speed up. And then, let's see, I'm just comparing these three because these guys
are a bit too tight. I, C, Y, okay? Because there we go. Okay. Yeah. So I'm going to speed
up now. This part here. All right? I think that's it
on this part of this side. Let's now do a final check up. Because I see, for instance,
I made a mistake here. Didn't dissolve it, didn't
dissolve this edge. And then I didn't do, as a matter of fact, I
didn't do anything here. All right, let's do a final
check up just so we make sure visually that everything
matches and is in order. If I look at here, this is fine. These guys are
fine. There we go. Everything here seems
fine. All right? Everything here
also fine, I think. All right, here, this part
looks a bit different. We need to do this. Get rid of the triangles. So we have a perfectly
beautiful quads, okay? Everything here
looks fine, okay? Everything here looks great. Excellent. Yep. Everything
over there also looks good. Let's see this. Everything
here is looking good. Okay, let's now start adding
an edge loop also here. We can add one, I believe, here. If I push this here, then
I need to take this. And then we can just keep
this one as is for now. Because we have no
windows on this side, There's really no
need of doing that. We can just go this one here that we look at our geometry,
that's pretty good. We can lower, let's see
what we could do here. Okay, we could lower this one. And this one goes going way
too high, it looks like, which is also
messing up modifier. Yeah, I think this is messing
up the modifier a little bit, which is what's
going on there. So if I push these two up, that's going to be a bit easier Then here I'm going
to take this, push it a little bit more down. There we go. We could add one here that's
going to help me with the corner if I really want to have
that type of corner. Later in the next video,
we're going to focus on matching these doors
to look similar. And we can also do
here, we can go here and maybe a little bit lower. Take this one is, that's fine. We're probably going to have to push this a
little bit lower. We can do that now let's
do that now first. As a matter of
fact, we just want this to match up with this here. And SC, there we go. Then we can go from
here, select this edge, all the way here. There we go. We can select all the way here that we probably take this one and then just drag
it down so that it squeezes. I think that is good for now. This video is very long
by default already. Even with the time lapse
with speeding things up, it's still very long. Let's cut it short here, then. Next video, we're going to clean everything here up so it matches a
little bit better. And we'll also do the
windows. All right guys. I'll see you in the next video.
16. Adding Windows & Cleaning Up: That we've done this part here. Let's do a little
bit of clean up and just double check if
everything is correctly done. First thing we can
check for right now is do we have only
quads or are there any tries or polygons in
general here in the scene? I believe last time we did add this quick shortcut
for faces by size, we created a shortcut, but in case we can
just always go here, select, select all by trait, and then go faces by sides. Now here we can tell which
faces we want to selected. Right now, blender is selecting all faces that are
equal to four. But what if I say, I want all faces that
are equal to three? Show me this part here. This part here. This part. There's a couple of places
that I made a mistake. Looks like that I didn't do
a good job of setting it up. Let's see if there's
an with five. It doesn't seem to
be that we only have a couple of triangles
that we need to clean up. Let's start here
quickly. Let's see what's the issue that
I did over here. Over here. I didn't take out this part here because of that. Right now we're getting this
triangle of three vertices. So I'm just going to
select this edge, so I'm going to
press number two. And let me go back here
and add, there we go, Sur. So you guys can see all the
keys that I'm pressing. What I need to do here
is just click Alt left, and then I can hold shift, click Alt left to
cycle this one. And then I can go X and
then dissolve edges. Now we have quads here, which is perfect,
which is what we want. Then let's see what was
the other place you see. Now, it's really cool
to have that here, because I can just go
like this and say, okay, this is the
one that I missed. There's one over here,
over here. What I missed? Let's see, I didn't delete this. Solve this edge,
and I can just push this here a little bit. And then I can go
again, faces by sides. This is the one that I missed. I need to add one loop, cut here like this. I need to take out this one
so that we can get quads. There we go, I think that's all. We can go, like this, four. And then we can say
less than four. Okay, And then we
can go than four. We can also select all of it. So we can go just press A
and then go into Edit mode. And then deselect everything
presque, basis by sides. Let's see, Greater than four, it looks like nothing
is getting selected. Which is good? Less than
nothing's getting selected. That's good as well.
Great. Let's see what do we all have here? That's good. That's good. Now let's start aligning these windows a little bit more closer to what we have here in the
reference image. We're going to do this manually. We actually don't
want them to be fully symmetrical to each other. We do want to leave a
little bit of room for that difference or imperfection. As a matter of fact,
I'm just going to push some of these here on push. I'm just eyeballing that. Which is fine. I'm going to push this one a little bit here. Then I'm just going to press and push this one a
little bit more up. This one a little bit more here. This one a little
bit more like this. You can do this at your
own reference and pace. That is going to
be more than fine. As I said, they're not going to look exactly identical,
which is fine. We do want some
similarity but not exactly complete because
once it looks completely, your eyes immediately
will notice it and you want to
disrupt the pattern. Our eyes are pretty
well trained in recognizing patterns three D. Well, whenever you build
something in three D, if you probably noticed by now, everything tends to be perfect. Perfect angles, perfect shapes, corners, sharp, et cetera. So our role here when
it comes to realism, is to almost break
that perfection, because the actual world around us is full of imperfections. That's really one of the key
ingredients for realism. Now, naturally imperfections, especially when it
comes to symmetric symmetrical parts or things, are less common in hard surface. Realistically,
something like this is probably going to be made in a factory and it's going to look very similar to each other. Almost identical, but
there's always going to be a little bit of
that difference. Nothing is ever exactly alike. All right, let's go here. Let's lower this. Somewhere
around here is fine. I think somewhere
around here is fine. Can go here a little
bit more inside. Push this one a little
bit more inside. Let's see how that look.
That looks perfectly good. If you ask me these
corners look good as well. There's a little bit of a bump over here and I'm looking at sold lower this or
should I lower that go? A Z can lower just this here. Is that going to
solve our issues? Again, we don't have to lower it fully again here. I know we did a little
bit of changing here, so let's just push
it a little bit more down. Yeah, that's good. Let's see, what else do
we need to do now here? Well, let's go and
add our windows. To add the windows here, let's go and ******** shift. We do multiple selections
and just click on the corners of these
loops that are going. Now we're going to add first the wind shield shield or whatever the rails or
whatever this is called. Just make sure that you don't have active elements selected but instead
you can have, I believe, individual
origins. This. Now if we press, and then we are extruding inwards and they're all going to be more or less symmetrical. One thing that actually
don't press anything yet. Click, escape, click. Let's see, Yeah, we did this. Let's do this. Let's go do a few more. There we go. Let's go
and select this one. First of all, we forgot
to do is separate them. Once we have all of them
selected, let's go. And then there we go. Now let's click on this. Here, let's click A. So it's going to
select all of them. And now we can go.
And then there we go. Much better, perfect. From here I do want to push them a little
bit more inside, so I'm going to go into
my solidify over here. I'm just going to go and type in negative 1.5,
maybe even more. I'm going to go
maybe negative two. Let's see how that looks. I think that looks great. I'm going to go she
shade auto, smooth. Now we just want to do the
same thing just for the glass. For the glass, We're just going
to select the windshield. Think that we just did. There we go. Let's go
into our right view. Perfect. Let's click Tab. And then let's make sure that all D's edges are selected
as they are right now over here that I have only
have D's edges selected. Let's go shift, click
Separate the selection. Click on this one here. Now the new one that we created, click a, slect them
all, and then click. Now that we have
this, it's really all about connecting them. We can go click
here, click this, connects to this, this
connects to this. Clicking J connects to this, and this one to this one. Now you just need
to repeat this step for all of these individually. I'm going to just speed
through this, to be honest. That's pretty much going
to be it for this video. We are right at the
ten minute mark. Let's just call this
one more or less a day, you can just continue repeating the same process and I'll see you guys in the
next video then.
17. Adding Modifiers, Cleaning Windows & Building Sides: Before we start building this red desk part
in the middle. I noticed the small issue and it might also happen to you. I'm not sure if you've
noticed it or if you have it, but if you have encountered
this issue where the mirrors, where the glass is
going outwards, it's because of our offset
from the solidified modifier. But if we take a closer look
at it, as a matter of fact, we can see that some glass is
actually set up correctly. And then if I go
like this, we can see that it's almost inversely, moving oppositely
from one another. What is actually
causing this issue? Well, if we go into
our edit mode now, and you can actually see, I already figured out the
culprit of the issue, but let me just show
you from scratch. If we go into the
edit mode here, then we go into here,
viewpoint overlays. We can go and check if we want to see our
normals from here, we can go and click
like this or you can, these are your essentially
display normals. This is split normals and then this one here
is vertex normals. If we show where our vertex
normals are pointing in, we can see that some of them are actually pointing in
the opposite direction. That essentially just means that the vertices are
opposite from one. Another set of vertices
is actually opposite, and it's facing the
wrong direction here. Even though our mesh
here looks okay. This one is opposite of this one in terms of the
direction that it is facing. To fix that, what we
need to do simply is go and click A to
select all vertices. And then we can click
Shift in the letter. And that is essentially
just going to reset or recalculate
all our normals. And here we can
actually say, well, do you want to recalculate them towards inside or outside? In this case, obviously, we want to recalculate
them outside like this. Now, all of them are properly aligned in
here. There we go. I don't actually even believe, if I go and look into this here, I don't remember that we even used our solidified modifier. Yeah, this doesn't have the
solidified modifier at all. But you know what,
Let's actually keep it. Do need to do is just set it
a little bit more backwards. Let's do here. If I could go and
click minus three. It's going to push the glass
a little bit more backwards. And now we get this nice
shape, which is what we want. Then the next thing
that we want to do is I am thinking of adding a Bevel modifier
here so that we can add a little bit of
bevel so that we don't have such harsh edges. Later on when we're
doing texturing, bevels are going to actually
help us get nicer edges. Let's add a bevel modifier here. And we might also
add it here as well. To add a bevel modifier here, simply go Add Modifier. Let's click here.
Bevels. There we go. And then let's give it two. I think that's going
to be perfect. Fine, let's go something
like this. That's good. Then let's add another one
over here on this big one. Let's go and click Be. Let's add two as well. This is now going to give us
a little bit of there we go, I think two might
even be too much, and we are getting
a little bit of a shading issue happening here. We can actually hide these, now let's hide the verdict
normals. There we go. We are getting a little bit
of artifacts happening, certain area, which just means we need to clean
it up a little bit. The more I look at it, we might actually,
for now consider, let's see if we maybe
add one more set, can sometimes hide it. The shading issues if
we do it like this and then let's see if we
decrease the amount. That might also just get us
where we want over here. And then shade smooth,
shade auto, smooth. One more thing also
that we need to do, and I don't think we've
done for the train before, is if I go and let's
see something. If I go and click over here. Second, I think we might even
need to go into edit mode. How do I see face orientation? That's, there we go. This one here, If we go to our face orientation overlay,
well again, see that. These faces here are opposite from where
it's supposed to be. I think if I do the same
thing I did before, I go into the edit mode
and then we go here, we can see that, yeah, these guys are
pointing inward. We just need to do the
same thing we did before, which is click A and
then shift in to calculate them to go
outside that way. Now if I go here and
then uncheck this, if I leave this mode and
then go here into phases, I can see how everything
is blue, which is perfect. Which means this is that, That's good. Okay, let's see. One more thing now, you can actually add
this as a shortcut, which is what I have currently, so I don't have to go there. You can see here, you can
just go here and then re click sign shortcut or remove
or add to Quick favorites. That's how I have it. Let's
see what else can we do here. I am thinking that
this is maybe a bit too soft for my taste. Maybe adding just one segment, if you ask me, is maybe
even better like that. I'm thinking of maybe pushing
this even more inside. Even here, going smaller. I do want to copy this one. Let me see, here is 0.11
and we had two here. It's 0.9 Let me see if we make
it zero, It's very sharp. We don't want that because
nothing is as sharp like that. Then if we make it this, let's go, I think three I guess seems to
be the best option. Yeah, let's see if we can
do how does this look like? If maybe a little bit more
inside then we push the glass. Maybe negative four. I'm just trying to
get a much stronger, harsher shadow here, trying to see how that would
look like for this one. I actually don't
mind sticking out. I do like the idea of
it sticking out here. I don't think we
should put it out. Let me just see if we put
number three and then we put here number four, which is making it stick out. I guess we need to
make this thicker, a negative direction, a
little more like this, then push this glass a
little bit more like this. Does this look better?
That's the question. No, I like to push it inside. I do like it being inside more. I think this is what
I'm going to go with. I'm just going to
change the offset for the window, for the glass. But just for it goes a
little bit like that, Maybe negative 2.3 going
to hit the sweet spot. And then here we can just
keep it at negative four. Yeah, I think that
looks good. Okay. We've done that. We've
cleaned up all our normals. Now what we can actually do is just go and add the red part. I think that should
be very simple to do as a matter of fact. Yeah, let's add the red part
and then what we're going to have to do next is
also clean up this part. Because clean up our project
view here because it's slowly getting filled
and we need to name all of these things that
we stay organized. Let's just go into our
smooth mesh right here. Go into our right model
called Z tab out of it. Then from here, we
can just select almost everything from
here except these two. For here, what we
can do, let me see. We could push this one here. We can push this one here. We can push this one here. We can push this one. I would say like this. We could add, at this point, now, two more cuts. See, we can add one here. We can add one here.
Then from there, what I could do, we can
just keep it like this. And then we'll cut this out. Let's go and start
selecting all of these. That all the way up to here. Select everything here,
select everything. I'm just holding Shift while
clicking on all of this. Okay, that seems to look good. I'm just going to go
shift, scape, click. And then separate by selection, take this, push this
into the train. Hide the smooth mesh. Unhide the train, go in here. Now I just need to
click on this one, click on this one, and
say control C modifiers. Now that we've copied
our modifiers, we just need to start
cleaning up this mesh. Let's just a little bit
down right about there. We can make a loop cut
here to make this tighter. We can add one more loop cut
here to make this tighter. And we can add on to
make the bottom tighter, and one here to make
this tighter here. Now from here we just need
to add more cuts here. Let's add one here. Realistically we
don't need more. We could add one here, one here. We then we could
also do this here. And then that way I
believe that would work. And then also this
here would work, then this here that I think that just works
fine because I'm thinking, well, maybe we could just do the same trick that
we did before, which is cut this one out. But then I'm looking at, okay, if we do, if we cut this, let's see if it's going to work. And then solve this. Solve that does
actually seem to work. This is a, this, here is also a quad. Yeah, this does work. We
can actually take the, push them closer if you want,
or we can keep them here. As a matter of fact, it
doesn't really matter, at least at this point. Let's just do and repeat
the same process. That way we have less loop cuts and also
a cleaner geometry. So I'm just going
to my knife tool, we're just repeating the
same technique that we did earlier inside
inside, there we go. This should go here
into our faces by size. And let's check less than four, that's greater than
four, that's great. I think that works
great, to be honest. Everything is looking
good in this end. Everything looks good here. But one thing that we could do, let's just keep it for later. We could actually tell Blender which parts of this smash
we wanted to bevel. And then we can tell
it only to be level, maybe these parts here, and also not to be level,
these internal parts. That's like something that
we could potentially do. We can look into it. I
just like removed for a second the Bevel modifier
and now I brought it back. But yeah, I think this is
all we need to do here. Now in the next part
is built this here, built this this side
that's missing. Then all we're left with
are the wheels here, here and then the details
and we'll be pretty much done with the
train, honestly. Congrats if you made it so far. I appreciate you
taking the time, watching this tutorial
so far learning it. I hope you'll learn
something by now already. And if you have any questions
up until this point, or any critiques, don't hesitate to leave
them any comments. All right, that'll be
all for this video. We're way above the
ten minute mark. But hopefully it's been a good experience
for you guys so far. I know I've enjoyed
it, to be honest. And I'll see you
guys in the next.
18. Building the Lower Part: This part, we're
going to focus on building the lower
part of the train. But as I was looking into the
smooth mesh that I built, I think that we can do
it a little bit better for this lower part
than it is now. And that's going to
save us some headaches. In the very near future, what I would rather do is actually click here and
delete these vertices. Then click here and start
extruding downward Z12. And then three here, and then one more here. The reason why I did it this way is for a couple of reasons. One, I want to match these
corners with this one here, because this one has a little
bit more of an angle here. This one goes more
straight down. You can even see that here, how it goes more straight
down versus this one here, that has a bit more of an angle. Another reason why I did
it is because later on, once we separate this object, we're going to need to
tighten the corners here. This way I have an edge
loop already here. Tighten the corners
a little bit more. Then lastly, I would do
want to match all of this here to this way. This was my reasoning is more or less why to do it that way. Now what I can do is I can
take these faces again. I can click to inst them first, and then I can click to
inst them around this edge. Then click, Delete Faces. Now I have this
isolated flow here. Then I just need to add a
bit of constrictions here. I don't even need
this edge here. I can do one here, then I can do one here. What I'm going to do is
add one more around here. Then from here I'm
just going to go here. And with the knife
to will do that. And then dissolve this edge. And dissolve this edge. Now I got this going on then I'm just going to do and
repeat the same steps. I'm add one here. I'm going to add one
here like this, I think. I don't need to add anymore. I can just go here, do that. I can take this, dissolve it. I can take this edge
and dissolve it. I don't even think I need this. Now, let me see if I
remove these edges. Let's see if I
remove the vertices. Yeah, this works good, I'd say, let me just
keep it for now. For now, let's just keep it. But I'd say that
works pretty good. I'm going to take this now and then this
corner, this edge now. And I'm just going
all the way on the other side to see
what's going on here. Here, I'm going to do this, I'm going down like that. Actually, I don't even
need to push that down, but I do need to do here. I'm going to push
this down here. I'm going to check
how low is this part. I do want to push this also for later once we build the doors. But I am going to push
the side a little bit more to make room
for this part here. Let's see, this starts making
angle right about here. That's good. It's
nothing like that. And then this goes, let's say right about here. This goes right about here. Right about here, if I'm
not mistaken. Here we go. Let's actually undo
a few steps in that corners and then just select the faces for now first. Then inset like that and
then delete these faces. And from here I'm just going to start actually
organizing that way. It's much more accurate
than what I was doing just earlier now is going to push
all these a bit more down. This one goes right
about here, like I said. This one goes
somewhere around here. That's where the
cornering is happening. So I'm just going to
push this that way. There we go. Now from here, there's a couple of
corners I need to do. I'm going to start
with these ones here. To add edge loops
for these corners, I need to add edge loops
for these corners. This, realistically,
one I don't even need, but I'm going to keep
it for now Here. I need to add an edge loop here. I also need one edge
loop that's going to go all the way
there like that. I need one that's going to
go something like this here. Okay. Now let's go and
add this one here. There we go. What
am I missing here? I am missing one thing to
see this one goes here, that's why that goes there. Then I do want to add one
here to contain this here. The way this is going to
work now is I'm going, I'm going to take this one out. I'm going to take this one out. I'm going to take this so
that I can contain it. This edges here is fine. I have this, I have this
to contain that, this, I'm going to need
to add one here, one here to contain this edge. Now the way I'm going
to handle these, 3.3 here is quite similar. What I'm going to do is
I'm going to go in here, I'm going to dissolve this edge, but then I'm going to
collapse these ones. What I've done, let me just go. We have currently 123456. If I take these six and
turn them into one, now I have four here and I
just need to do this way. This is how I turn quad into tries and gone into quads. There we go. Okay. I can just take and repeat
the same process right about. Here we go in here, we delete this one, we get rid of this edge
that has these two. Now what we have is 123456. We take this collapse, you can also merge
it. That also works. You can click Merge at center. Here we have only one. I just go in collapse, edge,
collapse, collapse. I keep collapsing it up until I get actually
all the way to here. I can just collapse all of these because we don't have any cornering
happening on this side. I can push this like that. Let me see, this goes
all the way there. We do need that, That's fine. I could add one more
cut that goes all the way to tighten this part up, but we'll just leave
it as is for now. We're going to
probably have to do some cutting here once we
isolate and separate this part. I would say this now is okay
to start getting separated. Let me just see, fail
to solve this edge. Yeah, that leaves
me with a ad here, gone 12345, which is not good. Then if I connect to solve, that leaves me still
that I can just maybe, what if I solve all
of this like that? Then from here I just
combine this to here. That's going to give me one cut here to be able to control this. And then it's going
to give me one cut here to be able to control that, which is what I want. I'll be able to do the same. But then I have the issue of
this one here being solo. To handle this one
being solo here, I do need to add one more
here and then join them. I guess two might be enough. We might not even
need to go to three. Let's add 34 now, actually. And then just repeat
the steps here. Collapse, solve. There we go. I think this is better
than what we had before. Now let's select everything that we need here.
This, I'm just holding. My mouse while in
the box select mode. And you can toggle the modes in the I'm just selecting
holding shift, going here, selecting
everything here, selecting everything
all the way here. Selecting all of these parts. And then selecting
all of these parts. And this parts
here, there we go. Now from here I'm just
going to go x and collapse, and x shift my bed, then escape separate
by selection. Take the smooth mesh here, put it into the train, and then hide this. Now, here we go. Here we are. What
we just created. Almost everything looks good. The only thing we
need to worry now is cornering these parts
here around the door. To be honest, everything else
seems to be working fine. This one is going
to be very easy to corner, as you can see. And then we just need to
add one here at the top, here on the side that
was easy cornering. This one here, this one here. Then we can just add one
here at the very top. Let's see how far this one
goes, all the way there. That's exactly what we
wanted for this one here. I might need to go and do this. Actually, I'm just
going to go like this and cut it manually. Then I'm just going
to dissolve these into one, that way I have that. This, there we go, I have that, and here, let's see, I do want to
push this, maybe like that. So we have this, let me see. Okay, something like that is fine. I think we need to
add one more here. If I'm looking at it correctly, we have that, then we have this. If I push this one,
do the old trick, I'm not sure this is going
to work in this instance. Yeah, let's just go back. Yeah, let's just
keep this as is. I think that's fine.
This part is also fine. We do need to push this
one here to tighten this gap to add one more. And then here we need
to add one more. I think that, that
about does it. We can make this
line up better, Z. Now I can click click on
this control Copy modifier. And we do have, I think, a renegade
something here. We might have pushed
this one a bit too far. Yeah, we pushed a little bit too far based on the smooth mesh. If you want to keep
it where it is, if you want to keep
it as it is here, what you can do is just go into the smooth mesh and push
this a little bit core. Now this is going
to help us do that. Have one edge here that
we don't need this. Yeah, that was weird. Okay. Now what we can do is
we can actually go and check in terms if everything is all right with
this topology that we have to do that quite simple. Let's just go into, let's clean this part up. Before we do that, let's
just do this push back. I do want to push this
a little bit more here. More matches to that, and then I want
to push this more inside, it matches that. That's good. Yep, that's good. Yeah, let's check
our topology here. Now, in terms if we only have quads and there's
no en goons going on, I'm going to go faces by sides. I think everything
gets selected. If I go less than four, we do have something
going on. Let me see. Faces by sides, less than four. Okay. Nothing gets
selected then. If I go greater, then nothing is
getting selected. So that's good. Yeah, I think this is going to conclude for this
part of the video. If you actually want, we can do is build this side so
that we're fully done. You know what? Let's
do that. We have that sense of
completion for today. Let's just quickly build
this because this is going to take only a few clicks. We can go into our smooth mesh, We can go here into this mode. We can just go and select pretty much everything like this and then go shift
separate by selection. We can push this here and
then hide the smooth mesh. And let's just go and
start editing this part. It's going to be very
simple. We just need to take this corner here to the
top, this corner here. This corner right about here. And then select everything here. Push it a little bit down, Take this one, push
it a little bit up. Something like that, I think. Yeah, we just like this
copy, copy modifier. Yeah, we're good. We can push this one
maybe a little bit down, matches on the left
side to this here, then this one can
be really tight because these two are
almost basically connected. This one can be like
that. Yeah, there we go.
19. Reducing the Mesh Topology: The previous video. I'm going to try and keep this one short. One thing I noticed
just before I ended that video is that
in our smooth mesh, we have a little bit of
a shading issue here. And then if we go
into our train, that shading issue does also
a little bit replicate here. The reason for that is once
we go into a smooth mesh, we did create this
extra edge loop that goes all the way here. What we can do is simply cut it by using the
same technique we did before, which is we're going to
add another edge cut here. Then here we're going to
collapse these edges. But then this one we're
going to dissolve. Now we have these quads. And then from here we
can just go and lapse these edges like that, as long as that at the
lower part is contained. Now we're going to
be fixing this part here and the issue of the
shading is gone. That's good. A couple of other things
that we can also do to basically just make
our lives a bit easier, clean up this mesh is, let me just check here. I do want to push
this a little bit more to the side right here, Push this a little
bit more here, and then push this
one as a inside. I want to see how
much I can push this without breaking it. It matches the door more
closely in terms of relocation. Let me just go
like that. Yeah, I think that's good. It's better. Another thing, okay,
here we do have a little bit more distance between these two
than we would like, so we can just a bit more up. So they're touching, let
me just see that side. Then this can go a
little bit more up. We can tend this
corner up as well, and we can do the same here. Ten, this corner up as well. There we go. Let's see, what else can
we do? Another thing Yeah. I just remember is if we look at here and we can look at our
amount of subdivisions, we have two levels
of subdivisions. But on some areas here, we really don't need that many, we can just live with one
level of subdivision. What I can do is if you go here and you go into
your wire frame, you can turn this on
and this is going to show us how this is
going to look like if we apply the subdivision on that. What we can do now, as a matter of fact, I advise you to add this as a shortcut. You can red click here and add either quick barriers
or change shortcuts. For me, it says change
shortcut because I already added
it as a shortcut. For me, this turns on when
I press the semicolon. So if I go like
this, it turns on. What I'm going to do
now here is this one. I'm going to lower the
subdivision by one. Here. There's really not
many changes that happen. Everything looks good
as it was before. Even though I lowered the level, I can increase the
level as you can see and nothing changes. But what does change is if we look at here the number
of faces, vertices, and everything, it gets
almost doubled less. That's awesome. So here we have a sharp
corner happening, and I'm not sure what that is, but I am going to definitely
delete these words. I am a bit confused
what this is. To be honest, I did
not have that before. I don't think that's odd. Let me just clean this up. It might be happening X0x then. Just it, I'm a bit confused
where this is coming from. Okay. Yeah, that was weird. Yeah. These guys are for some
reason coming from there. I'm not sure what caused that. Yeah, that was weird. Sometimes weird things
happen like that. That's all I can
say. But yeah, here, I just want to add one loop cut here and then I'm going to
do this and then push this. Now I still have this edge
maintained, which is great. Looks good for this corner here. Again, I don't think
we need two levels, so we can just do that. Then over here we can just add one edge. Then we can do this. I can add just one here. Let's remove it for now. Let's see now here,
this part here, again, I don't think we need to. Let's just take it out and see how it's going to look like. Yeah, looks much better. And then if we
compare this to this, I think this looks much better. And it works better for us. Now we're just slowly reducing
the amount of phases here. We have already one, which
is great for this one here. I'm going to assume we can
live with one as well. Let's see if I only have one. We do lose some corners here, then I can make up
for it by doing this. Let's see if we have
one versus two. Now, at this point, let me see. How much difference does it make Only at these edges here. I can just go and add one more. I can just spread this a
bit more evenly like that. And I think that's much
better for this part here. Let's see, we currently
have two levels. I think we're going to
keep it because of this. If I do reduce it to
one, it still works. But in the background we could
even probably reduce it. But I am going to keep
it at two for now. This part here, there's a bit of something
happening here at the top. And I think probably
has to do with one of our edge loops also
going berserk. We can probably also
reduce this to one, and we're good to
go on that part. For this one, I
think it's best to keep it at two.
Let me just check. It doesn't do that much, which is quite interesting. It does enable us with
the Bevel modifier. It makes it look
a bit different. For now, I'm going
to keep it at two. I'm not going to apply any
of the modifiers though. All right? I'm going
to keep That was one. That was good. That's fine. Let's just make sure
this is 22 here, then for these guys, I don't think I need two. I can just go with one. What I might need to do
is increase the level. Then here maybe
two more segments, just so I get a bit
of a Harper Horner. I'm going to keep this at one as is might take to. Let me see, versus like that. We do add a bit of extra
that mentioned there, maybe we keep it as is there. I think those are we
have here we have two. We did add three and
that's I think necessary. Let's keep it at 31. This is two, that's
fine. This is one. Let's check all our
geometriagt going to click the semicolon overall. That's looking okay. It
could definitely be better, naturally things can
always be better, especially this part here. Seems like it. But as it is now, I think that's going
to work fine for us. If you do need to lower, if
your scene is getting laggy, you can lower it for sure,
so be sure to do that. No, One last thing
that I'm going to do is we've been getting quite a
lot of stuff going on here. It's time that we keep ourselves organized and keep with our
naming structure that we had. What I'm going to do here
is I'm going to call this front front wood because this is the
wooden part on the front. Then this is yellow bottom. Just going to call it like
that from yellow bot. Then we have let's
call this top then. This is, it's on the side, it's on the left angle. And I'm going to call it
wood, side left wood. I'm going to call this
side yellow, side yellow. There's only one yellow
thing on the side. We have side left, middle front wood, side yellow. Now everything is a bit more organized and it's
easier that All right. That's going to be
a for this one. This one is a bit
easier. We were just doing a little bit of
clean up on the things. I think I missed one
thing maybe here. But now that I've removed now that I've removed the subdivision
surface here, I think it's less visible. That's fine. I can maybe
take a quick look. Let me just see if it's
worth dealing with. Yeah, it's probably coming
from this part here. This would be the
culprit. I would assume. What you could do is probably also just take
this from here and then try to give
it some distance. That can also go a long way
of smoothing things out. As a matter of fact,
there we go. Excellent. So this will be all for this video and I'll
see you guys in the next video where
we're going to start modeling the doors. And we can also do this one, because this one is
obviously very easy, so we're worth something easy. And then move on to
the doors and then we see how we go on from there.
20. Making the Doors: Now, one key thing I noticed
when working on this door, if we look at our current reference image that
we're using here. This door has an extrusion here, but then there's also
something happening here. But then if I drag my artboard here that
I use as my reference, if I look at this
here or at the door, there is no second one. Then if I look at
this image reference, there's no second
extrusion inwards. It is just this side here. I'm not really sure what this part here is
supposed to be, but I believe for this door, we're just going
to be focusing on this image as our
main reference. What I'm going to do is I'm going to put
this right click, drag it, hole it somewhere
here to click on this corner. Push it all the way like this. Push this one all
the way like that. I'm going to put it right
here in my right corner. As to use it as a reference, I'm going to scroll
in a little bit more. Let me go a little bit like
that. I think that's good. You'll still be able
to see everything while we also have this
as a reference here. All right, to start
building the door first, what I'm going to
do is I'm going to select all of the mesh
around it like this. I'm going to go into
my edit mode now. From here I'm going
to click Edge Select. I'm going to click number two. I'm going to start selecting all of the edges around the doors. 123, I believe
four. There we go. So if we're going into my x
ray mode by pressing all Z, and I click my vertice
select mode by clicking one. Everything here, everything
around the door, is selected. Now, you could
probably also go and build a door by just
adding a plane, but this way I have the
entire outline already selected and pre made for me. And also, I'll be copying all the modifiers with me
as well, which is good. Now if I go and shift D like this and then separate
by selection. Now if I go into my train here, I can see that I have
new meshes created, specifically these
four with the numbers. If I leave my Edit
Mobic Licking tab, I can now go and
click control J. Let me just select
one more time to these guys. Here we go. 1234 control J. Now it's going to combine
all the meshes into one. It's just going to
join everything, which is exactly what I want. Now the only thing
I need to do is worry about these parts
here that aren't connected. I believe we have four in total. If I go into my tab, then
I click click Merge, And then I click these two
edges that are not connected, click M to merge
and then go here. These two merge at center. I just merge these guys
at center. There we go. Now I should have a total, I guess an even number of
vertices, but I do not. That means I might have taken one extra vertice out that
maybe shouldn't have. See, this part
here is connected. This part here is
also connected. It might just be that I
took one extra vertice out, but that's fine if
you have a different number of vertice here. Don't worry. We're
going to go over this, we're going to clear
everything up one more time. I'm going to click now A. And then then once I have this, now I have my door outlined. But you see it has like
a very weird geometry. We need to now continue
cleaning this up a little bit. That's because of all
these extra vertices I can do here is select
all these ones. Click Merge at center.
Select all of these ones. Merge them at center. And
now I can select these two and click J, like that. I can go over here, select all of these ones. Merge at center,
select all of here, merge at center,
select these two. Click J, zero, then Z, go down. Now for these ones, I am going to need to go
and use the knife tool. I'm going to click K. Let
just make it like this. Click. Click on this,
push all the way up. Click Enter. Click one more, type, push this up, go all the way up like
this. Click Enter. I can take these two, Click J, then here I can
also do and click J. I believe I can add one here, as well as an edge loop. And then control also
here as an edge loop. And I need to add one here as an edge loop.
But there we go. Now we have all of
our faces here. The next word, you're
just going to start with the window. I think
that's the easier part. I'm just going to
click on the window, click X, and then delete
the faces of the window. Click control R, and just
start adding loop cuts here. Here, here we go. To
add one more here. I'm going to add one more here. One more here. There we go. Now from here I just need to add more loops and
more edges. Here. With my knife tool,
I'm just going to cut here these corners. Now, I'm just going to remove these edges from inside
that I do not need. There we go. I'm, let me just
select all of this here. Push this a little
bit more upwards because I want to
condense it to this area. This part is fine. So if I
now look at everything here, that's how it looks like. Okay, then here I'm going to add one more
edge loop right here. The reason why I did
this is because I do want to leave this space here open to control to build this handle
right there later on. But now also we
have this going on, which is great, because
from here now we can just build out this
part here as well. Once we have the window, if
I go here and click Faces, and I click on this face, I click to Inset. And I just go a
little bit like this. There we go. And then
I click on this edge, and I click, sorry. I go into my face mode. I click on this edge
while in face mode here, click on this edge, slick,
this entire loop here, edge. And then I click to extrude and I go just
inside like this. And I can push it, let me see, something like that is fine. I might go push it a little bit, so don't click now
to push it inside. You can go and press G
X, just there we go. I think that's
going to be enough. But as you can see,
nothing's really happening. And the reason why it's not happening is because
of our modifiers, specifically the shrink wrap
and but also the solidify. They're both having an effect. I'm going to take
for shrink modifier, I'm not going to take
it out actually. I'm just going to change the snap mode to
inside. Okay, Right. This is done something
now, but I'm also going to take
out the solidify. There we go. I took out the solidify and I'm
keeping the shrink wrap on. And now from here I'm going to add three levels of subdivision. There we go, I'm going
to click here and then control R. I'm going to
push this one up like this, then push this one like that. All right, now we're
starting to get something, but these edges are very
smooth as you can see, which is looking a bit weird. We need to go into here and do some clean
up with these edges. What I'm going to do here is I'm going to click
on this edge here. I'm going to add one loop cut, right, like this loop cut
that goes all around it. I'm going to click scape. I'm going to click
control to add bevels. If you scroll with your
mouse like this up and down, you can control how many cuts in this bevel you want to add. But I'm just going to go
with this first number. So times just going
to scroll all the way down so I get
the minimum number. I'm going to go
somewhere like this. Now I'm getting a little bit of the tightening corner here. And I'm just going to do
the same for this part, which is this edge right above the one
that we just created, control our escape
control and just push it. Let's see if I think
this is enough. Let me see. I might go reverse
and control z and then exit this mode just so I can now go and see how
much I'm tightening it. I'm going to go
something like that. There we go. Now we have
this part here done. What you can also do is you can make this part also tighter. If we go into this edge and
click control R like that. And then control,
you can tighten also that edge and you
can also push it maybe a little more outside
and then click S to give it that shape. Right there. There we go. Now for the next part, let's start building out
the window right here. Okay, for this. Before I even do that,
what I'm going to do now, I'm just thinking of better first steps,
which would be the next. Let's actually, yeah, let's
focus on the thickness now to focus on the
thickness of the door. And also, let's clean this up here a little bit
before we add anything else, I'm just going to
this more here. Let me see this one. Yeah, let's keep it as it
is now because it's not going to bother us
once we add thickness. I'm just going to
go into edit mode. Select everything and then go and then just go
like this and extrude, I think for the thickness I'm just something like that
is going to be fine. Now I need to add
a loop cut here for this window and then do
the same step control B. And then depending on how
sharp I wanted to be, I want to be really,
really sharp like this. I want to do the same thing. There we go, right about here. Control, then just
do this like that. Now I have this door. There we go. There
we go, we have this. What I can do next is
I can take this and push it a little
bit more inside X. Somewhere like this
is going to be fine, but we do need to add some extra thickness on
Solidify for these objects. To do that, I'm just going
to go here into Solidify and here to 0.03 Let me see, 0.03 looks to be a good number for my
situation for thickness. I'm just going to add 0.03 here. I'm going to go add
0.03 Then let me see, do I need to add anywhere
else 0.03 here to a solid 0.03 There we go. Now for this, there's a
bit of a shading issue. And the reason why
this is happening is partially because
of this, but also, I believe, because of our
shrink wrap modifier. Because if I go like this
and start moving it, you can see at the bottom
what's going on there. I'm just having it here. I try to contain
that by doing this. Let me see if that's
going to help. It did help a little
bit, but not too much. I'm going to keep this
as it is for now. Let me see if I select all
of these edges right here, then try to push them
inside a little bit. I might be able to fix it. There we go, that's
a bit cleaner. Now, you could try to maybe
also play with the offset. That's one alternative. But again, depending on, I think I think you can go to 0.02 I am getting a bit
of a better offset. There we go. This tends to
work in my case where it might be a little bit
different. Perfect. Now let me just add
the windows here. To add the windows, I'm
going to add a cut here. I'm going to go to separate this cut by selection.
Click on this. Now the new one
that I just created here to make sure that
I'm in edit mode for it, Click a right click. Click F. There we go. I can join the two. There we go. Now for the window, I don't think we see have
subdivision perfect. I think we don't need that much. But one thing I did
forget to build, which is not
actually the window, is the window rims. Let me see. What I could do is
actually just take this x, dissolve this face, and then just a loop cut here, add a loop cut here, add one here, add one
here, add one there. Now I'm just fixing up, owing to my mistake, adding a cut here there. Here's then adding
a loop cuttle here. Then there,
dissolving this edge. Dissolving these
edges right here. Dissolving this,
dissolving that. Now I get this part
that I wanted. I can push this a
little bit more inward. This part a little bit
more here, to the left. This one a bit
more to the right. Okay, now the thing that this part is missing
is the solidify. Ironically, if I
click on this one, now I can just add a Solidify. I'm going to click on this one, then I'm going to click on
this part here on the right. I'm going to click Control C. And then modifiers and I
copied all the modifiers, but you're noticing that
it has actually pushed it outside. Why is that? Well, if we go into
our edit mode, if we click here and we let's
use Display Split normals, we can see that
the split normals are pushing outside here, in this situation
for this one here. But if I click, for instance, on here and click the tab, we can see that there,
these are pushing outside, and then these guys
are pushing inside. Essentially what
this indicates is that our normals are inverted. If I click here, you can
see our normals are inside, where in fact, they should
be pushing outside. Let's just select all
of this and let's go A and then shift N. That's just going to recalculate
our normals. If you see now this is now pushing outside as well as
everything. It should be. There we go. Now from here, I think we just need
to set up the offset. I'm going to try minus five
and see how that looks. Maybe that's a bit too much. I might go with even
lower, a higher. Technically, mathematically
speaking, I think minus four. I think minus four hits the perfect sweet spot
that I'm looking for. There we go. I might even go a bit more just because to match it with
these outer windows. Minus three maybe. Yeah, let's go minus three. In my case, I'm going
to go minus three here. And then I'm just going
to click Click Tab. And then just use this to
make the window as well. I'm just going to go so separate by selection like that, I'm going to click
on the new one. For this one I'm going to take
out the Solidify modifier. I'm going to take out the
Bevel modifier as well. I don't need the Bevel modifier, then this is the new one that I created. I'm
going to click a. There we go. And I'm going to, let me see, this is the
one that I created. I still want to take out a
few more things actually, now that I look at it, we
don't need solve these edges. Edges. I can take out
these vertices here. I can take out the
vertices that are here. I can take out the
vertices that are here. I just need the four of
these guys like that. Actually, I just
need this part here. Then I'm going to
go three and then grid bill, there we go. Now I have my window, but I think I have
the same issue I had earlier with the window or it just might be because of the solidify, if
I think about it. Let me just try this.
Control copy modifiers. Yeah, I think it might be
again a V normal issue. If we go tab here, normal. Yep, they're pushing inside shift end to recalculate.
There we go. For this one, I'm going
to use thickness of 0.01 because I think these guys are also
using 0.01 There we go. I'm going to add minus four
might need to go more. Let's see, Minus
eight? Minus nine? I think minus nine
might work for me. I'm going to take out the
Bevel modifier though. I don't need that one. Or the windows, I think that looks good
right about there. That looks good.
Now, for these ones, we can see that these
ones a bit softer. And I think that's because
of the bevel modifier. So if we take out,
the bevel modifier is going to look much better, but we still are going to
want to have a Bevel there. We're going to play around with the amount of the bevel maybe a bit later on to see
what a good number is. Another thing is that we get
this weird beating here. If I go maybe into the
geometry harden normals, I think that's exactly
what we need to do. We need to have the
hard normal selected. That's just going to make this
corners much, much better. We're going to probably be doing that final clean up right? Once we're done with
doors, let's just, let's now focus here and add the handle that
needs to go here. I'm going to hide these
normals. There we go. For this handle is going
to be pretty easy. I'm just going to
go int like this. I'm going to push these
guys a bit closer. Push these guys a bit closer. I might even make it a bit more tighter, something like that. Yeah, this is going
to be perfectly fine. I'm going to extrude inside,
I'm going to push it. Let's see. It's a good amount, this is
maybe too much to push it. Let me see something like that. The control control here, I think this is
still way too much. I might just go select
all of this here, and then select
all of this here. Then click Y to tighten it
up. Something like that. And then X to not make it much. And then I'm just
going to push it a bit like the reason why this is happening is again
because of our solidify. If we push it a bit
more inside there, we're getting that
which is what we need. I'm going to push it a
little bit more inside now. We need to add a loop
that goes right here. We need to add one more
loop that goes right there. All right, let's just push
these two a bit more up. Put them a little bit more down, we get rid of that
weird shading issue. These guys a little
bit more like this. There we go. Now we want to also contain this weird shading. We can just control R. And then this inside that, I think this is again
happening because of the shrink wrap modifier. So we might need to modify
this a little bit more, depending on how
I want it to look like something like this. I might need to rotate
it a little bit as well. I'm holding shift now. There we go. That's looking good for this part of the door. Let me see how we
have everything here. Everything here is
good. Excellent. Okay, for this part
now of the door, we just need to take these three parts
and then duplicate, shift the Y and then
just push them here. That now we're
just going to need to manipulate the door a
little bit to bit it all here. I'm going to go all push this
one a little bit more here. Push this a little bit more
here, a little bit more here. Push everything here, a little
bit more like that here. I'm going to need to push it
a little bit more up here. I'm going to need to
push it a little bit more like that here. I think this side I'm
going to need to push a little more like that, a
little bit more like that. I think there's a little bit
more of the bottom part. I need to clean up. There we go. That's about it.
We got the door. We can now just make sure that our doors are
named correctly. I that's about it for this part. All right guys, I'll see
you in the next video. We are we going to be
starting to build the rails, these things that go around and we're also going to be
finishing up this part here.
21. Adding Rails Using Curves: To build out the rails
that we see in here and also the ones that are
over here here as well. We're going to be utilizing bezier curves on top of
these bezier curves. We're going to be
also utilizing a view that we haven't
really used before. I'll show you once we
add the Bezier curves. To start off, it's going
to be fairly easy. We go shift a and then go here under Curve and click
Bezier Mediately, we see a little
Bezier curve here. If you've worked, let's say
in Photoshop or Illustrator, that you might be familiar with this concept where you have the curves and you
basically have to move it like a pen
tool, more or less. If you're completely
new to this, don't worry, it should
be fairly easy. A couple of things to
keep in mind before we begin is you can see as we
created the Bezier curve, we have also the origin
point here in the middle. But if I press on
the Bezier curve like this and go around, you can see that the origin
point moves with it. Now, in our case, we
don't really want that. I'll explain in a second why I'm going to press
control Z to undo this. While I have now the Bezier
Curve still selected, I'm going to go
into the edit mode. While in edit mode I can now move left and
right wherever I want. When pressing G,
you can see that my origin point stays the same
around the three D cursor. And that's exactly
what I want from here. I'm going to go Z. Push it a little bit up here
so I can see it. And then y zero it out so I have a very straight
line as you can see. Okay, from here
I'm going to make this side click on this
point in the middle. Make it slightly smaller. Click here, make it
slightly smaller. If you click on an
individual point and press, you can
move it like this. If you click here, you
can move it like this. If you click here and
press it increases, pressing R is going to rotate it as you can see like that. Y straightforward
and pretty simple. From here, we actually want
to add a mirror modifier to go on this left side so that we don't have to do
two times the work. That's why also we wanted to
keep our origin point here in the center so that when
we add the mirror modifier, it is going to be based in it, off of that origin point, so everything is
going to be centered, while in the top B. What you can do is
press and then go X. Try to match up these two
points to this one here. To be similar to this,
it doesn't have to be exactly accurate,
but just close. Something like this is
going to work fine. G, Y, Put it here like this. And let's add a mirror modifier that into the meter myrifier.
We can go under clipping. Now once we have them closer, they should all become one. Let's also go into
our data here, so we can see better
in the depth. Let's increase our depth to say something like 0.17,
something like this. Here you can see that
they're not yet fully connected x and now we have them basically being one perfect because of
our clipping from here. Now really it becomes a
matter of adjusting it. If you go into a front view, we can push this and go down, but then moving along views all the time might be
a little bit annoying. If you go like this
and then this, and then again left and so on. Instead of doing
that, what you can do is press control Alt. And this is going to create, I'm not even sure
what this is called, but you're going to get all of your orthographic views
plus your perspective. This just helps a little
bit better If I lied, what I want to see, I want to be able to see this corner here. I want to be able to see this roughly around here and here. I want to zoom in
a bit like this. Then over here, I can start
to adjust pressing this here, then slowly moving
it to this point. I can then go into
this view here. Push this slowly up to here.
I can see how it's doing. So I need to R Z,
rotated in the Z axis. I don't even need to press Z
while my mouses over here, because it's immediately
rotating in the Z axis as it's using the top
orthographic view over here. I can maybe X. Let's see, that's not
going to do it over here. We just need to rotate
this a little bit more within the y
axis like this, as you can see in here here. I'm going to go and increase this part a
little bit over here. I'm going to decrease this slightly, push
it more in here. And then let's see how everything is looking
from around here. All right, this looks not bad. For starters, we
might need to do some slight adjustments
a bit later. But for now, think this
is doing pretty good job. I might push this just a little bit more like this
in front then also, if you want one
more other thing, I just see how this
looks from here. It looks pretty good. I might push it maybe a little bit more. What you can do is
press instead of R, Z, R, Y, and so on, you can press R R twice. To get complete control over the rotation depending on
how you move the mouse. It takes a little second
to get used to it, but once you do it can
be really in handy. I think this here is
good enough for now. Now, from this point here, I want to create
another one that goes here. You can
do it two ways. Either you can press to
extrude and then go like that. Or by the way, once
you do this and let's say you press escape. Let me see. Once I like to
extrude and then press Escape, you notice that it
still stays here. Be sure to undo it. Control Z like that. The alternative,
instead of extruding, you can just press control
and then right click and it's going to immediately create another point
connected from here. Now we need to make it smaller, but we don't want to make
smaller both sides here. We only want to make
this one here in order to work on this
angle from here. I can make make this a
little bit more like that. Play around with the rotation, make this angle a little
bit tighter around here. Let's see how this is
looking. All right? It's not great, not terrible. It is usable here. I'm going to go
RR one more time. Let me see R R one more time to try to get
this a little bit better. Let's take a look in here. We want this to be fairly
straight, something like that. Let's push this
one maybe a little bit more inside, like this. With this going a little
bit more like that and then going a bit more like that. Let's take a look.
So we can see that there's definitely way too much of this going inside
versus over here here. We might even push it
a bit more, let's see. Like this. And then give it a bit more rotation
maybe here as well. A bit more rotation to
first even it out again, this is going to
require a lot of back and forth is just the way these things are and how
they work over here. We want to push this a
little bit more here. I'm going to press
RR twice to try to mess around with it, until I guess something that
works the way I want it. I'm slowly getting there. It's not there yet fully, but it's getting me closer. I think this looks fairly okay. For starters, in
order to save time, I do recommend playing around with it in your
free time as well. Now, once I finish all of this, we're going to do like a
quick round of clean up. All right, but once we have
this now part here created, we can go into our right view
as we have it also in here. Then we can just click control, right click, all
the way up to here. Just like that, press this. Let's just make sure everything
goes nice and smooth. We might need to go
into our right view and then just check how
everything here is looking. Because this part here might need a little bit
more finessing. That then from here you can go a little bit of
rotation like this. Let's see how this is
looking over here. This looks fairly okay. As I said, I recommend later on trying to
fix it if necessary. Over here we go. Let's see here. We can't really
see it that much, so we just need to rely on this part here and
this part here. I'm going to go press Control, right click, just like that. Then here in the top of you, we're just going to mess
around this corner. And this, I think this is
going to be fairly simple. Maybe I want to push this one now. A little bit
more like that. A little bit more that,
something like this. Then from here I can just
go and right click that. They're now connected
into one. There we go. Like I said, I recommend doing a final clean up after you finish adding
all of them For now, Instead of trying
to make it perfect, I want to focus on
adding all of them so that you don't waste too much
time watching this video. All right, we have the
first one here up front. From here, I'm going to now select this point,
only this one here. And let's see, shift D. This, Y, let me just y, z, move it like
that. There we go. Now Y, move it here in front, I have it roughly around here. Let me just move this part
here so I can see better. Let me move this part
here so I can see better here as well, like that. And now here I'm going to press control and right
clip, there we go. I'm going to push this
one slightly here, R mess around with it until I get a look that
works good for me. For starters,
something like this. It's pretty decent
from first try almost just messing
around here. There we go. I'm going to press control
right click to go into here. But then now again, I need
to just play around with this so that I can adjust
it to be a bit better. This looks fairly good. First try something
like that over here. Let me rotate this. Maybe I even a little
bit more here. This one a little
bit more like this. And this one like that. And then add another
one in here. Control, right click. Now I just mess around with
these two parts. There we go. And then from here we just
want to go to the door like this that see how
this is looking. All right. Looks pretty good. Acceptable. Definitely needs
a little bit of improvement. But now I'd say
it's pretty good. Let's go here. Do shift
the one more time, get over here and then
go Control right click. We can push this one all the
way up to here. Do this. One more thing that we can
do here while also add it is you can see now
these ones are closed. We can go here under field caps, that way they are now closed. Maybe we want to push this one slightly a bit more inside. Maybe you want to push
this one also slightly, a bit more inside like that. It's not stroting out that much, I would say just that much. That seems pretty good. Perfect. Okay, from here. Now next we can go is
here like this shift. Add one more here. Let's see. Add one here and
then add one here. We need to, again,
clean this up. Let's go here into
our front view. Let's check out what's going on. Here we go, and let's
do something like this. And now we just need
to close this gap. That maybe pushing
this a little bit back a little bit more like this.
Doing something like that. Going to maybe even the
back view, let's see, like this and then trying to match it somewhere here.
Control, right click. Let's connect these two
guys, just like that. All right, really,
we want to align it with this one that
we have over top of it. Something like that. Again, you can see how this one is looking
compared to this one. Now is the top to the bottom. We also want these two
to be similar heights. So 00 it out, we probably want z over
here as well from here. Now we can compare and do any changes and clean
ups that we want. Perfect. We need to add one more, which is this one
that's going to go over here to add this one. Select this one here. Shift, go like that. Then let's get it somewhere
where we need it, right? Let's go here. See what's
going on over here. Let's see what's
going on over here. Let's see what's
going on over here. We want this one to
be right about here. And then go up to here
like that over here. We just need to rotate
it a little bit. Let's go here. We just need to go like this. But we can look and see
here that we need to go a bit more inside this, let's even more inside,
Let's go like that. Make this part smaller, so it's a bit more straight. I would say we can push
this one also a little bit more inside like that. Then from here we just want to push another one
right into here. Make this smaller.
Let's take a look here. We need to push it a bit here, a bit more here, then play
around with the rotation. I wanted to go into that, but we need to mess around
with how it gets connected to here so we can get it
a bit cleaned up, maybe. I guess something
like this. But let's push it a bit more inside. Let's go here, should a bit more inside.
Let's rotate this. There we go. So
something like that, I think works pretty good here. We're probably
going to need to do some adjustments just to
make this a little better. I think we pretty
much have this done, like I said, at
your own time now. Feel free to do your own
clean up if you want, and might do mine as well. I think I'm just going to
want to rotate this a little bit more like that. It feels a bit more natural
going inside of it. And then you can just adjust these guys over here as well. But this is pretty
much the concept and technique that we're going
to use to build this rail. I think we've done everything. Let's check this side. There we go. Everything
looks pretty good. Over here at the bottom, we don't have any rails. I think this pretty much
closes it for this video. I'll see you guys in
the next one, Bye.
22. Cleaning Up: We've come a pretty long
way since we started with just this front
part of the train. Every once in a while,
it's good to just step back for a second and look at things that
we can improve. Look at small mistakes
maybe that we've done, just try to clean up
after once in a while. That's exactly what we're
going to do for this video. We're just going to be doing
a little bit of a clean up of a couple of things that I noticed for my project here and you might have also
had similar issues. The first thing that
really comes straight off here is that
I need to tighten this corner up a little bit
more and push it because there's a little bit of
here space that's showing. I'm just going to
do exactly that. I'm just going to press on
this curve here in the middle, and then click to
scale down like this. Then I'm just going to go y to push a little
bit more inwards. And I'm just going to close
it exactly like that. There we go, That's good. Then the next thing,
while we're at curves, I'm going to try to
align all these curves so that they fit a little bit better
right here with this. Then I'm going to also push them inward a little bit
more like that. I'm going to do the same here. These are very small
details and depending on your camera angles that you're going to be doing
for the animation, they might or might
not be visible. But just for the sake of the
tutorial and perfection. Somewhat perfection. I do want to nail it a
little bit better. All right, so we have
that part done now. Next thing I want
to do is see how this front part in
our reference image here is going like that. And I don't think you can
notice it that much here. But if we look at here, we can see that this front yellow part goes
a little bit more around than what
we've done here. And I'm thinking
of maybe we should try to employ a little bit
of an extra of that curve. So what I was thinking
was just a quick, simple fix would be to push this a little bit more
outside like this. We also need to copy
the modifier because we've done a little bit of
changes to the modifier. So I'm just going to
select this one shift, click on the other
one, copy modifier. So with control C, there we go. With that, I just want to push this edge a little
bit more internal. Now we see that it does a
little bit of a breaking. So what we can do here is we can select on this edge and then click control
and try to bevel it. And then let's see if
we add a third one. I just added three bevels like this and that looks to have
done the job perfectly. I do want to tighten this
corner up a little bit more. Let me see if I can, if I touch this bell it's going
to start breaking it. I'm just going to add
another loop cut right about here to try to tighten this
corner just like here. And might even do the
same with this corner. I'm going to take this cut and just push right about there. I'm going to take this corner because it is pretty isolated. I'm just going to push this
a little bit more down. I just got a better
tightening right here. And then for this part, I
might need to lower this here. I'm just going to go Z here. I have a few more corners
here that I'm going to need to probably lower
looking at this. Let's see what we
have going on here. If it's getting a bit annoying
to see these edge loops, what you can do is go
into your modifier here under Solidify. You can click here on Cage.
That should do the trick. Now when I'm in my edit
mode. There we go. Here I'm just going
to do a little bit of tweaking, messing up with this. I can't see much going on
here because of this here. Also, I want to
push this inside. What I'm going to do,
I'm going to press G to see if I go in my right
view for better precision. And I'm just going to push
this a little bit more inside, just like here, not too much. Then I'm going to click
Control, right click here. Then for this part I'm
going to R R twice until I rotate it how
I like it like this. And I'm just going to push
this a little bit more up. And then this right about here, just so I cover it, I'm going
to rotate this properly. Let me see how this looks here. I'm going to need to rotate
this a little bit better. There we go, like that. And then I'm going to
need to rotate this one a little bit better like this. And then push it inside is what I'm going
to do, like this. There we go. If I want
to increase this side, I'm going to click on Alt. And then then I'm just
going to scale it a little bit that he does a bit of a
better job covering this. Let me see. There
is still a bit of a breaking going on here. Might need to, let's see, this is coming from actually
this side of the train. I see. I think this is coming
too much outside. I might need to do
a little bit of a push here for
this to go inside. Maybe a little push
for this to go inside. Let's see if I put
this into top view and then it a little
bit more outside. Let's see, G, Y, G, yeah, GG, like this
and then GG, like this. Then I'm going to need to
push it, probably lower, then I'm going to need to
do the same with this one, Probably lower then
just push it back. Push it up just until I have something
a little bit better. I'm going to need to
do the same here. Just a little bit.
Close this gap. What I'm actually going to
do also now look at it. I'm going to give a
little bit extra bump to this part here. If I go into my solidify, I might give it a little
bit of extra thickness. Let me see, Thickness
is coming in 0.03 But what if I
give it like this? I don't like that way. If we give it a
bit of an offset, let's go to zero. See how that's going to look? Then from zero I'm going
to start giving it. I'm just going to go a
little bit more inside. I think 0.5 is going to be fine. 0.50 0.5 or negative 0.5 Negative 0.5 And I'm going to then
increase its thickness, try to match it up. So I believe if we
had before three, we should add just a five here. And that should do the
trick more or less. Yeah, nobody's going to
see that on the inside. For me, this looks
good. There we go. That looks pretty
good for that part. Next on the line is, here we have these doors. And this has been a common issue in the previous video as well. We have a little
bit of a shading. You can see how it's sharp here, but then it starts
smoothing out. And that's mainly because
of our shrink wrap. Our shrink wrap is pulling these edges to the smooth mesh. And if I move this, you
can see what's happening. But once we apply and we will be applying
these modifiers later on. Once we apply it,
you can see that it will disappear for now. We can just keep the
shrink wrap as is. But what we can do is something that we
haven't done yet so far, is crease out the edges. Whenever you have a subdivision
surface supply like this, what you can do is
you can increase out the edges and essentially you just go into your edge mode. You select all the
edges that you want. So I'm going to be selecting
this outer rim edge right here, just exactly this. Here is what I want, this edge around this. And I want to go
and click Shift. And as I increase, you can see that
it slowly starts to crease out like that,
it becomes sharper. I think for me something like this is going to be
good. There we go. And we're going to do
the same thing for this edge right here. If it's difficult to
select things here, I think you can go
and press on Cage. And that's going to make
it easier to figure out which edge we're going
for in this situation. We're going right
about this one. If I go and press shift, we take out on cage and
press shift starts scaling, we can see that that edge
is being now sharpened. There we go, Perfect. We're going to do, or you could do the same step
later for this door. I'm just going to do that off the video so that we
can save on time here. Next. What we're going
to do also in here is this part here and also these rooms I think I talked
about a while ago about it. How this is a little bit
too soft for my, my taste. And what I would
actually like to do is control where I want this
bevel to be applied. This is basically from
this bevel, right? This is without the bevel,
this is with the bevel. And I want to be able to control where this bevel
exactly is applied. And I want it to be applied
to the inside here. And I also want to tell
it how much of it I want. We're here under angles. What we can do is we
can just click weight. Now nothing is applied, applied, but if I go here and let me just select the
edges that I want. If I select this edge, I press this arrow here, under mean bevel weight. Now I can control, because we said here,
limit method weight. I can control this mean
level weight. I can tell. All right, apply
just a little bit, this much level I
want to applied here. And then here I can
go and do the same. I can say, well here I
want a bit more beble, I can push it to one. Now I have these sharp
corners on the outside, but soft corners on the
inside, for instance. This gives us a bit
more flexibility on how we want to
control our Beble. I'm just going to repeat
this exactly the same process for this
windows here as well. Luckily, all of these
windows are just one mesh. I just need to do go in here, going to the Beble, put
it from angle to weight. Now all I want are
these internal ones to be affected by the bevel weight. I'm just going to select
all of them like that. And then go in here
and then say, well, I want the mean
bevel weight to be just a little bit,
something like that. There we go. Now I'm just
going to do the same step for this part and I'm going
to do the same for the door. That's just going to
be it for this video. You can do pretty much
those steps on your own. And I'll see you
in the next one. So that we can cut this
video a little bit shorter. Under 12, 13 minutes. All right, in the next video, what we're going to be
doing is we're going to be adding these details on top. And we might also be
building in the same video, this part here as
well, the light. So I'll see you guys
there in the next video.
23. Modeling the Top Objects: Okay, so now that I've
added all my Bevel weights, and you can see this
by the blue edge here, all everywhere on these windows. I've added them also here on this side as
you can see there. And I've added my creases
here to this door, and then I did the same here. We're going to use
this same technique to build these
details on the top. So I'm going to start
with the simpler ones which are basically these two. I mean, this one should also
be pretty straightforward. The way to do this,
we're going to add simply a cylinder. There we go. For this cylinder,
I'm going to use ten vertices and I'm just
going to click okay. I'm going to go Z and
just try to match it up. I'm going to lz to this. I'm going to scale YZ. Just scale it a little bit more. I'm going to go and then something like
this. There we go. Now once I'm done with
this, a key important thing is that we need to apply
the scale that we see here. This all needs to be one. I'm going to press control
and a and set scale. Now that I've done
apply the scale, we can start modeling this and
improving it a little bit. It's quite simple what
we need to do here, we just need to add a little bit more smoothness
to this whole thing. So I'm going to add
control on one level of subdivision control to two
levels of subdivision. We're going to add one
loop, cut right here. Let me see if I can go
maybe one level back down. Then from here I'm going
to select this space. I'm going to inst it and then
do a little bit of that. Let's see, I'm going to
do a little bit of that. Then over here I'm going
to press control B. And then, let's see, yeah, I think something like
this is going to work fine. Now, this is obviously
much flatter. I'm going to select this Z, push it a bit lower, and then Y, increase
it in that direction. We're going to need to push
this lower end a bit lower, just so it goes all the way
down something like this. There we go. If we want
to make this tighter, where we can go is
press G here, I think. Gg a bit here, but we don't have
enough subdivisions, we wouldn't need to add maybe one more level or
what we could do is, let's see if we add a crease, we would need to add one
more level of subdivision probably to control how
tight we want it for this. I'm just going to scale
it down like this. You can press, make sure that you have you're
medium point when you're scaling, there we go. You could probably also
be an active element. Well, if it's
active element it's going towards this
selection instead. If you are individual origins,
that would also work. But for this case, I'm
going to use medium point. There we go. Now I have this. I'm just going to
push it maybe a little bit more down. Let
me see how it looks like. That is great. Now what I'm going to do is I'm not
going to duplicate this. Instead, what I'm going to do is I'm going to
make an instance of this because I know
that this object is going to be exactly the same. There's no tweaking,
no tinkering with it. I'm, instead of shift D, I'm going to press
all D escape and then I have it selected. I do have it selected but I
actually hit it accidentally. I have this cylinder selected Y. There we go. And I'm just
going to push it here. Let me just go Y, align
it with this here. The difference between shift D and all D is that when we press all D creates an
instance of this object. You can think of this
as it's a mesh here, but it's not an actual,
it's an instance. Whatever I do to you can see it does the same to
that element over there. These two elements are tied, linked one to another. This one is essentially
an instance of this. The way I like to think of
it is that this is like an alternative way to
do a mirror modifier. That's how I look at it. Somebody can correct me in the terminology if I'm
mistaken with that, but I just know that it doesn't create an actual actual match, just creates an instance of it. All right, we have this
now we just need to do is add this over here that
we're going to be using. The same technique
that we did with the door and with
the bebbles here. We're going to add first a cube. We're going to take this cube Y, Z, trying to align it the
best that we can with this. I'm going to go into my
old Z and then edit mode. I'm going to push
this a bit down, push it right about here. Push this somewhere around here. Go like this. Go like that. While I have these
two sides selected Y, try to push them a little
bit more like this, I'm going to need
to go on top of you because I need to also line this side x. I think something like this
is going to be fine. I just want to make sure that
all of these get inside. I'm going to even make
it a little bit smaller, x, there we go. Then I'm going to make sure
that the edges just the sick, these edges go all the
way down. There we go. So something like this for now. And then I'm going to control a, I'm going to apply to scale, make sure everything
here is one. And now I'm going to first start by adding a Bevel modifier. With this Bevel modifier,
I'm going to press this, let me see, 123 levels. Something right about here is going to be think good,
shade, auto, smooth. Then I'm going to also apply a subdivision surface
modifier right here. Now if I go and increase this, I have control how
I wanted to look on this side then let me see if I add how many
here we're going to have. We're going to have,
let's start with five. And then if we can lower it,
we're going to lower it. What I want to do
is take this side, take this side, take this
edge, take this edge. Let me see. I'm going to scale them in this
direction like that. All right, Now I want to
make these corners sharper. What I'm going to do
is I'm just going to limit this to weight instead. Now from here, I'm just going to slowly start adding weight
to first everywhere. Then I'm going to decrease to
certain parts that I don't. For instance, I
don't need weight added here to these corners. I'm just going to decrease it. Just put it to
something very small. This, if I leave this view, we can see that we're
slowly starting to get this shape that we want. We just have this
now in these parts. I do want it a little bit less, it's a bit sharper. Let me see if all of
them select edge, this edge and this edge. All I'm going to do now is see, then maybe decrease the amount or maybe even increase the
amount that I think of it. Now we're around here
and I'm going to start decreasing the segments two. I think two is
going to be enough. Yeah, two is definitely enough. But I also want to
maybe make this part sharper and I'm going to
decrease the bevel weight here. Also maybe 0.5. There we go. So I'm going to do this
is constant tweaking. I'm just going to increase it on this side so it has a little
bit more of that turn. I think I'm perfectly
good with how this looks. Let me just see if these two
should be all the same high. I don't think they are, but I am going to push this
one a little bit. I think it sticks out a little
bit too much for my taste, so I'm just going to do a
little bit of that push. There we go. I would say maybe
it's a little bit too big. What I'm going to do, actually, now that I look at I'm going
to select these vertices, I'm going to scale them
inside more like that. Then inside that, there we go. Yeah. I'm liking how
this is turning out. I'm going to push a
little bit more inside. This is just now more than my
personal creative choices. Yeah, there we go. We have the top part at it and we're
right at ten minute mark. In the next video, we're going
to be building this light on top of here and
then all that's left is the wheels
and the front lights, and I think that's
going to be about it.
24. Modeling the Top Light: Let's start with building
out the details. The first thing I'm
going to start with building out is this here. And then we're also going to be building out this part
here at the front. When it comes to building
out these details, what I'm going to do is I'm
going to put my reference, my PRF board right here
in the right corner just so I can look
at it every once in a while when building
these things. I'm going to go
into my right view. Now to start building this off, I need to figure out what kind of shape that I have here in my mesh options best
resembles this. What we have the one to go with, I found out was UV sphere,
which is this one. Because the subject is
a little bit further, we don't need to have
this many segments. We can actually reduce it to, I would say 16. Let's go 24. Yeah,
let's go like 24. There we go. Then the
next thing we need to do is if we
press R and then X, and then we rotate
it by 90 degrees. We rotated in the X
axis by 90 degrees. Then we push it a
little bit more up and then try to match it up
with what we have here. Say if this line matches
the middle of here, and I scale it, we are slowly
starting to get that shape. As a matter of fact, what
we need to do though is let's just scale it
down a little more. And then from here if I
take this side and I go into my face select mode and select half of it and
then delete those phases. Now I'm left with this. From here what I can do is
press Scale and then into the Y axis and just start pushing it out.
That's what I get. I can go shade smooth. Here we go. We have the first part of this
right there created. Now all I need to do is start building out this
metal part here. To start with the metal
part, the way I'm going to approach this is quite simple. As a matter of fact, I'm
just going to start with a loop cut right here in
the middle. Let me see. I can maybe even push it a
little bit more up here. Something like that.
And then I'm going to click control
to make a bevel. Then this little bevel, what I'm going to do
is while I have it selected like this as a face, I loop selection
in my face select. I'll then left click
with my mouse. What I'm going to do now
is just press to extrude, but then press to
extrude inside that. Just make sure that you have
either bounding box or I believe it's even going
to work if you have individual origins but don't
have it on active element. Because then it's
going to look a bit wonky now that
I've created this. I have this cut here, but
it's a bit too sharp. So what I'm going to do is
I'm going to press control one to add my
subdivision surface. I'm going to keep it
on one level here, but it looks again, a bit weird. And the reason why it looks
a bit weird right now is because we have not
applied the scale. We need to apply the scale. The scale, we go control
a scale. There we go. Now it looks a bit better, but we still have a bit of a
sharp corners going on here. To deal with this,
what I'm going to do is going to my edge select mode. Press Alt on this edge to
select the entire edge loop. And then control to
add a small bevel. This, now I'm going to
do the same right here. Control, add a small bevel. Let me see here. We need to do four, but there we have that. Perfect. Okay, now from here what I'm going to do
is select this edge loop. And I'm just going
to close it inside. I'm going to press,
let me see if I press a little bit,
does like this. A little bit of a closure
which is not bad. And I'm going to
press to extrude. And then now this is just me taking creative liberty
on how to do this. I'm not using an
exact reference, I'm just trying to assume how this potentially looks like. It almost looks like a rocket
engine at this point here. But let's see from here. Now what I'm going to do is
press again one more time, but this time I'm going
to go into Y axis. I'm going to go
inside like this. I'm going to press to start
scaling it inside like that. I'm going to keep going one more time and then I'm going
to go one more time. Now to close this hole, what I'm going to
do is press three. Going to grid bill. There we go. I've might even want to. My hole looks a bit
weird over there. That's odd. Let me just go
back a couple of steps. I might have made a
mistake somewhere. Here, let me see
if I scale this. That's good, Y. There we go. Then let me persist a
little bit more further inside, something like that. And then three face
that looks better. Then here I'm going to add, I'm going to add one cut
here. I have it like that. And then these sharp corners,
I'm going to do the same. I'm going to add a
bevel control B. Let's start with three.
Let's do three here. Now we have that perfect. Now to add the lights. As you can notice, there's
a little bit of a, there's definitely a
bit of a curve going on here to do that. If you'd really want
to do that curve, there's a way you
could do it manually. I would think of would be
probably just going here, make sure that you have
proportional editing selected and then pressing scroll with your mouse to make it a bit smaller. Okay. Now from here I can
push this out like that and then you can give me a bit of a curve if you really want to have that
curve, but it's not too big. Just a little bit
of a curve right there that I recreated
myself. That's perfect. Now to add the light,
what we're going to do, we're just going to repeat
the same step, pretty much. We're going to go in
here, go at a UV sphere, R x. Rotate that sphere here, scale it up until
it fits in here. Something like that I
think is going to be fined and Y put it, let's say something like here. Alt again, going
to the tab mode, we're going to cut down around
half of the faces here. We'll just make sure that you have your proportional
editing turned off. We can just try to push it
a bit here and then we can maybe make this a bit smaller so we match
the inside of it. But this part is barely
going to be visible. It is fine as is now
shade auto smooth, then you can produce S Y to try to make it a bit
more of a blob like that. There we go. That
is more than good enough for our light. Perfect. Now we're 8 minutes in. So you know what, I'm going
to cut this video in half. If you're good for today,
you're done with this part. You want to make a
break, go for it. And then in the next video, we're going to do
this front part. And I think we're
going to go and do the lights here as
well at the same time. Thank you guys for watching and I'll see you in the next video. Bye.
25. Modeling the Front Lights: Before I start
building this part, let me just increase the
scale of this a little bit. But the thing is like if I
increase the scale of this, then I need to go and increase the scale of this individually. Instead of having to
do both individually, what I can do is parent them. Click on this one and then click on the one that I want
to make it apparent off. And then click control
and set object. Set parent to object. Now if I move this sphere, it's going to move also
this part here as well. That way this one here
is apparent of this one. And you can see that
here because it's inside of it there. Now all I can do, all I need to do is just press, I can scale it a
little bit more. Can maybe push it
a little bit down. I can take this one, push it
a little bit more outside. I can go control a,
Apply the scale. There we go. Excellent. Now let's start
building this part. To begin building
this part, again, we need to figure out
what mesh we have here is closest and resembling to this
shape that we have. The closest that we have
is obvious right here. That would be the cube, right? If I take the cube,
I just scale it. All I really need
to do is match it up with this shape right
here as closely as possible. I can go into my edit mode, Select these vertices here, and then X, put
these vertices here, put these ones here. And then from here,
all I need to do is just take the cube, push it front like that, and now just slowly
start matching it up, similar to what we have here. We can see that it's not
actually standing straight, there's a little
bit of an angle. So it is following the
shape that we have here. What we can do is select
this part like that, We can take this, it here. This is the shape that we are
going to be going for here. Let's see how this
looks like, okay? This lower part, it
is barely like this. But I would say maybe we should push it a little
bit more forward, just something like that. I think this works good. Let's see if we
matched it front wise. I am going to maybe increase it a little bit
more on the z axis. Just give it a bit more
height and then lower it. Let me just see here. Might lower it just a bit
more down. Bit more up. This is again the re
creative liberty type of art of doing this. There we go, perfect. Then from now, if we
look at it closely here, we can see that
there is an inset and then an extrusion
inward that is happening. And that's exactly what
we're going to do. We're going to click to int, somewhere around here
is going to be fine. And then click to
extrude inward. But we need to be careful
how much we extrude inward because we can
see that we're clamping, clipping here with the train. So we might need to, then if
we want to go this far deep, we need to push it a bit
more outside like that. Now, the last part of what
we need to do here really is to work on these corners
so they're not so sharp. And at this point, you can go a couple of
ways of doing it, right? Like the easiest way would simply be just
select everything. Control B and then add a bevel, and then control how
many loop cuts you want. Like this, I mean, this gets you pretty
much right there, right? But then the issue
with doing this method is that you can't really go back if you want to do any changes. It's a bit knowing maybe then better way of
going about this. You could go and say, well
let's add a bevel modifier instead because it's not
permanent and we can control it. Gives us a bit more flexibility on how to approach
all of this here. I'm just going to
go shade smooth. And now let's say, well,
I want these corners to be a bit more sharper
right about here. Well, let's make it an
angle, make it a weight. And then from here, let's
first select everything. Let's add a mean bevel crease. Just a little bit like that. Now this is going to give us a starting point if
we want to let say, add a bit more of a crease here, let's say something
around there. We're going to add a little
bit more of a crease here. Something like that. Then we want to do with
these two corners, we want to do the same
with two corners. Something like that. Now we have like this, but then here inside, I want to make this
a bit sharper. What I'm going to do is One more time, and then one
more time, there we go. And I'm going to
press to extrude, I'm going to extrude it outside.
We're going to press Y. Now I have a little bit of this plate happening like
a back plate or something. As you can see, I can add maybe a loop cut to it just to make it a little bit sharper. Yeah, something like that is actually going to
be perfect because that's where we're going to
be texturing this shape. And then everything around that is going to be pretty easy. For instance, the
way you would do it is you click this one here
and then you glow to select. And you just go invert or control and it selects
everything except this. And then we apply
the texture there. Anyway, that covers
this part right now. Now what we need to do next
is add these things here. I thought a lot about, okay, what's the best
way of doing this? And I figured the
best way would be simply start off with
a curve like this. Not a curve but a
circle. There we go. Then from here we're
going to go our x 90. Then we're going to
push the circle here. We're going to scale
the circle like this. Go into our front
view like that, and try to match up the circle, something similar
to how it is here. Scale it again. Let's see where that's going
to be positioned. Yeah, this is perfectly
fine from here. Now we just want to
start extruding this. So we're going to
press and then, let me see, do we have
all of it selected? There we go. If I go into edit mode, select all the vertices
and then E, Y, perfect. Now from here we just want
to this right about there. This is like the starting
point of this whole thing. We can see even from
this perspective, it looks like it's
a little bit down. We're going to be playing
around with this, but this is perfectly okay. Now we're going to be doing
something a little bit differently once we go into the mode and we click on these vertices in
this edge loop here, we're going to use the Shear
tool, which is right here. Then this Shear tool
should give us, let me see the
ability. There we go. If I click now, I can match
this up a bit better. This and I can go
here and then match this part up a bit better. This is now just me trying
to tweak it so that this entrance point looks the best way possible
that you can see here. Now from here, I'm going to be doing pretty
much the same thing. Which is just, let's see. Taking this part,
trying to make it, this is just me eyeballing
things right now. Then this part here trying
to make it straight, pushing it a bit backwards. We just want to give it
a little bit of a space. I'm just now tweaking, going
back and forth between my different view
modes and trying to get just about something,
something like this. Yeah, just about
something like this. I'm going to go out of smooth, apply the scale now from here, well, we can even push it
a little bit more inside. Because I just want to do this first part that we have here, this is just the first part
here that we need to have. There we go from here. When I have that,
I'm going to press W to go into my box select mode. I'm going to press
to scale inside. And then again to scale inside.
I'm going to press now. And then y to scale that I'm going to press
and then scale inside. One more time I'm going
to go and then y, I'm going to scale outside. This time I'm going
to press a little bit that now let me try it out of this to make a regular
one regular circle. The way that's going
to go, I'm going to go again into my shear tool. I'm going to start this
a little bit more out, pushing this, trying to make
it match, proper circle. I think this does the job. Yeah, I'm going to
go, I'm going to push this a little bit more
here, there we go. Now we're building this first
ring which goes like that. I'm going to press extrude. To extrude inside
just a little bit. Then again, let me see from
here we're going and then y, extrude one more time here. And then like that. This is the second part that
we're building right here. Then we might even want to. This is the first ring
now this is going to be the second one that we're
building. Let's scale this. Maybe something like that. Something like, let's
see how this is looking. Yeah, that looks good.
Let's go like this. Let's go like that. Might
want to go in here, like this edge and then just
scale a little bit more up. Let's see, yeah, there we go. Something like
that. Even better. I'm I'm going to actually later apply the
subdivision for now. I'm going to keep it as is, but then now here I'm
going to go like that. I think it has like
a little bit of a, there's something
going on here also. I think I know how to do it. I'm just going to go like
this then bevel it once, but I'm going to try to, let's go like this scale, this, bevel it here and then I'm going to,
I have this selected. I'm just going to go inside, there we go.
Something like that. And then from here I'm going to scale it here.
Scale it inside. Close it up a little bit. There was an issue
right there, y. So we can do y. There we go. Scale it there,
close it like this. Keep scaling, keep closing. I think from here we can just, let's see, we could just do
like an F three grade fill. There we go. Now, before
we even add a subdivision, so that we smooth
out all these edges, let's start adding
our loop cuts here. Definitely is going to go to, this is going to be
beveled out a bit, three levels, this is going to beveled
out a bit for sure. This is going to be
beveled out for sure. This here is going
to have a bevel, then this here is going
to have some bevel. This might also have a bevels. Apply the scale control
one, and there we go. Now there's definitely
something wonky happening here that has to do with how this
part was done. Let me see control plus, no,
that's not going to work. If we do this probably
has to do with the amount of basis
we started off with. If I just take these pass out, let me see this S, let's just scale it
more inside like that. Then let's add one also here then for here we
just minimize it a bit. Let me see how
many we have here. Vertices selected? The hell do we get a try
to faces vertices 32 net, press F three grid. Phil, I was thinking
maybe if we do it, this one goes to one, this one goes to this one. Yeah, this is where
you get the triangle. Because of that. That's fine. Yeah, here we have
that. Perfect. Now we just need to
add the light inside. To add the light, we can, this is a bit of an inside, but we can probably go
maybe duplicate this. Then we need to
parent it off of it, so we can press all
to clear this parent. Then now we just go
into our front view, held down and then just try
to match it up with this, let's rotate it front. Something can make it even
flatter. There we go. I think that's going
to do the trick. I'm just going to
rotate a little bit. Realistically, we
don't need this many, we don't need many
bases and vertices. But now let's keep it. If our scene starts to lag a little bit later,
we can take it out. Then lastly, what you can do is let's just parent
this to control object. Now we just a mirror modifier that we need to go and
control a ptrsfmow. We might need to add a mirror
modifier to this as well. Unfortunately, let's add a mirror modifier
to this as well. Let's see. Control
a Altransforms. There we have it, perfect.
26. Modeling the Front Connectors: Let us now quickly build
this front part here. The only issue though is that I don't have any good
reference image. And right over here is
it's a little bit cut off. I'm going to use this back
part because I'm going to assume that it is similar. And I'm also going to
obviously do a little bit of creative liberty to say and to do things how I
would interpret them. To actually build this, it's going to be pretty
straightforward. We're going to be using
the same techniques that we did using this. The way I'm going to start
off is simply by adding a circle and then r x 90. All right, then from my front
view to two. There we go. I'm just going to
try to match it up, let's see, to something. I guess over here, this is, that's like
words going to go. The only thing is obviously, let's see, okay, let
me push it here. Yeah, this is like
where it's going to go. The only thing is that it's
not going to be this big. At least not from
the started point. I'm going to do a little
bit of reverse engineering. Here is what I'm going to do. I'm going to select everything. I'm going to go and then
y extrude to this side. Now from here I'm Z. To try to push it, maybe
a little bit more down, I'm going to do y, let's see. Push it like this, then
take this side, do this. Then from here, what
I'm going to do, let me, let me just see how this looks like.
Yeah, it's pretty good. I would say from here
I'm just going to use the shear tool again and
then this, a bit like that. Let me just go here in the
top mode. There we go. Then we're here. This is going to be
my starting point. From here I'm going to go,
I'm going to extrude inside. Scale it a little bit and then scale that inside the Y, Y. That's weird. Let's see, there's a duplicate here
that I need to dissolve. Let me see now. Yeah, I need
to delete these vertices. Okay, there we go.
That's what I need. Then Y, I just
want to push this, scale it a little
bit more like that. Do something like
that, and then scale, make it smaller like this. Now from here, all
I'm going to do is Y, let's say, how far is
this going to be going? Let me see if I can get an
idea. Not too far. I guess. I think this is
maybe a little more, it definitely needs
to go more than here because it shouldn't be getting. If that's the point of
this is like to connect, I'm going to eyeball
it roughly here. From here I'm going to go, let's see if I select all of this
S Y and then I do zero. Yeah, I zero this out. Now from here, that's
just going to do the job for me from here. Now I'm going to make
this smaller, like this. Yeah, I think that's
good. I'm push it inside like this and
I'll push it outside. And then from here,
I'm just going to like scale a little bit. Let's see. Okay, this is, this part is
the one want I build now. Let's see. Do, let's see. Y, E, S, Y, nope. I want to push this again. Here, back here. There we go. And then, there we go.
That's what I wanted. And then like that, I just need to make it smaller. Something like this.
Then again. S. Extruded inside the Y inward a little bit
S one more time, then E Y to go outside. And then this is going
to be the final part. This is, this right here. Let's see. How big do we want to be? Well, let's actually now
use this as a reference. We want this to be definitely bigger than that.
Something like this. I think maybe too much. I think this is maybe too much. So maybe like this,
this is fine. Then from here, there we go. We're going to do here
a little bit like Y, S, just like that. And then from here you can
select three grid fill. There we go, Perfect. Now again, we can
go shade smooth. Now we just need
to add, let's see, one level of subdivision
going to be enough I think, but we're going
to definitely add some edge loops, some bevels. I'm going to start by adding
a bevel right about here. I'm going to add one
also, right about here. I'm going to add one
right about here. Might even make this
one a bit bigger. Let's see what else
we can add one loop cut right about there. I might even considering all
of this here a bit more. So I'm going to
press here and can control plus a couple of times just to push it
a bit more outside. Y control minus and then y. There we go. Push
just a little bit, just get like this subtle. Let's see what else here. Definitely one cut the inside. We can do one even though
it's not that visible. Let's go like that. And
let's add one here. Let's add one here as well. All these corners are
actually the reason why these bevels are also
really important is this is going to help
us with the realism, especially when we
do the shadows. The way the light
hits and reflects and bounces off is
going to be really important to help us
nail down that realism. And let's go scale, there we go. Let's also apply all transforms. The origin point goes to
the three cursor so that now when I add a
mirror modifier, it goes right there, perfect. There we go. We have now this I believe the only thing that's
remaining now for the train are the wheels. Once we're done with that, once we're done with the wheels, our train is pretty
much completed. There is this one part that
I didn't notice like here, I don't think we're
going to be building that just because I don't
have enough information. Because for instance here, you don't even see it here. You can see there's
something going on here, but I also think the waves are
going to be covering that. It's just needless
work at this point. And then a lot of these
reference images, I couldn't, I wasn't able to
find it for now. We're not going to be
building that part, we're just going to be
keeping it like this. In the next video,
we're simply going to add the wheel part here. Perfect. Which is here. All right guys. They'll
be all F this one. And I'll see you
in the next video.
27. Modeling the Wheels: Pretty sure this is going to be the last thing that we need
to model for our train. That is this set of wheels here with this little
gizmo in the middle. I've looked at a couple
of reference images also from real life trains. And looking at this, I just think that this is way, is just way too much detail
and way too much work for something that is barely going to be visible
in our instance, mainly because the water, as you can see here
in this image, the water is going
to be covering it. Instead of having to focus
on too much on that, we're just going to be
creating something that resembles the basic shape of
what we have going on here. To begin with that,
quite simply, all we need is a plane. We're going to take this plane, we're going to rotate it in
the Y axis by 90 degrees. We're going to go
into my right view, and I'm going to
scale that plane, somewhere around here,
something like this. And I just want to get
like the basic proportions of how this is
supposed to look like. And I'm going to go S, Y, I'm going to say
somewhere here. And then Z, somewhere like that. For me, this is going to be the basic shape that we're
going to be starting off. I'm going to apply the scale. Then what I'm going to do is
I'm just going to cut this in half by adding control R and then leading this side I
can use the modifier and speed up my work instead
of having to deal with only one side this time. So far we used the
modifier on the X axis. I believe this is
the first time that we're going to be
using it on the Y. Now, I'm just going to
take out the X axis. For now, I'm going to
enable the clipping here. Now we have the modifier
on the Y axis here. The next one thing I'm
going to do is, let me see. We have this part here. Extends, Goes from
here, but it extends. I'm going to add
a loop cut here. And I'm going to
separate that loop cut into two parts like this. And I'm going to just
extrude this side in the Y axis like this. Here, there we go. This is actually going to be
the beginning of my mesh. I'm going to then go here. I'm going to add
another loop cut, and I'm going to cut
out this face so that I can get this shape
here for the whole. I'm going to add one more
loop cut right here, so I can push this
loop cut right there. This is what gives me the basic primitive shape that we're going to need just
to get started with this. From here, I can add a
subdivision surface modifier. I can press control one. Let's go control two for now. But I don't think we're going to need that many subdivisions to be honest here. I just need to actually tighten
up all of these corners. I'm going to start off
with the easiest one, which is this here. Then I'm going to add another
one right about here. I'm going to add one
more right here. I'm going to add one
more right here. I'm going to do one more here. Let's see, one more here, and then one more here. I'm going to add one more here. For now, I need to
add one more here. And to tighten this part up, I'm going to need to
add one more here. One more here. Let's
see what else we need. One here, here. Then I can go and do this. There we go. That does that for me, exactly what I wanted from here. What I can do,
I'll go like this, Add one more corner
right about here. The easiest thing to
clean up right about now, I would say the first
thing that I would clean up is I'll just
take out this edge. Because we have way too many edge loops
right now going on. I'm going to take
out this edge and then collapse this part here. So that I have a quad
going on right here. So I can take, maybe this part, put it something
like that, Y zero. Take this part,
put it right here. Y zero. There we go. I'm just going to go
collapse all of these edges. That is immediately
already starting to clean up my
scene a little bit. Now I need to deal
with this part and this part here also. I'm going to deal with
this part for here. What I'm going to do
is I'm just going to go like that here. I'm going to go this. And then I can just take out this edge, dissolve this one. I can dissolve, I think
this one here. There we go. And I can do the same.
I can dissolve two. I think I dissolved
the wrong one here. Because here, let me see. Let's take a few steps back. I did dissolve that one. Dissolve that. Think,
let's see if I dissolve this edge right here. This edge, this
edge, and this edge. That gives me, I think, what I need exactly
I'm going to do. Check afterwards. Here, I'm going to dissolve this here, which is what I need. And then from here I'm going
to just dissolve this here. There we go. I think that gives
me basics of what I need. I can probably take this there. Okay, let's do a quick
check up and see if all, if we have maybe any
triangles going on. I'm going to go into select all by trait faces
equal to four. Let's see, less than four. Greater than four looks like we are doing okay. That's good. Okay, is there
anything else that we can cut that we don't
need? We could cut this out. It looks like it, but then
this gives us this issue. If I cut this one out, that cuts that corner. I think we need everything
that's going on around here and we can do this, which might also be
important a bit later. Everything that, I think this
is a good starting point, we're not a starting
point, we're are like halfway done, to be honest. But what we're going to do
now from here is simply, let's add a Solidify
modifier to, there we go, Solidify. Let's just a little bit
more for the thickness. I'm going to hold Shift, click here and then a
little bit more to get like 1015. I think that's good. I shade smooth, I'm going to apply my scale so
I can get this. I'm going to also add
a Bevel modifier. Let me also go into the
bevels bullion, but bevel, there we go for this, I think three levels, there we go for shading, I'm going to put hard
normals, that's perfect. I might go into my subdivision because I don't want
to have two levels. That's just going
to be too much, it's unnecessary,
maybe even bevel let's see if we
control the amount. Is it going to make any
difference if we make it smaller? Nope, let's just
keep this like that. Okay, this is fine. Good. From here I want to do is add a inset right here because that's going to be
for this part over here. I'm going to do an add an inset. I'm going to make it closely resemble like a perfect
square, I believe. Now this is going to
be the first time that we use the Loop tools, which we haven't used yet, which is the add on that
we installed initially. Ifly, here on the Loop tools, I'm going to go here in circle, and that's just going to make this look like a circle, better. If I delete these faces, now I have an perfect circle going on right here,
which is great. Okay, let's see. I think that actually is everything that we need
from here, which is great. Let's continue now with adding
other things that we need. These guys, I'm just going
to use basic squares. Basic cubes. Sorry for that. I'm just going to
use a cube and put it something like there
while we were added. We might as well select both
of them and then just push them in x axis right here. Let's see, G, x one more time just so
I can see them better. I can rotate a bit
around them better. All of that, I'm just going to push them somewhere
here. That's good. Put it here, X
something like that. Y something like that. Let's see how this looks
in terms of the size. I'm going to push
one more like here, Y. Yeah, that's good. Perfect. I'm going to add
a bevel modifier just to help a little bit
more with the shading. I'm going to apply the scale. And then here again on
the amount I'm going to hold shift and then
click with my mouse. And then oil towards left side. That gives me a
little bit more of control in terms of the
increments and precision. Honestly, this is
more than enough. If I really want to, I can add one more level,
that's pretty good. I can do here, harden normals, maybe we can add the amount, make it a bit more roundish, but this really gives
us what we need. Then from here what I'm
going to do is I'm just going to press D and then Y, Then I'm going to
press shift R to, there we go. Repeat that step. Now all we have are just instances of this object
here that are created. And that's, that's good. Then let's see what else,
what else would need? We need two of these rods
going up to do that. We're just going
to take this one. We can actually, let's see, duplicate this one shift, put it here behind push up. We can maybe make
it a bit thinner so that they don't
fully match up. Apply the scale, we can maybe offset it a
little bit to this side. I'm going to do all D, G, Y, offset this one a
little bit to this side. I can make them a
bit closer to here. Something like
that. There we go. Should we make these
ones a bit thicker? Let's just make them a
little bit thicker Y, they don't need to be
evenly, that's good. Now lastly, it's the
wheels themselves. For the wheels,
we're going to go shift A and go into circle R, Y 90, scale them. I made sure also to use
like I think ten vertices. So let me just step a few steps back so you
can take a look. If I go shift a circle, you see the vertices is
around ten because we don't need that much
detail going on here, because this is
going to be barely visible somewhere around here. There we go. I just need to now match up the origin point closely
to the center as possible. This will do the
trick. I'm going to go and tab edit mode. Select all the vertices
and then press, I'm going to press to inst. I'm going to inset it
roughly around here. I'm going to press to extrude. I'm going to extrude
inside like this. This is going to
be this part here. I'm going to add one
loop cut right here. I'm going to add one right here. I'm going to add one more
inset right about there. And then one more,
right about here. I'm going to delete
this face now for here, I'm just going to use
three T fill this. We already added a couple of edge loops here so that
we can contain this. Once we add the
subdivision surface modifier, that's the goal. So we're just trying to speed
through this, to be honest. And then X. To do this I'm going to
add two more right here. I'm going to press
and then add that. Then here I'm, let's see so I can see better
what's going on. There we go. I'm going to press, I'm going
to push it roughly here. I'm going to push one
more somewhere here. I'm going to press three
grid, Phil, that's good. If now press control one. Control two, we should be getting something like this
which is a pretty good shade, auto, smooth, apply scale. I'm going to go here
and add one more. One more bevel, and
I'm going to here. I'm just going to add,
let's see, one more. Maybe, there we go. We have our wheel ready to go. Let's see the size of it. We could maybe make it a
little bit smaller like that. Now we need to take this. I'm going to a G Y here. What we can do also is
add another circle, R Y 90 scale, that circle. To put this in the center, there's going to be levels like this small nail thing
that we have going on. Then G, x, push it here, let's go something like
that. There we go. Then from here, what
we need to do is, let's see, Let's press, let's go to do this. I'm going to add one
loop, cut right here. I'm going to repeat
the same step here, faces edge three grid, fill the drill, and then
x, I'm going to make this. Then I want to go here so I can see
better what's going on into my x ray mode and
then some right here, and then one more time
somewhere right there. And then X to do this. And I think that's going
to be more than enough. Yep, that's more than enough. Kate auto, smooth control Y
to add one level subdivision, add a bevel right here. Pretty much. We can add one here just so we can
get this corner. But like I said, nobody's
going to see this. That's defeats the point. Then to add too much
detail shift D, I'll just duplicated it
to put it on this side. Actually what we can do
is all D and then Y, Put it there, and
there we have this. Now one thing I do
recommend maybe we should do is looking at this is What we could do is apply and then apply
all the modifiers. And join all of this as one
so that when we mirror it, it mirrors all of it
together so that we don't have to mirror all
these individual parts. I think they're just going to clean up the scene a little bit. Let's do that now.
Let's just start applying all of our
stuff that we have here. I'm going to start with
applying the Semror modifier. I'm going to apply
the subdivision, I'm going to apply the solidify, and I'm going to apply
the bevel For this one, I'm just pressing
control a while. My mouse is right here, so I'm applying bevel here. I'm applying the bevel
here, Make data object. All right, I'm just
applying everything now. For instance, in
this instance I can control J. I can join
these guys together. I can go here, I can
apply then here, I can also apply here. I can apply here, I can apply here. Now, I believe, just make sure that
everything is applied. If I select all of these
guys now, there we go. I press control J. They are all joined
as one object. If you still want
to, let's say later, we might need to separate
them into individual. What you can do is
go into tab mode because they are still
separate objects. They're not joined by
vertices or anything. Let's say I wanted to
separate this here, I can just press L like that, and then I can press P and
then separate by selection. We can still separate
this later on if we need. There's a lot of
vertices going on here, a lot of edges, We can actually
take some of them out. So I'm going to do a
little bit of clean up. I'm going to dissolve
some of these edges. I just don't think that we
need this going on here. That's partly my
fault for applying maybe too many levels
of subdivision surface. You can do this clean up on your own as a matter of fact as well, but that's what I'm
going to be doing. Maybe later on we'll be
doing a clean up phase. Now once we're done with this, I'll be showing you all the
stuff that I'll be doing. But for now, let us just continue with finishing
all of this part up. I'm going to add this
here, there we go. I'm going to press
all transforms that. Now my origin point goes there because now that my
origin point is there, I can just go add a mirror
modifier and look at that. We have the wheels also
on the other side here. Perfect. Now you might be wondering, well yeah, but it doesn't look full. Something like missing. You are correct,
something is missing. What's missing is this, Let's
see, what do we have here? Missing. What is missing
is see these boxes here. There's a little bit of also
a shadow going on here. There is something
also behind it. Yeah, to deal with that, let me just first also duplicate this shift Y, Push it here. There we go. Then in this instance,
what we can do, we can take these rods. I'm going to go into tab mode. Press on this rod, then I'm going to
press on this one, press L on that rod. I'm select this side. A little bit more up, there we go to deal with this so it's
not empty on the inside. What we're going to do
is we're going to go into our bottom view, as a matter of fact, and
just press at a cube. We try to match the cube,
something like this. Then let's go here as y
to somewhere like here. Yeah ''s Z. Make it a bit smaller. And then push that cube
a little bit more up. Now, I would say the cube does its job
pretty good for us. This situation, I don't
think that we need to do anything
more besides this. It's going to give us a little
bit of that shadow also in behind it gives us a little bit of that
fill, which is perfect. Now for the last part,
in the next video, we're just going to be checking everything to make sure
that everything is good. If there's any more
room for some clean up, for some small, minor mistakes. If we can clean up some of the topology, like for instance, what we did just now here,
we'll be doing that. I believe we'll also be applying
all of our modifiers so that we can do like a final clean up and
also duplicate the train.
28. Cleaning Up the Topology: Reach this part of the video. First of all I got
to say is congrats. Because we are pretty much done with the modeling of the train. There are a few very small, tiny details left, specifically talking
about this part here. But for this very video, we won't need to be
doing that for now. What we're just
going to be doing is cleaning up our scene, naming all that stuff here, and just checking that all of
our meshes are pretty good. If there's something
that can be improved, like if we go here, we can see that there's
a little bit of edges that we can probably
take out and clean up, especially if you don't
have a high end PC. All of this can slowly build up on top and slow
down your viewport. Slow down your scene,
slow down your progress, especially when we start
animating the water. We just want to optimize, clean up our scene as much
as possible before we start applying all of
these modifiers as well. Because we're going to need
to do that as well right now. What we're going to do first,
or what I'm going to do, and you can just follow along, I'm going to speed
up this part of the video is I'm just going to name all of these
things here and put them inside my
train collection. So I'm going to start right now. Okay, So this is
how I name them. You can replicate it
from me if you want. Bottom shadow, front
connector, front light, front sign, top cylinder, back top cylinder,
in front top light. This should actually
be front light instead of what I name this. Front light light. And then this should
be front light. There we go. Top middle
wheels, back wheels, front. That's about it. And
then from here I'm just going to take this and then put it into my train
collection like that. Then I'm going to be left with these two which were parented. So I'm just going to
call this top glass, I'm going to call
this front light. And I'm just going to take this, put it here now. Everything is where
it should be. Before we start
applying our modifiers, I want to go over the
mesh one more time and do a little bit of clean
up on certain areas just so that I can keep my
scene as lightweight as possible and as
optimized as possible. I'm going to go here in the, I can't remember what I even
named this, Wheels Front. We're going to be doing the
same thing for wheels back. What I'm going to
do is just select every second loop edge right
here, something like this. And then let's go like that. And I'm going to be
just removing them because I'm going to not select these ones because I do want to keep the shape. So I'm just going to take
out any edge that I find won't affect my
scene, to be honest. And if I dissolve these edges
while I'm looking at here, for instance, let me
just select this side. Let's also select few edges. In here, you can see the amount of vertices I
have in the amount of edges, and if I go now and dissolve
these, the number goes down. Our scene is getting
a little bit cleaned up, for instance. All of these are not going
to really affect my scene, but they are going
to make it lighter. I'm going to take
out these ones here, let me see what else I can take. This one, this one really, this one. And keep this as is. I think that cleans
up this wheel. I'm going to do the
same for this one. I'm going to dissolve this one. Dissolve this one, actually,
I'm going to keep that one. I'm going to keep this one. But I am going to dissolve
a lot of them in here. I just pressing Alt and
X selecting an edge, deleting an edge, selecting
an edge, deleting an edge. And back and forth like that. That's fine. Let's see here. I'm going to delete this edge. I'm going to delete this one
here. Everything is fine. I'm going to take
out some edges here. I'm going to dissolve
these guys up until there. Right now we have
around 7,300 faces. Let's see how many
we're going to have once we clean up this side. Let's just go one by one. Let's see how many we have here. Faces, if I select
here, 9,000 faces. Let's see how much we're going to have. By the
time we clean up. We should probably get up
to 7,000 probably, I think. There we go. Here we went again.
9000-7 thousand faces. We cleaned it up a little
bit, which is good. Let me see here. There we go. Take out this one.
Perfect, excellent. There's a few more places that we can do a little
bit of clean up. Let's see, here we have
these three going down. We could probably
contain them if we want. If we go like this, we
dissolve this edge and then go here and
collapse like that. That's going to be cleaned up. The dissolve this one
and then collapse. These guys collapse with
this here and collapse here, collapse here and collapse here. We also have that settled. Then here for instance, we can
take this edge right here. We can take this edge,
push it right here. We can take this one,
push one more right here. But then these ones
in the middle, we can, we can just take
out these edges here. The reason why I added
those to the corners, these ones here is just
almost like a container for this part here
balances evens out. There we go. Okay. And then let's see here. I'm
going to add one edge loop to contain this to this area so it doesn't go all
the way down here. But I'm going to
dissolve this edge. I'm going to dissolve this edge. And then I'm going to
collapse, collapse here. And just repeat the
same steps I did earlier. There we go. Then here I can probably take out
dissolve this edge here. I can dissolve this edge. Let me see if I can
dissolve this one. Yeah, let's keep these four. I'm going to probably
need for this corner. I think over here we
have the same issue. So I'm just going to dissolve
a couple of edges here. Then let's see, similar issue. So I'm going to
dissolve a couple of edges. I think that's about it. I'm not going to touch
anything in this part here. That's fine over here. Let's see. Yeah,
everything is fine here. We don't need to
touch anything there. Then here, everything is fine. Everything is fine here.
Is everything fine? We could probably
do something here, but I'm going to keep it as is. I'm going to keep this
one also as is for now. Next thing that we want to do
now is we just want to make a duplicate of this right
click duplicate collection. Before we start applying
any of our modifiers, we're just going to call
this one train modifiers or train backup,
you can call it. I'm going to put it below and I'm going to
call this one train applied this one that we just called modifiers or back up, I'm
just going to hide. And this is going to
be our backup if you, if something goes wrong so
that we can have it there just in case it's always good to
have a back up over here. We're going to start slowly
applying our modifiers, not all of our modifiers just
depending on the object. If you remember our issue, for instance, that we
had with the door, and we can just immediately
start with the door for now, if you remember our
issue with the door. But we had a little bit of that shading issue and it still remains here to this point. What we just need to do is if we apply our shrink wrap
modifier, I believe, but keep the subdivision and the mirror
modifier going on, I think we should
be perfectly fine if I apply the shrink
wrap modifier. There we go. We can keep these two modifiers
going on here. If I go back even before, if I just put the shrink
wrap in this instance, the order of the
modifier was important, and that's what was
causing the shading issue. If I put this above here, and I click here, apply it. There we go. We're doing fine. Also, I noticed a
small issue here, If you can notice it
around the corners. This is just caused by this thing here that we
added for our shadow. I'm just going to push
this a little bit, it doesn't bot it with the door. I'm going to go and
start basically from the top here,
from the back middle, and then slowly work my way down all the way Before we begin, I am going to do one more
thing and that is apply this, make this, let's see,
convert to mesh. There we go. Now we
converted this to a mesh. There's a small issue
happening right about here. What we can do just
for a quick fix, let me just go back
into my back view. Quick fix for this I
would say is just, let's see into the edges and then delete these two
edges. Let's go like that. Delete these two edges. Then from here, let's delete loops all over
the place a little bit. Let's see, delete
these vertices. Select this edge loop, select this edge loop control E. And then let's see
bridge edge loops. There we go. That would
be a quick, easy fix. We're going to do the same here. I think we have the same issue. Let me see. Yeah,
it's the same issue. I'm going to let the
vertices select this one, like this one, control E, and then bridge edge loops. There we go. That
fixes that issue. Now I'm going to start
with the back middle. For the back middle,
what I need to apply is I need to apply to mirror modifier. There we go. Because if I don't apply to
mirror modifier, and I apply, let's say the subdivision, I get this issue here
with the clipping. So I do need to apply the mirror modifier
first in this instance. Then I'm going to
apply to subdivision, I'm going to make sure that
I only have one level of subdivision going on here, so I don't need more than that. I'm going to apply this and in this instance I'm going to
apply to shrink wrap modifier. There we go. All right, Next we're going to
have the bottom shadow. We don't need to do
anything that as your cur we already covered. Let's see, What else do we have here for the front connector, we don't need to do anything here because these
aren't touching. We don't need to
apply subdivision, nor do we need to apply
our mirror modifier. Put our mirror, there we go. For these ones, we
don't need to do the same for the front rails. For front rails, we don't need to apply the
mirror modifier. We do want to apply
the subdivision and I want to apply
the shrink wrap. These two are the
only ones that I want to apply front here. We don't need to apply anything. Front window for the
front window. Let's see. Shrink wrap subdivision
and mirror, we just need to apply
the subdivision. And we need to apply the
shrink wrap. There we go. For front wood, we need to apply the mirror modifier
because it's touching here. And then we need to
apply the subdivision, and we're going to
apply the shrink wrap. Anything that is touching, we're going to need to apply the mirror modifier,
the subdivision. And in this case we're going
to apply the shrink wrap. But then if something isn't touching, we won't
need to do that. You can just speed
through this video or you can follow along as I'm
doing this as well. Let's see, Mirror modifier, we need to apply
that subdivision. We need to apply
that shrink wrap. We need to apply,
one thing I didn't check is how many
levels of subdivision. Just be sure that
when you're applying, make sure that you are applying with enough levels
of subdivision. Maybe on certain things
we had like two. And that is completely unnecessary because
as you can see, if I put it to one, it still
remains very much similar. For instance here, I'm not going to apply to
mirror modifier, I'm just going to apply to the subdivision and
I'm going to apply to shrink wrap, just like that. There we go. Let's see,
what else do we have? Let's go to the side, bottom side door left. All right, so for this instance, let's just check to
two side door left. We already applied side
door right over here. We're going to do
the same thing, so we're going to take
a shrink wrap. We're just going to apply it. And there we go here. What is the next side window
over here? What do we need? We have two levels
of subdivision for our side door window. And do we really
need two levels? I don't think so. I'm just
going to put it at one. It doesn't do anything
for my scene. I'm going to apply
the subdivision and I'm going to apply
the shrink wrap. I'm going to keep the
mirror modifier as is. Then for next one
side door window, right, which is this one. I'm going to do the same thing. I'm just going to lower this levels into Viewport and then apply the
subdivision here. And then apply the shrink wrap. Then let me check if
we have anything else. Side door, window rim, right? This is for the window rim. How many levels of subdivision? We have two levels
of subdivision here. Do we need two levels? Let's just check. You could
probably live with one, but for my case, I'm going to go with two
levels of subdivision. I'm going to use the shrink
wrap, apply it then. This one here is probably
the same instance. Yeah, I'm going to go with two levels and I'm going to apply the shrink wrap side
left window wood. Let's see what we have here. One is perfectly fine. We just need to apply the
subdivision and I believe we're going to apply
the shrink wrap in this instance here. We're going to apply, let me see if I apply
the shrink wrap. Only we could probably keep it like that
because there's not much drastic change. Let's just apply
that. All right. Side middle wood. I
think if we do the same, if we just apply the shrink
wrap, we're going to be okay. There we go. We can
keep the subdivision as is. Let's see here. Yeah, for this part
subdivision, one level. All right, let's apply
the shrink wrap. This one, let's apply also only the shrink then.
Let's see here. With these windows,
what do we have? How many levels of subdision? We have two levels
of subdivision. I think we're going to
need the two levels because if I go lower, there is a bit of a issue and then I would have
to go and reapply it. I'm going to keep it
at two in my instance. Let me just check if
I apply only this. So if I only apply
the shrink wrap, everything pretty
much stays good. Check on this side,
everything stays good because we have
the mirror modifier. So there we go,
Side windows, rim. Let's just see
subdivision shrink wrap in this instance
on the right side, I'm just going to
apply the shrink wrap, keep everything else
as is side yellow. Let's see side yellow. If I apply only the shrink wrap, we do get a little bit of a
change in shading and angle, but I think that works fine. We have a bit of an
issue going on here. I think we were
going to apply first the subdivision and then we're going to apply the shrink wrap. The reason why I'm not
applying all of them at the same time is
because as you saw with the order of the
modifiers is important. It just happens that
in this instance here, depending on which
one apply first, there's going to be a
different type of impact. I am looking into how applying the shrink wrap versus subdivision is
affecting my scene. I don't want to
apply all of them because when I go
into the eddy mode, I'd rather have this
limited control and in a non destructive way versus having it applied fully
like you see here. And then not being able to
go back to a lower mesh. Let's just see we got here. All right, for the top part, we will probably, we need to apply the mirror
modifier for sure. Then let's see if we apply
only the shrink wrap. Yeah, there's a bit too
much of a change going on. It's not that too much, but let me see. I mean, there's no
shading issues for sure. We did a mistake here by not applying the mirror modifier. So let's go back to
the side yellow. I believe this one here. I need to take a few
more steps back. Let's see, there we
go, side side yellow. Why is this happening? There we go, side yellow. What I need to do here is just apply the mirror
modifier first, and then apply the subdivision, and then apply the shrink wrap. Let's go like that. Then next
is the top. Let's see here. For the top, we need to apply
the mirror modifier first. I'm just going to
apply the shrink wrap. There's going to be a bit
of a change in height, but I think that works fine. There's no issues
with the edges. Everything looks good.
Top cylinder back, we don't need to apply anything. Top cylinder front, we don't
need to apply anything. Top here, light, we
don't need anything. Here we are also good wheels were already took care of and here we
already took care of, this is what we have and
there we go, perfect. All right, we're done with
applying all of our modifiers. What we can do now next is
simply put this on a rig. What I'm going to do is
I'm going to go shift a, go into my empty, and I'm going to select a cube. I'm going to make
sure that this cube matches the width and
length of the train. S, Y, G, Y, something like this. And then here I'm going to
make it a little bit bigger. I'm going to make it, let's go like something like
that. There we go. And then I'm going
to push this here, make it a bit smaller, just
so it matches like this. I'm going to call
this, put it zero, rig zero, just so we can push it all the way up on top like that. Then when I have
everything here selected, I'm just going to take this. And while holding shift, I'm going to put it in the rig that is going to make
this rig now apparent. If I want to move this, as you can see, it's going quite well. But it looks like
we have one issue. We didn't probably apply the
shrink wrap modifier here, and we should have,
let's just go click control A and apply the
shrink wrap modifier here. There we go. Let's see. Now if everything moves, it works good. Perfect. This is what we're
going to basically be doing to animate the train. All right, what we can do now actually is let's go
and then right click here. And let's select Hierarchy. And then click shift
D one more time. There we go. And then I'm going to go R,
Z. I'm going to do a 180. There we go. And then I'm
going to go y and push this here like that, perfect. Now I basically just have two
meshes going on like this. Then what we can
do is just here, this one is just going
to be a placeholder. We're going to be redoing this exact same thing
that we did once. We texture everything so that we don't have to texture it twice. This one is just going
to be a placeholder that's going to help us
with our composition. I'm going to call this main rig. We're going to call
this 1 second rig, just something like that. Then we're also going to add, actually this is not
going to be our main rig, this is going to be
also our second rig. I'm going to call
this front rig, back rig because now what I want to do is
I'm going to also add another rig that's going to be holding all
of this together. I'm going to do empty
cube one more time. This one I'm going to put
a little bit more above. I'm going to make it a
bit wider like this. And then go and do that right about here and
then make it a higher. There we go. Now if I take these two whole shift
and put them under this one, I have this main rig that
will control everything. Main train rig inside that
training ring we have front, which is the one
that we're going to worry with the most now. Then we still need to model
this thing here and then add this here and we're going to do exactly that in the next
video. I'll see you there by.
29. Modeling the Middle Connectors: I'm noticing just a few issues. I think we have a
little issue over here that I might solve
just by going control A, transforms, there we go. We just fix that. If you have that issue, that's
how we can solve it. You may also need to apply
all the transforms here. Yeah, transforms, there we go. What we're going to
start here is just building this connector here
and then building this part. It shouldn't take too long
because as a matter of fact, we already have this pre built. We can just re, use
this part here. If I go shift D, then G, Y, put it
somewhere here, and I go R Z by 180 like that, and then Y, put it here. We already have a base
mesh to start off with. From here, what I'm going
to do is let me just apply l transforms and then see I'm going to make it
a little bit smaller, push it a bit more closer
here, something like that. I'm noticing there's a small
mistake I did when applied. When applied, I didn't apply
the mirror modifier first. I applied, it turns out I apply the subdivision first without applying the mirror modifier. But to fix this quickly, while we have the
mirror modifier, what we can do is just go x. Let's just push this like that. That should fix our
issue because we have the clipping here enabled. We're still fine on that end. What I want to do here, it looks like we're going to
need to do it here as well. Let me just select everything
X and put it there. There we go. What I
want to do here is just fix this part here
that's in the corner. Just make sure you go
into the edit mode and make sure that your
shear is enabled. I'm going to go into
all Z from here, select everything here, and then just make it straight like this. I'm going to hold control
and it's going to help me to move it in
certain increments. That's going to help
me get to zero it out. Then I'm going to select this
here Alt and click on it. And then Y, and then zero. There we go. I'm going to
go into my right view. There we go, here. And I'm
going to select everything. And I'm just going to push
this y a little bit more. Let's say something like
this and I think this is going to give
me a decent start. Perfect. From here,
what I'm going to do is go shift D one more time. Z might need to
press, let's see, control all transforms
G. There we go, Z 100. I'm going to push
this all the way here and then try to
connect these guys. Let's see, find
some decent amount. Another way that we
could probably do this, now that I think of it,
is just delete this. Let me see if I were to
go into my edit mode. If I were to put here
the origin points of press control and then
click with my mouse. Without being in the edit mode, I press control and then
re click with my mouse. Or is it a controller and right click shift and
right click my bat. If I press shift and right
click with my mouse here, then here shift and I say cursor selected
slurs we actually want here objects set
origin origin to three. Cursor, there we go. Now what I want from
here is to add another. Just tell mirror modifier. Actually tell this mirror
modifier to go into Y axis. There we go. That's exactly
what I wanted to get. I just need to align it
a little bit better. Let's see, this
actually works fine. I think that's okay. We do need to maybe push
it a little bit more. Maybe we can, let's
see if I go into the edit mode of this one and then just
push this a little bit more back like that. I push a little bit more. Pretty much have it good. I can press Shift C now and that's going to
reset my origin to here just to make sure
thing is connected, everything works, there we go. Now for next, we're going
to need to do this. And to do that is
also quite simple. What we're going to
do is let me just, yeah, that's fine, that's fine. I was just double checking here. Let me just go into mesh. I'm going to add a cube. I'm going to take the
cube, push it here. I want to make the thickness of the cube roughly
something like this. I'm the height of it, something like this,
somewhere around here. Let me see how this looks. All right, this in between
here, I would say. Maybe, yeah. I would say something like that. Makes sense? Yeah. Something
like this makes sense. I'm going to say maybe push
it a little bit lower. It's right about here, This thing goes around it,
but we still have this. All right. Now from
here I'm going to add a bunch of subdivisions. Let me see how many control and add something like
this, press escape. Then I'm going to go
control like this. And then I'm going to
add one in the middle. There we go. And now I'm
going to press control. And minus, if you don't have
the numpad on your keyboard, you can go in there, select,
You can select more or less. You can press Select less there that now what
I'm going to do, I'm just going to make sure
that I have, I believe, my bounding box and if I press, I'm going to scale
it down like that. Let me just press W
so I don't no longer have the bounding box.
Yeah, that's not good. I don't want to have
the bounding box if I have individual origins. I think that's the one
I was looking for. Individual origins. There we go. When you make sure that you
have individual origins here and then you just
scale it down like that. I'm going to add control
one to add a bevel. Might even add two
levels of bevel. And then I'm just
going to go here and add three levels
maybe subdivision. I'm going to take this level, push up right about here, take this level, push
it up right about here. And then for this part
I'm going to take this level and push it,
something like that. And then bounding box and
scale it to these corners. Shade auto smooth. I don't want them
to be this sharp, so I'm going to add
an edge in between these corners like that scale. I think that gives me
what I'm looking for. You could go further and you can add more
subdivisions in here, but I think I'm going to
keep it as is like that. Now what I'm going to do, let's see how many subdivisions
we have here. Going on two levels, so there's a lot
of going on here. So I'm just going to go
maybe like this one. There we go,
something like this. What I want to do now here is let me just
shade auto, smooth. Maybe I'm going to
apply a Bevel modifier. Let me see, just so I
can get these edges a little bit more nicer. Mount segments,
maybe two segments, something like
that. There we go. But I am going to
apply the subdivision, the reason why apply
this subvisionI'mto my verdict select
node right here. I'm going to go under select. I will, I want to select
random. Here we go. Random select. Let, let's take a couple of different
ratios like this one. Press Alt, and then,
and then I'm going to, let me try to move
it very slightly, ever so slightly, not
to break anything. And I'm going to go and
do another select random. I'm going to go another
random seed and then alt S one more time and then
just holding shift, just moving it but very little I'm going to go at and
then move it just a little. I think I broke it way too much. Now I'm going to go a
few steps backwards. I'm going to probably have to
go one more step backwards. The hold shift a little
bit. There we go. Select random shift
just a little bit. I want to do this one more time. Select random al hold shift
and then just a little bit, this just gives me
a little bit of a variation going on here. Let me see if I can apply
one more subdivision. I'm just like overdoing it at this point with
the subdivisions. I can't apply one here. Let's just have one
level like this. I just wanted to essentially, let me see one more time. Maybe if I go select a sell random then at S and
then hold shift, there we go. So just make sure that you
have a subdivision applied. A subdivision also here. That's just going to give me a little bit more wiggle room. Give just some variations, not all of them are
exactly the same. I can also use, if you want, you can go here in
proportional editing and then press and then, and then move this a little bit. Move this one here,
move this one here. This one a little bit
here on this one. Like this one. A
little bit more up. We just want to achieve
a little bit of randomness there so
it doesn't look so perfect like that. There we go. I'm just going to call this connector connect metal. I don't know, I'll
put this, let me see. I'm going to put it in my 01. So I'm going to put
this into zero. Now if we move everything, we finally have our train completed and we
are done with it. For the next steps, we're going to be going
creating the environment. So we'll start with
creating the station, and then once we're
done with the station, we'll move on to texturing. And once we're finished
with the texturing, we move on to the animation. All right guys, they'll
be all for this video. And I'll see you in the next one where we'll
start building the station.
30. Modeling the Station: To begin building
the train station. I'm simply going to start
off by hiding this part here with our reference
images because we don't need them
anymore at this point. What we're going to do is
simply going to my right view. And what I want to
is just to center the train somewhere around
here, something like this. This is basically going to be this scene that you see
in the right corner. Then from here,
what I'm going to do to use the base
of this station, which is going to
be this part here, is a simple cubes. I'm going to go add a
cube in my top view, I'm going to put the cube
somewhere around here. And then I'm going
to scale it in the X axis a little bit,
make it a bit wider. Then I'm going to
scale it into y axis, making it a bit longer. I'm going to go into
my review again because I want to nail
this composition. I want to see how far,
in terms of dimensions, how much wiggle room
space do we have here, And then how much do we
have here, get that amount. I'm just going to push this a little bit further.
Something like that. And I'm going to hide
by clicking Alt, Shift and Z, just so I can see. Okay, and then if I push this, something like that, make
this like the height, I think this is going
to be good enough. I'm going to shift all Z at
one more time to my top view. I think this is going to
work just great for that. What I might do now to help me navigate through all of this is I'm going
to add a plane. I'm going to use this as
a reference where water. I'm going to press S
and then I'm going to type in, let's say 30. We scale it 30 times like this. And I'm going to just apply
the scale here as well. Now I can get a better idea of the level of water
and everything. I think the water is
a little bit too low. In my case, what I'm
going to do is I'm going to push it just just enough to say cover a big portion of the wheels but not
go further than that. I think that's fine. Okay, let me see. Now from here we need to start modeling this part
of the station. The first thing I'm going to do is I'm going to start off by, let me assuming to apply
to scale obviously first, then instead of having
this be like a block, I do want to have
it at an angle. This edge right here, I'm going to select this
edge right here. And then just press S Y to have them scale just a
little bit like that. It goes at the angle. Might need to scale
it a little bit more. So everything around there
is going to be fine. Now from here, what I'm going to do is I'm going to
add a bevel modifier. I'm going to add, say, three bevels, maybe four, and then lower this down
somewhere around here. But I'm going to use also, not angle but the
weight for starters. I'm just, I'm going to select everything and apply
the weight everywhere, all the way to the
max from here. I just want to, let's see, how do we want to approach this? How many bevels? I don't want to go more
than forward to be honest, because it's already
going to be really far. Maybe having it somewhere, I guess 0.05 is going
to be good enough. Shade smooth, shade
auto, smooth my bad. But I do want some
parts to be a bit. For instance, this part right here. I do want it to be a bit. I guess I might need to increase the bell
weight a little bit more. Let's try. Yeah, 0.0 0.2 But
then this edge, then then this edge right here. These edges, I want them
to have smaller weight. Let me see how that's
going to look. Okay, then maybe I'm going to decrease it here. Just maybe 0.1 See, I think that's
going to work fine. Just a little bit of a
softer edge on this corner. That's here, but then here we could probably have
it a little bit sharper. And then also we
could probably may increase the bevel a bit. Just like that. I think that's going to be fine. Okay, perfect. Now, the next thing that we need to
add here on the station, what we're going to
do in this video, we're going to add
these wooden planks. Not the ones here
you see over there. But first we're going to
add these guys right here. And we should also probably
think about adding this. I'm not sure what this is about. This doorway, this part here. We're going to add
a cube just to represent so you can get an idea for our composition
To do this first, I think it's going
to be easier if I just hide the train for now. Oops, let me see,
what did I just do? There we go. Let
me take out this. We need to actually create a collection for all
of our things here. I'm going to select the cube. I'm going to select the plane by clicking Control
and plane here. Control while holding control
and clicking the cube. Put them in outside
of the collection. Select them both again, press M, add them into a new collection, and we're going to call this
collection environment. There we go. Now if I hide this collection, I'm
going to hide the train. It's going to be just
much easier for me. What I want to do
next is just get a rough understanding of where this is going
to be located. And I can see that it's located de a couple of steps
next from here. And this column or wooden,
not sure what this is. The sign here is right
at the end of it. I'm going to start off, let's
say if that's right here, somewhere at the end of it. Then then the entrance, the door, this part here is going to be probably
somewhere around here. I'm going to just add a
cube and I'm going to put it somewhere around here. I think that makes sense. It's not exactly at the middle, it's a little bit on the
right side from here. I'm going to add a train
now because I also want to see how big is the
train compared to this. It is almost the same
height as the train. If I do add the train here, I can then push the cube here. I can say, well, it's
almost the same height. I might make it a
little bit lower. I might actually go and
just select this face and push it a little bit lower,
Just something like this. The train barely covers it. And I think that's
going to be fine even though the train here is a bit higher than it on my end. I'm just going to choose for not like this
because that's fine. Now I have an idea
where that is. Now we just need to start adding the wooden planks
that we had here, these guys, all right? And to start adding
that, essentially what we need is a simple cube. We're going to start
off by adding a cube, and then I'm going
to add a cube. Put it somewhere
here in the corner. I'm going to put it a
little bit more up. And I'm going to press,
and I'll press shift Z. And that's going to
allow me to lock it in x and y axis
while scaling it. It's not going to scale
it in the Z axis for now. Now from here I can just select
this part, push it down. Let's see, how tall
are these planks? Let's use our
reference image here. Again, the planks are
roughly up to the window. We could say, let's see, I'm going to push this
all the way here on the side just so I can
use it as a comparison. You could say that the planks
are roughly this tall. I might even add them
a little bit more height, just like that. I'm going to add, set
the origin to geometry. So my origin point is
here in the center. I'm going to push
this a little bit up. I'm going to guess
that the planks are somewhere around here. And I'm going to press
again one more time, shift Z, and then just make
them a little bit thinner. Put one right about here. I'm going to make
this a little bit thicker, somewhere around there. Perfect. Let's do, let's do one more shift somewhere around there. Yeah,
let's go like that. Okay. Next what I want to
do is I can immediately first apply the scale and then I'm going to add
a Bevel modifier. I'm going to add,
let's see, 123. Make this much smaller this time just a little bit of a bevel,
somewhere around there. Right click, shade,
auto, smooth. Then from here, what I want
to do is inset this here, then push it a
little bit outside. Scale it a little bit
more just so that I can achieve look for a base, I would say somewhere
somewhere like this. Yeah, I think that's pretty
much matches that look. Now, I'm going to
add also three. Let's, let's go with three. I think three is going to
be enough in this case. And then we might add
individually more. The reason why I added
this edge loop is because we're going to be adding some imperfections to it. Now we want to just scatter this piece of wood that we
have all across the station. The way I'm going
to do this is by using a array modifier. I'm just going to
click Array here. And in the settings of
Y modifier right now, it is giving me a count of two. We can see and it's scattering
it in the x direction, but we want to put
that to zero and we want to scatter
in the Y direction. Now, 20 too much. I think I'm going to
go with maybe eight, and I'm going to scatter them in the Y direction,
something like this. Let me just see how that
goes. I think that's good. Let me just see how
this side over here, we have probably 123. Yeah, I think we're going to
have 1234 planks over here. Right now we have
three, but that's fine. Let me also two, we could probably maybe
add a ninth one but then decrease to
something like that. There we go. I think this is
going to be fine. I'm going to apply this modifier because I am going to now be changing each of these ones individually a little bit
to add some difference. I'm going to hide my train again because it's
blocking my view. I'm also going to hide this
view here on the right side. I'm going to click
here to apply. Now that I've applied
this, I can do changes to all of them
once in dieted mode. But the first thing I do want
to do is I'm probably going to take this one
here and then go Y. Let me just go into my edit, my x ray mode Y, and then push it maybe a little
bit more closer to here. I'm going to take this
one, push this one here, maybe I'm going to take
this one a little bit here. I just want to make them
a little bit irregular in terms of distancing.
See, this one's here. I might even take this one out because I see that
there's none here. Maybe there is one. There is none over
there. So I'm going to take, maybe this one out. I might even delete this one. I'm going to keep
this one and push it somewhere here or
something like that. And there we go. Now
that I have that, I'm going to start off by adding a little bit of a
difference to each of them. This one, I'm going to change
the height a little bit. I'm going to change this here. I'm going to maybe rotate
it a little bit like that, just so it doesn't
look exactly the same like every one here. So they're not identical because no two things
are always identical. I just want to add a little
bit of imperfections. Maybe go here, add this
a little bit more, maybe lower it down,
scale it more. Add another inset and then move that inst a
little bit more up. Maybe this is a bit
too aggressive, so I'm just going to
push it like that. And now I'm just going to do the same thing for
all of these guys. I'm going to speed
this process up now. There we go. Now I'm going to take
just one quick glance and see if there's anything that
maybe stands too much out. Because I don't want it to
stand out too different. But I just wanted
to be a little bit different so that people
can go and be like, oh wait, that is
completely the same. I just want to give
a little bit of a difference to each
and every one of them. There is that feeling
of difference going on over here,
for instance, I'm just going to take this, put it here under side, maybe give it a bit
of an angle. Perfect. Next what we're
going to do is add these two planks right here, and you see them spreading
all the way here. And you see them spreading
all the way here. That's going to be
very easy to do. The way we're going to
do that is simply, yeah, the way we're going
to do that is simply going into shift A, adding a plane, R, Y 90. Then I'm just going to put
that plane somewhere here, going to my top view, push that plane
right about here. Now from here, I'm just
going to scale it into z axis like that. I'm going to push this side, let me see how high this
thing is going to go. It's supposed to
be I'm, let's see, roughly, let's say somewhere around here is going
to be the upper one. And I'm going to
just go and do this. Yeah, I think
something like that. And I'm going to push
it on this side. Is that plank in front
or is it behind? Let me see here. We don't really see,
it's definitely behind. Okay, that's good. We have
this plank that's behind. I'm, I'm going to take
this side and push it all the way to roughly here. For now. I'm going to say that's where it's
supposed to be. The next thing I'm
going to do is now I do want to do this
in a non destructive way. I think the best way to add some thickness to
this point is going to be using a solidify modifier. I need to definitely
apply the scale. So I'm going to go and apply
the scale for this plane. Then while I have the solidified
modifier, there we go. I'm going to also add a couple
of edge loops here to it. I'm going to add
a few edge loops. I'm going to go and I'm
going to do a B again, modeling just so that I can
add some difference to it. I'm going to push this one
a little bit like this. This one maybe. Let's see, I might push it a little
bit down this one here, a little bit up this one here. I'm going to go like this one. I'm going to keep
exactly the same, might keep this one a
little bit thicker. And that's what I'm
going to do here. I'm going to go now
and Alt while I'm in edit mode and just
shift and duplicate it. So I just keep it all as one mesh here even
though I duplicated it. And I'm just going to take
out this part here that I don't need to delete
these vertices G, Y. There we go. Let me
see how it goes here. This goes all the
way here to the end. So I'm just going to do
something like that. I do want to make them meet up. Similarly, I think this is good. I think this might
be even too much. I'm just going to push these
guys a little bit more up. There we go. Now over here, what I'm going to do is I'm just going to select all of this and then
shift the **** down. So I have this duplicate. But for this duplicate, I don't want it to
be exactly the same. So I'm going to
try to straighten this one up manually because that's going to help me
maintain these imperfections. It's not going to be
perfectly symmetrical. I'm going to scale
this one a little bit, make it maybe a bit thinner, maybe that's too
thin on this side. Then over here, let me see. I'm going to do
this shifty well in edit mode then I'm just going to make
this one also thinner. I'm going to, I'm going to make this side perfectly straight. I just want to see how
that's going to look like. Well, this side is
perfectly straight, the other one isn't. I'm going to push this
maybe a bit lower, this bit higher like this. There we go. There we go. We have now the first parts
of our train station. All right, I think
I'm going to cut this video here because we're
at the 20 minute mark and we've done a pretty good job so far with doing these planks
and everything here. So what I'm going to do now is just cut this video and we're going to
then start adding. I'm going to show you how to add these planks then
in the next video.
31. Modeling the Wooden Planks: For this video, we're going
to be building these plans. We're going to create
a couple of variants that we can then spread. To start off with that, I
think the easiest way is going to be if we go into our right view and we add a plane. I'm going to rotate the plane by 90 degrees and then just put it, say, somewhere
around here. I'm going to create
a couple of variants that are going to go from
here all the way to here. Let's just start off
by scaling this, then let's see Y, I'm going to make it a
bit thinner then maybe Z to get a certain height
idea, something like that. I want to see if I can find a rough comparison
in terms of size. It's definitely smaller than
the highest peak there. I'm going to go and do, I think something like
this in terms of basic height is going
to be just about right. We look here, we can also
see the distribution. I'm going to go back into, I think we have a couple of more examples here
which is pretty good. Again, this is one of those
instances where you can see here they're very
close to each other. But then if I look
at this image, they're way, way more
distributed from each other. I'm going to think
use this one here as a reference for height and how far they should
be from the ground. Again, here we can see they're actually very close
to the ground. Might even try to scale this. I'm going to go and use
this one as reference. Something like this
is going to be fine for me to start off. I'm going to push it
right about here. For now we can see that
they're push actually behind. So we're going to do
that a bit later. Now what I'm going to
do is, let me see. We could probably,
I'm going to add 123, maybe I think four loop cuts is going to be perfect for now. And I'm just going to
start trying to get the basic shape by selecting these two. Something like that. And then here I'm going
to just push this up. Something like this is going to be like one
of my planks for now. For instance, then let me see. Maybe I'm going to scale
it just a little bit more. Scale in the y, x, z, x the scale it down in
something like that. Apply scale. Okay,
I'm going to shift, I'm just going to duplicate this process in creating
a couple of variants. For instance, for this
one I'm going to make it, actually I'm going to
this up like that. I'm going to take this
part, make it like this. Now I'm going to go and
create another variant, Y and do, let's see, I'm going to make this
one a bit thinner. I'm going to make it
smaller, smaller here. And then push it, maybe
make it a bit longer here. Now I'm going to
also do another one. And I'm going to speed
up also this part of the video so you can go and create your own variance. There we go, I'm going
to add one more, so I'm going to
close it at eight, so I have right now 1234567. I'm going to do one more
variant for this one. Let's see, I'm going to
pick up something like this which is almost already
have this part built. I'm going to maybe push this
a bit closer here together. Take these guys, push
them a bit here, and then push them
a little bit down. And then I'm going to use
this one here as a reference. I'm just going to take this one, push it up. This
one, push it up. But then I'm going to take
these guys, push them down. Maybe I'm going to
take this one also, push it down, and then
this one also push it up. This is a bit too extreme, so
I'm just going to make it a little bit less extreme,
Something like that. Perfect. Now, we have eight different variants
for our wooden plan. I'm going to take this one just because it stands
out way too much. I don't want it to
stand out too much. There we go. So we don't want anything to
stand out too much. We want it to feel somewhat
natural, believable. These guys work perfectly fine. I'm going to select all
of them right here. Let me just see, 1234567. Yeah, there we go. I'm going to press M to add them
into a new collection. I'm going to call
this wooden planks. There we go. I have these
guys in the collection. I can put this
collection also inside my environment so
it's all together. I'm going to take
also these guys, put them here in
the environment, not into the wooden
plex, just into the environment for the
wooden plex collection. We only want to have
these guys here. And then also, one thing I do want to do that
I forgot to do last time is I want
to go in here, then add, let's see, increase my solidify
modifier for sure. That's the first thing actually
I'm going to increase it to 0.2 0.02 there we go. And I'm going to add
a Bevel modifier for that Bevel modifier. I'm just going to add two levels of subdivision and decrease this while holding shift and
then scrolling towards left. I'm just going to give
it very small bevel, I believe I've
applied the scale, but I'm just going to
do it one more time. Let me see. I'm going to
make it a bit smaller. Let's see, this is too much. Yeah, 0.001 There we go. Just a little bit of a beber. It's not a super sharp
infinite edge. There we go. Now we're here. What
I want to do is just add also a
Solidify and a bevel. I might even just
press control here, shift here, click here, control, copy the modifier. Then I'm going to probably
make this a bit smaller, bit thinner, right about there. I think that's perfect. I'm
going to do here the same. Then click this
one, copy modifier. And there we go. So they
all have modifier applied. I think that's pretty good. I'm going to close it
off for this video. And then in the next one, we're going to be diving into creating a basic geometry note set up that's going to allow us to scatter all these wooden
planks across this field.
32. Scattering the Planks Using Geometry Nodes: Right as a press record, in my tutorial I noticed
in my right view, that these two planks are basically identical
from the bottom. And so I just need to quickly make them a
little bit different. And I'm going to make probably
this one also a little bit different by
pushing this edge a bit down because
we want to take out as much of the
similarity out. Even though they look different, they might have a
similar pattern to them. And our eyes are pretty good at recognizing these patterns. And that's exactly
what we need to break, we need to break patterns. And that's really what three D comes down to in a lot of work, is breaking down patterns, breaking down
similarities to try to create that randomness feeling or at least the
illusion of randomness. And that's what we're going
to be doing in this tutorial. To be specific, we're going to be creating the illusion of randomness by taking
these eight planks and then scattering them in randomized order
across this area here. Unfortunately for this we
can't really use modifiers. Maybe there's a way, I'm
not familiar with it, but it's much easier to use geometry nodes in all
full transparency. I'm not a geometry nodes
expert, but luckily for us, this tree that not even a tree, it's more like apprehens,
this node tree that we're going
to be building is going to be very simple. Let's just start off
with building it. To begin, we essentially
need to tell blender in which on what exactly do we want to scatter these guys to? The best way, in my opinion, for this, is to add a curve. Or at least for this instance, the best way would
be to add a curve. I'm going to add a Bezier curve. I'm going to go put that
curve a little bit more up. Going to my top view, I'm going to rotate the
curve by nine degrees. Going to edit mode x zero, just to straighten it
up while in edit mode. And then x, put it here. Take this part, put
it roughly here. Scale it a little bit down. Take this part, scale
it a little bit down, Put it right about here at
the beginning like that. Then from here I'm just going to put it a bit closer here. This curve is basically what we're going to tell blender is this curve is going
to be a place where we're going
to tell blender to add these planks to. Now to tell it we need to go into our geometry nodes set up. If we've never been to
this layout before, what I'm going to do
here is just, oops, I do want to tell Blender
to take this right screen, and when I have this plus
icon appear on my mouse, I'm going to push
it to the left. That gives me a little bit
more real estate here. Now, to start off with
our geometry nodes, we need to click here on New. And this is just going to
create two geometry nodes. One is going to be the input. The input is basically
what is our input? The input is our curve
that we just created. The output is going to
be everything that we do here in the middle that is
going to showcase here. Essentially, whatever
I add here in the middle is going to be
what's going into the output. What I want to add
first is I want to just change this curve into points. To do that, I'm
going to go shift A. And I really tried
to find it here, but I wasn't able to
do so, to be honest. I'm just going to type in
here, curve to points. Now you can see that Blender has changed this curve
into these points. We can add as many
points as we want. I'm just going to keep
it in ten for now. Now the next thing is that we
want to tell it to change. Now these points to these
planks in this case. Now if you notice also
if I click on the plank, my geometry nod set
up disappears here. If you end up in
the same situation, what you can just do is click
on the Bezier curve here. If you want to keep it regardless
of wherever you click, you can click on this pin here. Regardless of where you click, the tree is going to stay here. I might actually do that
just so that I don't get, I don't have to click
constantly back and forth. Well I show things, but as I said now we
need to tell Blender to take these objects
here and convert, or actually take these points and convert them
into these objects. Another node that we
need here is called, I believe in instance on points that one we can even find if we go
here under instances, it says instances on points, not two points, but on points, this is one way we
need, there we go. Now everything disappears
because for this node, we need to tell this node what are exactly these instances
that we want to add. The instances that
we want to add are all inside of this collection. What I need to do is basically
just take this collection, drag and drop it here, and now connect these
instances to this here. You can see here over there,
it's a little bit funky, but all the way out over there, Blender has started
to create this. If I go and add a few more, you can see it's adding. We just have a couple of issues. The first issue is that they're not at
the right position. We need to go here and
tell Blender to separate the children and we tell
it to reset the children. Now you can see that
it's creating them here, but another issue you can see, it's stacking them on
top of each other. We need to tell it to only pick one instance out of
this collection. Here we're going to
do is sick instance like that. Now we have it. But another issue that we
have now is that we need to rotate them and that's
where we're going to use this rotation field here. Because if I click
here and then drag it, what I need to do
now is add a node called a Euler. Rotate Euler. If you watch another
blended Toria. If you watch the Donut
tutorial specifically, this might be very
familiar to you. Because what we're building here is similar to that node tree that was done in
the blendedtorial. To scatter the sprinkles, it just happens
that in this case we're not scattering sprinkles, we're scattering planks, and
we're scattering them all inside of one direction here. Now we added this rotate Euler, we can now control the rotation. We can put here, for instance, 90 degrees, and then we
can put it under Zaxis, put also 90 degrees and you can see how it's rotating
them, right? But one more thing
that we need to do, or what I'm going to do
is at least I'm going to hide these collection here
because it doesn't bother me. It almost looks like
we're done here, right? Because we can go
here under count, we can add a couple of planks and it already
looks pretty good, but we want to take it
another extra step forward. What we want to do next is we want to add a bit
more randomness. A bit more rotation, so they're
not all fully straight. Now here, rotate Euler
for under rotate By, we're going to add
a random value. This random value is
going to help us give a range of randomness
that we want to control for the
X, Y, and Z axis. Just make sure that you
have here under vector. I think in earlier
versions of blender, it it puts it under float. But in the newer
versions it immediately changes it to vector because float gives us a value 0-1 but the vector gives
us the values for x y, and z axis 0-1 We have more control in which how
we want to rotate this. Now, this part is a bit tricky. I'm just going to turn
the minimums into one. What do we need to get first? We need to put them as
straight up as possible. What I'm going to do here is
and type in zero or maybe 1.5 and I think this is getting
me already really close. I'm going to go 1.6 I think 1.6 is very
straight in that direction. Now for here, we just need to
rotate them all, I believe. Let's see if it put here for 00, that's going to rotate
them perfectly. Now next what I'm going to do
is I'm going to take them, put them a little bit more to
the plank right about here. Also, if you're not satisfied, let's say you want these
guys to be thicker or you want to maybe add another
plank, you can just go here. And whatever change
you do here like this, it's going to be later
on applied over there. If I go and change
this up or down, you can see it is being
applied there as well. If you want to add
another plank, you can go here and go shift
D. Add one more plank, for instance, make it straight, give it a bit of an angle. Take this one here, there, there you go. You just added another plank, and that plank is going to
be also represented in here. This gives us a
lot of control in that I'm having a little bit of trouble seeing it here,
all the things here. What I'm going to
do is go here under settings and let me see. I want to add backface culling. I think I'm also going to go
add a shadow. There we go. And this shadow is
just going to help me with my visibility a
little bit better. There we go. Now that we have this random
value going on here, we can also add, let's see, a little
bit of rotation, not on this side
but on this side. I'm going to put it
between one point. Minimum is going to be 1.5 my max might be, I
think that's fine. Maximum for 1.6 the value
that it's rotating is between 1.5 and 1.6 This isn't rotating at all because
it's exactly the same. And this is also
the same over here. I might put it maybe 1.65 I just add a little
bit of randomness. This rotation direction
1.75 might even be. It looks like it
works. There we go. Now if we want to take this
one more step, not further, We can do this same
thing for scale, so that we add a, I believe
just random value like this. And now we just put
everything for one. Then over here we can just push things a little bit more up. 1.1 I think is going to be fine. That is just going to change
things a little bit for us. You can see that you can also
change the set if you want. There we go, from here. What I'm going to do, I think, let's see, do we want
to add more planks? Well, we could probably go and add a little bit
more right there. But there's one more thing
that we could change, and that is the distance
between each plank. Now, you don't need to
do this. This is like an extra step and I don't even know if this
is the best way. This is just something
that I came across during my own research or trying
to figure this out, is if I want to have
all these planks be a little bit of a different
distance from one another, because right now they're
all using the same distance. What I can do here
is add another node, and I believe that one is called just a second merge by distance. There we go. And
if I add it here, now I need to play between these two variables that I have. Let's say increase the count by, let's put it 100. And then here under
merge by distance, I start impacting that. You can see that it merges
the planks by distance. But then if I
increase a little bit more after a certain amount, let's say I get up to 200. You can start noticing
that the distance between certain planks is starting
to get different. If I play just with
these numbers, you can see if I
increase the merge by distance between them increases or decreases if I just continue playing
with these numbers. Let's say if I get
to 500 here and let's say something like this, I think this creates this
variable illusion much, much better to something
that we have here perfect. And you can see even
here, for instance, where you have D
three really close, but then there's a
little bit of distance happening and so
on and so forth. The next thing
that I want to do, we have the issue
where it's actually, I think, repeated.
Let's repeat it here. It's repeated here, and
it's repeated there. We might need to, let's see, drop the distance, or maybe increase the distance
just a little bit. I think this might work
better in my case. There we go, we just need
to repeat this here. For this part to do this I believe would just
simply be if we go shift, put it on this side, I'm
going to unpin this because I'm going to need to go into
this other geometry node, because now we're going to
have two geometry nodes. I believe. I'm going to
take this, put it here, and then just drag
it all the way here. Let's see, this is now,
currently, I think the same, because everything I do here is going to also impact there, which as a matter of fact, is not even that
big of a problem. Now that I look at it,
I think it looks okay. I might actually, let's just look at our
reference image here. I might actually, let's see, maybe decrease the distribution
just a little bit. I'm going to increase the
distance, something like that. And then this side, let's see, something like this
is also not bad, but I would like to have a separate no tree to
control this side. What I'm going to do
is I'm going to click Copy Geometry Node
Group. There we go. We have two geometry nodes. Now everything I do
here is not going to affect anything I do on
the other side here, I can just go and play with
this a little bit more. I get something like that. There we go. I'm pretty satisfied with how this
looks like for my case. But you can also go and change. As I said, this is a very
simple geometry note set up that is initially
inspired by Donut tutorial. And then a little bit
of a twist because of our different instance
situation that we have here. But yeah, that's pretty
much it for this video. And I'll see you guys
in the next one by.
33. Modeling the Entrance: This video, we're going to
be modeling this entrance. I think this is an
entrance, that's how it looks like over here. It's because people go
through this passage point. We're also going to be modeling this pole here that
we have as well. To begin with, the entrance
is actually quite simple. We already added the box here. As you can see, What we
need to do next is just, let's go into our edit mode. I'm going to go
into my top view, all Z, and then
select this side. Then just try to match
the thickness of this wooden plank that we have here to match what we have here. Let's see, maybe I'm going to move it just
a little bit more. I'm going to go face select Y. Let me see how much space
that's going to give me. I think that's pretty okay. And I'm going to lower,
lower this part a little bit down now. This looks pretty
good, I would say. So I'm going to go shift y and then just push it here just so I can get an idea of how it's
going to look like. So I put it somewhere like this and I push this one a
little bit inside like that. That's what we're
getting. That's good. Let me see from here. What I can do actually even
is take this one out for now. And then I'm just going to go X, push this a little
bit backwards because I need to match it to the distance of how much space there is from here to here. Now as it turns out, there is
a wooden plank right here, but we're not going to
deal with that right now. And I also have to apologize, we have a huge storm right now. If it's raining a little bit, so if you hear some
thundering and some rain falling,
sorry for that. I'll try to clean it up as
much as possible in the post. So I'm just going to, let
me see right about here. Now, while we have this here, if you, if you look at here, you can see that this is
actually going all the way down, supposedly, here. That means that
people actually take stairs to go downward. And that's what we
need to create here. The way I'm going
to do that, I'm going to cheat a little bit and do it a bit of a lazy way because we've been so perfect. Or try to be so
perfect up until now. I'm just going to go into my
front view. Select all Z. Take this, I'm going
to push this first, all the way there we go,
somewhere around here. And then I'm just
going to push it down like that until I get a
decent, least similar angle. I think I went a bit too much. Let me see, front view. Push this a little bit
up, something like that. I think that's what I'm
going to go with now. I'm going to go shift G, Y one more time and
then just do this. There we go. I'm push both of them just a
little bit more forward. X, there we go. Let's see. So that's how
much it's over there. That's how it looks here. I think that's fine.
That's going to work. Okay. I wish I had this
upper part as a reference, but unfortunately I
wasn't able to find it. We're just going to
have to deal with what we have here
for representation. And we do know that
there's a bit of a sign also there's
something going on here. What I'm going to do
next is now I need to add a roof on
top of this, right? I think the easiest
way to add one, while also matching the angle
that we did this is just simply clicking on one of
these meshes that we created. Clicking shift on this face, then going shift
to duplicate it. Clicking Escape to
reset its position, and then clicking to separate. There we go, we have
our separated object. Now from here I can just go into that separated
object, click it, and then y, put it here, and then just start going while in the edit
mode, let me see. I can select this edge
and I can just go Y on this side and I can select this edge and
then go Y on this side. I think that's just going
to give me pretty decent. I can move this a
little bit more here. A little bit more here. There we go. And then
I can press three, go into the face, click extrude, and then just extrude it, not too much because we're going to give it a bit more layers. But extrude, let's
just give it a first, the let's just give it a thin one for starters,
something like this. That's how much we're
going to extrude it. Now, I just want to
push this part here. I think I need to go
into my front view. We need to push this edge
a little bit forward. It matches up. Something around there. It's going to be fine. Perfect. Okay. Now from here
you can see it has a little bit of these extrusions
outward, then goes up. Then it extrudes
outward one more time. This part here, this face here. If I select this face, I'm going to ex, this face outward. I'm just going to have,
let's see, bounding box. And then press and
then to scale. Or actually it might
even be better. Let me just take a
couple of steps back. I'm going to take
two steps back. Just make sure that you
take two steps back so that your extrusion
doesn't stay here. I'm going to take two step
back, two steps back. And what I'm going to
do is go like this. Then I'm going to go
press Control, I believe. Is there extrude edges? No. Is it all extrude face? Extrude faces along normals. That's what I'm looking
for. This one here. Press Alt, and then extrude
faces along normals. Then I'm just going to
press this and just do a little bit of an
extrusion like that. There we go. Then from here I'm going to
select this face, now I'm going to
select this face. And I'm going to press
Shift, Shift Alt. And then press on this
face here as well. Shift without the Alt. Actually, there we go. Now I'm going to press one
more time, upwards to Exes. I'm going to clean up this mesh because I don't need
this face here. I'm just going to go
and delete this face. I'm going to select these edges. I'm going to delete
them as well. So delete these edges. Or I might even go
delete vertices. There we go, vertices is
better then Alt on this edge. And then I'll going
to click to fill out this face just so that my
geometry is a bit cleaner. Now we have this, then from here, what I can do is we construe this
one more time. I would say out like this, select it all, and then press one more time, faces
along normals. One more thing I'm
going to do is I'm going to apply the scale. Something that's also important, I need to apply the
scale everywhere here. Then extrude faces along
normals. There we go. I think I went a little bit too overboard. I might
even go a bit. Extrude faces along,
let's see, too much. I'm going to do one more time, extrude faces along normals. I'm going to hold shift
this time while scaling, just so I can get
a better angle. I think this is fine. There we go. Next I'm
going to do here is add a bevel modifier because I don't want to have
these super sharp edges. And then I'm just going to go
and offset it all the way. Just a little bit. I have something like 0.003 I'm going to also add
a bevel modifier here, or I can just go and shift
on both of these guys. And then shift on the one that I want to transfer
the modifiers from. As long as this one is
light yellow and then these ones are orange
Control C copy modifiers. And now both of
these guys will have the bevel modifier with
them, which works perfectly. Now we have this, that's great. Let me see what
else we need to do. We need to add a plank
up top here as well. And what I'm going
to do also here, so it's not like fully
perfectly run, I'm going to, let me see, I'm going
to add a little bit of subdivisions right here
and then loop cuts. I'm going to add a few
loop cuts right here. I'm going to go into my
right view edit mode. I'm going to select both
of these guys and go into Mc and then change them,
both of them a little bit. I'm just going to
select this edge. Just do a bit of a, just some very slight
movements for a imperfection. And I'm going to
do the same here. Just a little bit of
very minor thing. It's not like
perfectly straight. I just want to break down
that perfection a little bit. Something like that.
And then shade, auto, smooth, shade,
auto, smooth. There we go. I just did it a little bit to break
it down. That works good. It also works fine. Perfect. The last thing I
think we just need to add on here is this
thing on the top. To do that, we're just
going to go again, we are going to add a cube. X. We're going to make
that cube a little bit th, something like this. Make it smaller,
something like that. I'm going to go
into my right view, Try to put it, let me see
here, roughly around here. Apply the scale. We're probably need apply the scale
one more time. It's easier to remember to apply the scale when
you have this here. You just press N and
then go to item. As long as the scale
here is one, we're good. But right now it's, let's see that x one more time. There we go. So thank you. We have this
somewhere about here. Maybe we should push
it a little bit up. Let me just a
little bit more up. Z, right about there. I'm going to do is add just a little bit of loop cuts
just for the same reason. Like this, Like this here. Just to give it a bit of a
imperfection right there, click shift on this one and
then shift on this one. And copy modifiers so that I can have the Bevel
modifier here as well. The only last thing that we need to finish this
one off actually, is if you see there's
like this box where I guess the guy who's
checking the tickets is, we can do this box
also fairly easily. We can just add a cube. Then let's go into our top view. Put the cube somewhere
around here. I'm going to press S
to scale that cube. Let's see, something
like this. I'm going to go into my front view. Push it up, go into my
right view now like this. And then Y, put it
somewhere here. Then put it, let's
see how far he is. A little bit inside like that. So something like this. He
is standing over there. Like I said, we're going to cheat a little bit on this part. What we're going to do
is let's go like this. Let's do we see there's a
bit of an indent over there, so I'm going to add a bit
of an indent right here. I'm going to do is here. I think that's where
he does the indent. And then just press, let's
see, we applied the scale. We haven't, Let's go now this is going to give
me that indent scale, it a little bit more. There we go. And then if I add a bevel modifier
123 auto smooth, and then the amount I lower to again 0.003 This gives me right about that
what I'm looking for. Then here I'm just going
to press on this face. Click to inset inside, and then click and then Z, and then just push it down. Even though this is,
nobody's going to see this, I'm not going to worry
about making anything on this side because nobody's
going to see that. As long as we have
something like this, that's going to create a
good enough illusion for us. That's that. I think we're
done with this part. So now we can just
go and build a pole. The pole is going
to be very simple. If we just look at the pole, it is practically a cylinder. All we need is to add a cylinder
in here under vertices, we don't need this
many vertices. I'm just going to
divide this by half. I think we're good
to go with 16. I'm going to put it a
little bit more up now. I'm going to scale it
to make it thinner. I'm going to go press
and then shift Z to scale it only in
the X and Y axis, without having to scale
it in the Z axis. I'm going to try to get
it to a certain thickness that I would say that much. Yeah, that looks good. Shade auto smooth. I'm
going to put it down here. I want to put the
origin point below it. It's going to be easier
for me to scale it. I'm just going to make
the selection here. I'm going to go press
Shift Cursor to Selected. And then I'm going to
exit the edit mode. Right click, set
origin three D cursor. There we go. If I put this, let's say here, and then
I start scaling it. It's just going to scale axis, but it's going to
scale on the upwards. And that's exactly what I want, I want to get, let, let me compare the height here. From here I would say this pretty much
matches the height. Can push this now to
Y somewhere here. If you want to reset
where three cursor is located, you can shift. And that's just going to reset
the three cursor location. If you go into my top view now, x, I put this somewhere. Let's see. Somewhere somewhere about here I think
is going to be fine. Let's see into our right view. Yeah, I think this is where
we're looking to put it. I might move it maybe a little bit more here,
towards the middle. Now the next thing
that we need to do is it has a little
bit of these arrows, like directional arrows, I'm noticing the top is
a little bit pointy. So I'm just going to
quickly do that by insting here like that. I think I need to apply
the Z. There we go. I need to apply the scale
which is what was missing in my insting then Z
scale like this. Just give it a bit
of that pointiness. And then this part
I'm just going to go control to make it like this. And then this part
I'm going to also go control B to
make it like this, so that we don't have any
modifiers here. That's fine. Then now we need to just add these pointer
directions to do that. The way I'm going to do it
actually is just going, let me see, control R, adding one loop cut, pushing it. Let's see, I'm going to
start from bottom and then move my way up to top because I think
there's three of them. I'm going to add
one loop cut here. I'm going to level
this loop cut into two like this. There we go. Then I'm going to
shift to do this, I'm going to to
separated by selection. Now from here, while I
have this cylinder part, it's going to go
into the edit mode. Select the entire, all of
the faces. Let me see. Click to extrude
to scale, I think. See, do I need to
apply anything here? No, I've done
everything here, right. So when I press and
it's scaling outside, might let me see a
extrude along faces. There we go extrude along faces, that's what I was
looking for this way. It's scaling
perfectly like that. Then from here I'm
going to select one of these faces ops. I'm just going to extrude
it in a certain direction. Then I'm going to extrude
it one more time. And then I'm going to do this I think I'm going to extrude one more
time and just do this. There we have it. Now,
if we don't like this, I can maybe scale
it at bit more up. Something like this
is good enough. What we can do here, this is
going to be barely visible, but you can add a bevel
modifier here as well. Bevel modifier and
then lower this. I'm going to assume
it's going to be in. There we go, 0.04 That's great. Now we just need to shift, duplicate this, add one more, then let's say we're
going to create a one more and then we're going
to say shift one more. But then let this one
we want to rotate. If you want to rotate, it
can't just go and press this, I believe there we go, because it is using
this origin point. But if your origin
point isn't there, if your origin point
by some reason is, let's say somewhere here, all you need to do is just
repeat the same process where you select edges. Let's say for these guys, you go into shift, then cursor to select it, exit that object, set origin
origin to three, cursor. As long as the origin is in the middle of the circle here, you can rotate it in which
direction you want to show it. And there's that that's
how we did this. I'm just going to
shift see to exit that I believe we are
done with the scene. All right, the last thing
that we just need to model, and we're going to do
that for the next video, is this sign art
that we have here, which should be fairly
simple to do as well. All right guys, that will
be all for this video. And I'll see you guys
in the next one.
34. Modeling the Station Sign: This is actually
the final part of the modeling stage
for our scene. The only thing that's left to create is this sign
that we have here. Without any further ado, let's quickly begin modeling, because this shouldn't
be too hard. As a matter of fact, all
we need to start with is a simple cube that we can
add right about here. And then scale.
It's super small, it's going to be used as
our base for this leg. So I'm just going to take this
cube, go into my top view, put it, let's see, somewhere about here, I'm going
to go into my right view, drop it a little bit down, then from here I'm going to push it probably a little bit more forward for now. Just so it's a bit
easier for me, the cube is touching the bottom, which is good now, I think here we have a bit
more angles than four. But for simplicity's sake, I'm just going to use
a cube as a base. Because this might be, look like there's another
angle right here. I'm not 100% sure. But whatever the case, I'm going to scale this a
little bit lower like this. Put it down, Apply the scale. Now the next thing I want to do is I do want to apply
a mirror modifier. But I need to tell this cube where that mirror
modifier is going to pop up. Because if I just go here
and I click in mirror, now where is that mirror
actually showing? Right? Because it's basing
it off of this origin point. There's a couple of
ways we could do this. I think one way we could
go about it is say, well, we want to cube, to peer into y axis. But now this origin
point is here. So how do we move
the origin point? Well, for instance, I believe the one way of doing this would be if we go
into our edit mode. And then if I go and select
everything and go Y. You can see now this
is like a easy, and let's call it a bit
of a dirty way to do it, but I'm going to stick
with it for now. Seems to be doing quite well for this purpose. Let me see Y. I want to put it, I think the distance of them should be somewhere around here. I'm going to put this a bit more lower again, one more time. Something like that.
Let me just zoom in here so I can get a
better look at it. Okay, And then what I need
to do next is just go in maybe a little bit
more upwards, like this. Scale it down, and then inst and extrude one more level up, then intlittleitp,
something like this. Now I just need to
push this, let's see. All the way up. Something like that. I do think that my sine is
maybe a bit too thick. What I might need to do
is make it ther let me see If I go shift
and then shift. If I do it like this, then these two are going
to get closer. So I'm going to probably need
to move them a little bit. But actually now that I
look at this distance, this isn't that bad. I might move them
just a little bit, G, Y, let me see. Yeah, something like this is going to be fine in
terms of distance now. In terms of height, it's
definitely going to be higher than our, whatever this is like fence. Yeah, somewhere around
here, I would say. I think that's pretty much good. Now, we also need to
enable clipping here. I'm going to my right view. The lower part here is right about here. That's how
I'm going to do it. I'm going to add
one loop cut here. One loop cut here. Then from here I'm just going
to press E and then start extruding until these
two guys clip that. Now we don't want to
have a face here, I'm just going to
take out this face and just leave it as is for now. Here like this, it
is a bit thicker. I'm now looking at it. Might this edge here actually let me see what's
going to be the easiest way to select All of this probably faces our edges
here. There we go. I'm going to take this
set and then Z it a little bit down to
make it not as thick. Think that does the
job pretty well. For some reason, My shadow I
want to include my shadows. I want to include
backface culling. Actually, no, I don't want
to inclue backface culling. What I do want to include
is cavity. There we go. Cavity is what I
want to include. There we go, That's
a bit better. Now, the top, what we have here, I'm going to do this
one right about here. As a matter of fact,
actually I might do it. See top one is a bit separated. I'm going to do. Right about here. And then actually a bit more
up, something like that. And this part, I'm going
to push and connect them. I'll take out this face,
keep this as is now. But I'm going to also take
this edge, select it all. Let, push it a little
bit up just to give it a bit of a T like that shape. Then let me see, what else could I
need to probably take this set of faces, I'm going to have to
extrude it a little bit outside and I'm going
to take this set of faces also extrude
a little bit outside. The best way to do this
and think it's going to be a extrude faces along normals, something like this. Then shade auto, smooth. There we go. I think this looks
pretty good from here. I'm just going to add
a Bevel modifier, three levels, it's
perfectly fine lower. Let's see, 0.005 I need to
apply the scale here as well. Just make sure to apply the
scale. We have our base. I think the last part that we need to do now here
is just add what's going to be the signed
the easiest way that I would probably
go about doing it. Let me just see. Well, the first thing I'm
probably going to do, I'm going to apply the
mirror modifier. Let me see. That's going to give me, yeah, what I could do here is
actually the easiest way to do it exactly is to add a
loop cut right here. And then select this loop cut. Go shifty selection. Now I want to have this
loop cut selected a. Going to press one. Let's see. I think if I go
into my grid fill, it's going to work perfectly. Fine Gridil, there we go, it did the job perfectly. We can add it some thickness. We don't need to use
a solidify modifier. We can just go and then choose a direction where we
want to add a thickness to. I'm going to just do it like
this and apply the scale. Well, the scale is already
applied, so shade smooth only. Let's see, for bevel, we don't really need a Beble
in this case. I think if I took out the Beble out, we're going to be fine. And there we go,
that's our sign. I'm just going to move it
a little bit closer here. But yeah, we are
officially done with the creation for our sign
and with the modeling. Can do a little bit of
tweaking if you want. If you think that this is
maybe needs to be wider, it's going to be fairly easy. Just go like this,
right mode, a Z, select one side up until here, push it a little bit more, or you want to select maybe
both sides like this. If you think if you press
Y, you can scale them. There you go. Like
this a little bit. There's different ways. You
can just take a one side, add a modifier mirror again, and adjust it in my case. I'm going to keep it as it
is in terms of the distance, and I think this
looks pretty good. We can add the train
now if we want. Let me just see Train Apply. We can make it like this. I'm going to click on the brick here that we created and then just push it a little bit back. This is what we
have is our scene. We have our entire scene
modeled out now perfectly. And all we need to
do now is start texturing it and animating it. We're going to start with the texturing in the next video. Guys, for now, one
thing I do recommend, I'm going to do this
outside of this video, is just fixing all of these guys here,
fixing their names, adding them, and then
adjusting them into their own collections so
that we stay a little bit more organized once we get
into the texturing phase. All right, so you can do
that on your own and I'll see you guys in
the next video by.
35. Texturing the Train Planks: Tutorial, we're going to be texturing this
part of the train, Everything here that has
these wooden planks, the front part in the middle, and also then this
side part over here. That's what we're
going to be texturing. As you can see here
on my right side, I have taken the
liberty of organizing my environment as I said
in the previous one. If you want, you can ase the video right
at this frame and then copy the way I've organized my
environment collection. You don't need to do this. It's just a good habit
to do in case you're maybe handing off
your project to somebody or you're just
trying to stay organized. You don't want the amount of
measures that you create, especially for big projects, to bottleneck your workflow. It's just a good habit to stay organized when
doing projects. But for now what we're
going to be doing is setting up are
layout for blender. To do that I'm going to hover
my mouse right above here. When I see this ply
side can appear. And then I'm going to
drag it to the left. While clicking here, I have two windows
for the left side. I'm going to use this left
side for my render view. What I'm going to do is go press the Z on my keyboard
and go into Rendered. But we also need to set
up our render settings. I'm going to go back in here, going to put this a
little bit more up. This here, this icon here
which says render properties, we need to set up
our render engine. Right now it's set up to EV, but what we want is to use
the cycles render engine. Instead, you can notice a
small change happening here, especially if you move around a little
bit, which is okay. But as you notice, obviously our scene is
currently very dark. One of the things that
we can do right now, as a matter of fact
that we should, is add our sky so that we add a little bit more
light to our scene. To do that, we need to go
here where it says world. If you see here in
color right now, there's a gray color
that's set up and that is what is shown on
here on the left side. If we change color to black,
it's going to go black. If we change it to white, it's going to do
that red, et cetera. But instead of
having a color here, what we want to have
is a sky texture. Click here on this
yellow dot and then go with your mouse all the
way here to sky texture. Now we can see that we
have a sky in our scene. We need to change these
settings that we have here. On the right side, we have the sun size,
that's over here. You can see that
decrease the sun size. For instance, our
shadows get much harsher over here versus if we increase whenever you have a larger source of light
in terms of the size, you're going to get
softer shadows. If you have a smaller
source of light, these shadows are going
to be much harsher. It's exactly the
same in real life. This is simulating how
real life light works. Another thing we have
is the intensity. If we lower the
intensity, we can see that the sun becomes dark. And that's actually beneficial for us because now we
can see where it is. And I actually my son not to
be in the behind the train, I want my son to be on the
left side of the train. As a matter of fact,
I'm going to change the sun rotation and push
it all the way up to say, let's see, we are currently
at 90, it's over there. I want it to be
somewhere around here, 100 and minus 154. There we go. Now for the sun size, I'm probably going to want
to increase the size. Maybe up to ten.
Then the intensity I'm going to bring back to one. All right, So now
we have our sun hitting all the way up there, but I want to put the sun
a little bit more down. So I'm going to control
here the elevation now and I'm just going to
drag this number down. And as I do, we can see that the sun is slowly going down. And I think somewhere
around here, 0.7 is going to be fine. It is going to give us a little
bit of that sunset look, which is exactly the look and field that we're aiming for. I'm also going to drag this now a little bit more up here. Since I'm already dealing
with the sky texture. I want a little bit more
real estate so I can see what's going on
on my left screen. All right, Next thing I'm going to change
here is the air. And a good thing is
that if you hold your mouse over each
of these settings, blender is going to
tell you what each of these settings does. Essentially, if I hold here
on the dust density of dust molecules and
water droplets, I'm going to put that to zero. I don't want any dust for
density of air molecules. I'm going to reduce the density. And you can see if I
reduce the density, now I'm getting this look, which is actually pretty good. Might increase it just a
little bit ever so slightly. If you want to do
like small increases, you can hold shift
on your keyboard. So just press shift and
then move it left or right. And it is going to change the slider in a much
smaller increments. There we go. I'm also
going to hide all of these things so I get a much clearer image on what's
going on on my scene here. There we go. Now we have
our sky texture set up. We have a good idea of how the shadows and
everything is looking. If you want, you can
tweak it for me. I think these settings
are just good enough. You can play around with the
rotation and as you can see that we get cool effects here
with the shadows happening, which is also not nice. All right, the next thing
that we're going to do is start texturing this part here. I'm going to move this now a
little bit more to the left. And I'm going to keep
this right about here. I'm going to zoom here
just a little bit. And for this like
that, there we go. So we're going to be
texturing this part, this part and the one behind
to find our textures. I'm going to go into my browser. I'm going to show you a
few websites that I use to get free textures that you
can use on a daily basis. One of them is, I believe, called MB and C, G. There we go. This is a website that has
a lot of different assets, including HDRIs,
also three D assets. And as we just need materials here you can find a
whole variety of materials. But for our case, what
we need is a material. And as a matter of fact,
we could use plenty of these ones and
then maybe change. Like for instance, this
material over here is also good that we could
probably use it to change this then color into reddish, then it
would probably work. In our case, this
one could probably also work just by changing
the hue value of it. But we just happened
to be so lucky that I found exactly this one here. It's called planks 028. If you just go to the site here and in the search if you go to the materials and you
type in here planks 028, you'll be able to find it
on your own like that. Now here we have an option to download different textures, so we can go from one
K 2k4kk in my case because because we are basically going to be a bit
further with our train, we're not going to be
really, really close. We could actually get away
with using a two K texture. Usually if you are much, much closer we would
want that fidelity, then you would go with
probably a four texture. But four textures
will also take up a little bit more of your
memory on your project. We do have to always be careful about optimizing
our projects. Especially if you have
a mid, like I said, BC, you always want to be careful about optimizing your project, not overloading your scene. One way of doing it is just be careful what kind
of textures we use. You can just click
on here at two K and you can then download the
file and simply unzip it. I already have that done, so I'm not going to be re
downloading it again. But once we're done, then we can now make sure that we have
this part here selected. What I can do now is
open another window. I'm going to pull
this like that. I'm going to use this one
here just for my selections. I'm going to put this like here. I'm going to use this one here just to make sure
that I have this selected because I've removed all the Gizmos as you saw here. I'm going to use this one to
go into my shader editor. There we go. I'm
going to press and to hide the settings here. What I want now, while I
have this here selected, what I want is to add a
new texture. There we go. Now for material, I'm going
to call this one red. I'm going to call it
actually wooden plank. And I'm going to put
it front like this. So I know that this is
my front wooden plank. All right, next thing
we can use our Node wranglar add on that we have
installed on our blender. And if I press control shift
and then letter like this, it's going to give
me a new window to select the textures that I
want to add into blender. I'm already to go
here where I have them saved in my texture file, and the textures that I want
to add are the occlusion, I'm going to hold control while clicking on these textures. I'm going to add the color, I don't want to add
the displacement, we don't need it for this case. I do want to add the normal
and the roughness map. 41234. There we go. And I'm going to
click Add, Don't. Angular is immediately
going to map out all of my textures and everything
here as you can see. But we do have an issue. As you notice, even though
our texture is added, it looks a little bit wonky. As a matter of fact,
the scale of it is reared and the rotation
of the texture is reared. In order to fix this, what we
need to do next is we need to unwrap this texture in a way that's going to
be better mapped out. We need to unwrap the texture, but our mesh here, that's going to be better
mapped to this texture. To unwrap our mesh, what we can do is go here in the front view, make sure that you have
this front mesh selected. I'm going to turn this on
so it's a bit easier now, maybe for you guys just to understand what is
I'm talking about. I'm going to go
into my edit mode. I'm going to select A to select
all of my vertices here. I'm going to press U for
my UV Mapping settings. Here. I'm just going to go
and say Project from View. While I'm in the front view, I'm clicking all of
my mesh and clicking Project from View. There we go. Now you'll notice
that this immediately looks a lot better, but it's still a little
bit of an issue. These planks are way too big. The next thing that
we want to do is simply change the
scale of these planks. I'm going to go while
clicking with my mouse, and then dragging it all
the way down like this, So that I select all
three, the X, Y, and Z. I'm just going to
try to play with the scale. In this case, I need to increase the scale number and it's going to give me
more wooden planks. Something something like this is going to do the
job just fine. There we go. Now we have that. You can also play, let's
say with the rotation. You can change the
rotation here as well. You can also change if you want the location, for instance, if you want to
push them a little bit up or down, that's
depending on you. In my case, I'm going
to put them just a little bit somewhere.
Let me see. I think I want to put
them somewhere like this, so that I have these pins. As you can see, these
nails right almost here, it looks like they're nailed
to this at the bottom of it. There we go. I'm pretty
satisfied with how this looks, although we do have a bit of a repetition
happening right here. Because we've scaled our texture so small that now our
texture is repeated. I'm probably going to change
the lazy way now where I'm, let's scale it just enough so that the
repetition is broken. There we go. And then just
lower it just enough. This is right about here. Perfect. Now, you might also notice that as I move
here in my shader editor, you might notice that our ambient occlusion node isn't being connected
to anything right now. The reason for
that is we need to mix the ambient occlusion
with our base color. That is going to
give us a little bit more of a shadow effect on these edges in these corners
here where we can control. To do that, we can
start by clicking shift A and going into
here and typing Mix. I'm going to add mixed color.
I'm going to click here. And then the next thing I'm
going to do is I'm going to mix the ambient
occlusion here. I'm going to put it under here. And I'm going to put the alpha here under the
factor. There we go. Now we need to also change
the setting here from color, from mix to overlay. Now we have our ambient
occlusion note here, but we also want to be able to drive the strength of
this ambient occlusion. The way I'm going to do this
is by going again here into the shift A add type in search. I'm going to add a
color ramp is going to enable me to clamp the values
of this ambient occlusion. So I'm going to put
the color ramp on the color here on the top. And one, let me just make
this a little bit easy. I'm going to take
this factor out right now so that you know
which I'm putting it. I'm going to put the color ramp right here and I'm
going to go here on the alpha reconnected to
the factor, there we go. Now if I move this like that, you'll start noticing that my shadows over there are becoming much
more distinctible. I get a bit more control
over my shadows. As you can see,
that's essentially what That's essentially what our ambient occlusion
texture can help with. I'm going to put it, say,
somewhere around here. I think it's going to be fine. Yeah, I think I'm
fine with this. Now, another thing
that I also want to do is affect a little bit the
color of this wooden plank. It's not lightish. Essentially, I want to add a little bit
more red tint to it. The way I'm going to
do that is simply by clicking a shift a
and then going here, and then another color ramp. I'm going to just
add it into here. Now this is going to
turn it purely into black and white because these are the two values
that we have here. And we can control, again, how we want this to be. But what I want is to change it to a
color that's much more resemblant to what we see
in here, this reddish one. To do that, I already have
the X values mapped out, so I'm just going to
copy paste them and you can try to do it yourself. So you would go here basically
and then change this, and then try to go
maybe a little bit in here and you would get a
certain value like that. But in my case, like I said, Or we could go, I guess
with this pinkish one. In my case. I'm just
going to go here and paste this value, 5322. You can type that in
and then press Enter. Something went wrong. Let's go one more time.
Enter. There we go. So this is the value
I'm looking for. And then for the other side, I'm also going to type in
another value, 6484 a. Now I have a color that is somewhat resembling more
to what we have in here. Next thing I want to do is add a little bit of
reflection to this, because right now there isn't
much reflection happening. And to do that, I can go
here into this roughness. What I can do is just take this color rim
that we have here, press shifted to duplicate it, and then drag and drop it into
the roughness right here. You can see it now it's getting a little bit
of that wet look, almost like it has
like a coat over it. What we can do is just
maybe change that. If we drag this a little
bit more towards here and put this a little bit
more towards here. There we go. This
is going to work. We see how it looks
a little bit better, I would say perfect. I think this is
pretty good right now for our front part
of the wooden plank. Later on, we'll be adding a secondary texture
to all of this. So we'll be mixing two textures to get a bit more realism. But for this video, for this
video, and for this section, we're just going
to be focusing on our primary textures so that we can get our
scene filled up. All right, now let's continue to add a texture over
here on the right side. In order to do that,
we can just go here into the right
view like this, and then simply in here, choose the wooden plank. Now we need to
repeat the same step where we click on
this here, press Tab, select Everything,
and then go to and then Project From
View. There we go. The issue though here is
that let's say we want to change this, changes to go, let's say a little bit, maybe down for a location, we can see that the changes
don't only affect here, they're also going to
affect here as well. We don't really want that only to affect these changes here. We're going to need to click here to duplicate this texture as a new material
effect like this. Now this texture is separate, new material and
I'm going to call this instead of from
going to call this side. Now any change
that I do in here, let's say I want to
put this a little bit more down,
something like that. It's going to only affect
this side and I want to, let's say change the
scale to make it maybe a little bit more
thicker or maybe. Yeah, something like this. There we go next. I just want to do the
same thing in here. I'm going to go select the side. There we go, select everything
A let a project from view. Again, I'm going to have to duplicate this texture
one more time. I'm going to duplicate this
texture one more time. I'm going to call this side middle like this so that I
can go here into the scale and then change
these wooden planks to better match what
we have going on here. There we go. We have a little bit of an issue
happening in here, and I think that's because of how our textures
look right in here. What we're going to do here is probably we're going
to need to add, maybe this to enclose it. I just added a loop cut
right in the middle that helped me contain that
issue. There we go. That looks much
better. Okay, over here what I'm going to
do is I'm going to lower the amount of ambient occlusion. Do something like that. Let's lower it a little bit more because this repetition
of textures was a little bit more noticeable
and so I wanted to mitigate that.
This looks better. Okay, and then
here on this side, we're just going to. Let me see. Let's go
here on this back, Rick. I'm going to click Shift and then click on the
Hide in Viewpoint. That's going to hide
the entire scene. Now with your mouse
here in the outliner, I'm just going to
click the period key. That's going to show me
where this connector is. I'm just going to
hide it for now just so I can get a better
view of what's going on here. Now the issue here is that we cannot use project from view. That's because this
view is on two sides. We have to go here and
we have to go back. Instead of doing that, let's
just first apply detexture. I'm going to go side middle. I'm just, let's see, I'm going to apply
the middle one. I'm going to click Tab A, and then I'm just going
to click on Wrap. With the Unwrap, that's
going to help us to unwrap this
entire texture wrap, this entire mesh as
a matter of fact. But we're still going to
need to do some changes. I'm going to duplicate
this 11 more time and call this back for here. I'm going to need to
play a little bit with the rotation and a
few other things. Rotation, I believe it's the Y. If I put it to 90, we put it that's not the
one then looks like. Let's go here and try to change the Z -40 This will work for me. It's going to give it
that straight look. It's a little bit of a corner. Still Might need to push it
like something like that, but I'm going to need to change
the scale as I'm going to play with the scale now
and there we have it. All right. I'm going
to go back into the back and deck connector
middle that I hidden. I'm going to put it back. And I'll go into, let's see, my back rig. And put the back rig here
as well. There we go. We have our wooden planks
texture right now. Perfect.
36. Texturing the Front Metal Element: In this video, we're
going to be texturing the front part of the train here and this part on the side. We're only going to be ticturing two things because
as you can see, the side mesh goes
all the way and back. Hopefully this video
is going to be shorter and easier
than the previous one. We need to find a texture
that has metallic properties, as you can see here in real
life examples of trains, This here is definitely made
out of some form of metal. And here as well, probably
we need to find a trained to find a texture that resembles these properties that we can then apply to
make a look like this. All right, enough with
the rambling in here. I am back in the
ambient CG window where we had our wooden plank. If I click here and go to
the materials I can find, I believe somewhere
here it says metal. The thing is though, that
I went through a couple of these textures that we see over here and I'm pretty sure that you could
use some of these, but I just didn't like them. How in my personal
taste and use case, I didn't like them. So I went to another
page where you can also find free textures. The other page is called
Holly Haven over here. This is also as it says here, the public three
D Asset library. You can go here under
Assets and under Textures. I believe I put in
here also for metal. This green metal rust texture was the one that
I decided to use. We're going to be doing the
same thing as last time. We're going to go here,
instead of four K, we're going to download a two
K version of this texture. We're going to go here
and press download. And I'm going to save
it in my file right next to my other wooden texture. Then also be sure to extract your texture
here as well and zip it. There we go. Okay, now I can
just go and delete it going. Now back into our
blender file here, we just need to repeat
the same steps. I'm just going to
put this like this. There we go. For my layout, I'm going to drag this one. Drag this one now down. I'll use this one here for
navigating, selecting. And then this one is going to
be for my texture editing. There we go. I'm going to go here into my
front view like this. I'm going to go not
texture shader editor. There we go, my bad. I'm going to go into my shader editor. Click New here, now click on the Principle BS DF shader
control shift and all right, I'm going to go back here to my parent directory
and this is where my green metal rust texture is. Going here into textures
In here I'm going to select again the diffuse the
roughness and the normal. I don't need to take
the displacement. We're not going to be adding
any displacements for now. This is what I get. All right, let me just make a little bit space here because we're going
to need to change, obviously this green texture. The first thing that
I'm going to do is go into my tab mode. Press A and then press, and then I'm going to project
from View. There we go. Now we can see that we're going to probably
need to decrease this texture a little bit
because this is way too big. I'm going to go
here under scale. Something like this
I think is going to be fine. It's
going to be okay. Then the next thing
that we need to do is change the color
of this texture. To change the color, we need to go here
under base color again. Shift a color ramp like this. Our color is between
black and white. I already have saved the color values as
last time that I use, so that we can save
up a little bit time. If you want to
experiment, you can just click here in the black one, go here and then change it. Try to experiment to which
color works best for you. I'm going to add the ones that I found work best in
my case for here. I'm going to add 93753. Enter, there we go. And then on this side
I'm going to add, let me see, 9d815. These textures worked
pretty good in my case, but we're not done yet. We still need to change
a couple of more things. We have the metallic
property here, as you can see, and we also
have the roughness property. And I want to effect both of these properties
a little bit more. Now, I'm going to start
off with the roughness. I want to achieve
a little bit of that reflection that
we have going on here. I'm going to go
shift a color ramp. What I'm going to do now is
I'm going to press control and shift and then click on this color
ramp with my mouse. This is going to show
me how this texture, this roughness texture is
mapped out on our scene. If I now move here, this you can see. Thing, essentially
that's becoming black is what's going
to be reflective, what's going to be very glossy. And then everything
that's more closer to the color white is essentially
going to be rough. If I wanted everything here to be fully glossy
and reflective, I can just put it all
the way down here. But if I wanted a
areas to be dry, I can go to maybe something like this and I can
put them closer now to clamp up the values as well
to something more like this. Now if I click here in
the principle BSDF, and I click control
shift and click on it. And I move it a little bit, and we can also see here
we're getting a little bit of that glossiness happening, but I don't want it
to be this glossy, so I'm going to move
this a little bit more towards here like that. There we go. All right. We can probably maybe decrease our texture a little bit
more and we can increase our normal map here to get a little bit more of what's happening here in these
shadows and corners. To give it a bit more grudgess, I'm going to put it
to two or strength. Then I'm going to
change the scale, maybe, let's see, I'm
just playing with it. If you want to see better
how your texture is scaling, you can go press here
on the base color. Go like this, control shift
and click on it so that now you can see
what's going on with the base color from here. As I changed the
scale, now I have a little bit better visibility in terms of how
big my texture is. But you can see if
you go too small, you're getting a bit of that repetition happening as
you can see here and here. We do want to be careful
with that so that your repeating textures are
not way too noticeable. I think I'm going to go with something like this
here that I have. I'm going to click back on the principal DF control shift. Click on it like
that. There we go. If you want, you can also
change your Metallic value. I'm going to go shift
copy this in here. Let's click on the
metallic and let's just see how we want to change it. If it goes all the way to white, that your material
is more metallic. If it goes all the way to black, material is less metallic
as you can see here. Now it's like super metallic. If I put it more, it has a little bit of a less
of that metallic view. I think I'm going to have
it somewhere around here. This is looking
pretty good for me. This is just the first
layer of our text. We are going to be
adding an extra layer of texturing to give a bit
more of that realism. Because right now,
everything is looking a little bit too clean and
that is perfectly fine. As I said, we are going to be adding more layers
as we go along. Now we just want to add all the base layers so
that we can get the general look idea of how this is going to
look like for here. I'm going to go
into my right view. Now to texture this part here, I'm going to go
into my tab mode, select a select
everything, press U, and I'm going to, instead
of project from you, I'm just going to
click on Wrap for now. And we'll see what we're
going to be dealing with now. We haven't used this before, but we can also see how this
measure has been wrapped. I think it might be
useful in this case. Let's go here and then
click on UV editor. We can see now this
is how our texture, how our mesh is being on reps. So if I go here, let me
see under these images, I need to find the
green metal rust. There we go. This is
or believe this one. This is how our texture is
currently being projected. And this is going to most
likely cause some issues for us now as we apply
the material here. And we also need to rename this, so I'm going to call it
yellow, yellow metal. Let's see if the way that this texture is currently
being applied, as you can see, the way it's being mapped out here is going to cause
any issues for us. I think the best way would be to figure this out if this
is causing any issues, would be to move our sun. I'm going to move
our sun, rotated a little bit around to
here so I can get a better idea of how this material is currently
reacting and how it looks. I can already tell that
this is way too big, So we're going to need to scale down the material a little bit. One way to do this would
be to now go either, if we go here and
change the scale, it's going to also
affect the scale here. We don't want that,
we could duplicate it, that's one way of doing it. But we could also go in here and then try to scale the way this mash is wrapped
around this texture. Another thing that we
could do is maybe, let's try to change the
way that this was wrapped. I might go here and press U. Instead of just
clicking on wrap, I might go try and
use Smart UV Project. Then we add here island margin. Just put it to 0.0 Ten press. Okay, there we go. Now this is much cleaner in terms of how
it looks here in the UV. If we increase this, the scale, this is going
to decrease. There we go. So I'm just going to put it, let's see, I'm going to put, it just fits a little bit. Something maybe around here, but I'm going to put it
maybe on this side here. Because now we have
these repeating textures and we don't really want those
textures to be repeating. Let's see if we can try to get rid of as
much repetition as possible by just aligning how
our mesh is being rejected. Here, I think when we put it
at a little bit of an angle, does the job more or less? Well, one thing
that we could do, even though this
might be a little bit advanced for this case, is to break down
this repetition. Let's, we could go
in here and simply, let's go this duplicate, this texture, select everything
here, Shift to duplicate. Now, add a mixed
shader, there we go. And then connect
this one to here. And then connect
this one to here. And then connect this
one into our output. Now I can change maybe
the location of this one. This is going to break up our texture a little
bit because we are mixing these two textures and blending them by
50% If I go here, everything is going to be
the texture that's up top. If I go here, everything
is going to be the texture that's here. If I put it right
here at the middle, we're blending these two
textures one over each other. Now I can add a bit
more variation just by messing around with the texture that's underneath,
as you can see here. If I go, for instance
to the scale, let's assuming to see closer. What's happening? Let's say
I changed the rotation. You can see now we're moving certain parts of the texture and just adding a little bit
more variance to it. I think that's going to help
us with this issue. Perfect. I know this was a little bit of advanced thing that we
haven't done before, but it is a very common
practice to break down textures that are repeating by simply
mixing them together, or mixing another texture
that's similar to it. And then trying to achieve that a little bit of
that extra randomness, which is exactly what
we've been trying to do throughout this whole tutorial whenever we were
modeling as well. The same principles do apply
to texturing to a degree.
37. Making a Procedural Metal Texture: Up till now, all of
our materials have been built using image textures. Such as the planks here
that we see on this side. These textures are, as I said, images of a certain object, and then if we zoom in, we can also even see the pixels. Then out of those images, we get derived roughness map. We've got a normal map, an ambient occlusion map that tell blender different values. And then it interprets it and creates a material
as we see here. And the same goes
for this metallic material we have over here. For this video,
we're going to be doing things a little
bit differently. Instead of an image texture, we're going to be creating our very own procedurally
generated texture using blender nodes and noise textures
within our disposal. With that, we're going to get
a couple of extra abilities to control different properties of this metal texture
that we'll be creating, as you will see as we go
along to begin with this, the first thing I want to do is instead of texturing the strain, I want to use something
better or something much more easier to preview my texture. I'm going to go and
add a UV sphere here. I'm going to push
this UV sphere up. I'm also going to
activate my shortcut VR, so you can see my keys. There we go. I want to also clean up my
scene a little bit. I don't need this part
here at the bottom. So I'm going to put this down. I'm going to push this a
little more to the left, like that over here. I'm going to zoom in that. Then with my right
click, I'm going to go shade auto, smooth. I'm going to add one level of subdivision just to clean
up these edges over here. And this is going to be
my working space for now. To begin adding a new material, I'm going to click on
this sphere and click here to New. There we go. Additionally, what
I can do is I can rename this material
to call it Metal. All right, now before we begin, in full transparency, I'm not an expert when it comes to procedurally
generated texture. As a matter of fact, the texture that
we're going to be creating now is something
that I've learned by watching a tutorial by
a channel called Blender. Made easy, this texture that we're going to be creating is actually the same
texture from there. Just with a little
bit of extra tweaks that I've added in the process. If you want to learn more about procedurally generated
textures and get better explanations of
certain functionalities, I do recommend checking
out that channel to get a bit more
information in detail. But for now, let's focus on
building our metal texture. Since we're dealing with metals, I'm going to go into
this metallic property of my BSDF shader. And I'm just going to go and
turn this all the way up. That next thing I'm
going to go is drag the specular all the
way down from here. I want to start off by adding
a noise texture shift. A noise texture, there we go. This noise texture is
going to be used to drive a brush stroke effect
on our metal object. To preview this noise texture, I'm going to click control
shift and click on it. And now we're getting a look of how our noise
texture looks like. This is done using our
node Angular add on. Without the node Angular add on, you wouldn't be able to do
this then if I press control on the noise texture blender
or the node angular add on, as a matter of fact is
automatically going to give me a mapping and a texture
coordinate node. From here I want to do
a couple of changes to this noise texture,
how it's being mapped. I'm going to change from object
from generated to object, so I'm going to
connect this, then I'm going to go into the scale. And I'm going to increase
the scale all the way till I get these lines like this. And this is already
starting to give me that brush stroke effect. I'm going to drive
the Y lower to say, 0.1 something like this. Then I'm going to also do some changes here to
my noise texture. I'm going to change
the scale a little bit to condense the
lines a little bit more. I'm going to increase
the detail and increase the roughness just a
little bit. And distortion. I'm just going to put
to maybe 0.1 like that. Now the next thing I want
to do is I want to add a little bit of chaos
to these lines here. So that's not so
perfectly straight. To do that, I'm
just going to take this noise texture
over here and I want to mix this noise texture along with this mapping
node that we have. I'm going to go here
and type in mix color. I'm going to push this here. Then from here I believe if
I take the factor and put it in here and I take the object and put
it into the vector. This is now going to drive this noise texture
here within here. If I increase the
factor, for instance, you can see it's starting
to get really noisy. And what I'm going
to do is just take this all the way down to say, 0.24 something like that. There we go. In this noise secture. I do want to do some small changes. I'm going to change the scale to let's see something
around here. Then I'm also change
the roughness, maybe 2.5 there we go. And distortion. I'm
just going to put it all the weight down to zero. This is what we have right now. I might also increase
the factor here just a little bit,
something like that. Now we add a little bit of randomness into
our brush strokes. Next thing I want to
do is I want to add now color to this material. And to do that, I'm just
going to push this, connect it to the material
output like that. Or you can also press Control Shift and click
on the principal BSDF. I'm going to push
this all the way here and I'm going to add a color ramp right here for
this color lamp color ramp. I'm going to clamp down these values a bit closer together, but I am going to now
choose colors that are more closer to some
form of a metal. So I'm going to take make it like this, I'm
going to take this one, make it a little bit lighter, somewhere like that. I
think these two work. If you push this closer, you can see now you're
getting the values of the lines look a
little bit different. I'm going to put it somewhere around here, something
like that. For now. The thing is I don't really want to have to go in here and change the color of both of these
handles every time I want to have the color
of this material change. Instead of doing that,
what I'm going to do is add a mixed color here. There we go. Now I'm going to change this mix to multiply. If I push this factor all
the way here to the side, now it's basically fully multiplying this here
with this value here. If I go and change
the color here, now you can see that I have complete control of the
color of my material. I'm going to drag the saturation all the way down to zero it out. And I'm going to push this maybe to somewhere a bit
of a lighter color. This is the color that we're
working off right now. The reason why it
looks, it doesn't look gray by default is because right now our sun and our sunset is, as you can see,
giving that orange, golden hour color that is being reflected
on our material. But in terms of
the brush stroke, we've added the brush stroke to our material as you
can see it here. The next thing we can
do is also change here. Instead of multiply,
we can press F two, or we can go right click
and choose rename. And we can just call this color. Now we have the base
color of our metal here, and we can control
it by this setting. The next thing I
want to work on is going to be our
roughness map here. We've used the noise tture, now I'm going to push this, everything selected, push
it a little bit more up, just so I can get a bit
more space over here. I'm going to add what's called a musgrave texture. There we go. And I'm going to
press control shift on this musculate texture, just so I can see
what it looks like. And I'm going to be changing
a few settings on it. The scale, I'm going to
drive the scale down all the way to 0.1 there's nothing
really visible here. Then I'm going to
increase the detail to, let's say, all the way up top. But when I lowered
this dimension, now I believe you should be able to see
what's going on here. I've put the dimension
to 0.1 and now we can see how our musculate texture
is starting to look like. From here. What I want to do is go back into my
texture coordinate. And I want to take this object and drive it into the vector. It uses the same coordinates
as we have up until here. And this is what we get. Now one more thing
that you could do is we want to
isolate this sphere. It's only that in my view here, I'm going to press forward
slash on my keyboard. This is going to
isolate the sphere, so that I only have to look
at that versus having to look at the entire scene
that we've built up so far. Now what I want to do is just add color to my
musgrave texture. I'm going to go into a colors
that I'm going to go into my search color ramp and I'm going to add colors that are fairly similar to
what we have in here. I'm going to clamp this
here, push this here. I can also press
control shift on my principal BSDF so I
can see what's happening. I also have to connect my
color to my roughness. And this is what
we have right now. But instead of having this, I want to take this black one, push it to something
closer to here. I'm going to take this
white one, let's see, Push something like that, something that's close to these colors that we have
up over there. I'm going to take
this all the way to one edge to the other edge. Right now, we have
barely any roughness. Somewhat visible over here with the reflection of the sun. We need something to help us control the strength
of our roughness. Instead of having to
constantly change the colors and move
this left and right. To add that, we're going
to go here and add a math node like this. Instead of add, we're going
to change this to multiply. If I increase the
multiply value, you can see now my roughness
is also being changed. You can go also here
if you want to clamp down that value a little
bit more like that. But for now I'm just
going to keep it as is. And I'm going to rename this
and call it, let's see, Roughness, strength.
There we go. Last thing that we want to do, I'm just going to let me
drag this a little bit down. Something like this. But
yeah, let's organize this. Show it a little bit more
up so we have more space. But last thing that
we need to add, or what I want to do is work on the scratches
for this material. Before we even begin
with the scratches, I did forget one more thing. Let's say we want to be able to control the color
of this roughness. To do that, we really need to do on this color that we
created, duplicated. Put it red here. Now from
here we just need to take this height of the musgrave texture and push it all the way here
into the factor. Now, this musgrave texture
basically works as a mask or our base color
that we have here. If I go into my principal BSDF and I change the color here, let's say to red or to green. We can see that this node here controls the color specifically
for our roughness. This can give us some
really cool abilities. For instance, to
give, get that washed out metal or basically
rusted metal. Look, there we go. I'm going to drag this
back all the way down. I'm going to change the color, maybe a little bit darker here. This one I'm going
to keep as is, but I'm going to rename
this to roughness color. Now I have my base color. I have my roughness
color over here. I have my roughness strength. As mentioned earlier before I was interrupted with
this roughness color. We're now going to be adding some scratches to our material. So far we've used the
musgrave texture, we've used the noise texture, now we're going to be using what's called
the wave texture. I'm going to push it
somewhere around here. Let me just organize
this a little bit better. There we go. For this wave texture, I'm going to press control shift to just preview
how it looks like. Now we're just going to
be changing a few of the settings as we did with
all the other textures. I'm going to go with
the scale and push it somewhere around here to one. I'm going to change the
distortion to say 25, 26. Then I'm going to turn
the detail here to zero that I'm going to add the
detail scale here to five, the detail roughness
to let's go 0.75, Let's go somewhere around
something like this. There we go. Now the same
thing that I did here with the noise texture where I
had this mixed note and the noise texture be combined
with this mapping note. I want to do the same thing
with this wave texture. We're take this me, I'm going to take
this noise texture, I'm going to go shift, put them here,
that, there we go. And then I want to take
the generated output of the texture
coordinate here and put it into my node
right here like that. And then I want to
take the mixed node, take it into the wave texture, and now I'm getting so much more detail what's going on here. From here I'm going to go into my noise texture that I just added and do some small changes. Let's go here to changes
to somewhere six, I'm going to go roughness, Change this to maybe 0.1 maybe. Let's go something
like this. 0.6 let's go distortion. That's fine. As you can see, we are getting so much more ability now to
control what's going on with our material versus just what we had when we were working
with an image texture. All right, let's
go on with this. We want to add some extra
sharpness to these scratches. To do that I'm going
to go shift A and add a color ramp in here. Now if I clamp down
all the way here, you can see getting
sharper lines. But the issue is I want
this to be inverted. I don't want this to be black. I want this to be we,
I need to go here. Click, flip color ramp, and then push all the way here. And push all the way like that. Now I get these
scratches super thin. I can zoom out here a
little bit more to control at some extra detail like that. Right now we have
all these scratches happening around our measure, but we don't want them to
be happening everywhere, we want them to have
them at certain places. We need to break
down scratch pattern that we have on our material. To do that we need to add a
noise texture one more time. T, I'm going to push this a
little bit down like that. I'm going to add a noise texture right above my wave
texture here, like this. And I'm going to do a couple of changes to this noise texture. I'm going to change the scale to something like this to eight. I'm going to add
much more detail. Let's see, roughness, we can keep it something like this
as it is right now. I want to add a color
ramp one more time. Let's just go shift a
color ramp, there we go. And then I'm going to
push this color ramp somewhere around here. This noise texture is
going to be used to break off this pattern that
we have right now here, so that the scratches are only appearing at certain places. Another thing I can do here
is if I go here under linear, change this to constant, and then I'm going
to push this a little bit more
like this so that the falloff isn't visible. For instance, if I go
under, as you can see, there's much more falloff and
linear what we had before. You can see there's
a very clear falloff happening between
black and white. I don't want that,
I want to have a very strict direct fall off, something like we
have going on here. Now, the next thing I want
to do is basically I want to subtract the
values from here, from this value that
we have in here. And to do that, I'm going to add another math node like this. I'm put this one into the value, I'm going to put
this one into here. This is what I'm
getting right now. I need to subtract. There we go. As you can see now, these
strict lines aren't happening everywhere as we had them before because
they're being subtracted. And so we only have
them in certain places. Now, let's say you want to
do some changes to this. You don't want to have these
lines per se like this. You can go here where
it says three D. You can change this to four D. This is going
to now allow you, if you move this noise texture, you can change the look. You can even change
everything here regarding these,
these scratches. The same also goes for here. You can change the
scale if you want, but I'm going to keep a
distortion as well to add a bit more difference
to your scratches, but I'm going to
keep my settings as they are for now because
I'm going to use this, what I have here as a base
for later on from here. Now what we need to do
next is simply connect all of this into our normal
map that we've created here. I'm going to add
a bump like this, drive the subtract
here into the height. I'm going to go press
control shift here. We can see that here
are our scratches, but the scratches are
happening on the outside. And we need to
simply invert this. And now our scratches
are happening inside. One more thing I'm going
to enable the clamp here. Doing this is basically
going to clamp the values 0-1 so that we don't
have any negative values. The range is now
basically from 01. Lastly, we also want
to be able to drive our brush stroke as well through the bump here,
through the normal. To do that what I'm going
to do is I'm going to add another bump node
over here like that. I'm going to take
the color ramp from here and I'm going to drive it through the
height over here. Then I need to mix these
two bump nodes together. I'm going to use a
mixed color like this. I'm going to push
that one on top. I can push this one on bottom. That under mix, I'm
going to put it now. I can control individually
the strength of my. Let's say I don't want to have the brush stroke
to be so strong. I can only want to
have it like this. Let's say I don't want to have my bump to be also that strong. I only want to be
like this here. Now with this, I can
control those properties. I'm going to change
the names here. I'm going to call this one, let's see, strength,
brush, bump, strength. I don't call this one
scratch, bump strength. This is going to be our
base for our material. Like I said from here, we can
do a lot of crazy things. Everything here, almost
everything here that we change is going to affect our material
in one way or another. But to summarize it,
what we have here are three key things. We have our brush stroke
that we built through here, and this factor here controls how straight or sharp are our lines
of the brush stroke. And then this here base
color controls the color of our material and this controls the color
of our roughness. On top of that, we added here, the roughness nodes over here. We can change how our
muscrave texture looks like. For instance, if
we want to change the look of our roughness, we can give it a
different look here. We can also change the
strength of our roughness by changing this number
here, there we go. Then over here we
have our scratches. To manipulate our scratches, we can do a couple
of different things. Let's say clamp this together. If we clamp this together, then our scratches become
much thinner as you can see. Then if we get more
or less scratches, depending on what
we want to do here, let's say I want to have
much bigger scratches. I would then push this
and go like that. Or if I want to have
only very tiny, thin scratches, I would
push this and go like this. Then also from here, we can control the strength
of our stroke. If we increase it like that
or if we increase here, we can increase the
strength of our scratches. And this is pretty much going to give us a lot of flexibility once we start texturing the metallic parts
of our material. All right, this was
a pretty long video, but I hope you'll learn
something new here. This material is
going to be applied to a couple of different
things on our train. We're going to be,
as I said, applying it to our windows here. Instead of having
an image texture that doesn't have that
much flexibility, It would be much better
to have this material that's going to give us
more flexibility and options in control over how we want our train
metallic parts to look like.
38. Texturing Metal Objects: Now that we have our procedural
metal material created, let us start applying it. I'm going to move
this roughly half of my screen and we don't
need this sphere anymore. So I'm going to
delete that. Let's go to the first part that we're
going to be tech shrink, which is going to be our
window rails right here. Before we do that, there are a small few tweaks that I
do want to do prior to it. I was looking into this model a little bit before and I thought, I think it's going to
be better instead of having these rails stick
out of this yellow, yellow metal part, let's
just have them go inside. As a matter of fact,
you could go and press G and then try to manually
move this inside, and then move it a little bit down and then try to
tweak it left and right. But I think the easiest way, especially at this point now, is just going to be to
use the solidify modifier and play with the offset
that we have here. If we just go into our solidified modifier and
change the offset to say, let me see, five
is going to push it perfectly inside in that direction that
we wanted to go. Now we really need is to change here the
thickness of this part. We can do that quickly
just by going like that. I'm going to put it to
0.04 Now with the glass, we just need to add a solidified modifier to it like that. For thickness, I'm going
to make it like a half, 0.005 I'm play with the offset. Put it to, let's
see, negative six. I'm going to have to
go more, negative ten. I'm going to need
to go a little bit more. Just a little bit. Let's go negative
12, that offset. The reason why I wanted
to do that is now I'm getting like
these shadows here. I just think that visually this looks a little bit better. It gives a little bit
more detail to the train versus everything being
flat out and sticking out. This gives a bit more
of that extra detail. Lastly, let us just change, see how we have a
very sharp bevel going on here. I'm
not a fan of that. What we can do is go here
under our modifiers goble. We don't want the Bebl to
be applied everywhere, we just want it to be
applied to these edges. We're going to go
into our edit mode. Press Alt here, hold shift, press Alt on the other edge. So we select both edge loops. Then press N to go under our transform
settings and change the edges data for
bell weight to one. This way the bebbles
are only going to be impacting everything here
that is in the blue outline. Now if I go into
our Beble settings and we change from
angle to weight, we can just go here and play
with the amount and say, let's see something here and let's change the here
to three, maybe four. Let's see, three. I think
three is going to be fine. Is this part being impacted? I don't think this part
is being impacted. So we're going to change the
strength a little bit more. Maybe four. There we go. Now we're getting
what we wanted. Just play around a little
bit more with the strength. Maybe 0.01 I might
want to go even lower. 0.05 something like that. There we go, This
looks pretty good. Lastly, you can see how the
edges here are a bit blocky. I'm going to add control
on a subdivision. You don't need to, if
you don't want to, but for my own
personal preference, I do like that to be added here. We can see with
this material here, we're also having a
little bit more issue. There's still those
duplicates happening. We didn't do the best
job in terms of scaling, so we can just maybe, let's see, change this to
something like that. Okay, let us go now to apply
our metal rail part here. We can just go, here we go
to press, we'll stop here. Pi shows me in the
outline what I have selected here,
the front rails. Let's add the metal like that. All right, so a
couple of things. I think that it is a little
bit too dark for my taste, so what I want to do with
this metal now is to change the color a little bit
closer to what I want. All right, to change the
color, let's go here, under the color
ramp and push this little bit more above here. Let's do the same with this guy, a bit more above here. Something like this.
I think this is already looking much closer
to what we have here. The next thing that I think it's too noticeable
are the scratches. Maybe we should also lower or increase the
roughness strength. I'm going to increase
a little bit of the roughness
strength like that. And then I'm going to
play with these scratches that they're not so present. I'm going to go into
the strength here. The scratches decrease them a little bit,
something like that. I can also go in
here and say, well, I don't want the scratches
to be this thick. I could play with
the thickness of the scratches,
make them thinner. I can go here and say, well, okay, let's change
type of scratches. Maybe one difference,
so I'm going to play with the value here. I'm getting something like
this. I also think that the brush stroke effect
is a bit too strong. I'm going to push the
brush stroke a little down, something like that. I might want to use
these roughness part. Do you want to make them feel
like rust? A little bit. I push this here, make it a bit orange
like that. Perfect. We have this part of
the rail created. Let's move on to this part here, which is the Bezier curve. Let us add the metal part here. But I do want to do
changes to this material, but I don't want to
affect this one. I need to create it
as a duplicate of this initial material
that we just played with. I'm going to go in
here and select new material and I'm
going to call this metal. There we go. I want to
keep the brush strokes, but we can see here
that because they're using object mapping right now, they're a bit wonky
in my opinion. Instead of them being object, let's just push them
to be UV instead. Now we get a little bit cleaner. All right? I think I
might have overdone it with the redness here, so I'm going to lower
the saturation a bit. I'm going, that's too much. I'm going to push this
maybe a little bit here. I'm only playing now with the material that's
applied here. I'm not touching this
material here, by the way. You can see, let
me change the hue. Something like that. Because
here I really don't want to, I don't want to have much of that rusty feel and I
don't want to even have much of roughness, strength, and I don't even want
to have this much of a strength when it comes to the breast stroke going to have a much weaker breast stroke
effect something around here. I can also play, let's see with the amount of the
breast stroke because right here we're mixing it
with the noise texture. So go all the way here,
the breaststroke is gone. I push it like
somewhere around here. It's still there but it's a little bit
disrupted by the noise. It's not as sharp,
which is perfect. I do want to add a
little bit more, maybe roughness back to it, so I'm going to go push the roughness just a
little bit more up. Now, we have our rail material. Maybe I want to add a little bit more scratches to
the rail material. Now that I look at, I'm going to go here and
increase the strength. That's the Btn, increase the
strength of my scratches. And these are like they're okay but I want to have
them a bit bigger. Let's just make this
distance a bit here. Maybe push this a
little back so that we can increase the amount of
scratches that we have here. It has a little bit more
of that damage going on. Let's see. Then maybe push this to make it a bit
thinner, something like that. I think this looks
pretty cool now. It has it's almost
broken feeling. It's definitely been worn off. Let me just maybe decrease the strength so it's
not like super damaged. Just enough like that.
Yeah, that looks good. The two I don't
like the fact that there's two by two going on, so it's just a bit weird. Just a bit weird instead of
two by two going like that. It actually, yeah,
it's also there. Let's just play with the W. See if we can maybe change
that a little bit. Maybe the scale. Let's see
if we can change it here. There we go. I think
this looks better. Perfect. Next, what
do we have next? Let's see, we can deal
with the lights here. Let's deal with the lights and then also deal with the sign. For the lights. Let us go here. Let's, let's just use the metal that was used
over here as our base. This is how our lights
are currently looking. I'm not a biggest fan of this. I might change this. Metals like that. I created a duplicate. Let me see, metal. I changed the name of that one. Let's go a few steps
back where I apply this. There we go, apply it here. Metal, there we go. And then duplicate it.
That and then call it metal, light here. Really what I want,
I'm going to use this noise texture that I
have and just completely take out the brush stroke effect and have it only
be like this, perfect. I'm going to apply the same
one here. There we go. That good, I think I'm going
to apply the same one here. I'm liking how that looks like. I might play with, let's see, we might want to play
a little bit more with this if we push it lower, right? Something like that. Let's see, this is going to be
my roughness here, so maybe I can increase
the roughness here. I do want it to be metalish, more shiny, Something like that is going to
be fine over here. We're going to be having this
material applied for now. We can keep this as is until we start applying
that material, which is going to come
a little bit later. Let's see, what else
do we have Here we, here we have this yellow part. We can apply the same
yellow material as well. Let's go like that. I want to add maybe a little more
thickness to this part as well. Let me just push this
thickness a little bit more up. Something like that. And now I need to push this Y, push it a little bit more front just gives me a little
bit of that extra dimension. A little bit more
shadow perfect. Then where else do we need
to apply our materials? We need to apply
our materials here to this part, we can see that. Let's go to where do we
have a close up of this? There's a little bit of
metal happening right there. Unfortunately, I can't find
a close up. There we go. You can see this part here has that metal
material for now. We can just apply
the entire thing honestly. But not this one. I'm going to use
the front light. We can just use it
for now, like this. And then we're going to
apply the other texture onto this part later. Let's see, we don't
have our wheels. We have our windows
here that we need to still apply our
textures towards. Let us apply them to
the Windows Windows. I want to use the same
material that I had here. I'm going to go metal. I think that was the first one, but we can see it's
a little bit wonky, mainly because of a
couple of things. How our topology is set
is one of the reasons, but also how this set up here is we're going to be doing
some changes for that. I want to also, again, create a new material. I want to call this
one side window metal windows like that. Let me see now, what are the
next things I want to do? Next thing I want to do is actually change how this is
being mapped, I believe. Let me try to change
it to object from UV. Let's just keep it object
as a matter of fact. But I do want the brush
stroke, which is here. I don't want to horizontally
as it is going right now. I want to go vertically.
To go vertically, I need to replace
these values too. I need to have 0.1 I
need to have this 100. Now it's going vertically. But then the scratches, there's a bit too many
scratches for my taste here. Let's change the scratches and how they're
being here as well. So we have the
wave texture going on which is what's driving
our scratches right now. We don't need this many of them. Let's maybe add
stores detail scale. There's just way too
many scratches overall. Let's go first to the material. Let's see, what can we do here. We can decrease the
scratches strength. We can do that. We can
play a little bit more. This here. There's less
scratches going on then. If we increase this, then the scratch of strength
is way too big. If we take, this is way too spread, we want
to make them thin. Now we have very small, very thin scratches happening, which is not bad actually. There we go. See here where
the wave tture is there. This is being generated perfect. There we go with that part. I think that looks pretty good. Let's go and see
how it looks here. I do think maybe brush
stroke is a bit too strong. Might go here. Brush strength just
decrease it a little bit. Something like that. All right, I'll see
what else we need. We need to apply the middle
material to our wheels. We need to apply it also here. Let's just go middle
side windows. I'm going to apply
the same one here. I can go here, apply
metal side windows. I can apply the
same material here. Let's worry about
the wheels now. Where the wheels, we can just
apply the same material. Let's start with the metal one. This was the one
that was applied to our windows on the front. Let's use the same one, but then it just changed the color. I'm going to call this
one metal wheels. We just need to change the
color here for the color. Let's have it be
something more brownish. It's going to be bronze,
something like that. And then we can use
the same material here for this one here as well. Let's just go a bit
more with saturation. There we go. And let's apply
it also here, metal wheels. When it comes to the metal
material that we just added, I think that's we can
still add it here. I would say this
is the last part. Now, I just use this one
as a combination of a few. I'm going to use the metal up here and then
I'm going to use metal front light or maybe metal wheel no
metal site window. Then yeah, I'm going to keep
this one as is for now. Later, I might change
it because like I said, I don't even know what
this part here is for now. I'm just going to
have it be like that. All right, I believe this concludes this video
for the metal texture. Next video we're going to be adding the textures over here, then here while we're at it, let's just add textures
here to the doors. I completely forgot
about that. There we go. They just use the same yellow
material. We'll get to go. All right guys, 20 minute mark. Exactly. Almost.
And I'll see you in the next video when we start texturing this part on
the top and bottom.
39. Texturing the Top and Bottom Parts: Apply the top texture. That's going to go
here, here, here. And I think also at the bottom, we're going to go back to our ambient CG website
that we have right here. From here I'm going
to go into materials, and then I'm going to
select, let me see here. I'm going to go with Metal. The metal that I personally
chose to go with, I believe it was this one here. Let me see. Metal 029 exactly. I downloaded this Metal here and I downloaded a two K
version. So you can do the same. I already have it saved here. You can see I'm going
to be redwoding again, but you just download it and
then zip it as you did with the previous ones from here. I'm going to go and add that new material that I'm
going to call this roof. Is it roof top,
maybe? Top metal. I'm going to call the
top metal like that. And I'm going to
press control shift and use the node rerangular
add on to do its magic, find a texture that
you download it. Let me see Tutorial
Textures. Here we go. This is where I put
mine metal 029. I'm going to, let
me see the color, the metallnsal roughness these four textures control while you select all of
them and click Add. All right, next we just need
to unwrap this material. I'm going to go press Tab, Select a press U and click Wrap. They should give
me predecent like that now it is a bit too large. Next thing I'm going to do
is change the scale of it. I'm going to just go
somewhere like here. Then the last thing
that remains really, is to get us to a
color that somewhat resembles what we have
going on here like that. I'm going to use this
color here as a base. What I'm going to do is go into, let's just move this here. I'm going to go a shift, a color ramp like that. I'm going to add a
color ramp right here. Then for this side I'm going to use something towards here. And then I'm going to use also something towards here like this that might make them
a little bit darker. I think this gives me
pretty good starting point. I'm going to apply the same
material here, Top metal. There we go, I need
to unwrap this. I'm going to press a U Unwrap. I think this gives me exactly
what I'm looking for. I'm going to use
the same material one more time. Let
me just see here. I'm going to use it
here as well here. The way I'm going to do this is select the area where
I'm going to apply it. I think I'm going to
select this edge here. Shift, select this edge. Then we have control. And I'm going to press
plus on my numpad, like this to expand
my selection. Now if you don't
have this again, what you can do is
select here and then go select More or less. And then control
Numpad plus for more. I think if you
press shift R. Yep. It's going to just like reapply the same thing that
you did earlier. I think I want to have
roughly this much selected. All I need to do now
here is go under slot, add a new slot for this slot. I'm going to go Top Metal. Now. Here I'm going
to go and press assigned. There we go. Lastly, we just need to apply
the same material in here. There we go. If we want to play
with the roughness of the material, I think
that's what I'm going to do. I'm just going to add a
color ramp right here. And I'm going to be playing a little bit with the roughness. Just clamping that color ramp. Not too much. Just a bit. I might make this a big
so that we can see here. I think in terms of the
first layer of texturing, we did a pretty good job. We can also apply the
metal material here. I guess we forgot to do that. Let's just go here, put metal. I don't want that
one. Let me see. Maybe front light. There we go. Now we're just going
to conclude here. Like you said, if you like, you can play around with all
of these textures yourself. Try to find the values
that work better for you. But for me, I think for now this is perfectly good enough. All right, so you guys,
in the next video.
40. Texturing the Windows: Almost done with adding all the primary layers of
archittures to the train. The only thing that's remaining is the glass that's
going to go here. And the material that's
also going to go here, that is going to be a
little bit different than the one that we put on here. To start off, I do
want to do a couple of things up ahead moving
into this part. First off, I was looking into it and I
believe we're going to have to actually remove the
solidify from our glass. If I take it out right now, you can see that it's going
to get pushed like this. We're going to have to
probably manually adjust it a little bit like this here. Then we're going to need to
drag it down to go here. But there's a little
trick that we can do so that we don't
have to go like this. And the manually we can actually
drag it into this axis, this alignment that
it is right now. If we go into our edge select, we select one of these edges. Here we go here under our global and we add
a new orientation. We call this pretty
much like that. All right, now I believe if we have selected the new
orientation, this one here, and I press Y, you can see that
the Y axis now is a bit better aligned on this. And this is helping me, so I can go y maybe
a little bit more. I'm holding the shift,
I'm going to go z and then go a little bit back. Just so I have it nicely added onto all of
my parts in here, I might need to, let me go
back now to the one here, global and I'm going to go x and then just try to maybe a little
bit closer to each other. Let me see if this is because there's a little bit of
that extra room here. I could probably
close that gap by adding maybe some thickness. Let's see if I add some thickness here and
then I play with this offset. I think this is going
to help me close the gap right here. We've averted one issue. The next one is this one here. We need to do the
same thing here. I'm going to take out
the solidify from here. But I think for this one
it should be fairly easy. If I push this X in here
and then just hold shift. I just need to make sure that they all we can probably go into our solid view and
then just make sure that there's room X like that. Let's go check if everything
is looking okay here. Now with this side,
we probably go into the way we're
going to do this, see is we're going to need to reset the origin
point origin to. Let's go shift if
I go like this and now object set origin
origin to three cursor. I believe that should push them right up that
spot. Perfect. All right, I think the
next one that we need to clean is this one here
with the solidify. If I take out the solidify
from here, let me see. Maybe if we take this like
this in our edit mode and then go X and then we just inside. I think that impact also the
other end here that we have. So this is going to be
pretty good Exactly because now if we're in the tit mode and we're changing
where our mesh is, our origin point is going
to stay exactly as it is. We can do the same trick here, we can take out the solidify, then go shift a x, then just push it
somewhere here. I think both of these sides
are going to work just fine. All right, I think
we've done it. I'm going to explain a
little bit later why it is that we just had to
take out the solidify. It will have to do with adding a droplet effect to our glass. Let's start off with adding
our glass material here. I'm going to press
New. There we go. Instead of having
it be like this, I'm going to principal SDF, I'm going to press Cape. Delete that one at a
glass SDF material, I'm going to connect it
here to the surface. Now I just want to add the same material to
all of these guys. I think what I can
do is just press. Press this one, press this
one and press this one. This one is being last control
L link materials, now, they're all using exactly the same material right off the bat. This is starting to
look pretty good. What I want to do next, I need to change the
IOR of my glass. The index of refraction. The index of refraction that
we're going to be using is, I believe, car windows that
I found. For car windows. The index of refraction is 1.51 That we're just
going to change it here. That's going to add a
little bit of distortion towards how the light passes
through here for a glass. But we're going to add a little
bit more extra distortion by adding a mus grave texture. But first we're going to
add a bump, one right here, and then we're going to
connect this bump with the height to a
musgrave texture. This thing is going to drive a little bit of
that extra distortion, but what we need to do
is press control now to add here our texture coordinate and then go object
connected here. Now we just need to play around a little bit with our
mus grave texture. So I press control
shift and left click on it and then play
around with the scale. Let's see, What I want
is something more, this and then maybe detail
like that dimension. Let's see, this is completely up to your
own taste by the way, so you don't have to have
it exactly the same as me. What I'm going to do next
is I'm going to go here, play with the four D part. Let's think something like this is going to give
me a decent distortion. So if I go into
my glass and then here under strength
I lower this. Something like this.
Something like this is giving me too much even for my taste. So maybe we go lower. Just a little bit more. Yeah, Something like this is not bad at all for now. Perfect. The next thing I want to do is I want to create an effect that makes it look as if there's dried water droplets
on this glass. Because this train, it's
driving on water here. It's driving, I believe, water or sea salt water
maybe. I don't know. But we want to create that
effect that it's driving on it and there's like water splashes
that have dried out here. Almost like salted water
that has dried out. And for that, we need to
add a surface imperfection. And we're going to find
that surface imperfection is back in our ambient CG site. So I'm going to go here,
I'm going to open ambient G.com here on the materials
I'm going to type in, imperfection is going to give me a couple of different
surface imperfections here. But what we're looking
for is something in the line of these
guys that we have here. I think this is the one that I used surface
imperfections 013, I used a two K texture, that's what I
download it and then I zipped it so you
can do the same. Once you're done with that,
we're just going to go and add that surface
imperfection here. We're going to go shift
a search image texture. There we go. I'm going
into open find my texture. It's this one here. Surface
imperfection, color. There we go. Now I'm going to connect this
to the roughness. Nothing happened. We need to
add a text coordinate here, Control, we added a
texture coordinate, we added a UV one. But if I go and control
shift, click on this, there's still nothing
happening. Why is that? Well, the reason
for that is we need to unwrap these windows here. I'm going to go here
in my front view, I'm going to go shift A and
then click Project from View. Now I believe if I go under
surface imperfections, we are getting this here, let me see If I go rap, I might go with wrap,
but we can see that these two look exactly alike. And the reason for
that is because of our mirror mirror modifier here, we need to apply our
mirror modifier and then go and unwrap one more time. There we go. And we're
going to need to do the same step now for all
of this here as well. I'm going to go here like this. I'm going to press shift A rap. Then actually I need to
apply the mirror modifier. I just did the same mistake. Shift on wrap. All right, here we can go and apply the mirror
modifier and we can do the same one for here
we need to do it twice, shift a rap and shift a rap. There we go. Now we can see
we have our textures wrapped. Everywhere here. If I leave now, and if click control shift
and click on this glass, PSDFhuh, we can see we are getting our
stains on the glass. Now this is looking pretty good. But what I can do more to
drive this a little bit better is I can
add a color ramp. This color ramp, now I'm going
to do a couple of things. I'm going to increase
the roughness so it's not everything fully
dark like this, so there's still going to be some extra
roughness like that. And now I'm going to start
pushing this white value up to increase the strength of these smudges as
you can see here. There we go. If we had a solidified
modifier applied to this. Now if I go under my solidify
and if I increase it, you can see because the solidified modifier
adds thickness, then this smudge
would appear both on the front side and
here on the back side. To avoid that issue, we remove the solidified
modifier from our glass. Even like this, this
is looking real good, I would say excellent. Now there's a couple of more
things that I want to do. First off, I want to play
around with the size of this. I want to go here and
make them a little bit smaller like that. But then this introduces
another issue, which is the repetition. We don't want to have
repeating textures here to tackle that issue, what we can do is simply
select everything here. Shift to duplicate it. Shift A, add a mixed
color, Go into here. Now we're just going to
mix these two textures. Something similar to what we did with this yellow material. For this one, what I want to do, let's go click shift here. On the mix one I want to do, I want to change the scale. Maybe make these ones bigger. I'm going to maybe
rotate it a little bit. That something like
this and then maybe location play
around with it just so I add a little bit
more variance to it's. So if I go now on my glass BSDF, we're adding a little
bit more variance to our smudges that we just added. But then now what about, Well, I don't want to
have these smudges go all the way up, right? I want these smudges
only to cover maybe the lower top part because not every drop is
going to go all the way up. We need to add a mask that's going to tell
blender essentially, hey, add these smudges only up to a certain point that we
need to add another mix. Because we're going
to be mixing this now with a gradient texture. This one here. I'm
going to press control. Let's see what this gradient
texture is now doing. Control, shift, click. Well, we can't really
tell what it is doing, but there's definitely a
gradient that's happening here. We need to change this
gradient from generated, I believe to object
that we, well, let's do this gradient on this
object, all of this here. But then we need to also
change the rotation. What we want is the black
to be all the way on top. And then we want the white
to be all the way on bottom. I'm going to play around with the values here up until I
get something close to this. I need to play with the
rotation a little bit more. I think this is giving me
about what I would want. I can play around, let
me see with the scale. There we go, to maybe
add a bit more fall off, not too strong, just
a little bit more fall off, maybe like this. And then location go a
bit more up now that I get a little bit more,
maybe something like that. Let's see now, what
is this going to do if we look at our glass BSDF? Well, right now it
does do a little bit, but you can still see that
there's stuff happening here. The reason for that is because how our mix node
here is working. We need to change this
from mix to multiply. I believe this actually
changes to multiply. We need to push this
all the way here to the top like
that. There we go. Now everything
that's black is not going to be obviously
shown here. As we can see, everything that's going to be here is
going to be visible. The only issue is right now, we need to bump up that
contrast a little bit, because right now it's not too
strong as we can see here. If I go under my color ramp, and let me add a
color ramp one here, let's see we can
push this one to increase here the strength. Maybe we can push this here to add a bit, something like this. Actually, let's
take this one out. I believe the color ramp
is actually supposed to go here, if I go like this. This is what I'm looking
for here. There we go. I want to add a bit
lighter color over here and push this white,
something like that. There we go. This
is what I'm looking for now, our smudges. And we can play around
with the strength, we can push this to clamp
them up a little bit more. We can go here under our gradient and we
can just simply say, let's decrease them and push
this a little bit lower. Now, these smudges
are only you can see happening up to
a certain level. Let me see how far the grading is updating them.
That's pretty good. Let's see here, what do we have? We have this. That's
pretty good as well. Now that is doing a
pretty good job now for the last part is let's add some droplets onto it as
well to run the droplets. Let's make some space here. Let's push this a bit here. We're going to be
combining some stuff with our bump that
we have over here. Let's take a look also here, how everything is looking. I think we could probably
reduce strength of this. It's way too strong. Let's see how the smudges
are looking here. Seems to be looking good. Perfect. Let's go now and try to play with adding
here an extra bump. To do that, I'm going to
go shift a image texture. What I want to add is the normal map that we just got with our
surface imperfection. This one here, I'm going to add a normal map to drive
this normal map, I'm going to use
a bump like this. I'm going to connect, let me see if I go color to the height. I'm going to go color
to the normal first. And then let's see first what's going to be
happening here. All right, this looks very messy. That's not what we want. What I want to do here is actually put a color
ramp like this, and then plug this color
to the height like that, and add a control UV. There we go. This looks good. Now we just need to
clamp down these values. Let's see what's going on. All right, we're
getting some droplets, you can see them here. You can see them on top. There's definitely some
droplets happening. Yep, we can see those
droplets. Nice. They're looking pretty
good, I would say. But one thing I want to change is I want to
add another mask. And I want to also combine this. Let's go in here, combine these two mix colors, then go into here. And then, I believe
it wouldn't be, it would be a float. Let me see. Or is it Let's
combine this here. Let's combine this here,
because it's a bump, and bumps should be floats. Let me just check. All right,
let's go back to color. Looks like I was
wrong. There we go. That works fine. But there's one more
thing that I want to do. I want to again, add a bump that add a mask that only
tells it to add the water up to a certain point. To do that, I'm
going to go here. I might want to mix
this one more time. Let's go and add where I think this is my
mask that we had and I'm going to try
and combine this mask into, into the factor. Now we should be getting
on droplets, there we go. You can see here on this side, there's only droplets
happening at the bottom. Let's see here, do
we see anything? There's some droplets happening here as well at the bottom. There we go. We have our glass right now
like that, perfect. But if you want to add
a bit more roughness, for instance, to your glass, what you can do here is
just drive this little bit lighter and this is
going to the roughness, I'm going to have something like that might even push it lower. Because then if I
put it too much, this part here is going
to start to show off. I might want to push it lower because that is also the
mask driving this here. We do need to be careful about that since they're connected, but I think this
looks pretty good. I'm going to close
this video here. In the next video we're
going to be building out, let me see, we're still missing this part
here for the train. Once we're done with
that, we are pretty much done with the first
layer of our textures. There's still the sign
here that we can add. We can do that once
we finish this part. That's to be fairly easy, but that's pretty much
about it for now. All right guys. I'll see
you in the next video by.
41. Texturing the Lights and Front Sign: For this video. For this video, I want to finish off the first layer of
the textures for the train. That includes creating
a texture for here, one for here, and adding this
sign here in the middle. And I think we can
do that all in this one video. Let's begin. I'm going to start off by this material here and we're
going to be creating some, a glass that somewhat resembles
this here that we see. Maybe a little bit more
controls for that. We're going to be creating
a procedural texture. It's going to be really simple. We're just going to take
this principle SDF out. Going to shift a type in glass, so we're going to
use a glass BSZF connected to the
surface like this. Now I'm going to
change this to say 151 to add a little bit
more of that distortion. These lines essentially,
we're just going to drive through the
normal, We're here, I'm going to create
a wave texture, but right now it's
not looking good. I'm going to press control as well to add my mapping
and texture coordinate. Because I need to now add a bump to actually
make this work. Because my wave texture
needs to go into here, I'm going to put it
factor into height. We can see that these lines here are now being
showcased like this here. And they're almost similar
to what we have here. I can control how
many lines I want. I can go like this. There we go. Now the next thing I
want is I want to add also some horizontal
lines to this. In order to do that, I'm
just going to go here, need to combine these two. Even though right now this one goes vertically the
same as this one here. If I change this x to y, now I'm getting them like this. I can also go and change
this, maybe to Saw. And it's going to give me
a much thinner line here. Now if I go back
in here in order to connect these two textures, all I'm going to do is add
a math node like this. Then connect these
two like that. I think I can change
this to multiply, there we go, and now getting
these lines backing, but I don't want
this much detail. Instead I'm just, let's see, I want to change the amount of these guys, the vertical ones. I also want to change
the horizontal ones to maybe just a little bit less. Let me see
how many we have. Yeah, I just want to go like
maybe something like this. Maybe two or three. Yeah, three might work
best. There we go. Now it has like that
old car light look, which is what I want. We can also add one
rounded one to go here. For that, all we
need is let's just duplicate this wave texture
here. Let's connect it. I think all we need to do, if I'm not mistaken, is let's see if we change to Z. There we go. So we're
getting this now. I want to decrease
the amount again. Let's see, something like this. If I change it to Saw, it's going to get
this again, sharper. Look, let's add a multiply here. And let's now connect
this factor into here. And let's press
control Shift and click on our glass BSDF
to see how it looks like there's that extra
distortion happening here. Let's see if we change it to sign. It's a little bit bigger. Maybe I want to, I
want to add maybe one more here. There we go. Perfect. Now, if you want
to add some light to this, what you could do,
let me just check. We could probably combine
this with an emission shader. If I tap in here,
tap in emission, and then I go mix shader, We plug this into here. Now this is being
emitting light, but we can then reduce
it to just give it some extra extra
light brightness. And I don't want to have
this fully white color. I want to have maybe
something that's a little bit more yellowish,
maybe something like that. Maybe we can also add, let's see, we can
add some roughness. To this entire
material. Let's see. So something like this,
so just a little bit of that emission, let's say
something like that. There we go. I think
that looks pretty good. Perfect. There we go. Let's make it maybe a bit more lighter but I want to
change the hue of it to maybe a bit more yellowish. I guess this works pretty
good then. Let's see here. Let's go with this slight
first because for this, all we need is to just duplicate this material that we created. And that's not the
one. What is this? This is, if I'm not mistaken,
surface imperfection. Color ramp. Color,
ramp. Wait a second. Oh, that's the smudges. Okay. We actually need to call this glass,
I guess, material. I forgot to call it glass. Window, glass. There we go. And then this material we
need to rename and call it, let's see, light main. If I go here, what I want to do is add light maine like this. But I'm going to
duplicate it and call it red because this one, if we look at our
reference image here, it has that red color here. All we need to do is
go into our mission, change it to red, can play
around with the strength. If we want, add maybe
some extra emission here. Maybe we can reduce
it. Maybe it's too strong. Just
something like that. As if it's turned off right now. Perfect. Then we just
need to go in here. Let's go into the front view. What we want is to add
a texture for this. Now, I already created
that texture as an image. The way I did this is I took it into Photoshop and then just tried to by hand draw this
sign with this background. What I got was essentially
that material, as you can see in here. I did this essentially
by hand and then I added some dust smudges to it. We're going to be using just
this image that I manually created to drive this sign here. The way to do that is we're
just going to go here, We're going to select
this right here. We're going to
select this space. We're going to go into our
slot and add another slot. And we're going to create a new material here that
we're going to sign. Click a sign here. Go into new. Now we assigned a new material to this space, to that face. I'm just going to dragon
drop this ji, there we go. I'm going to connect
it to my base color. Right now, everything
is going to be a mess. Because I need to go here and press to unwrap immediately. In my case it aligned
it pretty perfectly. I can press control also for my mapping
coordinates if you want, but if you're having issues
with it being mapped, all you need to do is make sure that you have
this face selected. Once you apply the texture, go into your UV editor and
then select that face here. And then just try to map it
out accordingly, it fits. You can also scale it maybe a little bit if you want
to make it smaller, but just be careful so
that it doesn't repeat. You have to be careful
in how much you scale. I think this is roughly
around the maximum, you can go like that. Now in our shader editor, we just want to add maybe
a little bit more detail so it's not so flat. Essentially, Starter
is what I want to do is I'm going to use this
to go into the roughness, but now I need to, I want to add some more extra detail
to this roughness. So I'm going to use a color ramp to drive the black and
white values that we have. Everything that's black is fully shiny and I don't want
it to be fully shiny, but I want it to be somewhat, then I want to drive
this maybe something like here in the middle and
then this one also here, there is a little bit of these
smudges, see these lines. This is what I meant
by just be careful on how you go in your UV, so we're going to need
to make it smaller. There we go. Then let's go back into
our shader editor, let's see how this is looking. All right, so this is
pretty good already. I'm liking how this looks like. But I want to add for
this text to go out, give it a bit of an extrusion. An easy way for me to do
that is just going to be by connecting this
color into the normal. And I need to add
obviously a bump, otherwise it won't
work like this. I'm going to connect
it to the height. Now, this is
obviously too strong. Let's just lower down the
strength a little bit. Let's see how our bump
is looking right now. You can see right now it's
working as an indent. We need to invert that
indent like this. Let's go here. This should give a little bit of as
if it's popping out. We still need to play with a few more values here to
make it really work Well, the first thing I would say, let's see if I play around with the distance
and the strength I get that I would go now and
add a color ramp actually, and control the color ramp
that goes into the bump. Let's see if I play
with this color ramp. There we go. We can see
now what's happening here. I think everything
that should be in black is going to
be indented out, or maybe everything that is
not in black should be in. Let me see if we push
this closer to here. If we push it like that, yeah, you can play around
with this at your own pace. I'm just going to try
to do something really quickly here and see what works best for me. There we go. I think something like this
is going to work best for me. So I'm going to zoom
in here, so you can copy if you want
this exact look, this is what I've made. It gives it a bit of
that worn out look as has some parts are shiny
still, some parts are. You can play around with the
strength if you want here. And so this here then would control how much of it is clean. If you push it all the way here, you'll see that then
the sign is much cleaner if you push
it all the way down, the sign has grutch to it. And then here obviously,
we can control if you push it all the way down,
we add the shininess. If we push it all the way up, the shines is a little bit gone. How strong you want to
clamp that shininess down? There we go. I think we are done as it looks. We are done with the
texturing part of our train. You can still play around
with some of these values. For instance here,
I think my strength maybe of emission is too strong. I just want to give it a little
bit, something like that. Just so it's not like fully
dark if I have it like this. So now it has just a little
bit of that extra light. You can go here, the glass maybe to glossy here on
the ends you want to add, maybe that extra roughness. What you could do is simply, let's see where this is
connected to our roughness. You can more like that, but then you reduce the detail. What you might want to do is
then go here, maybe more up. Now the glass is less glossy, it's a bit muddy almost. While it still remains
all the detail. Yeah, you can play around
with a lot of stuff. Here we are fully
done with the train. I'll see you guys in
the next video when we start adding detail to
the rest of the environment.
42. Texturing the Fence Part 1: For this video, I want to start adding some textures
to this fence. First of all, I'll begin with
texturing these guys here, and then we'll move
on to the rest of these planks right off the bat. These plans here. As you can see,
they're all connected. And I think at this
point it would be better if we all had them
individual planks. Instead what I'm going
to do is I'm going to go here on my outliner with my
mouse and press a full stop, which is going to show me
where this wooden plank is. Then from there,
what I want is to simply actually add
first a new collection. I want to store this
inside a new collection. I just press Click out
of a new collection. I'm going to drag this new
collection here in the fence. I'm going to drag
this wooden plank inside this new collection. I'm going to call this wooden
plank vertical collection. That's a very long
name From here, all I'm going to do is well, I have my wooden plank selected, press a select all of them, and then I'm going to press P, which is give me the separate
menu options from here. I just want to separate by loose parts because they're
not really connected. They're all distance from one another and they don't
have any connection point. Loose parts is the way to go. There we go. Now we have
all of these separated. This is going to help us
centrally when we start Turing, because we're going to
need to individually map out textures for all of these plans to be a
little bit different. Because as you can see here, there's a couple of
challenges that we are going to be facing once
we start texturing. The first one is, well,
there's technically, you could either
find a texture that looks identical exactly
like this online, which is probably
going to be very hard, or you need to find two textures that can give you
this type of look. In our case, that's exactly
what we're going to be doing. We're going to be trying
to find two textures that are going to
give us this look. We need like a painted texture that has almost like
this paint peeling off, which is going to give
us this side here. But then as you can
see, there's also this edgeware that we
see here on this side. And for that we're going
to need to have some, a pure wooden texture. And then we're going to
need to combine those two. For starters, what
I'm going to do is simply go here under Poly Haven. I already know which
textures I want to pick. If you don't want to go and search for these
textures with me, you can just get them
from the resource folder. The first one I believe
is going to be, let me see if I go
through the wood. I believe it is this
one blue painted plex. There we go. This is the texture that we're going
to use for the painted part. You can already see
in our benefit, this texture has a
peeled off paint like whether it off paint
effect, which is pretty good. But then also to drive
this extra here, I'm going to also download
one more texture if I go here under B and
CG, and I go wooden. I scroll down. Let's see, the one that I found
worked best for me was, I think I might have missed it. Let's there is
this one here now. I know this one
looks green here, but actually when I applied it, it wasn't that green at all. I think it's going to work
out pretty good for us. So this one is called Wood 065. You can download
both two K versions of these two textures
or you can just get them from my resource file that's included in the Storial. Now we're going to
begin texturing. I'm going to go here, prezi, going to my rendered view. There we go. Then from here I just want to start
add new texture. I'm going to make
this smaller so it doesn't take up so
much on my screen. I'll just put this here
as a reference like that. From here, I'm going to start
by pressing Control Shift. I'm going to go into
my Textures folder. I already have mine here. I'm going to add the diffused, the normal and the roughness. There we go. Now this is
what we're getting out. We need to properly map out our texture to this
individual model. The thing is, we could
do it by playing here with the scale and
maybe the rotation, et cetera, but then
we're not sure that this would work on each
one of all of these. If I go now, for instance, if I shift click, all of these guys, let me see, here, here, and here. Let me just make sure I
have all of them selected. I'm missing one, it looks
like I'm missing one. There we go. I need to
go from here to here. There we go. Then I'm going to select this one
as the last one. Just make sure that all
of them are dark orange. This one here is yellow
on the left side. And then I press control
L and go Link Materials. This is just going to take
the material that was applied here and then link
it all the way across. You can see if I
go for instance. Let's say maybe we
increase how it's scaled. We're still not getting
the desired outcome. I mean, it's starting
to look okay. But then you can still see that it's being
very poorly stretched. So what we need to do, I'm just going to reset this all to one. I clicked and then dragged
my mouth all the way down and then selected
one. Now it's all one. What we need to do is we need to unwrap all of these
guys individually. That's how we're going
to approach this. The way I'm going to do this is I'm going to go here
into my edit mode. Press A, and then I'm
going to press U, and then I'm going to go and say Smart UV Project. That's
what I'm looking for. I'm going to put it in an
island margin of 0.0 Ten, and I'm going to press okay. So what this is done is if
we go here and if we go into our UV editor,
this is created. A UV map, essentially is under wrapped our texture and
each one of these face, as you can see, coincides. Let's select
everything coincides to one of these ones in here. If I select this one,
this one, this one, they all coincide to
one of these faces. What that means is, if I
select all of them here in our unwrapped material
here, all I need to do now, for instance, is press R, press R. And then control so that I can
rotate it in increments. And now I'm just slowly rotating and changing how
this texture is going to be mapped out on my unwrapped
material from here already. Now it's starting to
look much better. What we need to do next is just clean up these edges
here a little bit. What we can do is we can simply go and maybe
select this one here. Now I know that
this edge is coming from here. I can press here. I can press the letter L, which is going to select
this entire island. I can just press
maybe S to scale it down a little bit
so that we try to, we try to avoid any of
these lines in the middle. Might need to do a
little bit more. Let's see, a little
bit more here. We might need to
do the same here. Yep, I need to do the same here. So I'm going to press
L. I'm going to select this one because this one also got disconnected, I believe. I'm just going to do
it one more time here. This is already starting
to look much better. I'm I'm not going to worry about the backside because
the backside isn't really going
to be visible. I'll just focus
on the front here and these sides here.
I'm going to press here. I'm going to press, let's see, A. So this one is this. I'm going press L,
then I'm just going to push it like that. For this video, I'm
only going to be focusing on adding
the first picture. And then in the next videos, we're going to be adding
the secondary layer. For now, all I want to do is go through all of these
here things and add a primary texture
specifically for these planks. We're going to be
combining two textures, but for instance here, and I believe also for here, we can survive with just
having the same one texture. What I'm going to do now is I'm going to repeat the same steps. I'm going to do it slowly here, one more time so you
guys can follow. And then I'm going to
speed up the rest of the steps once to the point
I'm done with all the planks. Let's go and do this one again. We go into our edit mode. Press A to select it, and we can see right now
how it's being mapped. So we don't want it to
be mapped this way. I'm going to press you to unwrap and I'm going to
go Smart UV project. And then just press okay, that did not do it. That's weird. Smart project. There we go. That was
weird. For a second. All we need to do
now is just press a Let's rotate at this time
in a different direction, so we get a bit more variance. I'm going to push this
somewhere around here now. We just need to start mapping
it all out accordingly. What I can do is just
press L, make it smaller, Put it here, make it
smaller, Put it here. L scale, press L now is going way more faster. And this one probably needs
to go somewhere here. Let's see how this looks on top. There is a bit of a issue
here at the very top. Let's see, this one is coming from there.
This one is here. Let's try to put this, maybe try to make it look
closer to this as possible. Think something like this
is going to be fine, especially because we're going
to be at such a distance, it's going to be barely visible. But now we have this plan going on here, that's pretty good. I think for the
next one I want to have it completely peeled off. For this one, I'm going
to do one more now, and then I'm going to
speed up for this one. What I want is to
go again, Unwrap. Not unwrap Smart UB
project. There we go. I want this front part to be having this super peeled off. What I'm going to do is I'm
going to select everything, rotate it, put it
somewhere. Let's see here. I'm going to take
this front part, which is this one here. I'm going to take
it and just put it, let's say somewhere here, lower. It's mapping out
right about here. I think what we can do is maybe we can select everything here. Let me see If we press
into select mode Y zero. Straighten this part out. Then we can select here Y zero, just to straighten it out. Then we just go and we
need to deselect this one. There we go. Now this one here, we have like this super
worn off material. Let's see, we might
want to make it a bit bigger because as you
make this bigger here, you can see the material
becomes actually smaller because it's spreading through
a much bigger surface. If I make it smaller, you can see that the
material here is bigger. Because it's just going on this little surface
here that you see. If I make it bigger now, it's taking a bigger
surface. All right? I'm just going to go like this
for this one scale scale, go like that and this
is what we have so far. All right, moving on now, I'm going to speed up the video. I think this is going to be
my final one. All right. Smart UV project, there we go. Smart Project, there we go. Sometimes I actually rotate like on the opposite side like
this, Just to make it, like I said, a little
bit different from here. I'll just take these two, put them in here, even go side. This one, I'll put it here. Let's screw that for this one. I might actually put
it here for now. And then I'm just going
to push these guys here. And now I'm going to
just take this one and put it right about here. There we go. I think we should
probably map out it also. This top part a
little bit better. Let's see what works
better for it. Something along these
lines is going to be fine. There we go. We've just finished texturing this part and
then in the next video, we're going to be doing the
same thing with these guys. Here, we're going to be applying this first layer of textures.
43. Texturing the Fence Part 2: Next on our texturing
to do list, we're going to tackle
this long plank here. Now I'm thinking maybe we're going to need to separate it, but we'll see when
the time comes. I'm 100% sure we might
need to separate them so they're not
one large object, but it might actually work even if we don't separate them. So I'm going to start
off by going into my let's see Shader editor. I'm going to go here under the material that we
just recently created. We need to actually also
rename this material. We're going to call
it, let's see, blue, blue at plank like that. Right off the bat we
can see this doesn't really look good right now. We could maybe,
let's say go here U and then unwrap this as we
did with these planks here. But then if I go into my shader Editor in
the UV Editor here, and then let's say I
select everything, I rotate it like this and you can see right now
it's very pixelated. Even then, if I scale
this so that I make it less pixelated and
I go, let's say, to something like this, another issue occurs and that
is the repetitive texture. We can see here this
is being repeated, and then here also this line is going to be repeated
because this is so long it's going to
be repeated because we only have so many
things here to use. I'm going to undo this
a couple of steps. Instead of approaching
this through a UV, I'm going to go into
my shader editor. I'm going to
duplicate this plank. I'm going to call this
one paint a plank. I'm going to call this
one long like this. I'm going to go use
object instead of vector. Now what I'm going to do
is just rotate, I believe. Let me see this by roughly 90. All right, from here I'm going to maybe do a little
bit of tweaking, just so I get rid
of this line here, maybe I can play around with
the Y location. Let's see. Get rid of this is why, this is why I might need
to actually separate. Because right now we're
having this issue. Let's see. Maybe if I play around
with the scale, I'll be able to get rid of it. Let's see now how it's going
to look like. For now. I'm going to keep it as is, even though this part here
is a bit potersomet'hfI, push it up, then it
comes almost there. Maybe something
like this for now. But the issue again, as I said, this is still very long. Because it's very long,
you can see that this texture here as repetition. Like for instance, if we look
at this line right here, we can see that it's
being repeated over here. Again, we, we did a similar thing as
we would do when UV and wrapping when
we were playing here. Except this time we
created it through these mapping controls
here on our shader editor. The next thing that I want to do is how can I get rid
of this repetition? Well, one cool trick
is we can just do the same thing that
we did here, right, where we mix two of the same textures together
and then just try to blend them and change the locations to get rid
of some of the repetition. We can do the same trick here, only this time we might
even use three textures. As a matter of fact, let us just take all of here,
all of this here. Shift D, I'm going to add
a mix shader like this. I'm going to push this here, push this into the mix shader. Combine this here, then I'm going to control
shift on this one. Just so I can see how this
one is projecting here. I'm going to maybe play
around with the location. Might even change the scale. Let's see, I'm going to increase the scale to something bigger,
maybe something like this. And then play around
with the location. Yeah, now that I have
something like this, I'm going to try to
combine these two. So these are the same textures, they just have different
positioning as you can see here and here, right? How these two are
being positioned. Now I need to create a mask, and as usual I'm going to
now use a musgrave texture. And this musgrave texture is
going to be used to simply drive where this one is going to show versus where
this one is going to show. To create or to more
manipulate this mask, I'm going to go
here, press control. I'm going to put
this into object so that have like this generated. Then I'm going to add a
color ramp which is going to be used just to clamp down those values to make
them a bit stronger. Because right now for
instance, let's say, let's say I increase the scale to say something like this. I drive the detail. Let's say all the way up, I lower the dimension. And now I'm getting this
look, which is great. But I want to clamp down those black and white
values a bit more. I'm going to press
control shift here. Now I can see as I'm
moving this grading, I'm clamping down these values. I'm making this
mask much stronger. Let's see how this is
starting to look like. All right, for instance. Let's say I want
to move this here, let's see how that's
going to impact. You can see now we're breaking
down that repetition. We are introducing
still this issue where we have this large line. I think the best way to solve this large line for now is
just to play with the scale. Maybe increase the
scale a little bit until it's not
visible on both sides. This helps, but then it's
being visible right here. This is where I
said that we might need to play around and maybe
separate these 22 planks, make our life a
little bit easier, but this seems to be
doing a decent job. Let's see here. Yeah, I think I'm going to
separate these two planks and then maybe apply the
two textures individually, because that way it's just
going to be less of a hassle right now moving here and then changing this
one, and then go here. Let's see here. Changing
this one just to break down the repetition
isn't really doing a good job. Because then again
here, it's just so long and it's a bit annoying. So what I'm going
to do is go Shift. I'm going to press here. I'm going to press here while
holding Shift on this one. And press L one more time. It's not. Let me select one
more time. There we go. Now that I have both
of these selected, I'm going to press last time, we separated by loose parts, but this time I want to,
separated by selection. I'm just going to
create this and see this one and this
one. There we go. I have two planks. I'm going to focus on this one here for now. First, I think on this one I actually did a
pretty decent job. I might need to lower, let's
see what we can do here. Yeah, don't worry about the
top one because the top, on the bottom one, because we're going to probably
be changing that texture. But for now let's just
worry about this one. Okay, let's go back into our muscular texture and see
how much space we're taking. We can see that one texture
is being all the way here, the other one is
all the way there. I want to maybe add more diversity between how those textures are
being blended. Just so I can break
down the obvious, the obvious repetitive
texture parts. For instance, right now I think doing a pretty decent job, but I might want to make
this even stronger. But been adding a little bit of the blending just so they blend a little bit
better perfect. Then here I might
want to, let's see, experiment with which one I want to be blended with
that one there. Let's see, maybe we have one
that's completely full and then we
have this other one. Let's say the broken. Let's go here. And
then move this one, then this one is going
to be the broken. Now that we mix these two, we get the idea of where we want the broken parts to be versus where we want the
fixed parts to be. Right now, I believe the one that is white is being
from the bottom. So those are the broken parts. I might want to go, maybe
do something like this. Have less broken parts, more fixed parts like that. And I think this
helps me break down the repetitiveness a
little bit better. Perfect. Let's just see how everything is looking
down from this angle here. This side is looking
pretty good. Okay, We have a little bit of
an issue right about here. So we might need to increase, I believe the bottom one. Let's see if I'm right.
Yeah, I was right. Just push it maybe
a little bit down. Let's see how that we got
inside our train accidentally. What we can do if we
want to isolate this, we can just press and
then go View Selected By. This is because we're so close. Let's just see how this looks. Okay, there's still
some repeating parts as we can see this part here. But we do have it being broken
off every once in a while. Maybe it's not going to hurt us that much in terms
of noticeability, okay? Now I can see it
way too many times. If I want to push it
a little bit lower, it's not so visible. Let me try to break it. Let me try to break
this part actually. Then we might want to do, we might want to do just
something like this where we cover it. There we go. Now I added like
an extra cover on it that seems to be
doing a decent job. I might want to blend this
together a little bit more. Maybe one side a
push this one a bit. Somewhere around here, yeah. All right, so we broke down a little bit of this repetition. We've introduced this issue, now we're going
to need to go up. Push this up here. We're going to need
to maybe increase the scale of this one. Let's see, just so that
we don't have that. There we go. I think this
is going to work fine, especially because
we're going to be at a distance, this is
going to be fine. Let us now try and
texture the bottom one. I'm going to, again, selecting it and then pressing forward and then just
seeing what we can do here. For this one, essentially what we need to do is the same thing, just make another texture. I call this one quite
literally bottom. That I don't have to worry
if I do any changes here now that those changes will
affect anything at the top. So let me see. Everything
seems to be going pretty okay up until here. And let's see, let's do check up one more time how this looks like
from our scene. This is looking pretty good. Perfect, realistically. I mean, this is looking good
enough already. You wouldn't even
need to potentially add these edge wears
that we have here. But we do want to break off the feeling of
the same texture. At least having it here on top, and maybe a little bit here on the edges is going to help us. So that's what we're going to
be focusing maybe later on, but next on our repertory
list is going to be Turing. These guys here, and these guys are actually going to be easy. And I think that we can even fit them into this video right now. All we really need to do
is find the wooden planks. Let me just see
they are from here. Let's go to this
one sign pole went, see we have, there we go. This is what we're looking for. We're looking for
these wooden planks up here and these
are these guys. I think for them we really
can just go and add this. Then maybe play around with
how this is being wrap. So I'm going to go
smart you project. Okay, I'm going to
do all of these, I'm going to all of them. I'm not 100% sure
if this is going to work and apply the
same plank material. Let's these guys go control
L link. Yeah, link material. That's what we're looking
for. There we go. What I might need to do now, maybe just change the
rotation, let's see. Nope, we don't want
to do that because that's going to impact
everything else below us. Maybe what we're going to do is let's go like
something like this. Select all of them like that and go and wrap. Okay, now we need to probably rotate everything
that we've unwrapped. Let's go to the UV Tor, Select all of them and then
just try to do this and play around with each of these
that has been unwrapped, maybe something like that. Something like this.
There we have them. Let's see how it
looks from the back. It looks okay. Pretty good. I'd say this is pretty good. We have these two
that are repeating. We might want to, maybe, let's break it down a
little bit differently. We have it like that, we
have that one like that. Maybe we push this one
a little bit lower. It's not exactly the same. There we go. We basically just used the same technique that we did at the very beginning when we were texturing those
plans that we had there. I'm going to make
this one a little bit smaller with this ones
because they are so small, we can actually get away with shrinking them a little bit. But I think this does
a pretty good job. Let's see if we hide
all of this here. How does this look like? I'd
say it looks pretty good. Looks believable,
looks pretty good. One thing I'm noticing
is I think you need to still push this Z. Push this maybe a little bit up, just so it doesn't fully
scratch it. There we go.
44. Texturing the Sign: A little bit more down the road. Once we finish tturing this environment that
we have in front of us. With the first layer, we're
going to be starting to add a little bit more details to certain places, not everywhere. Primarily really the
train because that is the main focus of where the camera is
going to be looking. And all these other
extra details aren't necessary
to have so much, but some are better than others and give a
better impression of that extra realism that we're trying to
attain without any much more further do of talking me, blabbling
and all that. Let's start just quickly. Turing this part here
should be fairly simple because what I
want is to go into, let me see, shader editor. And I'm going to apply the
blue paint of plank here, but I'm going to make
a duplicate of it. Just in case I'm going to call, I'm going to call this one. Let's see, slide, slide, signed. There we go. What I want next is, let me see. We created a duplicate perfect. I need to just unwrap this. I'm going to go into my
UV editor press tab, and now I need to just
unwrap this entire texture. I'm going to press, I think I'm going to use
smart UV project. Might do like an angle limit so I can get more projection
groups so that things see to go like to tend. Let's see, what do we get here? Okay, let's try to
rotate this, okay? And this is already
getting us somewhere. Now there's a few more things that we just need to change. I think starting off
with this part here, we would probably
want to rotate this, make it bigger, then
let's put it here. Maybe it's not a
repeating texture, this part is looking pretty
decent, I would say. I would just want
to make it maybe a little bit more bigger. Put it here. And
then this part here. I want to straighten
this part out. Actually, I don't want it to be, Let's see if we increase this. Put it maybe like that. That's not bad. But I'm going to definitely want to
straighten this part out. So I'm going to press
S Y zero. There we go. And then Y zero, like this one. There we go. Now that we have
it straightened, it's a little bit better. We're just going to
scale it from one end to another, something like that. This is already
looking pretty good. There's a few more
things that we just need to change here. I want to add a little
bit more of that like that edge ware that
we've talked about. So I think I'm going
to go with me, I'm going to push this
here to give it some of that edgewa specifically right around that edge, around here. There we go. Then all
these smaller parts, let's see, these are
just like small parts. I'm just going to
go like in here and then scale
them a little bit. That perfect, let's see. But then, because we
have the edgeware here, I think this part
should also maybe have some kind of edge
where happening. Maybe if we did,
let's see which part. We could probably use this part here to help us with that. We have here edgewa, we have also edgeware
happening here. That is looking pretty
good on this end. Let's just fix this
part here that we have. So that's a bit
more centered here. There we go. I think this
is already pretty good. We don't need to worry about
our back side because again, we're not going to be
looking at the back. There's no point in
fixing that here. We could maybe just because this one is
looking too clean, I might want to just push it, say let's see Somewhere
somewhere like here. We forgot one more part. I just need to make sure
that this one here, it's almost like playing puzzle. At some point, I think we already have this
one now cleared up. And what we can do next
is then add a sign here. For the sign, I use
the pretty much the same technique as I
did with this one here. I went into Photoshop and then I just tried to manually draw what we see here and then applied
it on a wooden texture. You don't need to do this.
I took the liberty of doing it myself since
it is three related, but it's not in a three
software, it's not in Blender. I just took the liberty of
doing it myself in Photoshop. You'll find the results
inside the resource folder. So what I'm going to do is, oops, let me just scroll out. There we go. What I'm going to
do is just go here, going to my shader
editor, add a new color. I'm going to call this one, I
think it's called Numahara. And then I'm going to press control through
my Node Wrangler. It's just going to add an
image texture over here. I'm going to go open,
I'm going to go into my textures and I'm just
going to add this thing here. Right now there's
nothing happening. And what we're going
to do is we're just going to project this from view. So I'm going to
press, let's go press here in the UV editor just so
we can see what's going on. And L press project from view. And this is going
to work perfectly in our case because
it's going to project just exactly these
two faces that we need. That we can then
go and say, well, let's add this right around here and just make sure that it doesn't
fully go over the edges, because then you're
probably going to get some repeating tiles happening. I think somewhere around here is going to be just about right. In our case, I think it works pretty good if
we want to think. I don't know if we can make this smaller, it
doesn't make sense. No, this works pretty good. I'd say, let's see if we could maybe increase
it just tiny a little bit. I think we're still in
the clear in this case. Perfect. Let's go into
our shader editor now and just quickly add a few
changes to this, right? Because right now
we only have one texture that's
driving everything. What we can do is also
drive our roughness. For instance, right now I
think it's a bit too glossy. We can see it a little bit here. I'm going to go and add a color ramp through this color ramp. So for instance, if we want
it to be really glossy, right, you can go
super like this. And then you can
see how it's being almost like it has glass. It's reflecting but
we don't want them, we actually want the opposite. We want to drive this this way. It's almost like all
purely rough like that. Then the next thing I want to do is I want to copy
this color ramp. But I'm also going to
be adding a bump node. And this bump node is going
to go into the height. I'm going to go here into the height and then
here into the normal. And then I'm going to connect this factor into the color here. Let me just spread this out
to see what's going on. All right, if we
push this dark here, we get this almost like a clean look like there's nothing going on, I would say. But then if we push
this all the way here, we get this really
worn off look. One thing I would say is
that because I think this is pushing inward right now,
if I'm not mistaken. Let's, let's invert this. It pushes outward, let's see if that does any
difference in our case. Okay? This is still
pushing inward. Maybe if we replace, is this going to make
any difference? Now, let's see how
this is looking. I think I'm going to go back
to something like this. I'm going like this. Let me see, invert. I'm not really noticing much
of a difference. I'm just going to keep it as is. I think this is okay. One
more thing I would say is we could probably play with the
hue and saturation value. I'm going to add here into the base color for the
hue saturation value. Let's see, I want to drive the saturation a
little bit that much, but just give it a little bit
of that grade out effect. Something like, maybe a
little bit less like, something like that
Then for value, let's see, push it up, obviously it's going
to make it stronger. I want to push it a
little bit more down. Just try to match this
painted material here. All right, we can
clearly tell that these two are separate objects, which isn't ideal compared to how we have it in
our reference image. But I think it is perfectly acceptable in our case because let's say we're
going to be somewhere here. Let's just wait for the blender I'm going to include here, let me see my noise. I'm going to put it
maybe at 50 samples just so that noise starts getting to me and
so we can see how it looks like, for
instance, from here. Yeah, this is pretty good. Like that. Awesome.
45. Texturing the Entrance: Just as we did with
texturing this sign here. We're going to use
the same techniques to texture this entrance. I'm going to go into
my shader editor and select this
entrance part here. And I'm going to go probably use the material that
I've already used before. And I think the
wooden plank one is just going to be the best
use case in this situation. We can already see
that like this is not looking the greatest. And so what we need to do is, let me just go here. I'm going to duplicate
this material. I'm going to call this
wooden plank entrance. We're just going to probably, maybe with the color
we want to maybe change how this
color looks like. And we're probably going
to need to change with how this is being wrapped
around our object. The first thing I'm
going to do is going to my UV editor, select everything. Select a Go, maybe
press on Wrap. And let's just see what
we're getting here. Yeah, this is not really
looking the best. I'm going to go under
Smart UV project, that's probably going
to be the best option. Give it 0.0 1066. That's fine. I'm going to go press okay. And this is already
giving me a better look. The next thing is I
probably want to, let me just select
everything here. I want to separate
these two a little bit, but I also want to
straighten this out. I think the best way to
do this is going to be by using a add on
that we've installed, but I don't think
we've used so far. And that is called
the UV squares. I think if I select everything
and I go here under the UV squares and then
go to grid by shape. Yeah, that's not going
to do a good job. Let's see, this one. Nope, we need to select
everything individually. I think that's the way
to go. There we go. So if press here, press L and then press
to grid by shape. It just does, it's
magic like that. I can do the same here,
but with these guys, I really don't need
to worry about straightening them
because they're already pretty straight
out. That's perfectly fine. What I just need to worry
about are these ones here. Next thing I'm going to
do is I'm just going to rotate everything
here like that. And this is going to give me, let's see how we have it
in our reference image. It's just going to
give me this look. We can see that there's some
texturing happening here, maybe at the bottom.
Will we want to do that? I mean, we could maybe, I don't know, it would actually be pretty
straightforward to do. We might not even need to use any texturing for
that. But we'll see. Let's deal with that
a little bit later. Let me see how that
is going here. And then it's going
all the way down. Okay, very interesting. It would be a bit, maybe more
challenging just because of how our faces are currently. I think we're going to
just skip that part as it's not really going
to make it or break us. Let's just focus on adding
this wooden plank Right now, I'm going to select
everything here. I do want to maybe
scale this a little bit more to something like this. And I think another issue is that if I go into, let's see, UV shader editor, whereas
the shaded there we go, I think the ones that we have
in here are maybe to big, just go here and
play around with these values to make
it something smaller. Maybe something
around four point. Let's see, I think 4.5 matches
this look that we have. And that's pretty good. All right, Next I want to do, maybe is just play
around with this color. I know this is being hit by
the sun directly right now and it's giving it
a very strong look. I want to actually increase
the size of the sun just to soften up the
harshness in the shadows. I'm going to go here and
then change the sun's size to maybe something like that. Okay, then let's
just go in here and play around with,
let's just go in here. Play around with how
this color looks like. Actually, I might
want to make the sun smaller now that I look at it. If I make it bigger, it's
definitely brighter like that. And I don't want that.
Maybe I'm just going to undo my sun here. Let's see, the sun
is over there. That's okay. Let's
change the color now. Here a little bit. All right. For the color, I think
it's way too glossy. So I'm just going to
go and push this. Maybe, let's see, a little bit forward here and then push this maybe a
little bit more here, just going to give it a
less of a glossy look. Some glossiness is okay, but not too much in
terms of roughness. All right, and then the
colors. Let's see here. What we could do, maybe we
could drive this one here. This one a bit more here. I think it's because the sun is still looking very orangy. And I want it to be a
bit more reddish even though it does match this
color now that I look at it. But let me just see how does it look under different
sun rotations. I guess it is pretty good, so I'm just going to keep it
where is the sun rotation. I'm just going to bring
back the sun. There it is. Okay. Do we add
any beveling here? We might want to increase the amount of beveling
that we've added. Just a little bit.
I think it was just too sharp for my taste,
at least on this side. And we might want to
do the same here. This was 0.12 0.12 We don't need to do exactly
the same, but just enough. All right, let's just go here, clean this part up. In our UV editor, we want this to go like this
and probably closer to this. I think the reason why it's
being shrink now is because, yeah, it's probably
because of that. We play with the scale
in our node editor, We just need to maybe
mess around with this, but this is giving us
a pretty good look. We're getting like
this nice edge here, which is also not bad. I'm actually liking it. This is looking
pretty good as well. Let's now tackle this
front part here. Let's see, what could we
do here or the front part? Let's go and go into
our UV shader editor. I keep mixing those
two up right now. Today must have
gotten bad sleep. Let's see, we want to
add a wooden plank, not that one wood plank
entrance. There we go. All right, so we have the
wooden plank entrance, but it is way too big, so we might need to
go into our S again. Uv editor now is
becoming a meme slowly. Let's see if we decrease this. I think something
like this. But we want to maybe rotate it. Yeah, we rotate it and then maybe just increase
it a little bit. Let's see how this is going
to look like way too much. Maybe I do want to have, let's see, one or two
that are going long. I'm just trying to
find a decent texture that I can mess around with that would
work for this sign. I think this is fairly okay. I do want to maybe make it
a little bit different, this one, but I'll worry about
that in the final phase. I'm just going to move
on to this stage now. Let me move on here
for this part. All I'm going to do is go into my shader editor. There we go. Then press here and use the entrance
texture. There we go. I might need to just go into
my UV editor now select everything and smart UV project
do the same thing here. I'm going to press this
res L grid by shape. Move it a little bit here. This one, press L grid by shape. Move it
a little bit here. These guys, maybe here on
the side, push these guys, Rotate them like this and then just push them
something like that. Again, nice, nice
edge over here. This leaves me only with
this part in here right now. Let's see how this is going
to unwrap a smart UV project. Let's go like this. We need to add obviously a
texture which I forgot. Shader editor a two. What am I looking for?
I'm looking for entrance. Maybe I need to really change
this naming for this one, but this is already
looking pretty good. Wow, I did not expect it to
actually look this good, to have to do some
changes to this part, but I think that
looks pretty good. Wow, really did not expect that. All right. I did say that. I want to add maybe a
little bit more difference to this part here. So what I'm going to do is I'm going to
duplicate this part. I'm going to call
this entrance top, as if it's not going
to be confusing. Let's see, I want to play around maybe with
the coloring of it. So what I'm going to
do is under here, under overlay, I'm
going to add curves. Let's go curves. And this is like if
you've used Photoshop or any other editing
software where you do like some kind of color
editing and brightness. This is pretty much
the same concept. I just want to maybe lower this down just to try to give it
a bit of a different look. This is obviously
way too aggressive, but just something that
gives it a little bit more of a difference
in how it looks. And I think that's just going to be a little bit of
just something, that's what I'm looking
for, just something. To add that extra difference. Let me see if we
go hue saturation, we maybe just push the
value a little bit down, just so it feels like it
is this part of wood, but it's like a separate
part that was put here. Very subtle, right
there, perfect. We might actually want to use the same texture up in here. While they are similar, they're different
sizes, different parts. They're cut off and painted because no two
things are exactly the same. Now there's a little bit of a difference and I think
I'm okay with that. The next thing we're going to
texture is this part here. This should be fairly easy. Let me just see how our
texture is looking here. I can't even see it in here. Let's see, we have
this, let me see. Everything here looks
to be the same texture. Why don't we try to first apply that and just
see how it looks? If it's the same texture, I might go with the one
that I use on top here. We can see that this needs
to be set vertically. We might let's smart UV project and then just
go under our UV editor. Just rotate this like this. Maybe make it smaller so we make thanks a little bit bigger. I don't think I want this part to be looking like
this. Exactly. So I'm going to go
select everything here, maybe rotate, push
it to something, I don't know, maybe
something like this. Let's see, Maybe I want every part to have like one
of these pins somewhere. I'm just going to go a little bit of a random here just
to save up some time. But if you want to
aim for perfection, just you can try it yourself. But I think this
looks pretty good. One thing I do, like this line might want
to go and let's see, I might want to go and push
this line a little bit lower, just something like that. Let's see, yeah, there we go. That looks pretty good.
Oh, look at that. I think we need to push
this slightly here. That's better. And now that I look
at it, let me see. Are we missing one here? I think we should
probably have some, a plank in here at the very end. Let me see if I were to duplicate this one just for
the sake of duplicating here, Maybe putting it in front of it, just like it covers.
Sorry, little guy. Yeah, I'm just
going to cover it. I know it's like
very mean of me. And then maybe just mess
around with it too, so it's not like fully
identical to the previous one. I'm like betraying it
completely a little bit, but I think this is Yeah, that's perfectly fine.
Something like that. We might actually want to do that. The same with this guy. And just like it,
now we're on here, it's like the ending
on both sides. I think we're good
on that, actually. For the sake of imperfection,
Let me just see here. Yeah, for the sake
of imperfection, let's push it back
here in between, while this one is here,
that looks pretty good.
46. Texturing the Pole: As I finished recording
the previous video, I started to experiment
a little bit more on how to potentially differentiate this entrance part from the train texture here. Because remember, these two
are using the same texture. We use the same texture and it is not a lot of
space to begin with. Like, right, this
is just 123456, maybe eight planks, right? Eight planks that are
being spread out so many times on so many different
objects on our scene, right? We have them here, here, here, and then also we have them now on this here as
well, and then here. Right? And then on the
other side as well. Even though, I mean,
obviously we're not going to be looking at the
other side, but still. Right, there's a lot
of repetition in this texture is used in so
many different things here. And so to add a little
bit of variance, make it stand out a
little bit differently. What I thought about like, well, how can we make it
look different, but we don't have to
do much work on doing. So what I found out was that if we just go here and click
on, let's say this plank. And go on our ambient inclusion color Mp
that we have here. Watch this. If I just drag this, clamp it more and more and more. Watch, how would we
start to get this worn, worn off look going on? I think this is exactly the
kind of trick that we need. And I'm going to do it here
on top as well. Here as well. And here I'm going to do it
maybe a little bit less. But this is exactly the kind
of trick we need to help us get these extra
darker lines here. Because right, we want
to make this feel old. It has been here for a while. Dirt has accumulated
around these edges and on these small holes and lines that we have here
that are painted like this, This small trick, it gets
such a long way, honestly. Yeah, I just wanted to
share that before beginning with our next part of
the texturing stage. And that is with this pole, this should be pretty
straightforward, but it is, the devil is
always in the details. As you'll notice, what we're going to be doing is we're going to be texturing this pole. And to do that I'm going
to go into, let's see, Polyhan, the texture that I want to use is going to
be called rough wood. So you can download
it from Poly Haven. If you go again on
acids textures, it should be very
quickly available. Right here when
you click on wood, you just scroll down and
here it is, rough wood. I mean you could
obviously, like I said, use any texture
that you want here. I just found, found that
this one in my memory of how these light poles or lightning
poles look like this, kind of resembles the type
of wood that's used there. So I wanted to go
with this texture. Obviously, even on
this image here, you can notice that this is a
very small texture, really, there's already, even
here, repetition going on. This is going to be
the key challenge for today's tutorial is like breaking down that repetition of the textures
as you'll notice. So if I go click here
New and add the text, click Control Shift and to use Node Wrangler so that
I can add the textures, find my textual folder, I'm going to use the difference, the normal and the
roughness added here. There we go. To unwrap, I'm just going to go a U, and then Smart UV project, put this on 0.10 so that we have some spacing between
the islands. If I never explained it,
essentially that means, let me just showcase to
you if I go Smart project, if I increase this drastically, you can see how
separated these are. Just adding a little
bit is what you want. 0.01 There we go. Now from here, what I
want to do is let me just change this so we don't
base it off of our plank. We want to base it off of
rough wood that we have here. I'm going to press a scale this summer run here.
I just wanted to. Yeah, I just wanted to cover, let's see, this much
area, let's say. And then now we've
introduced our issue, which is this text, which is this tiling, right? So we have a repeated
texture constantly, which immediately our eyes is drawn to because that
doesn't seem normal. Right? So in order
to break this, and I think we like, yeah, we've used this
technique, I don't think, I'm pretty sure we've used this technique
already, a few times. Sorry for the little
clap. I'm eating my breakfast while I'm
also recording this video. So what we're going
to do is we're going to duplicate this texture and then just try to mesh it out, essentially to break
down the repetition. So I'm going to go here, select everything that I have. Shift the created
duplicate over here. I'm going to put this material up, put somewhere around here. I'm going to shift a mix shader, because we're mixing
these two shader here, put this one onto here. And now we have two
exact same textures being mixed, 50, 50. In order to break that mix, I'm going to use here
a noise texture, I'm going to add the
noise, I'm going to press control to add a texture
coordinate and a mapping node. From here I'm, let's see how this noise is being mapped
out. Definitely not good. Go object slightly better but we need to see a bit
more what's going on here. I'm going to add a color ramp. I'm going to connect
the color ramp here. That goes into the factor breast control shift click
One more time, I'm going to start to clamp down these values just
so I can see better. Where are the blacks, where
are the whites, and so on. So I think the white is going
to be the one that's below, The black is going to be
the white that's on top. If A, if I'm correct, we can prove that maybe I'm wrong by the way, going in here. And then let's make
this one darker. Whichever wood is darker, should be at the bottom here. There we go. I was right. Perfect. So we can see that
these dark smudges are the ones that are
used at the bottom there. If I go and make this, it's not like that,
but if I make it super dark, that's what we get. Excellent. We're going to use
this just to help us better visualize what's going on
here with our noise texture. A couple of more things I want
to maybe clamp down this. I do want to add detail to
this, something like that. Roughness, just a bit too much but just a
little bit distortion. I don't want to touch
that. Let me just add maybe a little bit
more of this gray, so it's not perfectly
black and white. And I think I'm
going to use this as the starting point to try to add some variants
to our textures. I'm also going to
go here where it says three D. I'm going to
put it to four D because this is going to give me this
extra dimension so that I can now go essentially
up and down, almost changing noise from here. Push this old way on one
side, I'm going to go here, Shift, push this here on the
other side. There we go. Now everything is
back to normal. What we need to do
is start changing. Let's see what we could change. Maybe the coordinates
in here, all right. Maybe the scale a little bit, not too much, because
we still want them to blend relatively well. But we're slowly adding
some variants here, but we still need to break down. You can see them,
these repeating lines, and these lines belong
to the top part. If we go into our noise, maybe we need to just
play around with the W, play around with that. Are we going to get it covered in some instances we
do get it covered, in other instances we do not. Maybe we need to mess around with the scale
of the noise a little bit. Now see, let's clamp the values a bit
more. Keep messing it up. Let's actually isolate this. I'm going to press
my forward slash so I can just stare at this, what I have going
on, I think this is a decent angle to try to figure out what's
going on in here. Let's see, we have this, we might need to mess
around a little bit more. I do want to have it like
somewhere 50, 50 like that. But then definitely,
maybe change the scale so that to add more
variants between the two. Let's see what else
we could do here. Maybe play with the Y. It's not this one,
it's definitely the top one that's
causing the issue. Let's mess around with one more thing that I
think would be really useful is that we just like rotated one to a
completely different side. If I tick this one, let's see Y moves
it up, there we go, I just want to move this
maybe to get rid of that and maybe something like this here. But now I have the issue of
these repeating lines, right? We need to, again, play around the values till we
get something just works. I think we're slowly getting
there. It's not there yet. Let's, I'm going to add 180 rotation so I can mirror
this from one another. And I just want
to cover a couple of more of these guys going on. Honestly, I increase, decrease. This is going to add
so much smudges to it. But you know what? Let's just see how it's going to perform. I'm not 100% sold
on it by the way, but let's just see how
this is going to look. It might just actually
work perfect. Perfect. Perfect. Yeah, I think the top part is going to be
fine. This part is fine. Let's just bring
it back now with everything to see if
it's going to pass our BS detector like this. Oops, one more time, go here, do that. I think that looks
pretty good, honestly. Awesome. All right, let's do a quick texture
now of these guys. I hope not to spend
too much time. We're already 11 minutes
into this tutorial, but what I'm going to do here is just something
very simple. I think we have like whitish and like super yellowish color. For this, it should be pretty straightforward when it
comes to texturing it. What I'm going to
do is just add, I'm going to make this one
slightly subtly yellowish. Not too much, but just slightly. You can see it here. Maybe track down it to
make it slightly darker, maybe like a neutral color, Just something like
that for starters. But what I want to do then next, I'm going to add the
noise texture here. One more time, press control T, I'm going to make it object and then I'm going
to add a color ramp. This color ramp is
going to go into here. This is going to drive my color. And then I'm going to
duplicate the color ramp. This one here, this one is
going to drive my roughness. I'm going to duplicate the
color ramp one more time. And this one is going to
drive a pump like this. This should go into the
height, there we go. Now everything is a bit messy. We need to mess around with this noise texture a little bit. Let's see where, let's
start with this color ramp. I want to have it be something similar to
what we have here. Want to add more
detail to this noise. Something like that. Maybe mess around with the scale
just like that. And then maybe no distortion. Just a little bit
like that. This is going to be my base off. So I'm going to
start off now here, this is looking very
nasty by the way. I'm fully aware of it.
We're just going to P's, we don't want it to
be fully glossy, so I'm just going to turn down the roughness to
something like that. It is some metallic, so I'm going to give it maybe a bit of a metallic property. But then from here, let's see, what do we want to do here? This is driving where
we have disappearing. So I'm just going to make
it very slow and subtle. That's going to give me like
almost like this worn off. Looks pretty cool, but I
think we need more detail. Might actually go like this, push this into here, push this into here, and then just start
messing around with the detail like that. Make this maybe a
little bit darker, that's everywhere, but it's
not the same strength. Maybe push this a little
bit more like that. Perfect. I think the strength is still a little bit too high. So I'm just going to
lower the strength. Let's see. Because this has
been on top for a while now. I'm using this highlight here to guide me as a point of
reference. There we go. I think this is pretty
Okay. I'm going to go now use this to help me with
the color a little bit. As I said, I want to
use a neutralish color. Something around this
here looks acceptable. And then maybe here I'm going
to use something the same. I just want to copy
this color hex value. Take the hex value, put it here, copy paste it here,
it's duplicated. And then now I just want to play around with
it just a bit. I think this gives me that neutral look that
I'm looking for. I'm going to press
here, press now here, and then go control L. Link materials that did
not work for some reason. Let me just go one more time. Control L and then
link materials, maybe control L, link materials. Okay. Makes sense.
Sometimes I forget. Yeah, Just make
sure that you have this one being the light one and then this
one being the dark one. So it has to be like this order. It takes from the one that
you have, final selected, which is active element, which is this one, and
then transfers it to here. Perfect. Now, oh, how
did I get to this color? Let me just play around
with the hue. There we go. Maybe you can just
do that on your own. By the way, I think
this is perfectly okay. And then this one I
wanted to be yellow. I'm going to create just go and link at one more
time control link. But then I'm going to
separate this one as a new material and
I'm going to go here, make it yellowish. Okay. I'm going to actually change this color here to
make it a bit lighter. I think it's blending in too much with the wood,
which is what I didn't like. Then, this one a bit more orange and a bit lighter. A bit lighter here as well. All right, let's see
how this is starting to look from roughly here. Okay, I want to drag
down the colors just a bit. Something like that. Perfect. So we have our
light pole done now, or it's not actually
a light pole just, I guess a direction
tells directions. Not really sure what this is, but we have it done,
which is great. The last thing that's remaining
or the last two things are the stand here
of the station, this rock huge where people are standing and then the water, water is going to be
generated procedurally. But for this rock itself, we're going to be using
similar techniques that we just did with this pole. All right guys,
they'll be all for this video and I'll see
you in the next one. Bye.
47. Texturing the Station: Hoping that this video takes shorter and is less convoluted
as the previous one. Honestly, I did not expect
the texturing of this poll to take as long as it did and get so complicated
at certain points. For something so simple and
pretty straightforward, I did not expect to encounter so many hurdles along the way. But things like that
just tend to happen, I guess in one way or another. Could also be used as a good learning
experience for you guys to see how to deal with
similar situations. But moving on from
there for this video, we're going to be now
texturing this pavement. Station road blocks rock. Not 100% sure how
to call this thing, but yeah, to texture this, we're going to be doing the same things that we've done before but also adding on, on top of that
learning something a little bit new in
this video as well. I believe that at least I believe that we haven't
done this before, if I'm not mistaken to begin, we can just go under new and
add a new texture and we can call this texture
Station texture. Very original. So to say, one more thing that I forgot to do in the previous video is also give names to these
textures to stay organized, I'm going to call this
on poll wood texture and I'm going to
call this one here pole sine one and then
the yellow one sine two. I think now we have all of our textures applied with
good names. More or less. That should just help
us stay organized, which is pretty good and
important I would say. All right, from here we are just going to be trusting
our good old node, Angular add on, so we
can press Control Shift, and this is going to take us into our File view
and we just need to find the textures that
we're going to be using for this shoot. I haven't even
really talked about the textures in terms of textures that we're
going to be using here. We're going to be
combining two textures. Primarily we're
going to be using this paving stones
136 texture and we're also going to be mixing
it with tiles 130. You can go both of
these textures on ambient CG or you can just use the resource folder
that is attached with the tutorial to
download those two textures. All right, back to
the texturing itself, Control Shift, and let's find those textures.
There we go. And here we're going
to use our occlusion, we're going to use our
paving stone color, we're going to use
our displacement, which I believe we
have not used before. On top of that, we're also going to go with our normal map and our roughness map here. It goes right off the bat. This is looking horrendous,
but no worries. We don't really need
to do too much here. There's a couple of ways
that you could clean up this texture part of
how it is being projected. You could go under
object for instance, and just have the texture
reprojected on the object, this is not too shabby at all, or you can just go
under UV and then play around with how it is being
wrapped on this object. I'm going to go press Shift A, and I'm going to
unwrap this using a be projection because
this looks like a cube. A little bit has that rectangular
cuboid, I guess shape. I just said rectangular, but yeah, it still
works in this case. Then we just need to play
around with the scale. I think I'm going to go with, you know what, something
like this is not bad, that's why I'm looking at it. Nine maybe. I'm going
to actually make them a little bit
more, so maybe ten. Maybe a little bit more. 12. Yeah. Let's see what else we got here as a good potential option. 15 isn't that bad. It doesn't really matter though that much. Now that
I think about it. We could go with maybe
something like this. This is 15.7 I think this
is like maybe one too many. But let's play around with
this and see how it turns out. All right, from here, what I want to do next is I think we need to connect our ambient
occlusion first. And then we're going
to play around with the displacement
a little bit. I'll show you how that
works because I don't think we've used
displacement yet. If I'm 100% sure for
ambient occlusion, we're just going to use a mixed
color shift A and then go into mixed color for our base color, it's
going to go under A. Our ambient occlusion
is going to go under B. Then from here, this is our ambient occlusion
is our main color. And we're just going to
go put the Alpha because the Alpha is going to drive
this all the way to the B. Now from here we can just go and say overlay and
add a color ramp. Let's go search color ramp. This color ramp
needs to go under the color of the
ambient occlusion. From here we can just crank
up this ambient occlusion. Like if I go all
the way like this, things are starting
to get really gnarly, but we don't want
to go that much. We just want to have something along these lines I think
is going to be fine. And usable. That's
perfectly okay. What else could we
play around with? Maybe this going
on. So let's see. Just do some small tweaks
to it. What could we do? Let's see. I guess
something like this, but then it's like the
tiles are very big. Yeah, this is looking weird. So I don't know if
I want like that. I'm going to worry about
this a little bit later. I do want to get now into
the roughness actually color ramp and then let's go
into the roughness here. I'm just going to
clamp out the value. So if I push this one more sent to get things darker and then if I
push this one here, we're getting this look, whatever is dark is
going to be very glossy as you'll notice
just in a second, if I go all the way in here, like everything is like super wet and glossy as you
can see in the reflection. But then if I go,
maybe not everywhere, but just like some places, it's going to be a
little bit more natural. Let's see some
places because I do want to give it a little
bit of that wet look like people have walked
over it and there's water splashing a little bit. I do want to have that,
which I think this gives me that wettish look,
which is not bad. Then the last thing actually, at least, is going to
be the displacement. To make the displacement work, we need to do a
couple of things. First one is we need to go
under material settings. We need to go here under
surface displacement. And where it says bump only, we need to change that to
displacement and bump, we can also change the
displacement only, but we want both bump and displacement. We
change it like that. Now immediately
something happens, but it's not really there yet. The next thing and you
already have this done. But just to be sure, you need to make sure
that you're in cycles and you're using feature
set experimental. That is also very important
from what I understand. Lastly, and this is the
most important part, you need to add a
subdivision surface control one shortcut to add a
subdivision surface, but not just any
subdivision surface. We need to change
this to simple and we need to have adaptive
subdivision turned on. Once that is done,
you can already notice that things are
starting to get very, hey wire crazy around here. We need to play with our
displacement strength. If I go here, let's just change the scale to just something
a little bit more normal. Let's say what A whole shift. And play around with the values, maybe 3.03 seems to be doing a good job, and
I think that's okay. All right, from here I'm just going to duplicate
this principle BSDF. And now we're going to be
adding on our other texture. We're going to go control shift. Let node angular do its magic. Go under our tiles,
go under occlusion, color displacement Again,
normal and roughness, perfect. Let's move everything
here so we try to stay somewhat organized in this entire mess that's
slowly happening. Let's just connect
control shift, and click here to see how
this texture now works. All right, The way
it's being projected, we're probably going to have to play around with the size. Let's just try to get something similar
that could work with what we have in
terms of our tiles. And we can see, well, we don't really see our tiles, but we do see the
displacement of our tiles. You can see these lines. This
can help guide us in terms of how we want this other
texture to be rejected. In terms of scale
and everything else, I think I'm going
to start off with something like this.
That's going to be fine. What we can do
from here is let's just go and replicate this too. So I'm going to
press select them, shift, put them down here. And then take the
ambient occlusion, put it under A, or no, actually that goes under B. And then put the color,
color goes under A. Then this one goes here. I'm a little bit tired today. There we go. And then
the factor perfect. Now if I have this,
if I click here, this should be giving me, oops. And connect it. There we go. This should be
giving me some crazy stuff, but not like this. Let's see, what am
I doing wrong here? I have the color. There we go. This is wrong base color
needs to go under a. This needs to go under perfect. Yeah, I guess the
video cannot go with a little bit of
complication caused by me, maybe a little bit rushing this. I'm going to slow down a
little bit now probably, but I think this is
going to be fine now. We just need to combine
these two textures together, and we also need to combine
their displacements. I'm going to start with
the displacements first. See, I'm going to start off with combining actually
these two textures first. Because that should be easy,
I just go mixed color, I put one into here. And then this one's
going to go bottom. This one's going to
go top, mixed color. There we go, mix. Then this one goes here, this one goes here. Then now I just need to combine also these
two displacements, because right now we
can see the textures are being 50, 50
mapped out here. I'm going to go and add, let's go here mix. And I'm going to
put this one here, and then this one is
going to go into here. And then this is going
to go into the height that I can actually take this one out
because I don't need it. And this one can go
into here. There we go. Now these two, we can also put it under Ad and go like this. Lastly, we also need
to add a factor. I think the factor for this is going to be the noise that
we're going to use here. I'm just going to push
this a little bit closer to here.
Something like that. This one can go here, this can go here, really. Now we just need to play
around with this part. We need to go here
into the factor, we're going to use a noise, this noise texture is just
going to be used as a mask, to mask out these
two textures that we currently are
building off from. I'm going to press control to add a texture coordinate
and a mapping node. I think I can also
immediately just do and combine
this here as well. It goes under these two factors. I'm going to add, actually I'm going to need to
add a color ramp. And then from this color ramp
it's going to go into here. Because the color
ramp is going to be controlling both of them.
And that's what we need. If I push this now
super close like this, and if I push this
super close like this, we can slowly start getting
these weird things. But the reason, because
of our noise texture, how it's being mapped
out around our object. We need to go and change, let's say object quite literally and maybe play
around with the size. Let's change the scale
to something bigger. For sure, I'm going to
go into my color rem because that's going to give me this contrast, which is better? I'm going to change
the roughness, I'm going to change the detail. I'm going to play
around with the roughness a little bit more. I do want to like these very
dark splotches distortion. We don't need
distortion, we just need to maybe get a little bit better in terms of the
detail and everything. Let's see how this is looking. It's not bad, it's not
looking bad at all. We can probably clamp the
values up a little bit more even to get something like this. I think this is starting
to look really good. Probably I would say
maybe go in here and mess around with the
height in the end. I do think that if we have this lower to something like this, like 11.6, that's
actually pretty good. Maybe we can make these ones
also bigger. Look at that. When we get these to match,
like this line here, it's starting to
blend in So well, I think this is
looking really good. We can now just maybe
play around with, let's see, should we mess around with the displacement?
That is the question. We could probably maybe change the displacement a little bit more, way too much. That's like not good,
but something like that, it adds a little bit of this
stuff going on in here. I think that's really cool. I think this
is going to be it.
48. Texturing the Sky and Water: I think now is a good time as any to start working
on our composition. Actually, let me just
push this in here. We want to get this look that I have on this screenshot here. Except we're not going
to go landscape. I think we're going to go more
into like a portrait mode, something that's more
fitted for Instagram. For instance, let me
just put this here. I don't think we're going
to need it this big though. Let's make it smaller. Something, something like this is going to be fine. Perfect. All right, we don't need
to add a camera now, so I'm going to go shift
A and press camera. We're going to take
this camera out of our environment collection that we have here so we
can have it in here. Let me just go Z so we can see how this camera is
currently looking, where it's being placed. I'm going to press N. I need to zero out the
stuff on the camera. I'm going to go press zero. So now the camera is
facing downwards and facing in that direction
of the Y axis. I don't really want
this. I'm going to press rotation here, 90. And I'm going to
press on the Z axis, rotation 90 as well. This way my camera is
facing in that direction. I'm going to split my
screen now here as well. Because I want to
have one screen be dedicated to
this composition. And this is going to be my
left screen from now on. My right screen is going to
be for working on things now. We can obviously
change that later when we go into texturing
and other things, but for now this
is perfectly fine. Okay, we need to go right
click here on the X and grave or whatever you call
this, key view camera. I'm going to press, let's see, Press here on the camera, go G, X, move it somewhere
around here. And then I want
to move it lower. This is going to mean that I need to expand this part here. That's going to
be for the water. So I'm going to
press one more time, X, push this past the camera. I'm going to press control A, just so I apply the scale
while the camera is here. Let's see, we have
this angle here. If you can see how far it is from here and you can see
how far it is from here, it's centered, and you can see that it is on
the lower third. The train is positioned
in the lower third, we can go and what
we can actually do is rotate it into y, axis y. And then just holding shift, just slowly moving this,
it pushes it upwards. About that we need to change, obviously also our
resolution here. Right now it's in landscape
mode, as we said. And we're going to put
it more into portraits. I think this needs to go under 1080 and we're going to put 12, 80 here, exactly like this. We might need to also
play a little bit more here on the R Y of our camera. I'm just going to push it
maybe a little bit more. And I need to push my camera
a little bit further. Right about here somewhere. I'm going to push my train away, just so I can see
G Y on the train. I'm going to push it away just to see if this is centered. And I think this
looks pretty good. All right, so this is our
composition more or less. Let's put the train
here in the middle. Something like here.
Maybe a little bit more. I'm going to press here, the
biggest one, biggest cage. And move it something like here. Perfect. Let's press R here. There we go. And I'm
going to press control. And then middle
mouse button click. And then just zoom in here so I can get a clear
look what's going on. We need to start working
on the water first. To work on the water, I'm just going to click
on this plane here. You can click on here
as well if you want. Shader Editor with
the plane selected, I'm going to click Material and tap Water so can stay organized. The water material is
actually very simple. We need to just lower
down the roughness. Right now you can see we're
getting nice reflection here. We need to play with
our transmission. We can increase the
transmission all the way now. It's very transmissive. We can actually maybe
lower it just about here. And then we can push
this color here. Something bluish. I'm thinking, let's go something around here. Then next thing we need is simply change the IOR for water, we're going to use the 1.33 OR then let's see what else we need to
play with our normal. You need to add some
bump here to the scene. The bump is actually
what's going to give us. If you look here at
this source image that I use from a real place in Bolivia where we have
this similar effect. You can see that water has like these small ripple effects here happening that give a blurry, almost like a motion blur to it. And then obviously there's
a bit more clear look. I think that even matches
more what we need, but you can still
see that there's this ripple, blurry effect. I think it also depends on
the angle that you go for, whether you get a
clear reflection or not here for instance. I think I'm going to
go with something in between these two that
we have going on. Now what I'm going to
go here, add a bump, is going to be a
bump under height. I'm going to add a
musgrave texture and I'm going to
add control key, my texture coordinate,
and my mapping. To start off, I'm
going to just go to play around here
with the scale. Let's see if we increase
the scale drastically. We get something like this.
So I'm going to go with 150 just so we can
use round numbers. And then for detail
I'm going to lower that detail by holding shift. This is still too aggressive. Bite away, 0.3 I'm going to lower the
strength actually as well. Now I'm getting that look
already. It lowers strength. Little bit of a distance here, one the same as what it was. Let's see, detail.
What do we have? We had something like this.
Then maybe dimensions. Are we getting anything? I don't think we
are. So if I put it to zero, it's still the same. I think something like this
is going to be good enough. Now this is going to be the
first layer that we're doing, as I talked about before. We're also going to
be adding secondary layer to all of our textures. Pretty much for now. I think this is good enough. It's going to get us a long
way and give us a good idea. We can even go and move
the train and see, okay, if the train is here,
how does this look like? It looks pretty good.
We can say, okay, well maybe I want the train to be a little bit more stronger because cartoon in
our anime image here, right here, you can see it's
very reflective, right? So I can like lower this
detail, make it a bit cleaner. Something like this
is going to be in all your personal
preference, to be honest. So it's going to be your
call while we're here at it. I think we can also
go and press Shift A. Use our image as
plane background. Let's go under our pictures, we can add our
background, sky, sky. We're just going to be using this little trick where we
take an image as a plane. We're going to 100
scale it by 100. Push it a bit back, push it
a little bit up, Let's see. Just enough so that
we can find our sun. Where is our sun?
Okay, there it is. I want our sun to be right
around here somewhere. Now, we need to also
keep in mind where our actual sun is that's
lighting up our scene. If I move from here, we can see that the
sun is over there. So we need to push the
sun closer to here so we can get a more
realistic lighting. I do first. Actually what I'm going to do is I'm going
to picture this. I think that will
be the smartest way I'm going to go view camera on this side because
right now it's very dark. I'm going to go here.
Under the shader editor, we can see that we have our
sky texture going on in here. We can just disconnect
the alpha like that, We don't need it, but we can take
the color and push the color into the emission. Now this image is being emissive
and it's missing light. It's lighting up our scene. We can play around with the strength of the
emission if we want. We can push it a
little bit stronger, a little bit weaker.
This is up to you. I'm going to push it 1.3
something like that. We can then play also
with the huun saturation. If we put the huun
saturation here, you can see you can
control how you want the image to be saturated. This is too much for my taste. I'm going to go something
a little bit softer, maybe a little bit
more like this. Then also we can add a
curve or contrast also. But let's go with the
curve RGB curves. I'm going to put
a curve in here. I'm going to push the
highlights a little bit up, but I'll push the shadows a
little bit down to get this nice dark, little contrast. You look, it's a little
bit off from what we have here because you
can see that the shadows here are much softer. But something like this matches
also here in real life. So I think this is good
and we can also see how our water is looking because
it's a different shadow. We need to play now with the
water again because I'm not really liking 100% how
this is looking. Maybe. Let's see if we, with the scale, add a bit more detail. Let's see Dimension Cuarity. I'm going to keep it
something like this for now. Let's just now, as a last part, play with the position
of our sun in relation to our image here and
lighting overall. I'm going to take out
here all of these things. Just so I can get a clear
idea of what's going on, I'm going to click on my camera. Let me see, View Display. I'm not sure how
you pronounce it, but I'm going to
increase it all the way so I can get like a full, full, clean idea of how my
render is going to look like perfect from here. Let me just try to play a
little bit more with my son. Where it's positioned,
how it's looking, I think I'm going to push the
sun A B in this direction. And now it's getting like
almost covered by that, which is actually
is getting covered. So I'm going to push
this and just go, Y, push it a little bit more
on this side so I can give my son here a little bit
more light coming through. I am fully aware that
this compresses, moves my image a little bit. Okay. In this case,
I don't mind it. Let's just see now
where the sun is. I think I need to move it
a little bit more towards left to get some of that
sun coming through. Because if I move
this, I have that. Let's go somewhere around
here where it was initially. We can also play
maybe with the size, we can try to get some of this. I want it to be a
little bit lighter. Let's see, that's
a bit too strong. Maybe if we play
around with the air. I think I like how the air helps with the
overall image here. Let's just because
this is actually our main focus here at the
colors and composition. Look around here, that's good. What I can do, one more thing
is I think I'm going to add like a point light right here where the sun
is positioned. So I'm going to go shift
a, I'm going to go, let's see, I'm going
to add a point light. Push that point
light right about here in the height
of the sun solid. Then we're just going to push
it a little bit further. Right about there
were the images. We're going to increase the
size of this point light. Let's see the strength
and radius I can get. You can see this thing here that's happening,
That's what I want. I'm going to try
to match it with that sun, a little
bit like that. Let's see if the
sun is right there. You can try to push
this like this, increase the radius
a little bit more, definitely, stronger
bowl of light for color. I'm just going to go
with the color picker and click here so I can get. Let's go even more into the
yellowish side of things. Something like that. So
we can have like this, almost like sun is slowly
reflected here into water. If I decrease the shadow, it's much harsher,
decrease the radius, it's definitely going
to be much harsher. If I increase the strength, it's going to be
definitely much stronger. Let's see if we go to, let's just go crazy
with 10,000 for now. First, let's play
with the colors. Now it's obviously too
strong, fully aware of it. We can probably lower it by, let's go lower it by 10 and decrease the radius to
just something like that. Maybe play around
with the height. It's still too strong, maybe. Let's check our
reference image here. I think this is
still too strong. Let's go once, it's just
a little bit here of a hint that's coming through and this is like
causing the reflections. I think this is looking
pretty good so far, right Now, one more
thing I'm missing. I want to have some
let's image here. There's a bit of a
shadow happening here. But instead of a shadow, what I want, we can say, I guess the sun in this
case is coming directly, it's coming directly at, it's not coming from there, it's coming from
here towards it. Technically, the sun would
be in that direction. But in our case, we're going
to keep it as is here. But what I want is a
little bit more of a reflection in this part here. I'm going to go here,
back into the sun. I'm going to play with
the rotation until I get a nice perfect reflection
right about there. I have like this rim
light here happening, which is exactly what I want. Let's see, what else. Can
I get it a bit better? Yes, there it is. This is what I want. Very nice, cool, very good looking. I might even want to push
this now more to the left, so it kind of matches
my whole idea that I'm going with the sun is
coming from this direction. Let's take the sun, move
it more to the left here. And I can call this light, let's call this light bake sun. The sun is coming from here and it's reflecting
onto this here. And we're getting
this here, perfect. I think this really nails, uh, and not just in terms
of our composition, but it also helps
with our lighting. I think we're settled with
that and now the only thing that remains is to start adding our secondary details
onto the scene to bring a bit more realism to how everything
here is looking. Once we're done with that,
we're pretty much done with the texturing phase and we can move on to our final phase, which is the animation. All right guys, this
will be all for this video and I'll see
you in the next one, Bye.
49. Texture Painting the Station: All right, so we've gotten up to this point and our render
is looking pretty good, but it's still not there yet. Something just feels off, right. Like I think the water is a
bit too aggressive over here. The sun, the way
it's hitting it. And then especially
our train and the station here
just feel simple. Even though we added a couple
of extra details in here, it just, it's not there yet. Something just feels off, and it needs a little
bit of extra work. So what do we need to do? Well, let's start
first with the water. I'm going to clean up the water just with a really
simple trick actually. I'm going to go into my shader
editor on my right side. I'm going to push
this here on my left and just go like that. What I want to do is
just lower the strength here just a bit, just enough. I can barely see these
ripples like this. I just put it, I want
to put it at 0.002 might lower the scale
slightly a bit. Let's see. Change the detail to maybe
something like that. Then play with this
value here as well until I just get something
that works for me. But this is not it yet, right? Because right now the water is just to clean in a way and we need to
play with the roughness, we need to change the roughness. I'm going to go and add
a wave texture here into my roughness like this. Then I'll just play
with the scale. Let's say something who I really like
actually were worry. I think something like
this really works nice. But then I'm going to also
play with the distortion. Get, let's see.
Something like that. I'm going to press
control to add my texture coordinate
and my mapping. Then from here I'm
going to add a color M, which is going to just control the strength of the
roughness in certain areas. For this white part, I'm
just going to lower this, push it almost to
dark, but not fully. What this gives me really, is this nice blurry
little rough part here. It's not a perfectly
clean reflection. I'm going to play
now with the scale. Let's see if I put it too much. That's not what I want to get. I want to go with something
closer to what I just had. Like this looks pretty
good, I would say. Then for this value here, I can also increase
this part here. It's, you know, let's see, this is way too much obviously. But if it keep pushing it somewhere here
and maybe this part, I make it darker
also just push it. Now, these are
just tools, again, to help you achieve the
vision that you want. You don't need to
follow this exact look. If you want to do
something different, absolutely, go for it. But I think I'm going
to be, for now, very satisfied with what I got. I might just lower this slightly a bit more just so I can get a bit more clear
reflection like that. Perfect. All right,
moving on next is I'm going to change a
little bit how the sun is working right now
because I think it's a bit too much on this end, so I'm going to put
it somewhere here, negative 150. I think it's
going to work for me. And then if I go
into the look again, I think I'm just
going to increase the intensity just
by slightly bit, like 1.5 Then I'm going to play with the air
just a little bit to increase the contrast here. This part, maybe add just a little bit of
dust, not too much. Maybe decrease the air,
increase the dust, just to get this look right there and be increased intensity
just a little bit more. So there is like a
stronger reflection on the front of the train. Like this part here, that
gets me pretty good. I can also change, let me see,
We have the fake sun here. I'm just going to press G, Z to see where it is. It's right over
there. You can barely see it, but it's right here. Might go into that one
and increase it by 200, so it's a bit
stronger over here, but maybe that's too strong. So let me see if I
lower down the radius. Increase the radius, maybe
something like that. But then maybe play also
with the saturation. Make it a bit more orangy so
it fits here in the scene. I think that looks pretty good. Okay, that is overall much
better in terms of the color. Next is what's the
most important part in the technique that
we're going to use now in a couple of videos. I think even once you
learn it from this video, you'll be able to just repeat it in the next view and you'll
know how to do it exactly. That is texture painting. Up until this point
we've pretty much Control how our two textures are blending with using noise. We've used this noise texture to control where one texture, where this one is going to be versus where this
one is going to be. We had that in this mix shader. But what we're going to do now is we're going to
add a third texture. I'm going to organize this a little bit by
selecting everything. Pressing control J, I have like this grouping
here in the frame, and I'm just going to
call this frame nexture. One texture set,
one in properties. Increase it, just so we
can see what this is. This is only for staying
organized purposes. We're going to add a new
texture here, this one. Let's go mix shader. We're going to add it into here. This is going to be where
a mix shader is going. Then over here I'm going to
add another principled STF. For this one we're
going to be adding a new texture that
we need to get. Now you can get it either
from the texture file or you can go to Mb and
CG as per usual. If we go under our materials, we go into Rock, you'll find it here
at the very top. At least. It should
be called Rock 053. You can download a two
K version or four K if your computer can
handle it from here. All you need to do then is
and add it in this scene. I'm going to press control shift and to use my Node Wrangler. Add on then from here, let's see, Tur, where is it? Rock 053. I'm going to add the
ambient occlusion, the rock, the normal
and the roughness. There we go. Now we have
this, all of this added. Let me just select
this, push it here, push this here,
push it like this. Let's just go in here. Let's have our
mapping also be here. We now need to clean
up this texture. We can't see it yet, but
if we push the factor over here of our mix shader all the way on one side there it is. It's not looking that good, It's not looking good at all. Because we need to
change the scale first. Let's push the scale
so it fits better onto this rock station scene to
maybe something like this. This is looking a little
bit better already, but now we also need to
do our MP occlusion. Let's add the Mpc mix overlay. Let's go mixed color like that. This needs to go under
overlay, I believe. Then our color goes into here and our alpha goes
into the factor. Then color ramp goes into here. Let me just double check
if I did that correctly, I think I did perfectly. So now I can use
this color ramp to drive the strength of the ambient occlusion
as much as I want. I'm going to keep
it not too strong, just something like this. I can see these cracks
a little bit better, but we're still not there yet. Now, we need to also play around with the coloring.
Here's the deal, right? We're going to use this
texture on this side of the station because if water has been here
for some time now, right, it wouldn't
be this clean. This rock would have been almost eroded and mass would have collected on this side like
because the water would be definitely like green
and mossy and wet. This is what we're trying to
achieve with this texture. We want to give it that
green, mossy, wet look. The next thing on
our list is going to be a hue and
saturation value node. If we push the hue and
saturation in here, we just need to now just
do a slight change. Maybe 2.6 I would go in less. 2.5 0.5 0.5 55. There we go. So 0.55 does the
job pretty good. But I'm going to maybe lower the value a little bit
just to make it darker. And I think I'm going
to lower the saturation just a slightly bit. This is matching my color
palette scene a bit better, but it's still very dry looking. The next thing
that we need to do then is add a color ramp. This color ramp
is going to go in here into our roughness. Then we can push it all the way almost,
let's see what we get. Something like maybe this, it's almost like super rough, wet looking in all of the
parts, which is good. Now I think I would say
this is pretty much ready. How is this going to work?
Well, let's push this here. This is going to be
the part now that we need to play with to worry about our mix right now
is being 50, 50 split. We need to create a mask that
we're going to hand paint, that's going to tell it to
only appear on this part here. I'm going to add an
image texture in here. This image texture is going to be perfectly clean.
I'm going to press. And I'm going to call this mask because that's
what it's going to be. I'm going to type
in here times two, so it's like two K mask in here. I'm going to put this to non color because
it's going to be a value between black and white. To give you an idea, what's
going to be happening now is if I have this
object selected. If this here is selected, if I go into material preview, I have this station mask
here selected as well. So if I go here, let me see. V image editor and I
go here, station mask. We can see this is how the
mask currently looks like, it's purely black value. Let me just see if we've
connected the mask. Mask needs to be connected
here into the factor. If we go into the image
editor and I type in here into white paint,
sorry, texture paint. There we go. I have
this set to white. And I start doing this, you
can see that now we've added this white value onto
our image suture and that white value is
being used as a mask. But the issue that we have
right now is that you can see this follow,
being very soft. And even if you know the
strength is all the way up, it's just, it's not
there yet, right? Follow. It just
looks way too soft. So if I go into our render
view, this is what we get. It's okay, but not great. Now this technique
is something I've learned from watching
blender guru videos. So I'm just going to undo this. A couple of steps you
don't need to do this, is that we need to now
apply or change the way our image texture here is going to be applied
to this mix shader. As a factor, we're
going to be adding a mixed color
putting in here and we're going to use a
mixing called color burn. This color burn is
going to help us create a better fall off
for the mask here. If I go here under
roughness also, I'm going to put this here for B and that's just going
to help me drive that. Then the last part, which is
going to be the key part, also is our color ramp. So we're going to add a color ramp and
I'm going to put it to constant and then
push it somewhere here. Once we have this
set up going on, watch this now, it is much stronger of a
fall off happening. It's much harsher edges. We have if I lowered
the strength a little bit and if I
press a couple of times, you can see how these edges
are starting to look. Which is way, way better for
this scenario that we need. Now, one important thing, I'm going to press control
Z a couple of times now, is we need to one more
time unwrap our objects. Because if I go into UV editor, this is how it's
looking right now. And unfortunately, this isn't
going to work because we have this cross area
that's happening. So that means that
at some point, even if we're
painting over here, something's going to appear over here because of this cross area. The way to fix this, I think if we want to be really quick without
doing too much work, is just selecting this, putting it like
that on this end. And select this, putting
it like that on this here. Now we can also test this theory if I'm being correct or not, by simply going here under
architecture paint and then trying to paint on these corners to see if there's anything that's
going to be happening. I think this is way
too much right now, but I think this is
looking pretty good. We can also hide our train. We can go a couple of
ways by doing this. You can go like very aggressive
as I'm doing right now. And then once you have this
entire corner part done, all you need to do next is just now press control and then go on this side and
then just clean up. You don't want to
go all the way up. That's at least not how I want. If you want to do that,
you can go for it. But I just wanted to be
up to a certain point. I'm just like pressing, holding control and pressing my
left click with my mouse. As I'm just slowly pushing this over there and then
pressing here one more time. You can see you get this
nice look that we have. Then pressing here one
more time control, then just controlling
essentially how this is being added onto my scene. Now we have a seam
that's right about here, which is causing this molese. We might need to maybe lower this and
increase the strength, and then just press
here a couple of times, let's see, to get
rid of this seam. Unfortunately, alternatively,
what we could do, we can just have B, let's see, we can go here and
say clear seam. Then if we unwrap
everything one more time, this could work, but
then you have to do everything from
scratch, I think. In our case, I don't want to
do everything from scratch, I just want to clear the seam. So I'm just going to go
like this At certain parts, you can have it go all
the way here, obviously. But for me going
to go like this, I'm going to probably
speed up the video because now it's really just a
matter of playing back and forth until you get a certain look that
you want to go with. I'm going to speed up the video now until I get my
results so you can see it. You can do the same if
you want or you can go your own way,
whichever you prefer. Once again here you can see I have this part
that's being here. So I need to just take it, push it here on
the side, map it, let's see, something like this. So that I can now paint it. Because otherwise
it would have also affected over here somewhere because it was being overlapped. But I think I'm
going to have to do, even though this is not
going to be very visible. I'm same here with this
part here, press L G, push it here, and now just
paint over it like that. Let's see how this is looking. I think that's pretty good. I'm going to go Rendered. There we go. Now this is
way better than before. Perfect. You can play
with this as you like. Go in here, change this part. You can see I have a
few mistakes here. Realistically, the
mistake that I've done here is I've had the seams, as you can see, appear here. What you should do probably
is just select everything, clear seams and then create seams that just
go maybe from here to this part mark seam
and then a unwrap. And then that way
this part here, you wouldn't have the seams
and then you can create it or you can use maybe
Smart UV project. Let's see, I think, yeah, smart UV project really gets us a long way
where we want to get to this part as long as this
part here is connected. Even though with this there's still some scenes happening, But I think it would be clear, but I think I'm just going
to control Z and do this. Even though it's not perfect, it's still not that
noticeable on the naked eye. And it looks pretty good over
here once we had the train. See, this is our scene
up till this now point. Perfect. One thing that I forgot to mention
just when I stopped recording this video is be
sure to also save this scene. This image here in
the the image editor. Once you have the
station mask go under image and go under save as. And you want to have the saved
inside your textures file, so you can go here and call this station mask PNG
and save image As. Perfect. Once that is done, be sure to save your project as well. And you're good to go.
50. Texture Painting the Wet Planks: Now that you've learned
how to texture paint, the rest of this is pretty
much going to be up to you in a way because for the next
couple of videos now, I'm going to be
basically just texture painting and adding additional
details to this train. And it's going to be your choice on your own personal preference, creative decision to choose how you want to approach this. You can go with the texture
painting route that I just showed you
when we were doing this station over here or you could basically
just use noise textures. How we had it over here where we had the mus grave texture, we had the gradient texture. And then all of these things
would basically just drive our surface
imperfections that we have on the window here. So this is not just going to be a matter
of personal preference. In this video, I'm going to
be adding extra detail to the wooden planks here,
all of this here. But really, I'm just going to show you the
beginning part of it. And then I'm going
to speed up and meet you at the end because it's all going to be a
very repetitive process. Explain my reasoning here. What I want to do
is because this train writing on water
right now, right? So my logic is that if
it's writing on water, the water is probably
going to be splashing. And if the water is splashing, then that also means
that this part here, the lower part of
the wooden plank, should at least have
some wetness look to it. Right now, it looks very
dry and it's very rough. The way I'm going to approach this is very simple actually. I'm just going to
take everything here on my textures
that we have here. I'm just going to press
Shift D to duplicate them. I can actually just go here at a mix shader and connect now this here
into the mix shader. Then from here I can just
go push this on one side. Now I'm just
previewing this here. If something is going
to be really wet, first thing that comes
to my mind is that it's going to be more glossy.
It's going to be shinier. Can just push this roughness to make it a little bit more shiny than
what it was before. And that's already given me
a very good desired look, pretty much right
on there on spot. The next thing is it's
definitely going to be darker. So I can just go in here, this here, push this. Now, this is maybe too
dark for my taste, so I'm just going to maybe
increase it slightly. But I mean, this is
pretty much what I need, because from here it's now
just a matter of repeating the previous steps that we
did when texturing this. We just need to add
an image texture, color, burn, and color ramp. That's what we're going
to be doing here. Let me just frame
everything in here. I'm going to organize
this a little bit better, makes sense for you
guys to look at. From here, I'm going to
add an image texture. I can go ahead and call
this image texture, see this is a mask and I'll
call it mask wooden front. There we go. I'm going
to make sure that this image texture is two K. I'm going to make it
non color over here. Now I just need to
add a mixed color. With this mixed color,
I'm going to put it to color burn from here. I can actually take
the roughness from here to drive this. Then I'll put factor
all the way to one. I think the last thing that's remaining really
is the fall off. So when we texture
paint, it's a bit more rougher around the edges, it doesn't have that
smooth fall off. We're going to add a
color ramp and just make it constant,
somewhere like this. This is pretty much the same set up as we had when doing this. As we can see here, we
have our image texture, color, burn color ramp. All right, from here. Now all I need to do is let's just make
some room over here. Perfect. Let's go into
our texture painting, texture paint like that. Let's go into our
material preview. Now all I need to do is just, let's say increase the radius. I think the strength
is going to be fine. Let me just press
a couple of times to see if something's
going to happen. Nothing happening yet might
need to increase my strength. First, let's go and increase
the strength and test if something is going
to happen right now. Still nothing's
happening. It might be that I don't have this selected, but I want, let me
just make sure. All right, that is selected. We have our wooden
plank, that's perfect, color burn, this
here is constant. Maybe we need to
lower our color ramp here and there we go. That was pretty much
just the issue. We had to just play with our
color ramp a little bit. Now from here I
can start adding. I don't need to
have the strength strong can lower the strength, but I can keep the
same size because this is the look that
I want to go with. I want to have a little
bit more here in the center because the train
is a little bit more pointy, it's rounded around
here at the center. I would assume maybe most of it accumulates on the center and the edges of this part here. That's where the
biggest splashes are. And then maybe there's like
slightly less splashes going on here and here. Now we can also play around with the sizing through here
by changing our constant. Additionally, I'm
thinking of adding one more color ramp onto our roughness,
that's right here. That's going into
our B from here. This color ramp is
also going to allow me to play around with how
this is being distributed. I think something like
this is not bad at all. Now. I'm just going to
repeat this process also for this whole
thing on the side. I'm going to follow
you for one more, which is this one, and then I'm going to speed up afterwards. But also do not forget
to save your texture. We need to go into our image
editor over here here, save As, and be sure to save your texture in one of
your texture files. All right, I'm going to now start with this left part here. I'm going to go exit
my texture mode. Go into object, go here, go into my shader editor. This the cool thing,
what you can do now. We can just take
this lower part from here and then just
put it in here. It's going to work
just the same. Additionally, we can also take this mapping node so that arittures are
mapped accordingly. And then just put it in here. We don't need this one here. We can delete everything
on this side. Now it's really a matter of
repeating the same process, where we add a mix shader, We add principle SDF. Now we just add another
image. We can put it here. I'm going to press new, call this one mask
side, wooden blank. All right, press Okay. Now I'll just make
sure that it's a non color mode from here. Now we can actually, I think, go back into our color burn. Let's see. We can take the
color burn, the color ramp. I think we can also take
the color ramp from here. And just copy everything from
there onto here like this. And let's just make a little bit more room for
all the things that we need. Organize this a
little bit so it's not so messy as it is right now. We push this in here, then we have this here,
this goes into here. And we just need to
connect the roughness into the color ramp.
And there we go. We just pretty much built again, the same set up
that we had before. It looks a little
bit messy, bud. This is far from something
very complicated. There's also always ways to
clean it up a little bit. This way it looks a bit cleaner. Now we're back to just
texture painting. Let's just go into
our material preview. As we are turn on
object texture paint, let's just start
adding the details. Let's, let's see if we have
the right thing selected. All right, maybe it's
a question of color. Ramp again, it
doesn't look like it. Let's see what is bugging
us down this time. Because we're pressing this
is working, there we go. So it was again, just
a color ramp issue. Now I'm just clicking here, adding a little bit
here on the edges. I'm going to make it
smaller just so I can cover this part here. Just making sure
that everything is nicely here on this part. I'm trying to match
it with this here, even though I'm not making
it very good job at that. But I think overall
it's looking okay. Again, we can just go
with this here now and play with how we want it to. We don't need to go
fully all the way up. I think this is just going to be perfectly fine,
something like this. So I'm going to speed
up the video from here and then cover the
entire part up to here, and then that's
where we'll meet. Once I get here, I'll probably freeze the video because there's going to be a small
issue around this part. One thing I forgot
to mention earlier, don't forget to save
your texture to the one that we created here
which was called mask side wooden
plank, UV image save. Now going back to
my new one that I'm making, here we go. There's one small issue
with here that has to do with basically how we
had to rotate and stuff. So for instance, if you followed the same route and you just like control C here and
then went control in here, then we also had here, let's take this one here, let's take this one
and put it in here. In terms of our mapping, what I want to show
you what's going to happen is that if we turn
this mapping in here, you'll see it's rotated on different sides,
essentially in here. You just need to take
the mapping that's from here and put it in here. Now that it's using
the same one, we can go back now
to our same process. Adding a color ramp, adding a mix shader
can organize this. I've realized that if you put everything
like this upwards, stays a little bit
more organized. So that's good if we push
this here, push this here, push this in here at a
mixed color image texture. Lastly, I don't also remember if I've saved my
previous one again, be sure to save your textures. Wooden plank, side metal. I need to save that one.
I'm going to save it one more time just
in case if I forgot. Now I'm back to here. What I need to do, let me
see. I'm going to press new. I'm going to call this
mask Wooden blank back. Okay, non color. Let's push this here,
this into here. Push this all the way here. Let's see what else
I need to have color ramp constant from here. Here. And this. I think this is pretty
much where we need to go. Although this looks
completely wet now. Might have done something wrong. Let me just double
check, There it is, made mistakes small here. Color ramp needs to
go after our mix. There we go to clean up that. Let's go constant. Now, let's
push it all the way here. Here we need to put
color burn. There we go. Now if I go under
my texture paint, let's see, Might need to
push this a little bit more. Maybe I need to push my
strength a little bit more. Let's see if I'm painting, I'm going to go into
my image editor. All right. Something is
definitely happening here, but it's not exactly
what I want. Let's just go into
the shader editor and see if I'm doing
something wrong. Roughness goes in here, this goes in here,
This is my image, goes into the color burn, this goes into the factor, but something's not right. Let me just take this
one out for now. There we go. It seems like that might have
done the trick. I still want to add it. Sometimes these things can
be a little bit wonky. I still want to add it though. That's what I'm going to do. I'm going to go in here, add a color ramp, push it in here. And then now just do
something similar to this. Let's just play with this one. Play with this one,
and there we go. All right, we pretty much have our entire train nicely
done in texture. Let's take a look
at how it looks when it's rendered perfect. Let's go into our camera view. You can barely see it, but it is there and it makes a
little bit of a difference. Now, this is not the only details that we're
going to be adding. We're going to add a few
more details as well. Don't worry about that,
but already this is looking pretty nice,
which is good. Let's take a look at it
in our entire screen. So we can do is you can
press control space. Let's see how this looks here. That looks great. Awesome. All right, don't forget guys, to save your textures
one more time, I'm going to press
control space, I'm going to go in here. I want to play around with it. If you want the witness to go more up, be sure you can do it. There's a couple of ways
you can go about it. You can just play around here and push it
even further up, or you can just go
in texture paint it. Now, yourself
manually, The choice is really up to you
how you decide. Just don't forget to
save this texture.
51. Texture Painting Algae Part 1: Have a boat on water for a very long time At the bottom of it, the part that's
touching the water. Over time you start seeing
this accumulation of algae. I guess grass or I'm not really sure how to call this
exactly or what it is, but my reasoning here is that just the same as
you have it with the boat, why not have it here also at this part of
the train a little bit. Now, up till this point, we've used pretty much
image textures and procedural textures to
create this part here. This was done procedurally. This glass was done
procedurally here. Then here we used
image textures. Even this here was done
through image textures, but also with a little
helpful Photoshop. Our image here for the
sky is from unsplash. For this mass, I took a
little different approach. Over here we have
our Textures folder. Here you have all our poly
haven and Ambien CG textures. You also have our
mask that we've created up to this point. You'll also find this
mass to K texture. Now, unlike all these
other textures, this one was created using AI. The reason for that was simply, I wasn't really happy with the results I was
finding online. I decided to use Mid
Journey to create this wet mass algae texture. While this may not
look realistic and define off when you
combine it with this here, it does get a
pretty decent look. This is what we're going to
be focusing on in this video. We're going to be
focusing on applying this texture onto
this yellow part. As a matter of fact, we're
going to be applying this texture onto all
these other parts. But I might actually separate
this into a couple of different videos because it
will take otherwise too long. I am noticing also here a bit of an issue with the
reflection of the wood. And we're probably going
to have to deal with this, do a final check up when
we're done with texturing, just to see that everything
is actually right. So this is like a small issue to remember for the later future. All right, in the time
being now let's focus on working on this
front yellow part here and adding our
moss texture to it. So what I want to do first is let me just
isolate this here because I noticed there
was a bit of an issue when I was working on this
file a bit earlier. This is mainly caused by
how I applied to solidify modifier or not apply but
added the settings here. I just need to push
the offset like this. And then over here
just go and push this, maybe 2.3 I think this
does pretty decent job. I can also take this,
push it maybe slightly. In words not too much but
just enough like this, it's going to do
pretty decent look. I was also thinking
maybe just pushing the water a little bit more up. Oops. Because the water
is definitely going to be also covering this part. And then pushing a
little bit down, I can rename the water here. Instead of playing,
just call it water. That's pretty good, and I think we are ready
to start working. If I go into my shader
editor right now, over here we have
this yellow material. But if you remember, we also had the same
yellow material applied to a bunch of
different other meshes. We need to make this one as a new material separated from the rest and call
this yellow moss. I'll just call yellow moss
for simplicity's sake. All right, from here
I don't really think we need this part because we use pretty much the
same texture twice over here in order
to just create a bit more variance so that there's not a purely repetitive
texture continuously. So I'm just going to
take everything from here and delete it. But while we're also at it, let's see, I actually deleted
it from the wrong place. My mistake. Be careful in
what you have selected. I'm going to select here
and then delete it. There we go. So don't
have here selected. Have it selected here.
Yellow mass from here. I think I can just go and
add my AI texture into here. And then go and see how it looks when it's set into
the color from here. I can just go control
Shift and click, this isn't really looking good. I think the reason
for this is maybe we never unwrap this properly. I'll just click my slash
key to isolate it. And then looking here
into the object, I think I need to
apply the solidify. So I'm just going to leave
my edit mode. Click Apply. Now I have this, let me go
into my sold view quickly. I think we're going to
also add a double modifier just to maybe make these
edges not so sharp. I think this is
going to do a pretty decent job from here, since we're going to
need to unwrap this. We can also, while we're at it, select all these edges in here. Like this. All right, And then we can press control
and mark this as a seam. So that now let's go into our rendered view so
we can see what's going on. Press A, and then to wrap, it's just going to use
that seam to unwrap. And you can see over here we have that tiling
from this side, but that's fine because this side won't be
really visible. We're only worried about
how it looks from here. Let's go and take
a second to see how this is now being
mapped onto our objects. So if I go into my UB
editor and over here, type in mass, there
we go, press tab. This is how our texture
is being mapped. From here, I can just press
L to select this island, then rotate it a
little bit like this, push it into here,
and then scale it like this from edge to edge. I think I'm going to
rotate it like that. I think this side is giving
me a bit of a better look, especially with this
here and so on. Actually, I'm a bit
undecisive here, honestly. Let's see. We can also put it all the way down.
That's also fine. Even though this is
being overlapped, because this is
on the hind side, it's not really
going to hurt us. Maybe something like
this, it might be okay. So this is going to be
your own personal choice. You choose how you think
works best for you. I'm going to go like
this. Excellent running back to my shader editor. I think it's time now to start working from
this principle BSDF. I'm going to press
Control Shift. Click on here just to see
how this is previewing. I can push this
here on the side. Add a color ramp over here, connect this color
ramp like this and then push this into
the roughness. I'm using basically
color ramp to turn this image into a black
and white value over here. So that can now play with which areas are
going to be rough, which are going
to be reflective. The dark areas are ugh, the other ones are
going to be reflected. And it's going to give
it a bit more of, I guess dryish look
at certain areas where it's going to also have a wettish look on other areas. I'm going to duplicate
this color ramp, now connect this one
more time over here, I'm just going to reset,
reset it by clicking here. I can push this maybe a
little bit more here. And then over here
I'm going to add a bump with this bump. Now I'm going to go into the height and here
into the normal. This is the look that
I'm currently getting. It's OkishIuess. But maybe I want to
mess around a bit more here and maybe I want
to mess around a bit more. Now, this is way too reflective. Maybe I can a bit like this, but it's still not giving
me exactly what I want. Let's close this. Maybe
push this even more here. Just keep it as is like that. Let's see what we
have going on here. Can push this maybe darker.
Push this a bit more. Push this like this. I just
put it to the default state, something similar to here. All right, if I invert this, it does look to be going
outside versus inside it. If I have it like this,
I'm going to invert it to get this look. I think I'm liking it much more. If I close everything on here, then maybe if I turn
this even darker, let's just see what
I'm going to get. Now this is just a
matter of experimenting, testing out, seeing what
works, what doesn't. I do like it just being, maybe like this
fully on one side, but looking at it maybe
with the entire mechinal, I do think that
it's to greenish. I'm going to go here,
hue saturation value. I'm going to change the
hue slightly down to maybe 0.45 just to add a bit
more brown in ish to it. It also matches the
scene a bit better. It's not also too saturated. I think this is also giving us pretty decent starting
position for our whole thing. Maybe just increase
the saturation again. You can go back and forth
to infinity with this, but I do think this is giving us a good starting
point from here. I'm just going to press Control
Shift and click on this, do this, push this maybe
a little bit here. Just preparing to add the
remaining things from here. So instead of having to just
add each note individually, I'm just going to select
here, select here, select here, and here. With this four selected, I think I can just press
control C. Go into here, Press control C one more time. Now I have almost everything
At least connect to this, connect this one to here. Then over here I can just
close this image texture, add a new one, type
in here, times two. I can call this
yellow moss mask. Okay, make it non
color like this. Now, I believe is going to
be time to texture paint. Make sure they
have this selected so you don't paint
on something else. You can go also into your
image editor and then go here under moss mask just to be sure that you're
painting on the right thing. That's like this. Go here under your texture paint
and you can start, maybe increase your strength, but we can already see
that something is here. The only issue is that
nothing is really showing. I think the reason for that is most likely due to
our color ramp here. Maybe it's a bit too aggressive,
so I push it like this. Maybe if we go into
our material preview, let's see, Yeah, now we're
definitely getting something. Just be sure to adjust your
color ramp over there. And now I'm just going
to start painting first, this lower layer like this, it's looking pretty
good already. We're going to add a bit here, on the sides, a bit here. Even though this part is
barely going to be visible. But still something like
this gets a pretty long way. I think this is already
looking really good. I'm just going to
lower my strength now. And then just press a couple
of times to add it bit more here like that. And then just a bit more there. I really think this pretty
much is it already. You can play around
with this all you want. This is now on you and how
you want it to look like. If I go now into our rendered settings and just take a look, let's see, this
looks pretty good. Just right off the bat,
this looks pretty good. I'm going to go
object like this. I'm happy with how
this is looking. So I'm just going to push this here to stay a bit
more organized. Push this here,
that don't forget. Before I close this video off and move on to the next one, we're going to be
texturing this part. Don't forget to save this image. Go into your image editor and
save your yellow mass mask. Save as here under
the tutorial file. I can go into the texture file, I make, maybe a new folder. Let's see, 22,
where's my textures? There we go, new folders, yellows, mask, Save
image. There we go.
52. Texture Painting Algae Part 2: All right, for this video, let's aim to texture
both this part and this. We're going to need
to be fast but also correct in our approach
towards these things. There are issues, even
though it's going to be repetitive in terms of
like we've done already, this over here and we've done
a similar thing over here. There are constantly going
to be some smaller issues that are challenges that we encounter that we need to solve. Some are big, some are smaller. But still it's also important
and I want to showcase you guys how to deal with
those things in here. Let's now start texturing
this metal part here. Let's go into our shader editor. Really for efficiency sake, we can just go and copy
everything else one more time. So we can go from here, take these four nodes that we
have, select all of them. Control, go into here, control V, Just move
them a little bit here. Then let's see
what else we need. We need also the
slower part from here, control C go into here
control and there we go. I think we have pretty
much everything ready. We just need to
connect a few things. I'm going to go also enable my shortcut viewer
because I forgot. Do that. Sorry for it. I'm going to connect
this part here, connected here to the factor, so that I don't forget
that over here, we need to just add
our mix shader. There we go, like this. And this needs to go
into the factor here, and this needs to go into here. From here, all we
really need to do is just into this yellow
mass mass that we have, X, and create a new mask. Put it times two and call
it what's this called? Metal bron light,
you might think, Yeah, this is good.
I did a good job. Well, the issue here is, and I just realized it, and this is something
that actually prepared for this video is this metal front light
is also used in here. These two are the same. Everything that we
did now here is also going to be applied here and we
don't really want that. We're going to need to
separate this object. Click this here. Let's call this one metal front
light moss like that. Then over here,
what we can do is just take everything out
from here. Take this out. We don't need this.
We don't need this, and we don't need this. This stays as is, while
everything else remains in here. Perfect. Now, I think
we are almost there. Have this here. Now, make
sure that this is selected. Otherwise, you're
going to be painting over texture that you
don't want to paint. You want to paint over this
mask that we just created. I believe we have everything else connected that needs to be. Let's just go here into
our material preview. Let's see now what we
have to deal with. The first thing I
want to check is how is this texture
being wrapped? I'm going to press control
Shift and click it. Does not look that good at all. Let's try wrap this.
Let's a smart project, 0.01 and there we go. So this is looking pretty
good right off the bat. But there's another issue
that you might not notice, or you might notice that. Let's, for instance,
take this smudge here. You see the smudge over here. And then there's
like this little smudgy thing here as well. And looking at it,
maybe I want to. Let's see, invert versus invert. I'm not noticing that
much of a difference, so I'm just going to
keep it inverted. But let's go back to my point. You see this thing here,
Let's take a look over here. It is exactly the same, but it is at the mirrored place. And the reason for that,
why it's being mirrored, is because we have our mirror
modifier right over here. We need to apply this
mirror modifier. Then let's go into
our UV editor here. Let's type in here mass so
we can find our texture. Let's see how this is
being currently wrapped. You can see this object
here is not just in here, it is there, I believe twice, because it's being
wrapped over here. And there's also this one that's going to be
wrapped over there, just in a mirrored position. What we need to do
now from here is just Smart UV project. Let's do this now. One thing that's happened, I'm not really sure
exactly why this is. You might notice that these circles are a little
bit stretched. I'm guessing it's
because to fill in the position in here,
that's my assumption. But I am just going
to press X and then just try to make it a bit more rounded as
it's supposed to be. It's not that big
of a difference, but just for not stretching our textures too
much, let's just do that. All right, now we have
these two objects. If you look at here, this, let's just take a look completely different
from what we have here. And that's exactly
what we wanted. There is a bit of a
seam happening here, but I don't think
this is going to hurt us once we start
texture painting. Let's go into our shader editor. Make sure that we
have this selected. I think we have
everything prepared over here. Control shift. Click here so that we
preview our mix shader. Click this one more time, and let's just try
texture paint. Make sure that the strength
is all the way up. We can go here at
this bottom part. Click plus we are texturing.
This is looking great. I'm just holding my
mouse right now, will have it at full strength and I'm just texture
painting over it. I just want to go
somewhere up to, let's say somewhere up to here, for starters, I'm just going to try to texture
everything here, including this side as well. You might experience also a
bit of a lag when doing this. And there we go. All right, from here I'm just
going to lower my strength. Now I'm going to start
clicking a little bit more around just to get
these extra details. Almost like a splash
or slow progression. There we go, on this side. Let's do the same here. As I said, you might experience
a lag when this happens. Just don't click, stop clicking, then wait a little bit. And Blender should get back
to normal in a second or two. And there we go, we
are back to normal. I'm going to increase my
strength just a little bit, so this goes a bit faster and
might speed up this part of the video because at this point you already
pretty much know to drill. Now I'm just going to move. Once I have this completed, I think I'm pretty okay with how this part here is
looking because I'm mostly focus on this side here. I'm going to go and focus and do work on this
guy here on this side. All right, let's look, let's see how this
looks when rendered. I think I'm okay with this. Let's just take a look here. Yeah, I would say
I'm okay with this. This is going to work
fine. Don't forget. One more thing,
which is probably the most important part is
go into your image editor, find your textures
and save it to go into my call this one just this is not
the yellow moss mask, this is the other mask, or
how do I even call this? See, this is where really, there we go, moss. I recommend adding mask in here and going image editor, Mask over here as well. And then here, mask metal, front light mask. There we go. Now let's just go Image save as save perfect. Now we have this texture
saved and that's good. And all that's left
for us now to work on is this over here. When dealing now with this part, there's a couple
of challenges that we need to talk about. Let's go into my mass textures just so we can see.
What do I mean by that? Right now this is
wrapped this way and we probably unwrapped
it earlier when we were working on this
model or texturing. Get one thing that comes
to my mind is, well, you could leave it
like this if you want, but then the issue
is that you're only having this area of textures that it's covering, being used. If you're painting, your
texture is going to be, you're going to be
very pixelated. Essentially, we might
want to avoid that. Let's just first set
up everything here before we move into
the texturing phase. Let's go into our
shader editor again, because this is
called Top Metal, I'm going to assume that this
is used at the top as well, and I'm going to be a right
in this case as well. Let me just prepare
my scene here, where I select everything
here. Going to go in here. Click this, Call
this top metal moss. Go into here. Put it down here. Push this here. Push this a
bit to the side like this. Add a mix shader. There we go. We can immediately
connect this one as well. Let's see what else
we need to do. We need to go in here,
take these four material, four nodes, and add them
into here one more time. Sometimes it doesn't grab
the selection. Perfect. Over here, we can just
go take this mask out. Click, call this top metal mask, it's called moss mask. There we go, Make
this non color. And let me see if I made. This one here is non color. This one here is SRGB. So let's just make
this one as well, non color like this. There we go. Then from here, let's see, What else do we need? We need to connect this to here, and we need to connect
this image into here. And I think we are
pretty much now ready. Just make sure that you
have this selected. Let's just preview
this texture now. See, this is what we would, this is what we would
have at our disposal. It's not bad per se, but the issue is again that
it is much more plated. When you compare this
here to this here, there's a couple
of ways you could dirty solutions that you
could do to make this work. One would be maybe an easy one. It was just if you go
and you scale this, it goes like this. And then you would still have
an issue of color per se. As you can see that's
happening over there. This is maybe not the best solution that
you should go with. An alternative, you
might try, let's see, our UV square, this here, but then even though you are getting maybe a
little bit more detail, it's still not there yet. Maybe the fastest way
would just be to press, let's see what we get on wrap or when we Smart UV project. Smart UV project seems
to get pretty decent. Look where I think we can. This here is the
side, I believe. Let me just double check if I'm correct, but I believe I am. Yep, this is the side. If we just scale this like that, maybe it gives us the
best of both worlds. The only thing I'm looking
at, thinking right now, is maybe it would be cool if
we just mirror this by 180. I'm trying to get
this pattern going in a direction that's
opposite of this one, essentially like this. Then let's see, we might be able to work
with something like this. Let's see how this is looking. All right, This is looking okay. And then there's
like a small seam happening right about here, but I think we can live with it because
it's right at this corner. It's barely going to be visible. Let me see if this being
separated, I believe it is. Now that it's
separated, we could probably also match
it with something. It blends like this. This be a pretty
good starting point to paint our texture over here. Okay, let's see if we
have everything ready for our texture painting over here. Everything is connected. This just needs to be
connected in here. Then over here, we
just need to make sure that this here is selected. If I go into my
texture paint now, make this all the way
strong and start painting, we are starting to get a look, that's great, let's just
maybe play around with this. Get a bit more of
that going on then. Maybe a bit too
aggressive on my lower. Increase the color here. Too
slightly lighter. Let's see, too strong. Let's just
go back to normal here. All right, let's start painting
with the first strength. Just this bottom
part. For starters, you can go a little bit
higher if you want. And then here as
well, especially then here we have the
back parts as well. All right, I'm going
to now decrease my strength and
increase my radius. Shift to decrease the strength and just to increase the radius. And I'm just going to start
clicking a little bit like this very radically to
get these off patterns. It's not purely
straight and clean. There we go. I think I am
happy with this result. There's definitely some room for more minor improvements
maybe here and there, just cleaning things
up a little bit. But overall, the way
this is looking, I think it's going to
be perfectly good. Let's just check out, now
that we have it like this, let's put it into
our render view. All right, let's go
here, control space. Let's check out our scene that is looking
great right there. I'm very happy with
how this is looking.
53. Texturing Edgewear: A common issue that
you might experience when working on this
tutorial is let's say you just finished with
texturing and creating the mask and everything and you saved everything.
You've done everything. As I said, you've
turned off your PC, you went to bed or took a
break, turned it back on. Turn down blender again, open your project
where you left off, and all of a sudden
you notice there's a missing mask over here. There's no moss or
algae or whatever. Maybe the wetness is gone
or something like that. Well, if you've saved all your
textures that you created, you should be pretty much fine. All you just need to do is
go here into this file, find where you save
the test mask, there it is, and just
load it like that. You should be pretty
much good to go. Also, one more thing
that I decided to remove the invert and just
keep it as it is like this. I think I prefer this look a
little bit more from here. In this video now,
we're going to be adding some
edgewaresentially. We're going to be making some a war torn look on these corners. Not just this corner here, but pretty much all corners
around here as well. We're going to be
doing that here. We're going to be
doing it here as well. I think that's pretty much it. We can also do it maybe here, but I don't think we'll need to. The ones where we're
going to focus are here, here, here, and here. Pretty much everything
that has yellow. Let's just go with that. All right, how are
we going to do this? Well, I'm going to select
this part here and maybe just look
like this for now. We're going to need
to make some space. Not too much, but just enough. So I'm going to push this
something like this here. What I can do is I can
duplicate this mix share, because we're going to need
to mix this with something. I'm going to create
another principle SDF that put it into here. I'm going to connect this
one into the shader. And then from here I'm just
going to make this one be red just so that we
can see the difference. What we need to do
in this video now, the goal here is to
essentially tell blender to, through this factor, be able to distribute
material one onto this side and then
this red material onto this corners
here that we want. How do we do that?
Well, it starts off with node called the Beble. We just need to duplicate
that node, this. Now let me just show you what
this node is going to do. The Beble in here
creates this edge. If I go in here and I
increase the amount, becomes a little softer over
here in terms of samples, then if I reduce the radius,
it becomes really tight. So I'm going to push
this one point 0.01 I'm going to push this to be 0.4 I'm going to keep
this one for now, maybe make it eight
and keep it like this, a bit softer from here. I'm going to add a mixed color, let me just combine
these two together. We're also going to add
a color ramp so that we can just see this as
well in black and white. But also we can preview what the hell is going
on in here, right? So from here, if we
go maybe to darken, multiply, color burn, nothing really interesting
that we need is happening. But if we come to difference, start getting this look, which is not really
where we need to, but it's slowly
getting us there. There's definitely
issues also happening. As you can see in here. A couple of things
we need to fix. First off, let's just push
this here all the way, like that factor into one. All right, now we're
slowly getting there. Perfect, Over here we're going to go into constant
so that we can clamp down this value and make this edge much tighter
like this here. Perfect. But there's another
issue over here, it's not fully connecting yet. We need to basically do this little trick
I found on the line where I believe we go from
here in between these two, we add a separate color. We make this hue
saturation in value. And then we connect the value
like this. There we go. Now we can just clamp this down, or we can do
something like this. Let's just push this
a little bit closer. Push this closer to here. This is where I
said maybe we need a little bit more extra
room over here like this. Let's just see now how everything is going
to look once we connect this color ramp here into the factor
into this C shader. All right, we're definitely getting some edgeware,
which is pretty cool. We can see it also everywhere, here and here as well,
So that's awesome. Now another cool
trick that we can do is in your folder
with the textures, you might find one called
surface imperfections. Now we've already used
the surface imperfection. If you remember here that
we got from Ambien CG, which was this here. Like water splashes, dried
out, water splashes. And we're going to do
something similar in here for this I found on art station. This one pack from ML Scri that has a lot of different surface
imperfections that you can either download for
free or you can get it from the tutorial pack here
in the Textures folder. Inside of here it is called
free surface imperfections. Inside of it, gli fid a bunch of free surface
imperfection textures. The one I'm going to
go with I think is probably going to be
maybe scratches 11. Let's see. Also we
have a bunch of these. You can definitely
experiment how you wish to. I'm going to start
off with let me see. I think scratches 11. I'm going to start off in here. Let me just frame
everything. All right. I'm going to add
scratches 11 into here and then I'm going to connect it to
the radius in here. Now this is the look that
we're getting so far. At this point, I think we can start taking out this red color. And instead of replacing
it with something, maybe more believable, if this was getting
some kind of scratches, I would assume maybe a bit
more bronze looking dark, maybe something like this, and then maybe a little bit more metallic, something like this. I think this is the look that we're going to go
for here for now. Additionally, I guess
one more thing you can do is go into your color ramp, plug this in here, and
then take it into a bump. Put that here into the height, and then height could
go into the normal. Now this can be like that, a little bit more torn into. We don't maybe want
to have it so much, can put it like
0.5 or something. Or maybe you can play around
with this later if you wish. This is looking pretty good, but maybe it's a
bit too aggressive, especially on this side. This looks worn off, almost like from a horror
movie or something. We definitely need to tweak these values a little bit more. First off, I'm
going to check how this has been wrapped around. So I'm going to press
control, add my UV here. Let me just check
how this is being mapped around my objects. I'm going to find what
was he called scratches. Yeah, there we go. Let's see how this is done. Okay, so definitely
want to increase this. I believe this is
because the scratches are a four K texture. We definitely have
some wiggle room to increase our UV mapping here. Regarding the repetition
of the previous tecture. I don't think we need to worry because we're already
adding so much detail, it's not going to be visible. All right, So this is looking much more detailed
and much better, but it's still a bit too
aggressive for my taste. So I'm going to go back now
into the shader editor again, I need to make a
little bit more room. So I'm just going to
push this like that, push this like this, push this into here,
make some room here. All right, there we go. I think what I can do now from here, that can help me out. Let's just move this a
little bit more is in here. I can add a range node. If I go and add a map
range node in here, I might even need to use this one to go
into here as well. I can just now
start playing with this minimum value
that I want it to be, say something like this. Maybe 0.04 But then the maximum I can
reduce drastically to, let's see, 0.2 or 0.24 This is
drastically going to reduce the amount of edge
word that's happening over there while still
maintaining some of it. This is pretty good. I can go back in here and then
play around with it a little bit more now
really comes down to just tweaking the values
to a certain amount. That works for you over here, I might increase the
max a little bit. Then over here, let's see
how this is looking Also, it's a bit aggressive
on this side. What you could do,
you know, one way of solving this is you could go and make this its own material and then separately
do the changes in here. I might even go and do that
now that I look at it. But there's one more
issue with the door here. I don't think the door has
been wrapped properly. So I'm just going to
press a Smart U Project 0.01 Unwrap this. Okay, this looks much better. Let's take a look how this
here is looking. All right. I think this is pretty okay, especially with the
edgeware here as well. It has definitely been
more on digressive side, but I don't mind it that much. Next thing we can do is just
take everything from here, quite literally, and
just go into here. Make some room like that. Control V, simply, let's see, connect this into the top
and connect this into here. And we're supposed
to be getting some edgewear on this side here. Perfect. I really
think that this is pretty much it at this point. What you can do really,
is you can make these guys its own separate value and you can
play around with it. I'm going to go and make
this one side because I don't want it maybe
to wear it to be so aggressive over here. And then you can go
into your map range and just play around
with the max, maybe reduce it a little bit. There's not that many scratches, but you still want
some edgeware here. Whereas in here
maybe you want it to be a bit more aggressive. So you can go in here and the push it a bit
more like this. This is really now
your choice and creative how you
want to do this. But I believe this pretty much concludes
this part of the video. Also the majority of
the texture we have. Maybe one more thing that's remaining that we can now do
here in the final clean up, which is going to be
texturing this here. You could also add some moss in here if you want because we
haven't done that. This is one more
thing that you could do on your own or free time, because at this point you
should be able to just take these to copy
it, add a new one. Feel free to also play
around with that. I'll see you guys in
the next video where we're going to be going
pretty much one by one, just checking things
on our train, doing a final texturing clean up to see if everything
is on its place. And then also the
replacing this white train here with all the
elements from over there so that we have our
fully functioning train.
54. Cleaning Up the Scene: All right, so we're pretty much done with all of our texturing. Essentially all the
groundwork is right here. So now it's just about tweaking, changing things
that we don't like, or improving certain things
where we can see and so on. So the goal of this
video is really to just clean up everything
that we have here, replace this, and prepare
everything for animation. Essentially, this is going to be the last video for texturing related things unless
something really bad happens, but I'm hoping it won't, and that's what we're
going to be doing. We're going to be
focusing on this video to just improve the things
that we already created. Maybe add some things
that we missed and so on. We're going to go from this
side and then slowly move our way towards the
end of the train. A couple of things
that I do want to improve here slightly. This is just a personal
preference of course, but you might do this as well. You don't need to. I'm
going to go in here, go into my shader editor. I just don't like exactly how this is looking on
this side fully. So I'm just going to clamp the values slightly
up like this, then clamp these values
slightly up like that. Push this maybe a
little bit down. Maybe this is now
way too aggressive, but just something in between
these two values to get this uneven paint
look is what I was literally going for
just a bit more. What this is more of a personal preference
thing, but yeah. All right. Another thing is we can do
the same here if you'd like, just to even things
out a little bit. Just pushing this,
maybe more in here, pushing this now, more in here. And there you go. Now looking at my
render view here, there's one thing that has been bugging me that I
mentioned I think earlier and that is how
I guess glossy this is. And so then the water reflects. It almost looks like it's oily and I don't
really like that. So luckily the fix is very easy. All we need to do is just track this, not this one, sorry. Drag this roughness map
from the top texture here, just reducing it a little
bit, something like this. We can do the same here, just reducing it to
something like this. It does the job pretty good. And then we can
do the same here. There we go. While we're on
the subject of the train, I do want to also
slightly alter, just darken this part of here. If I push this all the way down, this is just way too
much, obviously. But if I, let's say
something like this, I think I'm going to go
more in this direction. So I'm going to go here in hex. Say this value, go into here, select it, replace it. Okay, looking at it now here, I might think that
it's maybe a bit too aggressive to just
slightly more increase it. Go back in here. Tweak
it one more time. All right? I think this is the value
that I'm selled with, so I'm going to go from here, This, then go in here. We just do the same in here. Perfect. All right, happy with this, let me just take a look at how my train is looking from here, going to full screen view, maybe zooming in a little
bit, that looks great. Look at all these details and stuff that we can
see that is perfect. Now, this is exactly why we
also added so much detail. So can we do these
close up shots? And I might actually settle
for a close up shot versus going with the traditional
one that we have in here. In the second variant that I, I think I might go with that. Let's look what else we can improve. A couple more things. Let's see. Now this lower part is definitely being very
reflective as well. So we might maybe
want to reduce that. I don't know, Let's just
see how it's going to look if we change that too much. Oh, there's something very
strange happening here. This might be some weird
bug that is very odd. So it looks like we have
everything of two in here. I'm not sure how that happened, but I'm just going
to remove everything here that I see that is of two. I think that's about it.
That's just strange. All right. Connecting
the normal to the color. Sorry, there we go.
That was just weird. All right, from here I do think maybe changing this
up a little bit. Let's see how it's looking. If I do it like that, it's not as dark then
as I hoped to be. Maybe just bringing it back, but then maybe pushing
this here to be darker. Let's just see, this
is way too dark. But just something like this
might just be the right one. So I'm going to go
take this value, then let's just see if we
have any duplicates here. Thankfully, it was only
a one case scenario. I'm going to go here just
checking everywhere just in case there are no
duplicates Last one. Here. Luckily no
duplicates. There we go. We made this a
little bit darker. That's good. All right. What else do we want?
Let's see from here. I think the door is the next thing that's been
on my mind a little bit. Looking at the, I think this
is just way too aggressive. What I'm going to
do is just make it a separate texture like this and call it from here. I just want to change this
edge to not be so drastic. Maybe change the mint value. Change max value as well. I think this already
looks way better. We can maybe also play
with the values here. Change this. That looks pretty
good. I'm pretty happy. Maybe just a little bit more. Because too much edge
scratches, in my opinion. Let's see how this is looking. All right, that
looks pretty good. I would say maybe we can
just add a bit edgeware. Let's go take a look here.
Maybe something like this. We see anything? Maybe
a little bit more. Okay, that's too much. I
can see the scratches. All right. That looks a bit
better. Now, one more thing. I do want to go here
into the right view. Let's go here under UV editor. Let's just take a
look at the door. I'm going to go,
instead of this, I'm going to project from view and then just go like this. I can do the same
thing here as well. I'm project from view, increase the door
size like this. Go here. Let's see,
Shader Editor. What was the other thing? We
just want to change this to be Metal Door, like that. Perfect. All right. What I know I've done this
already a couple of times but I do think that want to push the sun a little bit more towards the train then off. So I'm just going to
push this to 1509160, just so I get this highlights
here a bit more like that, really liking that quite a lot. All right, so we've done here, we've done this, we've changed
the door. That is great. There's one mistake
that I did here, and that is not apply
to mirror modifier. And kind of comment, bite me, maybe you have already
applied to mirror modifier, but in my case I didn't. So unfortunately I'm going to have to work with that and
re texture this part here. I'm going to do
that a bit later. But while we're
at it here, let's go and texture this here. And as a matter of fact can just go like this and call
it, I don't know, connector. Maybe smart UV project
is going to work here. Let's try, we have it. You'll be on erupt
in case we need it. Can lower the color to be
don't something darkish. Let's just see what color is. This is like grayish, dark, grayish, like this here. Then we can just duplicate this, go into here, make this
one brighter drastically. And use a mix shader. Again, we just need to
tell this mix shader to maybe give some edgewaar
here to the corners. We can just literally copy
paste what we have in here. Just this part here is enough. We don't need the images,
We can just take this. That can take this out. We don't need, we
don't need this. Push this into here and then
just connected like that. Perfect. Let's just maybe
play around with this so it's not so strong were
actually it is a bit stronger. Let's see what
we're getting here. This looks pretty
good. I would say maybe reduce the
values here a bit. Maybe something like this. Let's see how this is
going to turn out. Maybe we need to increase
the color here it is. A much increased. I'm not sure what
more can be done, but just maybe
playing with this, I think that's good enough. I do maybe want to make
it slightly darker. I'm going to this,
make it de This. Slightly this? Yeah. I think I'm satisfied
with how this is looking. Awesome. All right, Last thing, but not least actually, we need to model something
that I forgot to model. That is this small part here. There you go, Right over here. It should be fairly
easy and it's a good, I guess, reminder of
our modeling practice. All we need to do is just
shift at a cube like this. Make this cube super
small like that. We can even make
smaller into Y axis, just like this, like that. Let's see a Z. Maybe I want to make
it slightly bigger in height but then
thinner over here. I would say this
looks really great. Push this in here. And
then maybe click here. Click here. Use the three
cursor as a pivot point. So that I can just do this
very subtle rotation. So I can get like this rotation. Look, all right. I think this one is
slightly shorter, so I'm going to press Y twice
and then scale on this end. I think this is
going to be fine. Let me see, is there really
anything else I need to do? Maybe just apply like a
small bebble modifier. Apply the scale,
everything is nice. And then just go
segments times three. Reduce this like that. I think that's more
than good enough. On one side, I'm going
to use the bounding box. I'm going to shift
the duplicate this, then let's say X like this. I do want this one
to be in front. This is going to
be the longer one. I'm going to put it
like this. I'm going to click Shift, right click. So I can use again, this
here as the pivot point. Because I'm going to now use
the three decursor to scale in this direction
like this. All right. Now it's really just a matter of getting the right distancing. I guess using it here
one more time just to, just to scale this up
properly. So it's like that. And then this side, I guess I could maybe push it like this, Y, Y like that if
we really want. Now we could just maybe add, let's, we could add some thing that is going to
connect the two. Maybe, let's see cylinder then we don't need this many
faces. We can reduce that. Eights going to be
perfectly fine, considering how small
this is going to be. Reduce this into
something like this. R, Y 90. Put it here like this. Make it shift or no shift. Y, no shift X. There we go. But I need to take out the pill point to be three decursors or
just something like this. Perfect relic.
Let's go like that. Then from here I can
just select extrude, select everything,
all these edges here. And then shift X. There we go, Shift X like this. I get this, look, this is
barely going to be visible. But while we're at it, why not add a
little bevel scale, reduce the amount,
the sizing amount. This, add a third level or second one just to get
something going on. I think this is perfectly fine, shade auto smooth, shade auto, smooth, shade auto, smooth. Let's just pre this now
in our render view. Okay, I think from here
what we just really need to do is just we can
add the metal material here. Honestly, I was
going to go metal, metal, metal, metal in here. There we go. We've added the
metal part here like this. It works great. It does wonders. We just need to maybe join
all of this into one object. So I'm going to press control J, it's this one object. Let me see if I want to try a different
metal material here. Metal. What do we
have for metal? Metal? Busier? Metal, light. I guess this could work fine. All right, let's
not forget to add this into one of our
rigs of the train. Take, put it into
the train applied. Then from here, hold shift, I'm going to put it into
the front rig like this. It's here is going to
call, I'm going to call this connector metal or
something like that. I guess it should be
first position that. All right, and I think Just going to position
it slightly rotated. Now that I'm looking at
it, I'm just going to R Z it and then
just position it. It's close to this here
as well like that. Let's see how this is.
It's a very small detail but I think it does
add some value. I just press shift
to reset my cursor. It's a very small
detail like you can see, but it does add value. All right, we are now
at the final part. We need to basically just
replicate this side here. Put it into here, we can take out this whole rig that we have, right click, and delete
this hierarchy over here. I'm just going to
shift the, oops, let's just remove this. I'm going to select Hierarchy. Click Select Hierarchy, and
then shift D. There we go. I'm going to go R, Z,
180 Y, and then go here. Just so I can clean up some of the extra things that
I don't need here. For instance, I don't need this X. I don't need this X. I do. Well, I think I guess I'm
going to need that one. That guy I'm going to keep
over here. We have everything. Let me see. Do we
have everything here? It does. Everything does
seem to be else in place. So we can just go
here and try to no connect everything
how we want it. Let's see if these two
guys are connecting. I think everything is pretty
much connecting, honestly. Let me just go into
my solid view, just see how this is. This is looking
good, I would say. And then this here
is looking good. Now the only thing,
like I said, for me, the issue is because I've
used a mirror modifier here. This side is purely
identical to this side here. It's definitely mirror. It's a very small
but annoying detail. And so I'm just
going to spend now the rest of this video
cleaning that up. But I mean, if you already
haven't done that, if you already don't
have that issue where that site is being exactly
replicated the same. You don't need to do this,
this is just me having to. So I'm just going
to speed up now this part of the video
until I'm finished. And if you already want to quit, go ahead, go to the next video. Or if you want to spend
some time now with me. I'll keep cleaning up,
checking your model. If you have missed anything,
go ahead and do that. Everything here looks okay. There's one small issue I
found that was a bit weird, which has to do with this side here and how it's being done. I'm not really sure
what's causing this. Maybe it has to
do something with the textures that seems
to have fixed it. I just want to make
double sure that none of my wood sizes are
pretty much the same. There we go. That's great. I think this
here is a bit too aggressive. Way too aggressive, maybe. I'm just going to go here
under preview and conjecture. Paint this part down. Kind of like that. I can go
here under the UV editor. I think this here and there we go. All right, so I
think this pretty much concludes everything
that has to be done in here. This is looking pretty great. I'm just going to rename
this part here one and call it back rig one more time. And so everything in
here is part of this. Now, the way we're
going to animate our train is just going
to be going like this. And that's pretty much about it. We are done with this video, and I'll see you guys
in the final video where we're going to be
animating our scene. And that's just going
to be pretty much it.
55. Animating the Train: This is it. This is the final
chapter of our tutorial. I think we only have like
three videos remaining. So in this one we're going
to be animating our train, setting up our
composition a little bit. Next one is just going
to be for the water. And then we only have the compositing for
the final part and rendering welcome to the final
chapter of this tutorial. Honestly, congratulations
on sticking this long. I didn't expect
this tutorial to be this long when I initially
started working on it. But hey, it's been already almost two months
when I started. If you've been watching
it, if you got this far, congratulations really, really
happy and really exciting. If you have any comments
up to this point, please don't hesitate
to share them. I'm really hoping to do a
couple more tutorials as well. So this has been my
first one and, you know, if you think there's any
room for improvement, anything specific
you'd like to learn. Anything specifically
in my teaching style that you think
needs improvement, don't hesitate to let me know. But for now, enough chat again. Let's start off with our video. So what we want to do
now is we're going to be animating our train before
we move into the animation. I do want to one more time
visit my composition. One thing I want to do that
I've been thinking about is just stretching out the y axis. This picture here that
I'm using as a background and then just trying to
move it a little bit here, let me match it more with
the sun that's around here. There we go. I think this just works a little better and I'm
really liking overall this. The other thing that's
been on my mind is also since we've
added so much detail, I think it's a wasteful thing to not have the camera be
closer to the whole scene. I think I'm just going
to push the camera. I don't know. Something
like here we'll see. I think this is maybe too close, but maybe something like here. Let's see how much of our train fits if we have
the train coming. This almost fits a
way too perfectly. Let's just move this
slightly bit more backwards, just so there's a
little bit more room. I think this is right about
where I want the train to be. This looks pretty good. Perfect. From here, I would say now
we can start animating. This is going to be
our final composition. I'm going to go here
into the solid view. Then what we want to do is have the train
start from here. And then halfway
through halfway, I think we're going to do
like a 15 second animation. 15 times 24 360 frames, halfway through 18162, maybe
22, something like that. So it's like 3 seconds,
almost more than 3 seconds. Actually, we're going to have the train stop in the middle
and then move to the left. It all starts with essentially
adding key frames. I'm going to go here
under N and under Y, because we're going to be
animating in the Y axis. I'm going to press, sorry, Relic insert key frame. Or we could actually go
Insert Insert single frame so that we just work
with the Y axis. Since that's where
we're going to do it, No unnecessary
keyframe is added. Let's go like this. Let's
go, let's see, 160. Roughly 160. The train is going to come here. Click Insert, Single Frame. It's going to stay
here for some time. So selecting the
last key frame shift we're going to go to maybe 240. That's 123, roughly 4
seconds more or less. But it's not going to be exactly stationary as we see here.
Don't worry about that. Then it's just going to go away. Zoom like that, we
never saw him again. Insert single keyframe. There we go. Let's just take a look at how this
animation is looking. It's not going to be
perfect, far from it. Let's see, The train
is coming. It goes. It stops, Probably
very abruptly. Yeah, very unrealistic and
abrupt. And then it moves. I also think I want to move the camera just slightly,
a bit more back. Just let me see comes here. I think this is going to be a solid base for our animation. All right, so a couple of
things to work on now. Let's go into here our timeline. Press shift F six so that we
can see our graph editor. With here our main
train rigs selected. We can now go here, Tilda Rall. We can now see what we're
dealing with in here. Perfect. Let's just
move this like this, and let's just put this in here so we can see our scene
a little bit better. Oh, by the way, this
is such a nice angle. This looks so good. I got to say perfect. What
do we want to do? Well, we're starters here. Let's just select our Y. We want to have to train, slow down much quicker, so we're going to
take this here. Really sure how to call this
Bezier curve, hook or point. Then over here
we're going to take this one and then go like this. Now the train should be entering the scene very fast
at the moment, but we're going to have it
slow down. There we go. It's entering the
scene much slower. It's slowing down here. We're going to have it
actually, once it slows down, I'm going to have just move slightly bit more then I'm
going to take this part here. I just move this slightly down. I'm going to take
this handle here, press push it here. And I'm going to take
this one, press S there. The idea is it's come
here, slow down. But it's going to have like
this very subtle movement when it comes and slows down. So we'll just connect this. Then here we're going to push this handle
drastically like this. We're going to push this
one drastically like this. The acceleration is
going to be very rapid once it goes past our screen. It really fast, slows down, keeps very subtle
movement forward. We might need to maybe subtly
rotate this little bit. Just did a very small rotation. Might even need to
do a little bit more to push this up
to Z, just like this. Let's see how this is
going to look now. Much more natural, there we go. Then it goes, the train stops, but it still continues
this momentum forward, which is perfectly what
I wanted to go for. It slows down, has
a very slow stop, but it keeps moving
a little bit more forward and then it goes
back and accelerates. Excellent. We can even see. Let's just
preview this as an animation, even though it's going
to be very blurry. But let's just see how
it's going to look like. So the train comes, slows down and then it
goes away. Perfect. All right, then we
have the water here. For the water, we do want
to animate it as well. I think the easiest
way would be to play simply with this factor. To animate the water,
what we can do. Let's just push this here so that we have a bit
more of a viewing space. What's going on? All right, let's move this a
little bit more here that you can even zoom in here a bit
more into the water. Maybe it won't hurt
us, for starters, to just have it be in
their material preview for now so we can see what's
happening in here. We're going to go into
our shader editor. Actually, let's see, where do we have our
Musgrave, which is here. We're going to go here and add, I believe we need
to type in frame. Let's see, this is what's called a driver that's going to
help us drive this value. Now it's going very fast, obviously we don't
want it like this. We need to go and
maybe by divide it by 6,000 now it's much slower, maybe by 5,000 because
it's way too slow. All right, this is
looking much better. We could also maybe do
this or our mapping. No, now this is your choice. Where do you want
to move the water? Where do you want to move
it? In this direction? In this direction, or x? This is purely now your choice on which angle
you want to move the water. Think I'm just going to
go here for a location. But it's, let's see,
has frame divide by 5,000 Maybe I'm going
to put it, let me see. I can put a negative 5,000
It moves like forward, a little bit like this. There we go. Let's take a look at rendered,
how this is looking. Obviously it is a bit blurry. It's going to be hard to see. But I think this really good, we can maybe slow
it down even more. I would say maybe
we put everything to 6,000 so it's
not so aggressive. Maybe even more. Let's see, 7,000 here for the speed then thousand slower in
here, 8,000 now. It's super slow,
very barely moving. Let's see in our material
preview. Very calm water. Nice. We can also maybe
increase it if we want. This is now up to you on the
speed that you want to go. I think I'm pretty happy
with how this is looking. Maybe I want to lower the
distance so it's not so strong. Something like that. Let's just take a look at our
rendered view. We had the distance at one. I might actually
keep it at one now. All right, this is
looking really good, and I think we're
pretty much done with animating everything that
we had to this scene.
56. Setting up Compositing Effects: I was thinking instead of animating the water
in this video, because that's
going to be a very heavy and intensive process and it is going to increase our Ndo times very drastically. Instead of doing that, let's first focus on our compositing. Adding some glow effects, adding a little bit of
the aberration distortion to make this less digital and bit more like it came
out of a camera. That we can then render
our scene to test it out how it looks while
being very light. And then once we nail
all of our compositing, we can then go back and
do the water animation. It's a bit of an
unorthodox approach, but I think it's
just going to save us a little bit more time
because once we done the compositing and have the
water time is going to be much longer if something is not good with our compositing. When did then go back? What I was just thinking maybe while everything is still
going very fast, let's do it this way. All right. A couple of things
I want to start off first, looking at how my camera
is set up over here. I was actually
thinking of maybe just adjusting it slightly bit
more for the composition. Just pushing it Z, pushing it a bit
more down like this. And let me put the train here somewhere in the middle
so I can see better. Then I'm going to press R, Y, and then just rotate it more like this so
that the train is, I guess closer to the middle to, I get a bit more
of the water here, but also here of the
train like that. Let's see how that
looks. All right, I think this is a
bit better then. We can also just see how
the animation looks. So the water is moving here, the train is coming overall, it looks great, but our
image is very static. So what I was thinking
then is let's use the add on that we added
called the camera shake. Let's add some
motion to our scene. Let me just go here into the solid view so we can see how our scene is now looking. Once we clicked here and
added this investigation, I think this is obviously
way too aggressive. So what we can do is
maybe change the scale. It's quite aggressive,
may influence a bit, still quite aggressive,
maybe less influence. This adds just a little
bit of that movement. I think still it's
a bit too strong. Maybe just lowering
the speed is going to also help us do this. Let's see, while we're at it, I'm thinking maybe pushing
the camera backwards. But then I would have to,
because I do want it to be seeing just part
like this as a station. But then I'm losing all the
nice detail that we added. So this is going to
have to be your choice on how you want to handle this. I do like the fact that I
see these corners over here. It just adds a bit more
value to me personally. I think I'm going to go with that direction where I can see
the whole scene like this. But if you want,
you could also just do a close up as we just had even push it closer if
you want because we did add a lot of nice
detail onto this train. So something like this also works really well in that case. So it's going to be your choice. I think I'm actually
going to stick with this. So yeah. Hi editing Darren here. While I was going
through this footage, I realized that I haven't
touched the topic of camera settings in terms of composition and
depth of field. So I just want to
take a quick second to go over those two topics. Right here in our
camera settings. Over here when you go here
to the dead A properties we have under view per display,
our composition guides. And these can help
you quite a lot when working on
your composition. You just need to enable over
here your show overlays. And then if I go
here, for instance, under third, you can have this, you can have the Golden Ratio
if you want, like this. And I think this one
fits the Golden Ratio. If you look at how
we set up our scene, this is like what
we were going for. You have all these other things. Additionally, one more
thing I wanted to talk about is the depth of
field settings over here, which is very common if you look at footages with
cameras that are taken. Most cameras always
have that blur and nice effect in the background usually comes from
the depth of field. You can control this by enabling or increase or
decreasing the F stop. If I increase the F stop, which is actually a lower
number, that's how it works. You can see that my footage
becomes very blurred. But it needs a focus
object over here. I can just click say, the train. And then my train is going
to be a focused object. And you can see now
everything aside from the train disposition
is blurry over here. But this is obviously very
high level of F stop, so we can go much lower to
something more realistic, maybe 3.5 like this. Or if you want to go maybe
lower 2.5 something like that, it could also work pretty well. There we have it. The
only issue here though is that because we set
our side middle wood, this part here I guess
as our focus point. Because this is moving,
I'm not 100% sure if that's the best
practice to have that one. The focus point, you
can either select maybe an object
that's over here. That static, maybe
distinct here would be helpful because it's really close to the training
should be fine. Or if you want to be
even more precise, a common practice
to do is to add, let's say, a null object
right about here, where the train is going to be. So we can just have it
over here at the top. And we can call this
one camera focus. Then we can go
here under camera, say instead of the
side middle wood. Let's see, where is our camera focus that
we just created? This one here. Now
this object here and that we've created is always going to be
our camera focus. Regardless, we can use that. Now, there you go. I just wanted to
quickly gloss over these two settings to help
you with your composition. Now we can go back
to the tutorial. All right, while
we're now at this, let's worry about
our compositing. Now, I'm going to go here
into my compositing, I'm going to keep
my settings here. Let's put this 200 so I
have a bit faster render. And I'm going to
press Render Image. All right, so this is
the image that I have on my disposal. I'm
going to close this. I'm going to go use nodes and then over here
I need to add shift a viewer node so that I can connect here and see
what is at my disposal. I'm going to push this a
little bit forward here, and now I know you
can see my shortcuts. We're going to press
Shift and then right click and go like this. I have this and I'm going
to connect it here. This way. I don't need to add individual nodes both to
this corner and this corner. I can just have this
part here in the middle. To do that, I want to start
off first with the glare. I think that's like
the most important part that I want to work. We're going to have one glare.
We're going to have two, and then we're going
to mix them together. This one here, that's on top, I want to use what's
called a fog glow, and I think that's going
to be my primary glare. I'm going to reduce
this threshold, so if I push the
threshold to zero, I'm going to have this
very dreamy effect. Now that is great, but I don't think I want it
to be aggressive, so I might go to like 0.1
let's see, like that. I think 0.1 is actually doing a pretty good job,
if you ask me. Maybe it's a little
bit too strong. I see some clipping
happening here, so maybe we need to
play around with. Let's see, let's
go 0.8 to strong, so that we don't see any glow. Now let's see 0.6 It's
taking some time to render, but I can see a little bit
of glow happening here. Let's go 0.5 All right,
we're slowly getting there. I'm going to try to push
this glow as much as I can. 0.4 Let's see, 0.3 0.3 is looking really
nice, very dreamy. That's exactly what I want. Perfect. And I'm going
to go into here. I want to this one
here and I want to connect this to the
image. All right. This one here is giving
me this streak effect. I'm going to push
this maybe to two. I don't want to have this
many streaks. Maybe three. Yeah, something like this.
But this is way too strong. So let me see what
we can do here. This is going to decrease
it slightly threshold. I'm going to maybe
increase it a little bit. And then let's see, angle offset, I can play
with that a little bit. And then over here I'm
just going to push this. Let's see if it's half, so it's fully mixing
one and the other. I might even push
it to go like this, 0.2 Yeah, I think that
this works really good. So we have a little
bit of that streak happening at some corners here, but overall it's very
dreamy like that. This looks really good. The next one I want to do is add some lens distortion for this. I'm going to distort
it very little. It's just going to be like 0.005 So you're going to see a
very small distortion, you can barely notice. If you go like really
high, it's going to be like a fish eye look. So I'm just going
to go 0.00 maybe eight, very low distortion. I'm going to put
it here under fit, so it fills in the corners here, even though you cannot
see it that well. Then dispersion is
going to give me like a chromatic aberration effect. This is a bit too
strong, obviously. So I'm just going to go
and say 0.0 Let's see, 01. It's a very small chromatic
aberration effect. Just enough. Then we're off to,
let's see, Really, we want to just play around
with our color balance. I think that's the
key part here. What I want to do is push the lift into the
blue a little bit, which is going to pop
up these clouds and the shadowy areas make
them a little bit darker, which is really nice over here. Then I want to my gamma here into a bit of a red to get a bit more of a warmer tone like that. And I'm going to do the
same here with the gain, push it a bit more
to the red side, but I think this is a
bit too aggressive, so I'm going to push
the lift a bit. Up that's a bit too strong,
something like this. And then maybe gain also
a little bit more up. Let's push the gamma
a little bit more up. Okay, this is maybe a bit
too much for all of them. I'll maybe just reduce
the factor a bit. There we go. I'm
going to push this, let's see if I can just
push a little bit, push all of these
a little bit down. Maybe also a bit too aggressive. Something like this is not bad. I just want to add a
bit more brightness. I'm going to go and add a
brightness and contrast. Now I'll just go here. Brightness shift, right click, push the brightness to 0.1 If we go like this is going to go really high. As you can see. I just just one case. Let's go 0.5 I think
this looks pretty good. Then from here we're going
to add one more mix, but it's going to go before all the coloring and
effects and the distortion. It's going to go in here, We're going to be adding a texture, it is going to be used for
our noise to give a bit more of like a grain
effect happening. And to do that we
need to go here, under brush, click, new here. Let's see, where is it? Noise. There we go. We can just call this
noise like that. Then here we can
select this noise, put it here, then
add, obviously. Then we can reduce this
to be 0.1 Let's see, it's still too aggressive, 0.01 and we could go to multiply, let's try multiplying 0.1 There's some noise,
but not too much. Let's see if we go to one.
This is way too aggressive. Obviously, this gives us just a little bit of noise happening everywhere in
here, which is really nice. We don't want to also
animate that noise. I'm going to go here
and the offset. And press, I'm
going to push this all the way here to the
end of the animation. Here I put 360, press again. Now this noise is going
to be animated later on, but I think this pretty
much gives us what we want. Let me just shift right
click here as well. Connected like that. Let's have our noise here for our noise so that we can
have it like this accurate. And there we go. There
we have our scene. Let's just render an image to see how our scene
is going to look like. All right, This
looks pretty good. We can see our noise
a little bit here. Everything looks really nice. Let's see a scene where we
have the train also in here. Maybe like 95, rest
of 121 more time. That looks really
good. We can see the noise here, the train here. There is a bit of a motion blur because in here under
our render settings, we have our motion blur enabled. This is overall
looking really nice. Then maybe I want to try a scene where the train is
barely coming in, just so I can see how
the blur is looking. Something like this,
while the train is still relatively fast and we can
see the glow from here. So let's do one more test
render image that looks great. Excellent. I think now that we're done with
the compositing, we can move on to animating the water wave
effect in our next video. All right, they'll
be all for this one. I'll see you guys in
the next video. Bye.
57. Animating the Water & Rendering: This is, quite literally, it, The final video
before we even begin, all I got to say is thank you so much for watching
and sticking through 50 videos as someone who's been self taught
by watching tutorials. I know this is quite a lot and it's been a
very long journey. Thank you for sticking through. Thank you for watching
all of this up till now. If you've enjoyed or didn't, even if you didn't enjoy
it and watched 50 videos, kudos to you even more. But be sure to let me know. What do you think
can be improved? What would you like
to see in the future? I really hope on doing more
of these videos and I really to improve with
each video that I make so that the experience
can be better for you. Do let me know what you
think or what can be improved once you're
finished watching this. Now let's begin with
the final lesson. As you know in this video we're going to be building
out the wave animation. We're actually going to
be spending around 80% of the time building
the animation. And then the last 20% is, is going to be setting
up for the rendering. How is this animation, how does the wave works,
and et cetera. This is actually
my third time of building this whole
scene through. Each time I try to improve it and learn how to
make things better, and the wave part has
always been the trickiest. The reason for that is
essentially it's just going to depend on how you
sit your scene as well. There's a lot of factors
that are going to go into how our animation
is going to look like. Let's slowly begin step by step and then I'll try to
explain it to you for me. The goal of this video is to explain to you all the settings and how each of these
changes impact one another. So that you can then build the perfect animation
for yourself. Because this is a simulation, what I get in my results might
not look exactly like you. All right, how is this going to? Well, for starters,
we need to create an object that's going
to mimic this train. In creating these meshes, we could potentially
use this train, but this is a very, it's not that big,
but it has meshes. It's very separated
all of the parts. So we can make something
much simpler that can be much more efficient
in our process. What we can do is just go
here under mesh at a cube. And what I'm going
to do is go into the top view and just wait for the train to hit
somewhere around here. So that I can line
this cube better. I want this cube to be a
little bit underwater because depending on how your object is going to be
underwater as well, it is also going
to reflect on how, what kind of waves it creates. So I'm going to push the
cube a little bit more here. I'm going to then go here
and push the cube like this. I'll take this part,
push it a bit here. Let's see, push this like that. I have added a little bit
of a loop cut over here. Push this a little bit
more to the front. I could just, Let's do this. Let's see, maybe I don't think we need to
even add a subdivision. We can just stick with
something like this. I'm just going to corner
these edges a little bit. Something that, or let's just go one less,
something like this. Let's see, let's do
something like this. All right? We don't
maybe need to even have it be this thick. So we can go a bit
more like here. I guess this part
that we have in here, we can maybe make it a bit like this and then
select this part. Let's deselect over there here. We might need to actually expand this a little
bit more like that, but this gives us a pretty decent front part of the train. We can go into the edit
mode, select everything, shift to duplicate it like this, and then z, and then type
in 180 on your keyboard, and then Z to just
put it over here, you can select this part, it's roughly over here, maybe a little bit more. Or is this like that? This is going to
be our base mesh. It really needs to not
be a lot of details. Just something like this is
going to be enough to disturb the water and give us the waves that this train
will usually create. Next, we just need to take
this into the train applied, we can call this train waves. And then holding shift main
train Rick, just like this. Perfect. Okay, from here I think we can now
start adding the waves. As you can see, if I press Play, the object is being animated because it's
inside the main train. Rick, let's keep this
visible for now. Here, we're going to
actually hide this water. We're not going to
use this. We can go at a plane scale, that plane. Let's something like this here. Then maybe scalativen more. It's around here
covering the camera. We can hide this here. Then we can go and add
the water material. Let's call this water
waves. A couple of things. The quality of the
waves is also going to depend on how dense
this mesh is. Right now, it's just one plane. So if I go into the edit mode
and I click subdivide 123, and then let's say I go into
the subdivision surface so that we can add the modifier and I remove
the optimal display. And I press the semicolon, or if you haven't
added the shortcut, you can go here,
press the wire frame. You can see how many
of these you have. This is going to be very
little, by the way. We're going to have to go
way more just for context. We're going to probably
have to go this much, but we're not going to go this much at the very beginning. Because then our
animation is going to be very slow for now as
we slowly moving forward. Let's keep it low to
something like this. All right, now it's time to
add the physics properties. While I have the
water waves selected, I'm going to go here
under the dynamic paint, I'm going to press
canvas and select add cannabis under
the surface types. I want this cannabis
to be the waves. Now we have this
part here set up. Next we need to add a brush. We go again into
the dynamic paint and the brush is
basically going to be the object that's going to disrupt the canvas that we have. Now that I've selected here, put the brush, added it, and I go, let's say it here to the very beginning. Let's see. Just make sure that this object is a little bit more
underneath the water. I would say something like this. If I press Play,
you can see it's already a third to happen now, I just going into those
shade smooth and here we go. Now as I said, depending on
how many of these we have, the quality of our waves
is going to be better. But the more we add, the scene is slowly
going to be laggier. As you can see, once
I go to pass six, it just gets crazy. This might also depend
on you as well. Just be clear sure of what
you're doing in that case. Let's talk about
now the settings. Well, one thing that I found
to be working for me that is breaking the rules
a little bit is I wouldn't apply
the scale at all. I wouldn't go control a and then apply scale Something
that we would usually do. Something that you're
usually told in a lot of these tutorials to do. In this case, for me
it just would mess up the waves from the outcome
that I wanted to be. I kept the scale as is, and as a matter of fact,
I even played with it. And I'll show you a little
bit later how from here. We have a couple of settings. By the way, if we go here under the physics properties or the canvas, we
have timescale. Timescale essentially
just is for the waves. The bigger the timescale also, the more the
waves you have. If you see here, if I reduce it, it looks like you're
going on snow almost. But then if I
increase it to 150, it goes like this. This is what the
timescale setting does. Then we have the speed. The speed is quite
literally, as it says, the faster the waves, or if you would reduce it to 0.20 scroll all the way
to the left, the slower. But something very
interesting also with the speed is it can go slower than 0.2 You just need to type
0.1 for instance. Here it works. There we go. At this point I think we can
just hide this part here. So we can press here, this, and I can hide it
from my render. But we need to keep
this one here so it affects our situation
in the view part. All right, this is what
we're getting so far. Sweet. Let's go into our
settings a little bit more then. There's damping. Damping
gives also that snowy effect. If I go all the way to one
and I increase the damping, you'll notice it creates
that hard surface effect. If I push the damping, let's say to 0.5 it becomes
a little bit more mushy, a little bit more like jellyish. Then if I increase
it all the way, let's say to point 0.05 then it's looks like water,
which is what I want. All right, then
there's the spring. And this one is very weird
to me because I don't know. It says here, if I
hold, hover my muscle, it's the spring force that pulls water level back to zero. My logic is that if this is one, then that means the force
is supposed to be stronger and the water is going
to go faster to zero. But when I do a comparison,
and now from here, let's say I go to 0.01 I don't see that
much of a difference. As a matter of fact,
at 0.01 I see it being much calmer
water then it is. At one, as you can see here. I'm going to keep
this at one for now. But this is going to be the setting that I'm
probably going to have to experiment with
as I move along. All right, then we
have the smoothness. Smoothness is fairly
important because that helps us smooth out the
mesh a little bits. As you can see, if I
decrease the smoothness, it looks like this. You have all these
brakes happening. But then if I increase
the smoothness, it looks much cleaner. But I think you don't want
to go way too smooth, so you might want to be
somewhere around four. All right, here we go.
This is what I get. Then let's see the last one which is if we click
on the train waves, there is here under
waves there is this one called depth change type here. We can just change
this factor to be, let's say, something stronger. And then it's going to
impact how much it affects the objects of the
waves are going to be stronger or weaker. For the factor I'm going
to put in here, negative, actually 1.5 I found out that
I've put it to negative, I get a very nice effect here
at the front, which I like. There we go. Now there's this weird situation happening over there that
we need to also address. This is the part now where we can also try
out these, I think. But I don't think I
found any, any results. I think by the default value was the one that worked for me. So you can see depth change. But yeah, this brings us
now to the final part, which is talking about
how to adjust the mesh. If we go here and add one more, our scene is going to start lagging like crazy,
as you can see. Now we need to stick to five. But what I found
out was as well, if I adjust the way that this topology
looks, for instance, if I scale it in the y axis and I get a bit
more like a shape like this, it actually works better. For some reason I'm
going to go like this. I'm going to reduce the
scene a little bit, to condense it a bit more, then make it a bit
more like that. If I have this like
cuboid polygons, if I go here, check
out the scene, this works quite great. Another thing I found as well is that maybe I
could just go and slightly increase this here. The scale in the z axis, that's also going to impact
my waves a little bit. But before I even
go and do that, what I recommend doing is
baking your animation, saving it into the memory. If you go here under the
physics tab and I press bake now it's saving
the animation here like that so we can
see how it looks like. As we can, I press here S Z
and increase it a little bit. It's going to add a
bit more higher waves over here, which is pretty cool. There we go, Think in my case, let's just see how
this looks like. This looks very interesting. I'm going to reduce
the spring to maybe 0.5 but then every
time you do a change, now we're going to need to
delete the bake like this. Then bake one more time. Now let's see what's
happening here. Very cool. Looks very nice. Now I can go here and maybe increase the waves a
little bit like that. One more thing that you could do potentially is add
here the substeps, which is extra frames
between scenes. It smooths out the
motion a little bit, but the more you add them,
I think it goes up to ten. The more you add them, longer it's going to take for
your scene as well. I'm going to go
bake one more time. Here's our scene. Let's just see how this looks
like. It's very nice. One thing I would do here is just check how it
looks like when rendered. Let's see. I think the water is maybe a
bit too bluish for my taste. You might want to just go here under material
and just take the water blueness just slightly down to
something like this. All right, let's
go back to solid. This is almost there. One more thing we're
going to need to I. Recommend adding one more level of subdivision then
we can apply this. Let's check out
how it looks like. You don't necessarily even
need to maybe apply it. Let's go back one more step. Let's just check in
terms of the mesh. Yeah, I think this is
going to be barely enough. We're going to need to now
bake this one more time, then we can do a render. I'm going to bake this. It's
going to take definitely longer now because of
the scene being bigger. There we go. Even if
I try to preview it, it's going to go slowly. As you can see, this is pretty much the final
outcome that you can expect. What you could do,
maybe just push this Z to increase that
wave slightly a bit. Oops, that's pretty much
what you're going to get. That looks really nice.
Let's take a look here. If your animation is lagging, you can go here under plate
back and say frame dropping. That way you're not
sacrificing the speed, you're just
sacrificing the frame. It is still lagging,
but it's going roughly the same speed that
you would expect it to go. This looks I would say pretty. Okay. Once you're
done with that, you could maybe do a test here to see based on the current
settings that you have. Let's go here. Max sample
is 100 open image. Noise We have motion
blur turned on. Let's just render one image. See how long it's going to take. Not bad at all. I'm getting 12 seconds per
frame, which is pretty good. I would say that means
add either more detail to the mesh or let's
see, add more samples. I go 200 samples here,
that's going to be double. I think this is pretty
much it depending on now whether you want to do your compositing and
inside after effects. But then the one that we did here doesn't
necessarily apply to you or you want to just
export it as a video. You can go here, choose
either PNG or you can go here and choose a video and
click Render Animation. That's pretty much going
to save your file, play around with these settings
that I just showed you, and try to get an animation
that works best for you. As I said, once again, seriously, thank you
so much for watching. I hope you've enjoyed it. I really look forward to seeing you in one of the
next editorials that I do. Thank you.
 Daren Perincic