Transcripts
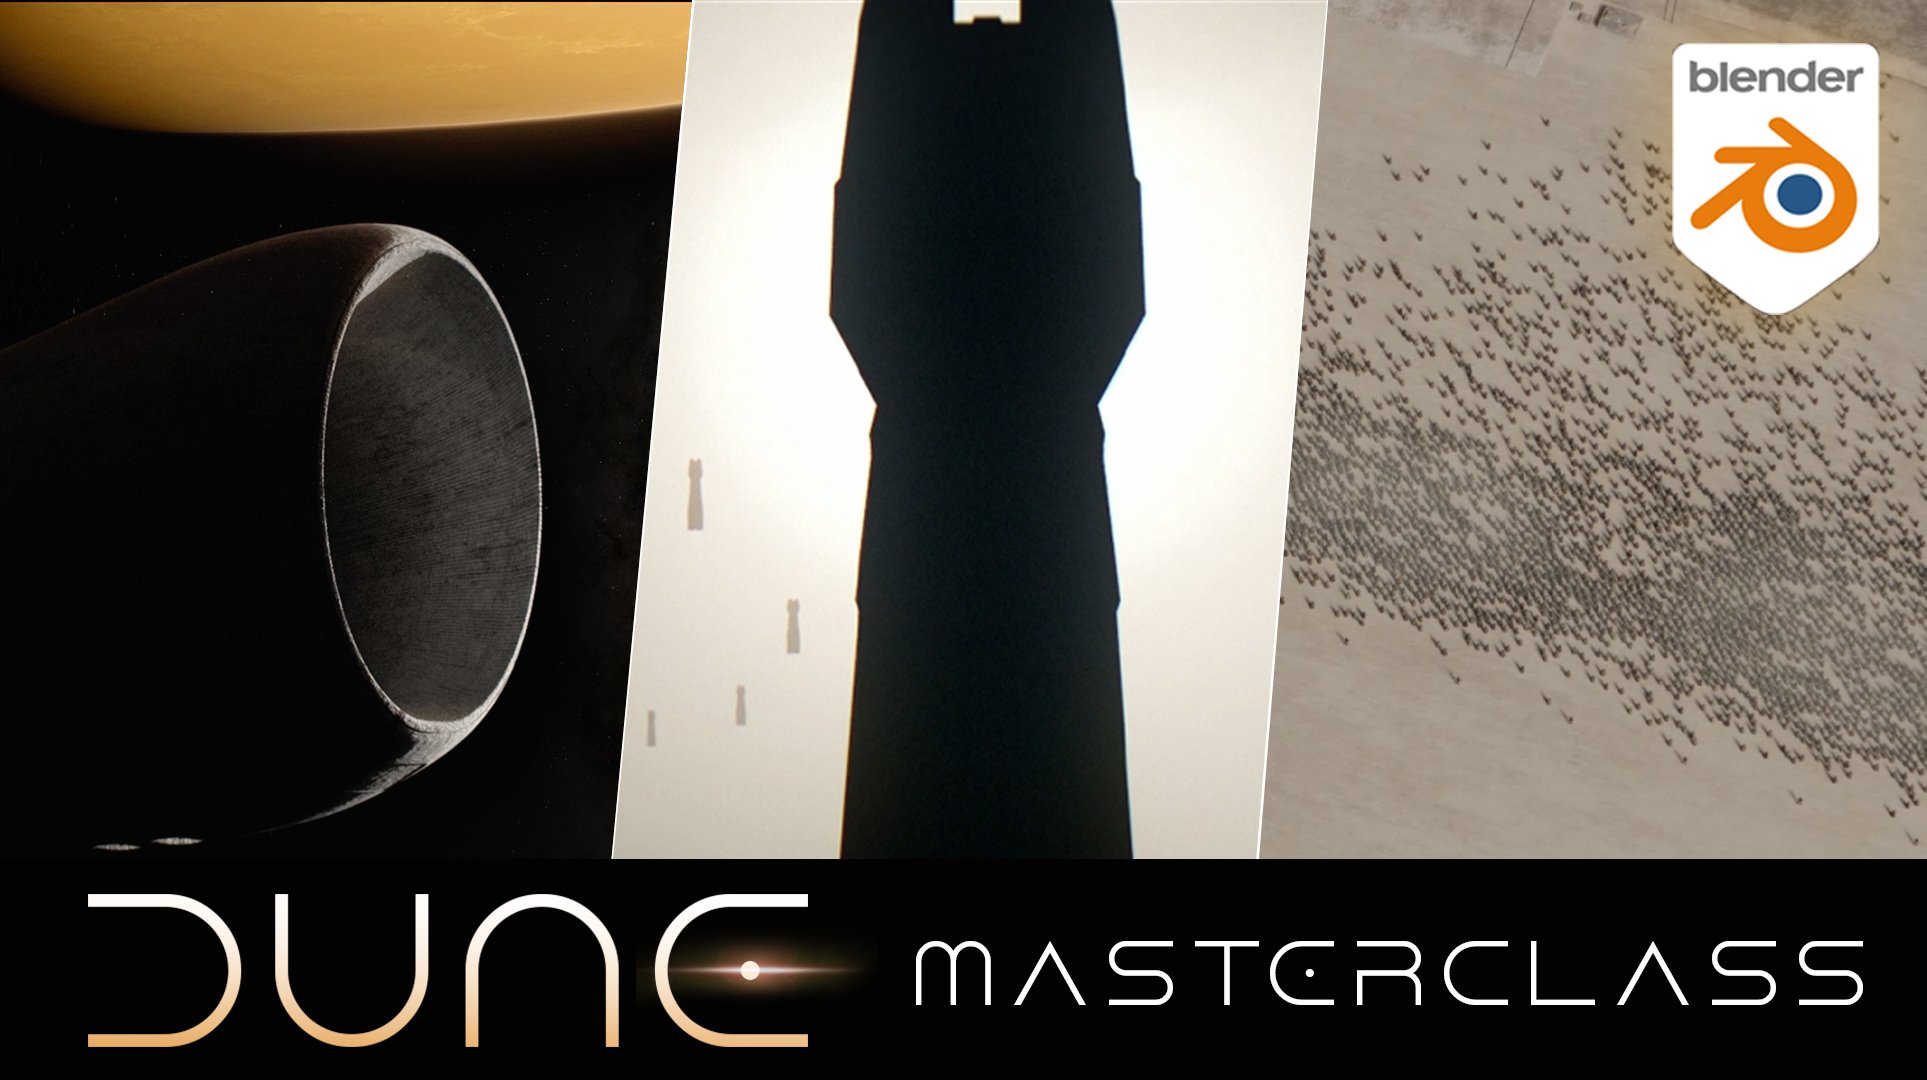
1. Course Overview: Hi. Welcome to Part two of
the Dune Master class series. This is a step by
step tutorial where re recreate movie
shots using Blender. If you haven't watched the
previous one, don't worry. This also works as its
own individual course. That being said, I P one, we created our opening shot with the highlander arriving to
the planet racus in space, and now we'll continue our sequence as our ship
enters the atmosphere. So if you wish to have the
whole sequence completed, I do recommend checking
Part one first. The previous course was
more evenly focused around modeling text
animation and post. In part two, we'll spend a
good portion of our time building a geometry note
system to distribute scale, scatter, and animate our ships. Additionally, it doesn't mean we won't be doing other
things as well, though. Once the scene is
completed and blender, we'll jump into
after effects and continue the rest of
our work in post. So with all that out of
the way, let's begin.
2. Onboarding: Ally at the beginning
of each course, I like to have an
onboarding video where I talk about the tools, plug ins, and shortcuts that I tend to use throughout
my projects. This on boarding video was
actually made for part one, but since it covers most of the tools that we'll
use here as well, I decided to keep it instead
of redoing another video. So with that in mind,
in this course, we won't be using
the first three shortcuts marked on screen, as well as the
bottom two plug ins. So if you wish, you
can pretty much skip those sections and only check out the lock camera shortcut, as well as how to install the node wrangler and
copy attributes add ons. If you're already familiar
with all of those, then you can entirely
skip this video, and I'll see you in our scene breakdown in the next chapter. This is going to be a
very quick boarding video in which I'll explain some of the basic shortcuts and
plug ins that you'll see me use across the
tutorial as we go along. And so if you're familiar
with all of this here, you don't necessarily
need to watch this video, but I would suggest maybe
going to the very end and just watching the last two if you've never used these two
plug ins before. And for the rest of you, you
can just sit back, relax, and enjoy, as I explain some of these basic things
on the right side. Starting first with
our shortcuts. And one of the first
shortcuts that I want to talk about is the
show wire frame. Now, by default in blender, you can't really
see your wireframe unless you go into the
edit of your objects, so by pressing tab,
and now we can see it. And so if you're in object mode, the only way to see your
wireframe is by going here, right click and then going into the wireframe of the geometry. And this is a little
bit tedious for me personally. I'm a bit lazy. And so what I've
done is I've signed the wireframe to be
to my semicolon key. So whenever I press it, I can see my wire frame like this. Can just do this yourself by going here into the wireframe, right click right over here on this check mark and then saying either add to Quick favorites, which is a quick queue
or to change shortcut, in my case, because I
have it already assigned. In your case, it will be
assigned shortcut, I believe. And that's pretty much it
for the short wireframe. The other one is
face orientation. And sometimes when
you're modeling, you might have issues with your faces and with your shading, and this can be often caused by your normals not being
in the right direction. And so in order to
check your normals, you usually have to go under
face orientation like here. And again, another thing
that's a bit tedious. So what I did was I assigned the face orientation to be
inside my quick favorites. So whenever I press
Q, I can see here, face orientation
and go like that. The next one we have
is faces by sides. And this is another
one that is only available to see once
you're in the edit mode, and mainly it has to do because
it's used for modeling. It allows us to see if we have any triangles, gons and such. Essentially, the
way faces by sides works is if we go
under Select and say, select all by trait, click here, Faces by sides. It's going to highlight all of the objects that
have four vertices. If we say five, it's going to highlight all of
them that have five. And then if we say three, it's going to highlight
the ones that have three. And so when we're modeling, for instance, the
highliner here, we'll always want to work in
quads having four vertices, and this is going to be used just to double
check if we've done everything correctly
in that regard. So usually, you'd
have to go here under select select by
trait, faces by sides. And what I've done is,
I again assigned it to a quick favorite
shortcut because this is something that I
tend to use quite a lot. So when I press Q, I have it right here under faces by sides. Then we have the lock camera. And this one should be
pretty straightforward. So something I didn't like about Blender when I moved
from cinema for D to it is that when I press go into my camera
view using Tilda, I can easily leave
the screen like that. And even though Blender
now has added this button right here to toggle lock
so that we don't leave it. I still find it a bit tedious, and I prefer my method
of where I just go here, and I assigned the shortcut of the lock camera to
view as my quick here. And so whenever I go Q
lock camera to view, it's just quicker to have it
always here at my disposal versus having to go either to lock or to go to this
button right over there. And those are pretty much all of the shortcuts that
you will see me use, I believe, and now we can
just jump into the plug ins. The first one being pretty
much your all favorite that I'm almost certain that all
of you are familiar with. But if you're not, that is
the node rengular add on. And to install all the
plug ins, by the way, I would say these two come
natively within Blender, and these two we will
have to install manually, and I'll show you
all the resources and the links where to get them. So for the node wanguller, all you need to do is just
go under edit preferences, and the node wrangler is
a native blender add on. So if you go in here, tap in node wrangler under add ons in the preferences, you'll
be able to find it. So what the node wrangler does, if we go here under shading, I have here this
material set up. And let's say I
want to take all of these objects and simply assign them to
create my material. Usually I have to add them
one by one like this, which again, can be a bit
of a tedious process. And then as well, you need to connect all of them properly, so Mod needs to go color. You need to also
take your roughness, connected here in the
roughness, and et cetera. So again, a bit of
a tedious process. But with the node
regular add on, we can just press on
the principal BSDF, press Control Shift T, and then select all
of these materials, and it's going to immediately
connect them properly. So we're saving a
lot of time and doing unnecessary
busy work here. Additionally, the
node regular add on comes with a bunch
of other features. For instance, if you press
control shift and left click, you can preview the
textures individually, and this is going to be
very useful when we start billing our textures
for the highliner. And then also, for instance, another cool feature is, let's say, we have a
noise sure right here, and then we have another noise
sectione right below it. And now we need to mix
these two together. By default, you would usually
have to go mix tip in here, mixed color, adding this node right here and then
connecting them individually. But with the node
regular add on, if you press control shift, reli with your mouse like
this, move it downwards. It's going to immediately
create a mixed color node. So, very time saving tool.
I highly recommend it. If you don't, I don't
think you'll be able to do this
tutorial without it, at least not exactly, and it's going to be much
bigger of a nuisance, so I recommend adding this
one to your plug ins. All right. Then we have the
copy attributes add on. And the copy attributes
is again a blender, a native plug in
that you just go here under edit references. Type in here copy
attributes. There it is. And what this one allows us is to essentially,
for instance, I have here a cube that has also a subdivision and
array modifier in it. And let's say I want
to now transfer these two modifiers to
this cube that has none. Usually, you'd have
to go here manually, type in all those modifiers, assign the values, make sure that they have the
same numbers as here. And so, again, a
tedious process. But with the copy
attributes one, we can just press
here, whole shift, press on the other
one on the left, press control C and say copy
modifiers, for instance. Additionally, it comes off with a bunch of other
stuff in the menu. Let's say we have, for
instance, copy location, so it's going to copy
this location to this one here of the
original that we selected. So very useful tool. You've seen me use
this quite a lot, not just in this
tutorial, but in general. I use it almost every day. Then we have two
more plug ins that aren't coming
natively with lender. The first one being
the UV squares add on, and I'll actually need to
maybe undo this one more time. So let's just press tab. As here you see me having ss, so I need to UV
unwrap this model. I'll press A, U Unwrap. And so now if I go under my
UV editing, inside of here, you'll see that this is how
my UV It's pretty good. But let's say I wanted
to make these lines be completely straight
and not have them bend over in these
corners like this. This is where the UV
square add on comes in. If I go here under
my UV squares, and let's see Snap
two X and Y axis, it's going to straighten out
all of the corners nicely. And this is not a native
blender add on, but it is free, and the link to
download it is going to come also in the resources file. So when you go, you'll find it right here in the
GitHub repository, you can go here under code, download it as a zip. And then once you download it, all you need to do is go
into your preferences, click on install, find it and install it. And
that's pretty much it. And the last plug
in on our list is quite literally the final
plug in that you'll see me use inside
of Blender as we go in the tutorial
at the very end. And this will allow us
to essentially send tracking data from Blender
into after effects. I'm not going to be
doing that right now, but essentially, for
instance, if I press play, you'll see me that this empty is following this cube
as it moves along. And so what the plug in does, it's going to allow us to send
this data from this empty into after effects
that we can then later on use for compositing. This plug in also comes
with in the resources file, so you'll be able
to just go edit references and install it directly from the resources file that I'll be sharing
with you as well. You'll see me using
this at the very end. In general, you simply need to select the MT that you need, go into file, export, and AdobF Fax JSX. And that's pretty much it. We've covered all
of the shortcuts. We've covered all
of the plugins, and I'll show you
how to install them, so you're now more than ready
to start with tutorial. I'll see you in
the first lesson.
3. Scene breakdown: There. Welcome to part two of the Dune Masterclass
series in Blender. In the previous video, we recreated the
shot where we saw the highlander arriving to
the planet Irakus in space. And now as the shot continues, we see it entering
the atmosphere. Now, if you haven't
really dumped P one, you don't necessarily need to because the only
resource that is going to be reused from Part one is going to be the
highlander itself, and that's going to be attached inside the resource folder. Now, that being said, I highly
recommend also going to part one and
recreating these shots that you see here where the
highlander is arriving, just because you can
then have obviously the entire sequence versus
just one scene of it per se. All right. So in this video, there's not really much that
you're going to need to do. This is more of my conversation towards you and breaking down the shot step by step of everything that's
going to have to be done, so you can pretty
much lean back. One thing that I would
recommend is going on YouTube and typening in arrival to
Iraqis from Doom P one. And so there's
going to be a bunch of videos that all
are going to have pretty much the same three shot sequence that we're
recreating here. You might also come across
my video if it says Dot and Pechch on the YouTube
account. That's my video. Be sure to, you
know, if you want, like it, subscribe,
highly appreciate it. But in the meantime, let's break down our shot. So, again, as mentioned, we see the highlander over here, and then we see
these small ships. And right off the bat, one of
the key, important things, key most memorable
things about doing cinematography is
the sense of scale. Now, here we have a sense
of scale and distance, like There's also, like these small ships
all the way here. You can barely see them, and then there's this one right around here where I'm
coloring with my mouse. We just changed the color, so
it's a bit more noticeable. This one here, and then these
ones are all the way here. So there's a huge
sense of distance, and then there's a huge sense of scale because the highlander, even though it's so far
away, it's still enormous. And these ships are carrying people inside and so we
can immediately perceive, like, Okay, so people
are, like, you know, this size, then the
ships must be even huge, which means that the
highlander must be even bigger than all
of that combined. So then again, very important, there's going to be a lot of very intricate camera
movement in here, whereas in the previous course, it was pretty well balanced
in terms of animation, cinematography, texturing,
modeling, geometry noes. This one is going to be
slightly disproportionate, and part of it is going
to be also because of the very intricate
camera movement that we're going
to have to nail. And so that's why also I highly recommend going to
YouTube and following how this sequence
looks like because I can only show you this
much from images, and I don't want to get a
copyright strike or anything. So as we go upwards, then we see that the camera has slowly moved and bend
towards the right. And that also means we're
now also starting to get a little bit of a lens artifact here like lens flare as well. And additionally, as you
move in closer to the ships, we can see that we're having a little bit of
chromatic aberration, where here it's red,
here, it's blue. And so as we continue to move
up, the scene continues. Now it's even more panning
towards the right, and we see way more
ships even closer to us, but we're also getting this
lens flare from the sun. Part of the lens flare
is going to be done within after effects
in post production. Actually, you don't even
need after effects. You could potentially even
do it in Premiere Pro or any other video editor, but we are going
to be using after effects for discourse as we
did in the previous one. And so we have this lens flare that's almost like blinding us. We see have some artifacts here with the different
coloration happening. And we see this ship really up close to the
camera that's almost cannot even pretty much fit the camera frame as
it's close to it. And then it keeps moving
towards right and now this ship is slowly
starting to cover the sun, cover the lens flare
that was happening. And then as we move forward, the camera still keeps
moving towards that ship, and it comes closer to closer, and the ship has completely
blocked out the sun. And so in short, that is the sequence that we're going to be building here. And so Now that you've seen
it hopefully on YouTube. Now that I've broken
it down for you. I want you to take
a quick minute in between now pause the video, you know, take a quick minute. And just think
about how would you approach building
this scene, right? Because we have the highlander. We already have this
resource, okay? We know how to distribute
things along the curve, because we've done that
in the previous video. So we've distributed
things along the curve. We distributed those ships
when we were creating this here over here. We were
distributing them. So we know how to do
that. To a degree. So what are then the challenges that we're going to
have to overcome in this video that
we haven't done really before? Think about that. Additionally, how
are you going to approach modeling these ships? Right? Then this is a bit of a trick question because
in the next video, we're going to be actually
building these ships first. But just think about
it for a second. How would you approach
modeling them, right? You know, think. And let me see if I pretty
much covered everything, and I believe that
is grammatic I think we're pretty much there, because besides what
I just mentioned, there really isn't much else that we're
going to have to do. But those little things are going to take
a lot of our time. And for instance,
with the highlander, we're just going to have
to change a little bit of the roughness here because
we can see that there's a little of a glossy
effect happening as it as it touches its
material, the light. And then lastly, which is maybe the most important
part of the shot. And that's also going
to depend heavily on the resources that
you have available within your device is, well, as you notice, obviously, the shot takes place inside
of a foggy environment, which means also
that we're going to have to be using
volume metrics. Now, you don't necessarily
need to use it. You can still recreate the shot, and I'll show you a way
also using Z depth. But it's still not going to give you
exactly the same effect because we're going to
need to use volume to get like this look where the light is interacting
and scattering. And so we're going to have
to control the enotrop. That's the effect, I
believe, a volume metrics, that controls
essentially the way that the light scatters
inside of a volume. And so that is going to be
even if we optimize our scene, which we'll try to
do our very best to optimize it as much as possible, it's still going to take
a lot of resources. So depending on what kind
of machine you have, it's going to vary how fast the scene is going
to either lack or so, luckily, like I said, There isn't too much texturing that's going to be involved. There isn't even
too much modeling. And so this course
is going to be both geometry nodes and animation and
cinematography focused. So I think that pretty much covers everything
I wanted to talk about. So we're 7 minutes in, which is under
ten. That's great. And welcome to p21 more time. Thank you for continuing
watching my videos, and I'll see you in the next
one where we are going to start modeling the ships.
Looking forward to it. Cheers, guys.
4. Modeling the ships: Have a completely new
blender file open, per usual, on the left side, you have all my keystrokes, on the right side,
you have the PUF, which you can
access also through the resources folder where all of this is going
to be attached. And lastly, I'm using
the version 4.1. Now we can go also below
that. I believe 4.0. But just in case, I
wouldn't go below 4.03 0.6 or 3.9, I believe. So yeah, go between
4.0 or above. In any case, in the
previous video, I did ask you to kind of stop
and think for a second or how would you approach
modeling these shifts, right? And so if you kind of
came up with a solution, and your solution
was, by the way, you don't need to
kind of like do this, what I'm going to
do now, you can just relax, enjoy, sit back. And if your solution was
essentially to, you know, take this cube, goal let's say in front of you
start extruding it, and you know trying
to match, like, let's say this shape
here that you have, where this then goes
additionally extrude it. You scale it in the xx, you extrude it one more time, you scale it one more time, you extrude it one more time. Then you have something, you know, like this. And you cut it, and
you kind of already have a pretty
decent base for it, I would say, you wouldn't
be wrong, right? Like, you wouldn't be completely wrong in
going this direction. But if we look really closely at this image
as I reference, we don't really have
any depth to it, right? Like, we have height. So if I go into my front of you, we have the height, we have
the height here as well. We have the width, the
width is here as well. But there is no sense of depth. Even if I Zoom in
really, really close to the one super close
to the camera, you can still only
see the silhouette. So, in reality, We can
pretty much get away with just using a simple plane like this without
any need for depth. And so that's exactly how we're going to be approaching
modeling this. Again, you weren't wrong, and if you thought about going with the
cube, you're not wrong. If you thought about going
with the plane, good job. But just from a resource
optimization standpoint, there is no need to use a three dimensional object for the model of the
ships in this case. I wouldn't be surprised
if they actually didn't use three
dimensional objects. They maybe use planes.
Like, there's no way of telling exactly here. We don't have any
depth information from these ships, I would say. So the way we're going to do is, I'm just going to press A to delete everything and
then x like this, so I have a completely
fresh blender file with no stuff in it added
at all whatsoever. And I'm going to go
into my front view. And this is kind of
important because we're going to be adding a
reference image now, and so the image is
going to be added based on our point of view. So if we're in the front view, the image is going to be
also in the front view. So if I click he reference, I'm just going to find
where I added it. It should be called
Scene two reference. You'll find it inside your
resources folder again. And so I'm just
going to load it, and there's my reference image. And so what I want to do
now is simply just make this reference image
unable to select it, so I don't want it
to move around, so that way I can hover my
mouse click around like this. And I'm just going to go shift a ad mesh and go at a plane. This plane, I do want it to
be aligned towards my view, so I'm just going to
press here aligned view. And now with this plane, what I can do is simply take
the biggest ones that I have here and just try to match
kind of their shape. So roughly the height
is around here. And then there with, I would say, this is
pretty good enough. And additionally, we can actually just add a
loop cut right here, cut this part out completely, and use a simple mirror modifier to kind of cut down on our
time, and there we go. So make sure you also have
clipping you're enabled. So that way, this
part is clipped, and whatever we do here is mirrored on the
opposite side as well. Alright, F here, what
we really need to do, the only thing we
need to do is start adding cuts, a lot of cuts. So everywhere where you see
like this little indentation, you're just going to
be pressing control R and adding cuts, and then trying now to
match these cuts like this. So we have one roughly
here that goes there. And again, you can actually, do this in your own way. You don't have to match this exact look if you don't want to. I do want to be as close to
the original as possible. So that way I'm
doing it like this. So adding a cut
right around here, adding one right here, adding another one right here. And the reason why
we're adding two cuts all everywhere instead of one is because we
also have like these little angles that
we need to meet. So that's why we have
also two of them. So this one here,
this one there. That's very good.
Let's see, over here. There's a very
subtle indentation. So what we're creating now, if we zoom in closely are these little indentations
that you can see, kind of like almost like steps. They do look very
steppy, I would say. That's the right
word to describe it. And so we have one
here, one over here. And then again, we need to add another one because
we do want to achieve that step kind of
look. There we go. And then here, we're
going to need to drop one right below ops. Not that, in here. It's a dropping one, going
inside, dropping another one. Let's see how this looks like. There is a little bit of
like an extra one here. Let's see. Let's just GG to slide
it up a little bit. It's really hard to tell
just by looking at this. So I'm just going to
zoom out for a second, try to see if I can
tell any difference. I guess it's really
hard, so I'm just going to improvise
this part on my own. Push this one maybe
slightly more, push this one slightly
in. Kind of like that. Again, this part now, it's a mixture of using a reference, but also slightly
improvising as well. So it's combination of
both worlds, to be honest. So this, and then one
more. Going inside. And then from here, we can
just push it like that, push this one here. And this is our first reference. Now, obviously, it doesn't
match exactly with this one, because if we look at it, I believe this one is
also slightly rotated, so it's not going to
be perfect, perfect. What we could do potentially, if you want is, you know, make this click hole
again and then just do slight rotation to try to
align it a little better. That's going to, maybe help
you out and lock it in again. But I would say that is
a bit of an overkill. You know, we can do it
only for the first one. I wouldn't recommend
doing it for all of them. But it's going to be your call. I'm just going to be
showing you the tools now. So once we have this, once we have the first one
created like that, what you can go is simply
call this plain base. And so for the base
one, it's going to be essentially used to create
all of the other ones, but in the meantime, we can also press shift D to duplicate it. And let's call this
one plain one. So for the one, I'm going to hide the base, and
then for this one, I'm going to go press apply the mirror modifier
because we still don't have our word
cut out for ourselves. Specifically around
here, want to press control B while clicking on this horizontal, sorry,
vertical edge, and just spreading
it out like that, and then adding one word
cut over here on top, and then one extra cut
right here at the bottom. And we can click on this face right here by pressing
three and then going into our face and pressing x and completely removing
the face so that way, both sides, we get this
nice little indentation, and so we can do some
extra corrections now where we take this part. We spread it out a
little bit here. We take this part, we
spread it out like this, take these two edges, but now we don't have
the mirror modifier, so we need to be a
little bit more careful. Now obviously, not
everything is, even though if it's
made in the factory, it's never going
to be perfectly, perfectly proportional
on both sides. And so it's okay to have leave some room
for some imperfections. Where one side looks slightly
different than the other. But just be careful
not to make it too much stand out
because that way, it's going to be a little
bit more distracting. So additionally, what we
have this last part is, if we look at, there's a little bit of
extentation right here. Again, very small detail. It's probably going to be
only visible to the ones that are really up close
versus the ones that are back. You know, just make sure
that we do have it on some, or well, depending might
actually have it on all of them. So you can do it
by simply pressing control B on the cut right
there in the middle. And then three, pressing here on this
edge, sorry, pressing two, edge select, and then E, z, adding a little one,
right around here. Let's take a look at
how this looks like. There is a very subtle, I would call it scaling inwards. So S X And there's like a subtle scale inward and maybe
making it slightly lower, just a little bit like that. Is there anything
else on the bottom? Can we tell? I
think the bottom is perfectly clean, so
there we have it. Let's just hide it to take
a look how it looks like. And this is our first
ship that we've created. Now, we still have our
work again cut out for us because we have a couple of other ships that
we want to create. And you can go two
ways about it. Either you can use this
plan one that you created, or you can use the plane base, which is going to help you
making it mirror modified. I think in my case, I'm going to use plan one simply and then just
start duplicating, pick the ones that
are closest to you, so because they retain as
much detail as possible. So the one I'm going
to go with now is this one right here. Again, I can click this plan
base. Sorry, not plain base. I can click again on this MT and just rotate it
slightly to try to make this one reference as close to accurate and
straight as possible. And now clicking on the plane, I'm going to rename it to
number two, plane two. And just scale it
down and try to get it to kind of look close
to this one as possible. So, for instance, this is
going to be slightly lower. Let's see these two sides. Like I said, I don't
want to mess too much around with each
side individually, so I'm just going
to try to scale it horizontally a little bit. And this is already
looking, you know, overall pretty good with selecting these two
edges, moving them here. These two moving
them slightly more. These two moving them
slightly more in D x axis. Then taking these two, moving them a little bit more inward. Like that, I would
say everything else is looking roughly okay. I might actually take this and make it slightly more wider. So we want to have some slight variations between the ships, but not too many of
them, obviously. So then we have one,
two ships so far. Let's add a third one. For the third one. I'm going to go with the one
right below here. And again, same
process as before, where I'm going to rename it. Now to ship number three. And then I'm going to
click on this image, make it clickable by going here. On it, rotate it just a
little bit to try to make it, you know, as straight
as possible. Click on this disable
selection one more time. Scale my selection
of plane three to try to match
it with the ship. And, you know, as it fit, this one already
looks pretty good. I wouldn't say that this one needs too much work
where we could do is just just lower
this slightly down, make it a bit more compact. Very small subtle variations, and then we can
take this one here. This looks a little bit
elongated and almost like it has it looks perfectly straight, but it feels a little bit more
indented on the left side. And as a matter of
fact, if we look at it, the one right next to it feels almost identical as this one. So I wouldn't be
surprised that they accidentally use the same
one right here for Ds two, like an exact duplicate. It would probably say in time. So let's press S now, scale, so I just press
shift d to duplicate. Let's call it plain number four. So shifty, duplicate it, scale it now, and then
just try to match it. Let's see. I'm going to
make it slightly thinner. And then let's see
if we can maybe rotate this slightly more to
try to get it. This look. I think this is perfectly good. Unclick this so that
it's disabled selection. Then just try to make this
part right here by scaling. Moving it around GG. And I would say, overall, this is pretty darn good. I'm going to move this
slightly more up, and then this one slightly
more up like this. Then maybe this one
a little bit here, this one a little bit here. Just some very, very
subtle variations in them. But again, we are
going to be doing now a final checkup just
to see and make sure that nothing nothing
stands out, so to speak. We don't want anything
standing out too much from us. So this part is
slightly different. You can see how here
it's indented inwards, but over here, it doesn't seem like it's indented inwards. So there are some
slight variations. Okay say four is good enough. So I'm going to
hide my references. And so what we want
to do next is simply kind of like align them all
one next to each other. And so the way we
can do this is, let's just take
the first one and put it roughly around here, so it's kind of almost
touching the x axis. And then select this
one Cold shift. Click on this one,
click on this one, then click on the
plane number one, press Control C, and this is using your copy
attributes plug in. And then now we can press
simply copy locations. So they're all going to
be in the same location. So we can press on
the number two. Move the number
two, roughly here, press S, try to scale it, try to give it
roughly the same size as the one right next to it. So something like this,
then plane three. Do the same scale it. Let's see, trying to get it roughly the same size
doesn't have to be exact, roughly the same size. And then there's plane four. I think that was
the last one that we created, the Elongator one. It does seem slightly slimmer than the rest
of them, which is good. Slight variations are good. And now what we can do next is simply just make sure that
roughly they look similar. Okay. Just hide your overlay so that we can take
one final look at them to see if anything kind of
stands out to us differently. Would say the plan
one is the most accurate or the
closest one because that one had the most details. That was this one right here. It's closest to the one that's also going to be in front of us, and then the rest of them are
slight variants and so on. All right. We are now
coming close to it. We just got to make
sure that all of them actually are going to
have our scale applied. But before we even
apply the scale itself, one last thing to
do, I would say, is, well, let's talk
about the height. So this is going to
be a rough estimate, and right now they are, let's see, Z axis doesn't
even say our Z axis. So I guess it is being translated to the
Y one, let me see. Our Y is being
translated as the z. So we need to apply the
rotation as well later on. So I would say right
now they're 0.8 meters, so they're not even 1 meter big. So if we were to
add a full cube, the full cube would be bigger, because we're dealing with
scales and distances and such, I would probably want them to be roughly 20 meters in height. So what I'm going to do
is simply go here under, let's see my each one, each item individually,
like this. And I want to make sure that this y is going to be around 20. I'm just going to press
S, select all of them, and then just try
to scale it all the way to 20 roughly here. And now I'm just going
to move them right here. So if I go, I check it, 20, roughly 20, almost 20,
that's pretty good. So select all of
them one more time, and now apply the scale. We can apply also the rotation. And now we have our
z being the height. So if you want to have
them all B 20, go ahead, you can just go and try to do some subtle changes like this. And you know, but
I'm going to keep them as they are right now. So, now we've created ships, and then in the next video, we're going to start working
on our distribution. I'll see you guys there. Cheers.
5. Distribute along curve: Literally how we had to create
a geometry node setup in the previous course
to distribute these small ships coming
out of the highlander. In this video, and in
a couple of next ones. We'll be creating a
geometry node setup, but it's going to
be slightly more advanced than the one
in the previous video, previous course that
is going to be used to distribute these ships
again alongside a curve. Now, to start off, obviously, we first need to go
and add our curve. So I'm just going to go
shift A and search here. I already have a
typed in Bezier, but you can just
go type in Bezier, and it's going to add a curve. We can scale that
curve S 100 like this. Then just go r to rotate z to rotate
alongside the z axis, and then press control to
rotate it only inside of increments of five
like this until we get to negative 90 right here. Then I'm going to go
into my top view, and then G, move it so I can
line it kind of like this. And while we're also added, we can press tab to go into
our edit mode of the curve, right click and subdivide, to get one more middle
point right here so that we can add a little bit
more height to it, so it doesn't all
stay flat like this. So we can just go G Z, add a little bit more height. Maybe try to match this one so that it lines a
little bit better. There's a nicer fall off. I guess, something like this. It doesn't have to be
perfect right now. This is just for like
testing purposes. We're gonna be doing
some tweaking, picking way later on once
we have everything set up. So for now, we just need to
get the functionality of it. That's our primary focus, almost like a proof of
concept, so to speak. Alright, so we have this, and
now we just need to create our sip geometry note setup that you should be familiar
with at this point. So we're just going
to take this window, drag it a little
bit more upwards, and then go here under
our geometry note editor. Press. The curve here, press new so that we have our geometry no input
and output right here. And in between, what we
can start off first, and I don't think we ever use this one is a resample curve. And a resample curve is
simply just going to help us add or remove
detail from this curve. So if I press, let's say number let's
see number four. You can see how basically it almost like has
less points to it. And then if I press,
let's say 40, it is much smoother and nicer. So it's a neat one to have
here. It's going to be useful. Alright, so we have
the re semple curve. And while we're at
it, we also see that our Bezier curve currently
has a scale of 100, so we should probably press
Control A, apply the scale. Otherwise, everything is
just going to be humongous. And from here, we can now
change this curve into points. So I'm just going to go here type curve two points like this. And from these points, now we just need to tell blender to change these points
into these planes. And while we're at this
side here of the window, I'm just going to select
all of these planes, shift left clicking on them, and then press M. To add
them inside of a collection, I'm just going to
call this one planes. Collection like this. And now, what we need to do is
click on this curve or these points at this point
right now, points points. And essentially just change this now points
into an instance. So instance on points. And now that we have that,
we just need to take this collection,
drag it in here. And by the way, because we
can see our curve right now, and it would be actually
very nice that we could, we can in between also add
a join geometry right here. Take this, plug it
all the way here, and now we are still able to see our curve because it's
taking everything from here. But it's also taking
this here that we have. So that's pretty useful. And from here now, we can just take this
collection info, plug it into the instance, and now we have them
all here lined up, but we only want to tell
you to pick one instance, not all four of them, so then separate the
children, reset them. And here we have them
all aligned nicely. But they're all
pointing, I guess, in that direction, we want
them to be looking forward. So to do that, what we
need to do actually here, we have the rotation of
the curve, not applies, so we can just press Control A while having the
curve selected and say, apply the rotation, and that's going to rotate all of them. I'm noticing that
I still also have my x ray mode turned on here. So I'm just going to turn
that off by pressing Alt and Z. And there we go. We can now hide our
planes collection. We don't really need to see it. And here we have our
planes distributed. So what now would make sense also to do is to
simply add a camera to try to get
somewhat similar look to what we have in here. So what I'm going to
do next is go shift A, search typing camera. I'm going to add one
camera right here. I'm gonna press S also to scale, so I can see it slightly better. I'm going to change the rotation of the camera,
everything to zero, and then just our x to kind of like rotate it so get like
90 degrees like this. The camera settings,
I'm going to use a focal length off
85 millimeter. And then I'm just going to
zoom out roughly around here. What I can do is go here on my top right window and
just click and drag it on one side so that this
left side is going to be to enter my camera view,
so I can just see better. I'm going to press control
middle clips with my mouse. I'm going to like
zoom in a little bit, so I can get a better look
of what's going on here. I can press t to
hide this window, and I can just hide
all of the overlays. And what else I can do
here is, let's just see. I'm just going to
move the camera slightly more backwards. And so here we kind of have our, let's call it a basic setup. Now, the issue with this setup, is though, is,
hypothetically speaking, because our camera is
going to be moving off, is going to be panning
towards the right. If you remember, like, this is our starting position scene. And then as we move, we move slowly more towards the right, revealing more of the ships
happening, and et cetera. And so issue that we're going to have now here
is if I press G x, and let's say move this
a little bit more, and then R z and rotate it is we can start noticing that there
is no depth to these ships. Essentially, if I look closely, like, if I move even more, and then I rotate even more, we can see that these
ships are planes, and we don't really want that. So we need to now add
a functionality to our geometry node setup that's going to
impact the rotation. And tell these ships to always
be looking at the camera. So that way, we always
have kind of like this feel that they do have a
certain depth to them, or we can see the
back side of them, because otherwise, like here, we can see that there's
nothing behind them. So in order to do that, we need to play around
with this rotation here, and it all essentially
starts by adding a node called Aline Euler to vector. So what this node is
going to allow us. I think here we can just
press this to y or x. Let's just keep it
like this for now. But what this node is going to allow us next is essentially, we need to now tell it which vector to use
to rotate to wars. And so if I go here and
I type in object info, and I just say
location like this, and I tell it use the
location of this camera, so I can just go click here on this eye dropper tool and
then go here onto the camera. And I tell it use the
location of the camera, and rotate towards it. And I think here now,
I need to press Y. Let me see if it press
z. Yeah, it's y here. So bivo rotate onto
the y axis like this. And so now, if I
move this camera, you'll notice that
these ships are also moving and following
my camera direction as it moves, regardless. But the issue though is, because my camera is also
going to be going up, you'll see that these ships
are now moving up as well. So we also now need to tell it, not just to follow the camera. Only to follow it
inside of the z axis and not have it be impacted
by the x and the y axis. And so to do this,
we're going to be using essentially a vector math node, I believe, going like this and just typing in vector math. Over here, we can add multiply. And so now we are
basically telling it, take this location
and then multiply it. Right now we have it by zero, so this one is x, y, and z. So if I tell it to
multiply it by one, a number multiplied by
one is the same number. And so if I say number multiplied by one here
is also the same number, but a number multiplied by zero is always
going to be zero. So that means that is
going to be stationary. So now, if I go up, you see that it stays like that. How I move the camera, it
rotates towards the camera. If I move the camera forward, they rotate towards the camera. Now, obviously, we're not
going to have huge movements, but we do have them all now pointing and looking
towards the camera. And so this is going
to be we can call this one our rotation
lock, basically. This is going to be
used for locking our rotation and
keeping it as is. Alright. In the next video, we're going to be dealing with more details and additions to our geometry known setup
to help us achieve this look in terms of
distribution and scaling. So I'll see you
guys there. Cheers.
6. Creating distance: Now that we have the rotation of our ships locked to the
movement of the camera, we need to start thinking
about the illusion of scale and distance in
relation to our scene. And the reason why I
say the word illusion is because from a
practical standpoint, if you were to create
this idea of scale, which is one of the
key parts of Dune, as I talked about
a couple of times, and distance that we
have here in the shot where these ships
that are way way further away are
obviously appearing much smaller versus
the ships that are much closer to the camera. They are appearing much larger. And then we have the
humongous highlander, which, even though it's so far away from the camera, is still huge. So you would have to use, you know, real life
or not real life, but, you know, as
close to real life as possible scales to
kind of achieve this. So you would need to, you
know, take this curve, push it all the way
back here like that, and then try to obviously here you having
the clipping issues, you need to go under your view. You need to change the end of your clip to be much larger. You can already see,
you know, this is a huge curve already that
we have and you know, controlling it is just
going to be a pain. And obviously, then
you have the clipping of the camera here that
you need to solve, so you need to go into
your camera over here and change the clipping
here extra zero. And you know, it's
just what it is. It's very, very impractical, so I'm just going to control Z a couple of steps to
my starting position. And so that's why I say the word illusion because
we can kind of fake it by essentially making things
that are further away from the camera also change in
scale to make them smaller, which is kind of
going to amplify the idea of distance
progressively. So the way to do this is we can just push
this a little bit here. And for the scale part here, what we can start off with
is a simple position. So we take the position and we plug that into
another vector math, and under here, the setup, we're just going to use
distance for the function. And now we plug this
distance into the scale. And what this is going
to do, obviously, it's super huge, is, but my understanding of
this is that it is taking the distance from
the origin point because we don't have
anything plugged in here. And the further things the way
are from the origin point, the larger they are
right now versus the things that are closer
to the origin point, which are going to
be much smaller. And you can't really
tell this right now because everything
is super huge. But if I take a Mathenoe to kind of
help me change the scale, and I divide it. Let's see here by
a certain value, for instance, this much. We can see now that
things that are closer to our origin point right here
in the middle are smaller, and the things that are
further away are much larger. So if I were to take
this point and scale up, you'll see it's going to get slightly different
in scale. All right. And so what we could do now is because if you have a
similar setup as me right now where your three D cursor is right here and your
curve is around here, you have your origin
point right here. You could simply go right click Set origin origin
to three cursor. And now we have, obviously the
first one that's appearing being the smallest one versus the last one that's
appearing the largest one, which is technically
the opposite of what we're trying to achieve. So you might be
wondering, a, well, why not simply at a origin point right
here at this point, at the end, that way, the one that's that's here is
going to be bigger, one that's here is going
to be the smallest. And you wouldn't be wrong. Technically, you know,
that would work. The problem is just from
a practical standpoint, because the end part or these two points are going to be the ones
that we're going to manipulate the most
to kind of help us achieve the look that we have or positioning look that
we have in here. The front point is going to be the one that we're going
to be changing the lease. So that way, as you can see, it's still going to be
closer to the origin point. So just from a
practicality standpoint, we're doing it this way. And now, additionally, as
you're wondering, okay, but we still have the issue of the first one being small versus the last one being large. You can simply take this
plug it at the bottom, so now we're kind of
reverse dividing it. And while, you can't really see it now because
everything is super small. But if I increase
the division here, you can now see that. The ones that are closest to the origin point
are super large, ones that are further
away, are super small. So we need to now
play around with this map range of
quite literally, we need to add a node to map our range a little
bit differently. So we're just going to go
shift a map range. Right here. And so if I now play
with these values, you can see, let's just
start off by changing this. Actually, let's
keep this to zero, and the minimum, there we go. And then this one here perfect. And then this one
here maybe smaller. And so if we just play with
these values, like this. We can now get the result
that we're trying to achieve. Additionally, we can also add one more extra function right
here after the map range. We can take this
divide, take it right here and just change
it to multiply, which is going to be
kind of like a value that's going to control
our global scale, essentially, so our final
size of all of these things. So everything before that
controls essentially the scaling of the furthest to the closest of the point
that we're looking from, so how much they scale
progressively versus one here that controls the global
scale thing vinyl. And so that's kind of
like our basic setup. Additionally, kind of
like a bonus point, because I said here, right now, we are using our origin point. For the sense for the idea of for the point of
reference of the distance. What you could do is simply
take the object info, for instance, right here. Location. And let's
not use the camera. Let's add an empty. Let's go shift A and add
Let's type in here. Empty. Let's see cube like this. Let's scale this cube
a little bit bigger. And let's call it scale field. Like this, push
it slightly back. And now inside our
geometry, knows, plug the object info
into the vector bottom here and tell it to
use this object. And so now if we were
to move this cube, you can see we kind of have a field that's telling it
to control the height. So I don't think we're
going to need now. This is just kind of
like an extra show for you to kind of like see
what can potentially be done. So what I'm going to do is
just click X here for now. I'm going to keep this
cube in case I think of a useful use case to use it maybe in the future
videos now to come. But for now, this is
pretty good where we are, and I'll see you guys
in the next video, where we're going to start
adding a little bit of extra randomness to the
positioning of all of our ships. All right. See you guys there.
7. Adding random distribution: Right now, all of our ships are way too perfectly aligned
along this curve. And as we can see here,
some of them are up, some of them are down, some of them are left, some
of them are right. So in this video, we will be building an
additional component to our geometry node
setup that's going to allow us to add a little bit of randomness of the distribution
along this curve. But additionally, we don't
want the ones that are way up front to be
fully influenced by it. We only want these ones
that are further behind to be more influenced by that
random distribution system. And so we can do here
is actually take the similar setup
that we have right here with our position,
object, and distance, no, and we can just press
shift D to duplicate them because the same as before
in our previous video, where we wanted only the shifts that are further away
from the camera to be affected by the scale
versus the ones that are really close like this
one to stay the same. We want a similar
situation here so that this one roughly stays
in the same position, but the ones further away get
distributed just as we have it here in our pure
reference going on. And so, additionally, we
can't really plug this in anywhere because we don't
have any positioning input. So we need to tell Blender, we need to add a node here
that's going to allow us to give give a
information to that node, and that node is going to
influence the position of each of these individual
instances that we have scattered across our
And so that node is called translate
instances right here. And we need to plug it in to the above one that
comes right after the instance on
points and not the below one that is connected
to the joint geometry. So this one here. And
while we're at it, we could actually organize this a little bit better just
by pushing this up, and then taking
this geometry input as well pushing this up as well. That we know, here
we have our input, here we have our output, and then everything below it
is what we've built so far. So let me just move
it kind of like this. Let's just make a little
bit more space by selecting all of these things so we have everything
slightly separated. So over here, we have our lock rotation that I have selected right now. Above it. We also have kind of like our starting setup with curve
to points and resample, so this controls the amount of ships that are
created along our curve. And then we also have our scaling system
that we've created, and now we're going to have our distribution system
right over here. And so for this
distribution system, we want to first start off by normalizing the values that they're going to be coming
out of this distance. And so we can add a
simple map range. Like this, and we can plug
this value into the value. And because I said
we want to add some randomness to
our system early on. We can also add a
shift a random value. But because we're dealing with a coordinate vector
system, x y and z, we don't want it to be 0-1, we want this random value to be both in the x axis, y and z. So we're going to
instead of float using a vector random
value right here. And we can simply go and plug this for now
into both of them. And then add it into
the translation. And not much is
going to happen yet. If you were to go and start
playing with these numbers, you can notice some slight
differences happening, as you can see right now, but not much because they're all moving kind of uniformly, even though they're
connected to a random value. So what we need to now add
is something that's going to help us multiply this
effect much harder, for instance, here
in the minimum one, so that the minimum
threshold controls it. And so that way, we can
go and add Math node, or we can actually,
you know, what, take this multiply from before and then shift
the plug it in here. Let's just move it slightly up. And if I control this multiply, you can see that it adds
way more randomness, but almost to everything. And so as I said, we don't want randomness
to be added to everything. We still want this front
ship to be kind of, like, similar to the original
position where it was. And so we can achieve that by simply playing with
these values right here. Let's try to get close
to it as possible. There we go, just putting
them in here to zero. And it is going to keep
the ship tightened up right here while changing
all of the back ones. And I think if we
change the max here, we can still get some effects
for them individually. But yeah, I would say roughly around here is something
I want it to be. So let's just change a little
bit more of the values. Try to see what we can get. Okay, we want to push
this one to one maybe, and then something
close to here. Right. I think this
one is going to be good for me for now. Might actually reduce it so
that they're not so far off. But something like this
looks pretty good. Additionally, we can also
increase the amount of our ships that we have so
that let's try maybe 30. Now it's starting to
look more interesting, but we have also
ships that are very close to each other, and
we don't really want that. So what we can add here
in between the curve to points and our instance points
is a merge by distance. So by telling it to say,
Hey, everything that's, let's say 10 meters
close to each other, merge those two so that we don't have
anything conflicting. And so now we're starting
to get a little bit more of an interesting look and feel closer to what we are
having right here. But, for instance, right now, the ones that are
further away here, they're not as small
as we want them to be, so we can go into
our scale here, and I believe if we just mess around maybe with
the divide a little bit and we change our
range there we go, we're starting to
get much smaller ships all the way
there in the back. Like I said, we're
going to be playing with these values later on. Right now, we're just building our preliminary setup.
That's going to allow us. So now we have created a random distribution system
that we have over here. That allows us to control where they are kind of position. And then in the next
video, we're also going to be tailoring it
so that now we can control all of them together
because this one is kind of adding them to our
instances individually. And then we want
to also have one global system that's
going to tell us, hey, move all of these guys left, move all of these guys
right, and et cetera. And so stay tuned for
that in the next video. I'll see you there,
guys. Cheers.
8. Adding movement components: Video should be pretty
short and straightforward because the last and
only thing now that's remaining to our
setup is we need to add a component
that's going to allow us we later on to animate the ships and have them move
in a certain direction. So we want to be able
to control all of the axis of X Y and Z
and how the ships move. But we also don't
want them to move all at the same time equally, because that will look very
weird and digitally created. We want them kind
of to have each its own individual
slight offset. And so what we can do is
actually add a new node, so shift A and type
in set position. Just turn on my screen
cast keys right here. There we go. And with
this deposition, we also get these offset
coordinates for X Y and Z. And we can just add
another node that's going to give us the same thing
called combined X Y Z. And Let's just move
everything here, so we have a little bit more
to play around with it. So now we have combined X Y Z, so we have the ability to
move all of them at once. And what we can do now
additionally is multiply or combine these values
with a random value, and that should
give us an offset for all of them in a way. So what we can take
here is, let's see, we can take this random value that we have right over here. We can shift D, put
it right maybe here. And we don't actually
need to use a vector one, we can use a simple float. So value between
either zero and one. And now we need to
add a vector math. We can set this vector
math to multiply. We can let's plug this
one at the bottom, plug this one at
the top, like this. And so now if I
were to move these, we can see already
that some of them have a slight offset as they move
up and down, for instance. We can also maybe change with the seed values so that can get a slightly different
offset for different ships. Additionally,
obviously, can move them left and right if you want. This is now completely on you. But for me, I'm probably
much going to be focusing on the z axis because it's going to
be going up and down. And obviously, now, you
were to put here one, then they should all
pretty much move synchronously the
same more or less. And then if we
increase this to ten, then and then here
we put a zero. And then let's see,
we put here zero, And then we put another
zero over here, and we start moving them now. You'll see that they move way faster and slightly different
because the range of a value that we're
multiplying it with is between much bigger
numbers, so we can even go, if we were to go to 100 here, and then you can see now they're all moving incredibly fast, and we don't really want them to move like that crazy fast, so we're just going to stick
to maybe a value of like five and give them this
nice little offset. We can maybe change
it from zero to be something closer,
maybe like this. So it's still somewhat similar, but still different, so we can maybe push
it even more up. And so, yeah, this is going
to give us a lot of control. And at the same
time, our movement is going to be very, very small, so we can even make this
number super super small. Let's see 0.001, and
that's add one more zero, just to see how this
is going to look like. And so now they're barely
barely moving, as you can see, even though we're drastically
increasing the numbers. So, yeah, play around with this. This is going to give us a
lot of control later on. At this point, we pretty much have our entire
geometry note setup. It is still not, you
know, super complicated, but it is relatively bigger
from what we've done so far. In the next video, we're going to be organizing it a little bit and doing the same thing as we did in the
previous course, we're adding it here into our modifier setup so that we
can actually control all of these parameters
from this window rather than having to
go inside of here. So I'll catch you guys
there in the next video. Cheers.
9. Organizing geometry nodes: Similar to how we did it
in part one of this class. In this video, we're
going to be organizing our geometry node setup
so that we can have it appear here inside of our modifier tab so that once we get into the
animation phase, we don't really
need to look into this window here and then, add keyframes onto
these individual nodes, but from a practicicity
standpoint, they're all going
to be available to us here on this right window, and we'll be able to close
it completely like that. So, I'm actually going to just push this pretty much
all the way here so that you guys can have
a better overview of what's going on on my screen. Now, that might also affect
the screen as keys here, but I think the keys
are going to be fairly straightforward
and I'm going to be trying to be vocal about what I'm pressing
and doing all the time. So the first part that
I think we should do is just kind of
like add frames around all of these node groups so that we can be a little
bit more organized. So what we can start
off, and you do need to have the node
wrangler enabled for this, but, I mean, I believe,
pretty much most of you already have it enabled
by now at this point. So we're going to do select
everything here like that. I'm going to press Shift P that's going to create
this little frame. And I'm going to go
here under node. I want to rename this
frame to something that matches it theme. So this is going
to be almost like our instance settings,
I would call it. Then we have another one,
which is our rotation lock, so I'm going to
press shift here, and then I'm going to go
type in rotation lock. Then go for this one.
This should be our scale. So shift and B. And let's see move this
one a little bit here. Let's call this one scale by distance because it basically scales it depending on how distant it is from the object
that we tell it to be here. Next, we have this
is our distribution. So let's call it distribution
Distribute distribute. Tribute by distance. This is our distribute
by distance. This is a scale by distance. And then lastly, this part here is kind of like
our global movement. So **** P. And let's call
this one global movement. There we go. So now we
have all these frames, and we can just move them one underneath each other like this, just for organizations sake, because now we're going
to be basically taking this group input
and then plugging it into all of these nodes so that we can have it appear
here on the right side. And so we can start off actually with the scale by
distance You know what? We can start off with
our instance settings. So I'm just going to
go here under group. Here, I'm going to click
Plus and add a new panel. And this panel is
going to be called instance Settings, like this. And we can simply start
of by telling it, Okay, choose which
instance you want. That's going to be the
first one, let's call it instance right here. Then say, choose how
many of them you want. That's going to be our
seconds. This is going to be our instant amount. Let's call it amount. And
then detail of the curve. Let's just go and say,
let's go like this, so curve resample curve. And then we also
want to tell it, merge merge in by what distance, let's call this one
merge by distance. So now we have choose the amount of how many
we want to appear, the detail of the curve, and the merge by distance. I would actually
maybe say, let's move the resample curve
above the amount. So insert before socket,
so that way we say, Okay, this is how detail
a curve by one, and this is how many on
that detail curve I want. I just think for personal preference standpoint,
I prefer it that way. But I think we have
everything now for our instance settings. We can even just move this
slightly a bit more here, and we can now add
them all inside here. So we want the merger by
distance to be the last, we're just going to go from
the bottom to the top. Click on the merger by distance, drag it when it says, insert
into panel. There we go. Drag then this one,
resample, and instance. Let's just call it Choose
instance. There we go. All right. We can now take
this. G, move it down. We're going to skip
the rotation lock for now. We don't need it here. And instead of the
rotation lock, we're just going to start now
on our scale by distance. For this, let's add, let's collapse this one here or on collapse, and then panel. And let's call this
one scale by distance. And here we want
to add the divide, and then the two men two max, and we also want
to add the value. We don't need to add these
two because essentially, if we just change
this, let's see. Yeah, kind of gets weird. So I think we can pretty
much just get away with using two max and
two men values. All right. So let's
just go ahead and start off with our Claps
this. There we go. Divide Tumen two Max
and value. There we go. And now we can just
go one by one, value. Insert into panel, two max, insert into panel, two
mint, insert panel. And let's go here, insert into panel. All right. And we can actually rename this one so that we
know what it is, let's call it divide value. And then this one
here is wait to sick. Why do we have to This
is our multiply values. So this is going to be
our global scale in that case, like that. So the global scale is
going to control how all of them are big mutually at
the same time. There we go. This leaves us now
with these last two, so let's just push this all the way down here in
the second to last. And now from here, I think we're pretty much going
to connect everything. So we're just going
to go from me. Before we even do
that, I think it makes more sense to
just add a panel. Panel. This is going to be
our distribute by distance. And now let's just
start plugging one by one from men from Max. Tom two Max, multiply. There we go, and
seed There we go. Okay. Again collapse these
guys and dis go one by one, distributed by
distributed by distance. There we come on, insert into. There we go. Into into into. There we go. And so now we have all are setting for our
distribution to value, kind of like our global one. And then all of these ones, depending on how we change it, is going to control how our ship is being
distributed along the curve. Perfect. Let's just go back up. And then the last
thing that's remaining is are going to be
our global movement. So we can add a new panel here. Let's call it global movement. We want it to be at the
bottom, insert after panel. So we have instance setting, scale by distance,
distributed by distance. Global movement
is at the bottom. So we can connect this also
all of them individually. We don't need to connect the
seed one though so that when you can skip Perfect. And now we just need to again, drag and drop them into our
global movement into panel, into panel, there we go. Perfect. So we have
everything now in here. We can control our
global movement. And the last one that's
remaining that we didn't do yet, and this is kind of
like the one that is optional because
we are not really using anything inside of
our scale by distance. We're not using anything inside our distributed by distance, but we are using something
in our rotation lock, so we can add these three
into one that's going to be called object info settings
maybe or something like that. L et's just call it
object info settings. Maybe that makes sense. So let's go anal
object info settings. Let's just change this so that they're all
lowered caps here. Object info settings. We're just going to connect
this one to camera. This is our rotation lock. Target rotation, target
rotation lock makes more sense. Then we have our
scale by distance. This could be our
distance field. Let's call it scale. By distance field. And then the last one is
distributed by distance field. Distribute by distance
field. There we go. Now we have our fields now here, also object info settings. We can actually track
and drop it right here. I feel like this is a good
position also for it to be. Scale by distance,
insert into panel. Insert into panel. We have only two right now.
One is missing. Where did that one escape
distributed by distance field? There we go. Insert into panel. Alright. I think for me, the target rotation is
the most important, so I'm just going to put it
at the very top like this. So let's just look
at it from now a logical standpoint
on how this works. We have let's just
go camera here, and then take a look here. We have choose the instance, so we select which instance we want to be distributed
along the curve. We tell it how detailed
we want the curve to be. We choose the amount,
and we say, okay, but merge them so that we have some kind of separation
between them. So they're not all really
really close to each other. We then tell it,
okay, lock onto, let's say, a certain camera
or an object, this one. We also say, Well, by
the way, if you want, we can use maybe this cube
for our maybe even scaling. So let's just say, closer
you are to this cube, the larger you're going
to be versus the farer. So this cube is really close, and this object is going to be the I this cube is somewhere
here in the middle, then this object is going
to be the biggest one. So we also have that. In my case, like I said, I am not going to be
using it right now. So I'm just going
to click. X here, but we have that optionally
in case you want to add this setup into, one of your other blender
project that you're working on, you can always import
it, so that way, you have it nicely organized. And then we have distance. So the further you are right
now from this origin point, the bigger the front
object is going to be, but the smaller also the ones that are behind are going to be, if I mess around
with these values, I'm just going to keep
it as it is for now. And then what else do we have? We have our distribute by distance and our
global movements. So once we decide to animate
everything, for instance, on our Z axis, we
can just go and say, Okay, now, start moving. And if we want it to be
very subtle movements, we can change this
number to maybe 20. That way, this max
value might need to increase much more
than incrementally, or if it's maybe just like one, and then now it's slower. So we also have that
control now set up, and that's pretty much
it for this video. Now, in the next one, we
are going to be starting to work on our composition,
our camera settings. We're going to be adding
the highlander to our shot, and then we're going to start also on the animation
afterwards.
10. Working on the composition: This video, I want to match
my opening shot as close as possible to the
first image here at the very top where we
see the highliner, and then the small ships
on the top right side, a little bit of a distribution
happening over there. So for this portion,
we're going to be working on the composition,
as mentioned earlier. So that will also entail a little bit of
back and forth to tweaking and maybe some changes we like, but then don't like. And a lot of it is also going to be to your own personal
preference, maybe. So you might not even want to recreate this exact
shot shot by, you know, how it
looks like here. You might want to, you know, actually encourage
you to kind of like, take a little bit
of liberty and try to add a little bit
of your own spice. So try also to do that. In my personal case, I do want to get as close to as possible to the one that
was used in the movie, so that's why I'm going to
be heavily relying on here, but you don't necessarily
need to if you don't want to. So, to start off, we obviously first need to add the highner into our scene. And so we can just
go under file. Click here on a pen. And for me, it's already
going to open it. But what you need
to do is just go under your resources folder, find a highliner dot blend file, click a pen, and then go
into your collection. And then click on the Highliner, and it should be
adding it immediately. As you can see, is
super huge right now, and that has to do with how the scaling was done in
part one of the course, which is also why we tried
to avoid it by, you know, adding all of these
setups here to help us with
distribution distance to fake that illusion of scale
and distance in general. As a matter of fact,
if I just take the highlander now G Y and
push it a little bit back, and I look at the size
of my curve here. Right now, our curve is set
at 200 meters in distance. I believe the one that I used in my initial test when I was trying to figure this out
was around 1 kilometer. So we can actually, you know, find it in the
sweet spot in between. Let's just put instead of, well, not even a sweet spot,
less than a sweet spot. So we're going to use like
400 meters for a distance, and just make sure to apply
the scales so that everything here is set to one. There we go. And now once we have
our highlander added, we can probably move it
maybe a little bit more to the left so that it's going
to be roughly around here. And then we can also
reset our camera. Right now, the rotation is
set to negative 16 degrees, so we can push that to zero. And then we can
start positioning the highlander and everything. And we also might need
to do a little bit of scaling, so don't
worry about that. Up. So we want to push the highliner a little bit
more to the right side. So we can move the
camera a little bit. We can then scale
this highliner. And while we're at it, we can see that right now we are using a resolution
of 1920 by 1080. So we're going to
change this to b816. 1928 16, which is the exact same
resolution that was used in the previous
court video. And I believe it has a similar aspect ratio of
2.35, which is used in here. And so in part one
of this course, I do talk a little bit
more about aspect ratios, and I'll show you how to find different aspect
ratios depending on the resolutions
that you're going for. If you're interested in that I encourage you to check it out, but you know, let's continue
now with our work in here. Additionally, I am
always bothered by this extra capacity here. So I'm going to go under
my camera settings and just change my viewpoint display to pass per tout that way. I can get a much
clearer idea of how my composition is going to look and what's going to be
cut off, what isn't. So that means now that I need to also change some stuff
around my highliner. It is definitely
a little bit more rotated in a way that I
wouldn't want it to be here, so I'm going to go
into my right view. And let me just press in
hide everything in here, and let me turn on
my screen casks. Oh, they are already.
They're here. Perfect. I didn't
even notice that. And so I want to just rotate my highliner just a
little bit to try to get it to a roughly
similar shape of a silhouette
that we have here. This also might mean that I need to squeeze my high
liner a little bit because this one
here is much more narrower and its width than
the one that we have here. So I'm gonna press S
and then X and just squish it until I get look
somewhat similar to here. And then G and X to move it roughly to a
third of my screen. Now, while we're at
it, one more thing, and this is more of a wild guess is that I don't think that we're going to need the entirety of the highlander. Looking at this image only, and then looking how this
looks right now over here. I'm pretty sure we can
get away with just using the top front part of it up until roughly these
inner extrusions here. So what we can do is
just to be double sure, let's just copy Control C, Control V, the highlander, put it into the
highlander collection. Take this lattice highlander,
put that as well. And let's just
rename this one to highner backup in case
something does go hey wire, and I'm wrong, and
then press a shift, left click with your mouse, put everything here to hidden so that we have it as a backup. And then for this highliner, what I can do is
just go on my top, going into edit
mode, press old and Z to enable my x
ray. And I want to Highlight or select pretty
much everything roughly up to these lines right here, and then one extra
from the inside part. And then once I have that, I'm going to press x and simply delete all
these vertices. Clear all z, so I can see
what I have left here. Go back into the edit
mode, press number two, to go into my edge select
lt and then left click. So this way, I select this entire loop and then
press F. And now I close it and then I press
I to kind of like get rid of this little shading and then press I one more time, just to kind of get
rid of that shading. And here we go. Don't need to worry too
much about the topology here because this is barely
going to be visible. And as you can see,
it really doesn't make much of a difference
to what we had. I'm going to control do just so we can see
the difference. So let's just take a couple of steps. We
don't need to do this. So you can see this was before, and just focus on
these outer edges. Don't focus on the internal
part because we are only going to be looking here at the outer edges, as you can see. And then redo, you can see that there's really
not much of a difference. Before. So when we had the back part after when we
don't have the back part. Once it's closed,
you can't really tell if there's much
of a difference. So I would say this
is pretty good. While we're at it, we can
also slightly R z and then rotate the hyner to face a bit more, maybe
towards the camera. We're going to be tweaking with that part later on as well. So I don't think
that's that important. I might push the hyner
just slightly more into the back. Round here. And then looking at how it's being cut
off and framed here. I'm going to I'm assuming that the bottom part is less cut
off in the top part just by looking at the angle of cut off here and how deep it goes
into its top view here. So I'm going to maybe
push it slightly more up right around here so that this part here is narrower
versus this part here. And then might
also just scale it slightly in the x
axis to add back that width that I
cut off a little bit to try to get it as close to
as possible as I mentioned. And I think this
pretty much gives me roughly a decent estimate to similarity to how
I have it in here. I'm going to apply everything to the higher control A by scale, and that looks pretty darn good. Now, additionally, we're
going to be now working on our curve here that we have set up and our geometry
node set up here. What I want to do is kind
of because I am being obscured a little bit by my
reference window right here. I'm going to open
a second window and you don't necessarily
need to do it. And the purpose of
the second window is just to be able to
navigate maybe a little bit more freely if I'm unable to do
it on this side. So for now, this is kind of
how I'm going to move around. And so what I want to do next is early on at the
beginning of this part, I did talk about how, you know, from a practicality standpoint, it makes more sense to use the origin point right here at the front versus at the back. Sorry, Yeah, to have
this origin point here at the front versus
like here in the middle. Because right now, for our distribution and
for our scale by distance, it is looking at where
the origin point is and then distributing based on
that and scaling based on it. And so we talked about whether or not we're going
to need this field. Turns out, we can actually
use it quite well. So the issue here
was that if I were to move this front vertex here, then it would distance it from the origin point because the origin point
wouldn't follow it. But If we click on this cube, and then I click on this curve and then
go into my edit mode, and I have this vertex right here selected along
with this cube, and I press control and P, and I say make vertex parent. Now, if I move this vertex, you'll see that the cube is going to follow it
anywhere it goes. So that means that if
I position, let's say, this cube roughly around here where we have our current
origin point. Let's see. That seems to be matching
it more or less exact. So let's just go
like that, press control S scale, or actually, let's make it bigger
so that, you know, we can see it where
it actually is. And now, if we go here and
say, distributed by distance, use the cube, distributed
by distance, use the cube. We can also change
the name of the Cube and just call it field. And now, if we move, even though there are going
to be some changes, what's most important
is that our main one, the one that's at the very
very front always remains the largest one and the least
distributed one as well. And so that's what we have
right now. All right. Now, let's start working on the ships that
are going to be here in these corners,
and et cetera. So what I'm going to do is now start messing
around with my curve. And this is the part where
it's, you know, kind of like, either you want to
do it exactly like me or it's more of a
personal preference. In my case, I want to, let's just take a quick look. I want to take these two parts, move them closer
to the highlander. I'm going to rotate them in the z axis a little
bit more aggressively. Let me just take a look
now what we have going on. And then maybe move it
a little bit more like. This part might be a little
bit too aggressively moved. I'm also going to shrink these handles so that
they're not so humongous. And there we go. We can barely see
the ships over there and so don't worry
about that for now. What I do want to
is kind of take this front part now.
Let me just go. This is why it's a bit annoying now because of the pure window. Let's see if I can cut it off a little bit more to
get some real estate. I guess this is as
close to as I can get. What I want now is to take
this vertice right here, scale it down a little
bit so it's not so huge. And then start rotating
kind of like in this axis. Take this point,
scale it inside, so it's not huge of a handle. But then this one,
I want to expand a little bit more
because I do want these ships to also go to the right side because I'm kind of thinking a couple
of steps ahead. And I know that I want to
have one ship at least on the right side off
this main ship. So I'm going to try to push
it like that. Let me see. All right. We have this part. Okay, this is maybe
too aggressive, so I'm going to maybe
do it a little less. Now I'm going to
rotate it slightly. I'm going to give it a bit more of an angle and
interest like that. And then for this part,
I'm going to push it a little bit more up, and then this one, I'm going to push it a little bit more down, rotate it slightly,
and there we go. We can barely see these
ships in our back. And so what we want to do
is just change the to min value right here to kind of get an idea how big are
they? Let's see. How big are those ships that are supposed to be in back?
They are very small. You can see barely small dots. So we do want to have them be as small as they
are over here. But then some of them we do
want to have slightly larger, so we might actually mess
around with the divide value, push it a little bit more up, and then push the middle
one slightly more down, and push this value here. Little bit more up. And this gives us a pretty
interesting variation with the ships right now. I might push the
mint even further down just to get something really interesting there we go. This looks pretty good. And so it also looks relatively similar to how we have
it in our first shot. We can maybe just push
this slightly more lower to add a couple of more extra
ships right around here. But I would say
this is starting to look pretty good, like this. Alright. Let's just maybe
push it slightly more lower. Yeah. I think this looks
pretty good overall. And again, like I said, now it's just a matter of tweaking. For now, I'm just going
to tweak my scaling, and I'm going to worry too
much about other things. There we go. So we have
a couple of big ones, and then in the back, we have some super small ones. So we have that idea of scale or illusion of scale and
distance happening. Perfect. Additionally,
last part, I guess, before we close
off this video is, I do want to you can see that the hyner is a bit
more indented towards. And again, this is
an aftermath of the previous course that we did and how we were working
on the space scene. So what you can do
is use this lattice, this cage around the
hyner, go into tab. Click these two
vertices, and then go G, Y and push them slightly
towards the back so that way. You can even use this line here right on the coordinate
that's right next to the higher to kind of help
you make sure that it is fairly straight. And so there we go. This is looking pretty
good overall, I would say. Alright. In the next video, we're going to continue
with our composition, and we're gonna
also start thinking about our animation as well. So I'll see you
guys there. Cheers.
11. Finishing the composition: Our opening shot
set up. But now, we also need to make sure
that our final shot, where we have the ship
here being at our focus, also resembles the
reference image over here. And also, we cannot forget either the last two images as
well that we have going on. So first, before we even begin, let me just turn
on my screen cast keys so you guys
can see over here. And also, we want to make
sure that we don't lose our current positioning of the camera if we move it
later on, which we will. So to save the current
position kind of like to this section that
we have right now, we can and just add
two key frames, one for the location,
so intra key frames, and then another one
for the rotation. And so that way, if we
now move the camera left, right up and down, whatever, and I press shift and then left click with the left arrow, it's going to reset
the camera to the starting position where
we lock those key frames on. Perfect. So no, as the camera
is going to slowly move up, and I can tell that the camera is going
to move up because of how the ship here
is being cut off. So in our starting position, our ship was barely being
cut off at the bottom, but now it's cut off way more. So the camera is going
to slowly move up, and it's going to also pan
towards the right side, and we can see that as
well by the distance of the ship to the left end of the frame versus
here being smaller. So if the camera is
going to go g Z, and then it's going to
go roughly up to here, Then it's going to go r and then z slowly
towards Roughly there. At this frame right here
at the top right corner, we need to see an extra ship, so this one right there. What I want to do next, though,
before moving into that, there's a couple of
small mistakes I did early on when we were
setting up our geometry nodes. Nothing too much, just
a couple of clicks. We need to go under
our geometry node, and we can do it right here in this window. So there we go. And then just make sure that
for your rotation lock, you have it set to relative. And then also object info scale distance set
that to relative. And here object info for
your distribute by faces, have that be relative, and don't also have it be
clamped for the map range. So unclamp the map range, because what this is doing is actually making
the ships that are fur way still kind of
locked closer to the line, as you can see, and we
don't really want that. So we can actually keep
the clamp, I would say, actually remove the
clamp here as well and just keep it as it is now. Alright. Let's go under
our three D viewport. And what we can do also we
can add a separate field. So we have this field
being our scale right now. And also, we can add a separate field that's going
to be for our distribution. So for that one,
we don't want it to be exactly the same looking, so we're going to add maybe, let's see, where is our empties. There we go. Let's add a sphere. Scale the sphere
up a little bit, and then just push it
right next to over here. Then go shift left click tab and then
click on the verdict, Control B, make vertex
parent. There we go. So now if this moves,
it didn't work. So let's go one more time.
Control B, make verdic parent. So now if this moves,
everything follows, perfect, and we can just go now into our scale distribute
by distance field, and have it B this one. So now if this moves, it distributes them
slightly differently, which is exactly what we want. Okay. And we can also
rename this field. So let's just call this
one field distance. And then this one is going to
be field scale. All right. And now, as the cameras that are going to slowly move up and
move towards the right, which is what we
just did over here, we need to have this ship appear over this part where I'm hovering with
my mouse right now. So let's just go top
view and try to move this a little bit more
towards the left side. But we can immediately see that the ships here at the
front are way too big, so we can maybe tweak our max value to kind
of match that slightly, and then just go g
Z and move it up a little bit until we get something
closer to what we need. All right. This looks
as close as I can get. I'm just going to
move everything, so I'm just going to
select the entire curve, leave the edit
mode, and just move it slightly more over here. Move this slightly more
right about there. And then I'm going to go now to my starting frame just so I can see how everything
is looking here. So I want to push
this middle point still back so that
I don't lose it. And so you'll
notice that there's going to be a lot
of back and forth. Well, not a lot, but a
decent amount of back and forth now for the
next couple of parts, and I don't want them
to be that small, so I might even
scale them slightly. All right. Additionally, what I want to do, let's
just take a look. So the camera is
now going to go. Up all the way up to here, and it's going to rotate
on the z axis here, and we still don't
have our ship, so the ship is going to need to move a little bit
more right there. So the ship is going to
appear right about there. So somewhere, this is kind of like the frame
that we have going on. Okay? And then as the camera continues to roll right
towards the ship, about here, it's going to
continue moving upwards as well until we have our
ship appearing like that. Alright. This looks pretty good. The only thing that's
bugging me a little bit is the closeness
of these two guys. So I'm wondering
if I can somehow change it without impacting
my scene too much. So let's just try
to figure it out. We just need to maybe mess around with some
minor distribution. We could even have that one
ship kind of hide them, which, honestly, I don't mind. So let's just go back to
our starting position. We have our ships over there. And then we have two ships
right over there that are still kind of close
to We're to each other, so let's just see if we can kind of mess that up. All right. Hopefully, it won't affect us right now in the next frame. So the ship goes up
roughly about here. Slowly starts
rotating. We see it, keeps going up about here. Slowly continues
rotating. There we go, comes about here and then starts getting closer and closer
to the ship itself. So somewhere like that. There we go. So for me, this works pretty good. I think we have our composition kind of set up more or less. If you want to do
something differently, a couple of things
you could maybe, but this is going to
affect your scene as well. So you might need
to redo some stuff. So you can change your
merge by distance, maybe to a smaller number, which is going to add a bit
more shifts to your shot, and I actually kind of
like that I'm getting now lightly more
ships going on here. But as you can see
now, everything has been kind of reset it, and you're going to have
to redo these steps again. And so if that
doesn't worry you, be sure to, you know,
you can try it. Let's just take a look
what we have going on. Right now, as you can see, let's go to our starting position. You can see that
everything is going on. It's very crazy, so
we can probably take up some ships from here.
You can take this up. But yeah, be sure to experiment. I'm going to go back
to the position that I really like,
which was this one here. So ship goes rotating
roughly up to here, all right, getting closer to the ship and then
moving towards it. So that's going to be kind
of like our animations that we're going to have
to do in the next video. We now lay around
with these values, try to get a look
that works for you. Use the images as a
reference or come up with a look and feel that
you want for yourself. In any case, I'll see you
guys in the next video, where we're going
to start working on the animation. Cheers.
12. Animating the scene: Car layout more appropriate
for animation to also make our life easier
once we start doing it. So this top left window, I'm just going to merge
it with the bottom one. So clicking when the plus icon appears and then just
dragging it downward. And then additionally, I'm going to pull this
window all the way up, which is going to
be reserved later on for my graph editor. But for now, I only need it
for my timeline so that I can add my essential key frames to kind of get
these shots first. And then in phase two,
we're going to be tinkering with our graph
editor to make it to give our camera movement but more natural looking feel
versus being robotic and CGI. So to start off, let's just look at our first shot that we
have already created. And then for the second shot, we need to move our
camera up as we talked about and then pan
it towards the right. So I'm just going to move
this up right about here. And also, we need
to make sure that we tell it at which
frame we want to do it. So let's just say
around frame 200, but that's going to make
our scene too short, and we want this scene to be roughly around 15 seconds long. So we can type in
here, for instance, 15 times 24, and it's going
to give us 360 frames. So just make sure that you are using 24 frames per
second as shown in here. And so once we're
done with that, once we're at this
position at frame 200, and these are not
final, by the way, we can change them later on. Want to move this
GZ up around here. And then we also want to
move it slightly towards the right with a little
bit of rotation like this, be even more rotation and
slightly more towards the left, to get somewhat of this look, with maybe a little bit
more extra up movement. So roughly around
here to kind of get the look that we see in
this image over there, and we can even maybe slightly, and this is just my case. S lightly shrink the size of our highner right
there like this, and maybe push it just
slightly more down, so just moving it
right about there. A. Let's press now the letter K on having our camera selected to insert a keyframe and press available. Now, we won't really need the rotation key
frame and the Y one. So we can just right
click here clear single keyframe and then click on
the y clear single keyframe. So we only have these
ones now available. Let's just take a look
at our current movement. So we're starting off here. The camera starts moving
slowly towards the right. There's going to be
a very, very small rotation happening as well. And right now as you can see
it has the es happening, but don't worry about it.
We'll fix that later. And then we can jump
onto our third shot here where we have more of
that ship being visible. So I'm going to put it
almost around 270 here. So in here, we can add, let's see, more movement
up roughly up to, I would say here,
and then rotation to right about here where we can barely
see the ship anymore. So something like that. I'm going to press K available. And then a couple of frames
later, right around 320. We want to match almost
close to the shop, but still not fully zoomed in. So let's just go G x, move it more towards
the right side. Maybe slightly more
towards the right, and then a little a
little rotation in the z. And if you can't tell whether you're in the center or not, you can also click
on your camera. Go here under composition
guides, click Center. Then go under show overlay, and this is going to
help us match where we want our camera to be in
terms of position rotation. So we want it to
be roughly here. This is the center,
but I also want it to be a little more up
right about here. I'm going to press K available. I'm going to hide
my overlay for now. And then from this point, I want my camera to slowly start moving towards
this subject here. So sorry, G Z Z twice, and then just moving
it G Z up until here. Sorry, I forgot to push this to frame 360, so this
is our ending one. G Z Z, moving it a
little bit more, and then G Z, and
then maybe subtle R just to maintain the
center position. Let's just take a look. I might have rotated wrongly, but this looks pretty good. K, available, and there we go. So now, if I were to play this, it's probably going to
look very weird and off, but as a matter of fact, because we have easy in set up, and we don't have our timings
yet perfectly created. We only had our basic
key frames here. So let's just take a quick
look by pressing space. So the first portion not so bad. I think the issues are
going to start around. Yeah. You can see very
fast acceleration, weird movement, that feels
a bit jarring and so on. So let's just now jump
into our graph editor. I'm going to push this
slightly more up. I'm going to put my
references right here. And also on my right screen, I'm going to use my
other blender file where I can actually see
how I created or how I matched those graphs
so that it's a bit more accurate when we
are recreating them as well. So let's go right click here and go into our graph editor. As you can see, we have all kind of stuff happening in here. So let's just start
off simply with our X. And then let's hide all of
these ones here. Frame all. So the X one is the movement towards the right that we have. So if you see here, we can see that it's
moving towards the right. We don't want this
key frame here, and we don't want
this middle one. Either. What we do want is our shot not to start moving towards
your right immediately. We want to leave a little bit of a breathing room because it is transitioning from
the previous shot where we had the
highlander in space. And so we want to kind of
let this one marinate with the viewer once it switches
to the next image. So from here, I'm just
going to g X and give it. Let's see how much is this. Yeah, like, almost
half a half a second. Half a second here a little
bit more than half a second of time to kind of let it sit with the viewer
before it starts moving. And then also, I don't want
it to be so eased out. I want it to kind of like
start abruptly over here. And then this
handle, I'm going to scale and then move it a
little bit more like that. So that this part here does have some easing when it slows down. So let's see. There's a very short second before the
movement actually starts. So, as you can see,
very short second, and then the movement starts or not even a second,
half a second. And then it starts moving towards the right, moves
towards the right. So only focus on the
movement towards the right. Don't focus on the rotation now, just look at the movement
towards the right, and so far it looks very good. I would say, the movement
towards the right, so far is okay. We have this part here
that might be weird, so we'll see how to
handle that. Let's see. We might need to maybe
tweak it later on, but so far so good, let's just check
now our Y movement, which is our forward
one that we added here. So for the forward one, I'll just take a look into
my reference. All right. We also just want to actually take out these key frame the extra ones that
have been added. We don't need this one.
We don't need this one. This one here, we don't
need to be that big. We can take this
one here as well, make it a little smaller, and then this push it
slightly more back. And again, just add maybe here a bit softness towards
the forward movement. This is our forward
movement that's going to be happening. Right here. So we wanted to kind of be
timed also with the x axis. So let's take a
look right about, I would say here, maybe where we wanted to
start moving forward. So we almost have
that kind of set up. Perfect, and we
wanted to continue. We don't want it to stop. So the forward movement is going to be roughly continuous, so we can move this also
inside a little bit. So as it starts moving
forward, there we go. So I think this is the
rotation that kind of puts us a little off center. So far so good. Let now let's just jump into our rotation
instead of locations. Let's just take our rotation frame all and see what's going on here because that's the
one that's kind of breaking, it's still most apart. So for rotation, we
can take out this one. And I would say take out
tack out this one as well. We can only keep the
one that we have here. We don't need to have
it so eased out, and this part here can
pretty much remain as it is, but we also want the rotation to start off with a
little bit of a delay. I'm just going to
put it slightly similar to 18 frames
of waiting time. So there we go. Before he starts rotating, and then it moves, keeps moving. All right, this is already
feeling better, more natural. And then it starts
going towards our ship. Okay. And then the last part, I also want it kind
of like here to have a bit more of a slower movement. So I'm just going to
push this slightly down, maybe make this a little softer, a little bit more
aggressive, there we go. And then this one, push
it slightly more down, and then just move this
maybe a bit lower. Let's just take look
where our Z axis is. So let's just move
this slightly lower to have it start off actually
from here. All right. So let's just take a look now. So far so good. Slowly
starts moving up. And then starts moving
towards the ship. Perfect. Let's just
take a look at our z location
now, the last one. Okay. For the z location. For this one, let's just
take out this key frame, and then we have
two of them here. We don't need two,
we only need one. Let's zero d two together. So res S Y and then zero. But we want it to be
at the same position, so let's just move this one. More like that. I
think that's going to zero S Y and zero. There we go. And then for here, we want to shrink this
handle a little bit, so it's much more natural. And again, the same thing
for the bottom part where we want it to start off just
a couple of frames later. So around 18. So it lands there, and then it starts moving. So it's almost like a delay
that we're creating here. And it's very similar to how the shot from the actual
movie begins as well. So there we go, gets there, and then it slowly
starts moving forward. So this here is
where our rotation goes a little bit too far,
where it should stop. So let's just take a
look at our rotation. So rotation should be
right around there. There we go. Okay, it should be much more softer
than what we have here. So make it a little
bit more like that. Let's take a look
at our rotation. Okay. Let's just make this slightly softer. Okay. And then this should be fairly
straight almost perfectly. Along with this one should
be f almost shorter. Let's take a look at one now. So far so good, so far so good. There we go, and then
zooming towards. So I would probably want
it to zoom even longer. And I don't want this to go
down there, so let's see. We want to probably take
this slightly more upwards. Let's try to zero d rough
out a little bit, S Y zero. And then just move this
one very slightly down. There we go. Okay. And then here is where I want my Y
movement to start actually. So the Y movement,
I wanted to start a bit sooner. So
right around here. That's much better.
Okay. We still have a bit more of a rotation happening that I'm
trying to fix here. Let's just take a
look at our rotation. I guess, if we even this
one out completely, S y and then zero, they should pretty
much mix our rotation. But it's a bit too
aggressive, like I said, and so I wanted to just
have a bit more of a fall off That's why I'm kind of pushing it slightly
towards the right. I guess this is close
to we can get so far. Let's see our Z movement
where it stops. Z movement stops right here. So maybe if I push
the Z movement slightly more over there. There we go. Much better. Smoother. Perfect.
So we have that. And then one more extra final
part that I want to add to our animation is
also for the ships to move slightly more downwards, but we want to keep them. We want the final frame to
be right where they are. So it's kind of like almost
like a reverse animation. So let's just go here under our timeline. Click
on the ships. And let's just move
this here. Go here. We have our min, and let's just go all the way here
to our final frame. So we want them to be
here for our final frame. So I I, and then Z so press
I to insert key frames. And then for the
starting positions, we want them to just
be slightly more up. So, for instance, holding
shift on the min, and then moving this
slightly more up, holding shift on this one,
moving it slightly more up. On Z one, just
changing it slightly, resting y, y, I, and then also making sure that all of them
are going to be, let's just click right here, going to our graph editor, and then selecting all of them, right click linear
interpolation. And then let's just take a look. There's a very, very slow movement of the ships
going downwards. And then we have our scene pretty much being
created. There it is. All right. This pretty much concludes everything
for the animation. What you can do now is maybe do some minor
tweaking, if you want. So for instance, in my case, maybe I just want to move some of these ships
slightly more, spread them out a little bit. So just lay around with this. But not too much, and so on until you get the final result that works best for you. I think that for me,
this is pretty good. And then in the next videos, we're going to start
adding our lighting, texturing, and also thinking about working on
the volume metrics, which is going to be the
most important part. Alright, once you have the
inimation, you're good to go, and I'll see you guys in
the next video. Cheers.
13. Adding the light: Uh, to begin, I'm going to rearrange my layout
just a little bit. So I'm going to merge these
two windows on the top. Then I'm going to
zoom out slightly, so I have this top part only
assigned to my camera view. And then I'm going
to add my PUR RF. Right here, I think it's
going to fit fairly nicely. I'm going to lower
this, maybe slightly down and then try to match it to get the most
out of my space. I guess this is as
close as I can get, which is fairly okay. So just shrinking this part, maybe slightly down,
cutting it up like this. Should be more or less
okay for me. All right. Then additionally,
we're going to add one extra window right
here at the bottom, which is going to be used
for our timeline, like that. We can lower it slightly down. And then this part,
I'm going to use for, let's see my three D viewboard. Perfect. And this should pretty much be it for my layout itself. We're going to press n, and
then go here under view and just add one extra zero for the n part and
then add one here. And I'm going to do the same
for my camera just so make sure that there's no clipping
going to be involved. So let's add. There we go. These values match up perfectly. Then the only thing that's remaining going into
our render settings, changing our render
engine to cycles. From supporter,
we're going to use experimental because if you
weren't here in part one, where we were doing
the highliner, we're actually also
using displacement, and we're using
adaptive subdivision and Adapt subdivision primarily works when
you have your future set to experimental, so
that's why we need it. For our MC samples here, I'm just going to use
around 400 for now, and then I'm going to do the
same thing for our render. I might change these
setting slightly later on. I'm going to click
out the D noise. I'm not going to be
using any de noising, and then for color management, I'm going to put it as AGX. And I think that pretty much settles everything
that we need for now. We can go in our top
layer here and press Z, and then go under rendered to
turn on our render engine, and this is how it
currently looks like. So to change it, we're
going to be lighting up our scene primarily
using the sky texture, so I'm going to go
under color and click. There it is sky texture. And so now we're
just going to be tweaking some of the
settings in here. For my sun size, I'm going to change this to
something super small 0.01. Intensity. I'm going
to keep as is. And then the elevation.
I'll probably going to have to tweak
later on, but for now, I'm just going to
lower it almost like to almost like a sunset, so we're on 3.2 degrees. Rotation. I think my sun
is like somewhere on the far right end because
I can see it based on the shadows
that it's creating on the high liner,
so that's fine. Altitude, we're going
to be very high up, so I'm going to type in ten KM, so 10,000 meters up is going to give us this like
nice, bluish tint. And then we are also
going to be changing it. Here we go. There's
our sun over there. We can barely see this
little white dot. Then for the air, I'm going
to keep right now as is, but I'm going to change
the dust to zero, change the ozone to zero, and then change the
strength to maybe, let's see, I use 0.6. So you know what? Let's just
go with 0.6 here as well. But then for the air, I'm
going to slightly push the air down to also maybe
0.8 like that. And so this is what we have
for our scene currently, gives us this nice
little bluish look. And so, from here and out, I think before we talk about the volumetrics or
the mist at all, let's just do some of
the easy stuff first. I'm going to go to my final
frame so shift click. And then for these shifts, we want to change
their look as well. So we want to just create some
kind of a basic material. I'm going to go here under
planes collection right here. A click on this one
on the left side. Go under here, material. I'm going to click New, call this one Ships, and I'm going to
take this window, move it all the way like this. I'm going to press N in here, press N in here so that I hide the side menu and then go
under a Shader editor. So once I have
this ship clicked, going to go here and
just change the colors, make this one pure black, and then we'll push the
roughness all the way, so there's no
roughness going on. Maybe just add a very, very
subtle metallic, not much. Something like this is
going to be fine enough. Now we want to just click
on all of these ships. So Sift, left click on this
one shift, left on this one. Left left on this
one, and then shift on this one that
has the material. Brest Control L, and then
say link the materials. So now all of our
ships are going to have exactly the same material. And we can later on maybe
come back to this one. So we can see that this one
is it's not pure black. It has a little bit of a tint. So what I can do is actually take this eye dropper
and just say, Hey, use this color, so it's closer to it. It has a little bit of
let's see how much it's 22, 16%, white in it. So this would be like 100. So we had, like, roughly 16 ish percent
if we pressed in here. More or less, 14, 16. Let's just go with 16. So, like this. There we go. So we have our ships
pretty much set up. And now we can kind of talk
about adding a miss pass. I'm going to hide these
ships over there. I'm going to go into my camera view so that
everything is here. And we can talk about our
volumetrics and our miss pass. We're going to be adding
volume now into our CM. So if your device cannot handle volume where
you're trying to avoid volume metrics, you're not going
to be able to have all of the benefits of it. You can kind of fake
it a little bit, so I'm I'm going to skip a
couple of steps right now. But what you can do
is go here under your view layer and enable your mis pass
this one right here. Then additionally, what you're
going to want to do is go on your camera settings and
inside the camera settings, also here, show miss so that you can see your mist
coming from the camera. And then lastly, I believe, inside our render settings. If I go here, let's see, lights, volume actually no here. Sorry, world settings,
Ms pass here. We can actually change it. So if we were to push
this all the way, let's see past the highliner, this number, like that. Let's see, it goes past, and then we went into
our compositing, and you don't need to
do this, by the way. Now, I'm just going to
render an image so I can show you. All right. It took me 24 seconds
for this one frame. And if we go, let's close
this and change use nodes, and I add a viewer. You can see that we also have a mist pass here
which creates it, and then we can control
the strength of it of the mist here
happening as well. And so that is one way where you're going to be able
to kind of control it. But like I said, it's
not going to give you the same effect
specifically around this, almost like halo effect
of the light and some other stuff with the way that the light
is being scattered. So if you can, I highly recommend trying out the trying
out using volume metrics. There are some minor settings that we could probably tweak. So the way we're going to
do this is we're going to start off by
adding a simple cube, then we're going to press
S 100 to scale the cube. We're going to go here
under our object and then view display as we're
going to put it as a wire, so that way, we can see
actually what's inside a cube. And now we just want
to match the cube. So S Z and then maybe just go into the
edit mode. Take this. That's weird. Let's
just S Y a G Y. Just try to cover
the main area or a shot where we
have the highliner, and the ship and then
GX roughly round here. S X more or less. Something like this
should be fairly okay. Once we have the
cube here selected, let's call our cube atmosphere, and then here under new, we're going to add
a new material. We're not going to be
using a principle BSDF. Instead, we're going to be
using a principle volume. So this one here, type it in, and then connect the
volume to the volume. Right now, because our
density is so high, we can't really see anything, so we need to change this
to something like 0.005, and now we can slowly
start seeing things. We can still see
our sun over there. And so something
that, for instance, you won't be able to get
by using a miss pass is, if I push my enesotropy
all the way, you can see this nice
little haziness effect that we're getting
on this right side, which is exactly kind
of what we want, similar to how we
have in this image. So that's one of
the things. And now this is taking way too long for you to process you D R endersen. You could kind of tweak this by let's see going under
our light paths here, and then changing these
values slightly lower. So maybe you can change
the diffuse, the glossy, and the transmission
here to slightly lower, and then maybe total
light bounces, reduce the total ight
bounces to four. And it's going to
more or less remain similar quality without kind of without losing that benefit of the effect that we're
trying to achieve. I'm going to reset
my settings here, but you could pretty much
lower them to get a very, very similar result altogether. There we go now,
and then pushing the anisotropy all
the way to one. Additionally, I'm going to add a little bit of emission
strength to kind of like mitigate what
happened right here where we kind of lost our
effect, this one of the mist. So this is kind of like
what our anisotropy does. You can kind of see
a small shadow right here happening through the
mist because of the sun. So that's exactly what I want. We can see it maybe
ale bit less now, but if I push it all the way, then we can see a
little bit better. Then what I want to
do is just change the emission string to
something like 0.001. This is going to almost fake it. Going to give me back a
little bit of that nice miss. And lastly, for the
emission color, I want to add a little
bit of blue and haziness. And I have a number here saved that I want to add in here. So under my hex value
just type in E 8f5ff. And again, like I said, this is everything here that you see is something
that I've tested. I tried out before. Sometimes it worked, sometimes
it didn't work. And so it was like a hug
lot of trial and error, now I'm just like giving you
the condensed version of it. Don't think that,
Oh, how does he know which color, which
this, which, that? Everything came out
of a lot of testing. La, this pretty much kind of gives us a good
starting point. If we go to our final frame, so shift right
click to frame 360, what we want to
have is our sun B right kind of below
our ship over here. So what we were going
to do next is simply, let's go here under
our settings, and then sun elevation, pushing it slightly right below. Oh, right now, it's above. There we go. And then slightly
towards the right side. So this is kind of almost like this shot here,
the second frame. This is what we want. And you can change the
values, play around with it. But for me, what I
found, what worked best, what gave me the nice li of this hazy feeling from the sun was this shot right here by having the anisotropy
all the way to one. And so this is kind of
like how it looks like. I'm going to test
take a quick render image test just so I
can see how this is, and I'm going to speed
up the video from here. All right. So for me it
took roughly 20 seconds to get this kind of
frame, but here we are. Perfect. And then this is kind of like where N s
is going to be where we have the sun rotation right behind our ship
like this, more or less. I would say,
something like that. We can maybe just
change the sun size. Let me see if we
change the sun size, that's way too much. So I'm probably going to
stick with the settings that I already All right. This is going to be pretty much for this video, and
then in the next one, we're going to be
tweaking our high liner, which is going to
be the next part. So we need to also
for the high liner, get like this nice little, as you can see here, glow reflection happening on
these stripes that we have. So in the next video, now, we're just going to
be changing a lot of the texture settings
that we have pre set up in our highler.
14. Improving the textures and light: This video, I want
to do two things. I want to tweak the
texture of our highner, so it matches the
shininess that we see in this reference
image right over here. And then additionally,
I also want to affect the movement of our sun to match it closely to the
shots that we have in here. And then if we also have time, I will also want to change a
little bit of the settings that we have created for our principled volume
right in here. So, to start off
with the Highlander, I'm just going to click on it. And then here you can see
this large spaghetti monster that was created in part one of the course with
all of these textures. Now we tried our best to be
as organized as possible. And so in short, we
don't really need all of this stuff
that we have in here. For instance, you can
see all this, like, damaged stuff done to it, that's purely run through
this displacement. And what we want
here is just to take the displacement waves and only use that one or
our displacement. So we're just going to
go here and plug it into the material output
of the displacement. And then we're going
to change the settings to make it slightly
smaller so we can get rid of these nasty damages
that were done here. So I'm just going to use
something super small, maybe here for a
height of like 0.5. And then in here scale, I'm going to change it to 0.1 to get something
similar to that. The same thing for
our bump map as well, we're just going to take
our bump from the top one. We don't want to
use the PBR one, and then we're going
to plug it into our normal right in here. And we can pretty much maybe even reduce some of
the bump map here. I would say to, let's see 0.5. Okay, let's just try one for now and see how it's
going to look later on. But let's just keep it here. And then the last part,
which is actually the most important part is going to be our roughness here. So we're going to be changing
how things are plugged in. At part one, we didn't use any roughness to
avoid any kind of shininess happening to the
high land because this was the shot that
we were recreating. So it was, like,
very, very flat. No shininess happening to these edges, as
you can see here. But now in here, We can actually see some shininess right
you see at these parts. So what we want to do
first is kind of create a nice separation
for these lines, so that we actually
have here under this color ramp that was
used for our wave texture. And so what we can do
is just take this knot, turn it pure black
all the way down. So now we have a separation
between black and white, but we want to reverse
it so that these ones, the lines that are
currently black are white, and then these larger
ones are actually black. So we can go under this arrow and simply select
flip color ramp. We go. So now if I were to pluck this into our
roughness and then preview the roughness and then change this color here all
the way to pure black, this is exactly what
we'll be getting. And if I were to
preview this value, and see how it look like you can see that
we now have like this completely huge shyness
happening on our highliner. And It's not bad, actually, the more I look at it, it kind of almost works, but we want to add some extra
details to it additionally. Also, I'm noticing this is probably happening
because the shines, this middle part here, as you can see, yep,
that's definitely. So we want to mix this with we already have it mixed in
here as a matter of fact. Let's just preview this multiply in between the mix and the
multiplier right here. So let's just preview
what's going on in here. So this is what we have so far. So if I were to change this, let's say to Lighten, think that should give
me some nice details. There we go. And so
I'm going to take this multiply and plug it into the roughness right
here and then preview the roughness one
more time just to see what is I'm getting. So far, I'm pretty much liking
what I have going on here. So let me just preview now this entire texture to
see what's going on. Let's go into our view camera. Okay, we're slowly
getting there. I would say the only thing
that's remaining is changing the strength of this color
here in the roughness. So I would probably
want to push it like halfway up to make it way way weaker,
maybe even more. There we go, becoming
really good. And now I'm just
going to clamp it to get a little bit
more of those details, and then push this
one slightly more down to get back some
of that shyness. And this is exactly kind of the result that
we're trying to get. Perfect. So we have our
highliner set up now. Yeah, let's deal with the
movement of our sun last. The next thing I want to do is actually mess around
with my volume metrics. And so what I want
it to happen is that the further away
it is from the camera, the denser the volume gets, and the closer the one it is for the camera, the
less denser it is. So what we can do
here for our density, we can take in and add
a gradient texture. So if I could just go here
under gradient texture, and right now it is puro black, but if we add breast control
T and add our mapping. And so for the mapping, we change the rotation to
negative 90, I believe. If I were to let's
just go in here, or you don't have to, you
can just take a look. So when I make this render, right now, our cube is
looking puro black. But if I were to
change this location, you see that it is affecting how my fog is being
moved around. So what I want to do
next now is under this gradient texture
at my light just died. Let me just replace my light that just died.
Sorry about that. Okay, I'm back.
Sorry about that. My left light is on batteries. So I guess the battery ran
out, and then it just died. Whereas the right one is
constantly connected to cables, that one shouldn't ever die, I hope not, at least. Anyway, we were talking about adding a color ramp to drive
this gradient texture. So I'm just going to go
here under color ramp. And then what I want
here is so as you can see this white one is
actually there the whitr, it is the denser it is, and then the blacker it
is, the less denser. It is. So we want to actually take this white one that's here. We want to make it almost pure
black, but not completely. So, you know, like, somewhere somewhere around
here is what we want. So it's almost pure bada. So then if we were to push it, then that part in front
is going to be denser. So this part here is going
to be denser with more fog. Additionally, what
I want to do is just lower down my endisotropy, just ever so slightly to, like, value of Yeah, I guess, 0.993 should
be fairly okay. And now we're getting this
nice little fog effect, very, very similar to how we
have it in our initial shot. And so the only
thing that now is remaining actually is to push to move our sun a little because you can see
our starting position here, the sun isn't as strong
as it is in our shot. And so what we can
do is just take it. Let's see all the way. Let's go under our rotation, and just move the
sun all the way to roughly around 18
degrees towards the right. Should give us a little bit of that nice sun
happening right here, while also having the highlander
just enough in focus. And then if we want to make it a little bit denser
around the high ner, we can push this almost
black value all the way, as you can see, it's now completely
covering the high laner. So we just want to be mindful
of how much we cover it. Let's just take a look how
this is going to turn out. I think this is
almost pretty good. I'm very somewhat
satisfied with this. Let's see, from here. Comparison looks
relatively good, I would say. All right. So from here now, as the camera is moving, t just also add a keyframe. Let's not forget to add a
rotation key frame here. So let's just press R click or you can add right one here. And then as the camera is
moving about, I'd say Here. We'd want this sun to be
slightly more behind. Lets see where it's
going right now, it's going to the right side. We want it to be slightly more behind this ship
right here, but not fully. So we do want to have that
glare effect happening, that bleed of the light
right around there. That looks pretty good. So L just add one
more key frame here. L just press this. And then
as it continues going, we kind of want it to be
just ever so behind it. Let's see. I need
to lower it even further to somewhere here. 11 maybe. 11 seems to be
the spot right there. And we can maybe
also just change the elevation so
it's slightly lower. I guess this is not bad. I want it to be a little
lower. Around here. All right, Let me
just take a look now. And here, we have it
being completely covered. And then our starting shot, we see some of the
ships over here. I'm going to do a
quick render test, so I'm just going to
press render image to see how this is going to turn out, and I'm going to speed this up. So as expected, it is
taking longer to render. On my 2080, it's around 1 minute and
12 seconds per frame. So if we have 360 frames, roughly it's going to
take three 60 minutes. So just do the math for that. And let's see what we have here. I would say I want it to be even more foggier around
the high ner here. And so what I'm
going to do next, but everything else
pretty much looks good. What I'm going to do next is
just push this fogginess, maybe slightly increase the
color a little bit more up. Not too much, just a little bit. Okay. Now, let's check
the rest of our frames. Okay. I'll probably maybe
push this a little more back. E. Here, and then this part then change it a little
more up to change the high liner. Let's see. Let's keep moving
this more back. Okay. I'm looking at this window here as I'm
moving the color ramp. That's my main focus right now. Everything here seems
to be looking good. Except, it looks
like we didn't add a key frame to the final
position of our sun rotation. So let's not forget to add
that key frame right here. We wanted to be We
said around 11. So adding that last keyframe here is also going
to be important. Additionally, I'm going
to increase the size of the ship because looking
at the comparison image, a little bit more
is here at the top, so I'm just going to go
clicking on the ship, going under my sittings, and just scale by distance. I'm going to change the max here ever so slightly to
get this kind of look. There we go. So I'm going to go now to my
starting position. There we go. Super foggy, little bit more foggy
for the high lender. That looks pretty good. My middle position,
right around here, we're supposed to have that
light bleed effect happening. Let's see if if we are. Is it prominent? It is not as prominent as it's
supposed to be. So I'm going to go back into my role settings here and
just see what's causing that. I might need to push
it a little bit more to the wards the
right. There we go. Anda press. There we go. That's our light bleed
effect right there. And then As we go, it's going to slowly come to this point where it's
right behind our ****. So we have pretty much the
movement, the animation. I would say the fog also
set up to a good result. And so if you're happy
with all of this, I would say, we're pretty
good to call it a day. And then in the next video, we're pretty much left
with just tweaking with our render settings
for our final output, and then jumping into
post and after effects. Alright, guys, I'll see
you in the next video, which would be fairly
straightforward and super short. Cheers.
15. Improving the volumetrics: In the previous
course, we render our see using the Open
EXR file format, and this one we'll be using PNG. And it mainly has to
do well, two things. One is, I couldn't help but
figure out how to solve this overblown
highlight issue that we get once we export it
into our after effects. And even with changes in
our exposure, Lumetri, it just didn't seem to give me a result that
I was satisfied with. Luckily, this shot,
in particular, doesn't require as
much post processing as we did with our first
one in the previous course. So we can kind of
get away with P&G, even though it's not
my preferred choice. So for our file
output settings here, we can just change this here to PNG and make sure you're
entering an eight bit. We don't need to go
16 because there's not much color
information in here, and our shot is going
to be pretty much almost done and ready
right out of the render. So additionally,
in light of that, we can pretty much do a lot of our post processing
in here and then just do some camera imperfections
later on and some lens flare details
in after effects. So whatever it is
that we see here, unlike in the previous course, our shot was completely
different than the render one
because of OpenX R. Whatever we see here,
it's going to be pretty much the same
as our file output. So What I want to do, I want to go under here my render settings and then scroll all the way down
where we have our AGX, and we can pretty much add some color contrast here and change our exposure
and our gamma as well. And this is going to be
actually very important. So for my exposure, I'm just going to actually, for my look first,
I'm just going to use a medium high contrast. And then if I go to my final
frame, all the way here. What you'll notice is that
obviously these ships are slightly more brighter than the ones that we have
in our final shot. And we can kind of tweak
this as well inside of our renderer versus having to worry about it later on in post. So if I go under my exposure and I just start dropping this down, all the way to start let's start around here, negative 0.1. And then I dropped the gamma
as well. Around here 2.5. I start getting these much darker ships, which
is preferred. Additionally, now, if we
go to our first frame, you'll notice that
our initial shot looks a little bit off. So we're going to be doing
some extra tweaking now in this video to kind of fix
all these little things. So I'm going to scale
I'm going to scale my atmosphere a
little bit more in the x axis to push it like this. And then I'm also slightly
scale it in the z as well. I'm going to push this not all
the way to the right side. And additionally,
I'm going to change the color here all the
way to pure white, something that I forgot
to previous videos. And now we're slowly kind of starting to get back
to where we want it, but it's still not there yet. Luckily, we can play around with our emission strength
here to kind of bump us back to our
original position, so I can change this 2.004. And you can already see
we're starting to get back to where we kind of
wanted it to be. So this is kind of like the current result that I'm getting. And it's fairly close to what
we want in our final shot. I might want to change my
emission strength color to be a little bit a
little bit more saturated, and maybe more
towards, let's see. Let's try to play
with our citration. I was going to see more
towards a yellowish hue, see what kind of result
that's going to bring. I think this matches
relatively close to our two shots over here. Let's take a peek now at
our final shot. Again here. You can see we need to play
around now with our exposure, maybe slightly just drop
it down, go back in here. Let's see if we need to maybe
bump up our shot in here, or what we could do
is just slightly decrease the density of our fog. That's going to make issues
with our highlander. So maybe we don't want
that, and maybe we'll just change here to 0.5. Again, now, this is going to be a dance of back and forth, tweaking our settings
until we get some results that we're
really satisfied with. But I would say this is relatively close
to what I'd want. Maybe I can move just these
four points slightly closer G and y towards here and that's going to also
slightly affect my density. So right around here, I still want to have
it covering my camera. So this is as close
as I can get so far. And then maybe I
can do the same and push this side though,
slightly more back. Let's see what we get now. Alright, this is
looking pretty, pretty, very close to our initial shot. I would probably want to add a little more sensitivity
to our roughness here. So I might just drop this color slightly lower to be to add a bit more shininess happening to our highliner
around those edges. That we created. I think
this is looking now much better and closer to the
original shot that we want. And so I would say this is as close to it as we're
going to get so far. I am pretty satisfied
with these results. Remember, you can always
tweak with all the settings. Check out with your
movement of camera. Let's just check our
movement one more time. So our camera starts off here. And for instance, I'm not
satisfied with this one being maybe a bit too abrupt
or a bit too aggressive, but I guess I'll
survive with it. You can maybe tweak yours
to be slightly smoother. But everything else here seems
to be looking pretty good. I would say together. And there we go.
The shot is there. So in the next video, I believe we can pretty
much just change our final compositing settings to render out our
layers and everything. And that's going to
be pretty much it. And from there,
we're going to jump into rendering our shot, and then going into
post production. So I'll see you guys
in the next video. Cheers.
16. Render settings: Is it the final video, before we jump into
post production, we need to prepare our
scene for rendering. As you can see, I have done
some slight changes to my shot right here
where I changed the endstropy to 0.980, and I've also changed the
exposure to negative 1743, and then Gamma 0.404 with the emission color pretty much being this value right here, and that kind of gave me
pretty very, very close look. So, you know, as I said, I encourage you to do
some extra final tweaks to get your scene to that level that you're
trying to achieve that get closer to the shot
as we have it in here. And so for me, what
we want to do next, at least is now just go over all of our render
settings one by one. So I'm going to be
using 600 samples. You don't need to go that high. For me, 600 samples render
out this shot in 50 seconds, so I'm okay with it. But you can also play
with your noise threshold by slightly increasing
get more allowing, maybe a little bit more noise in some shots that you
can get away with. But if you the decrease it, then it's going to
take more time to render out those parts
where it has more noise. So essentially, if you want to kind of bypass
some of the noise, you can increase this number. So that should kind
of, like, help speed up your render times. I'm not going to be
using any Denise. And then everything
here in my Max bounces of light is going to pretty much remain the same as it's
by default and blender. As I said, with the
exception of our AGX, medium height contrast and
the exposure and gamma that I personally tweaked
for my own preference. Then if we look at
our file output at the 192-81-6204 frame rates, create a file output here. I already created one folder
here inside of the beauty. So I set that up. And then R GB Alpha eight
bit pretty much there. And then aside from that, everything else is over
here as we wanted. Then for our layers, I added in combined, the missed one that we created very early on at the beginning. And then also I added one for
volume for here for direct. And then also I
enabled my cryptomats, which we're going to
now take later on. Once you have all
of that set up, simply glow, click Render Image. I already did that for
myself, and that took me, like I said, around 53
seconds to complete. So render out the image, and once your render
is completed, just go here under
your compositing tab. And you'll see pretty much
of a window similar to this. You can add shift a
viewer node and then connect your image into both the viewer and
the composite in here. What we want to
do now is we just want to add separately
now the ship. We want to add the other
ships to the highlander, the small ships and also the
mist and volume direct pass. Let's just take a look how
our mis pass is looking. So this is our mis pass. You can see all of these things, and then here we have our
volume direct as well. So those are all the
passes that we can potentially use in
our post production. So from here, what I
want to do is just shift A and then file output, and I'm going to go shift A
and cryptomat. There we go. So for the cryptomat, I'm just going to start off
and select the highliner. So here, we can see it. We can barely see it, but it's there. And so I'm going to simply
plug in the highliner in here. And then under my node
settings under properties, I'm just going to change this
one to be called highliner. Slash highliner. So it's going to create a
folder called highliner, and inside the folder
is going to create files, also called highliner. Then I'm going to add
a secondary input, which is going to be
or another cryptomat. So I'm going to shift
D duplicate this cryptomt, MT ID change, and then control shift left click with my mouse to turn
using my node wrangler, just to find these ships, and I'm going to choose
under material so that it shows all
of them because they're all sharing
the same material, clicking on the ad, and
then going on ships. And then going
back on the image, as you can see, are here. So I'm going to plug this one into the next output
that we've created, and I'll call this one ships slash ships this. There we go. And then that pretty
much now leaves only our mist and
our volume direct. So in here, I'm just going
to add two more outputs. One is going to be
called Ms slash Mist, and then the other one
is going to be called volume volume D volume re. That's how I'm
going to name them. So my mist is going
to go into the mist, and then my volume direct
is going to go there. And I think that pretty much solves everything
else that we need. Let's see, what do
we have over there? We had some That was weird. Not sure what that
was, but Okay, In any case, I believe this pretty much
sets up our scene. Let me just double check into my original composite
how I had it created. Yep. That is fairly accurate. And so what you can do from
here is simply press render. So, and let's just also leave this beauty
one out of here. We don't want to
render into the Cute, one to render into the
render. So in here. Except, and that's
pretty much it. Press render and render
the entire animation. And I'll see you guys
once this finish is rendering inside
of after effects, we'll go deal with
post production.
17. Preparing files inside AE: E to after effects.
In this video, we're going to set up our
files for post production, and for the final part,
we're going to also be installing a plug in that's going to help us with
chromatic avation. So we're going to be taking things a little bit differently in comparison to how
we did it in part one. So to start off, we
can actually just close off this
window right here, and then go click
here under Project. Right click, go Import
multiple files. Just need to find all your
files that have been rendered. So I have them right here inside of my render
folder that I created. So I'm going to
click on the Beauty. Start off with there. Click
on the First image Import. I'm going to add
immediately next window. Now I'm going to go go
click on the Highliner, click Import and just do the same thing for all
of them, so Missed. Then we have also our ships. And we are also going to import as well, our volume direct. Even though I'm not 100% sure I will be needing
it in my use case. You might also want
to use it for you, but it will depend on how
you created your shot. So I want to click
down here because I've added all of the
key files for now. And then what we want to do is, I think After effect is that if you click on one of these
images and you look at it, After Effect interprets
these images as 30 frames per second
for some reason. And so what you
want to do next is just press Control
Alt and then G, which is going to give you
this interpreter footage, or you could go right click
interpreter footage Min. Then just here, say, assume
this frame rate to be 24. You need to do this
for all of them. So control G 24, Control G 24, Control G 24, and for the final 124. And that pretty much has our
scene more or less prepared. The final part of it is the
installing of a plug in. So previously we
use a method to add chromatic embraion to
the previous video, but for this one, I discovered a little cool plug in that's going to
speed up the process, and I think it gives
a little bit of a better result for
this particular scene. So If you go into your
resources folder, you will find there is a
file called QC A V 3.2. So all you need to do
is just enter the file, and whether you're
using Windows or Mac, you would click on
one of these two. You can also go here under
the documentation and help, which is going to
set you up to with a notion page that has all
the extra information. And this Quick chromatic
aberration three, I believe it's called, comes from a team called
Plug in everything. You also have them on YouTube, so be sure to check it out. That's kind of how I found
out about this plug in. And so for the
installation process, it's really not that hard. All you need to do is
go QC A three here. Click on this one, Control C, and then go here where you have actually installed
your after effects. So for me, it's in my C, and then I go under
program files, and I find where it says Adobe. And then once I'm
in this window, I'll click here on
Adobe After Effects, Support files, find
where it says plug ins. So right here, and
then just control, paste it in here,
as you can see, I have a couple of other
ones. And there you go. The caveat to all of this is that we do want
to save our scene now, and then we need to reset after effects for it to actually work. So do this next. So go file, save us, save your scene somewhere. I'm going to save
mine right now. And I'll put it. Let's
see, here my tutorials. Save. Then once
you're done saving, close your after effects
and then turn it on. And I'll see you in the
next video where as before, I won't be having the
camera turned on, as we will be jumping now
into color correction. Regardless, see you
guys there. Her.
18. Post: Imported our files
into after effects, we've installed the plug in, we reset after effects, and now we're ready to
start on post production. So to start off quite simply, I'm just going to go and
rename this 0012 beauty, so that I know this
in my beauty layer, and then I'm going to
dragon, drop it here. It's going to automatically
create a composition, as you can see in here. Right now, if I
were to press play, is going to show
me how my current scene And just by taking a
quick observation at it, one thing that's kind
of slightly bothering me is that at least in
my particular case, minus has a little bit too
much of a fast movement. You might be happy with yours, so you might not want
to do the next thing. But in my case, what I
want to do is extend the duration of my
composition just by one extra second and
then stretch it out, which is going to just slow down my scene ever so slightly. So I'm going to press control and then letter K
on my keyboard, which is going to give me
the composition settings. And then in here, I'm just
going to change the duration add it one extra
second. Press enter. And now I need to fill in that
extra second by stretching the duration of my beauty
beauty Coperate here. So what I need to do is, if you don't see
this stretch here, just click on this icon at
the bottom left corner, expand or collapse in and
out duration stretch panes, and that's going to give
you the stretch window. You can click on it.
Then under the duration, just change it here to 16, which is going to give
you the stretch vector of one oh 66 to seven, so okay. And it's going to
automatically add a duration. And you see that it
added some extra frames in between it interpolated
those frames, which slightly is just going
to stretch out our sine a little bit add a bit of
that slower movement to it, which is perfectly okay. Go. All right. Now, from here, you can also press Control
Alt, and then, I believe, left click, which
is going to bring you all the way to
the starting frame. And what we want to do next, especially for those who
haven't used volume metrics, is we want to add a
mist to our scene. Now, if you have
used volume metrics, we still want to have
that mist into our scene, but it's going to
help us a little bit extra with the
density of it inpost. So we're just going
to drag and drop this mist right above
the beauty in here. Now we need to tell
after effects, kind of like what color to use
for this mis because right now it's using this
gray one if you press T to give your
opacity sentence, you can kind of control it
and adjust it a little bit, but I don't want it
to be like this. Instead, I'm going
to right click, go under new and
then click solid. And then I'm going to choose this particular color EDF FFF, for my solid, p's k
and k one more time. Now I need to tell
the solid to use this mist as a luma
mat to drive my fog. So if I go here under Track Matt and I
change this to mist, and I click on this icon here, which is going to
change it from Alpha met to uma Mt selected. Now we get our new fog added that is using
primarily this color. Now, if you're not
happy with the color that you've picked and you
want to change the color, an easy way to go into
your solid setting is when you have them selected,
you select your solid, you press control, shift, and then letter y
on your keyboard, and it's going to give
you the solid settings, so you can then go
here and play around with the color of your mist. In my case, I'm pretty
satisfied with the one I have. Again, you can
press the litter t to open your opacity settings, control the density this way, or the way I'm going to
do it is I'm going to go here under my effects and presets tab that
you see right here. I'm currently using
the default settings, so that should make
the effects and presets tab available
for you right here. I'm going to type
in here levels. And then if I take this levels, drag and drop it into
the mist right here, and then it's going to give
me the effects control. I can play around with this value right
here in the graph, and that's going to also help me control the density of my mist. For now I'm going to go
with something around here. That works pretty
good in my case. But something that we might have forgotten is if we
look here at our mist, our duration of the mist
is still at 15 seconds. So every time that we add a new layer that's going to be from our
project pane here, we're going to need to
extend its duration to this number in
particular here. So simply click on it. Control C, and then click
on the stretch 1100 here, Control V, paste it, and it's
going to stretch it out. So we have our mist added. Now, in between the
mist and the beauty, I kind of want to
add one extra layer. We can actually maybe
just go above it. As a matter of fact, that
would make more sense. So let's just go
adjustment layer. And for this adjustment layer, let's use aumetr color, which is going to be for
some basic color correction. So I'm just going to drag
and drop it right in here. And then if I go here
under a basic correction, I maybe just want
to maybe, you know, change the contrast
just ever so slightly, not too much, so maybe just a little bit of
contrast right here. And then let's just go all
the way to this frame. What I want to do
here is I actually want to lower the
strength of the sun. So I'm going to go
under my curves here, and then if I go under
Luma versus saturation, and I just slightly add maybe two points
right around here, and actually u versus Luma Sr, and not luma versus saturation. So I can control undo this. And for this in
between the red color, I add these two points, and then just slowly start
dragging this down you'll see that it also decreases ever so slightly the
strength of my sun. So we don't want to push
it all the way because you're going to get start
getting some weird artifacts. So I'm just going to
change it just a tiny bit. So this was like before,
and then this is after. So it just like a very,
very tiny switch, can also maybe change to take the yellow value as
well a little bit. Then add one more
point right above it. So just pushing these two is just going to
change the strength. Like that. All right. So that looks
overall pretty good. I am getting too much of a yellow or round
circle right there, so might need to push
this one slightly more up just to bring up the
haze a little bit back. There we go. But I think that overall
should work pretty good. And then the next thing
I want to do is if I compare the color of the blacks in here versus the one in here, I want to actually
increase the strength of these blacks over there, so I can go all the way
up and then just take this blacks value and
drag it to negative, like, maybe negative 89 like this just gives
me pretty good. Estimate to what I need. And that's pretty much
it for our lumetri. I would say, I'm pretty satisfied with the
remaining things. You can always play
around a little bit. Maybe one thing
that I forgot that I could add is a vignette. So going just right here under
a vignette and just taking the amount and dragging it to a negative could give you
like a little vignete. I don't want to go this strong. So obviously, I'm just
going to have it be like, maybe negative negative 0.5, like, a very, very
subtle vignetting. So before after. There we go. All right, after you're done
with your color correction, you can play around
obviously with these values. You can go into
your curves here, you can push the highlights up, you can drag the shadow slightly down to increase the
contrast if you want. I am pretty much satisfied
with my out of the box, and this is why also we used PNG because one of the
reasons we use PNG, the benefits of it is
because you literally get out of the box
render as you want it. So there's really not much color correction
that we want to do. This particular case. So what remains
next is actually, we want to add now the
chromatic aberration that we use for our plug in. So let's just rename
this adjustment layer. Press enter, call
this lumetri color. And then let's add a new
adjustment layer like this, and this one is going
to be called chromatic. And we're going to go here
under effect some presets, step in here chromatic. I is going to give
you under plug ins everything quick chromatic
aberration number three. Drag, drop it into the
chromatic right here. Going to give you some
chromatic aberration, but in our case, we actually
want it to reverse it. We want the reds to be on this side and the blues
to be on the right side. So we need to go here under, I believe position here. And when we have 0.5, we need to change
it to negative 0.5, and that's going to just
reverse our positioning. And then additionally,
under stylistic, what we can do is just add a little bit of a
blur, not too much, maybe like a three
just going to add, like, very some subtle blur. So this would be
like way too much. So just like round
three, should be fine. Maybe we can just
change this value to 0.7 just to make these
a little bit stronger, but I wouldn't really go more than what we have currently, as you can see,
this is it's very subtle, this
chromatic everation. It could maybe just slightly
increase the blur to four and then decrease this
value to negative 0.6. So around here should
be pretty good overall. And then the next thing for
us is to add the globe. So we can go again, R click
new adjustment layer, enter, type in here, glow, and we can go under our
effects and presets and just go glow as well, drag and drop this glow in here. And then we're going to
be using some values that I already kind of like know
that going to work for me. So for a threshold, I actually want the threshold
to be fairly large, and I'm going to
change it to 80%. And then my radius is
going to be around, let's see, around 200. And that's going to give me like this halo effect
around the ship. As you can see
here, we also have that halo effect right
around here around the ship, and that's kind of what we want to achieve with this globe. That's kind of like the
purpose of the globe. We don't want the globe actually to affect around the ship. We want to be inside this
part of the ship only. So for that, I'm going to
show you also how to do it. But first, let's just
complete our settings here. So the radius, I'm
going to change to 200 and then intensity, I'm going to even bump
that up to 1.6 for now. So it's going to be pretty
high, as you can see. But later on we might tweak the opacity right here
under our globe setting. So we want to tell this glow to only be affecting
the ship inside. And so for that, we
need to use a mask. Now, inside of blender, I made the mistake
of not rendering an Alpha mask, but luckily, we can convert these
ships that we have here into one that's going to give us kind of the
advantage to use it. So it's not actually
going to be an Alpha. It's going to be a Luma, but let me just show
you how to do it. So we need to take the ships, drag and drop it into here, and we again need
to stretch it out, so control C stretch factor, control V, right in here. And then from here, we need to let's just preview our
ships by double clicking here. So this is kind of what
we have right now. And if your scene is
completely black, you just need to toggle
the transparency create right here at
the bottom corner, and that should
kind of enable you. So we need to change now
the transparency over here, and we're going to do this
by simply adding a solid. Let's just go here under solid. Solid composite, and then drag and drop this
solid composite under our ships is going to give us now a black and white value, but we want to invert this
black and white value. So we're going to actually
go another effect, and let's go invert it because everything
that's going to be white is going to be kind of like the mask that's
going to be used. So right now if we used it, it would only have the
globe effect around the white areas and not around the black areas. We
don't want that. We want to reverse it. So
that's why we're adding a invert now, perfect like this. And then to control the
strength of the mask, we can also add a, let's see what this is called. It's something with
an E. Oh, my God. My mind is blanking
out right now. Exposure. There it is. I'm supposed to remember
this all the time, and I currently forgot.
I can't believe. Anyway, let's take
this exposure, drag it right in here. And then the exposure, if we control the strength
of you can see, it becomes wider
or becomes digger. So let's just actually see
how this works in effect. Let's go back into
our composition here, composition C, as you can see. Click on the globe, change the track mat to use the ships, and then change this
here again to a luma. Right now, this is
how it's looking, so we don't really want it
to be obviously like this. What we want is
slightly different. So we need to go here under
our let's see, chips, and then change the exposure
to something maybe lower, as you can see, and this is kind of then
what we're getting. So if we change it
slightly lower, we get this kind of result, which works pretty good. One more thing I would
probably suggest we should probably add our chromatic
right above our globe, so it's not being affected
by the glow itself that way. So, there we go. So if we can increase. We can also go here, change the globe strength on this side, and I just want to have it very, very subtle just around
these edges like this. So we are getting exactly the result we're looking for right now,
which is pretty good. And I'm going to go back
into mylumetric color and just decrease the strength of these blacks that I
added just a tiny bit. There we go. To add a bit more
of that ziness to my ship. Perfect. So far, so good, I would say. Alright. Now that we have our
chromatic added. We have our globe added. You can also play around
with these values. If something is too strong, you can just change
it either in here, or you can go and change it in here under the
exposure settings. So we have a lot
of flexibility in different ways of manipulating
our scene right now. The next thing on
our list would make sense to be just adding
some depth of field. So for depth of field, we're going to create a separate mask, and you might have
seen this method before that something
that I very commonly use. So we're going to go
and add a new solid. This one is going to be
pure white like this. And then for this solid, we are also going to
now precompose it. So we're going to add it
into its own separate group. So I'm going to right click. I'm going to click,
precompose and click Okay. I can rename the solid. I'm just going to call it DOF, which stands for depth of field. And then I'm going to
double click on it to just enter this group to
see what's going on in here. Inside of this solid, I want to add a new adjustment
layer like this. And then for this
adjustment layer, I'm going to go here on the side for effects and the
sep in gradient. And a gradient rep is
just going to give me like this gradient
that you see here. And for it, I'm
going to click on this bottom dot that
you see right there. I'm just going to drag
it all the way up. So we're now going to create a mask that's going to be used to tell and we'll set blender
to tell after effects, kind of like which areas
we want to be grade out, grade out, or blurred
out to be specific. Sorry. And then which areas
we want to be in focus. So everything that
has a little bit of a darker value is going to
be blurred a little bit more versus everything that has a brighter value is
going to be in focus. So we need to add another
adjustment layer, so we can actually just control C control V, duplicate this one. Let's call this one here top. And then let's call
this one here bottom. So let's just bott. And sometimes when you double click, it opens this new layer, so we can close this layer, go back into your
composition settings. Click on the bottom one,
click on the gradient ramp, and just replace the
position to go like this. It goes bottom, and this one goes top or we can actually have it
somewhere around here. Now, we need to combine
these two together, so we can do this
by simply going pressing normal and
using multiply, and this should add
us with the both of So if you would think
this is too much for you, maybe you just want to drag
these slightly more up. You can then take the
bottom one, gradient, drag it slightly more down so that we have a little
bit more area in focus. Now we need to go back
into our composition here, the main one, so we can click on this middle one right there. And we can actually hide this
depth of field pre comp, like this because we
don't really need it. What we do need is adding
a new adjustment layer. And inside of this
adjustment layer, we're going to add an effect
core called lens blur. So camera lens blur
this one right here. Then just drag and drop it
into the adjustment layer. Right now, everything is super blurred out because we haven't really told it which
layer to use as a mass. So let's just go here
on a blur map layer and tell it to use
the depth of field, and then also tell it to
invert that blur mass. And now, as you notice, the top part here is blurred
versus the bottom of. If I go in here and I say, Hey, have this part actually even more blurred
out bottom wise, it's going to reflect
here in my shot, now more of it is blurred out. Now, obviously, I don't
want it to be super strong. Maybe from a blur radius. I want to change some settings. For instance, my aspect
ratio to slightly lower. Let's see maybe the blur of it. Also. Let's use I guess
three should be fairly okay. Additionally, one more
cool thing to show you, sorry, one more Sorry. We can actually hide
these two guys as well. And let's add one more
adjustment layer. If you want to do
like a circular blur. So you can just go here. Let's call this one circle. And then go here
under gradient ramp. Put it in here and just change the way the ramp is being
done into a radial one, push this here in the middle, and then push these
colors around like this. We can actually go and
increase the circle, so we can drag this
one even further, something like that, and
then change these colors, the top one make it white, bottom one make it pure black. So now what's in the center
is going to be fully in focus versus what's out of out of it is
going to be blurred. As you can see, let's now
drag the black values. Let's go where is our gradient, push this a little
bit more like this, and then go back into our comb. You'll see that part here, this part here is a
little bit blurred, then this here in the
center is focused. So this is now a matter of personal preference on how
you want to drive your blur. I'm going to increase
the strength of it just ever so slightly. Actually like this
one. I'm not going to lie. I'm kind of fan of it. Although I am noticing
that in here, this bottom back one is
relatively in a decent focus, so I'm going to decrease
the strength of my blur here to
maybe like a three. And then I'm going to
go control all the left click just to see how my
starting frame is looking. And I think overall
this is fairly okay. So we can actually now
rename this one and call it blur. There we go. And you can always go back and change this out by
simply clicking, you know, use the
bottom ones here, and then go back to your
com, press capslck, I press it accidentally, and you're going to have
the regular blur where the top one here and the
bottom one are being affected. This is now again, a matter
of personal preference, choose whichever
way works for you. Actually, looking back
at it now, like I said, I'm going to, this
is a trial and narrow testing process
where we go back and forth. I'm going to stick with the one that I currently selected. And then additionally, we want to add a light burst effect. It's going to give us
a little bit of extra that what I call it
anamorphic lens look. So we want to go under
new adjustment layer. And then let's call this
one light burst. Like this. And then let's go into here and type in
light burst as well, CC, drag it, put it in here. We don't want to use
these huge values, so we're just going to change
everything here to one, it's going to give
us a very nice subtle blur effect on the side, so that way, it kind
of helps out as well. So it helps with the
scene quite a lot, which is really nice. Now, the last thing
that's really remaining or two
last things that are remaining is adding the lens
flare effect and the grain. So for the lens flare itself, we just need to go
here into our project, right click, import file. And I was able to find this
lens flare on YouTube simply. Just typing in free
lens flare YouTube, and it'll show you
a bunch of them. So just take this
one and then import it And now we just need
to add it to our scam, we can add it to the very top of our sca right around here. And so we want this
lens flare to happen. Let's see, let's
hide it for now. We want it to start
happening actually right about here is when we
want it to appear. So let me just hide
this one here. So we want the lens
flare to happen right around this part here
when this here is appearing. So if I turn on the
lens flare now, and then if I go here under it's the mode and
change this to screen, starts to give me this nice
little effect on the side. And I think if I press play now, it's going to take a while
for it to pre render. I'm just going to press play,
wait for it to pre render, and then just preview
this scene as it looks. Let's preview our shot now. And also, if this is
taking way too long, you can turn off some
of these effects to speed up your preview time, if it's taking too long to
render out the preview. So let's just go press
play and see what we have. This looks pretty good so far. Nice little lens flare. There we go, looking
really good. And then as it covers it, it's supposed to disappear. So I need to work on my
timing here a little bit, change some of the durations
of the lens flare, so I need to lens flower to
pretty much stop around here. So maybe if I push
this, let's see. This is where the nsloer
needs to stop almost. There we go. Then let's
see if we go like this, this is also way too long. Maybe I just need to change the duration of it to be
something around here. Let's see, this part, it goes, and then here it stops. And then maybe this part here. I can actually have it be
appearing about let's see. So this looks
actually pretty good. Let's press plate. Now, if this lens player in particular
isn't working for you, I'll be adding the
link to where you have this library of a bunch
of the other lens flyers, you can try out with
different ones as well. So that link is also
going to be included. For me, in particular, this one does a pretty
decent job as well. There we go. You can
also time it a little bit better just by pushing this maybe slightly lower here. That looks better. Pushing
this slightly more back, or actually pushing
this, let's see. Somewhere here. Yeah, and then pushing this one like that. Let's see, tweaking it. There
we go. Much better timing. So, this pretty much
concludes this shot. So only thing that's remaining is just going here under dit, simply clicking here
under Sorry file, and then export add to render Q. You can use these settings that you currently have and then choose a specific folder where
you want it to be added. And just simply click save, and then render, and this is going to
render at your scene. As mentioned, all of the resources here that you see will be in the
resources folder, including also the links to the lens flares and
everything else additionally. So This is pretty much
concludes this course, and I'll see you
guys in part three, where we're going to be
building our final shot. Hope you've enjoyed it and
see you there. Cheers.
 Daren Perincic