Transcripts
1. Intro: Hey everyone, My name is Smith. I'm a 3D artist with artha, four years of experience in the creative industry. In this Skillshare class, we're going to be recreating this shape shifting animation, utilizing shape keys and modify as we're going to cover a wide range of aspects inside the blend of including modify as texturing, lighting, compositing, particle systems, and a main focus on animation. This class is a little more on the intermediate side. So a basic understanding of the Blender interface is ideal if you need to blend in there or you're just starting out your 3D, Johnny, I recommend checking out my course, making your first 3D scene, which covers the basics of opening blend up for the very first time. As always, I'll be walking you through each step of the process from a to Z. There's a lot of ground to cover in this class. So let's get started.
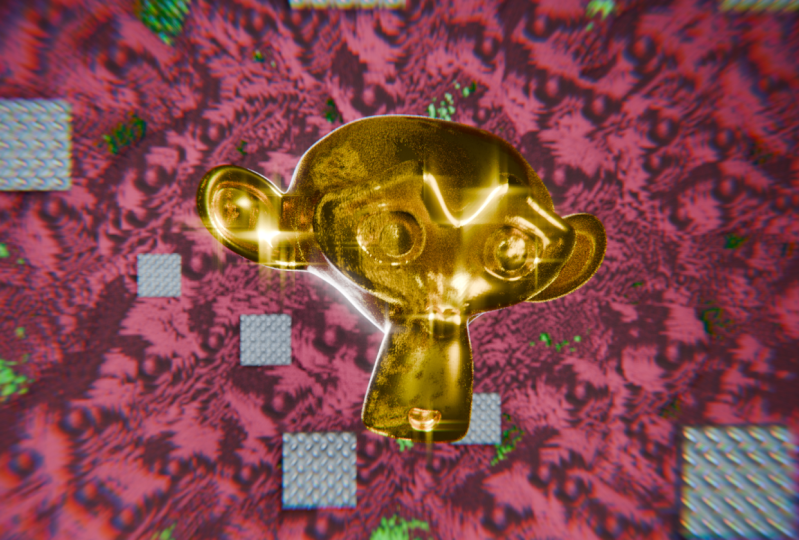
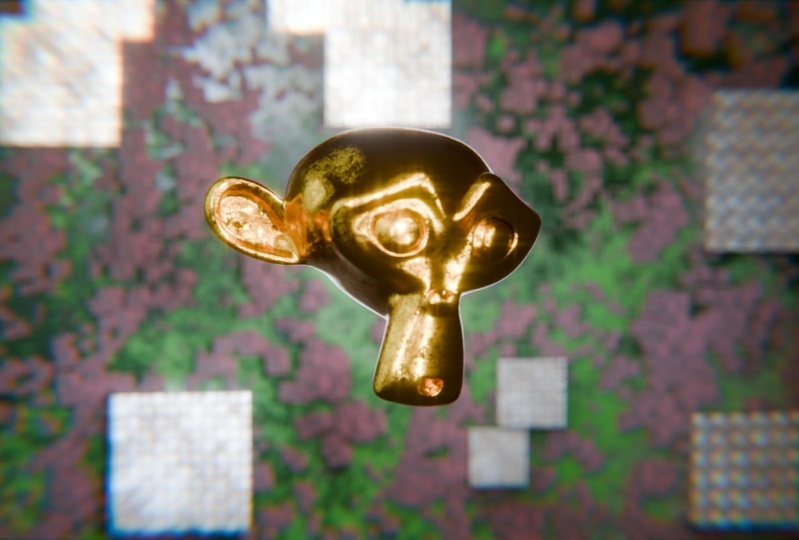
2. What Are Shape Keys: Let's cover quickly shape keys and what they're useful. A shape key is mainly used for morphing from one shape to another shape. First, animation studios will have a department for rigging 3D models and creating the shape piece to help the character animators cycled through their facial expressions or simple process that can even be used to fix a correct prices with bad topology or topology that overlaps. For our purposes, we are going to be utilizing shape keys in conjunction with the shrink wrap modifier, which allows us to create some pretty cool effects. And by the end of this course, you will have this cool morphing animation. Now that we know what shape keys are useful, Let's jump into actually creating the shape keys in the next lesson.
3. Creating Shape Keys: All right, let's get started with creating our shaky animation. So we have blender open here. I'm running version 2.93. Any version greater than 2.8 of Blender will work for this. So make sure that you're running something that's fairly recent. To start off, lets us open up a general new file. You'll be greeted with the default cube. This lights and a camera. What we really need is the cube for now. So let's just delete the camera. So select your camera, press X and delete, and then select your lat, press X and delete. And now we're left with the default cube. So what we want to do now is essentially add in the Suzanne monkey object. And we're going to create a shape key that moves it from the monkey to the cube. So let's hit Shift a, come over here to mesh. And let's add in the monkey. And straight away, you'll see it's hidden in this cube. So let's make the cube out of the way. Now, something that we need to, I guess discuss immediately is that basically for this morphing effect to work, we need a lot of topology, a lot of vertices basically for the monkey. So right now you can see it's fairly low poly and if we shade smooth this, you'll see it's, it's not looking to do HIV LA, so we basically just need to add a subdivision surface modifier to this. So let's come over here to the wrench, open up modify properties. And now we're going to click Add Modifier, come to generate and then subdivision surface. So what I found with my tests is having a subdivision surface of 33 levels is usually pretty good. Say what we can do is grab this ladder and drag it up to three. Or you can hit these two areas left to guard down, right-click up, and just change it to three. So you can see immediately it's already much higher resolution. What we can do now is actually apply this subdivision because we want to have all of the subdivided surfaces be applied to the monkey so that we can actually stop working with that topology. So let's come over here and over to this little drop-down arrow. And we can click Apply. So now that we've applied that if we went to tab into edit mode, you can see this is a pretty dense model. And there's good reason for that is because we're going to stretch it to basically fill in this cube here. So in object mode, what we're going to do is select cube and we need to move it back to the median point of the scene. So a quick way we can do that is if you have if you don't know if it's going to be directly sent it up in the scene like this, it's kind of off of balance. What you can do is press Shift and S. What this will do is bring a pie menu up. And essentially we want to take out selection and move it to the 3D casa. So we have selected the cube, and we're going to move to 3D cassettes. So you can just click that. And now you'll see it's directly centered into the middle of the scene. Okay, So now comes the fun part of actually creating the shape key. We're basically going to be utilizing another modifier. And this modifier is cold, the shrink wrap modifier. So before we actually apply the shrink wrap, but we need to do is create a duplicate of the monkey. So let's hit Shift D on your keyboard, and that will bring up another monkey. And what we can do now is just move it to the side. It doesn't really matter where it goes, just needs to be out of the way. And now with the original Suzanne monkey, we can come over to the modifier stack again, open up the drop-down here, and we're going to go to the D form section and click on shrink wrap. So what the shrink wrap modifier does is essentially whatever object you have selected and whatever target you put it onto. In this case, the cube. The original object is going to shrink itself around that object. So it'll make a lot more sense when we actually do this. So let's click this eyedropper here to select the target. And we're going to come over here to the cube. Click on the cube. And now you can see Suzanne is kind of shrinked in the box and it's to scale this, which we will. So let's hit S and N scale. You can see it's kind of conforming to the topology of the cube, which is what we want. So it looks a little bit weird. But essentially if we were to tab into edit mode, you can see we have a pretty large suzanne. We essentially just need it to be larger than the cube so that all Olaf Suzanne's topology is squished and shrink wrapped onto the cube. So this is perfect for down. So let's tap back into object mode. And what we want to do now is actually applied the shrink wrap. So again, it's going to be here to the drop-down on the error. Click Apply. You can also see another quick way to do this. If you don't want to click this button every time you can hit Control a, Control a, and that'll apply it for you. So now we have essentially. The original base mesh of Suzanne for the shape here, we have the most object of suzanne, which will basically go from this to that. And then we also have the original cube. So in this case, what we need to do is select the original cube and we no longer need this, so we can select it here in the outliner, hit X and delete. So now it looks like we have just the cube and Suzanne, but it's actually Suzanne. And also see you then. So before we go any further, if you remember, we scaled Suzanne pretty, pretty large. So we need to apply the scale. Otherwise things get a bit funky when we start doing the shape keys. So I've just hit N on my keyboard, just to show you right now. So you then scale is all out of whack. So what we need to do is hit Control a and hit Apply old transforms. Once we've done that, you can see Suzanne scale is come back to one, which is exactly what we need for this effect to work. So I'm going to hit N on my keyboard again to get rid of this Properties tab. And now we can actually make the shape key. So with the base mesh that we essentially want to go from this to this, we need to move this back to the world origin. So again, we can hit Shift and S, type up this pie menu and then click Selection 2, cosine. So now you can see it's back at the origin. And from here we can click on Suzanne, Shift-click the second suzanne that we've squished into the cube. And from here, this is where we actually begin creating the Shape Game. So with those selected, you can come down to this object data properties tab. Click on that. And now you can see we have a section here called shape keys. So what we want to do is come down to this error. Shaky specials. Click that to open it up and you'll see a couple selections here. But what we want to do is join as shapes. So what we will do is click that. And now you can see we have the basis and the algebra that we're going to be morphing two. So basis is essentially the original cube, but that we squished Suzanne into. And then Suzanne dot 000 001 is this shape here. So if we click on the cube, you can see when we click on the original Suzanne, there's no shape keys. So we don't actually need this one anymore. So we can hit X and delete. And now we're just left with the cube. So we have basis. You'll see there's no slide here. And then Suzanne one, you'll see there is a slide up. Essentially, if we start to move this ladder across the value, you'll see it just starts transforming back into the original monkey, which is pretty cool. So obviously this really weird, shrinking and morphing when you get not fully to one. But a quick way around that is how we're going to animate this transformation effect later on in the class. So you won't have to worry about those weird stretched morphing cones and everything like that. It'll look much better once we actually get to that part of the course. So now that we have bow-shaped key created, we can move on to making the background, which is going to basically elevate the scene and create a little environment for us to work with.
4. Creating the Environment With Particles: All right, so now that we have our shape key under wraps, can see we've got our transformation there. What we can do now is actually fill out our scene. And the way we're going to do this as actually with a particle system. And it's going to kind of give you this cool environment. So let's get set up with that. First of all, what we need is a plane. So let's hit Shift a, come through to mesh and CO2 plane. And now we have a plane here. Let's scale this up to a factor of eight. So you can hit S, start scaling it manually, or you can hit S and then hit eight on your numpad. That will scale it up by a factor of eight. Press Enter. And now we have this cool plane here that we can start modifying. So what I want to do is basically rotate this so it's behind the queue. So let's hit our x. And then I'm going to type 90 for 90 degrees on the number pad. Hit Enter. And now I'm just going to leave it behind the cube, so G to move. And I'm just going to lock it to the y-axis and push it behind it. There we go. So now we have this cool plane here that's going to basically, we're going to apply a particle system to this and have multiple smaller cubes and logic cubes instance on top of it. Let's just start off by first adding some cubes. So let's go shipped a mesh cube. It really doesn't matter where we put this one. We just want to add a frame for our camera. So our camera is going to be mostly here. So I'm just going to move it across. And I'm going to actually do create this one as well. So Shift D again, I've just right-click so it, it goes back to its original place, but now we can just move it wherever. And this one is going to be the smaller cubes. So I'm just going to scale it down a bit. There we go. So now we can actually create a particle system. So let's select our plane. We come down here to particle systems. It's called the particle properties tab, just under the wrench. Click on that and you'll see it's basically a blank slate here. So what we need to do is click this plus button. And here you'll see there's a bunch of options. Don't worry, I'll walk through each one that we need to use. So let's just first of all, start by naming our particle system. So we can call this one small cubes. Press Enter, and you'll see it. It hasn't renamed the particle system here. So, just so that we don't get confused, what we can do is double-click this to rename it, and then we can just also name this small cubes. There we go. So right now it's set to emitter. We don't want emitter enabled because basically what the emitted does is it will emit whatever object or instancing to it. So it will actually like spawn cubes and push them out and we want them basically stationary behind the cube. So a better alternative for this will be the hair option. And you can see immediately we have a bunch of hairs sticking out of it, sticking out of the plane. So basically, this is how you create hair and blender. We're going to instead using hair particles, we're going to be using the cube as the hip particles. So let's click back onto a plane. And what we're gonna do is come down to the render section of this. So open up the render tab. And then here you'll see there's a couple, couple options. What we need to do is change the render as sorry, instead of pop, we can open this up and click object. So now you see everything goes away and we're basically going to render as object. And then the instance object is going to be this cube. So let's hit the eyedropper. Select Cube. And now you can see straight away what's going on. Basically instance this cube thousands of times on to this plane here, which is pretty cool. So now comes the part where we start to play with it and make it look cool. Just quickly I can, I've just noticed that I've instance the logic you've gone through this. So I'll just quickly change the instance object again. So come back to the instance object, exit out of that. And then we're just going to click the eyedropper again and select these smaller cube. There we go. And so now, now let's actually start messing with all the settings. So first off, I like to basically do scale of randomness all the way to one. So what that's going to do is change the scale of each individual instance. So you can see it's kind of varying all over the place, which is pretty cool. Next, what we can do is we can actually play without big we want these. So I think something like 1.50.150. It looks pretty good for now. And if you don't like the way it's kind of spread out, you can actually play with the emission seed. And what this does is it basically chains, changes the spawn seed to something different. So it play with this API lack. So I'm just gonna go with a seed of three, and now we can start playing with the number. So basically, the number just means how many is going to be there. So you can see as I start getting up into the thousands, it's getting pretty crazy. Something like that is maybe a little too crowded for me. So I'm going to try 1500. That looks pretty good at essentially, I want some of the wool to actually be peeking through because that's where we're going to have the kind of rusted moss effect happening like you saw in the final render. Let's keep it as this for now, this is looking pretty okay. And with the plane selected again, we essentially want to add a duplicate of this particle system. But instead of referencing the small cube, we're going to reference the latchkey. So basically you how to do this is you can click the small cubes particle system here. Come over to this little particles specialists drop-down and you can click Duplicates particle system. So I click on that one. And essentially it's bola settings in here. It's made a copy of it which is active. And it's yeah, it's made it active for us, sir. We need to do really is Festival. Click this button to make it its own separate particle system. So it's not referencing these settings anymore. And now we can just rename this to be big cubes that we'd go. And then you can also rename it here as well. So the cubes done. And so now what we need to really do is come down to the render, come to the instance objects and change it from left cube, so delete it and then reference the logic you just like that. So you can see straight away this way too many of them. So let's come back up to the number and let's just bring this down to something like 500. Even that there's probably way too many. So let's bring it right down to something like say 20 to maybe even 30. See how that looks. That's pretty good. Again, we can always come back and play with this and sort of iterate on the final render for we're happy with going through the whole animation. So for now, this is pretty good. We can leave it as is. And now that we've done all of this, we can move on to the lighting setup and then we'll move on to some material creation and admitting.
5. Lights Camera Action!: Alrighty, So let's move on to creating the lights for our scene, as well as the camera. And then from that we can jump into the material creation. So before we actually start putting all of our lights in the scene, I think now is a good time to start cleaning up a bit and making a scene collection a bit more tidy. So what I mean by that is, right now everything's kinda named Wally. And there's not much organization in our scene. So what we can do is let's just click on Suzanne and let's hit N on your keyboard. So what this'll do is say move to collection. So what we can do now is create a new collection. And let's just call this one. Shape keys. Just hit R k. So now we can see Suzanne is neatly tucked away in the Shape Keys collection. For everything else. I think for the environment that we've created at the back, we can select all of this, just dragging and selecting them. And then again, you can hit M on your keyboard. Let's create a new collection, and let's just call this environment and hit. Okay, There we go. So now we have a bit more of a tidy seen that we can work with. And this is more so going to be helpful with the lights and kind of iterating on lighting setup. So let's just jump right into creating that. So shift a, we're going to add in a light here, and we're going to use an area light. Let's just move this up. So I'm going to hit G and Z. And I'm going to scale this app a little bit. So for us actually see what's going on, we need to change to rendered mode quickly. Before we do that, it's probably a good time to change out camera settings. So if you come over here to the render properties, you're more than welcome to use the render engine API. But for this class we're going to be using PBL textures and they're not as effective in EV. I find AB is more of like a real-time rendering Internet and it does have some limitations. So we're going to be using the Cycles Render Engine for this class. So let's open up this drop-down, click on cycles. And depending on your device, if you have a graphic Scott to use, definitely recommend using that. So let's hit GPU compute. And now that we've done all of this, we can jump into the rendered view. So up here in the right-hand corner, you can change the viewport shading. So you've got your solid minute. Which one right now we have material preview. If you click that, this was basically what EV will look like. And then the viewport shading, this is rendered mode will basically look like so click on that. And yeah, now you can see we have our light interacting with our scene. So let's just continue with blotting out the rest of our scene. Just quick. Fyi, this is going to be a very basic lighting setup to begin with. Main reason being is that all of our materials currently are completely white. So even if we got the lighting to be exactly as we would like it to be in the final render. As soon as we stop shucking on Madeira materials to eat everything, It's going to just go all out of whack and we're going to have to replace our lights and change all the values and setting, sir. This is just a very basic lighting setup that we're going to create just to get the groundwork in place. But this lot here, with it selected, Let's just come down to its properties over here, object data properties. And from here we can actually play with the color that it's going to be emitting the Pala, the shape, and all this good stuff. So let's just first change the shape to a disk. And then from here let's just start playing with the palette. So straight away you can see it's getting fairly variety there. I think for my scene, I'm gonna go with 300 to begin with. It's going to move it around. Again. I'm just using G to grab and then running it to different axes. So like, gee, why to go on the y-axis? Gz to go up and down. So that looks good for now. Let's duplicate this latch. So shift and D brain across here. And you have a basically creating a three-point lighting setup. Very, very simple three-point lighting setup. So we've got our top flat here. I'm just going to grab this light and instead of trying to manually rotate it to be where it's supposed to be. What you can do is click Shift and t with the last selected. And with this, wherever your cursor is pointing to, you'll see the light basically follows. So I'm just going to point out onto the cube there. Just like so. And that looks to be good. What I'm going to do is actually scale this up to be fairly big or maybe two times the size of the initial bite. And I'm going to crank this up to something like 800. There we go. So that's a really filling out the scene now. Not too bad. And then again, we'll just going to hit Shift D to duplicate this light. Going to bring it across to the side of the cube. And again shifts and T. I'm just going to point that out the cube. That's looking pretty okay. I'm actually going to scale this one up again to be even bigger just for that soft, soft delighting. And then again, I'm going to crank this Power App. Let's just do something like 1200. See how that looks already. So for now, we can leave this as is. And what we want to do is actually frame up our scene. So let's just add an IP camera here. Shift a come to camera, click on that. And the quickest way I've found to sort of line up the shot, because you can see the cameras just stuck here in the middle. What we can do is with the camera selected, hit N on your keyboard to open up the Properties tab here. And I have quite a few add-ons enabled. But what we want to do is come down to the View tab. That should be your third tab along the Properties menu. And then here you'll see there should be this area code view. And in the view there'll be a view luck. You can basically look the camera to your view. So click on that one. And then while you're in your scene here with your castle on the viewport, if you press 0 on the number pad, basically shoot you into the view of the camera. Spin. Now that we have the camera luck to you, I can scroll out with my mouse wheel and I can start lining up the shop and making it look as I would like it to be. So just for this instance, I'm going to change the viewport back to solid, just so it runs a bit Smith for me and I can start shaping up the shot to what I want it to be. So from here we can actually start playing with the aspect ratio and the focal length and all that cool stuff with the camera just to make, make the shot look as it's intended to be. So without camera selected down here and object data properties, it should already be selected on the camera. You can see we have the lens and we can actually edit this to be whatever we want it to be. So for the focal length, I want it to be pretty macro. So let's try something like a 125. So straight away, that's looking a lot nicer. It's kind of flattening out the image. So let's sum the, I'm gonna go with that. And I'm just going to line this up to something that encompasses basically this. This looks pretty good. From here, you can see, we can still see everything outside of the camera's view, which can be kind of a distracting to when we're working. So I'm actually going to festival turn off the camera to view option here so that way we can freely move around the viewport while our camera is locked in place. So back to the camera view with the 0 on the numpad, where we're going to do is come down to viewport display. And the passive pot shouts is basically, it determines how much she C of the cameras. What you see in the lens basically say I want it to be basically our only, this one. I'm looking through the camera just so I don't get distracted by the ADA objects. So that looks good. Another thing that really sells the effect of it being small is having depth of field. So just underneath viewport display we can click on depth of field. And instead of manually true thing like where the depth of field starts and stops, what we can do is actually just choose what focus object it should be focusing on. So click on the eyedropper, click on our morphed Suzanne. So that cube. And we want to actually see the effects happening until we're in rendered view. So I click on Render View. And now if we stop playing with the f-stop, if we bring it all the way down, you'll see everything behind our cube here is out of focus. And even everything in the foreground is also out of focus. It's just a little bit hard to see. So what we wanna do is find something sort of in the middle ground to say, I think point here, point 3 looks pretty good. And usually if we had some kind of light source in the background creating there's Bokeh effects. We could change the blades to essentially decide what kind of bucket we want. So if it was a three-sided blade, like a triangle, that would basically all of the lights in the background would be good as a triangle. So I'm just going to move this to something like four, just in case we do get some cool reflections and then it'll have a cool bokeh effect that just before we finish up the setup here, we can actually put all of our camera and our lights into a collection, just like we did with the environment to make assay and a little bit more tidy. So let's just come to the outliner and let's select everything. So the area at right now it's all in the shape keys because we had shaped keys selected when we were adding the Latin. So let's select all these area lats and the camera. So I'm just clicking area, holding down Shift and clicking to the camera and it selects everything in between. So with everything selected here, Let's hit M on the keyboard to create a new collection. And let's just call this one lights camera action. There we go. Okay, so that's going to finish up this lesson. We've got a shot framed up here. I'm out basic lighting setup. Next lesson, we're going to cover the material creation. And like I said, these lights are just temporary. That is a basic foundation for us to get a materials looking correct. And then once all of our materials are actually applied, we're going to be editing the lights, the colors, the values that Hughes, everything like that. So yeah, let's just jump into material creation.
6. Material Creation: Alrighty, Now it's covered material creation. So before we start actually creating all the materials, There's a couple add-ons that we need to enable. Both of them are shipped with blend 0, so you will have them eat us up to enable them. So up here in the Edit tab, you can open up this and click on Preferences. And in the add-on section, you can come up to the search bar and type name. Note to open up narrowed wrangler, just make sure that this one is ticked and enabled. And a second one that we want to enable is called blend ticket. So such where a blender and it will come up here. 3d view blend ticket. Also, make sure this one is enabled. Once you do open it up, it will give you this little block into blended kit. You can just hit, Okay? And all of the preferences are now saved. But if you want to make sure you can't click on this little hamburger menu and click Save Preferences. Again. So let's close out of this. Okay, So what those add-ons now enabled, let's just move over to the shading tab. And we're now in the shading workspace. And this is where we're going to start making those materials and fleshing out the scene. So straight away you, I think what we should do is change the cube here and we'll actually just make the shape key as one so that we can actually see what we're doing to the monkey. So if you don't know where this is, again, it's an object properties. Let's click on that and then you can come to your shape keys. Click on the second one here and just change the slider all the way to one. Okay, So let's just start off with adding a new material. So let's click here nu. Let's call this monkey gold air we get. So what we're going to do is basically make a very basic gold material. And then we'll jump into making the rust and the bump map and everything like that. So straight away, Let's change this metallic slider all the way to one to make the Mikey metallic. And then for the base color, Let's choose something gold. So click on the color here. It'll open up this color wheel. Can just choose something that looks fairly golden. Right now. It's not very shiny. So what we can do is bring the roughness down. Something like 0.3. There we go. Something like that looks pretty good. And yet you can see this is now a gold monkey. So that's basically everything we need to do that we can always come back and fiddle with it, like the specular and all of that. But for now, that looks pretty good. I'm just going to rotate it a little bit so it gets hit by the life a bit more so I can see what I'm doing. And now let's actually start adding some nodes in and creating that procedural rust material. So to start off with, let's go shift a search for the Musgrave texture. That one down wherever. And now the Node Wrangler add-on, it's going to come into play. So what you want to do is hit click on the muskrat texture and then press Control T on your keyboard. That's going to add in these two nights at the mapping node and the texture coordinate that right now, we basically just want to ensure that the texture coordinates are being utilized by the object. So all you need to do is come in here and move the object, plug that into the vector. This is going to help us when we come to texturing for this specific object because it is morphing and shape-shifting. So it's, it's better to use the object texture coordinates. So for the Musgrave texture, we can't really see it right now. We need to be able to view it to see what we're doing. So another hotkey that we can use with the Node Wrangler is Control Shift. Click. And now we can actually see what this is and what it's doing to our model. So right now, I think we want this scale to be not as large as it is right now. So let's just move this to something like 0.7.5 or just point back for now. And we can change the detail to something like 16 and the dimension to 0. So you can see straight away what is happening. We've got some kind of rusty looking material being blood. So what we have currently is basically anything that's black will have nothing applied to it. And anything that is why it will have something applied to it. So black and white is 100%. And then we can basically utilize some other nodes to blend between those percentages. And then we can use that information to derive the bump map, which will do, which will give it some detail on the monkey and a whole lot of other things. So let's just start off first by adding a Colorado. So I shipped a set. Color ramp. And instead of having to manually plug everything in, you can drag let you can just put it a covered over the current line and it'll basically just plug straight in. You can see that's straight away. It's popped it into the view and no debt, it's changing. What's happening in a material. So what we can do is with the color ramp, you can actually play with these sliders. And it's a little bit hard to see, but I'll just switch to material preview so you can see it in real time. I'm basically crunching the black material and the black value of the material closer to the light. And it's making it a lot more crisp and sharp. So the more, For example, if I did it with, the more I crunch it this way, the more more precise it's going to be. And this is really helpful with some PBR materials and procedure of materials. So I'm just going to do something like that for now. And from here, what I'm actually going to do is there's a cross shaped a. And we're going to set the bump node. So we can place that down here. And what we want to do is basically plug the color of this and to the height of this bump. Control Shift click this, you'll see what's happening. So the blackened and y values of this color ramp and this Musgrave texture, a feeding into the height of this bump. And bump is essentially fake displacement for lack of a better term. And it gives it the appearance that as some kind of a ripple effects happening on my key when in reality they're, there isn't really, it's just a price process that we're putting onto the material. So basically we can compare the strength and see how much we would like to be showing. And it's probably a lot clearer if we just Control Shift, click the principled shader, and then plug the normal into the normal here. And now you can see really what's happening. So if we play with the strength, we can basically decide how much we want to show. There's something like that looks pretty good. I'll just quickly switch into rendered mode. So for me that's looking pretty good for what I'm looking for. I'll change the roughness just a tad to see how that looks. There we go. And I mean, yeah, that's looking pretty good. That's basically the monkey material completed. So we don't really need to do much else on that. From here. Let's just start actually texturing the plane behind the monkey. So lets actually copy this material that we have for the monkey. So let's go. We'll click on a plane. And then we're going to shift click monkey. And then what we can do is press Control L on our keyboard. And well, that's going to allow us to do is to link the active material to the selected, so Control L link materials. And now you can see that golden material has basically instance itself onto this plane. So with all of that happening, we're going to need to click this button here that has two. Just to make the instance of the material on the plane, we make it, it's ARN material essentially. So click on that. We can now call this plane. And now anything that we do here isn't going to affect the original material on the monkey, which is really nice. So for this material, I think what we're going to do is add in a couple mics RGB nodes. So let's go shift a such mix, RGB. And basically for this one we're going to take the color ramp. And you have to do really is click on the active slide here. So we want to change the white slider and change it to more of a green lookings Lambda. So let's go something like that. We can't actually see what is happening just yet because we need to plug some other things into some other things. So let's connect the color here to color one. And we're going to click here. Let's go and mix. We're going to make this an additive color. So basically, with this color is being fed into here, and this color is being added into the overall color. So when we plug this into the base color here and kind of see what's happening. You can change the factor of which color you want showing the most. So for example, if we have factor of 0, it's only going to be showing the color ramp. If we have a factor of one, it'll either be showing this secondary coil. So let's just leave this as 0.5. And let's change this color here to more of a dark green looking color. There we go. Something like that looks pretty good. For the play material at the back. I don't want it to be metallics. I'm just going to change this to 0. See how that looks. It's looking pretty good. So we might just keep it as that for now. And finally, what we're gonna do is we're going to shift D, this mix RGB. So click on that, Shift D to duplicate and we'll plug it in between these two. And what we're going to do is change the method of its mixing. So we'll click on here, change it to mix. And I'm going to change the color to a failure. Lack looking color. And now what we want to do is push this river on this ladder a bit until we get kind of a mossy looking green, which that looks pretty messy to me, so that'll do. Okay, So from here, we can move onto texturing the instance cubes. Then the final step will be to, we'll add the cube. We'll add a material to the cube when it's in this state. It'll be in the same monkey cold material that we created and will basically mix them together and animate the mixture in the final step in animating. So with all that said, let's change this back to Suzanne. And now we can jump out of the camera view and we can select our main cube here. This is where we actually start to use the blender kit. So what you want to do is press N on your keyboard while you're in the V put. That'll open up the Properties tab here. And from here, you should have a, an add-on called Blender kit. So minds at the very bottom, but that's because I have a few other add-ons already. Yo should be around here somewhere, but yeah, click on blended kit. And what this allows us to do is essentially search for I'm free, royalty-free models and materials that we can use in our projects. So in this instance, what you can do is click on Materials. And in this search bar here, you can delete whatever, whatever is in there and type in metal and then press enter it as such. And what that's going to do is it will, it may take some time because it does have to learn, but it'll open up this search bar here, but you can stop sifting through different materials that you can use on anything any of your model is that you lack, sir. What I'm gonna do is click through the tabs here and I believe this is the one that we want to be using rustic metal. So I'm going to click that one here. So as you click it, as long as you have your objects selected, it's going to apply to that object. So it'll download and then apply. And you can see basically here What's happening. It's a PBR texture, so it's got a bunch of normal maps, roughness maps, metallic maps, all that good stuff. So now that we've applied to the material, you can see it's also applied it to all of the instance cubes on the background here, which is really cool. So with this selected, we can actually go ahead and move on to the small cube now because we've finished up texturing that instance cube. So again, I'm just going to copy this material onto this cube. So select your instance little cube here and then shift select your plane. Press Control L and the link, the materials. There we go. So we have that linked onto our instance cube here. So you want to change the color of it. So what we can do is without a small cube here selected, we can click on this instance button here to remove its incidence. So it's, it's iron material now. And from here we can start editing everything and changing it up. So let's just first of all change the name to small, small cube. And essentially I think I want to go with sort of a pinkish look to the queue. So all we really need to do is change this over to a pink, something like that. And then the main color ramp here, we can change to more of a pink looking, Something like that. Now jump into the camera view quickly. If you're, if you don't want this or print while you're working, I'm sure there's a hotkey to get rid of it. But the quickest way I've found is to just jump into a different workspace and then jump back into your original workspace, or how does it move to texture paint and then back to shading. And it's now removed itself. So in the camera here, I'm just going to be playing a little bit with the color until I find something I like. So I believe something like this is looking pretty good. Yeah. So I like how that's looking. I'm not change the factor here. And you can change the color a bit that we go. All right, so that looks pretty good. I'm happy with that. We can also change how much bump we want on this thing, as well as the roughness. But yeah, for now, I think let us change the roughness up at a tad bit. And that's essentially everything that we need to do for the instance cubes. I'm just going to quickly select my plane here. And I'm going to go over to the particle settings tab. And with the small cubes, I'm just going to play around with the number of them. So I think what I'm going to do is I'm going to increase this number here to something like 3000. And then the instance object. So I think it's cubed zeros or one. Yep. I'm just going to scale this down a bit. Something like that. And we go because I want these small cubes to be fairly small, but I want them to be large and the patches, so something like that looks pretty good. And then I can again click on the plane and jump into here, play with the seed. I made even just quickly with the plane selected. And the small cubes particle system enabled. I can actually come down here to the children tab. And what we can do is basically click on intercalated. You'll see immediately it sort of explodes half the number of cubes we have here. But what we can do is bring the render mat down to something like five and also the display amount down to five as well. See how that looks. That's looking pretty good. I like the way that's sitting on the plane. And now with the, the, the moral cubes that we have here, I might just jump back to the small cube texture and player a bit more with the color of the texture are at demo. So I'm just going to leave it at that for now. Otherwise, we'll be stuck here for quite awhile. So from here, I may also just to the children instancing for the large cube as well, just to see how that looks. So let's go click on the big cubes here, and we'll choose Children, interpolates it straight away. Let's change the display amount to something like five. And just play around with it until you get something, something that you're happy with. So it's important when you are changing the display amount to also match it to the rendered amount. Display mount shows you, shows you that level in the viewport render amount. If we left it at 100, it would be chaos with his cubes. And Sarah, leave that as the same value as your display amount. And I'm just going to play with the sea the bit to see if I can get something cool. Okay, I like the way that's framing the monkey here, so I'm going to keep it as that. So I think for now we're basically good to move on to the final step here, which is to get that secondary material on the monkey and then mixing them together. So what we can do is click on the cube that has that rustic metal material. Here it is. It's quite a large material. So what we can do is press a to select everything and then we can basically copy it and paste it into the Suzanne material. So let's go Control C. And then we're going to come to the monkey here. Click on the monkey, and then in here press control V. And that's going to paste that material into this material. What we can do this, move it out of the way so it's a little bit more easy to work with. And straightaway, you can see it's not immediately applying to the monkey, which is good. That's what we do. One, we need to first plug in a few values. So if we scroll in just for ease, we're going to actually press Control Spacebar with my cursor here on the shared editor. This basically full screens that workspace for me if I want to go back heel press Control Spacebar again. Yep. So Control Spacebar here, and now we can have a little bit more space to work with. So essentially what we wanna do is mix this principled be SDF with, this principle would be SDF. And there is one note that we need. It's called the mix shader note. So shipped a search mix shader. And essentially we need to mix. This and this, and then put it into the material. So grab your B SDF Ultra, click, drag it to the shader there. Same with here. I'll right-click, I get in there. And lastly, we'll drag this Shader into the surface. So now if I go back out of this screen, so Control Spacebar. You'll see we kind of have a 50, 50 mix between the two materials. So we dry, it changes all the way back. This is the material of the cube and then translate all the way to one, and that's the material of the Golden Monkey. So when we actually begin animating the same, we can actually animate this factor and change between the two materials and it'll create that illusion of it, shape shifting and changing material. So for now, let's just change this back to the metal material with this vector. So all the way back. And then I'm going to also change our monkey shape key, change that old way back to 0. And now we basically have the material that we're going to use straight away. You can see it does look a bit weird. A metal material is super stretched and doesn't really follow the same patent as these ones at the back. Basically how we need to fix this is if we follow this pathway here to the metal material and we come all the way back to the mapping. You can see on this mapping note here for the metal material, we have a scale here for x, y, and z. So if you left-click and drag down to select, highlight all of them, it'll open one up so we can change the value simultaneously. And now if we scale this up to something like 10, you can see it, it looks, looks a lot nicer. So you can play around with this. Maybe we can try. Try something like five. I might stick. Maybe let's go Eight. Eight, Eight looks fairly decent. Now it's just a matter of setting up the lights. And as I was saying, we need to really touch them and make them look a bit better. So let's actually go to the layout here. So up the top left layout section. And in this section here, we're basically going to edit the workspace. So it's a little bit more easier for us to iterate on our changes. So in this green, Let's press N to get rid of that Properties panel. And basically we're going to drag a nother workspace cross. So up the top left you can put your cursor here and it should turn into like a crosshair. If you just left-click and start dragging, you'll see it drags across another view for us to work out of. So basically, we're going to make it so that this is our camera view. And this is where we're going to be working in an iterating on. So in this view, I'm just going to press Z and then change it to rendered mode so we can actually see what's going on. Awesome. And now we basically just want to stop playing with the lights and all of their temperatures and hues. So for the, for the top light, I'm just going to select this one. And I might just try bumping up to 500. I'll also change the color here to something a little bit more yellow. Just a very creamy yellow color like that. And again, for this one over here, I'm going to select this one. Might just keep it as the same power, but I'll just change the color to something bluish. There we go. That's in blue. So now it looks a little bit more like it's kind of in a cave somewhere. Was trying to get that get that mood light flooding happening. So it's not just the land white seen. Lastly, for this massive soft light in the left hand side, I'm just going to click this one and stop playing around with the color. Okay, So I've gone with a sort of blue hue to that color. Again, I'm going to come to this light here and maybe see what it looks like with a sort of yellowish turn. Okay. Yeah, I think that looks a little bit better. So I might just keep it as that. So while we're here, we can also continue looked having the depth of field because right now everything's still pretty much in full focus and the background to make this effect really stand out and look pretty cool. We basically, there's one for the background to be mostly out of focus. Let's open up our lights camera action collection that on the camera. And let's just come over to the camera tab and change the depth of field. So right now we've got a 0.3. But two, it looks like at point 2. Again, most of it is out of focus with 0.2. So I think we might just leave it as that. Okay, so that's looking yeah, it's looking fairly decent. So another thing we can do, I believe I have the lights actually animate in the final sequence. So when the transformation happens and our object turns into Suzanne, I have a basically a point light at the very back of them to sort of highlights around them and sort of make it holy looking in a glowing. So what we can do is shift a, add in a point let just like so. And I'm just going to grab it and move it directly behind the monkey. And for this, we basically want to increase the radius to something. This, and of course we can change the palette is something a little bit more intense. Maybe let's try 1000. That's looking pretty cool. Go. So it really gives that sort of rim light around the monkey. And I mean, while we're here, they're actually going to be looking more like this in the vomer and does say, yeah, that's pretty cool. I'll keep it as that for now. Of course, when we're actually get onto animating in the next lesson, we can play with the color and everything. So in fact, I might just change it to a bit more of a blue because that's what it will be in the final product. And we go, yeah, that's basically everything done for this section. Next we'll move onto animating and actually going through the transformation effect and creating that cool spinning animation and turning it from metal to gold. So I'll see you in the next lesson.
7. Animation Blocking: Okay, So now we're ready
to start animating our scene and all
the objects and the camera to get that
cool looking effect going. So let's just jump
straight into it. We are firstly going to reset
the rotation of the monkey. I was just rotating it
to get a bit more angle on it to look at how it actually looks in the shader editor. So if you want to quickly
reset the rotation, you can select the
monkey and press Alt. That'll basically reset it to the original rotation
it's bonded with. So with that rotation done, we essentially want
to, first of all, change the shape key here back in the object
properties change the shape P back to one. And what we're going to do
is create an empty object for the cube and
monkey to follow. So let's do that. So
shift a click on empty, and then we're just
going to do cube. And you'll see it's basically the exact same
proportions as the cube. So I'm just going to scale it up slightly so we have a bit more
of control on it. And from here, it's going to be a good idea for us to open up our timeline here a
little bit more so we can actually see what we're
animating and keyframing. So we have this
empty but you can see nothing happens when
we actually move it. So just quickly I'm going to, in this secondary window here, I'm going to press Z and
change this back to solid. Because we don't,
we don't need it rendered for right this moment. And essentially, we
just need to parents the shape-shifting
object to the empty. You do that by
selecting your cube and then shift clicking
the empty object. And then on your keyboard
you can press Control and p. That's going to open
up this Parent menu. So we can do set
parent to object. So now when we start moving out, empty or rotating it
or doing anything, you'll see Cuba's
following alongside it. So this is going to
be the main driver of animation for the movement
and rotation of the object. So now that we have this
setup, Let's Festival, do the animation of the rotation and
character of the object. And then we'll move on to doing the shape-shifting animation at the lights and the camera. So to start off with,
Let's just first of all, make sure that our scene
settings are correct. So we should be rendering this out as
24 frames per second. We can come up here to the
render properties tab to confirm that I
render properties. Actually I believe it's in the output properties.
Sorry about that. Sorry. Output Properties. Frame
rate 24 frames per second. So that is correct,
That's good to go. So now we basically
just need to figure out how long we want
this animation to be. So if we're doing 24 frames
a second and we want, let's say six seconds
of animation. You can come over here to this basically
current frame timer. This tells you which what
current frame you're on. You can click into
this and you can do 24 times six that we go. So a 144 frames is
how many frames we need to do six
seconds of animation. So we need to change
our start and end time. I hear, sorry. The end, we will need to be 144. So click into this,
changes to 144. And now we basically have the full animation six seconds
timeline to work with. Awesome. So now we can actually
begin creating this thing. So what I like to do with this
is essentially on frame 0. So not frame on frame 0. We're going to basically start animating the cube
so that it's off screen and there's
no duplicate frames. So if we were to make this a complete seamless
loop that we had the same keyframe on
frame one, frame 144. That would be a slight overlap of the frames and it would kind of make it not look as good
as it could be Friends. Or what we can do is press R twice and it'll give you this sort
of gimbal rotation mode. Or you can just do
manual rotation. So our constraints as
z, something like this. And then I want it
to be sort of skew, sorry, R2 times,
something like that. Looks pretty cool. So
we've got an imposition, but now we actually
need to set a keyframe. So what we can do is click
on this little button here. It's called Auto key. And essentially any sort of action that we
do in the viewport. It's going to create
a keyframe for it. So for example, if I press R on my keyboard and then
left-click to select that, you'll see it's created
a little keyframe there. This is pretty powerful.
We're going to use this for most, most of the animation, but some of them will have to
set the keyframes manually. So with that in mind, let's just start planning out what this cube is going to do. We're basically going to, I'll throw it up on screen, but it's going to
rotate slightly, very slowly and then
spin around fairly quickly through 60 degrees and reveal itself as the monkey. So let's just start off. Let's say let's go 12 frames in. And here we're just basically
going to press Enter twice and slowly rotate
it around like this. And then we're just going to correct protection like that. Looks good. Then again, are like this. Then you can just lay it in the playback here
to see how it's looking. So you can see right now
it's animating linearly. So what I mean by that is
it's going from 0.1 to 0.2 with nerves sort of
curves or dips and diodes. It's basically just
one straight line from point a to point B. So we will be changing that. But right now let's just set up our keyframes and then
we'll hit that again. So timing wise, I just wanted to sort of play it
and see how fast it's going. That seems a little too quick. So what I'll do, I'll drag and highlight
this keyframe here. Press G, and I'll just move it through to frame 20 and
see how that looks. That's not too bad. We can only iterate on this. So let's just say
that's good for now. And then we'll go, let's say
one frame in the future. So for him Tony, 4424 frames. And now we will do like
a full 360 rotation. And then that'll be the
reveal of the monkey. So twice to get
that gimbal motion. And we'll do that. Go and just quickly to
see if this is actually the correct way for
the monkey to face. Yep. Cool. So let's just play this now. Not bad. And I'll just quickly
show you what I mean by changing it from a
linear animation. So a, to select
all the keyframes, we'll press T to open up
the interpolation mode. And we'll change it
from linear to bezier. And you'll see pretty
quickly what it does. A lot more smoother than
just linear. And will play. Once we're finished
sitting all the keyframes, we'll play around
with the curves in the graph editor to make
it look a lot nicer. So from here to here,
That's the reveal. Reveal will happen
somewhere in here. And then the monkey
will just chill about and sort of show itself off and then it'll
revert and go back. So let's just say here, do R2 times fully rotates
to the front. Like this. Too bad. And then it'll just stay the same position and sort
of tilt itself like this. And then come over here. These are just very
rough keyframes. You don't have to match
exactly the timeframe. We can iterate on this as we go. So let's just quickly
preview what we've got. So tilts his head, spins around to the camera and then reverts back to the Cube. Okay? So as I'm going along here, I think we might need to
increase our actual frames. So I think let's try something like 1010
seconds of animation. So in the end frames here, let's just change this
24 times ten to 40. Just so we have a little
bit more of a playhead to use because we don't
want to be constrained. So I'm just moving these
keyframes out a little bit. Let's see how this is looking. So I'm going to move these
to the head tilts here. And it's slowly pans across the screen showing
off its golden glory. You want small. And then it'll zoom back to reality and turn
back into a cube. So let's do something like this. Cool. Then. Last but not least, it'll basically like
correct itself. Look at the camera and then
the currents going to zoom in and finished
animation sequence. So let's go. Something like this. Will change the change the cat, the cubes rotation to basically be looking at
the camera like that. Again, r2 times. And then you can actually hold Shift while
rotating to get a little bit more of a precise
movement, we go. So let's see. So it rotates, shows itself off a little bit,
turns back into the cube. And then I think
what we're gonna do is we're actually
going to move this keyframe to
something like 211. And then this keyframe here, instead of it
interpolating sort of slowly to the look
at the camera. We're going to copy
this keyframe. So basically stays in
position. Paste it. So select this
keyframe control C, control V. So it basically
stays in position there. And then quickly, correct. And looks at the camera. Right. Now, I don't think we want it to be
completely static here. So maybe on this
keyframe, by the way, you can actually switch between keyframes with the up and down arrow keys
on your keyboard. So on this keyframe here, I think what we'll
do is actually just give it like a tiny little
rotation, something like that. Then I'll do the quick correction
to look at the camera. And the camera will
zoom in to black and then basically loop itself to the front and zoom out
and reveal the cube again. So yeah, that's basically
the animation down pat. But now we need to do the
shape shift animation. Well, we can do is
find the part of the animation where
it basically appears. So essentially here. So this second keyframe for M20, make sure you're on frame 20. And then you can click on the Suzanne shaped key
model that we have here. And for this one
we're going to have to set the keyframe manually. So if you press, if you go to the value
and you start sliding it, nothing really is going to
happen in the outline here. So you'll need to, first of all press I while
hovering over this. That's going to
change the yellow indicating that
there's a keyframe. You can also just press this
little circle next to it, but I find just hollering. I've written pressing
eyes easier. So we've set a keyframe for the value to be 0 on frame 20. And then if you click
on the empty objects, press up on your keyboard to
go to your next keyframe. And then we basically
want to set the value to one for the shape key
on this keyframe. So click on your
shape-shifting objects, come over to the value,
change it to one, and then hit I on your keyboard. And now you can see it's got that cool little shape
shift animation. Yeah. And then yeah, it will basically show itself off a little bit. And then it'll turn back
at this keyframe here, frame 155 for me. We're going to click
on Sudan again. Set another keyframe.
I on the keyboard. Click on our empty object again, or to the next keyframe. Click on Suzanne,
and then again, change the value to 0,
press I to set a keyframe. And there we go. We've basically completed the key-frame section
of the animation. So right now, we can
obviously polish this up and make it look a
lot better, which we will do. But right now, yeah,
this is how it's looking. It's not too bad. I think for the beginning, I'm just going to
Shift click Suzanne. I have both the key frames
in the timeline here. Instead of sort of
immediately changing into the monkey here I'm going to select everything
from timeframe 20, press G and just move it
across very slightly. So something like
that we'll do just to see if we can sort of hold the initial cube in frame for a little bit longer
before they transform. Let's go. Let's see how this looks now. All right, okay, so not too bad. So basically now what we want to do is
change our workspace. So I'll just drag
this up a little bit. I'm going to change this area into the graph editor
so we can stop playing with the curves and making it a little
bit more snappy. And it's just going to elevate
that animation a lot more. So the way to do this is you can click here on the top-left, there should be an editor type. Click that I prompt
the drop-down, come through the animation. And what is going to change
this to the graph editor. So now that we've got the
graph editor open here, we can start changing the curves here and making this whole
animation a bit more snappy. So first thing that
we wanna do is press a to select all of
our keyframes here. And then we can,
on the number pad, you can press the full stop. And that's basically
going to zoom in and make everything relative and a lot
more easier to work with. Quickest way that we can go
about editing this animation. So let's just quickly
view it again. Okay, So currently, that's how it's
looking at the moment. So if we have the empty object and the shape-shifting
objects selected, we can come down here,
select everything. And before we start editing, we can come to this drop-down box here
to that pivot point. We're basically going to change the pivot point to
individual centers. Well, that's going
to do is when we start scaling and moving, it's going to pivot on
each individual keyframe. So what we wanna do is
press S to start scaling. We want to constrain
this to the x-axis. So press S and then x. And we just want to start
pushing this out until we get a pretty rough crunch there in the middle of so it's
a very snappy motion. You'll see when
we play this now. It's a lot more snappy. Looks a lot more nicer,
but I think we can even crunch this out a bit more. So let's just do that. So S and then X. Awesome, There we go. Just polishing this
up a bit more. I can see right here when it begins to morph, it's
pretty noticeable. So what I'm gonna do is just select the morphing
section here. The problem I've
found is that the, this is still a linear motion
for the shape-shifting. So for press a to
select everything here, T. And yeah, you can see it
was actually on constant. Say, let's change
this over to bezier. And now we can start
to crunch this n. So right now it
looks a bit weird. So I'm going to just select everything rest of the period key on the numpad to zoom in. And now you can see we have this cool coffee that
we can start editing. So again, press S to start scaling and then
constrain it to the x-axis. Let's go something like
that. And straightaway, that's a whole lot better. Much, much better. So let's just watch this
full and see how it looks. Not too bad. So what we can do now is really, I mean, it's up to
you at this point. You can start to really
finesse these curves and make it look
however you would like. But currently this is
basically the aesthetic. We're going for, these sort of sharp, quick,
snappy transitions. So the only thing I'm
really going to play with is just this first
transformation here. So I've just selected both the objects and I'm
basically just going to select these keyframes here and just stop scaling on the x-axis to something a little bit more, less, less intensive
and less quick. To see how that looks. I'm going to just decrease that
just a little bit more. And yeah, I mean, I'm
very happy with that. This is looking really nice. So now I think we can
start on animating the camera at the lights
and also the material. So currently if we just move this over to
material preview, we haven't actually animated the transition of the material. Yes, sir. The monkey is still
a metal cube. So what we need to do
now is come over here. We can just change this
screen to the shader editor. So come over to the top-left
option here at the top, and you can just click
that and change it to the shader editor. From here. What we're going to be
animating is this mix shader. So we want to do is without shape-shifting
objects selected, we can, in the timeline here we can just make
the keyframes relative. So select them all. Press the period
key on your numpad. We want to go to
the first keyframe here and make the mix
shader have a value of 0. So we can just hit I while
we're hovering over that. Now we have a keyframe incented. And we can go to
the next keyframe, changes to a value of one. Press I again while
we're hovering over it. And now you can see we
have this keyframe. But what you can see is
it's completely linear. So we need to, again press a to select everything ti and then
change it to bezier. And you can see it's not
quite matching the curve that we have for the
monkey Transformation. Fix this curve. You can see right now it's
showing both of them. So you'll have to choose the correct curve
to start editing. A little bit
confusing to do this. So what I like to
do is come over here to where it says key. And you can actually see
you can select the Suzanne one and you can actually just
hide it for the time being. So click the eyeball, hide that. And then we'll
compress a S to scale. And then we can just crush
that in something like that. Basically we're just
trying to match it up to the previous curve. So there we go, That matches just like that. And so now you can see
once we play this, it's pretty seamless
transition effect there. Fantastic. So now
we need to go to the next keyframe here. Again, I set a keyframe
for the mix shader one. So I just set the keyframe and then go to the final
keyframe here, changes back to a value of 0, and then hit eye again
to set that keyframe. So again, we need to
alter the curfew. So very quickly we'll hide, will hide this keyframe so we
can select just these two. And we'll bring it back
into view so we can match it up to the curve
that we've got here. And then we'll scale
this on the x axis. So x, sorry, S, then x, scale that in. There we go. And now when we play this pretty seamless
transition there as well. Awesome. Okay, so
let's just go back to Solid mode for a moment. Because now we can move on
to animating the camera. So for this, I'm just going to bring
this screen over a bit. And what we're going to do
is basically Animate here, sort of zoom out effect. And then when it
looks at the camera, we're going to animate
the Zoom in effect. So to start off,
let's go to frame 0. Grab our camera. And I'm just going to
change this back to the 3D view port. There we go. So now what we can
do really is just start animating the camera zoom. You'll see when I start to move it in and actually
constrain it on the y-axis. It doesn't really zoom in
directly into the cube. So what you can do instead is do the lock camera to view and open up the properties
luck camera to View. And then in this
green, you can press G to grab your camera and then hold the
middle mouse button and basically push forward. And that's going to push
it straight ahead forward. There we go. So before we do that, I
think what we're going to do is let's go to frame 14. And we're just going
to press G and left-click to set
a keyframe here. Then on frame 0, we
will do the trick here. So g in this view and then hold middle mouse button
and just push that forward. Something like that. There we go. And now we have a pretty
simple zoom out effect. Again, we're going to utilize
the scaling on the x-axis. So let's just press
T changes to bezier. And let's just do
to scale on the x. Really crunched that in. Let's
just see how that looks. Not too bad. I think at the moment it's not picking up all
of the keyframes. So let's select everything, press S and then x, and scale that in. And now let's see how
that looks much better. Now we can do these
Zoom in effect as well at the very
end. So let's go there. So just about here. We can set a key-frame around this
section, press G, click. Once it actually looks
at the camera like this, we're going to do
the same trick. So in this viewport, press G, hold the
middle mouse button in, and push that forward. Just like that. So again, we can set these
keyframes and scale them. So let's select them all. T, make sure that
they are Bezier. And then S scale on the x-axis and really
crunch that end. Let's see how that looks. Okay, so that one that's
coming in pretty quickly. I think for this, what
we're gonna do is grab these and move it
over just a tad bit and see how that looks
a little better. I might just try scaling this on the x axis one more time. So S XX really crunched IN. You can see the green
curve in the middle, hats crunching.
Something like that. Yeah, that's a lot, lot
better timing wise. So the last, last and final
thing to animate is the lats. So let's just quickly review
what we've created so far. Alright, brilliant.
Now let's jump over to these lights and start the
animation process on them. It's very similar to everything
else we've been doing. So let's just click on
this Suzanne model. Let's find the exact moment
when they actually transform. So about here seems to be the amendment
that they transform. So what I'm gonna do is select this point lot and just during the
transformation process. So maybe let's go to
the first keyframe. We'll click on the light here, point light behind Suzanne. And we'll just set a keyframe
for basically no palate, changed the power to 0
in the light settings. Press I to set a keyframe. Then we're going to
click on Suzanne again. Go to the actual keyframe
where they've transformed, graph this light, change
it back to 1 thousand. Then again press to
set that key frame. So one more time. Let's change this to the
Bezier interpolation. Now let's press S and scale. There we go. And it's going to be a
little bit difficult for us to see this in solid mode. So let's change this layout here to render our
app brilliant. So if we just shuffle
through these frames, you can see as
they're transforming, you can see that rim light
coming in behind them. What we actually
want to do is in conjunction with this light, we want to animate some of these other lights
to basically turn off so that we have this really bold look
behind the monkey. So let's grab this. Again. Let's go back
to the first keyframe. I think let's just
start off firstly by animating this lots of power. So over here in the palette, Let's hit I to set a
keyframe for 1200. Come back to the light,
go to the next keyframe. Come back to this slide here. And we'll change this
one to power of 0. I again will change this
interpolation to bezier. I'm going to scale this on the x axis, something like that. And again, we're
basically just going to follow the same steps. So we need to animate it
coming back or turning on. So let's click on the
monkey model here. Let's go to the next
keyframe in the transition. So here is basically
where we'll have this, this light here have
a power of one, power of 0 still. So let's just go. I just sent an email to set a
keyframe on that. And then what we're
going to do is click Suzanne again, the
final keyframe. And then we're just
basically going to turn this back to its original power. I believe it was twelve
hundred. Twelve hundred. Okay, so I think I've
lost the keyframe here. So let's just click
Suzanne again. Go to the final
keyframe. So we want 86. Click on the light again, and then here we'll just
change the power 200. To press either
set the keyframe. And again, we'll select these two keyframes and
crunch them in S, then x. Scale those in pretty
far, something like that. And you can see we still have the little light in the
background still turned on. So we'll actually animate
that one turning off now. So again, select this select
out monkey model here. Let's go back to this keyframe. Click on highlight here. We'll set another keyframe. So put this little
button or press, I, set that key frame. And then we'll click our monkey again up on the arrow key
to go to the next keyframe. Select our light one more time, and then we'll change
this to a power of 0. There we go. So last, last thing for
this slide is again, we'll select these
two keyframes. Press S and then x.
Crunch those in. Okay, there we go. So we may even animate maybe
this top light turning off. Let's just see how it looks
without this top line. Yeah, I think let's, let's just go through with the
animation process on that. So click on this Suzanne muddle, jump back to the first keyframe. Click on our top light here. We'll set a keyframe. So I said that keyframe. Click on our model, jump
to the next keyframe. Look on our top light here. Then we'll change
this to a pair of 0. This time let's just do
all of them at once. So again, click on the monkey, jumped to the next keyframe. Click on our light. I'd set another keyframe. Click on Add monkey, jump to the final keyframe, and then click outlet once more, change the power back to 500. Enter. I had set the keyframe. Now let's just select
every keyframe, t, change it to Bezier S x, and then it will crunch that in. There we go. That's looking pretty good. I think what we
can do actually is right now what kind of basically completed everything that we
need to do animation wines. Now it's more so look dabbing. So right now I think
this light at the back, maybe a little too intense
now that I'm looking at it. So let's just see, Let's go back to this first
keyframe here and let's just see how it looks with maybe
a power of five hundred, five hundred that might actually even be better
than 1 thousand. So you can see it's going to, if we just leave it as this, it's going to rise in
power up to 1 thousand. So let's go to this final keyframe here and just match it
with a power of five. There we go. I think what I want to
do as well as introduce a spotlight to give this one final effect
to the whole scene. So let's do that now quickly. So shift a, we're going to go to light and we're going to add
a spotlight into the scene. I'm just going to move
it into position. So g, I'm just going to
constrain it to the y-axis. And then again shift and T
to aim that at the monkey. And these spotlights can sometimes be very
difficult to work with. So I think what
we're gonna do is, first of all, we'll frame it. So something like
that. But I'm going to move this out of my lights camera action just for a moment. Let's move it into
shape keys for now. Basically why I'm moving it
out of this collection here. This so that I can turn
the collection off and just see what the
spotlight is producing. So right now it's very dull. So let's just festival start
off by giving it some power. So let's try maybe
5 thousand power. As you can see, that
super right now. So what we can do is play
with the color a bit. So let's try something like Let's go a little bit of a blue hue to the light,
something like that. And what we can do is also
play with the radius. So the larger the radius, the softer the shadow will be. So maybe let's go something like 1.1.2 or even let's just try. Let's go with something
like one meter. It's not too bad. Then finally, the spot size we
can play with this. So the shorter the spotlight is, the spot size, I should say. The less of a light is
going to be produced. So we make this super tiny. You can see this is the
effect that we're getting. So let's turn the lights
back on in the collection. So just click this
eyeball button right now and this
is how it's looking. I'm just going to Shift T, aim the spotlight
back at the monkey. And I'm just going to
play with the power bit to see if I can find
something I like. Okay, so that's
looking pretty good. One final effect that we can do with this spotlight
is actually pretty cool. What we can do is with
the spotlight selected. Let's change our timeline
here to shader editor. And there shouldn't be this little checkbox here
that says Use nodes. Basically what we can do is
introduce a gobo effect, which is basically
putting an image in front of the light source to create some cool
looking shadows. So what we can do with this open now is click on admission. Press Control T to open up
basically an image texture. What we're gonna do
from here is apply a specific video sequence, and I've supplied that in the projects and
resources tab below. So what you can do is
download that video and basically arpanet up
here in the image texture. Once you have that open, what we can do now is I'm just
going to turn the lights. Camera action is exactly
what's happening here. And right now, all we
really need to do is play with the power
and the radius. Sir. Let's just move this power to
something crazy like let's try 30 thousand, right? That's looking pretty cool. And then let's just see the relatively small spot size to basically just
encompass the monkey. And then we can
change the radius to change how strong
we want the shadow. So if it's 0, you'll see it's got an
extremely sharp shadow. If we have a radius
of one meter, It's got a little
push to shadow. And so basically this video
sequence is going to, is going to play in front of
the light source and create some cool shadowing
treeline effects. So that's basically all the
setup we need to do for this. It's still not as strong
of a lactose as I'd like. So I'm just going to
change this power to something crazy
like 65 thousand. There we go. Let's just put the
lights camera action back on and see how
that's looking. Okay, Brilliant. So yeah, I mean that's
looking really nice. Another thing that
we can do quickly is actually change our
color management. So let's click out render properties and come down
here to color management. And basically we're
going to give this a high contrast look. So if you click this
look drop-down, click on high contrast. Immediately. You
can see it's given the scene high contrast and it's making it pop out
a little bit more. This part is totally up to you. Might even just try some medium contrast and
see how that looks. So now that we have
all of this down pat, let's just quickly
move into solid view. I'm going to open up
the timeline again. And let's just quickly see. Okay, I can see I made a bit of a mistake and accidentally made a keyframe
here on the light. So I'm just going to
delete that keyframe. I'll turn order keys are
for a brief moment and I'll just Control Shift T and M, the light back at the monkey. There we go. Then I'll turn
over the keys back on. But let's just see
what our sequence is looking like at the moment. All right, fantastic. So the very last thing
that we can do in this animation section is actually animate the
camera a bit more. And we're going
to use something. It's basically
procedural animation. So let's look at our camera. So here's our camera here. Click on him. And we need to change our workspace
down here one more time. So let's go here. I prompt the drop-down and
go back to the graph editor. And essentially,
we're going to add in some noise factor to the camera. So it's gonna be sort of
looking a bit more hand-held. So the quickest way to do
that is in this graph editor, you can press the N key to
open up the Properties tab. And there's a couple
of things that we need in this section that
aren't yet showing. And that's because we have to select our object
transformation. So open this little
tab here to get Bull about x and y and
z location data. And essentially,
let's just start adding some noise modifiers
to each one of these. So first off with the
X location added. Well you can do is
come over here, click on the modifies tab, and then on the
drop-down you can add a modifier called noise. So it's a little
hard to see what's happening if you press a hit the period
key on your numpad. Again, make sure you're
on the x location. You can see here it's got
noise in the actual animation. Now, if we were to play this, it's really strong, but you
can see what's happening. It's putting some
noise into the camera. So basically what we wanna do is make this way less intense. And to do so you can
just change the scale to something really small. So maybe let's go 3.1. You can also change the phase. So something crazy like that. Maybe they'll add intense,
Let's go something like 25. And then from here, we're basically
just going to keep playing with these options. So let's just increase the
scale a little bit more. Change the strength
to something, weigh less. So let's go 0.3. Okay, so I think actually
what we wanna do is make this scale pretty large. So let's actually change
this to something like 40 for the scale. Okay, that's much, much better. It's very, very subtle.
Now. 40 for the scale, Let's change the strength to
maybe something like 0.8. See how that looks. And
already you can kinda see the effect that
it's got going on. Not too bad. So if this is too
strong for you, you can always just play with the scale and also the offset. So offset just changes where the noise is
going to be placed. And what we want
to do is basically copy this data and put it
onto each one of these. So quickest way to do that with the X location selected
that we've just edited. And come over here to
this little clipboard. And you can see it's
got copy f modifiers. So click on that. Click on the y location. And then you can click
this button here, which will paste the
exact same modifiers that we have into here. And now it's, it's
basically a matter of changing some of the things. So let's change the scale, change the offset,
and maybe change the strength to
something like that. Basically just randomizing it. And now when we play, you'll see it's looking
a lot more hand-held. So That's all well and good. Let's do the same
for the z location. So press Z location, press this button here
to paste the modifiers. And that's looking great. So that's really all we need to do for animating the camera. The very last and final
thing that we're going to do now is add a
constraint modifier. So basically, right now you can see Suzanne's kind
of off frame a bit. There's a lot of empty, little more empty space
here than there is here. And I want the camera
to basically be locked on to the monkey. So quick and easy way to
do that is over here, that's this little object
constraint properties tab. Click on that while we
have the camera selected. And we're going to open up this drop-down and click
the damped track. So before we select
the monkey, well, we want to do is change the
track axis to negative Z. And then we can click the
eyedropper, click on monkey. You'll see straight away it
basically locked onto it. So now when we play
the animation, we've got these subtle
handheld camera animation that we've just done here. And it's also locked on a 100%
influence too. The Monkey. If you don't want
it to be locked down as much, you
can play with this. So 0 per cent, but we'll just have no
Lacan one per cent, little bit completely locked on. I think I'm gonna go
with something like 0.5. And yeah, that basically wraps up the animation side of things. So now we're gonna move on to the rendering and compositing.
8. Blocking Our Key Frames: Basically now what we want to do is change out workspace. So I'll just drag this up a little bit. We're going to change this area into the graph editor so we can start playing with the kids and making it a little bit more snappy. And it's just going to elevate that animation a lot long. So the way to do this is you can click here on the top-left, there should be an editor type. Click that I prompt the drop-down, come through to animation. And we're just going to change this to the graph editor. So now that we've got the graph editor open here, we can start changing the curves here and, and making this whole animation a bit more snappy. So first thing that we wanna do is press a to select all of our keyframes here. And then we can, on the number pad, you can press the full stop. And that's basically going to zoom in and make everything relative and a lot more easier to work with. So quickest way that we can go about editing this animation. So let's just quickly review it again. All right, Okay, So currently that touts looking at the moment. So if we have the empty object and the shape-shifting objects selected, we can come down here, press a to select everything. And before we start editing, we can come to this drop-down box here to the pivot point. We're basically going to change the pivot point to individual centers. So well, that's going to do is when we start scaling and moving, it's going to pivot on each individual keyframe. So what we wanna do is press S to start scaling. We want to constrain this to the x-axis. So press S and then x. And we just want to start pushing this out until we get a pretty rough crunch there in the middle. So it's a very snappy motion. So you'll see when we play this now, it's a lot more snappy. Looks a lot more nicer, but I think we can even crunch this out a bit more. So let's just do that. So S and then X. Awesome, There we go. So just publishing this up a bit more, I can see. And right here when it begins to morph, it's pretty noticeable. So what I'm gonna do is just select the morphing section here. And I think the problem I've found is that the, this is still a linear motion for the shape-shifting. So press a to select everything here, T and the a, you can see it was actually on constant. Say, let's change this over to bezier. And now we can start to crunch this end. So right now it looks a bit weird. So I'm going to just select everything rest of the period key on the numpad to zoom in. And now you can see we have this cool curve here that we can start editing. So again, press S to start scaling and then constrain it to the x-axis. Let's go something like that. And straightaway, that's a whole lot better. Much, much better. So let's just watch this full and see how it looks. Not too bad. So what we can do now is really, I mean, it's up to you at this point. You can start to really finesse these curves and make it look however you would like. But currently this is basically the aesthetic going for these sort of sharp, quick snappy transitions. So the one thing I'm really going to play with is just this first transformation here. So I've just selected both the objects, then. I'm basically just going to select these keyframes here and just stop scaling on the x-axis to something a little bit more, less, less intensive and less quick. To see how that looks. I'm going to just decrease that just a little bit more. And yeah, I mean, I'm very happy with that. This is looking really nice.
9. Animating the Materials: So now I think we can start on animating the camera at the lights and also the material. So currently if we just move this over to material preview, we haven't actually animated the transition of the material. Yes, or the monkey is still a metal cube. So what we need to do now is come over here. We can just change this screen to the shader editor. So come up into the top-left option here, edit the title, and you can just click that and change it to the shader editor. So from here, what we're going to be animating is this mix shader. So we want to do is without shape-shifting objects selected, we can, in the timeline here we can just make the keyframes relatives or select them all. Press the period key on your numpad. And we want to go to the first keyframe here and make the mixture have a value of 0. So we can just hit I while we're hovering over that. Now we have a keyframe and centered. And we can go to the next keyframe, change this to a value of one. Press I again while we're hovering. And now you can see we have this keyframe. But what you can see is it's completely linea. Say, we need to, again, press a to select everything ti and then change it to bezier. And you can see it's not quite matching the cub we have for the monkey Transformation. So to fix this curve, you can see right now it's kind of showing both of them. So you'll have to choose the correct cup to start editing. There's a little bit confusing to do this. So what I like to do is come over here to where it, so the key, and you can actually see you can select the Suzanne one and you can actually just hide it for the time being. So click the eyeball, hide that. And then we'll compress a S to scale. And then we can just crush that in something like that. Basically what it's trying to match it up to the previous SIR. And weaker that matches just like that. And so now you can see mostly play this. It's pretty seamless transition effect there. Fantastic. So now we need to go to the next keyframe here. Again and set a keyframe for the mix shader one. So pi to set the keyframe and then go to the final keyframe here, change this back to a value of 0, and then hit eye again to set that key frame. So again, we need to alter the cuff here so very quickly we'll hide, will hide this keyframe so we can select just these two. And we'll bring it back into view so we can match it up to the curve that we've got here. And then we'll scale this on the x axis. So x, sorry, S, then x, scale that. In. There we go. And now when we play this, a pretty seamless transition there as well.
10. Animating the Camera: Okay, so let's just go back to Solid mode for a moment. Because now we can move on to admitting the camera. So for this, I'm just going to bring this screen over a bit. And what we're going to do is basically Animate here and sort of zoom out effect. And then when it looks at the camera, we're going to animate a Zoom in effect. So to start off, let's go to frame 0. Grab our camera. And I'm just going to change this back to the 3D view port. There we go. So now what we can do really is just start animating the camera zoom. So you'll see when I stopped to move it in and actually constrain it on the y-axis. It doesn't really zoom in directly into the cube. So what you can do instead is do the lock camera to view. So end up not the properties lock camera to View. And then in this green, you can press G to grab your camera and then hold the middle mouse button and basically push forward. And that's going to push it straight ahead forward. There we go. So before we do that, I think what we're going to do is let's go to frame 14. And we're just going to press G and left-click to set a keyframe here. And then on frame 0, we will do the trick here. So g in this view and then hold middle mouse button and just push that forward. Something like that. There we go. And yet now we have a pretty simple zoom out effect. Again, we're going to utilize the scaling on the x axis. So let's just press T changes to bezier. And let's just do S to scale on the x. Really crunch that in. Let's just see how that looks. So not too bad. I think at the moment it's not picking up all of the keyframes. So let's select everything, press S and then x, and scale that in. And now see how that looks much better. So now we can do the Zoom in effect as well at the very end. So let's go there. So I'll just back here. We can set a keyframe around this section, press G, click. And once it actually looks at the camera like this, we're going to do the same trick. So in this viewport, pressed G, hold the middle mouse button in and push that forward. Just like that. So again, we can set these keyframes and scale them. So let's select them all. T, make sure they are Bezier. And then S scale on the x-axis and really crunched that end. And let's see how that looks. Okay, so that one that's coming in pretty quickly. I think for this, what we're gonna do is grab these and move it Ariba just a tad bit and see how that looks a little better. I might just try scaling this on the x axis one more time. So S XX and really crunched IN and you can see the green curve in the middle of hats crunchy. So something like that. Yeah, that's a lot better tying lives. So the last, last and final thing to animate is the lats. So let's just quickly review what we've created so far. All right, brilliant.
11. Animating the Lights: Now let's jump over to these lights and start the animation process on them. It's very similar to everything else we've been doing. So let's just click on this use n model. Let's find the exact moment when they actually transform. So about here seems to be the membrane that they transform. So what I'm gonna do is select this point light and just during the transformation process. So maybe let's go to the first keyframe. We'll click on the light here, point light behind Sudan. And we'll just set a keyframe for basically no pal change. The path is 0 in the settings. I press I to set a keyframe. Then we're going to click on Suzanne again. Go to the actual keyframe where they've transformed graph this line, change it back to 1, 0, 0, 0, 0, 0. And then again press it by the set that key frame. So one more time, let's change this to a Bezier interpolation. And now let's press S and X to scale. There we go. And it's going to be a little bit difficult for us to see this in solidified. So let's change this layout here to render our app brilliant. So if we just shuffle through these frames, you can see as the transforming, you can see that rim light coming in behind them. And what we actually want to do is in conjunction with this light, we want to animate some of these other lights to basically turn off so that we have this really bold look behind the monkey. So let's grab this. Again. Let's go back to its first keyframe. And I think let's just start off firstly by animating this locked out. So over here in the palette, Let's hit F5 to set a keyframe for 1200. Come back to the light, go to the next keyframe. Come back to this slack here. And we'll change this one to power of 0. Press I. And again, we'll change this interpolation to Bezier. Going to scale this on the x axis, something like that. And again, we're basically just going to follow the same steps. So we need to animate it coming back or turning on. So let's click on the monkey model here. Let's go to the, the next keyframe in the transition. So here is basically where I will have this, this slide here, have a power of 1.5, power of 0 still. So let's just go. I set an eight, set a keyframe on that. And then what we're going to do is click Suzanne again, the final keyframe. And then we're just basically going to turn this back to its original PAL. So I believe it was twelve hundred. Twelve hundred. Okay. So I think I've lost the keyframe here, so let's just click Suzanne again. Go to the final keyframes are 186. Click on the light again. And then here we'll just change the power to a 100. And to rest, I set the keyframe. And yeah, again, we'll select these two keyframes and crunch them and say S and then x. Scale those in pretty far, something like that. And you can see we still have the little light in the background still attend on. So it will actually animate that one turning off down. So again, select this select out monkey model here. Let's go back to this keyframe. Click on our light here. We'll set another keyframe. So put this little button or press I, set that key frame. And then we'll click out monkey again on the arrow key to go to the next keyframe. Select our light one more time, and then we'll change this to a power of 0. There we go. So last, last thing for this slide is again, we'll select these two keyframes. Press S, M and X. Crunch those in. Okay, there we go. So we may even animate maybe this top light turning off. Let's just see how it looks without this top line. Yeah, So I think let's, let's just go through with the animation process on that. So click on this, use n muddle. Jump back to the first keyframe. Click on our top light here. We'll set a keyframe. So I set that key frame, click on on modal, jump to the next keyframe will come out to black here. And then we'll change this to the power of 0. And this time let's just do ultimately answer again. Click on the monkey, dumped to the next keyframe. Click on our light I to set another keyframe. Click on Add monkey, jumped final keyframe, and then click outlet once more, change the power back to 500. And to I'd set the keyframe. And now let's just select every keyframe, t, change it to a Bezier S x, and then it will crunch that. In. There we go.
12. Adding Light Nodes with a Spotlight: It's looking pretty good. I think what we can do actually is right now what kind of we've basically completed everything that we need to do animation wines. Now it's most, Sir. Look diving. So right now I think this lab at the back maybe a little too intense now that I'm looking at it. So let's just see, Let's get back to this first keyframe here and let's just see how it looks with maybe a power of 500, 500 that might actually even be better than 1000. So you can see it's going to just leave it as this is going to rise and up to 1, 0, 0, 0, 0. So let's go to this final keyframe here and just match it with a power of fat. There we go. I think what I want to do as well as introduce a spotlight to give this one final effect to the whole scene. So let's do that now quickly. So shift a, we're going to go to light and we're going to add a spotlight into the scene. I'm just going to move it into position. So g, I'm just going to constrain it to the y-axis. And then again shift and T to aimed at the monkey. And these spotlights can sometimes be very difficult to work with. So I think what we're gonna do is, first of all, we'll frame it. So something like that. But I'm going to move this out of my lights camera action just for a moment and just move it into shape piece for now. Basically why I'm moving it out of this collection here. This so that I can turn the collection off and just see what the spotlight is producing. So right now it's very dull. So let's just festival start off by giving it some pallet. So let's try maybe 5000 power. As you can see, that's super right now. So what we can do is play with the color a bit. So let's try something like let's go a little bit of a blue hue to the light, something like that. And what we can do is also play with the radius. So the larger the radius, the softer the shadow will be. Say maybe let's go something like 1.1.2, frivolous, just try. Let's go with something like one meter. It's not too bad. And then finally, the spot size we can play with this. So the shorter the spotlight is, the spot size, I should say, the less of a line is going to be produced. So if we make this super tiny, you can see this is sort of the effect that we're getting. So let's turn the lights back on in the collection. So just click this eyeball button. But right now this is how it's looking. So I'm just going to Shift T, aim the spotlight back at the monkey. And I'm just going to play with the power bit to see if I can find something I like. Okay, so that's looking pretty good. And one final effect that we can do with this spotlight is actually pretty cool. What we can do is the spotlight selected. Let's change our timeline here to shader editor. And there should be this little check box here that says Use nodes. Basically what we can do is introduce a garber effect, which is basically putting an image in front of the light source to create some cool-looking shadows. So what we can do with this arpanet is click on admission, press Control T to open up basically an image texture. And what we're gonna do from here is apply a specific video sequence, and I've supplied that in the projects and resources tab below. So what you can do is download that video. And basically I opened it up here in the image texture. Okay, once you have that are opened, what we can do now is I'm just going to turn the lights. Camera action is built up, and that's exactly what's happening here. And right now, all we really need to do is play with the power and the radius. Let's just move this power to something crazy like let's try 30000. All right, that's looking pretty cool. And then let's just see relatively small spot size to basically just encompass the monkey. And then we can change the radius to change how strong we want the shadow. So if you'll see it's got extremely sharp shadow, common if we have a radius of one meter, which DO shadow. And so basically this video sequence is going to, is going to play in front of the light source and create some cool shadowing treeline effects. Sir. That's basically oldest stuff we need to do for this. It's still not as strong of a lactose as I'd like. So I'm just going to change this palette or something crazy like 65000. Here we go. So let's just put the lats camera action back on and see how that's looking. Okay, brilliant, sir. Yeah, I mean that's looking really nice. Another thing that we can do quickly is actually change our color management. So let's click out render properties and come down here to color management. And basically we're going to give this a sort of high contrast look. So if you click this look drop-down, click on high contrast. Immediately. You can see it's given the scene high-contrast. It's making it pop out a little bit more. But this part is totally up to you. Might even just try some medium contrast and see how that looks. So now that we have all of this down pat, let's just quickly move into solid view. I'm going to open up the timeline again. And let's just quickly see. Okay, I can see I met a bit of a mistake and accidentally made a keyframe here on the lights. I'm just going to delete that keyframe. I'll turn order keys off for a brief moment, and I'll just Control Shift T and aim the light back at the monkey. There we go. Then I'll turn all the keys back on. But let's just see what a sequence is looking like at the moment.
13. Procedural Animation and Camera Constraints: All right, fantastic. So the very last thing that we can do in this animation section is actually animate the camera a bit more. And we're going to use something. It's basically procedural animation. So let's look at our camera. So here's our camera here. Click on him. And we need to change our workspace down here one more time. So let's go here. I prompt the drop-down and go back to the graph editor. And essentially we're going to add in some noise factor to the camera. So it's going to be sort of looking a bit more hand-held. So the quickest way to do that is this graph editor. You can press the N key to open up the Properties tab and does a couple of things that we need in this section that yet showing, and that's because we have to select our object transformation. So open this little tab here to get all of our x and y and z location data. And essentially, let's just start adding some noise modifiers to each one of these. So first off with the X location added, what you can do is come over here, click on the modifies tab, and then on the drop-down you can add a modifier, cold noise. Sorry, it's a little hard to see what's happening if you press a hit the period key on your numpad. Again, hold. Make sure you're on the x location. You can kind of see here it's got noise in the actual animation now. So if we were to play this, it's really strong, but you can see what's happening. It's putting some noise into the camera. So basically what we wanna do is make this way less intense. And to do so you can just change the scale to something really small. So maybe let's go through a point 1. You can also change the phase. So something crazy like that. Maybe not that intense. Let's go something like 25. And then from here we're basically just going to keep playing with these options. So let's just increase the scale a little bit more. Change the strength to something, weigh less. So let's go 0.3. Okay, so I think actually what we wanna do is make this scale pretty large. So let's actually change this to something like 40 for the scale. Okay, that's much, much better. So very, very subtle now. So 40 for the scale, Let's change the strength to maybe something like 0.8. See how that looks. And already you can kinda see the effect that it's got going on. Not too bad. So if this is too strong for you, you can always just play with the scale and also the offset. So upset just changes where the noise is going to be placed. And what we want to do is basically copy this data and put it onto each one of these. So quickest way to do that with the X location selected that we've just edited. And come over here to this little clipboard. And you can see it's got copy EF modifiers. So click on that. Click on the y location. And then you can click this button here, which will paste the exact same modifies that we have into here. And now it's, it's basically a matter of changing some of the thing. So let's change the scale, change the offset, and maybe change the strength to something like that, basically just randomizing it. And now when we play, you'll see, yeah, it's looking a lot more hand-held. So That's all well and good. Let's do the same for the z location. So press Z location, press this button here to paste the modifiers. And I mean that's looking great. So that's really all we need to do for animating the camera. The very last and final thing that we're going to do now is add a constraint modifier. So basically right now you can see ends kind of off frame a bit. There's a lot of empty, little more empty space here than there is here. And I want the camera to basically be locked on to the monkey. So quick and easy way to do that is over here, there's this little object constraint properties tab. Click on that while we have the camera selected. And we're going to open up this drop-down and click the damped track. So before we select the monkey, what we want to do is change the track axis to negative Z. And then we can click the eyedropper, click on monkey. And you'll see straight away it basically locked onto it. So now when we play the animation, we've got the subtle handheld camera animation that we've just done here. And it's also locked on a 100 percent influence to the monkey. If you don't want it to be looked on as much you can play with this. So 0%, but we'll just have no silicone and 1% would be completely locked on. I think I'm going to go with something like 0.5. And yeah, that basically wraps up the animation side of things. So now we're going to move on to the rendering and compositing.
14. Rendering & Compositing: All righty, So we're up to the final stretch here. But the rendering and compositing. So let's jump straight into doing that. First things first we need to create a test render for us to start adding some compositing nodes onto. So let's jump into the camera. Here, render properties. And let's just change sampling render to something like. So. 50 samples would be good for this test render. And straight away, let's just do a test render, sir hotkey for that is F2. But you can also come up to this render button here and click Render Image. Alright, awesome. Insert. The image has rented here, took about five seconds for me. But depending on your machine, it may take longer. So we now have this saved in the f 11 screen, which is basically just a preview of the render that we've created. So let's close out of that. And let's jump over to the compositing workspace. So just up here. So in here, it's a completely new workspace. We don't have anything open right now. And that's because we need to click this checkbox used nodes. And now we can basically stop compositing. So we're going to do a very simple composite, but it's going to add a lot of character to the scene. So let's graph this render layers. Bring it over a bit. And let's just start this off by shift a searching. So shipped a search and we're going to add in a gland nut. So search for glare. Plug that in here. And straight away, we basically can't see what we're doing. We need to create a view and a SAR with the render layer is selected. Press Control Shift, left-click. And there we go. Now we have a Beulah here. So if this is too zoomed in for you on your keyboard, you can press it with v, and that'll zoom the image out. You can also press Alt V and that'll zoom it back in. So I'll just leave that with something like that. And now we can just jump into actually compositing. So right now, we're only seeing what's in the view and art here. Currently, what's in the view inert is the image that we've just friended. So we basically need to connect up this glare node to the view. And so obviously quick way to do that, control shift, click the glenoid. And you can see straight away what this gland art is doing. It's on the setting for streaks and it's adding three iterations of streaks to any kind of light source or light value that's above a threshold of one. So if I moved this to point, let's just say 0.25. You can see most of the objects in the scene have now got the glare applied to it. We basically want this threshold to be not too intense, but we'll just keep it as one for now. Okay, That we go. So what I'm gonna do now actually is create a, another glenoid. So Shift D. Pop that over here. And we're going to change the type from streaks to Fogler. So this is just basically a different type of glow effect. So let's just Control Shift click this. And you'll see it's showing nothing right now because the image hasn't been plugged in. So let's just lazy plug this end answer. I'll right-click racket over here. Riding. Basically at the moment, this is applied, but it's not too intense right now. So what we can do is change this threshold to something like 0.5. We go That's looking a lot better. And what we want to do is combine these two Leonard's into one and then push that into the composite. So let's do that. So shipped a, Let's search for a mixed node. We're going to first make this top layer with the image. So image plugs into here. This glare is mixing with the image. So if we just Control Shift click this. You'll see what is happening. Currently it's set to mix. But because these are lighting effects, we actually want this to be additive. So if you open up this drop-down, change it to add. Now you'll see we're getting an effect that we, we actually want. So this adenoid, we're going to duplicate it again, so shifty. And basically we're going to feed this mix node into this mixed node down here. So pull this down. And then we're going to put this glare, second glare node into the second slot here. So you'll see we can't really see what's happening yet. So let's view this. So Control Shift, click. There we go. Okay, so currently this is what the composite is looking like. Right now. It's a little too bright for my liking. So what we can do is in the render properties tab, you can come back down to color management. And you can actually play with the gamma and the exposure. So right now it's looking pretty overexposed. So I'm just going to play with the exposure and bring it down a bit. Okay, so something like that looks pretty good. And then also for the Gamma, you can also play with this and see if you can just find a loop that you are happy with. All right, so I think that looks pretty good for me. Yeah, don't go too crazy with these settings, but it's just basically a free tool for us. So yeah, this is looking pretty good. What I'm going to do now the final thing in the compositing is we're going to add in a lens distortion node. So shipped a search lens distortion that in here. And we want to make sure that this is connected to the final composite node. So let's plug that into the image there. And finally, this lenses dilution is actually going to give us some chromatic aberration. So this dispersion slider, who will basically give it a low value and find, find something that we're happy with. So let's just try a point to five to start off with. There we go. So that's pretty intense. Even though it's a low value. It's probably way too intense for what we need. So let's just change this to something like 0.1. There we go. So 0.1 even that's pretty stylized. So I mean, depending on what you're looking for, I think I might just try something like 0.8, sorry, 0.08. And that'll basically wrap up the compositing. There we go. So now you can see essentially this is what the final render will be looking like. Again, before we render, we can change our render settings. Say before we did have this render set to 50, but we can just change this to something like 180 for our final render is another thing that may help us save on time is adaptive sampling. So just enable that, make sure that's checked books on. And another thing that's really going to elevate this scene is enabling motion blur. So make sure that's checked on. Don't really need to worry about any of this. The settings down here, the base settings are pretty good for now. So we've finally the last thing that we need to cover is the output and how we're actually going to save our images and what kind of aspect ratio we're going to be saving them in. So good thing to make sure we have correct here is the frame rate. So 24 frames per second. Make sure that's correct. Resolution. So right now what, we're rendering this out by 1920 by 1080. So that's the basic so to standard aspect ratio. If you're looking for sort of an Instagram style of aspect ratio, it's 1080 by 1080. But we can keep this as is for now. The most important thing we need to do is make sure we're rendering to the correct folder. So right now, if asked to render this whole sequence out, it's going to save to my operating systems temporary drive. So what I would do is select a folder that's most suitable and something that you can access pretty, pretty easily. So just click this folder button here and find the folder that suits you best. All righty, that we got basically just want to make sure that this isn't going to be overwritten by anything or lust. So just find somewhere where you have easy access to it. From here. This is where we can choose what kind of file format we want to render ads. So generally speaking, the best file format for this scenario is a PNG sequence. So I would keep it as PNG. But if you do want to render it out as a movie sequence or an actual video, you can change this to FFmpeg, and that'll basically just render it out as a straight video. The only downside to doing that is if your blend is software crashes halfway through, you're going to have to restart the render from frame 0. And it's going to cost you a lot of time and frustration. So rendering with PNGs, basically if the blender crashes halfway through, say on frame 100, you basically just open up the software again and change the timeline to stop iframe on a 100 and then just continue the render on. All right, so speaking of rendering, this is basically it were up to the final process. And we can jump up to the render tab here and click on Render Animation. All righty, So now that we're done with our rendering sequence, again, depending on your computer, the random might take some fair amount of time. But once you've completed your render, what we can do is jump into the final step of this class, which is going to be opening up a video editing software. We're going to be using DaVinci Resolve. And what we're going to do is just import our image sequence that we've rented out into the video editing software. And then we'll render out that sequence as a video file. And then from there I will have a piece for our portfolio and for our socials to post online. So let's just open up DaVinci Resolve now and will continue off from there.
15. Rendering Our Image Sequence: Okay, So I've got to Vinci Resolve. I've been here. Essentially, all you really need is the this is a free software so you can download to Vinci Resolve 17 or you can even just use DaVinci Resolve 16. And what we're going to do is create a new project. So click this button here. We're just going to call this one, will that monkey transform? And we'll click Create. Alright, so now this will open up into our timeline here. Basically, all you really need to do is jump over to this media tab down the bottom left. That's it. Click that. You can see I've already got the Render Sequence opened up here, but you can essentially just find your rent a folder that IV or the law, all your image sequences two. And then from there you can drag and drop this into your media pool. It will jump up here and say, Do you want to change the frame rate of your timeline? So just click change so that it matches our frame rate. Once that's in here, we can jump back to the Timeline editor. And then from here we can track interrupt sequence into the timeline. So if we click, we just press space bar. There we go. So that's basically playing the whole animation for us. In my instance, you can see it's a little bit quick. So it's a little too fast for what we're going for. So I think what we'll need to do is right-click this clip here. And you can come over here to change clip speed. So I click on that. It'll open up and you can see right now it's got frames per second as 60. So I'll just click on this and change it to 24 frames per second because that's the primary that we rented it as. So once that's done, I'll click on Change. And you'll see if we actually just click here and stop dragging. There's vastly more clip for us to look through. So what we can do is drag across without middle mouse button. Or you can click Alt and then start scrolling on your mass will to basically zoom out and zoom in on your timeline. So from here, I basically just want to extend this all the way out to be the last frame. And now if we play this, you'll see it's in its native frame rate. And yeah, this is basically the final animation ready to go. Awesome. Now that this is all completed, we basically just need to render, render this out into an actual video file. So to do so, you can come over here to this rocket Icon. Click on that in the bottom right-hand corner. And up here, we're basically just going to choose all we would like the filename to be. So let's just call this monkey Transform. And then you can choose the actual location where you want this video to save. So I'll just do that now. All right, awesome. So I've just clicked on Browse and then chose the path for where the file will be saved to. So once that's done, we can scroll down a little bit here and we can actually change the format that we're going to export our video ads. So I find the best format really is MP4. And the codec we can leave as h point to 64. For the resolution and frame rate. We can keep this as is. But again, if you do want to sort of change it up and have your own custom resolution, you can totally do that here just in the drop-down menu. So I'm just going to leave it as is. And if you keep scrolling down, you'll find some extra settings. But we really don't need to play with these at all. So with those few settings enabled, now, we're ready to render this out. So what we can do is click Add to Render Queue. Click on that, and you'll see it's put it in this render queue over here on the right-hand side. And to complete this, all we have to do is click Render OEM. And then that'll begin the rendering process. And then it'll drop it into the location that we've chosen to save it to. And we'll have our finished animation ready to fight on Monday. Right? Brilliant say that's completed rendering. Now, what we can do to quickly find OWL file, you can actually right-click this job here. So I right-click and then you can click on Open file location. So I click on that. You'll see it'll open up the file location where you've chosen to save it. And then from here we'll have our monkey Transformation video ready and waiting to go over K. You said that wraps up my Skillshare class or shape key animations. Thank you so much for watching. I can't wait to see what you guys have created. So please feel free to tag me on my socials and definitely post your project in the project and resources tab below. Thanks for watching.
 Smeaf, 3D Generalist and Tutorials