Transcripts
1. Introduction: In geometry, nodes are an amazing
creative outlet for anyone and everyone
in the 3D space. Air certainly exciting
and powerful tools at your disposal
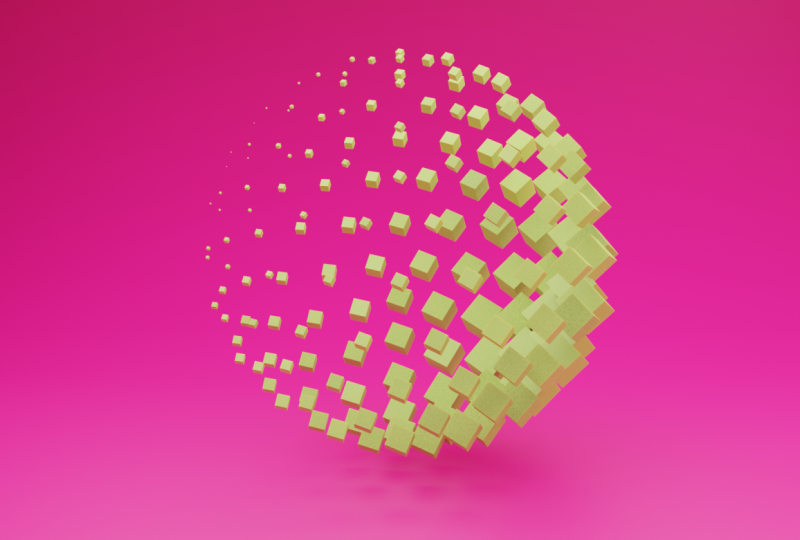
with this software. And today we are going
to be recreating this satisfying
looper ball animation using Blender Geometry notes, Hey everyone, My name is Smith and I'm a 3D
artist with agave, five years of experience as I created the industry
and as a freelancer, if you are new to Blender and looking to start
your 3D journey, or you're an experienced
blend to use a warning to understand
geometry unites a feather. This class is for you the
outline of the project. First of all, we're gonna need to download Blender three-point. Oh, we don't yet have it. We'll run through that quickly. And then we're going to
cover getting familiarized with the geometry nerds,
layout and workspace. And from there, we'll
jump straight into creating the animation
you see on screen. All that is needed
for this project is blend or three-point arc. And a tiny bit of patients, if this is your first
time using geo nodes, I'll be explaining everything we do in detail along the way. So with all that said, I hope to see in
the next lesson.
2. Download and Install Blender: Okay, so let's just quickly download blender
in your browser. I'm just going to come
up here and such, lambda 3D, Google. And the first option here, blended.org is the SAT we want to go to. So let's
just click on that. Now. First page here you can just
click on download Blender. This will put you over to
the blender download page. And we just want to
click this button here. Download depending on your operating system,
I'm using Windows, but if you are using Macintosh, you can click this
drop-down and change over to Mac OS if you start need to. With that said, let's
just download this. Once that's finished
downloading, we're just going to
open up that installer and run through all the prompts to install that
on your computer. And then I'll see
you in Blender. Once you've got that installed.
3. Familiarize Yourself With Geometry Nodes: All right, so now that we have Blender installed
and ready to go, this is the Blender splash
screen where you'll have all of your
recent projects. And we actually
just want to click this general new file, general, or you can just click
outside of the box and it'll open up a
new file here for you. This is the default layout scene where you usually do
most of your work. We're actually going
to be utilizing the gym injury Notes tab up here. Let's just click this
geometry nodes. Straightaway. There's a few screens here, probably all new to this
one in the top-left. We're not going to be
using all that much. This is basically just a
screen that shows us a lot of information about
all the geometry that we're going to be creating. And to be quite honest, it's not very, it isn't too
good for visual learning. I find that it's just a
little bit distracting. So what we're gonna do
is just come up here to this little top left
here of this screen. And I'm just going
to click and drag across to collapse that screen. Now we should have
the default layout and a geometry night
into workspace here. Now let's just get a little bit familiarized with
geometry nights. So let's just delete this
light and delete this camera. And the first thing to note is when we click on our geometry here in the layout,
we've got a cube. And what we can do
is come down to the geode tab here
and click on New. This is going to
create a new modifier called geometry nights. I'm just going to rename
this to practice. Just so that we can
have a quick session on sort of learning
some other nodes and understanding how old
this is going to sort of work before we get into
the more technical stuff. Currently, we have a
group input and output. So everything between
this line and this line is going to create
whatever we see here. So currently the
group input is using the cube geometry at outputting
that as the geometry. If I was to disconnect this, you'd see a cube is
suddenly disappeared. And we still have
this geometry here, so we can just replace it in and it'll once again reappear. But the power of geometry
and aren't really comes from actually just
not using the cube adult. So we're going to
disconnect that and we're actually just going to
create geometry with notes. Let's click Shift a, and you'll see a bunch
of options pop up here. Let's just start off with a few simple thing, mesh primitives. These are gonna be
all the primitive meshes that we can
place in our scene. So for example, we can grab a UV sphere and graph the mesh and plug
that into the geometry. And we now have a UV Sphere instead of a cube,
which is pretty cool. With this UV sphere, we can control all types
of things for us. We can control these segments. Just like that. We can control the rings. So we can make it very low
res are very high-res. And we can also control
the radius or the scale. Just quickly to make
this a little bit more visible for you, I'm going to enable the cavity. With that in mind, we can
actually do more than just changed the base
parameters of the UV sphere. We could actually click Shift a and we can come
through to this here, geometry and click Transform. Now we have this
transform node which can control the scale, the rotation, and
the translation, or basically where the
location of this fear is. What I'll do is I'll just grab this transform night here and I'll place it on
this green line. And you'll see it
sort of highlights white when I hover over it, if I let go of my left-click, it's actually going
to connect the two, which is nice and easy. Now if we saw
playing with these, you can see we can move
it along the x-axis, the y-axis, and
along the z-axis. We can also change its
rotation and at scale. So all of this is really handy because
we can actually make it almost like a custom
modifier using the group input, which will be using quite a bit. Once we actually
create the animation. For example, let's just press the Enter key
on our keyboard, is going to open up the
nerd Properties tab. There's a few different
sections here along the side, but what we want to focus
on here is the group. So currently, there's
an input with a group input and there's an
output for the group output. Right now, the group input has a geometry which was the cube. But if we just grab
this little circle here and plug this into, let's say the scale. You'll see we now
have an input of scale which we can click on and change to whatever we lack. We can name it
whatever we please. And you'll see we have it
now here in the Modify tab, which is very powerful
because now we can change the scale on the fly without actually having to jump into
geometry nerds. And you can imagine very large node tree where you have to try and
figure out what's doing, what and what's
connected to where. It gets very messy very quickly. So this is really just a way to control everything
that you're creating. With that said, I'm going
to disconnect this. And actually before we continue, I just wanted to
ensure that everyone has the Node Wrangler
add-on enabled. Because that gives us a lot of hotkeys which will make out, which will make this
all a lot quicker to len up in the edit tab here, we can come down to Preferences
and once that loads, we can click Add-ons
and search for Node Wrangler and just ensure
that that is checkbox on. Awesome. So now with that out of the way, we kind of understand how
to add some nodes in adder, add the nodes functions
to a group input. So we can have these parameters
to play with on the fly. And we also now know
how to change the name. So we could call this heights and you'll see it
changes to height here. Now, I'm just going to show
you a quick introduction to the power of geometry unites. So we have this transform. We have to see UV sphere. But what if we wanted
to put a bunch of cubes bold along each
face of this UV sphere. While to do that, it's
actually pretty simple. So we can shift a, come through to mesh and choose
the mesh two points node. What this is going
to do if we just drag and drop this
in-between this line. You'll see we now
have a bunch of points connected to the vertices of the UV sphere
that we've created. So let's say if we
change this to edges, there'll be instances
on every edge. We change it to faces, will be on every face, etc, etc. I'm just going to keep
this on vertices. But now we actually want to put some instances on these points. That's actually the name
of the next node that we need to shift a search, for instance, on points. Let's just drag and drop
that in-between here. And as soon as you do that, you'll see everything's
disappeared. And that's because we
don't currently have an instance lucked into
the instance of this. Or in other words, we don't have any mesh plugged
into the instance. Let's just go Shift a. Go to Mesh Primitives
and we'll click on Cuba. Then we'll just drag and drop
the mesh into the instance. Now you'll see we have
these really massive cubes, ALL incidence along
the UV sphere. To actually make them visible. Again, we can change the size. If we just left-click here and drag down to select everything, we can then put in a
number, let's say 0.2. Now you can see
maybe let's scrap 0.1 for better visualization. And now you can
see we have all of these cubes, bull instances. So they're not actually cubes, they're not actually
physically there. They are just instances
and not real mesh, which is very powerful and sort of the power
of geometry nerds, which is how are we gonna
be able to make this really cool,
satisfying animation? And that's sort of the gist of working
with geometry nodes. But now let's just switch
over to a new project. So I'm just going to hide this in our outliner and I'm also
going to disable the render. Let's jump into
actually creating a satisfying animation
in the next lesson.
4. Instancing The Cubes: All right, so to actually create a new geometry nerds network, what we need to do is let's just first of all add
in a basic mesh. Sorry, Let's go shift a. Let's grab it,
just another cube. And let's actually
just rename this. So I'm going to press
F2 to rename this. I'll just call this
satisfying at a nation. We have a clear idea of what
this is in our outliner. And with this selected, we can come to our GR nodes, tap here and click New. And again, let's
just rename this to the same thing,
satisfying animation. And now let's just start
fleshing this out and sort of going through
how to create this. First of all, we
need a circle and we need to instance a bunch
of cubes on each second. Let's just start off by
getting this geometry of the cube out of our viewport and out
of the group and book. So we could disable
it like this. But it gets a little
bit tedious one where working with
a massive network. So a quick way to do this is
with denied regular add-on. You can press Control, right-click and you'll get this little knife when
you start dragging it, you can actually just cut it. And it'll severed the connection
between the two nodes. That's a very quick and
phosphate for us to, to disconnect some
nodes and vice versa. You can actually quickly connect two notes together using
lazy connect as it's called. And it's just by using
Alt Shift right-click. So Alt Shift right-click on your part that
you want to connect. And you can just drag
this option over to here. Now what this will
do is they'll say, What do you want to connect and where do you want
to connect it to? We're gonna go from geometry
to geometry. That we go. Again, Let's sever
that with Control. Right-click. Now let's actually start creating the sphere. First off, let's make a
sphere with an ecosphere. So Shift a, go to Mesh
Primitives, ecosphere. Drop that down here. Now let's go shift a
instance on points. Instances, instance on points. Let's drop that down. And now just utilizing
what we've learnt. So let's go Alt Shift, right-click this,
drop it on here. And so now it's saying
there's only one output, so there's only mesh. We're going to push
mesh two points. Awesome. Another way to do
this is you can't just press Alt, right-click. And it'll just
automatically connect the first socket to the first
socket on the other node. This is just a very quick way
to speed up our workflow. Moving on from here, currently
we can't see anything. So we have this atmosphere here. But what if we want
to actually just view the atmosphere itself? But what you can do is
press Alt Shift left-click. And that is going to connect this straight
to the group output. Again, that's Alt
Shift left-click. So if we were to Alt Shift
left-click instance on points, you'll see it connects
up to the geometry. We're not actually
seeing anything because we haven't
instance at cubes yet. Let's just do that now. Shift a Mesh Primitives Cube. Let's drop that down
and let's just go Alt, right-click, drag and drop. And you'll see it's gone
from mesh two instance and it's basically made
the connection that this should be an instance. Awesome. Now we have this sort of blocky sphere that
we're working with. But we need to first off,
increase the subdivisions. So let's just pop this
up to, let's say three. For the cube. Let's change the size. So left-click, drag this down, and let's change
the size to 0.1. Like SAP.
5. Defining The Instances Radius: Cool. So now we have this really cool spherical
cube thing happening. Again, it's probably
going to be a bit difficult for us to jump
into geometry nerds every time you want
to update this and manually change the radius
and the subdivisions. With this group input node, we can actually just
drag this here, connected to radius, and drag this here and connect
it to subdivisions. And you'll see it's updated
here in our Geometry notes, modify, adapt, which is great. So now let's say if we
were in the Layout tab, we can just click on
App geometry nodes, objects, come down
to the Modify tab. And we can animate
this radius and subdivision level bowl on the fly, which is very powerful. I guess it back to
geometry nodes. I'm going to decrease the
subdivisions back to three. And I'm just going
to continue icon this for the final animation. And we're basically wanting to scale each instance
individually. And we want it to be scaled according to the frame
of the animation. For example, if I just
pull this up here and grab a timeline, if this was on, let's say frame 125, I'd want somewhere
on this cube to be more scaled and somewhere
to be less scaled. So how do we accomplish that? Well, there's actually a
node called scale instances. Let's go Shift a. And we can go instance, scale instances and
just drop that in here. And straightaway, nothing
is going to happen. But if we start playing
with the z scale, you'll see where scaling each
instance along the z-axis. Who do, why do they, why? It's very self-explanatory
from here. So the center we
don't need to worry about because we're not
going to be touching that. So now we have a option
to scale the instances, but we need to figure out how to scale each one individually. Which is going to introduce
some vector math. I think to start off with,
let's just actually find out the radius of the sphere, which is actually pretty simple. If we just festival
grab another ecosphere. So let's go. Mesh primitives like a sphere. This is going to be
solely just to visualize what's happening in ecosphere. Let's grab a transform node,
sorry, geometry transform. And again, let's
lazy connect that. So Alt, right-click,
drag and drop. Let's actually view this. Let's just sqrt Alt. Left-click on this. And you'll see we now
have this atmosphere. It's pretty big, so
I'm just going to bring the radius down to 0.1. So we can see it's directly
in the center of asking. Now we want to play
with the vector to actually change where it is. So we'll put the vector of the XYZ rotation and the scale. So thankfully, this is actually a pretty easy process due
to the fact that we want each instance to be rotating on the
surface of the sphere. The sphere already has a radius at basically
baked into the object. We would need to figure out this is where our atmosphere
is currently. We need to figure out
the distance to here until blender to push
this to that radius, basically, it's actually
fairly simple by utilizing the radius in this group output
and some vector map. Let's just bring these
guys across a little bit. Let's just go shift a. Let's grab a vector. In regard to use vector rotate. This is basically hot sounds. It's going to rotate the
vector of the object. In this case the vector
of the instances. So each, each instance of the
cube that we're creating, each one of these little guys, all of them are
gonna be rotating individually according
to this vector rotate. What I'm gonna do is I'm
just going to Alt Shift left-click the transform again
so we can visualize this. And we basically want
to figure out what, what is the distance from
here to the radius of the sphere of the
original atmosphere that these are being
influenced on. And basically, we kind of have
it already in front of us. This is the x-axis, this is the y-axis, and this is the z-axis. Basically, we need
to tell this nerd to push out to the
radius here on x. I believe that is positive one. So what we can do is plug the vector here
into the translation. Once we plug this in, it's going to override
all of these values. So it's gonna
overwrite x, y, and z. So I will plug that in
now to figure out the x, the separate x and
y and z values, we actually need to use a
node called combine the XYZ. Let's go Shift a, go back to the vector and click
this combined XYZ node. What this allows us to
do is manually control the x-value and the
y-value and the z-value, and plug that into
the vector rotate. This will make sense
in a hot second. So this is Grandpa
group input here. And all we're gonna do
is plug the radius of the sphere that we
created into the x-value. We go, you'll see straight away, it's already pushed
this across to the radius of the sphere. Here. You see, now we basically know the entire radius on the x-axis that all of our instances are going
to be rotating on. Awesome. So we're moving on from there. We also have this option here, which is the Z,
basically the height. So it might actually
be a good idea to create a group
input for the height. I'm just going to grab this, plug that into the Z. And just while we're here, I'm going to rename this
to instance heights. There we go. Now we have a controller for
the instance height as well. But let's actually get to
the fun of it and create a rotation for the instances.
6. Creating The Rotation Animation: So you'll see on the vector
rotate we have this angle. And if we start playing with it, you'll see we can
get this really cool, 360 degrees rotation. What we're going
to do is basically use a driver function. It might sound a bit scary, but it's actually quite simple. The drop a function is going
to tell this rotation angle, whatever frame it's on, push it that a map of radians. We will reach a problem as
well using this driver, but we can find a resolution
for it pretty simply. Let's just start
doing that, sir. Let's grab another one of these group inputs and plug
that straight into the angle. So now we have this angle here that we can start
modifying on the fly. What we wanted to do is let's
just name this to frame. Frame that we go. What we want to do is click into this and type in an expression. The expression is going to be hashtag, brain, all lowercase. Press Enter. You'll
see that this has become a purple bar. No matter what we do here now, we don't currently have
any control of this. And that's because it's being controlled by the frame number. You'll see straightaway,
that's a bit of an issue that the frame number is way
off on the radians. So you'll see the issue that
the frames are kind of the, it looks like it's
going supersonic. If this was to
play in real time, It's going extremely quickly. But that's because we're
using basically a, an absolute number here. So 12345678910, those
are all float numbers. And we're putting that into a, an option here for the angle, which is actually using
gradients or degrees. So we need to convert that,
which is very simple. It just uses a math nerd. Let's go shift a will
go to utilities, and math will just
drop that in here. So if you open up the
drop-down here from ad, you'll see there's a bunch
of math expressions, but what we want to focus
on here is the conversion. Right now we just need to
cut the frame number from a frame number or a float number and push
that over to a radians, Napa, click to radians. And all you have to do is
just drag and drop this here. Now if we were to press
space bar and play, you'll see the
actual rotation is working completely fine,
completely as intended. And you'll see it might,
once we hit the end here. You'll see it's sort of
jumped a little bit. That is due to the
fact that we have rotated from 0 to 250. We have to complete the rotation by pushing this to
frame number 360, which is very simple. If you don't have the
timeline open already, what you can do is come down to the bottom left here until
you've got a crosshair. Drag this up, and then just come through this drop-down and
change this to a timeline. And then you can just change
the end frame to 360. Now when we play, it'll go
all the way to frame 360. And it'll basically be a
seamless loop of the rotation. All right, wonderful.
7. Mapping The Rotation Range: It's now that we have
the rotation down pat, we need to figure out how
to put this onto each and every instance using their
own individual position. It's actually fairly simple. What we can do. Just
going to zoom out here. I'm just going to
grab these nodes here and push them across a bit. So we have a little bit
more space to work with. We go All right side now
might be a good time to save because blender is
known to crash sometimes. I'm just gonna save quickly. And now basically
what we want to do is measure the distance between the sphere and the instances using
the vector math. Sir. Basically, it's
fairly simple to do. Let's just go shift
a, grab a vector. We'll go back to math. Just drop that here. It doesn't really matter
where you drop it. What we're going to do is
also grab a position nerd. This is going to
introduce a lot of new, let's say, technology
for this animation. So you shift a gonna go to
input and then position. This is a new type of node
as another input node. At essentially. At first it's a little bit
hard to understand, but I'm just going to Alt Shift click this
scale instances, so we have our instances back. But for this position, basically it'll
take the position of anything it is connected to. Currently, the position of this. It's connected to nothing. So it hasn't no
information to go off of. But if we were to plug
the position into this vector math node and then plug the vector
math nerd into something like the
instances which we will do. Let's plug this vector
into the scale. You'll see this position and
art has now picked up all of the information of each individual cube
that we've instance. It's adding, right now, it's adding zeros,
zeros 0 on the scale. But it's a very
powerful way to control each individual instance
that we're creating. So basically positioned node, if it's not connected to
any type of information, won't be able to do anything. But as soon as it
hooks up to something like the the instances, let's just say it's if
it was hooked up to any number of objects or
any number of meshes, it'll be able to
picture each one of those individual positions. And that allows us to do
some really cool stuff. So now that we have
that under way, we're basically telling blender to take each position
of each cube, use the vector and put
that into the scale. Right now, our vector
method is set to add. So it's doing some weird stuff, but we actually want to
measure the distance. So if we open this up, you'll see there's a lot
of cool operations here, but what we want to use is distance will have
to reconnect that, grab the value and
plug that into the scale straightaway and
nothing is going to happen. But now that we have
the position data for each vector
of each instance, we can actually grab
the vector rotate. Just drag and drop this into
the bottom vector here. Basically what this is doing. So you will see
straightaway, I hit play. What this is doing. We've
effectively measured the distance between
each instance. Each cube is going off of
their own sort of position. And we're measuring the
distance between each one, which is creating this
really cool scaling effects. So basically we've taken, we've grabbed the
position of each cube. We've told blender to measure the distance between the
position of this cube. And since we know the
distance from here to here, blender is able to offset that, offset the scale in a clever way using the distance between
that we've just measured. So I hope that made sense, but I think you understand
the picture now. You can visually see what's
happening when you hit play. But now we want to fine
tune this by the range, sort of map remapping of the range that
we've just created. So we've created a,
basically a number between this in-between this, we want to map that
and sort of reroute the numbers to make it more
intense or less intense. Which is very simple
because there's a nerd, it's literally cold map range. So we can literally map the range of each
of these values. If we go shift a, come through to Utilities
and click Mac range, you can keep this
as set to linear. And you can just drag
and drop this in-between the distance and the
scale instances. I'm just going to save again
quickly so we don't crash. And so a very basic explanation of what's happening here
with the map range. Basically we're going
to be telling blend up with this node. We're going to say the
minimum number is anywhere between 01 and the maximum
number is anywhere between 01. To kind of visualize that, the radius where we're
basically taking the radius. Remember with this
transform node, we had it set on the
outer edge of the radius. That value there is basically 0, which is what this
is currently at. With that information, we just visualize
the instances again. We're saying here we can kind
of see what's happening. So 0 is basically nothing here, and maximum of one is
fully scaled up here. I think to make
this a little bit easier and user-friendly, we can actually just grab
another group input node. Let's go shift a
group, group input. Let's just place this down here. You'll see it has all
the same functions as this group input. It's basically just
so that we didn't get this massive, massive nodes. It's a lot easier
for us to handle. Let's just grab another
one of these sockets here and plug this
into the from maximum. And essentially this
is going to be, you can kind of think of
it as this such distance. So this is going to be, I'd say, always on 0 because
you can see if it goes to negative one or PaaS, negative or positive,
it kind of flips. If we just keep that at 0 and manipulate all of
the other numbers, we're gonna be able
to create some really cool looking results. I'm going to rename the
from Max to such distance. So I'll click on that name,
this search distance. Then again, I just want to
connect the NOR sockets. So we can grab this one and
connect it to the minimum. And we can grab this one here
and connect that to Max. For these two, I'm just going
to click on to minimum. And I'll call this max scale. Then I'll grab the
two max and I'll call this minimum scale. Now we have all of
these hooked up here in the geometry nerds
modifier to play with. Let's actually start mapping
these values and changing the way our animation looks
for the search distance, the position maximum and map. I think I'm just going to bump this up to something like 0.7. Something like seven. Straightaway. This
has gone to sort of shrink all about instances. But now for these other two, Let's go minimum scale. I'm just going to put
that to the point. To the maximum scale. I'm going to put 2.72,
something like that. You can see we have this really sort of
organic wavy effect happening. You can actually just
press Spacebar and play. And then on the flat lay with these values to get the sort
of effect that you'd like. For instance, I just changed
some of these parameters or you can kind of see, this is the effect
we've got now, which is almost there at the, at the end of this satisfying animation that we're
trying to create. So we basically just remapped the vector math that
we've just done. We calculated the distance
between each instance and we remapped it to sort of accentuate those numbers and make it look a lot more nice. And it's all being
plugged into the scale. Which is why we're
getting this sort of gradient effects on the
scale of each instance. So feel free to copy my
numbers if you lack, I've got for the search to since let's just go with three. Let's go with 2.5. I'll just round these
numbers, Officer Mack, scale, Let's go 3.5 and minimum scale, Let's go negative five. Just going to save that quickly. And we now have this pretty
awesome animation happening. But we can definitely take
this one step further. Let's jump into the
next part of this.
8. Adding The Rotation to Each Instance: Alright, so we are nearly
done with this whole Effects, and we're now up to the part
where we need to create rotations for each
individual cube. What this is going
to allow us to do, because if we play it right now, it does look pretty cool
and you can call it there. But what we actually want is for this to
look a little bit more organic and almost like sort
of a wave is flowing through this old and changing each individual rotation
of our instances. So to do that, we
basically just need to do a little bit
more vector math. And we can get that result fairly quickly and
fairly easily. Basically, what we're going
to do is use a noise texture. We go shift a, come through to texture and click on noise. What we can do is use the
factor of this noise texture as the rotation of each instance. To get the actual rotation
for each instance, we firstly need another node and that node is
rotate instances. Let's go shift a. Sinces rotate instances. We can just drop that in-between the scale instance and
the rotate instance. Now basically this
noise texture is going to drive the rotation for x, y, and z for each
individual cube. Sir, noise textures are
a value from 0 to one. And basically that's not gonna fly with the x, y, and z values. So we need to do some
math to make that work. And we also need to
introduce the position nerd again to actually get the position of each
individual keep. Let's go shift a, come through to input position. And let's save our project quickly and plug that
into the vector. And basically the
noise texture color is a range of values. Xyz, RGB. Sorry, that's kind
of the Though. Note that we need to use here. If we were to use the factor, It would just be a straight one single value and
it wouldn't really help us with the color
seeing that it's 0 to one. We need to do some vector math. So let's go shift a
vector, vector math. Drop that in here, and
let's just grab the color, plug that into the top one. What we're gonna do is
subtract all the x, y, and z values here by 0.5. Let's go from add and
change that to subtract. And then I'm just going
to left-click drag. Left-click drag to select
everything and type in 0.5. Hit Enter. So we've basically
subtracted everything. So now we're working
with basically negative 0.5 to positive 0.5. So we're sort of like
in halfway between. This is positive,
this is negative one. So now we need to multiply
this to get back to here so that all the
rotations are happening on the radius of the sphere. It's in the name, we
just need to multiply. So let's go grab this
node here and let's press Shift D to duplicate
it just a bit quicker. And then we can change this
from subtract to multiply. Plug the vector here
into the vector here. Wisely, we're just going
to multiply this by two on all the axis changes to two. Now this has made it so that
our values are actually going to be from negative
one to positive one. Which is exactly what we
need for this to work. Okay, so now that we have
this vector value here, we're working with rotations. If you'll recall,
we need to convert any rotation value to radians. Because all rotations
use radians. If we weren't to do that, we'd get some really
wacky results and it would look kind of odd. So how do we do that? Well, it's basically
another multiplication. So we basically need to multiply this vector value to the
rotation angle that we want. If we wanted to do 180
degrees of rotation, we just need to multiply this. So if we go Shift D
would need to multiply this by 180 degrees. Let's do that. Let's grab the vector,
plug that into the top. Then we basically
need two other nodes, which we've already used. So we need a math node to
convert a value to radians. Let's go shift a utility's math. Let's just drop that in. I'm just going to quickly
clean up my workspace here up a little bit. We have our math mode, then we need a value node. So shift a input value to this number is going to drive the degrees, the
rotation degrees. So let's change this to 180. And let's grab our math
nerd and change it from add to conversion to radians. And now we just need
to hook everything up. So grab the value, block
that till the decrees, and then grab the value here and plug that
into the vector. Then now might be a good
time to save as well. So Control S to save. And now we just need
to plug in this, multiply a vector
into the rotation, grab the vector that
to the rotation. So now when we hit play, you can see all of the instances have
their own rotations, but it's a little bit chaotic. And we want to make this
a little bit more of a smoother transition
between the rotations, etc. If we grab the scale and bring this down to
something like 0.1, you'll see we now
have this really nice flowy organic
rotation happening, which is really, really awesome. County gives it that
satisfying look. And if we want to, we can also describe
another group input. Shift a group input. We can just make
another socket here, like that to the scale. And again, you can just name
that to whatever you feel XOR certain craft this scale and say what's called
incidence rotation. We're very nearly done here, but as you'll see when
we're playing this, we actually want each
instance to rotate. They're not stagnant like this, but sort of move as it goes along the apex of the
curve that we've created. Instead of it oldest
being stuck like this. Each one would sort of
rotate almost like scales, sort of moving across
a body of some sort. So to do that, we actually need to utilize
the frame option that we've created so that while the
frame sort of pass by, the rotation is also being
affected by the frame number. So let's jump into
making that now.
9. Looping and Stylizing the Animation: So again, we're
working with rotation, so we need to convert
the frame to a radians. Let's grab a radiant snowed. So let's shift a utility's math and grab this or instead of add, we're going to convert to
radians, going to save. And if we drag and
drop this in-between here and hit Play, you'll see nothing
is really happening. So now let's grab a
vector math, add mode, shift a vector, vector math, drag and drop this here. And so what this is going
to do is allow us to alter each individual positions. Rotation, as you can see, that's x, that's y, and this is z. Now if we plug the radians from scale into the vector
and we hit Play, you'll see we had some really cool
animation is happening, but we can step this up a
little bit further as well. Let's just grab two methods. So let's grab this
one here, Shift D. We'll change this to a cosine, will shift a this again, and we'll change this
bottom one to a sign. Trigonometry. Well, this is going
to allow us to do is basically calculate the x and the y position for
each cube on the radius. And it'll loop it back to its original position at
the end of 360 degrees. And this will make
a lot more sense once you see it in action, it would need a few more nodes. So let's grab a combined node. So shift a vector
combined XYZ, again, cosine, that's going to act as the x and sine is
going to act as the y. And then to make this
look interesting, we basically need to multiply these values that
we've just created. Let's go shift a vector math. Change this to Multiply. We can plug this formula
that we've just created. We can need to make sure
that we're using radians. Sir. Pluck the radians into
the cosine and into the sign, then grab the combined
XYZ vector and plug that into the
top vector here. Now we need a value node. Basically need to
tell the vector value here what it should be
multiplying by on the x, y, and z axis. Let's grab a value node. So shift a input's value like
that into the bottom here. And let's just change
this to something like five to start with. Now with all of this here, we can actually move it across
and replace the radians that we had plugged
in to the add vector and plugging
the multiply vector. Plug that in here. You'll see straightaway
something's happened. So if we hit Play, it might
be a little bit hard to see, so we can actually just
bump up this value. Lets go something like ten. And now you can really see
what's starting to happen. It's creating a much more nicer I'm sort of rotation
effects on each cube. And it's all happening due to this trigonometry that
we've created down here. Awesome. So one final
thing before we finish this off
without group input, we actually created the
instance height earlier on. And this comes in handy now because you can
actually really stylize your animation here
by playing with this height. For example, if
we bring this up, you'll see we have it more so indicated in the opera region. And if we bring this
down, we haven't. Most are indicated on the
lower region of this via here. Either way, it's a
really cool animation, very satisfying. And basically now all
we need to do is setup a little scene and throw
in some materials. And we can call this one done.
10. Materials, Lighting and Rendering: All right, so now let's add in some materials and create
a very basic scene setup. And then finally render at
our satisfying animation. To actually apply a
material to geometry nerds, you have to set the material in the chain of command here. For us, it's a pretty
easy one to do. We basically need to
set a material rack here before it turns into
the output geometry. Let's grab a set of
material in art. So shift a material, set material. Let's
plug that in here. Now we have the option to
choose a material that we create from this drop-down here. So I'm just going to select the base material
that Blender creates. Quickly save this. And now let's actually jump
over to the shading area. Click on shading up here. And we're just going to click app object here and drop this
down and select material. Now anything we do to
let's say the base color, you'll see it's
updating on the object. Awesome. So we're going to use a pretty basic material here. But I think it creates a
really cool final result. Let's grab a Voronoi texture. So I shift a texture Voronoi
pluck that down there. What we want to do is actually grab a couple of notes here. So let's go shift a
such for geometry. Just pop that down
there. While we're here. Let's go Shift a and search for objects in fire truck that down. What we're gonna
do is mix between these nodes to create
a really cool, stylized sort of
sugar cube effect. And it's going to make this
really nice looking material for us to mix between
all of these. Let's grab shift a and
search for a mix RGB node. There we go. And now let's
grab the Voronoi texture, grab the color and plug
that into color too. And then with the
geometry night, scrap the normal and plug
that into color one. Then finally, let's
grab the object, infer random and plug
that into the factor. Now we have everything mixed in. And the factor of
this mixing, the var, nice extra and the
normal component of our geometry is being
randomly mixed. So let's actually change
this to Linear Light. Change from mixed
tilde linear light. Let's actually just plug
that into the normal of this object. Dropped
that down here. There we go. And you, you'll see
pretty quickly. We now have these really
cool sort of patterns all over at cubes. Now it's basically up to us to choose what kind of
color we want our cubes. I'm just going to grab
another node here. I'm just going to go
Shift a color ramp, pluck that down here. I'm going to plug the
color into the base color. Also going to plug it into
the subsurface color. Let that compile. And now with these two sliders, we can basically determine a transition from one
color to another color. For this first color, I'm going to choose
a light blue. There we go. I'm just going to bring
that over quite a bit. Then for the white, I'm just
going to change that to something like a light orange. There we go. Now to get this
really looking cool, can actually increase
the subsurface here. So this is bringing
this up to point to. Now basically we want
to learn in this look. So I'm just going to go
to rendered view here. And I'm just going to change
the subsurface to 0.14. I've got to increase the
scale of the learner and texture to
something like 200. And I might even
decrease that to 150, So it's a little
bit more visible. Let's go with 100 for the scale. Just a little bit more visible. And now if we were to jump
into cycles and see we have this really cool sparkly kind of a sugar cube effect happening on each one of our cubes,
which is really cool. All right, so now let's
make a quick scene. So I'm just going to
jump back into EB. Let's just make an
infinite backdrop here. So Shift a mesh plane, spring that blurry out sphere. I'm going to scale that up. I've just pressed S and
then ten on my notepad. And I'm going to press Edit. I'm going to press Tab
to jump into edit mode. And I'm just going to go
to edge select up here. Press select this
edge here, press E, and then press Z to bring
it up on the z-axis. Lexer. Now let's
scrap this here, this edge here, and press
Control B to bevel that And just scroll up on
your mass wheel to get some loop cuts in there. And then left-click
test to confirm that. I'm going to tab out
of edit mode and right-click Shade
Smooth this object. I'll just bring it in a
bit closer to our cube. Awesome, sir. Now
we can actually just give this background
and materials or just give it some color,
something like that. I'm just going to increase
the roughness as well. Awesome. So finally we need to add in a camera
and some lights. Let's shift a light area. I'm just going to bring
this above these via here, increase it a little bit. Actually see what our
lighting is doing. You can click this
drop down here and use seen lots and seen weld. Now our light is actually
being used in our viewport. Width are lots elected. Let's come down here
to the lab properties. Going to increase the power
to something like 500. Here we go. I'll just bring this
up, scale it up a bit. I'm just going to
duplicate this shift D. Bring it over here. I've gone to press
Shift T to aim the light direction with my cursor. Now this aim at here, back at the, back
at our animation. And I'll make one more light, so Shift D and bring it
across to the other side. And then I'll press
Shift T again, aim it at our light. I'll just scale this one
up to be fairly large. And I'll scale this one up
to be pretty large as well. Wonderful. So now we just need
to add in a camera, and then we can start
rendering this app. Let's go shift a camera. Immediately. The cameras in
the center of the scene here. If you just look at your object at a particular
angle that you lack, then press control of 0, the camera's going to
snap to your view. Now we can work
with it selected, you can just press G and
start framing this up. There we go. We also want to horn in the
look of the camera as well. So let's go to the
camera properties. Change the focal length to
something a bit more intense, like 125 offspring
this out slightly, so it's in frame. If you want, you can
include the field, depth of field enabled. You can just choose to focus
on satisfying animation and decreased the f-stop to make it look a
little bit more moody. Awesome. So now comes the
part where you can decide if you want to render this
out as EV or a cycles. If we come over to our
render properties, you can change our render
engine from EB two cycles. And it's going to change the
entire look of the same. This part is entirely up to
you with cycles enabled, just make sure you have GPU
impute enabled if you can. If you can't, CPU
is fine as well, but it'll just take it a
little bit longer to render. With all of this,
we can come down to the render tab here. I would change your max
samples to something like 200 or 150. Then you can leave de-noise enabled if you want
it to be denoised. So I'm just going to
leave that enabled. I don't think there's gonna
be any motion blur in this same I'm just going to
leave that unchecked. Then lastly down here
at color management, I'm just going to
go from look, none. Our cutoff that drop-down and
then just do high contrast. That's going to give the whole
image a really nice pulp. Awesome. So now
moving on from here, we basically just need to
render out the entire scene. If we go to Output Properties. Thanks for all your
resolution is appropriate. So I've got mine at 1920
by 1080. That's fine. The frame range,
that's going to be your frame and your end frame. This will automatically
be set up to be one through 360, which is great. Now you just need to
set an output folder. Click this folder button, create a new folder
and just call this skillshare satisfying animation tutorial
or something like that. And that's where Blend
is going to drop your movie file or
your PNG sequence. Then lastly, speaking of, we need to choose
our file format. So if we're going with PNG, you can keep it as PNG. All of this information is fine. Then we'll just
have to recompile the image sequence in a third-party software
like DaVinci Resolve, or you can even just
do it in Blender. But what we can also
do is change this from PNG to an MP4. You won't actually
have to do that. Sorry. If you go File Format, FFmpeg video, just select that. Leave the color as RGB. And then for the
encoding, drop this down, change the container to
mpeg dash 44, that's MP4. For the video. Keep
video codec as H.264 and make the output
quality perceptually lossless. So I drop this down.
Perceptually lossless. There we go and all the rest
is fine to leave as is. Now, all you have
to do is either hit Control F12 to render
your animation out. Or you can come up here to the render and then
click Render Animation.
11. Outro: All right, So thank you
so much for joining me in creating this
satisfying animation. I'm glad you made it
all the way to the end. Hopefully you now have a
better understanding of geometry nerds and more
comfortable in this workspace. If you want to, I'd love
to see what you create. So please send me your creations on
Instagram at sleep scopes. And please leave a review on this class if you enjoyed it. I'll see you in the next one.
 Smeaf, 3D Generalist and Tutorials