Transcripts
1. Introduction: Blender is becoming more
powerful every day. It's a free
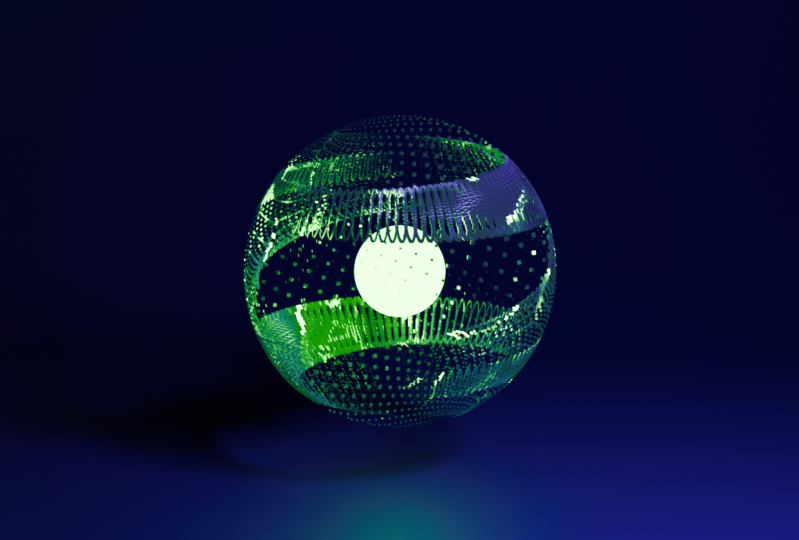
open-source software. And today we are going to
be making this animation. Hey everyone, My name is Smith. I'm a 3D artists with over five years of experience
creating in the industry. And as a freelancer, today, we're going to dive
headfirst into the newest blender workspace, geometry nodes, and create some amazing
procedural animation. This class is not for beginners. However, I will be holding your hand through each
step of the process. While we learn the fundamentals of blenders, Geometry notes, before we dive headfirst into fleshing out the
class, the project. Here are all the
topics that we'll be learning today in this class, ranging from note payable, I close all the way through
to lighting and rendering. The class project
will consist of you creating your own
unique animation. Within the geometry
nerds workspace, we'll start out with a blank blender scene and walked through the motions of creating from
scratch the final product. I've segmented this class into clear and easy to follow along sections so that
there's a sense of progression throughout
the entire class. And if you do get stuck or
need to take some notes, you can easily jump back. By the end of this class, you will have a multitude of different procedural
animations for your portfolio. As this entire setup is
completely procedural. Meaning at anytime, you can
change a small setting and your node network
and you'll get a wildly at differentiating
animation. I can't wait to start teaching
you this new skill set. So with all of that
said, let's get started.
2. Geometry Nodes Basics: Alright, so welcome
to the class. I'm glad you could join me. Let's start out by a
festival or ping up Blender. I'm currently using the
latest build of Glenda, which is the
three-point to build. But anything from
three-point arc onwards will work just fine
for this class. Let's start off by festival,
deleting this light. So select that press, Delete and also delete the camera x. Delete. And we're
just going to start with this simple cube. Again, as stated, this
isn't a beginner class. So you should know the
fundamentals of Blender, like the navigation, and just the very basics of how to use Blender
to follow along. Either way, I'll be teaching you everything from start to finish. So let's begin by
coming up to the top here and clicking on the
geometry nerds workspace. You'll be met with
this new workspace and it may look a
little bit unfamiliar, but we'll get used to it. So first thing to do is actually just clean
up the workspace here. This screen here on this side is basically an index of everything that's being
created in the scene. And to be quite honest, this is used for more math heavy sort of setups where
there's a lot of math involved and you need to
figure out what the indices and everything are about
each piece of your mesh. So this isn't incredibly
helpful to us right now. And I don't think we're really
going to have it use this. So for this class, let's just come up here
and collapse this. So we'll grab this
workspace here. Up the top left. You've got this
little cross hair. Just click this, drag across to the left and that'll
collapse in on itself. And now we have a
workable workspace here. With your cube selected. I'm just going to press
F2 to rename this. And we'll call this
satisfying animation. And all we need to do now is come down to
the geometry nodes workspace here in the lower half and click this New button. So this is now created a new geometry nerds setup
for us to use. But I'll do straight
away is click this little thumbtack
Pin icon here. That way, whatever we
do moving forward, let's say if we
click off of this, or maybe even just go to a different workspace
and come back. This will always be here. It'll be pinned and
tacked on so it can't just disappear on
us, which is very helpful. So to start, let's
just get a little bit more familiarized
with geometry nights. So if this is your
first time using it, we can run through
the basics before we dive headfirst into the class project and make that really cool,
satisfying animation. To begin, we've got
the group input here and the group output currently, all you can see is that there's a geometry input and
the geometry output. So what's essentially
saying is the geometry of this cube is here and it's going all the way
through to the output. And basically it
will be a stacking things in-between the middle to get a different
result on the head here. But you will see if I just
suddenly this connection, the cube or the original
geometry completely disappears. So that's kinda the power of geometry nerds is that we can actually input our own geometry so we can come to a
mesh permanent here. We could essentially
create another cube, connect that to the
output geometry. And you can see here we can actually play with
the size of this. You can give it more vertices, less Medicis, all
that good stuff. And let's just quickly
make like a very small scenes so you can kind of understand more about
geometry nodes. So let's say, for example, this new cube that
we've created, we want to maybe
instance a bunch of smaller cubes onto it. So what we can do is hit Shift
a is open up the Add menu here and come through to
instance, instance on points. And just drag and
drop that in here. In the middle. You'll see straight away,
everything's disappeared. And we have nothing
showing on screen. That is essentially
because we don't currently have an
instance plugged into the instance
on points node. If I was to duplicate this and plug another mesh
cube into here, you'll see we now have for each point on the
original cube here, we have a bunch of other
cubes being instance onto it. So for example, if I bring the size down of our instance Q, you'll see we now have precisely eight cubes on our original cube
being influenced. And you'll see it's
essentially because there's only eight vertices
to be instance onto. So if I increase the
number of vertices here, you can see quickly it's
increasing in the number of instances that are on the
cube, which is super cool. So that's just a very
quick understanding of geometry nodes. Another thing we can do is we
can grab a transform node. And you can actually transform everything just through
this transform node. So it's a very
powerful and this is sort of very basic level
of the German scenarios, but I'll get much more into
detail in the next lesson, where we will start out creating the satisfying animation.
So I'll see you there.
3. Creating The Spiral: All right, So welcome back. Let's just start out by deleting this nerve network
that we've created. So I'm just going
to select all of these nodes here and
press X to delete them. And now what I'll do is just
start fleshing this out. So let's just hit Shift a. And we're actually
going to start this whole setup by using a Kev spiral to become
through the cuff primitives. Let's just select
this cuff spiral. Click this here,
and let's connect the curve through to the
Geometry Group output. You'll see now we have this curve spiral
here in our scene. One thing I want to
quickly note is that this top bit here is completely grayed out and
we can't rename this. I'll actually just
want to rename this geometry nerds group to something most suitable. To do. So you just need to
uncheck this pin icon. Then you can actually
click this and rename it. So I've just renamed mind
to satisfying animation. And you'll see in
the right-hand side here under the modifiers, because geometry nodes is
technically a modifier. You'll see we have this
Geometry notes modify here, and it's old, it's
updating in real time. And we will be using this
throughout the entire class. Alright, so let's continue
creating this spiral here. This is the start of
the chain of command. So essentially anything that we do here will affect the curves, spiral and everything down the line of this sort of conveyor belt
that we're creating. For example, the rotations
here is set to two currently. So if I bring this up, you'll see that we're getting
more and more rotations. And that will technically
create more and more. Vertices are points
for us to instance cubes or circled oncospheres,
whatever we want. So that's really powerful. So we'll keep that in
mind. But for now, I'm going to keep that
at two rotations. We're just going to continue
down the conveyor belt here. So to start off with,
we'll keep one spiral, but in the end we
will come back and add a few more to
give it more variety. But just to keep
things simple for now, we'll keep this one. What we want to do now is
basically we want to add in another node here
called set curve radius. So again, let's hit Shift a, come through to curve, this curve menu here. And you'll see here we have
this set curve radius node. So click that, just drop
it in between here. You'll see the line goes white. So you can just left-click
to accept that. If you don't have this on
your version of Blender, It's just a simple add-on called Node Wrangler, which
comes pre-installed. You just have to activate it. So let's just quickly
run through that. Now actually, up here
in the Edit menu, you can come down to
Preferences. Open this up. Once that's open,
just come through to this add-ons tab here. And up the top, we can
search for Node Wrangler. You'll see here minds enabled, just ensure that
this is checked on. And we'll be using this a little bit more
throughout the course. Awesome. So once that's done, just exit out of
this and you should now have all the
functionality that I do. And we can continue on. Brilliant. So this is essentially
all we really need for the beginning of this whole
geometry nerds setup. This set curve radius Nerd is currently not doing anything. But in the future, we
can utilize this feather and create more variations
to our animation. So we'll just keep
this here for now. As it stands. This is all we need for the spiral part of
this setup currently. So what I'll do
is select both of these and I'll just clean
up my node network here so that it doesn't get too chaotic and have little
noodles going everywhere. Let's clean this up
now by selecting both of these and putting
them into a frame. So the hotkey to do this is with both of your
nodes selected, you can press Control J. And this is going to
create this frame here, this black box that sort of
houses both of these nodes. So you can see
wherever I move it, it'll stay locked in place. Now this is good,
but it's sort of bland and we don't really
know what this is doing. So we can actually give
this a name and a color. So to do so, we need to
open up this menu here. You can either click
this little arrow and open it up like that. Or you can press the N
key on your keyboard. And that'll open
up this side menu. Once it's open, well, we need to do is under the node tab here, you
can give this a label. So click this and we'll
call this spiral. And you'll see we now have
a name to this frame. And we can also give it a color. So click this little
color checkbox and then open up the drop-down and select whatever color you'd
like to put their balsam. That covers the beginning of our geometry
node set up here. In the next lesson,
we're going to cover curating the curve profile. So I'll see you in
the next lesson.
4. Creating The Curve Profile: Okay, welcome back. Let's begin creating the curved profile. So what is the curved profile? Essentially, what a curve is, is it isn't actually a mesh. So we actually need to give
this curve some thickness. And then transform that from a curve into a mesh
so that we can start placing instances onto each of the vertices on that new
mesh that we've curated. For example, it will basically create a circle that follows the path of this entire spiral
all the way to the top. And then we'll change this
from a curve to a mesh and instance a bunch of points
like this onto the mesh. So let's dive into this. So first status, we want to create a transform node.
So let's go Shift a. And if you never
know really what, where something is, you
can always search for it. But I find it best
to actually look through each of the
menus and try and find it yourself and you'll
get more accustomed to the jump tree nodes workspace
if you do it this way. So luckily, you have for me to tell you exactly where it is. But let's just start out
by going to geometry. And here is the transform node. So click that. Plays
out here in-between. Again, if you don't
have this sort of automatic connection thing, you need to make sure that
your Node Wrangler is enabled. Okay, wonderful. So now that we have a transform, we can actually transform
this mesh and rotate it, scale it, dual of
that good stuff. And what we want to do is basically create a
curved mesh and then put a profile curve
which will be a curved circle. So
let's do this now. Let's go shift a,
come through to curve here and up the very top, you can see we have
a few options here. Let's go to Mesh. Click that places here. And obviously nothing is yet happening because we don't
have a profile curve. So what we want to do
is go Shift a again, come through the
curve primitives. And we're actually just going
to use a curve, circle. Click this, plug the curve
here into the profile curve. And you'll see
straight away we have this massive cuff circle on the profile of this
and entire spiral. So we need to do now
is hone in that size. So for the radius, you can just grab this and shrink
it or enlarging it. If you need more precision
when scaling this, you can hold down Shift
while clicking and you'll get a more precise movement. I'm just going to go
something like this for now, 0.18 meters. Now we have this circular
profile, which is really cool. And you can see there's no
cap on the holes at the end. So what you can do is click
this filler caps option and that'll just fill
the mesh volume. Okay, Great. So we now
have this completed mesh. We've transformed it from
a curve through this, and then it's now being
output as a mesh. So this actually has
mesh properties. So if we were to now
Instance things onto it, it would be having vertices and faces that we can put things
onto that's super powerful. The next step here is to create basically a procedural rotation. Now this can get a
little bit confusing, but I'll do my best to explain
what we're going to do. So essentially, we want this animation to
be kind of chaotic. And one way to do
that is to actually rotate out curve like
this on the rotation, on the z axis. So what we'll do is I'll just quickly
show you my timeline. I'm bringing up a timeline here. Timeline that we go. I've currently got 250 frames. Now if I want this
whole animation to loop and actually
go on for infinity, I'm going to need
to have 360 frames so that it matches 360
degrees of rotation, which is what we're
going to set up. So to start with, just make sure that
your timeline has 360 frames in it in total. That way, once it gets
to the very end here, it'll go 360 degrees
of rotation. And then it'll come
straight back to frame one. And it'll start the whole
thing again from scratch. You'll see that
visually in a moment once we set up these nodes. So let's just begin by
sprinkling at the z coordinate, which is what we
want it to rotate. So festival, the
easiest way to do this is to use a separate x, y, and z node. So let's go shift a. Come down to the
vector option here. And we're going to use
separate XYZ. So click this. And now let's grab the Z output and plug this into the rotation. So what this is
saying is basically only the z will be affected. And the Z was that sort of clockwise rotation
that you sell. So now we need a vector. So if we stop playing
with all of these, you'll see we've got some
crazy rotations going on. And what we want to
do is basically plug a vector into here to
control that rotation. So what we're going
to do is actually use the timeline here. To control the rotation. So the easiest way to do
this is to grab a math node. Let's go shift a,
come through to Utilities and click
this math node here. Plug that down and
we're actually going to basically put in
a driver option. So plug this, plug
this math node down. And we're going to
change this from an ad. And we're going to use instead
on the right-hand side, this conversion to radians. So just click that there. The reason why we're using two radians is because
we're going to use each frame as a
rotational degree frame. One will be one
degree of rotation. Frame 135 will be 135 degrees
of rotation and so on. So that's why we had to
create a timeline to be 360, because that will be 360
degrees of rotation. So if we plug this
value into the vector, you can see as we
increase these degrees, we're getting different
rotations happening. Super cool. So as you can see, once we hit 360, it basically goes back to square one
where it started at frame 0. That's why we want this
basically to go through the frame rate of
our entire timeline. Now obviously we need to
animate this somehow. Don't want to do it by hand. We want to use a very
simple math equation, or it's not even really
a math equation, it's a driver of function. So a driver basically is a card that you put
into this box here. The code is very simple,
It's just hash frame. So our hashtag and then the
word frame and hit Enter. Now you'll see your
box here is purple, and that just means that there's a driver installed onto it. And if we hit Play, you'll see it's now basically for each frame that goes by, it's rotating to that degrees. Once it hits frame 360, it'll come back and
it'll loop seamlessly. So that's super
important if you don't have 360 degrees of animation, let's just say you
have to default to 50. It'll go all the
way to frame to 50. And then it will
basically jump back in a very abrupt fashion and it
won't look very satisfying. So just ensure that
your timeline is set to 360 degrees of animation. And that's basically the curve profile section
of this completed. Now, all that's left
is to select all of our nodes here and
clean them up a bit. So let's press Control
J to frame leaves. And again in the end menu, so n to open up this menu here, Let's just give this a label
of curve profile that we go. And let's also
give this a color. So I'll just go with
something like this. Amazing. So now we
can actually start instancing some objects onto the new mesh that we've created. So we'll cover that
in the next lesson.
5. Instancing: All right, Welcome back. Now we're up to the fun
part of actually instancing some objects onto our curves spiral that we've created here. So let's just jump
straight into this. I'm going to pull this group
output across just a tad. And we've gotten
to just basically turn our mesh a bunch of points so that we can actually put some instances
onto those points. So the node that we need here
is called mesh two points. So let's go Shift a and
come through to mesh. And then up here we have
the mesh two points. Let's just grab this and
plug it in between here. And now, you can see
straight away we have all these really cool
sort of sonic ringlets. And for each ring we've got
a lot of these points here. So each one of these sort of small cubes that you
see on the ring will indicate a point that one of our instance objects
is going to be at. So currently we've got
quite a few instances here. We can change the radius of the instances just to
see them a bit better. So now you can see them
just a little bit better. There we go. So that's basically what these instances points
will achieve for us. Amazing. So the radius here doesn't
really do anything. All we really need to
know right now is that we have a curve
to mesh function. And it's changing the
curve from a mesh. And then we're changing
the mesh into points. Also. So moving on, we want
to basically create an instance on points
now so that we can instance some things
onto these points. Alright, let's go shift a. Let's come through
two instances. We'll click this
instance on points. Note. So click this,
drop it in here. And again, everything
will disappear because we don't actually have
anything being influenced. So we need to put
some geometry or a mesh right into
this socket here. So let's now instance
a cube onto this. Let's go shift a, come
through to Mesh Primitives, and let's just grab
a simple cube. Drop this down here and plug
the mesh into the instance. And now you'll see
we have a bunch of cubes being insincere, but they're a
little bit too big. Let's grab the size here. You can actually, you can
actually left-click and drag down to cover all of these
and then slide them across. So let's just drag down here until they're
all highlighted. And then we can start scaling
these down to something more manageable. There we go. So obviously this is like a ring lit type deal and we don't
really want it like this. We want it to be more condensed. So this is where we can come back through here and
start fiddling with some of the spiral settings and the curved profile settings. So for example, with
the cuff profile, if I was to increase the radius, you'll see it starts to get more expansive and it's sort
of just meshes into one. I like the look of this. Again, we can change all of
this later down the track. What we also want to make
sure that we're doing is we're actually
increasing the resolution. So if we increase
this, Let's see, we're getting more
and more points and creating a more dense mesh. So the resolution is
something to keep in mind. Also over here on the
curves spiral at the start. Same deal goes for
the resolution. So if we increase this, you'll see we're getting a
much more dense and mesh here. So let's go with
something like 100 nano, say it's a lot more
dense and we're getting a lot more instances
to play with. So I'll keep this at
that level for now. And actually my just decrease the radius just to touch
to something like this. And now we can move on. So the next step in this
pipeline is to actually put something
in-between the mesh two points and the
instance on points. And that is going to be
the set position nerd. Let's go Shift a, and
let's come through to the geometry down the
bottom here, set position. So just grab that and
plug it in between here. And essentially
what this is, well, this node is doing
is it's setting the position of each
instance for the mesh. So we are setting the
position and we actually want to use some
cool vector math to basically walk this and create a really cool shape
and animation. So it's actually very simple to set this up and it's not
going to take us long at all. So just uses three nodes and an old plugs into
this position here. So let's just start off by grabbing the actual
position nerd. Let's go shift a, come
through to input. And we're going to grab the
position here. Sorry, input. Position. What this is
essentially saying is whatever the current position
is of each instance, that is the, basically this is capturing the vector
position of that. So it's getting a little
bit technical here. But trust me, when I say this is a very visual
learning experience. So it's not so much that you
need to be a mathematician. You can actually just play
with some settings and get some really cool
results without really knowing everything
behind the math. So let's just continue on and let's grab a vector math node. So let's go shift a, come through to a vector
and click on vector math. And essentially
what we're doing, we're taking the positional
vector here of each instance. And we're basically going
to plug this in here. We're going to take the
cosine and the sine and then basically add them together and put them
into the position. So a very quick
rundown is cosine is like a waveform and sine
is another waveform. And when you add them together, you can basically triangulate
the vector rotation. And it just makes a
really cool effect. So let's just quickly set this up so you can
actually see it in action. So first off, with this ad note, let's change this
from add to cosine. Like this. I'm just going to press Shift D to
duplicate this now. And we'll change
this from cosine to sine flexor and once again
Shift D to duplicate this. And we'll change this
from sign back to Add. And it's getting a little
bit clouded for me here. I'm just going to move
my notes over a bit. And now we basically just want
to connect everything up. So the position will add
this into the sign vector. And now we're going to
add them both together. So add the cosine
up the top here, and the sine down the bottom. And lastly, let's add the
vector here to the position. And you'll see straight away, something really cool
starts to happen. So if I hit Play, you'll see this really awesome looking
animation starts to happen. Amazing. So now that
we have this created, we can actually lay
that down the line, come back and change some of these values to get some
really cool results. And this is what I was talking about in the beginning
where there's so much variability to create endless amounts
of different animations. So now with all of this setup, we basically just want to select all of my
notes here and again, throw them into a frame. So select them all,
press Control J. And let's now just clean this up so it makes sure
your frame selected. Let's nameless to beat
instance objects. There we go. And again, let's just
give this another color. I'm gonna go with a
yellow this time. And if you don't
really like the way these node noodles
are displaying, you can actually clean them
up with Node Wrangler. The quickest way to do this
is by using a reroute nerd. So for example, I don't
really like the way this node is being plugged
into the position. Can't really see
where it's going. So what I'm going to do is
just drag this across a bit. While I'm holding Shift
and pressing right-click, I can create this line, which is going to
create a re-wrap node. If I just drag this
through the middle here, you'll see I've
created this node, is essentially another
piece of this node just extended out so I can
plug this into other things. But the whole purpose
of this is now I can do that operation again. Shift, right-click and drag. And you'll see we've
got this really nice sort of arrow line now, Frac press and G to move
the selected point here, I can basically just
create two of these. Let's actually go with three. Now I've got a
very clean sort of operation and I know exactly
where this node is going. So this is definitely
not necessary. But if you lack this neatness
in your notes setup, please go ahead and try
this out. Okay, Brilliant. So we now have this really
cool animation on hand, but it's not very
satisfying right now. It's just very bland and
we want to spice this up. I'm also noticing it's
a little bit hard to see on screen right now. So I'm actually just going to create up here in the drop-down. You can actually come down and click this little cavity option. And that just gives, basically
for every ridge or edge, gives it a nice sort of highlights so I can
see what's going on. So now it looks a little bit nicer and I can actually
read what's happening. So we've basically got
everything up-to-date now. And the next lesson
we're going to cover scaling the instances. So currently, each instance is the exact same size
and exact same scale. But in the next lesson
we're going to do a very simple node
network to set up that's going to create
some really cool effects and scale each
instance individually. So I'll see you in
the next lesson.
6. Scaling The Instances: All right, Welcome back. We're now up to the Power
BI going to be scaling these instances to create
some really cool effects. So let's just jump straight
into creating this effect. Now, to start off, we're going to need something
to scale the instances. And the name actually
states exactly what it is. It's called scale instances. So let's just such
shift a come through to instances and we'll click on
this scale instances node. Drop that in here. And you'll see now we have
this line here where we can scale each instance
relative to its axis here. So obviously we want to do
some really cool scaling. We want each instance alone
to be at a different scale, at a different time basically. And the quickest way to do this is basically with
this same setup here, just with a slight alteration. So very simply, all
we really need to do is just copy this across. So I'm going to
select all of these and press Shift D
to duplicate it. Let's see quickly
there's a problem here where it's kinda stuck in the instance objects frame to get it out of the frame here. So I'm just pressing
G to grab and move it to actually get
this out of the frame. But here we need to basically
on parented from the frame. So all you need to do
is press Alt and p. That's just basically
stands for on-in parenting. And now we can have it in
its own space down here. Awesome. So now what we want to
do is just grab these. And what we can do,
scrap the vector and plug this into the scale. So directly into the scale here. Now straight away you
will see something has altered on the
instances here. And if I hit play, it's a little hard to see
because it's moving a bit fast. But basically each, each individual instance is
now being scaled differently. But I want it to be
a little bit more drastic and a little
bit more noticeable. So the quickest way I've
found is to just change the operation here from
add to another operation. So the coolest one I've found
is to use the dot product. It's a little bit
hard to explain, but essentially,
again, this is visual. So once I plug the value
here into the scale, you'll see immediately
the results. Awesome. So you'll
see some parts of the mesh is really
small, almost invisible. The other parts are added
some maximum scale. So when I hit Play, you'll see we have this really awesome scaling
effects going on. And it's gotten this high-end really well once
we start putting in some rotational
effects as well. Amazing. So now all we need to do again is parent all of
these to a frame. Let's just select them all here. Press control J, throw
them into a frame. And again, I'm just going to
call this from the label. There we go, scale instances. And I'll give it
a color as well. Let's go with little light blue. Amazing. So just for
reference, if you have, if you think you've
missed something, here is currently what
we have for the nodes. We've got the curves, spiral, have the curved profile. We have the instance objects. And lastly we have
the scale instances. For the next section here, we're actually going
to create rotation. So we're going to create
individual rotation for each instance. And it's going to coincide
with the frame number. And it's going to
create this really awesome rotational effect
that you'll see shortly. So I'll see you in
the next lesson.
7. Rotating The Instances: Welcome back. We're now going to cover
creating the rotation for animation and all of
that instance points. You can see as the animation
is playing right now, everything is basically uniform. All of these instances and
each one of these cubes is basically straight
down like a line. So we want to, instead of it being
like uniform like this, we want some of the cubes to be on their own
axis of rotation. And it's very simple to do, but it does have a tiny
bit of math involved. Again, this whole process
is more of a visual thing. So you don't technically
need to know why this is working or
how the math is working. And I can just basically
walk you through each step and I'll do my best to explain
what's happening in KC. Do feel the need to know. So let's just start this
out by grabbing a rotation. Sorry, grabbing a
rotate instance nerd. Let's go shift a, come through two instances and grab the rotate instances node and
just plug that in here. So straight away, you can start playing
with the rotation. And you'll see each
one of these cubes, whichever one you choose, will start to rotate
depending on that axis. So what we want to do
is actually create a little math function
like this and plug that directly into the rotation
so that each of them are rotating depending on
a particular vector. So again, we're gonna be using the positional vector
and then basically calculating how far
away it is from the center of the curves
spiral that we created. And it'll give it some really
cool rotational stuff. So let's just begin by coming up above here to this
little blank area. And let's just begin flushing
this whole network cap. So to start off with, we're going to grab a method. So go shift a through to utilities and math.
Plug this down. And again, we're
going to be using our scene frames here to calculate the radians
or the rotation. So what we want to do
is change this from add to the conversion
to radians, like so. And again, we can put in that driver hash frame
here if we want to. But if you are in the more
recent versions of Blender, there's actually a node
that will do this for you. And that's called seen time. So if you just go shift a co-author to the
input tab here, and down the very bottom we have this scene time nerd here. Essentially, it
takes the same time, like seconds or the scene frame. So in this instance,
we want to use the frame and you can
plug it directly in here. Again, if you don't have a more recent or
up-to-date version of Blender and you don't have this node, it's totally fine. You can just use the classic
driver hash frame like this. And it'll do the exact
same operation as this. Either or, it's
totally up to you. I'm going to use the
node because, why not? I have it. And now let's just continue
creating this node network. From here, we basically want to triangulate the x and y coordinate for each
of these instances. And to do that, we
essentially use a cosine and a sine operation and plug that
into a combined XYZ node. So again, a sine function
looks like this. It's basically positive
one up the top here and negative one
down the bottom here. And it just alternates between. Then the cosine
does the opposite. When you add them together, it basically finds the median and that's basically the
long and short of it. So let's grab another
math note here in the utilities that we go. Let's plug the value
here into the top. And we're going to change
this from add to cosine, going to Shift D
to duplicate that. And I'm going to change
this from cosine to sine, that we'd go, again, plug the radians into the value. And now we're just going
to combine X, Y, and Z. And we're going to plug these
into the x and y slots. So let's go shift a, come through to the vector. And you'll see at the top
here we have combined XYZ. So grab this and we want
to plug the cosine into the x value and the
sine into the y-value. Amazing. So now essentially what
we want to do is get to the position of each
of these instances. So whatever, wherever they
are now on frame 304 or 181, the position node will
basically capture that attribute of that
vector, that exact position. And we can utilize that to basically create this
cool rotational effect. Let's go shift a hub
through to the input here. And we'll come down to position. This place that down there. And we're essentially going
to create three more nodes. So we need to vector math nodes. So let's go shift a
vector, vector math. And let's just duplicate
this. So we have two of them. So this top one here is going to be an Add tonight
because we're going to be adding this
and this together. Let's go position
up into the top. This bottom vector, nerd, this bottom vector
math note here, we're going to change this
from add to multiply. And we'll plug the vector
here into the top. Second, bind x, y,
z into the top. And we'll plug
this multiply node into the bottom vector here. So we're essentially
adding the position along with the cosine and sine
triangulation on the x and y. And we're going to multiply
this by a particular number. For the Multiply node. To finish this up, we have this value here
that we want to control. So let's actually just create a node to control
all of them in one. Go shift a into the input. It will come down to value. Plug this here. And the value
basically it will be a slider that we can
change on the fly. Then we can plug this directly into the vector down
the bottom here. Now, what that
allows us to do is multiply by a particular number. So we could multiply
the vector by one, by two by three by
whatever number we want. To be honest, I found that
2.5 is a great value to use. So I'm just going to
keep mine at 2.5. Amazing. So moving on, we've
currently got this massive nerd jumble here. And we now want to
connect this up to a procedural texture. So what we're going to be
using is a noise texture, which is basically
a random value. So let's go shift a
will come through to texture and choose
the noise texture. And now you'll see there's
a little vector slot here. So we can pluck this
vector into the top. And all of this math
is basically telling this noise texture how to react, and how to apply it to
each of our instances. I've just noticed that we've
lost our instances here. So I'm going to connect
them back up. Like so. There we go. Awesome. Now if we wanted to, we could just plug
the color note here directly into the rotation. And you'll see if we hit Play. We do have some
things happening, but it's not exactly
what I'm looking for. So for now, I'm just going to
continue fleshing this out. This last section is
basically complete, so it's not going to
take us too long. We just need a few more nodes. So this multiply node, I'm going to duplicate
and just place here. And essentially we're going
to take this noise texture, this procedural noise texture, and we're going
to take the color and plug this into
the top vector. Now straight away, what
this is going to do is basically push 0.5
in this direction, or basically a way from the middle of
objects orientation, which is this little
orange circle. So to counteract this, we have to do a few things. So let's just
change this to 0.5. So we're going to multiply it by 0.5 and that's going to push it. And then to counteract
that multiplication, we basically need to bring
it back to the center. And the easiest way
to do this is just to multiply it again by two. So plug this vector
into the top of this multiply node that
we've just duplicated across and change
the vector here for all of these and
set that to two. Amazing. So we're
nearly complete. Now we need to basically
multiply one more time, all of this math
that we've created. And then we need
to multiply it by the scene frame or the radians. So again, that's
fairly simple to do. Let's just duplicate this
across one more time. Plug they multiply vector
into the top here. And now we need a value node, and we also need a radians nerd. So we've already got them here. So I'm just going to duplicate this radians across to here. And also this value node
duplicate that across. So now we want the
value of this writing ensnared to come through and plug in to the
bottom vector. And the degrees. We essentially want
this to be 360 degrees. So you can just plug
it in here like so, or you can just use a handy
value node like this. And just type in 360 lexer. Amazing. So the final step for
this entire setup is to basically just plug it in to
the rotation socket here. So this multiply node, this last multiply node here. We can come through
with the vector, plug that into the rotation. And you'll see straight
away we'd have some really cool
rotations happening. So if I hit Play, you see we have this awesome
rotational effects going on. But it is a little bit chaotic. You can see them all sorts of rotating rapidly and
it's a little bit noisy. And the whole reason why
that's happening is because of the noise texture up here. So currently the
scale is at five. So if we hit play, we actually bring this scaled down just a tad to
something like, let's go with points. Let's go with just 1.5 for now. You can see we have this
really smooth rotation going on and it's a lot
more satisfying to look at. So this is totally up to you. The scale part could even change like other factors like the
detail and the roughness. And that'll give you different
varying results as well. But I mean, even just
this set up here, it looks pretty amazing to me. So I'm going to keep
it like that for now. Awesome. So we have this rotation sort of
setup going on here. It's pretty chaotic,
so I'm going to select all of this and just throw it into a
frame. Press Control J. And I can just keep it up
the top here like this. So it's a lot more
nicer to look at. And again, let's
just label this. I'll call this rotate instances, and I'll give it
a color as well. Let's go with a green for now. Awesome. So currently this is what the satisfying
animation is looking like. And the last step
really is to basically set a material and then also fiddle with these spirals at the beginning and create
more copies of them. So in the next lesson, we're going to cover curating the material for this object. And then we'll cover more cuffs, spirals and joining them
all together to create a really cool,
satisfying animation.
8. Creating The Material: Okay, so welcome back. Let's now start adding a
material to an object. And then we can dive into
creating more objects, more curved spirals,
I should say, to create a more satisfying
and organic look. To begin with,
what we need to do really is set a material. So if we go shift a, come through to material here and click on this
set material node. If we plug this in at
the very end here, we now have a drop-down and it allows us to
choose a material. So currently, we just have the base material that
blend boots up with, which is just a white material. So I'm going to click this
material so that set here. Then we need to change our workspace to the
shading workspace. And we can actually
edit the material that makes sure that you've actually
selected the material. And once you've done this, we can now come up to the top, come through to the
shading workspace. And we can start fleshing out a material for our object here. So to begin with, you can see we have just the basic material. I'm actually just
going to change this to say, satisfying material. And of course we want actually
see what by creating. So currently we're just
in material preview. So up here you can see
we've got viewport shading. You can also press Z on
your keyboard and you have this little pie
menu to change from material preview to
solid to rendered. So if we just come
through to rented, this will boot up
and it'll show you what the actual rendered
image is going to look like. So currently there's
no lighting, so that's why it
looks like this. So let's actually come
back to material, preview, flesh out the material, and then we'll jump
into lighting and rendering at the final lesson. Okay, so let's just
begin fleshing this out. So it's actually quite a simple material that
we're going to be using. You can obviously
create any material that you would like to
place onto your object. But I found that
this one seems to look quite nice in
the final render. So to begin with, let's just add in a color ramp. So let's go shift a search
for color ramp that we go. What we're going to do
is just plug this into another node and then into both the base and
subsurface color. So just start with, let's just choose
some colors here. So on this first color stop. I'm just going to come down
to the color wheel here. I'm going to increase
the color a bit, and let's just go with
something like a red here. Then for the white color, stop, grab this, come to
the colors again. And let's go with
something like a blue. So now we've got this nice
gradient between each other. And if we plug this
into the base color, you'll see this is what's
currently looking like. And I'll also plug this
into the subsurface color. So subsurface or
subsurface scattering is what it's actually named, is the effect of light penetrating through something
and then scattering. So you see it mostly
in human flesh. If you shine a light between your fingers or on
the back of your ear, you'll see it goes
basically completely red. And that's the light
trying to pierce through and come through
to the other side. But it's basically entering your body and scattering across and making that
really cool effect. I'm going to use
that to my advantage with this whole setup. And all you need to do is increase this
subsurface slider here. I'm actually just going
to increase this to one. So completely increase it. And for the rendering engine, I'm actually going to be using cycles to get that
realistic effect. So this is totally doable
in EV as well if you, if your computer
can handle cycles. But just for my project alone, I'm gonna be using cycles. Awesome. So now that we
have the base color here, you can see if we start
sliding this across, we can get different colors. You can also change
this drop-down from linear and change it to
something like constant. Or you can also change
it to B-spline. So this part here
is definitely up to you for what
colors you'd like. I'm just going to keep
mine on linea for now and maybe pull this color
stop across like this. Amazing. So moving on from here. So I'm just going to add in another node called
layer weights. In the input here. Come through to lay awake. Click that, drop it here. And we're going to use this for now option here
on the roughness. Just plug this
into the roughness and it might be a little
bit difficult to CFS, but I'll just show you
visually what this is doing. So for the, for now, what that is is basically
the outline of the object. So depending on where you're
viewing the object from, you'll see there's
sort of a gradient from black to white board, currently white to gray. So if I change this blend down to something
extreme like 0.05, you can see there's this white highlight on the front now, and then the rest is just black. So what this is doing is it's creating essentially a mosque. And what that means is
whatever is black will be a value of 0 and whatever is why it will be
a value of one. So all of these black patches
here, so for example. So for example right here, this is going to have
a roughness of 0, which means it's going
to be very reflective. And for all of the
white sections like on this outer rim here, it's going to be very rough. So that's going to create a
very dynamic look for when these objects are rotating
and spinning around. It's basically a very dynamic
and almost real-time mosque for the roughness
that we've created here. That's super cool. And it's honestly,
this is sort of diving into material creation, which I'll be
creating a completely separate class to talk about because it goes quiet in-depth and you can
do quite a lot of things with blenders materials. So if you don't understand
anything I've just said, Don't worry, we'll be covering that in a later class
down the track. For now, all you need to
know is that we have this for now node plugging
into the roughness. And it's going to create
some really cool effects. So again, the blend here is
going to basically decide how strong or how
impactful this mosque is. For my scene, I'm gonna go
with something like 0.2. And that's just a
sort of mid-range between extreme and not extreme. Awesome. So now with that done, you can kinda see in the viewport here, the white is basically all of these really shiny
reflective bits and the black is the
non-reflective bits. So that's more of a visual
cue for you to look at, especially when I hit Play. You'll see this in action. Awesome. So it's almost like glass tiles on each side of the face,
which is really cool. Now that we've set
up the material, we can just jump back into the geometry nerds
workspace here. Up the top. There we go. And now what we can do is come all the way back
to this dot here. And from here we're going
to start fleshing out the look and feel of our
animation before rendering it. In the next lesson,
we're going to cover curating more spirals and
joining them together. And then we'll be
covering the parameters here in the group input
and actually creating perimeters in this Modifier
Tab so that we can update everything
on the fly and we'd never have to jump back
into the screen again. So with all that said, I'll see you in the next lesson.
9. Creating Parameters and Alternate Animations: All right, So welcome back. Let's now dive into creating more curved spirals to flesh out outlook
of our animation. And also create group
inputs or group parameters so that we can actually
update everything here in the modifier
instead of here, the nerve network where
it gets a little bit chaotic and you might not
remember where you put things. So let's just dive
into this now. So for the curves spiral, this is actually
quite simple to do and create a lot of variation. So essentially what we'll
be doing is creating multiple different spirals
with different parameters. And then we're going to join
them together and plug them into this curve radius here. Awesome. So for the spiral,
lets us go Shift D. Bring this up here. And straight away, what we want to do is join
them together. So if we just go shift a, come through to geometry and select this joint geometry nerd. Plug this in here and you'll see there's this geometry tab here. And it's got a
massive nerd socket that is indicating that we can plug many things into
this one socket. So if I grab this curve
and plug it in here, grab this curve below, plug it in as well. Then grab the output here. Plug this into the cup radius. You'll see nothing
visual has changed yet. And that's because
this spiral is identical to this spiral here. If I hit the reverse option, you'll see it's now mirroring it in reverse and it's created another section for
this entire group here. So what I want to do is just change a couple
of these settings. So maybe I'll put in
some more rotations, give it a little bit
more resolution. Change the height a little bit, change the end radius. And immediately you can
see we've got all of this really cool
stuff happening. So if I hit Play, you'll see we now have
this super organic. It's a little bit too
chaotic for my liking, so I might just change some
of these settings back a bit. I believe that
rotations might help. Let's go with maybe rotations or even one rotation
that we go hit Play. You'll see now we've
got this amazing, really cool looking
animation happening. So with this in mind, you can now go buck wild and add in as many spirals
as you'd like. So for example, I could just add in
another one down here. Plug the curves straight
into the joint geometry. And I could give this one
like five resolution, one rotation, give it a
different starting radius, give it a different end radius. And again, we've just created a little bit more
variation flexor. So have fun with playing
around with all of these. And if you want to, you can even add indifferent curve parameters are
curved primitives. So under here curved primitive, you could add in something
completely different, like maybe a star. Let's see how this reacts. So if I just grabbed the curve, this into the joint
geometry, hit Play. You'll see it's
created this sort of segmentation here in the middle. And that's actually
looking pretty cool. So I might keep that
one involved as well. And again, all the parameters here are totally
different to this. So we could give it full points, could give it, give the radius something
larger like this. Could even give it some twist. Amazing. So that is a
little too chaotic for me. So I might just control Z, some of that we go. But you can see straight
away how quickly you can basically improve
upon your animation. Now with all of this in mind, it's a good thing to note that the instance is
currently a cube. So if we wanted to, we come through to the
instance objects and create variation here by changing this out for
something entirely different. So let's say, for example, I want to just disconnect
this and maybe let's add in an ICA is via shipped a. Let's come through to Mesh
Primitives and let's just add in an ecosphere like so. Plug this into the instance. You can see immediately
we have this really, we have this really cool
animation, actually. So much like a bunch of
growing sprouts or flowers. So that's cool. And again, you can change the radius. So maybe that's a little
too big for your lacking, so you can bring
it down to 0.13. Hit play. And straight away, we have a totally different
animation happening. Cool. So I'm going to keep mine as the cube for now because
I liked the look of it. So I'm just going to plug
that straight back in. And again with the incense, you can change the size here. So you could do something
like this if you wanted to. Totally up to you. Amazing. So moving on down, we're up to the spot where we
can actually start creating some parameters to update here on the side
under the modifier. So for instance, the
main spiral here. We can actually plug the rotations into this
below socket here. And you'll see straight
away what this has done is it's created the rotation, basically slide, I hear it's plugged it into
the group input. And it's now populated here under the geometry
nerds modifier. So I can now update the
rotations completely procedurally here without ever having to come back
into the screen. So that's super powerful. So for example, if I wanted to change the radius of the curve, if I do so, it's going to
become extremely noisy. As you can see. It gives us a whole different
vibe for the animation. But if I wanted to, I could come through to the
curve radius and do it here. Or I could grab
this radius socket, plug it into the group
input down here. And now we have the radius right here for
us to update in real time. For example, if I
made it super small, we got this really cool
ring lit animation. By making it super large, we get a more noisy,
chaotic animation. So yeah, there's pots
completely up to you. I'm going to keep
mine at two for now. And one thing to note is
currently the names of these parameters are
just staying the same as is on the spiral nerd. And I can get a
little bit confusing. So what I'd like to do is
in the group tab here, if you don't have this menu
open, it's the End key. And on the group
tab, what you can do is come through to the inputs. You can actually name
them or delete them. So for example, rotations. What we can do is name this
so that it's more accurate. So we could say rotations, spiral on the skull one. Now in the outline here
onto the modifier. We now know that this is for the first spiral
that we created. So that's something
to keep in mind. So for example, we don't really need
this geometry anymore. So I'm just going to
hit this minus button here to get rid of it so that we have a bit more of a
cleaner node group here. And moving on, we've
got the radius here. I don't really
know what that is, especially if I'm coming back to this project in like a
week or a month time. So let's just clean this up
to say something like radius. There we go. So now thinking back on this
when I'm in the future, I can say, okay, this is the Cubs radius, and then I can update that and actually know
what I'm doing. So something to keep
in mind when we're creating these group parameters. Again, let's just continue this trend of doing it
with this fast spiral. So we want to, we can create the
heights as a parameter. So again, I would just
click this and rename it to height spiral underscore one. So I know that that is the
height of the first spiral. Again, let's just do it for the radius and the end radius. Come through here like the end, the bottom, and plug this
one into the bottom. Start radius, I'll
change that to start radius, spiral, uninstall one. And the end radius, I'll change this from n radius
to spiral to spill one. Awesome. If you want to do
this for each Spiral, you're more than welcome to. But I'm just going to keep
this for time's sake. As just the one spiral for me. Moving on, we can actually
duplicate this group input. So Shift D. And we
can actually plug in other factors into this so that we can
update them on the fly. So for example, one that's
handy to have is up here with the rotate instances. If we come through to the noise texture and
grab the scale input, just plug this into the bottom. And we can now update the
scale of the noise on the fly. So what I'll do is I'll make sure to name this noise scale. Like Sir. If we hit Play, what we can
do is with the noise scale, we can actually just bring this up or down as the
animation is playing. So I could bring
this up like this, or down like this. Remember the high
you bring this, the more chaotic
the rotational be. So for me I'm just going
to keep it at 1.5. But now that we have
this as an output, I can more easily update this as we're going along. Amazing. So that's all that I'm
really going to add to the group input and
the parameters. If you want to, again, you can add more as you please. But for Miocene currently I think that's all that
I'm going to need. So now we have all of
these really cool inputs that I can update
as I'm going along. And it just makes it
a lot more easier for me to iterate
on my animations. So continuing on this trend, what we can do now is
basically finish off this whole animation here
by changing it drastically. So I mentioned at the start, you can have multiple
different animations and totally different loudly
changing animation just by altering just a
few nodes and settings. The first settings
are obviously all of these rotations and
spirals and all of that. But the other one is obviously the radius here on
the curves circle. That might actually be a good
output for me to put it in. So I'll just grab this and
plug that into the bottom. And I'll just name this to File radius because
that's what it is. So now we have another
slot to play with. Awesome. But another thing
that we can do is actually change the
operation of some of these to something
totally different and get an extremely
different animation. So for example, I'm just in the instance
objects section here. And what I'll do is
I'll change this from kerosene to something like, let's say, we can go with
the normalized option here. And straight away
you can see we have this increasingly
changing animation. So if I hit play, you
can see this is totally different and it has a
completely different vibe to it. Actually really enjoy this one. This looks amazing. As you can
see just with one setting. I've just created an
entirely new animation. This is super powerful
to play with. It doesn't take long or take
any effort really at all. I've just changed one option. So for example, instead
of this being ad, I could change this
maybe to subtract. And straightaway, again, we have this amazingly
different animation and it's just incredibly powerful and so
fun to play with. So moving on from here, as long as you're happy
with your animation now, we can start fleshing
out the scene, the lighting, and then
move on to rendering. So once you're all set, I'll meet you in
the next lesson, where we'll run through
all of those settings.
10. Lighting And Rendering: Okay, welcome back. So we're up to the final leg
of the whole class here. We're basically now completed
with our animation. We're happy with how it looks. And now we want to start
fleshing out the scene, the lighting, the floodplain, and then the rendering. So let's begin doing that. It's actually quite
simple to do. So first is we want
something to cast a shadow and basically
capture the shadow, which would be a full plane. Let's go shift a, come through to mesh plane. And we're just going to
scale this up by ten. So just quickly, I've
just press S to scale. Then I've typed in ten on my number pad to scale it
up by a factor of ten. And now I'm just going
to bring this below. So G to grab Z to pull down. And now we have a floor plan
to capture some shadows. Awesome. So moving on from here, this actually might
be a little too big. So I'll bring this in
scale down just slightly. And now we want to create an
infinite backdrop for this. So basically, an
infinity backdrop or infinite backdrop
is something that's used a lot in photo shoots. Or professional photographers
usually use this a lot when doing
subjects photo shoots. And it's very simple to setup. So we need to do is press
Tab to go into edit mode. And we're going to
extrude this edge up. So I'm going to press two. Or you can come up here and
click this edge option. Going to select this
edge here at the back. And I'm going to press E and then z to constrain
it to the Z-axis. Just pull that up a bit until
it's basically out of view. And now what we
want to do is grab this middle edge here that we have created and battle that. So just press Control B, that'll let you Bevel. And then on your mask
we'll just scroll up maybe three or four times to
create some more edge cuts. And then left-click
to select that. Awesome. I've just tapped
out of edit mode. And you can see, you can see that this, these edges that we've
created are positive. And that's a no-go that's going to show up in the render and
we don't want to see this. So let's shade this smooth. So I'll click, so
I'll right-click this and select shades move. And now you can see
we've basically created an infinity backdrop for
our subject to stand on. So again, we don't
have a camera, so let's just add
an a camera now. Shift a come through
to camera down here. And that's going
to create a camera in the middle of our scene. So I'm going to press
G and pull this back. And to actually view what
our camera is seeing, I'm just going to pull these
two workspaces down a touch. So we've got more of
a workspace up here. And I'm going to make
another window here or viewport for us to look through the camera. Up the top-right. Any of these viewports
are workspaces at any sort of intersecting side. So up here on the top
left are the top rat. You should always get
a little cross hair. And whenever you
have the cross hair, it'll allow you to either collapse it into
another workspace, will pull it across and
create a new space. I'm just going to
come to the bottom here, Left-click this, and just drag this across to create whole new
workspace for us. Now that we have this,
we can look through the camera and actually control the camera without
viewport here. So press the key or 0 number
on your number pad to look through the view of the camera and to actually control the
camera with our viewport, you can press the N key to
open up this side panel. Under the View tab here, we can come down to camera to view and just select
that checkbox. Once you've selected
that, you'll see these orange lines
around your camera. And now if you try and
move in the viewport, you're actually going to
be moving your camera. So this is just a
quick way to set up a camera view or camera
angle for your scene. So I'm gonna go with something
like this for the framing. And now let's just
quickly set up our camera settings. Down here. This little camera icon here, it's the object data properties. And we're going to just quickly enabled some cameras settings. So the focal length
will default to 50 millimeters, which
is not too bad. It's kind of like a
mid-range focal length. That's kinda good
for everything. But for my animation
specifically, I want it to be a little
bit more zoomed in. So I'm going to set
this to 85 millimeters. And you'll see straight away
this is zoomed directly in. So I'm just going to
scroll out a little bit on my Moscow until it's
framed in the shot again. There we go. That's essentially all I need to do for
the camera here. So once your camera setup is complete and you're
happy where it is, it's always a good idea to
disable the camera to view, just in case he accidentally
move your viewport and you actually move your
camera from its position. So again, I'm going to press
N on this view port here. I'm just going to
uncheck this camera to view set. Setting here. Awesome. So now when I move around here, it's not going to
move my camera. And I can again press the
arrow key on my number pattern to look directly through
my camera's perspective. All right, so moving
on from here, we can now start
lighting as seen. So what we can do is just quickly jump into rendered mode. So just quickly up here
in the render properties, this little camera icon, we can change our
render engine to either EV or cyclists depending on what you
are going to be using. Again, I'll be using the
Cycles Render Engine, so I'm just going to switch
that across for the device. If you do have a
graphics card or a GPU, make sure that you've
clicked this setting here so that it actually uses your graphics card
because that is a lot quicker than your CPU Wilson. So now let's dive into rendered mode so we can actually see what we're looking at. So just press the Z button and then on this little
pie we'll just scroll up and then either left-click or let go of z to enter
rendered mode. Amazing. So currently there's not
really any light source. We have very soft
wildland and currently, but for everything else has literally no lights
in our scene. So let's just start off
by adding in some labs. So I'm going to go Shift
a to come here to light. And I'm going to add in an area light that
we go from here. It's just essentially
setting up the position. So I'm going to
quickly move this into a three-point
lighting setup. So to start, I'm basically
going to put a lot here, a lot here, and a
backlight here. So I've just moved the
light across and to actually aim it
directly at the object. I'll just quickly show you
a fast way to do this. So you could either
rotate this manually on the x-axis and so try and
aim it at it manually. Or you can actually
just press Shift and t. So Shift plus T. And what this will do
is it will point to the light directly at
wherever your cursor is. If I want to point
out over here, Shift T and it will
aim directly there. Shift T again, and that's
going to aimed directly at the object, which
is really cool. So again, I'm just making a
three-point lighting setup. So I'm going to
move this one here. I'm going to duplicate this. Move it across on the y axis. Shift T again to pointed
directly at the object. And I'm going to just put a point light right
here at the back. So shift a light, white light. And I'm just going
to pull this back to illuminate the
backdrop behind it. So let's jump into
rendered murder and see how this is
currently looking. Alright, awesome. So it is a
little bit dull currently. And that's just because
the light sources aren't very powerful. So for this first light, I'm going to come through
to the light properties. Here are the object
data properties again, click this button,
and let's just blast this to
something like 500. Awesome. So that might be a
little too powerful. Sorry, I'm going to
drop this down to 250. There we go. And for the color here, I'm actually going to
give this a little bit of a warm tint. So on the color wheel, I'm just going to
hold down Shift so I can select my color
more precisely. And I'm just going to pull
it across to the warmer hue. There we go. So somewhere around this range seems to be good. So I'll keep it like that. For this secondary light here, I'm again going to
increase the power. So for this one, I'm gonna go with 500. There we go. And for the scale, I'm actually going to increase
this quite dramatically. So I'm just going to press S and scale that up quite a bit
to something like that. Then lastly, for the
point light here, I'm just going to increase this until it eliminates
the backdrop. There we go. So 100s
seems to be pretty good. And I'm noticing
straight away that the actual object seems
a little bit dull. And also the backdrop
is completely white. So I think what
we want to do now is just hone in those textures. So I'm just going
to jump back into shading just very briefly. And I'm going to just play
with the color ramp here. So in rendered mode,
I'm just going to quickly play with this. Awesome. So I've
just played with the color ramp here and I'm just basically credit is sort of gray gradient, red color here. It's very simple. And what I'm gonna do now is
just contrast this with a blue baby blue backdrop
for the plane here. What's going to create an
entirely new material? So I just click on New
and we can just name this backdrop like so. And all we're really going to change here is the base color. So what you can actually do
is grab this color here. So you can either
come through to the hex code and copy that, or you can literally just
hover your cursor over this color bar and press Control C. And that will copy
the color directly. So we can plug it into this material space column
with the plane selected. Now, I'm just going to
press control V to copy the exact read that this
animation is using. So with that in mind, we can now choose the
exact opposite, blue. And it will basically create
a really cool contrast. In this color wheel. I'm
just going to open it up. Come through to
the HSV tab here. And on this hue here,
this hue slider, we can actually
just pull it across to something like this. There we go. So we've now got the exact opposite of this
color, which is really cool. Looking through the camera here. It also looks really
cool as well. Awesome. So with
this now completes, you can obviously Tinker the lighting to
however you'd like. For example, the weld lighting, I'm just in the shading tab. Come through to this drop-down
here and change the weld. You could turn the
weld flat completely off by changing
the strength here. That'll give you a little
bit more of a dynamic look. But yeah, this pie is
entirely up to you. The lighting is a completely
creative process. I really enjoyed the
three-point lighting setup. It just looks quite
nice in my opinion. With that, out of the way, we can move on to
actually rendering this. So in your Render Settings here, under the Render properties, we can now just
run through all of these settings and
actually set up a render. So to start for
the render itself, all of the new blend
of saints will now start with a Mac
sample of 4,096. That's probably way
too many samples, especially for a
scene like this. So something sort of mid-range
would be 200 samples. That does become a point
where you can basically get diminishing returns on the amount of samples
that you're rendering. But for me, I'm just going
to go with 250 samples. And I'm also going
to make sure that the D noise setting
is turned on. Another thing that
we're going to enable is the motion blur. So just ensure that this
checkbox is enabled, it's going to give you that
really cool motion blur look. And the last setting in this setup here is just down
in the column management. So click color management. This is going to open up
a whole new drop-down. And what we're gonna do here
is just change the look. So currently this nerve
look applied to our scene. And if we open this up, I usually like to use the
high contrast look. So if I enable that you can
see it's now got a more punchy look to it and it's going to look a lot
nicer in the render. So up to you here, if you'd like to add some
contrast to your scene, you can see you've just,
you see when you choose the very low contrast
it but kinda comes more of a
flat looking image. And again, I just enjoy
the high contrast. Look. Awesome. So once you're happy with that and
your animation, we can now jump over from the render properties and come over to the
output properties. So click this little
image icon here. And this is where we're
actually going to set up what is going to be
output or rented out for the resolution currently
go to at 1920 by 1080. That's totally fine for
the percent. It's at 100%. So we can keep that as is. Frame rate is 24
frames per second. That's just, that's fine. So we can keep that
as is as well. For the frame range, we want to make sure
that the frame start and end is set up correctly. So we're going to have
I seen start at frame one and we're going to
have it end at frame 360. So just ensure that those
two values are correct. And now that one of the
most important parts of the output
section is actually setting an output folder for blended to put your images
that you're rendering. So make sure to create a folder. Currently it's set to
my temporary folder, which I definitely don't want. So I'm going to quickly create a render output folder now for all of my images to be
placed into. Awesome. So I've just created
an output folder here. And essentially all of the
images or the movie file that we're going to render is going to be placed
in this folder. So you can see if I
open this up here, I've created a very specific
file naming convention. And this is actually
super important. Essentially I've named this satisfying animation underscore, one underscore. So this part specifically is what is important
because we're going to import this whole sequence into a sequence editor
like to Vinci resolve. So if this was to be named
satisfying animation one, the actual output render would, basically it would name the file satisfying animation
on the school 1001. And it wouldn't go up
in a sequential order, it would become very confusing. So just ensure
that you're naming convention is similar
or identical to this. And you'll be fine. Once you're happy with your
name, just accept that. And now comes the part where
we can start to render. So if you want to
actually render a movie or a video file
straight from blender, I don't recommend that you do, but if you do want to, you can click this file
format and change it from P&G over to FFmpeg video. So what this will
do is essentially render out all of your
images into a video file, instead of you
having to manually open up another program like DaVinci Resolve and render out the sequence
as a video file. The only reason why I don't recommend you do
the video file in Blender is because there could be a scenario
wet blend of crashes. Maybe halfway
through your rent a, let's say you're
rendering 360 frames at only gets to frame 100. You'd have to then restart
your render from frame 0. So that can be really
tedious and time-consuming. Whereas if you choose
to do a PNG sequence, you're essentially
giving yourself a safety net so that
if blended does crash, you can locate what frame
number that Blender got up to, then you can essentially just restart the random
from that frame. So I always recommend to
use this PNG file format. Amazing. So once you're
ready to render this out, you have all of your
settings complete. You're happy with
your animation, your lighting, your material. All you need to do now is come
up to the render tab here. You can click the Render
Animation button. In the next lesson, once
your render is complete, we're going to open
up DaVinci Resolve and input your image sequence directly into there and render out the final video
of your animation.
11. Davinci Resolve: Okay, so your render
is now complete. We're now up to
this step to open up DaVinci Resolve and actually input your image sequence directly in here and
render out the video. So let's just start out by
creating a new project. So you should be met with
a similar screen to this. Let's just come
through and click the new project option here. Now we're going to
create a new project. So let's just call this
satisfying Animation Skillshare. There we go, and you can
hit the Create button. So this will now open up a
entirely new workspace here. And what we're going
to do is come through to the Media tab. So if you're not yet
on the Media tab, just make sure the R
by clicking down here. And this tab allows us to
input an image sequence. So now all you need
to do is locate where you saved your
image sequence to. So I'm just going
to do that now. Alright, so I've now found
my satisfying animation. And if you don't have this
kind of layout here where it's a stacked sequence and it looks a bit
more like this, where they're just
individual frames. All you need to do is come
up to these three dots here. Click this, and
then make sure that these sharp individual frames is not checked on. It
does click that. It'll shrink them all
into their own sequences. And now you can see,
if you click it, you have this little outline
here to view your animation. You can literally just
hit Play and it will play your animation
in real time. So that's super convenient. So now all we need to do is just drag and drop this
into the media pool. So drag your sequence
down here, place it here. It's not in the media pool for us to actually start editing and exporting into a video. So what we need to do
now is actually place it on a timeline so that
we can render this out. So come down to the bottom here and click on this Edit tab. This is going to open up
an entirely new workspace. We don't need to
worry about much of any of these workspaces. Apart from we have
the media pool here. We have the timeline here. If you don't have
the media pool here, just to ensure that this
button at the top Media Pool is selected and then your
immediate pool will show up. Now what we can
do is just click, click and drag this
onto the timeline like Sir, going hit play. And we have our animation
playing in real time. And now what we need to do
is actually rented this out. So super-simple,
come through here to the Deliver tab
with the rocket. Click on this. And
what we want to do is basically set up
these settings here, give it a name and a
location to save out too. I found the quickest way for
this is to actually just click the YouTube preset here. And what this will do is
basically render it out at 1920 by 1080 by definition, which is exactly what we
rented these images out as. So that's super handy. And all we need to do now
is just choose a name. So we can call this satisfying
and emission Skillshare. Then of course,
we need to choose a location for this to save, to just click this
Browse button and choose a folder that you
want your final animation video to be saved to. Awesome. So once you've
found your folder here, we're now ready to
actually write this out. So click on this Add to Render
Queue button down here. This will then pull it
over to the render queue. It should say job one. And now all you need to do is click this render old button. There we go. So
that's completed. It's rendering now
and we actually have the video file that I can
share it on screen right now. Once that's done, a
quick way to actually locate the video file is
you can right-click this. You can right-click the job here and it'll open up
this little sub menu. You can click on
Open file location. This will open up a quick folder here where your video
has been saved to. You can double-click
that and you can play, you're
satisfying animation.
12. Outro: Congratulations
for making it all the way to the very
end of this class. I'm so glad that you
could join me and learn through my experience with
Blender geometry nerds. Hopefully now you have a greater
understanding of palace, wonderful new workspace works. And you have a variety of different animations
for your portfolio. Now, if you'd like to, I would love to see
what you have curated. So please post your project in the project and
resources below. Or feel free to tag me on my
socials at Smith's sculpts. If you liked this class, please leave a review and
I'll see you in the next.
 Smeaf, 3D Generalist and Tutorials