Transcripts
1. Introduction: Hi, I'm Elisabeth,
and welcome to this super quick bite
size class where we are looking at the creative
art of Blackout Poetry. I am a professional
artist and art educator, as well as a published
author illustrator, and I've been
teaching classes here on Skillshare since 2021. I love finding fun
ways to play with text and art making
and Blackout Poetry is a really easy fun approach that combines poetry using found
words with art making. You can do any art
materials that you want to. You can even work digitally. In this class, I am going to
provide you with some texts, but you're also welcome
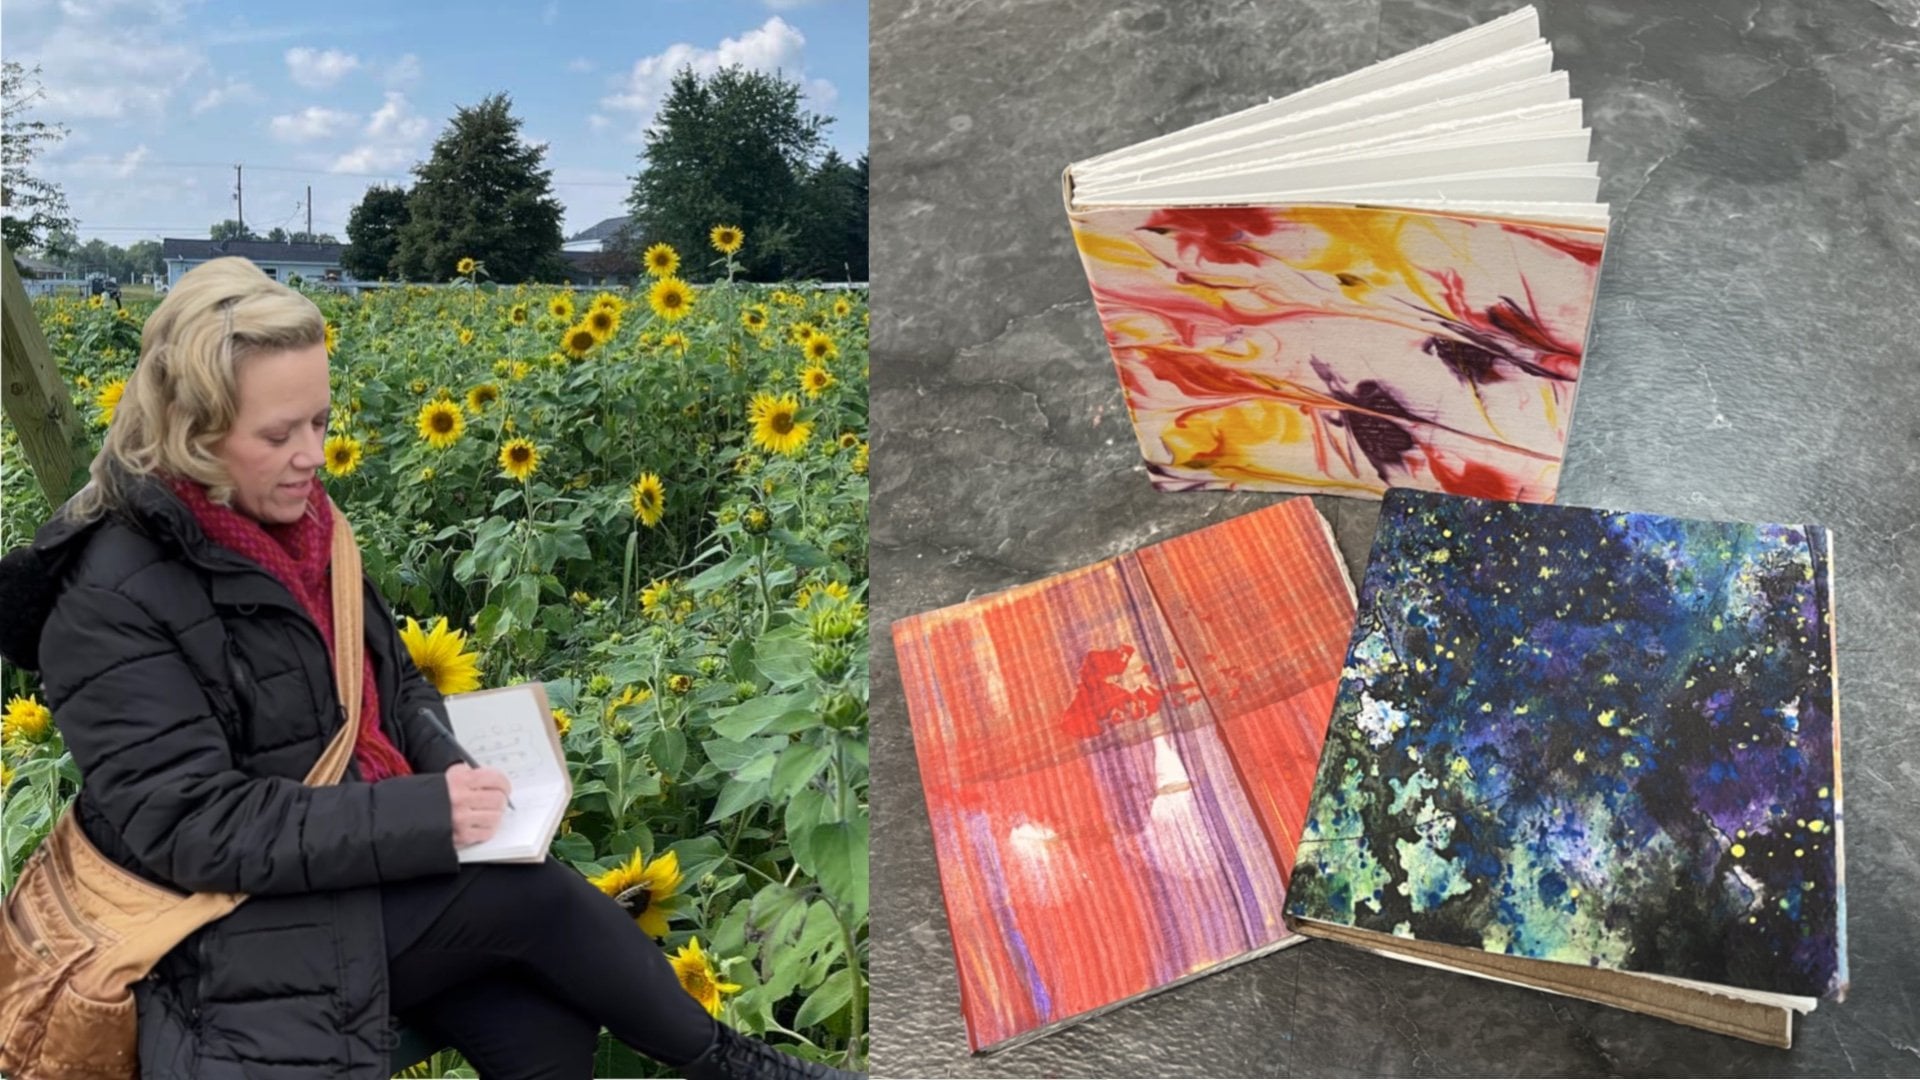
to find your own. I am often going to
resell stores and thrift stores to find
books that are for sale. Take the pages out, and then I repurpose the cover as a
cover for a sketchbook. But then what do you do with
the pages on the inside? Lot of times when I'm
doing these sketchbooks, I'm leaning into smaller books, so I end up with a lot of
pages with words on them. Then those make fantastic collage materials,
which is great. I love anything that gets
me a new sketchbook, but also provides me
with collage materials. But when you're
doing it to a book that has text, pages of text. You can then use that text as a foundation for
black up poetry. In this class, I'm going
to show you how to take found pages of text to
seek out the poetry, and find the poetry
hidden in the prose, and then we're going to use
a variety of art making approaches to black out the words that we don't
want to use for our poem. Lot of it depends
on both the poet, the artist that's doing
the Blackout Poetry, as well as the type of text
that you're playing with. You can have a lot
of fun with this. It can be a nonsense poem. I could make sense, or you can make this very
profound and very meaningful. In the next lesson, I
will talk some more about our class project
and the materials you're going to want to
have on hand for class. I'll see you there.
2. Class Project: The For our class project, we are going to be
finding text or using the text that I'm going
to share with you in the projects and
resources section of class. You could either
print out the text onto any kind of paper that
you want to for your printer, or you could work
digitally as well. Procreate or any other
digital software like that would be
a fantastic one, then that would let you
keep playing and adjusting. If you do this with
traditional art making approaches on
printed text paper, you have one shot, which I know can be a
little intimidating. But this is going to be so
fun and we're going to work up our poem and then decide how we want to mask
the other words. So if you start with your text and then you seek out your poem, you mark out those words and then through different
art making approaches, you make the other words become a design that hides the words
and turns that text into more of a texture or a pattern
or completely obliterates it and it just becomes gone in the color and the
value that you lay down. A quick project that I can come to and do
really quickly or I can work on it little by little. It's really fun to do this as a warm up or
if you don't have a lot of time for your
art making session or to do a collection of them. And see the different
ways you can play with variations on masking
out the unwanted text, as well as what poems get discovered in the process
of this class project. Lesson over to the next lesson, and I'm going to show you
the materials that I'm going to have on hand
for my class project. I'll see you there.
3. Materials: The materials for our
Blackout Poetry project are sheets of text. They can be pages that you
take out of an old book, either one that you
find at a thrift store, but you can also find
different books at your library book sales because I'm often also looking for books that are hardcover that
I can take the pages out and then repurpose the hardcover to make an altered
book sketchbook. So then what I do is I save my pages for Blackout Poetry
and collaging papers. Doesn't really matter
what type of book it is. A novel will work
better because we do want to have a lot of text filling the
page and then we also want to have interesting
words to work with. I find that novels give you
more to work with than, say, maybe a technical manual, but you could absolutely
lean into those too. I've provided you
with a couple of different text options on the projects and
resources section of our class that you
can download and print off for your Blackout now, you can absolutely print on just copy paper
if you would like, but if you would like
to get a little heavier in your drawing
application or painting, you can also print out on any kind of paper that is thin enough to run
through your printer. You just have to make
sure that you cut it down to 8.5 by 11 so that it will fit and then run it through just like you
would a copy paper, then you can paint back
into it, draw back into it. The great thing is,
even if everybody use the same page of text, every poem would be different
because we're all going to be drawn to different words
that we find on the page. Then I have a variety of drawing
materials that I'm going to like to go back in with
fine liner, paint pens. I've got brush pens if
I want to play with a transparent element,
Paint Pens, sharpies. Those things are
going to completely cover the text that's already there or
pretty close to it. The brush pens are nice
because they leave opacity. That way we get the color, but we also get the
text as texture, which is something that's
really fun to play. It also use colored
pencils, Oil Pastels. If the paper is thick
enough or if you mount it on another sheet of paper
so that it's more durable, you could work back
into this with paint. Again, if you print
it, you can choose your paper and then choose
your art media from there. Whatever drawing materials
you want to work with. And if you want to
be a little bit more cautious in creating your poem and crafting it from
the words on the page, you could absolutely
use a pencil so that you can edit it as you go. But this is all we need for
our Blackout Poetry project. Let's head it over to our
next lesson and we will begin discovering words as our poem starts to reveal itself
to us. I'll see you soon.
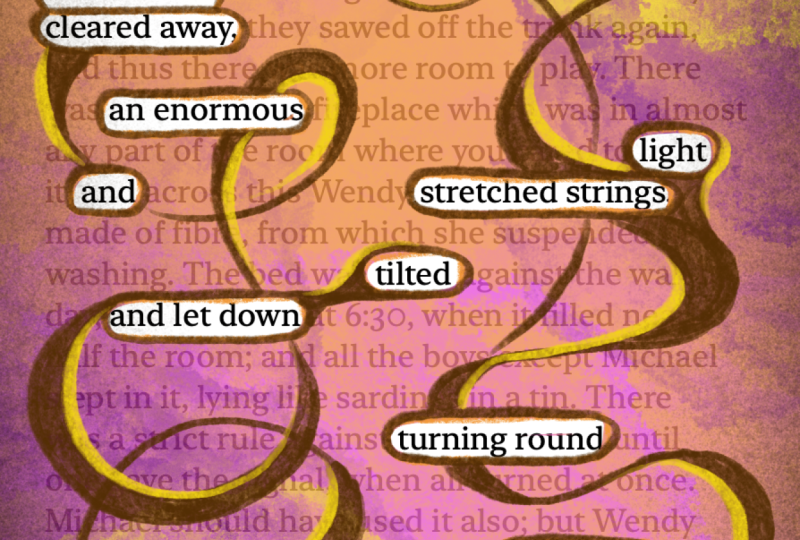
4. Finding Your Poem: The the Blackout Poetry, there's a couple of different
ways to go about it. So in the traditional
sense of Blackout Poetry, the idea is we choose
what words to keep, and then we choose
what words go away by masking them in a design or
completely blacking them out. The original intent of Blackout Poetry was
to use a page of text like this one and
choose words to keep, and then everything else
would get covered in black. So Blackout to find the poetry. I have a whole stack of pages
that came out of a book that I have repurposed the
cover into a sketchbook, and I'm just going to kind
of randomly choose a page. Any page of text
will work great. Then there's a couple of different ways we
can approach this. We can start to randomly
just find a word or a phrase that speaks to us and then build the
poem up and down, or you can start at the
top and you can work down, or you can start at the
bottom and work your way up. For this one, let's just
go right into it and just make some quick decisions
about what is interesting. Depending on the book and depending on what
words you're drawn to, you could come up with a
very random silly poem, or you might find
something deep. So I'm going to start
with on the other side, I'm choosing a phrase. I just jumped out at me, and then I think I'm going
to jump around a little bit. Let's start with smells became. I'm just going down the line of text and seeing what sounds like a good
part to come next. You can decide how much you include as you're building
your poem. Let's see. Smells became marked and spice. Smells became marked
in spice where the Riverbank where
the riverbank laid. Again, it doesn't have to
grammatically make sense. It just has to be something
that's interesting to you. Smells became marked in spice
where the Riverbank laid, and then we could just jump all the way down
to the next part. On the other side, guilty
eyes, on the other side, guilty eyes hung dedicated
to places on the other half. So I found my poem. For this one, I want to
keep this a little faster. I want this to be
kind of a quick one.
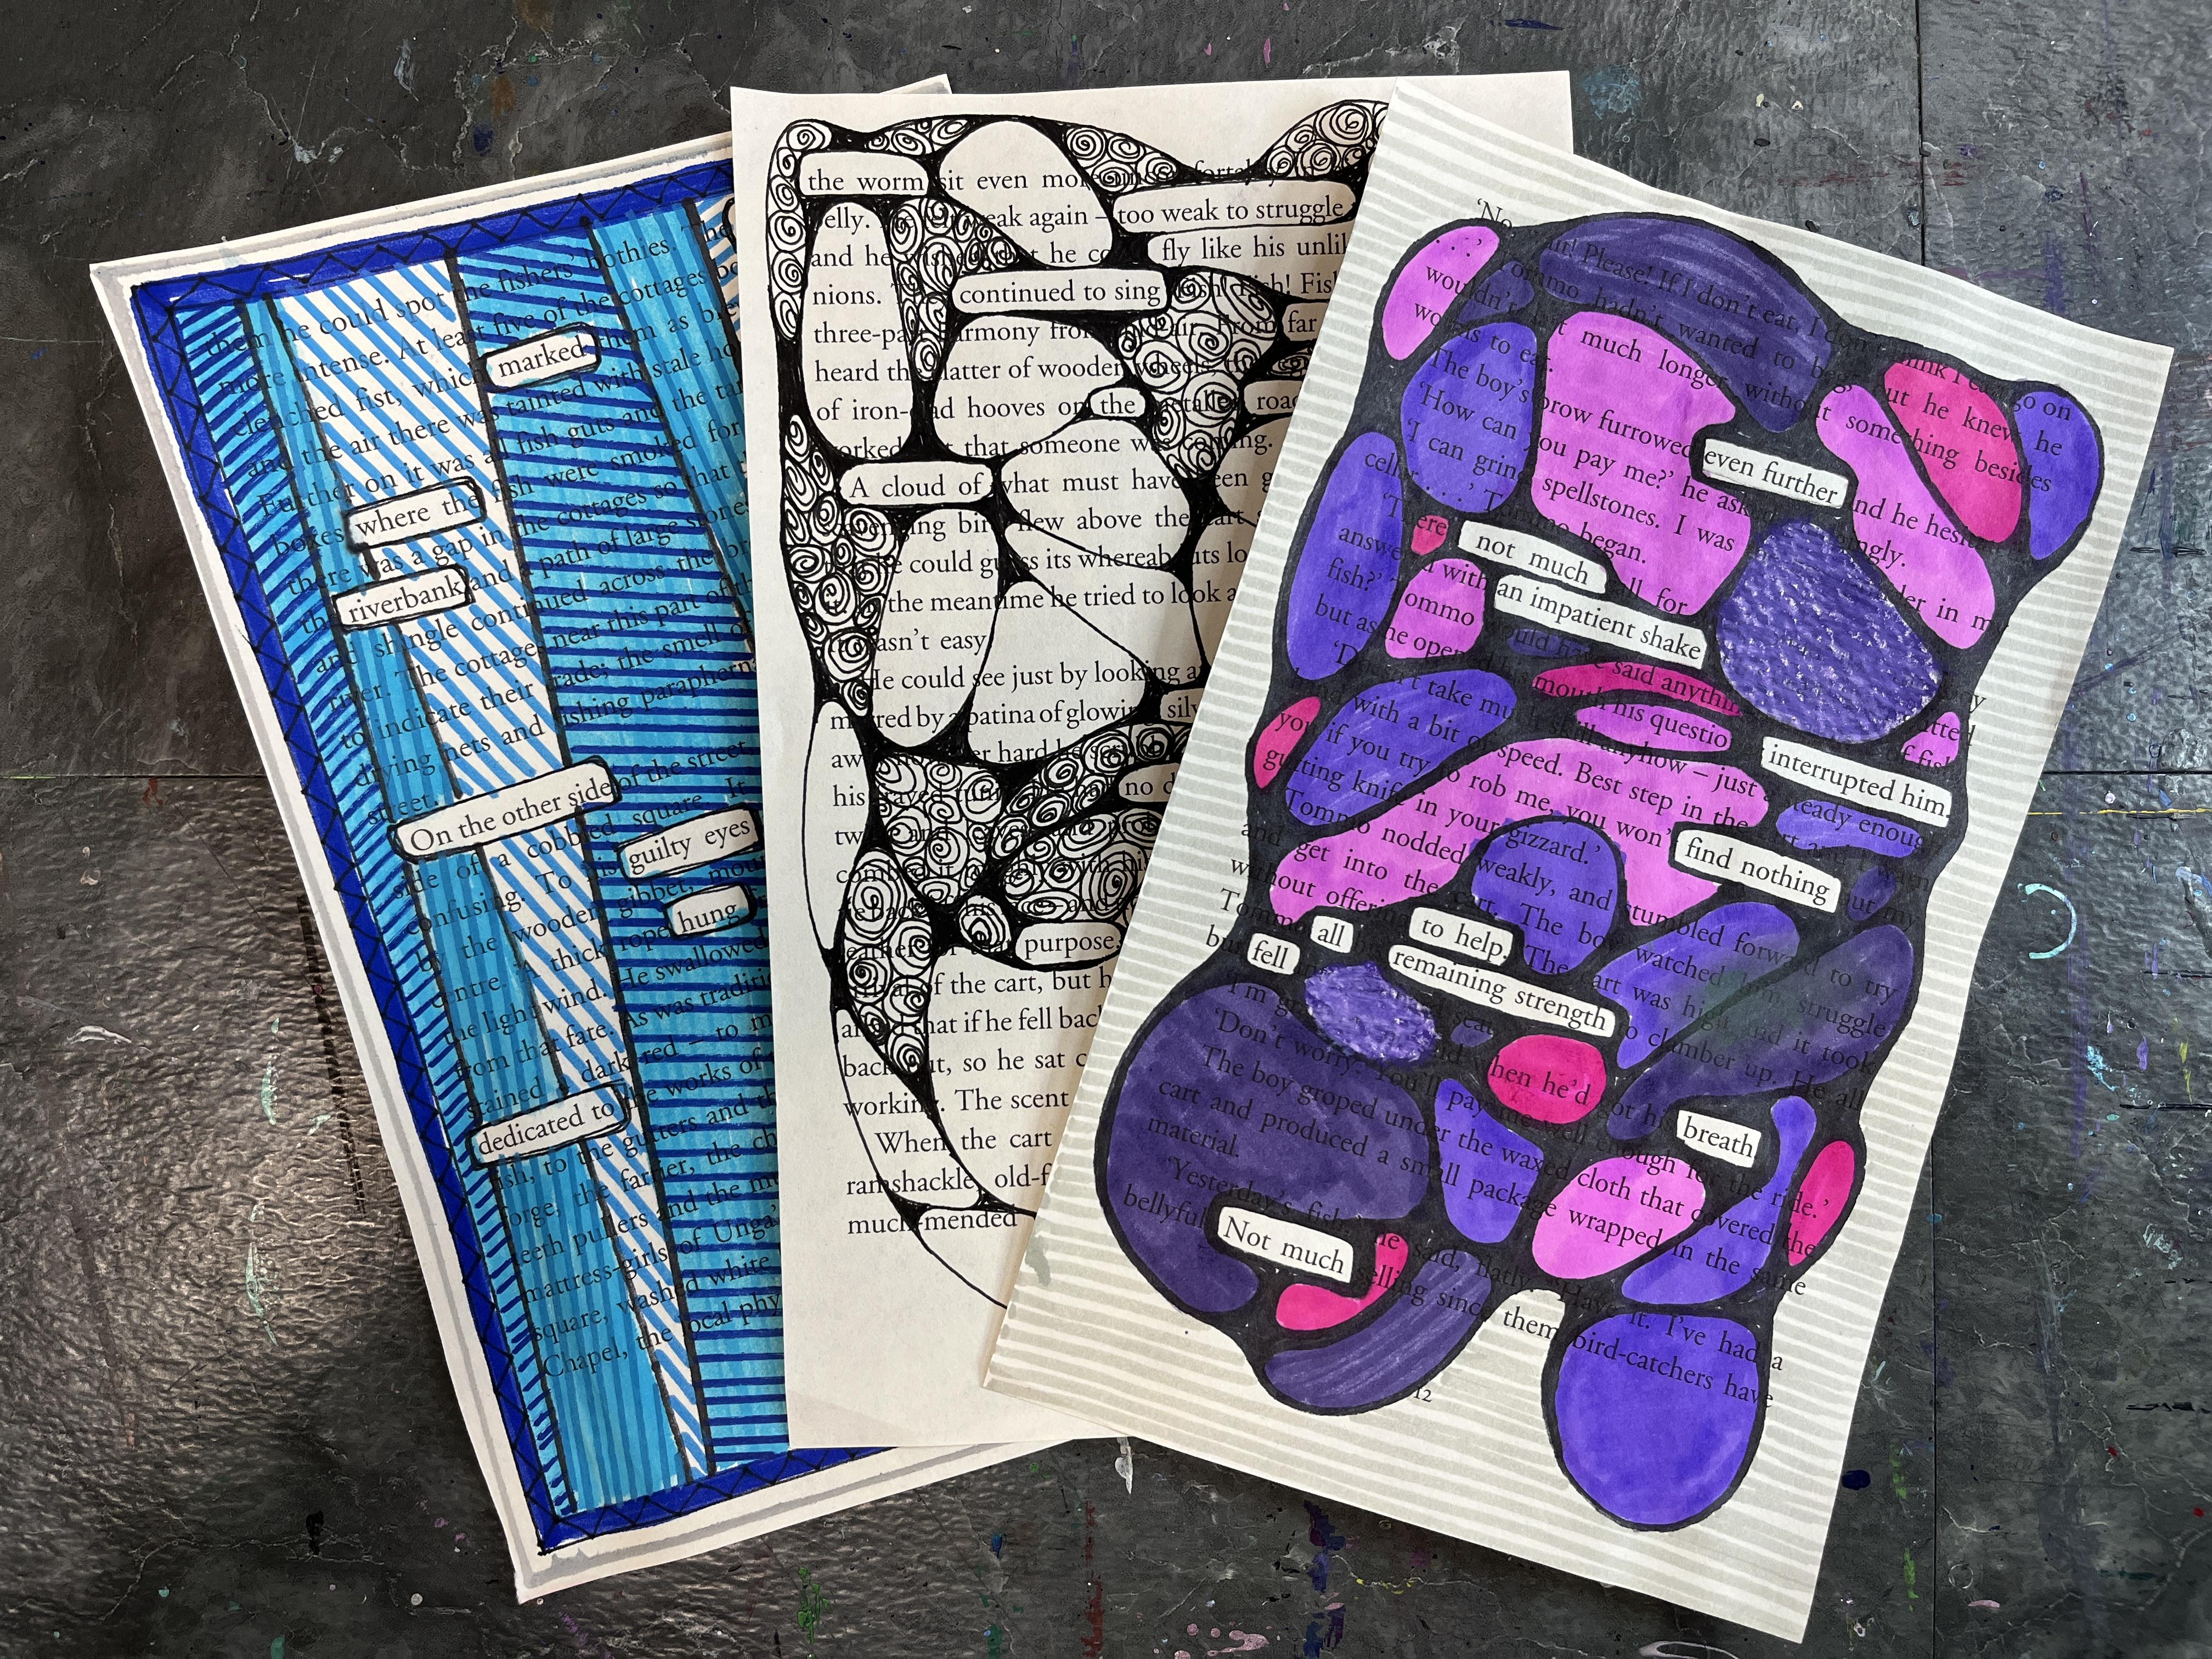
5. Designing Your Background: Ten Now, we can get a lot
more creative with this. We can take the idea of Blackout
Poetry to find our poem, and then we can go back in with different drawing details to create a decorative
element around the poem. In this one, I did
neurographic design. I found my words and I marked around those
words or phrases. It doesn't have to
just be a single word. Then often as you get started, your poem will bring
itself to life, which we'll see in a little bit. Then I did neurographic
design around it, and then I filled in all of the black ink for that just
like you normally would. And then I played around with different brush pens and a
little bit of colored pencil. I really like the
brush pens better, so I didn't even
get colored pencil out at this point
for my next one. But this one is very
much about the poem, and then the rest of
the words that don't get masked out become texture. And then I kept the neurographic design within
the center of the page. But then I really felt like the page blankness was
a little distracting. It was like competing with
where the words were left. So I just went in with another
brush pen and I just did some linear work to create a pattern and a design
in the background. So it also kind of creates
a nice depth to it. You don't to lean into the
poetry element of this. You can lean into
words as texture. So for this one, there
is a poem, some of this, I did circle bits
of words to keep, but it's almost like the poem isn't totally revealing itself. I could work back into this
and I could keep going, but I really liked
it at this point. So I started the same process. I found my words, and then I started my
neurographic design, and then I really liked
leaving some of these open. Then I like hiding
some of the words even further by doing
a spiral design. This is another option, either a pathway
that gets you to a color page or this
could be where we stop. I really do like the fact that even I forgot that I
still had a poem here. That's fun that the poem is found within
the page of text, but the poem is also masked
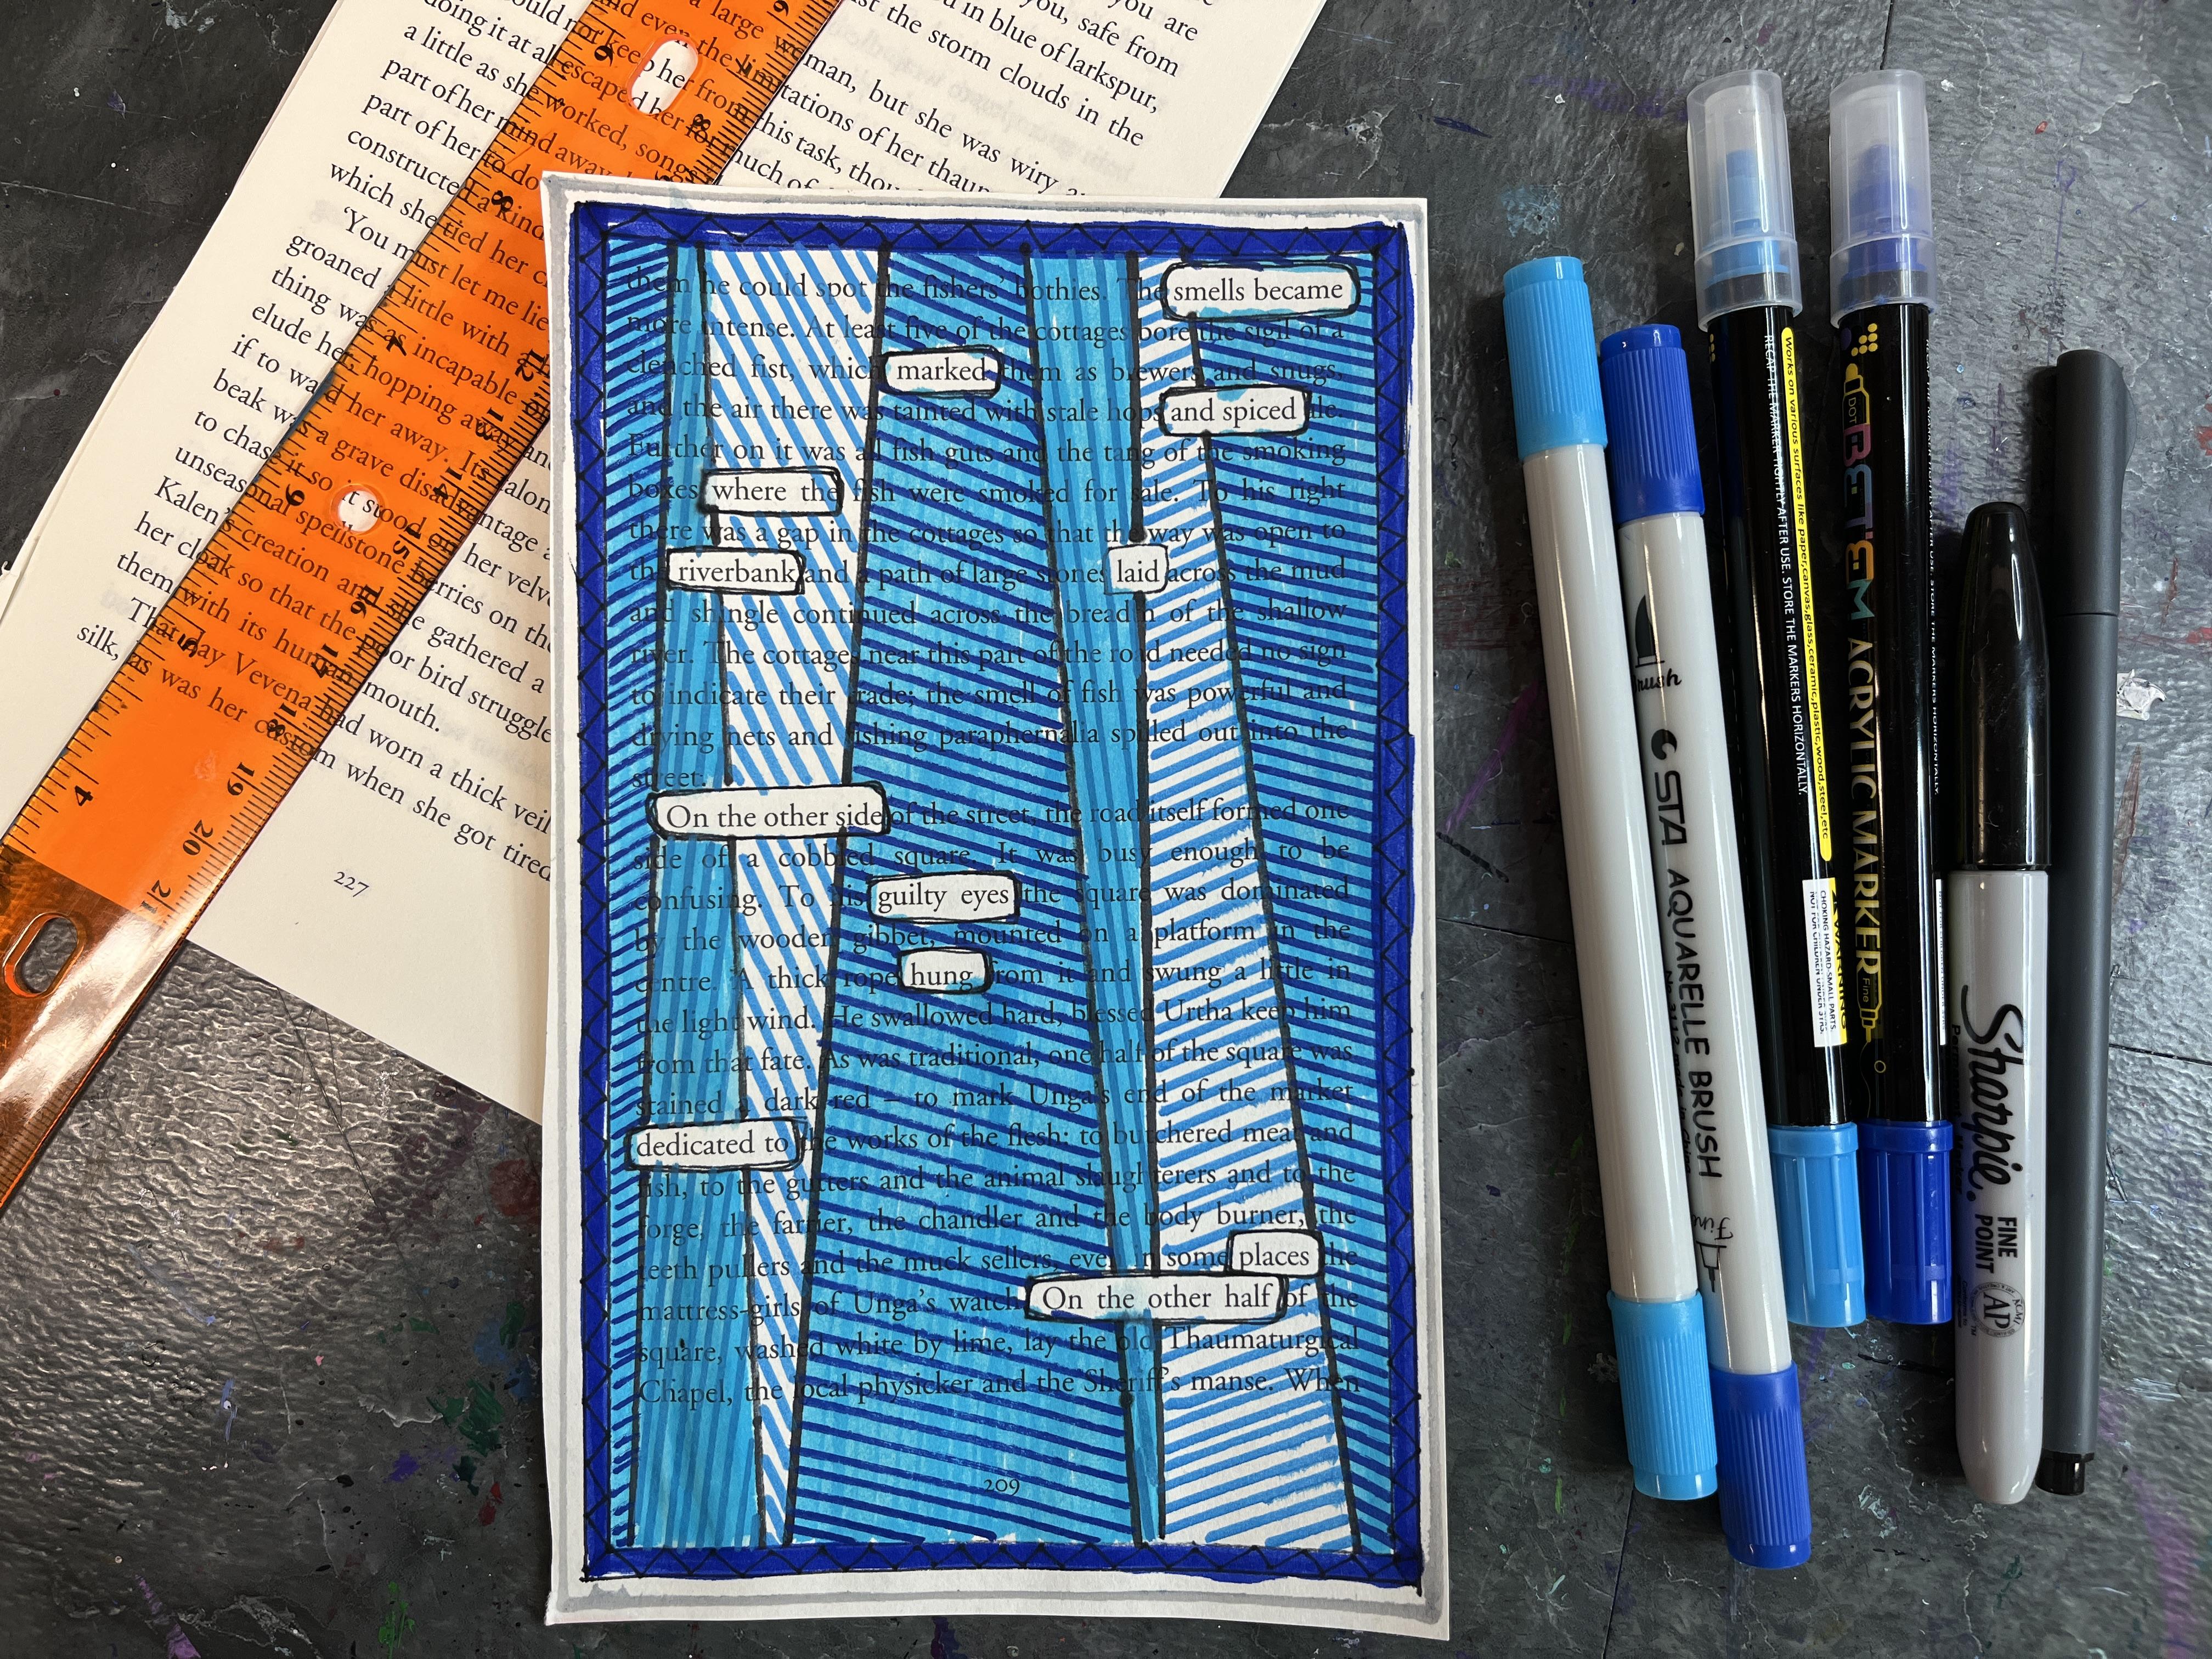
by the design that I. And I want to add a
design in the background. I think I'm also going
to grab a ruler. Now, as we get into the
design portion of our page, we can think about do we want
to stick black and white? Do we want to have it be more analogous where we have
the colors that are next to each other on
the color wheel or do we want to go all warm? Do
we want to go all cool? Do we want to do
contrasting colors? It's really up to you. You can have it
match the vibes of your poem or you can just go
with colors that you enjoy. So I think what I want to do is I'm going to create a border. I've been very into
borders lately. That kind of also
gives me a framework to work within as
I do my design. But I can also add a
design to my border, too. Now I'm going to
start doing a design. Anywhere that I
get up to a word, I'm going to stop. This part can also just
be a chance to dogle. I really don't want
you to overthink it. I just want you to have
really fun creative session playing with the idea of
Blackout Poetry and design. It is possible to accidentally
go into your words, and then can either
you can just let that accident happen or you
can eliminate that word. Maybe that word wasn't meant
to be part of your poem. I think I'm just going
to kind of lean into the colors that I really
enjoy working with. I'm just going to start to fill the broken up space with
different design elements. Something that would be super
fun and a way to extend this would be to
paste a bunch of text pages into a
sketchbook or to do a handmade sketchbook
with those papers, and then you could
do an art exercise or a creative session as a
regular creative practice. It was part of a continual
process where you get to play and create new poems each day or each week
as you feel inspired. Then the more design that
I add in the background, the more that my words
are popping out, which is great. Great. We can stop there or
we can keep going. I want to add some more details. I also think I want to bring my poetry out
a little bit more. I think I might
just loosely layer up the boxing that I did around the words just to help them
stand out a little bit more. I had a couple spots
where I went over crossed into where the
word is, but that's okay. I'm going to play with my
border a little bit more. I'm going to add on to that. Then I'm going to add
a design inside that. Great. It's very busy. I'm going to use my brush pens to tone it down a little bit. I'm just going to go over It's going to leave
behind the texture of the line work that I did, but it's going to add
a background color, which I think is going to
help unify the artwork. Brush bats. I think what I'm going to
do is I'm going to leave these ones unfilled in. Super easy, super fun, super creative. I love it. I love how this turned
out. And I love that. This much more angular
linear version brings me just as much joy as
the neurographic ones. So if you want something a
little bit more involved, I'll add a bonus lesson where I show you the neurographic
way to do it just because neurographic drawing takes
a little bit more time to get the thing in. So look out for a bonus lesson on Neurographic Blackout Poetry. This is the basics
of your design. You take a printed page
of text, find the poem. Ing within. Mark out those
words and then start filling all the space around your poem with whatever
kind of doodles, colors, designs you want. You can do a picture. You can do just abstract. Just have so much fun with this. This should not take
a long time to do, but it should be
an incredibly fun, relaxing art experience. Lesson over to the last
lesson to wrap up the glass. I'll see you later.
6. Final Thoughts: Thank you so much
for joining me in this super quick class
about Blackout Poetry. I hope you had so
much fun discovering the poetry hidden in your
page of text and that you're feeling really
inspired about the poem you wrote and
the ways that you blacked out the text around it and maybe your play of
line and color and pattern and different
approaches to the Blackout portion
of our class project. Pop in over to the Projects
and Resources section of class and upload photos of your poetry to the
student gallery. It's really fun to see
how everyone approaches a really fun project
like this and the art materials you used
and the poem you created. There's really no pressure. This is just a super fun, easy, light hearted class to get
you creating quickly and having a lot of fun putting
together poetry and art. Also really appreciate
it if you took time to leave a review,
sharing your experience, taking the class with others
as they consider joining the Blackout Poetry fun
and to give me feedback. I would love to stay connected. If we aren't ready, be sure to click the follow
button so you get notified about future classes that I have here on Skillshare. You can also pop over to my profile to see all of
the classes that I have. There's quite a large collection these days of different
art making approaches and artist inspired series
classes to get you creating and creative and inspired in all sorts of variety of ways. Then we can also connect over on Instagram as well
as YouTube where I share art making
approaches I'm working on things I'm
doing in the art studio, art adventures I'm going on. If you love art techniques, I have a ton of videos
on my YouTube channel that I think you'll find
really fun and inspiring. Thanks again for
taking this class and exploring Blackout Poetry and getting some quick art making creative session
going nice and fast. I can't wait to see what you've created and I can't wait to see you in another class real
soon till next time.
7. Bonus: Neurographic Blackout Poetry: You know you know any and the and and and and and the and and
 Elisabeth Wellfare, Artist, Art Educator