Transcripts
1. Welcome to the Big Fat Cookies class!: Hello and welcome to this class. My name is Peter. I am a Portuguese pastry chef, YouTuber, and cookbook author. But most of all, I am a lover of everything
sweet, especially cookies. So if you like me, like cookies, but not any kind of cookies, we're talking big fat
bakery style cookies. This is the class for you. Here's what you will learn. I will teach you a
master recipe with all the tricks and tips
for this kind of cookies. And we will use this dough to make a traditional chocolate
chip and walnut cookie. But I will also teach you how
to customize this though, so you can make the
cookies that you like with all the
flavors that you prefer, it will almost
feel like you have your own private bakery at home. Are you excited?
Let's get started.
2. Utensils & Ingredients : Before we get started
with the recipe, I want to talk to you about all the utensils and
ingredients we will need. This is a very simple
recipe, very simple process. So I'm pretty certain
that you'll probably already have this on-hand
house for utensils. We will meet. I'm Evan trait, obviously
an oven, parchment paper. If you have a cooling rack, that's great to measure
out the ingredients, you will need either a
scale or measuring cups. I'll provide both kinds of measures in the
recipe for you. You will also need measuring spoons and
to make the dough, you will need a mixer, either stand mixer
or a hand mixer. If you have a stand mixer, you will use the
paddle attachment. And if you like me, I'll be using a
hand mixer today. If you have one of this, you will use these
kinds of risks. These are the risks that
are meant for heavy dose, which is the case of our though, has for the ingredients, I will leave them here. As you can see,
they're very simple. You will need for the
master recipe, butter, both white sugar and
brown sugar, egg, flour, baking powder, and the
pinch of salt, that's it. Now to convert this
classic though into classic chocolate chip cookies, you will need chocolate and
moments for convenience, I will leave the written
recipe in the class resources.
3. Master Dough & Chocolat Chip Walnut dough: Okay, that's enough talking
for now, let's start baking. Remembering that in this class, I will teach you how to make the master though
that you will use not only to make the classic chocolate
chip walnut cookies, but also other flavors that
we will talk further ahead. Let's start by putting
the butter into a bowl and the butter
needs to be cooled and cutting two squares then at both white and brown sugar. And let's start mixing. At the beginning, you will notice it's a little
bit difficult to incorporate the butter with the sugars because
the butter is called. But we need the butter to
be cold because this is one of the tricks that
will make this law work. If you prefer stop
the mixer and start using a spatula to make
the dough come altogether. Instead of breaking it up, it will be much easier if
you're using a stand mixer. But I wanted to use
a hand mixer here. So you can see, you
can do it both ways. Now that the dough is
already more compact, you can return to the mixer and continue to mix until the
dough comes together. It's creamy but
very, very thick. I will show you the
consistency at this point. It should look like this. This whole process should
take between 35 minutes. Now, add the egg and
keep on mixing for about one minute or until the
egg is fully incorporated. When making this though, use your mixer in a medium to low speed with the egg
fully incorporated. And let's now add the flour, baking powder and salt, and mix one more time until
all the bell comes together, it should happen very
fast in about one minute, all the flower will disappear. We will have our though
ready and there we have it. I will show you the
texture that our though we'll have at
this point it's very, very thick, but if you touch it, it will feel soft, but it should not get
glued to your fingers. You should be able to pinch
a little bit of dough and very easily form a bowl
with it like this. And our master though for big fat cookies, is
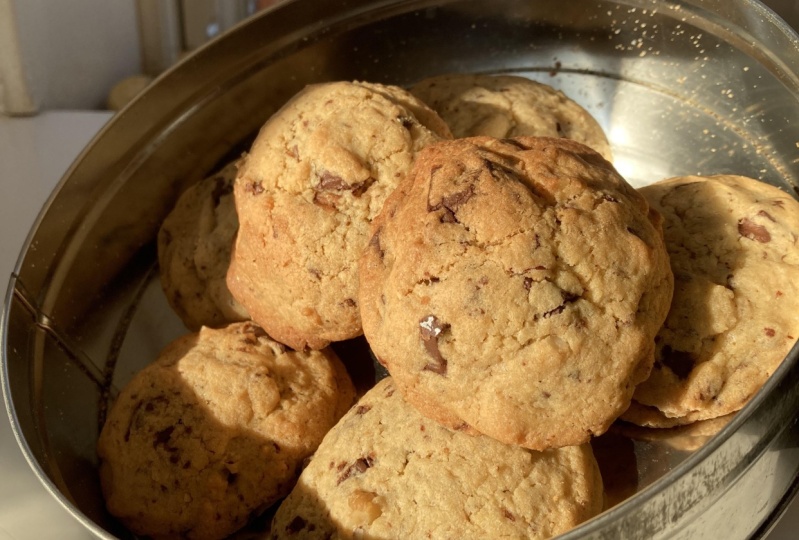
officially ready. Okay, Let's make chocolate chip and walnut cookie
that you can use. Chocolate chips are chunks
that you buy or you can chop up a bar of chocolate
into small chunks like this. And this is exactly what I did. Add the chocolate to the
dough as well as the walnuts, and they should also be
roughly chopped like this. We only need to mix all of these together
to finish our nail. And for me the best
way is to do it by hand because the thick
there's a lot of chunks and our hands
do a better job at mixing and incorporating and evenly distributing
everything. It's actually very easy. You just have to
kind of folded onto itself until all the
dough looks the same. Our database is finally
ready to make our cookies. And on our next class, I will show you how to shape
them and to bake them. I will see you there.
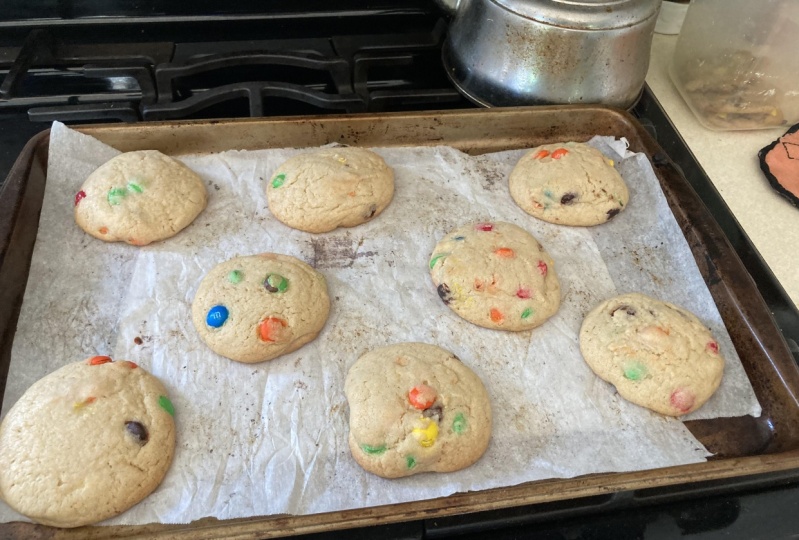
4. Shaping the Cookies & Baking: We will start this
class where we finished the last one with our chocolate chip and
walnut cookie dough ready, we will divide the dollar by the amount of cookies
you want to make. If you want to make
big fat cookies, I would recommend doing five or six cookies with
this amount of dough, you can do up to ten cookies, but of course they will be much smaller if you
have a scale where your dough and then divide the full amount for the number of cookies
you want to make. If you don't have a scale, you can just eyeball it. What you will do is
get each piece of dough and roll it in your
hands without pressing. We don't want to
compacted though, we just want nicely
round piece of dough. Place your dough balls in a
tray with parchment paper. One of the most important
tricks to get thick cookies is to bake our cookies when the
dough is very, very cold. This will help maintaining
the thickness, the tallness of the cookies, and overall the texture. So now that we have
formed our cookie balls, we will take them to the fridge ideally for six
hours before baking. If you are in a hurry, you can leave them for
the minimum two hours, but please don't skip this step. Cover them with cling film. And after the fridge, they got a few
hours have passed, and it's finally time
to bake our cookies. At this point, our cookie dough is chilled and firm and cold. And all we have to
do now is place our cookie dough balls into
an oven tray with parchment, paper and leave a good amount
of space between each ball because these cookies will grow and spread quite
a bit in the oven. You will preheat the oven to 350 Fahrenheit or 180 Celsius. And when the oven breaches
that temperature, place your tray there, and it will take from ten
minutes to 25 minutes. This difference in baking time depends on the size
of your cookie balls. Since I am making huge cookies, it will take more
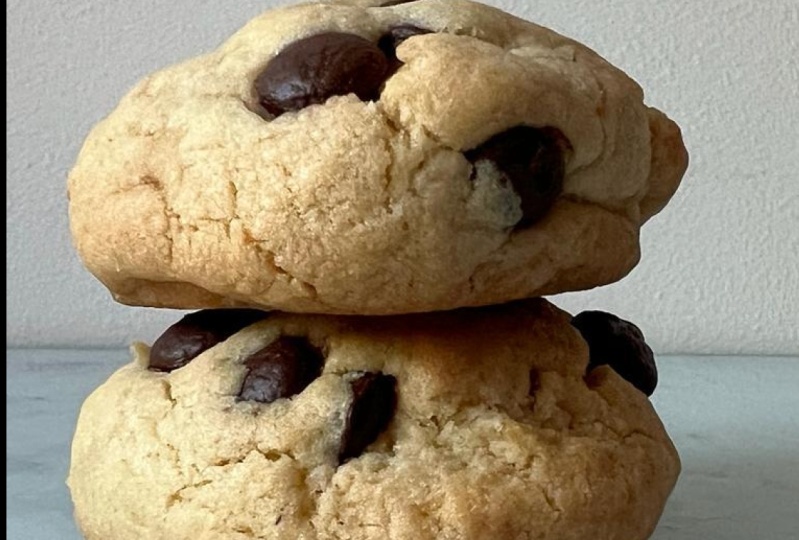
or less 25 minutes, but you need to keep an eye because each oven is different. There's two things you need to watch out while
baking these cookies. We need fully baked cookies, but we still want go and almost creamy
cookies on the inside. And we want a crispy outside, so they need to be golden brown around the edges and the
top part cannot be shiny. If it's shiny, it means rod. So leave them in the oven
for a few minutes more, but you probably don't want them to gain a lot of color on top because that could mean they are baking more
than we want to. If you are in doubt about the
baking time in your oven, or if you want to adjust the texture of these
cookies to your liking, you can bake one
cookie first and then adjust the baking time
for the other cookies. These cookies will be good. Anytime they will be good worm, they will be good, cold, they will be good the next day. But for me, they are the
absolute best when you eat them after taking them out
of the oven for 15 minutes, what you will do is
that you'll take them out of the oven and you'll have them rest on the tray
for about five minutes. Then very carefully
with a spatula, transfer it to a wire rack. If you have one and leave them there for about
ten minutes more, then it's time to eat. If you don't eat them the
same day, you bake them, you can store them in
an airtight container. And look how soft and gooey this look
the melted chocolate, the crunchy walnuts, and
they are pretty crisp pure. This is obviously the
best part of the recipe. These are so good. I will see you in
the next class.
5. Tips for Other Cookie Flavours: Now that we have our
classic chocolate chip and walnut cookies, it's time to teach you how
to customize this though and transform it into the cookies of your dreams with
your favorite flavors. Here are some important tips about this particular though, in order to achieve
always big fat cookies, you use the chocolate
that you prefer, any kind of chocolate, white, dark, semi sweet milk chocolate, you can use chunks or chips. I prefer to use chunks. I like to get a chocolate
bar and correct myself because this way
I get little pieces of chocolate with different
sizes and they tend to distribute more evenly
throughout the cookie dough. So I think they get more
chocolatey this way, but it's up to you. And you will also need
a nut or some kind of dried fruit to give volume to the dope if you
only use chocolate, what will happen is that your cookies will
tend to spread more. They want to be as
fat as you want. If you like cookies
this way, that's great. But if you want to
have them very thick, you will need to use some
ingredients for volume. And these ingredients
can be all kinds of nuts, almonds, peanuts, a zone that's cashew nuts, or some kind of dried fruit like dried apricot, raisins, dates. You can use one kind, you can combine them, and also you can
flavor the dope. You can use vanilla
or any other ******. And you can also use citrus
zest like lemon, orange, etc. I hope you'll have fun
creating your own versions.
6. Milk Chocolate, Almond & Cinnamon Cookies: The first extra
cookie we will make, it's gonna be milk chocolate, almonds, and cinnamon cookies. The spiciness of the cinnamon
goes really well with the sweetness of
the milk chocolate and the almonds are
there for the crunch, I will be making
a smaller amount of the recipe I have here, my master though, and the
ingredients for these cookies. I have my milk chocolate chunks, chopped walnuts, and
powdered cinnamon. All we have to do is mix all the ingredients
as we did before. Shape our cookie
dough into big balls. Remember not to
combat the balls. The balls should be quite loose, refrigerated out and then bake them exactly
as the ones before.
7. Dark Chocolate, Hazelnut & Orange Cookies: Next, cookies will be a zone that dark chocolate
and orange cookies. We all know dark
chocolate and orange are two flavors that
always go well together. And hazelnuts compliment really well both citrus and chocolates. For these cookies,
we're going to add a very strong orange
flavor to do though. So we'll add orange zest. I also have here my chocolate
chunks and my hazelnuts. You can either use
hazelnuts that are pills. Are we the skin on? It's up to you.
Now we will shape our dough balls
like we did before, refrigerate them, and of
course bake them and eat them.
8. White Chocolate, Pistachio & Cranberry Cookies: Okay, Our last flavor
will be this Tasha, white chocolate and
cranberry cookies. These are very
festive cookies with three flavors that
really go well together. Again, I have my master's
already and for these cookies, I will add white
chocolate chunks, pistachio, nuts, and
dried cranberries. And it's the same process. Mix the dough, make
bowls or of the dough, take them to the
fridge and bake them. And here they are. I bet you could
eat one right now.
9. Class Project: Now that you have
learned how to make big fat cookies for
the class project, I will challenge you to make
a recipe from the class. You can either choose the classic chocolate
chip walnut cookies or any of the three
that I provided. Or you can create
your own cookies. Just don't forget to
take a picture and upload it to the class
project so we can all see your
creations and you can inspire others to
bake big fat cookies.
10. Goodbye: This is the end of the class. I really hope you have
enjoyed your time here learning how to
make big fat cookies. Again, I m theta and you
can find me on YouTube or Instagram at la Dolce Vita and now go banks and
big fat cookies. This one is for you.
 Rita Nascimento, Pastry chef, Youtuber, Cookbook author