Transcripts
1. Introduction: Folk card painting most of
the time looks very simple, but it has some magnetism
and is always modern. It never goes out of fashion. This is an artistic
language that is understandable to everyone,
even to children. Are you an artist,
an illustrator, or digital illustrator,
or craftsman, or you have no idea
how to paint at all, then the classes for you. Folk art is a good
starting point for beginners as
well as can enrich artistic language
of advanced artist and make your signature
style unique. Hi everyone. My name is Irina Deviente and I'm
Russian folk artist, digital designer and a
teacher based in Spain. I studied academic drawing
and oil painting and later history of art in the Art Academy of St.
Petersburg in Russia. But last years of my life, I dedicated to folk
cart and it brings me a lot of joy
to say the truth. I paint every day. In this class, I will
teach you to paint one of the most popular motives in Jchloma, folkart
style strawberries. We will paint with a
brush and paint as the Choma artists started to do it more than 300 years ago. The secret of the
long term success of the berries motive is in
strict rules and canons. For a long time, Choma painting
was a closed knowledge, like a secret information. No one in the Soviet Union
knew how to paint Jchloma, except for artists
from the factory, the Jchloma factory, and some
single folk art teachers. I got this knowledge
in the modern time of Russia from a professional
artist of Hochloma. Today, I will tell you the secrets of the
strawberry composition, so that you can repeat
it on any surface and any size without losing harmony proportions and the
pace of the composition. The final project of
the class will be this composition with such
delicious, juicy strawberries. It looks quite simple, but it requires a
certain accuracy. Therefore, please
follow my easy step by step instructions and you
will definitely succeed. Even my small students
paint with me and then participate in
the children exhibitions. For instance, first we
will make a sketch with pencil and then we will
paint it over with paint. You just need a piece of paper, a glass of water,
palette or plate. A round brush and paint. Acrylic gouache tempera
or vinyl paint. It doesn't matter how can
this composition be applied. As you can see, I have
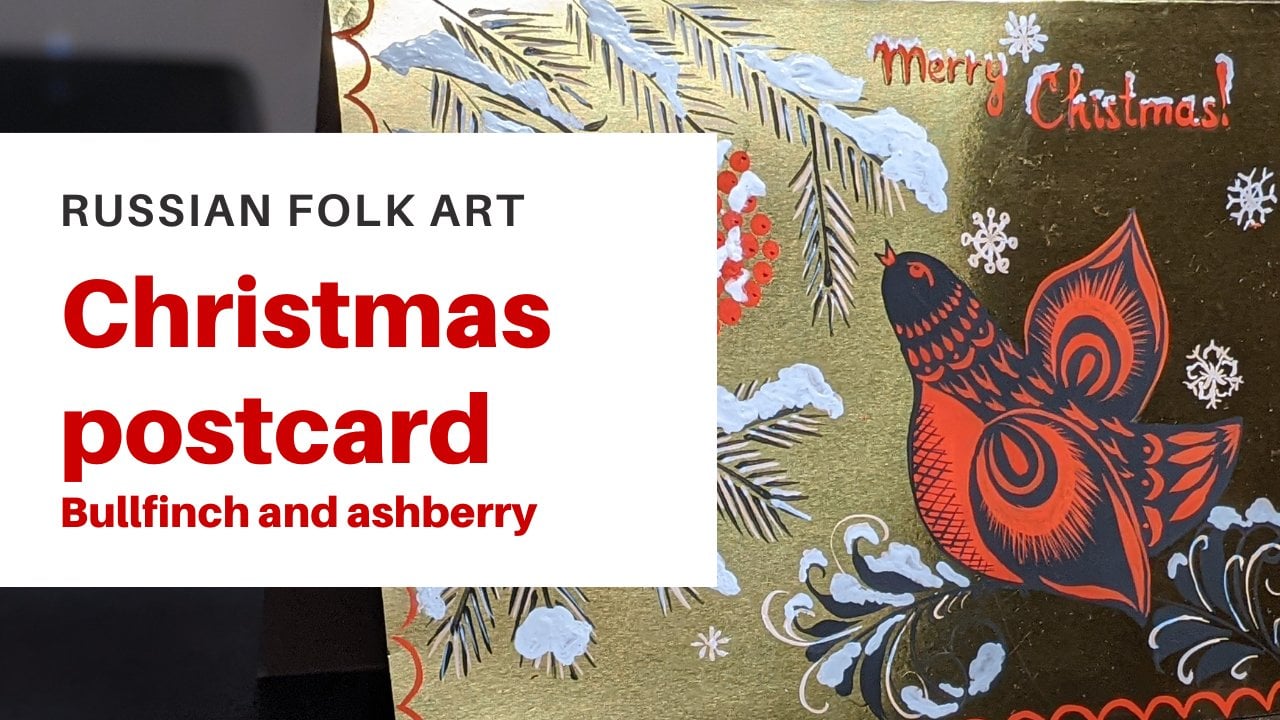
painted my strawberries on the box to demonstrate
to you how you can decorate any box. For example, you can
also paint your handbag, backpack, clothes,
sketchbook plate or tray. Any decor item. Well, and the most
joyful option I guess, is to create a postcard and
give it to a dear person. This is what we're going
to do in this class. To make this class even more
interesting and useful, I have prepared such
a free piece for you. The workbook includes exercises on the practice of elements and also additional
compositions that you can easily
paint by yourself. This way, you will have even more art works after this class. Additionally, I'm
attaching a guide on building a composition of class projects with
all measurements and inches and centimeters. If you would like to know
what is the chlomatyle is, I recommend you to
watch the history of chloma art lesson in my
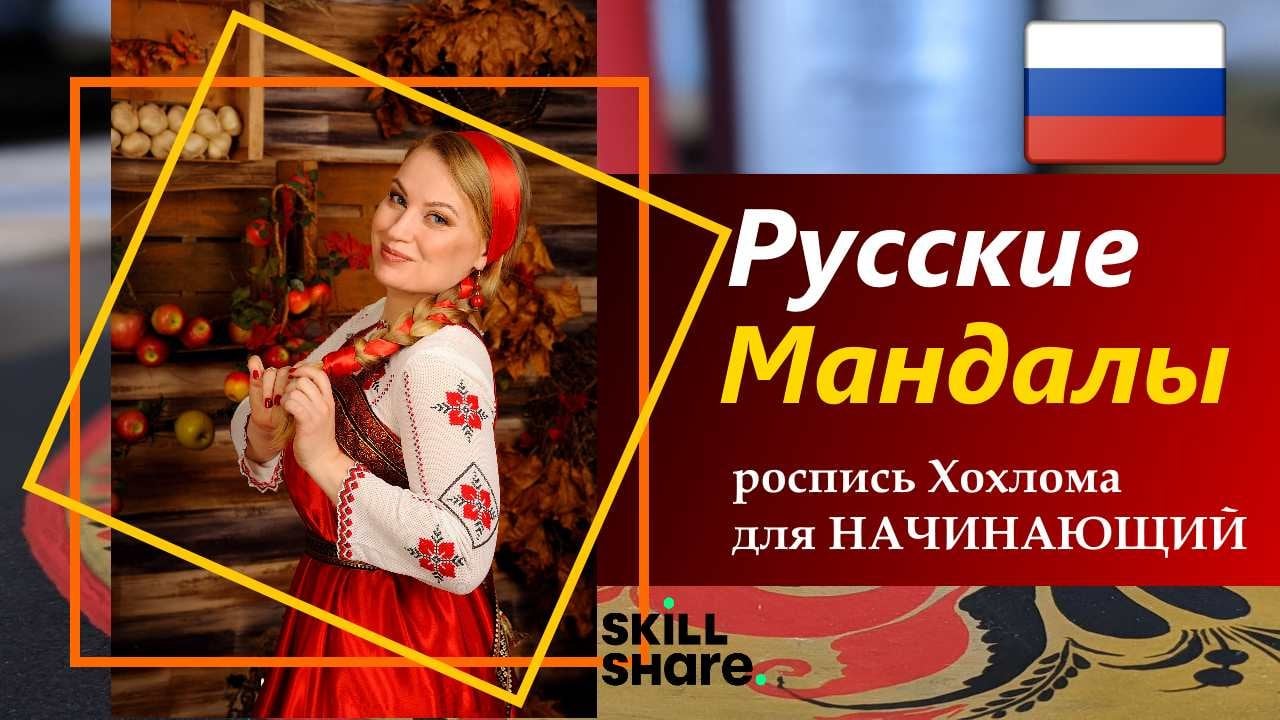
class, Russian Mandals. Here, skill share in the
short 8 minutes video, you are going to
follow the history of this folk cart style from
17th century till nowadays. Watch it right now. Believe me, it is very interesting. Follow my Instagram where
you can find both my hand painted and digital artworks and videos of creating process. Let's be Insta France. I invite you to my world, world of decorative painting
with artistic language of fairy tales when
you can transform your reality into
fabulous illustrations. I will be waiting
for you in my class.
2. Class project: A project of the class will be this composition
with strawberries. Please follow my simple step by step instructions and you will definitely succeed
for the beginning. If you try hochloma style
for the first time, I have a couple of tips for you. The first tip is,
don't hurry up. Jchlma likes slowness. Remember, the slower
you paint each element, the faster you will learn how to paint hochloma. The second tip. If something doesn't come out, don't rush to get upset, just change your brush. The brush is a quite
important element in any decorative painting, and every brush has its own character.
Take another brush. The fact is that one brush, for example, puts drops well, and the other one paints
longs strong Well, I have prepared a set of helpful materials for you
to download these files. Please use the link in this PDF. You will find it in the Project and Resources
section below the video. Go down to Download Resources. Click on the link
in this PDF and fill out the form to
unlock the download. By leaving your name in e mail. You participate in
my newsletters, but you can always unsubscribe from my e mails if
they bother you. And that's it, Click the pattern and download useful
materials for this class. Well, are you ready?
Let's get started.
3. Materials: Okay, let's speak about
materials I use for this class, a usual copy paper. And I recommend you to
try the first time to paint on a paper
because it's easier. And then if you wish, you can try another material, another surface, wood, plastic, leather. It's up to you. You can take a piece
of paper size four and fold it or five. It is a half of the usual
piece of copy paper. Please don't use a
watercolor paper. It will absorb water
from the brush very fast and don't let us
make a long stroke. But usual office
paper for printing is resistant to ink and the
paint will not blur. For a sketch, we need a pencil, razor, a ruler, and a compass. If you if you don't
have a compass, I will show you how to
solve it for the painting. We need a brush. I have
a natural square brush, number two, you can use number one or number
three as well. It can be also Kolinski
or synthetic brush. You need minimum one brush. I use professional tempera of
my favorite Russian brand, masterclass, black,
green, red and yellow. You can use any paint,
vinyl, acrylic, quash, or even watercolor I use for my daily decorative painting,
professional tempera. Because it is universal
paint for any surfaces. Wood, glass, plastic,
metal paper. It is absolutely ecological,
without any smell. Pretty mat and has
a lot of pigment compared to most
of acrylic paints. For instance, Russian Tempora. You can find even on Amazon, but it is not an advertisement. It is just my personal opinion. And you can use
any pain you like, even oil paint if
you have What else? Of course. Glass of water napkin and the
palette or a plate. Additionally, we need a
small piece of sponge. Do you know what for
to do this shadow on our strawberry chloma Artists call this process Tampanovka. Tampaning. I will show you
later cotton buds. If you don't have, don't worry, I will tell you how
to substitute them. Okay, my dear friends, let's get started
with a sketching. We are going to do the
sketch and then paint it over on the same
piece of paper I recommended to have additional
piece of paper aside for any case to try some strokes
or paint, it can be useful.
4. Sketch 1: Framing: Well, we're going to
prepare a pencil sketch. As I told you before, I do my sketch on
this paper and then I will paint over the sketch
on the same piece of paper. Be aware, this is not a draft. It will be the final work. Sorry for repeating
it a lot of time, but I don't want you to be disappointed later if you treat this piece of
paper as a draft. And then we'll need to prepare the same sketch for
your final work. Do you understand what I mean? Okay, that's great. I always start my work
by making boundaries. These are the edges that my composition will
not go beyond. Because in the creative process, we can get emotionally
carried away and the elements will
go over the edge. It won't be very pretty. Our composition
is not a pattern. It is a fragment, a
finished artwork. You can even frame it and hang it on the wall.
Look at this sample. Initially, I marked ages
and didn't cross the lines. As a result, some
elements come very close to the border but don't touch the painted frame.
It should be like this. This is the first rule
of chlama painting. All elements are located
very close to each other, but not touching one another. I step aside from the
half a centimeter, it's approximately 0.2 ". It can be a little bit
more. It's up to you. Okay. Now you have two options. You can create a postcard
with some words at the top. Or you can place a composition in the
center without any title. If you would like just to paint
strawberries with a leaf, then just find the
center of your piece of paper and start to place the whole composition
from the center, repeating all the
actions after me. If you would like
to put some title like Congratulations
or Happy Birthday, Happy Mother's
Day, for instance, then you need to leave some
space above for this title. This composition is
about 15 centimeters. It's about 6 " from my frame, not from the edge of the
paper. It is important. And I draw another line. I'm going to create a
postcard with a title. I choose the option number two. But all my steps according
painting will be the same. You shouldn't worry,
you got misled. Here. We will place the title. This is our working field. We will work with this area Now, regardless of how many
centimeters or inches you have, a little bit more than
me or a little bit less. I have 15 centimeters, 6 ". As I said, height, I find the center and it
is 7.2 centimeters or 3 ". Width is almost 14 centimeters. About 5.5 " and a half is
7 centimeters, or 2.75 ". So as you can see, it's almost a square
but still a rectangle. Okay, We found a center. All these lines will
be erased later. Of course, if you are doing
your painting without title, then you just divide
all your working field. It is 20 centimeters vertically and 14 centimeters horizontally. Okay, well done. We finished with the numbers. We marked the frame and we
found a center in this lesson. In the next lesson, I will show you how we
are going to arrange our strawberries according
Hochloma art rules. Let's watch this. See
you at the next class.
5. Berry Canon: We start from the main how to create strawberry motif
according Choma fall card style. As I have already told you, there are cannons in the
traditional chloma painting. These are strict rules on how
to paint certain elements. We call it can berry cannon, and you can see it in
a lot of Choma pieces. Now I'm going to explain
you it in a very easy way. For such an important question as Berry Cannon and Hochloma, I will take blank paper
and a white liner so that you can see very clear what I'm drawing
under the camera. They cannon is exactly
this arrangement of it looks very simple, right? But you will see. It can be strawberries,
raspberries, blackberries, fruits such as
apples, pears, et cetera. All those berries and
fruits that grow in the central part of Russia where the painting of
Hochloma originated. Why we should follow
the rules, the canons. Hochloma refers to the graphic
type of folk painting. As you know, there are a picture and a
graphic folk painting. The features of the
graphic type is a whole composition is
created from lines, strokes, sports, and dots. Keeping the same proportion
and pace of elements. We can create ornaments,
patterns repeating motifs. Imagine in the
factory of Hochloma, artists can produce,
for example, 100 plates every day
with the same motif, and they should be the same. It is a standard.
And also it is done, of course, in order to preserve, to save the tradition so that every artist
does not distort, deform, traditional painting and does not paint the way he wants. These are standards
of hloma style. Of course, in this
class you can switch on your imagination and express
yourself as you wish. But I'm showing
you the tradition of Russian folk painting. You can strictly repeat after me or make variations based
on the Jchloma painting. Both are welcome. Okay, let's come back
to the Berry Cannon. If we imagine that
it's a vertical line, we have on the paper and the horizontal line
in the center. We are drawing in the upper
left side corner a circle. This is a circle. This circle is
touching this line. And this one, it is
sitting in the corner. It will be a
strawberry number one. Then let's step a little
bit up, half centimeter. Let's say we are drawing
the second circle. It will almost touch
this vertical line, but still there is a
couple of millimeters between these two
circles I draw by hand. But you can use your compass
of course if you need. Okay, Here is a bury number two. If you use a compass, you have a little hole in
the center of the circle. If not, find just the middle
of the circle for us, these points are
important because we need to mark the direction
of the berry growth. It is no coincidence that
these berries go to the sides. They are located at an
angle of 90 degrees. This is one of the rules
of berry cannon in glom art that we
should follow how we can find this
angle of 90 degrees. I'm going to show you right now, how do I find it
using just a ruler. Look at this. The right angle
of the ruler is 90 degrees. This one we just need to
connect three points. We put the corner of the ruler exactly to
the vertical line. And two sides of ruler should touch the centers
of our two circles. You will get 90 degrees. Now let's draw the
strawberries. How to do it? Draw a wavy line from
above, like this. Then a small part at the bottom, like a little smile. Keep in mind this guideline. Now we are connecting these
two parts with the wavy line. It is like a heart shape, but the bottom is rounded. Let's do the same with
the second berry. You can do it also
with one motion, like I did look at this. This is a strawberry, actually, we can fit
it inside a triangle. How to find the location
of the third berry? The third berry can be the
same size as the first one, or a little bit smaller,
but never bigger. Smaller, yes, can be. Again. Firstly, let's find
a direction of the berry. We are looking for a middle
of 90 degrees angle. If to put a line through
the centers of the circle, number one and number two, we can see that this
line is not horizontal. It is a bit declined. It means that the dividing line will not be vertical but will
be slightly to the right. Now I will show you what I mean. I don't measure
now, 45.45 degrees. I just put approximate line, a little decline to the right. Just repeat after
me this action. This is a guideline of
the third strawberry. Now you can draw another circle, and then a berry inside. But I will draw now
without circle, just remember to follow
direction of the guideline. And the third berry should not touch berry number
one and number two. This is the rule of the
berry canon of Hochloma. All elements allocated very close to each other but
not touching one another. Firstly, a wavy line on the top and continue as a shape of the heart according
to the guideline. Finally, all three berries look in the three
different directions, but geometrically are very
proportional, as you see. Then we will paint
the berries inside. But this is another
chapter complicated, actually, not at all, right. Now we are going to
repeat it in our sketch. And you will see how simple. Let's go to another lesson.
6. Sketch 2: Strawberries: Okay guys, we will repeat now the same elements and
keep the same size like here. To understand better a process, I will give you exact measures
in centimeters and inches. So you could repeat after me. Absolutely the same composition. Our strawberries have diameter
3 centimeters, 1.2 inch. Therefore, the radius
of one strawberry will be 1.5 centimeter, or 0.6 inch. Take a compass and
measure 1.5 centimeter. If you don't have a compass, I will show you how
to do it without a compass using the example
of the second strawberry. And we draw the first circle. I remind you that
the circle must touch the bottom
and right lines. We put it right into
the corner like this, and I mark the center
of the circle. The second circle will be
located 0.5 centimeter, or 0.2 inch higher,
on the right side. Well, how can we draw a circle if you
don't have a compass? I measure a half centimeter
up this small amount. The distance up from central horizontal
line, draw a line. From this line,
we draw a square. Three by 3 centimeters. Three by 3 centimeters
is 1.2 inch each side. Then inside of the square, we draw a circle by hand. Okay, like this. We don't need ideal circle, because anyway, we're going
to draw a strawberry. Actually, we don't need a
circle as a final element. Then we find a center
of the circle. Use your ruler for it
to find the center. Another time, we create guiding lines,
connecting three points. Do you remember how I was explaining it in a
previous lesson? Using the ruler,
we connect centers of both circles
and vertical line. Like this, we find 90 degrees corner and
another guiding line for the third strawberry that is going a little bit to the
right from the vertical line. Well, all these things I have already explained
in the previous lesson. I don't want to worry you more with numbers and
geometrical explanations. Let's draw now strawberry number one and strawberry number two. To draw the third circle, fix your compass
on a guiding line. This one, not a vertical line. We don't want to have
the third strawberry straight in the middle of the
paper of the composition. That's why we decline a bit to the right,
the guiding line. And we follow this line. In this case, you
don't need even to measure centimeters or
inches for the third circle. Just go with the pencil
as close as possible to the drawn strawberries
and make a circle. And draw the strawberry
number three, like this. Okay, well done.
7. Catch a wave: Now we're going to find a wave, it means to find a direction, a flow, of our
painting movement. Here we're going to learn another rule
of Jchloma painting. All elements of Choma painting resemble one wave flowing
into another wave. There are no straight lines. The waves go to the right and
to the left, right, left. Imagine you are
swimming in the water, and how do you move your hands? If we take a look
to our composition, we can see here is
a wave to one side, let's say to the
right, another wave goes to the left here as well. To the right. To the left
again. To the right. To the left. Even
the bush element consists of elements that go to the right and to the left. It creates smoothness,
sophistication, charm, and decorativeness
of the painting of Loma. We need to find the wave. How do we find where
the wave passes? Let's measure approximately
1.5 centimeter. It's 0.6 inch from the
edge of the composition. Do you remember we
marked the border of the compositions field before. From this line, we draw a line to the
strawberry number one, it is a stem of the berries. It shouldn't be a straight line, as I said of course, but
slightly curved line. The stem never
touch the element, in our case doesn't touch the berry and usually
ends with a drop. It is the beginning of the wave. How will the wave continue? That's how it goes right here. You can mark this
wave right now, because here will
be a leaf later and it should lay
down on this wave. Don't bend this line too much, just continue the line
and throw it in the air. Then a stem goes
to the strawberry. Number two, we start
the line in the air. Don't touch the first stem. We need to start the second stem very
close to the first one, but without touching,
without connecting them. Do you remember the rule
of Loma number one? All elements are located
very close to each other, but not touching one another. With rare exceptions here, you start from any place and
go to the second strawberry. What mistakes can we meet here? I will take again a black
paper and show you this stem. With any berry should
be drawn like this. The lines go close one to another and follow together
almost until the end. And then they separate. Don't separate these lines
far away from berries. For example, I'm going to show you right now with the berries, the first line of a stem and
the second, it shouldn't be. Well, I don't have another
color pencil here now. But like this, the line
shouldn't go angularly, but gracefully smoothly.
Do you understand? To the third strawberry, we must start the line of
the stem in the middle here, it will be interrupted. It finishes close to the
berry with one or two drops. In this case, it seems like the stem goes behind the Barris number
one and number two. It is not a mistake in chloma painting when
the line is interrupted because by logic it is
behind of another elements. I prefer to finish the stem at the end also with one or two, but it is optional. You can leave it
without, if you want, but from my point of view, it looks nicer, as
you can see here. In the next lesson, we will construct the
shape of a leaf. Again, I will explain everything to you in detail. Let's go.
8. Sketch 3: Leaf: Okay, let's go to a leave. It is another interesting story. Look at this, how we
are going to design a shape of this leaf
in a folky style. And the size of the leaf should be proportionally
the same, like the three berries together. This bunch of berries is approximately 6
centimeters, or 2.4 ". It means we should draw a circle with diameter
6 centimeters, 2.4 ", and radius will
be 3 centimeters. We put a needle of the compass on the wave
line that we drew earlier. We approach the pencil
as close as possible to strawberries number
one and number three. You can even touch
the strawberries. If you don't have a compass, just like with a
strawberry before, draw a square first and then
a circle inside the square. Now we have to mark the
guideline of the leave. This guideline will pass through the center
of the circle and the point of entry of the
wave into the circle. The guideline does not
repeat the wave because the wave is a curve line and
the guideline is straight. Here is a center of the circle. Okay. Now pay attention. We divide it in half
and again, and half. And here is the
beginning of the leaf. It can be divided by eye, or it can be accurately measured
in cynimeters or inches. It's up to you to be precise. I will now tell you
exactly the dimensions. This segment is 4.5
centimeters or 1.8 ". We divide it one
more time in a half. We are drawing a rhombus. Don't worry if you
didn't get it so far. I will show you all
the process one more time graphically
in a couple of minutes. Just let me finish now, this explanation in a pencil. Well, inside of this rhombus, I draw a leaf. You can actually draw a
leaf without the rhombus, but to say the truth, this geometric
preparation helps a lot. Finally, you will get well
proportioned element. Please pay attention again, the tip of the leaf is rounded to the
left along the wave. Do you remember that We follow the wave,
right? Look at this. This leaf goes
along the wave and these two leaves to the
left and to the right, according to the rule
number two of Chlama. To finish the leaf, we
draw two bows here, like two small mountains
inside of the circle. The bottom line can
be at the level of the middle of the rhombus
or slightly higher. Okay, now let's
sum up and repeat again how to design
a shape of a leaf. Let's go, we put the
needle of the compass on the wave and draw a circle with a diameter of 6 centimeters, 2.4 ", as close as
possible to the berries. If you don't have a compass, then first construct a
square with the sides of 6 centimeters and then
draw a circle inside. Draw the line
through two points. The first point lies at the intersection of the
circle and the wave line. The second point is the
center of the circle, which is exactly located
on the wave line. Find and mark the
center of the circle, and draw the guideline. Divide the upper part
of the circle in half. Look at the picture and
centimeters or inches, we are looking for three
quarters of the circle than these three quarters which
are 4.5 centimeters or 1.8 ". Can you see it on your screen? And follow my logic? Yes. Okay. 4.5
centimeters or 1.8 ". We divide in half. Again, to construct a rhombus, look at the
dimensions carefully. That's it. This rombus
is a central leaf. Central part of our trefoil. Just draw a leaf inside of the rhombus as I
show on the picture. And don't forget to
curve a little bit, the tip of the leaf to the left, such an elegant band. Finish the leaf with
two more side leaves. It is ready later. We will paint it over
with a paint inside. Okay, well done. It was the most difficult. I just wanted to say that later you can decide how to
decorate your leaf. You can choose a more
simple decoration, as you can see here
in this composition. You just fill up the leaf with the green paint and draw
streaks on the leaf. I like it. If you would like
to make a leaf more complex, I would not say it is more difficult, just
in another way. Look at this like here, you can repeat the shape
of the leaf inside, but smaller and
in another color. For example, in yellow
or in red color. Or it could be drops of another
color inside of the leaf. This inner shirt can
also be decorated, it's up to you, you can
switch on your imagination. Here, I'm going to demonstrate it to you now to
be more clear, look at this. The inner insert should occupy
ideally, well, ideally, approximately the
third part of a leaf, not the half like this. Okay, the leaf is completed. It remains to draw a
stem line to the leaf. Well, following the wave that we have marked
in the beginning, we are drawing a
line ending with a small drop a little
bit to the left. And the second
drop to the right, we take it from the air and curve to the
right a little bit. Do you remember? Not to
the center of the leaf. Do you understand what I mean? Right, as a leaf is quite big, a single stem will
be not enough. Let's say a single
stem looks very weak. We can split the line of the stem into two
or three drops. Well done. Let's go to the next
lesson and complete our composition with
additional elements.
9. Sketch 4: Additional Elements: It. Let's now find the location
of this branch with leaves. Such an element in
hochloma is called a fern, despite the fact that it does not look very
much like a fern. But all these branches in Hochloma painting are
conventionally called ferns. We will also draw
this tendril here, then we will move
on to painting. If we catch the direction
of this wave and go a lin and draw a curved line
between these two berries, then we will have a fern. Please don't bend
this line too much. It should be almost straight, but still rounding off a bit. How are the leaves
drawn in a fern? The position of the leaves
in the fern should be at an angle of more or less
90 degrees like a corner. The leaves begin to grow as close to the berries
as possible. That's why firstly, we draw guiding lines with
a 90 degrees angle. And connect these lines
in the end of the branch. Well, we will have
a shape similar to triangle or to a kite
that flies in the sky. And we are drawing leaves
inside of the kite. This triangle like this, the first one or two couples of leaves must be on
the same level. They should be connected
with their tips. Other leaves can go separately because in the end the
branch is bending more. And it is difficult to keep these couples of the same
size leaves together just because there are more space on one side of the branch
and less on another side. Here they are. You can move
a piece of paper as you like so that in the end
you get a beautiful fern. It is better. Now draw in detail with a pencil so
that later when you paint, there will be no
incorrigible mistakes because it is difficult
to erase the paint. I agree. Let's draw on the
side of the tendril, like a spur with flowers. The tendril can curl
strongly like a fern. Make it nicely round like this. Here we paint flowers later. My congratulations to you. Well done. We've drawn
this sketch together. That was the hardest
part of the work. Let's see what we
have done already. First, we have marked the frame. We have found the
center of working area. Then we did a sketch of three strawberries,
do you remember? Then we did a sketch of a leaf. We were constructing the shape, the design of the leaf. Finally, we just finished
with additional elements. Okay, it's done already. You have just learned
how to create all these elements in the
folk art style of Loma. It was something new, wasn't it? This new knowledge is
now with you forever. That's great. Now you can tell your friends
that you can draw as Russians drew 300 years
ago in their villages. If you still haven't
seen yet my lesson about history of Hochlomafolkrd, please check my another class, Russian Mandals here
on skill share. It is very interesting. I recommend you to watch it now. We can erase all
supporting lines, we don't need them anymore. In addition, I
pressed the pencil quite hard so that you could
see what I was drawing. Therefore, I will
slightly erase part of the pencil so that the
painting wouldn't be duty. If you have an intensive
sketch as well, I would recommend you also erase a part of the
pencil like this. For me, the light
lines will be enough. They are still visible. Okay. That's it.
10. Title: Well, a title on the top. Do you remember we
spoke about it. If you don't want to put any greetings additionally
to your Barry's composition, then just skip this video
and go to the next lesson. Okay, and me, I'm going to show you the version of a postcard. Then I'm going to
write something like congratulations,
for example. And I will do it in
a Russian language. You can do it in English,
in German, French, Italian, Spanish,
Chinese, et cetera. So any language that you like, and I hope to see in
a project gallery, an international
strawberries do. It can be very
interesting, right? Well, if you know how to
write nicely by yourself, you know lettering calligraphy, then you just put the title
by yourself and that's it. If you don't know how, where, what kind of phone
to use and so on, I would recommend you my way. How I usually do
it, I usually take my cell phone and go to
Internet to see some samples. Nothing new yet. I use Russian
searching system for you, it can be just Google
Picture or Pinterest. Anything, just put something like congratulations
lettering or congratulations title or
another phrase that you prefer. You will see a lot of
different samples like this. For example, I will
not waste time now to copy exact writing style. I just write this title
by myself and you can take your time for
it And don't hurry up. First, I wrote the
word with a pencil. I had prepared my palette. In my case, it's just a plate
with four different colors. We are going to use
only four colors. As I told you before, a few words how we hold the
brush in Loma painting. It is not a usual
painter's hold. It's more similar
to calligraphy. And the position of the
brush in relation to the sheet of paper
is almost vertical, again, just like an calligraphy. Now I dip the brush
in red paint, and I'm going to repeat the pencil sketch
already in the paint. All the bristles of the
brush are soaked and paint, but there is no paint
on the metal clip. Watch out for this.
Please not to get your fingers duty and then not to destroy your work
with these fingers. How I did a lot of times. Look, here is a correct position of the fingers and of the brush. Please. If you
need more details, watch again a lesson about
position of the hand. In my previous class,
Russian Mandalas, I explain everything in
details in that video, not to spend more time
here to the questions. Okay, I start from the title
because it is on the top. And it's better to finish
first with the upper part of our composition and then go down in order not to
spoil the painting. And here, I'm not
going to give you any instructions how
to make lettering. Just paint how you feel. Lettering is not a
topic of this class. But anyway, I would like
to add this option to demonstrate different ways how you can apply this composition. Here is a postcard with a title, For example, To say the
truth, I like calligraphy. I like to write by hand. I always enjoyed this
process since I was a kid. All my workbooks and school
were full of colors. I used pens of different
colors and markers. Oh, yeah. Okay. Endure the
process and finish your title. Okay. Paint it. Now. I leave this part to dry. Later I can add some shadows or even some herbal elements. Green leaves or
flowers for instance. And I'm waiting for you,
in the next lesson, we are going to paint our
strawberries finally.
11. Painting 1: Let's start to paint!: And we are beginning to paint our composition from
the strawberries. We outline our strawberries
with the red paint carefully, and then we paint them over. Okay, ready.
12. Painting 2: Stem: Okay, we wash the
brush in water. Rinse, well, it
doesn't matter if you use one brush for
all colors of paint, or a separate brush
for each color. The brush should
always be rinsed well. After use that, the
paint doesn't dry out on the bristles of the brush and
doesn't destroy the brush. Actually, now we will
use black paint. Dip the brush in
the black paint. I remind you that I use
squirrel brush number two. Make sure that the
paint isn't very thick. This is the shape of the brush, Should be all bristles, should be soaked in pain. But at the same time, the brush should remain sharp. Now, we will draw stems. The stems go to the Paris, to the leaf, and two
additional elements. Turn the sheet of paper
as you like to draw, as you feel more comfortable. If you cannot draw a thin line
with a brush at one time, draw the line with
several strokes, but try not to
interrupt the line. Suddenly, as you draw the line and suddenly stop
at the end of the stroke, lift the brush slightly so that the end of the stroke
would be more narrow. Start the next stroke, also subtle, and then
press the brush harder. You can try to practice on a separate piece of paper first. If it is still difficult
for you to draw a thin, long line with a brush, take a liner or a black
gel pen, it's okay. Don't worry. Nothing wrong. You are learning now
and you can't afford any materials to achieve
the desired result. Mastery comes with experience. The main thing is that you learn the technique
of folk painting. You know how to do it. We bring the first line to bury. Number one, we
finish with a drop. As I said earlier, I'd like to finish the stem
here with drops as well. I will put two drops,
but it's optional. You can just leave the
line without drops. We take the second line from the air and bring it to
the very number two. When I say from the air, I mean we start the line
next to the first line, very close to the first line
without touching it again, I end up the line with a drop. Now, in the middle here, the line can be interrupted. If you have berries, number one and number
two are very close to each other or not interrupted. If you have enough space, both ways are applicable. Let's put two drops here. Okay? Very well. Then we continue our wave
and draw the stem to a leaf. A little bit to a side, we put one drop, and to another side
is another drop, don't touch with the stem, neither the berry nor the leaf. Well done. One more stem
line will go to a fern, pull a thin line, a paper is absorbing water from the brush dried out and
I can't finish the line. By the way, what doesn't happen when you
paint on an acrylic, vinyl or varnished surface? I mean, when you
paint some item, wooden box, for example, plate or canvas, you first
cover it with a background. For example, gold or silver paint with varnish and then paint on such
a prime surface. The brush slides better
and doesn't dry out. But now we have a
training option. We are painting on paper. Okay, we almost have
finished with the stem. Let's add a tendril with black paint and the
rest will be green. I want to say maybe we
will add more tendrils, but in a green color we will see Mm hmm. Like this. Our hand works as a
compass look at mine. I mean, we lean on the edge of the hand and
on the little finger, you can move your hand like this without even moving
your fingers. And finish the element with light finger motions like this. That is, you fix your hand, draw the line with a firm hand and round off the end of
the line with your fingers. Try it please. Perhaps it will be more
convenient for you. The line will be thinner,
smoother, and solid. Well, at the moment we finished
with black paint ase the brush place the next lesson
we will draw a fern in green.
13. Painting 3: Fern: Is. And we begin to give
life to our composition in the folk style
paint greenery. And we start from a firm, do you remember we have drawn large drops at an
angle of 90 degrees? Let's try to follow our previous sketch with
the tip of the brush. We touch the black line here. The leaves should be, let's say, fastened to the stem, connected with the stem. Since the drops are quite large, you can first circle them around and then paint over the inside. Or if you have a
bigger brush number three or four for example. Okay, I will show you just now. Look, I took the brush number four and you can make
a drop in one motion. That's it, printed. Just press the
brush to the paper, print it and then correct
it if it's necessary. Well, I will continue to
paint with the brush. Number two, I'm used to this brush this way I have better control over the
shape of the element. The drops here will
reduce the size. Later we are going to
decorate these drops. A bit decoration is important
part of loma style. It can be very sophisticated
or quite modest, but always present and another site.
14. Painting 4: Leaf: The last big element of
our composition is a leaf. We continue to use green paint. I will show you a type of the
leaf with a color insert. If you would like an
alternative option, you can paint the leaf
completely green and then you draw streaks of
the leaf with a black, yellow, or red paint. I will show you how
to do it later. The leaf is ready. Let's go to a Tampany.
15. Painting 5: Tamponing: The strawberries has
already dried up. Now we will make
berries yellow sides. Do you remember how
strawberries ripen? It starts to turn red, but some parts may
still be yellow, white, or even green. That's what we are going to
show in our composition. Now the painting will look
more interesting and lively. In the painting of chloma. There is a term tampaning. In Russian, it's tampoka. We dip it into the paint like a tampon and then
printed on paper, we do a tampering on
the bottom and on the left side or on the bottom and on the
right side of the berry, I use the usual kitchen sponge. I just cut off a small
piece with the scissors. And such a small
piece will be enough. I don't recommend using
such a co grain sponge. Well, we say fine grained and coarse grain
about sending sponge, but you understand
what I mean, right? A coarse grain sponge will just leave blots some big spots. We don't need this effect, that's why take a
fine grain sponge and I'm going to show how
we will make the tampering. You can try first on
another paper and another piece of paper to
feel the process better. Roll up the sponge like this, dip it in yellow paint. Tap the sponge several
times on the palette or on a piece of paper to make it a bit dry but
still with paint. Then we tap the paper
with these movements, make sure that it fits into
the form of the berry. Try it please. I'm beginning to tap
my strawberries. Well, it is not enough
paint and I'm taking more. Okay, now, it seems too much, too intensive, but still fine. Let's try another one like this. Try to tap smoothly. Look at this, I
made a blood here, but we will cover it
with the seeds later. It will be not visible, but it is better to
tap slowly and with a quite dry sponge little
by little and then add a bit more paint practice on
a piece of paper, please. You can practice like this. And in the next lesson, we are going to create flowers.
16. Painting 6: Flowers: Since we are using yellow paint. Now let's finish the leaf at the same time adding
yellow inserts here. Okay, That's the way just
filling the empty space. At the same time, you can correct the shape
of the inserts. If it was incorrect, the yellow parts touch
the tips in the center. Now we wash the brush
and let's draw flowers. Well, drawing is a
strong word because we are going to tap
it another time. But this time with cotton bads. If you don't have cotton buds, you can use a brush
handle, this tip. Or if by chance you
have such a stylus, you can use it as well. I will show you how to create flowers with the cotton bads. I wet my fingers a bit with
water and scrawl the cotton bad like this to smooth out all the protruding hairs
and dip it in yellow paint, I would like to draw
this bunch of flowers. These are three flowers. We start from the first dot as close as possible
to the strawberry, which we put on the black
line of the stem, put a dot. Then according to the
shape of a triangle, we put two more dots, like an Egyptian pyramid. We try to put the dots as close to
each other as possible, Completing the circle,
we put two more dots. We have got a five leaf flower. If the paint is imprinted bad somewhere you
can correct it, you can add the
paint additionally, the next dot we're going to
put here again on the stem. Again, we follow the
shape of triangle first and then complete
with the rest of the dots. It's funny how such
a simple flower may not work right away. This is absolutely normal. Don't worry if the flower doesn't turn out
as you expected. I had the same problem
before when I just started to paint this flowers. You can outline little circles with a pencil and then
draw with the paint. As always, I recommend
practicing first on a draft, on any piece of paper, and then proceed to the final
version of decomposition. The third flower we will draw
here above these two ones. Here will be the first dot of the third flower. Here is a dot. Go up to build a
pyramid upside down, then complete the third flower. Later, when the
yellow paint dries, we will add red dots in the middle and the
flowers will be ready. Now let's change the paint again to the green
and go to sepals.
17. Painting 7: Sepals: Is. Let's come back to
the strawberries and paint green
sepals on the top. Green sepals we are going to
paint with the curved drops. I will show you now. Slightly step down from the top of the berry
and put a dot. Curved drops will
meet in this point. Therefore, to begin with, we will put a dot here as a reference point for
us. Have you got it? Yes. Okay, And look at this. We don't put the first drop exactly in the center
of the strawberry, but a little bit aside. Okay. One drop and the third
drop, and one more. We can add one more
small here or we do not. Then we repeat the same
from the other side. Move your paper, how it is
more comfortable for you. Well, the second you
can use 34 drops, I put five here. Look, these drops should
be quite long, not short. Otherwise, the
strawberry sapple is going to remind a tomato sapple. Do you understand
here On the top, the drops cover the
shoulders of strawberry. If your strawberry suddenly
looks like a tomato, just extend the drops a
little bit, make them longer. Well now we are going to repeat the same action with
another two berries, and in the next lesson we complete decoration
of the Barris. Let's go.
18. Painting 8: Berries' Seeds: Okay, seeds. How can we show the volume
of our strawberries? Loma is a graphic
type of painting. We cannot use chiaroscuro, which means shadows in painting. That's why we band
the sepals lines before to give an effect of
a shape of the strawberry, we feel that the
strawberries are not flat. Another way to
emphasize the volume of the berry is to draw
the rows of seeds. Not straight but
arched band as well. Again, not straight but bent. Like this, we will paint
two rows of seeds. The strawberries are small, one row is too little, three rows is too much, then two rows of seeds. If you made a yellow
tampening like me before, then you can use black
color of the seeds. If you didn't make
a yellow tampering, then you can draw the
seeds with yellow paint. Choose how you like it. I'm putting black
paint on my brush. I make sure that the brush
remains sharp as a spear. If there is a lot of paint and the brush
looks like a bean, then remove the excess
paint on the palette. I start painting the
first row of small drops. If you feel that you cannot make small need drops
with your brush, take a needle or a toothpick. A wooden toothpick will
probably even be more useful because this is what a classic strawberry in
Hochlomatyle looks like. Well, in the same way we are going to decorate
the rest of the berries. And in the next lesson
we start to paint grass. This famous lama
grass, hochloma, is often called a grass
ornament or a herbal ornament. Well, let's do it.
19. Painting 9: Grass: Grass. We are moving
towards the famous grass. Grass is one of the main
elements of Hochloma painting. This herbal ornament is a highlights of
Hochloma in Chlomadera. Whole compositions
created only from grasas, all green blades
of grass and curls Grass in Chloras is a combination of
several basic elements, a very modest set. But what elegant airy
lace patterns and compositions can be created
using only the grass? I would like to
remind you if you are interested in learning more about basic elements of grass, there are only five
basic elements. I repeat again.
Please take a look to the lessons of my previous
class, Russian mandalas. Here on skill share, I show every element
giving recommendations. And finally, I'm putting
all the elements together into a complex
element called the Bush. I explained everything
very short, but with all details and
possible mistakes, have a look. Well, we start from the
beginning of the stem. This bunch of element has
a name in Hochlomafolcrd. The name is a bush, as I told before, such
a decorative bush. And we start from the bush. Just please watch how I do it
and try to repeat after me. To create a bush, I use
basic elements as a runners, spirls, blades of
grass and drops, and repeat the same
on the other side, and we continue with grass. If you have a space
here for one more bush, then paint another one. If you feel that another
bush doesn't fit already, then just put some herbal
elements like blades of grass, earls or simply drops. Let's first paint some
blades here down, then some drops or blades
in between these stems. Be careful if the
paint is not dry yet. Don't spoil your painting from below because the paint on
the paper cannot be erased. If you paint on
acrylic, for example, golden background,
then the paint can be easily erased
and painted again. But today we're
practicing on paper. Please don't hurry up. My teacher of Chloma used to say the slower you paint chloma, the faster you alone. I'm looking now at my
composition and I would like to add some
tendril on this side. What do you think about it? It is to make our
composition more balanced. The tendril can come out of
the grass or from the berry. I think I'm going to
let it out of here. Okay, Like this. Well, I'm pretty happy with it. Let's add some green blades
of grass in empty spots. You can also put some drops
between these leaves. Then we move on to the big leave and also support
it with drops and blades. Now I feel my paint
is too thick, it is much easier to paint. When your paint is more liquid, try adding a little bit water to the paint and you will
see how your brush slide more easily if you have the same problem
like me right now. In this lesson, we
painted Choma grass, famous Loma herbal elements. Let's go to the next lesson and add a bit more green grass.
20. Painting 10: Additional Grass: Okay, my dear friends, we have made the main grass. Now we are going to add additional herbal elements
to decorate our composition. I will show you that
techniques and elements, There are quite a few varieties. Look at these ones,
You can turn on your imagination and put additional elements
wherever you want. Where we have small flowers, we can add some drops
from big to small. It is fern element. In Hochloma, we turn
a piece of paper, paint in the direction
of yourself. It is more comfortable
to paint this way from big to small. Try to place the drops as close to each
other as possible. You can correct the shape
of drops, of course. Okay, I'm pretty
happy with this fern. Well, where else we
can add green grass? Let's put some
blades of grass in these triangles of the
leaf, in these corners. It is typical decoration
for Choma art. I'm going to show you right now. Watch it. First, a blade
of grass is to the left. A blade goes to the right. Inside we put three
drops, 23 drops. Perfect, easy and nice. Here let's do some variation. We begin the same, put a blade of
grass to the left, three drops curved
a bit to the right, from big to small. Why not? Can be
like this as well. Do you see I use only
blades of grass and drops. Nothing complicated. Okay. One more small drops here. Well, it is already
beautiful. I like it. Do not forget that a sense
of proportion is important. Do not overload your composition with a huge number of elements. Okay, I would stop now. Maybe I just want to add a
few tendrils and that's it. If it is difficult for you
to paint with a brush, such a thin tendril or your does not allow you to paint fine lines,
please don't worry. Just take a liner
or a jelly pen, for example, a black one, and draw these curls with a pen. The most important
thing is that you have fun and don't worry that
something is not working out. Please enjoy, You see, finally I cannot stop
and I wish to add some runner and blades here to surround the red
berries with the greenery. The combinations of green, red, and yellow colors always looks delicious, bright
and attractive. Do you agree? Like this. Okay, enough. This is the last
bunch of blades. Well done. We almost
finish our composition. In the next lesson, I'm going to show you the last decoration. The decoration of the leaf.
21. Painting 11: Leaf's Decoration: Let's go back to the leaf. If you painted your leaf with
yellow in shirts like me, then you don't have to
do anything with it. It is ready. And
if you initially completely paint it over the
leaf with a green paint, then I will now show you
how you can decorate a leaf in a different manner,
according Lomachenans. I'm going to explain it to you
on another piece of paper. Here is a leaf, for example. On a green leaf, we can make
streaks with a black paint. How to draw the
streaks correctly? We should try to
repeat the shape of the leaf to demonstrate
the volume. Can you see? Oops, I move
up a bit like this. Sorry. Do you remember in a
graphic type of painting, we express volume with lines, not with light and shadow? So let's show that our
leaf has its volume. I draw a line with my brush. It can be just a thin line or line with a thickening
in the center. I will show this line
here in enlarge size. Like this, professional
artists of chloma usually make such
lines with thickening. But this is already an
advanced level. Try it. There are no straight
lines in nature, you know, And the
line is not straight, of course, it is
bending a little bit. It is like the leaf
is slightly rounded. Do you feel this effect? And as you notice, I put this line not in
the center of the leaf, but slightly up again to visually show the
volume of the leaf. And in an other
part of the leaf, we draw two more lines. Start from the same point. It looks like a chicken
foot, doesn't it? Let's put small strokes with an angle more or less 45
degrees to the main line. There are actually little
drops. Drop, drop. Where do you have more space? A drop can be longer, but from the other
side is shorter. Or the same result, but with another motion. Look at this, I'm going
to show you here in big. It is something between
a shape of a rainbow and a 90 degrees corner with a thickening in the
middle. Can you see it? I think it's easier to use drops because with
the second method, you need to better control the brush and the
pressure on a brush. The second method,
professional folk artists, because it is faster
but not easier, they just do plan, plan, plan. And that's it, the
leaf is ready. We finally you will get
this kind of a leaf. Additionally, you can
outline the leaf around, highlight its shape like I did. Do you see here how did I change the pressure
of the brush as well? Good, It's just to show you
different ways of decorating. In this lesson, we
took examples of a simple but nice decoration.
22. Painting 12: Final Touch: What is missing here? I'm going to take a cotton, bad, and yellow paint again. First of all, I
will add one dot to each strawberry right here. Then I will put some
dots on the tendrils. If your tendrils didn't
turn out very well, you can hide some
defects with these dots. Sounds well. Right. The main
thing is not to overdo it. No need to print
these dots too much. Because when there are a lot of these dots,
it is not pretty. Believe me, they are
like berries or barts. You can put dots yellow or red or any other color
according to your taste. Now, attention, it is important not to put
dots on the stem. This is against the canon
of the hochloma painting, But put them on tendrils
or on tips of the grass. Look here, for example, I have a bunch of blades
of grass on the peaks. I can put dots. It will look elegant
here. Why not? I would like to
add some red dots to the center of the flowers. In this case, I'm going
to show you how do I use stylus or handle of a brush
instead of a cotton bud? Depends of a handle
of your brush. You can just touch a flower
once and leave a dot. Or you can do it in a circle or motion like me to
make a dot bigger. Okay. Now the turn of
stylus. Like this. Of course, it is necessary to
wait until yellow petals of the flour dry out and only
then put a red.in the middle. Otherwise, the pen will
merge and spoil the flour. If you like, you can put more red dots as well,
smaller or bigger. But again, don't overdo it. The main thing is
to stop in time. I always say to myself, well, I'm quite happy
with my result. Look how cute it turns out, but I think that the
frame is missing. The frame will complete
our composition. In the next lesson, I'm going
to show you how to do it. And the last thing, I
will refine the title. I will highlight some points with a black marker or liner. We see you soon is.
23. Frame: For the frame, I'm going
to use a cotton bad again, I dip a cotton bud
into the paint, for example, red paint. The reference point will be the pencil line that we
drew at the very beginning. Do you remember? Let's start from the corner and let's go. Quite a lot of work, but this is the easiest way
to create an even frame. Then we will paint over the remaining empty
space with a brush. Now I am taking my brush. While it is better to
protect your table first, just paint this empty space. Finally, we will get
a frame like I have on my box, like this. Actually, you can create
any frame you like. For example, you can
use your brush and make bigger waves like this
or just a straight line. I would be happy to see
your version of a frame. Feel free to express yourself. Well done. Let's leave
our postcard to dry out and then we will
finish the title. Okay, now my postcard is dry and I'm taking some
markers and liners. It is absolutely not necessary to do what
I'm showing you now, but I would like to show
you that you can use any materials to make your
postcard even more beautiful. Well, I have here a
liner, Farber Castle 03. You can take anyone for shadows. I can. For example this one. I have a brush marker,
Windsor and Newton. It is light gray. I like it to make
shadows and lettering. So let's go at first. I just circle around the
shape of the letters. Well, it's done and
now the shadow. Okay. I'm not going to do
anything else with my title. I'm pretty satisfied with it. I need only to erase
all the pencil lines, make sure that paint is dry. I used to always put my
signature under the composition, and I recommend
you to do as well. To put your signature under your handmade composition in Russian folk card style Jchloma. Okay? A, e, present your postcards with love to your family and friends. And I hope that your day has
turned into bright colors today and you have enjoyed exploring the folk
painting of Jchloma.
24. Final words: I'm happy to see you here
in the end of this class. We did a great work together. How did you find the
Russian folk car painting? Please let me know in your
views To say the truth, your feedback costs
a lot for me. It will help me to improve
my future classes. Please write me your opinion. Another important
thing, don't forget, please to download
your project to the project gallery
on the website. It's projects and resources and you just tap
here my project. Submit the project even
if you didn't finish or you are not satisfied with the result,
it doesn't matter. I'm waiting for your project. If you would like to receive notification about
my future classes, freebies and find
out my latest news, click on the Follow
button next to my name. And follow me on Skill Share. See you at my next class to.
 Irina De Vicente, Decorative & Folk Art