Transcripts
1. Introduction: Hi there and welcome to this Beginner's Guide to 3D design using Autodesk Fusion 360. Fusion 360 is a 2D and 3D CAD software. CAD is actually just short for Computer Assisted Design. This class is for anyone who wants to start learning more about 3D, designing and modeling their own products and prototypes. And, what is really great is that you do not have to have any prior knowledge with regards to 3D designing, graphic design, or even drawing. In this class, you will learn how to navigate and work through the Fusion 360 workspace, which at first glance can seem a little intimidating. I know I was, but I will help you to conquer that fear. Next we will be moving on to making our 3D model. And I will guide you step-by-step, giving you some great tips and tricks along the way so you can get your creativity flowing. Many of us often have ideas for products that we would like to make. But we might not necessarily have the capabilities or the materials to make that product. And this is with 3D designing can come in quite handy. 3d design teaches you all about form and function and how to design well, but one of the biggest misconceptions is that as a beginner or a hobbyist is that you have to own a 3D printer. This is simply not the case. I would rather suggest, see what you enjoy making within the software. You might not necessarily want to do product design. You might want to do animation or woodwork. So depending on what you would like to do, will also depend on whether or not you actually need a 3D printer. Many 3D designers that do make products for printing actually get companies to do the printing for them, because it's also a lot more cost-effective. But as a hobbyist, just have fun with it. My name is Hendrien Horn and I'm a ceramic artist and 3D designer from South Africa. Now I'm going to jump back a few years, back to the time when I was still only a potter and when it came to computers and software, well I pretty much knew the bare minimum and that was about it. But I found myself in a situation where I sustained a chest injury and I was able to practice pottery on my wheel for over a year. I had to figure out a way to conceptualize my art so that if I couldn't make it, I would have a visual representation of it so that someone else could make it for me. And this is how I stumbled across a 3D design. Like I said, I wasn't tech savvy at all. I was very intimidated and very hesitant to start. But the more I did it, the more I realized that the flexibility that the software offered was absolutely amazing. And I came to the conclusion that absolutely anyone that has a computer and a mouse can become an inventor. A great way to start thinking about what you could possibly 3D design is to look at the world around you. What are your likes, your dislikes? What do you enjoy doing for a hobby? Except for 3D design, which you've obviously now started And also where do you work? What are the products that you use every single day? Because you use these products every single day, you will know if there are problems associated with that product. And where there's a problem, there's always a solution. This could lead to great idea generation and problem-solving, which eventually leads to innovations and inventions. So what will you need for this course? All you will need is a computer, the software installed and a mouse. The mouse must please have a scroll wheel because I'll be doing this class using the scroll wheel. I'm Hendrien and welcome to this class.
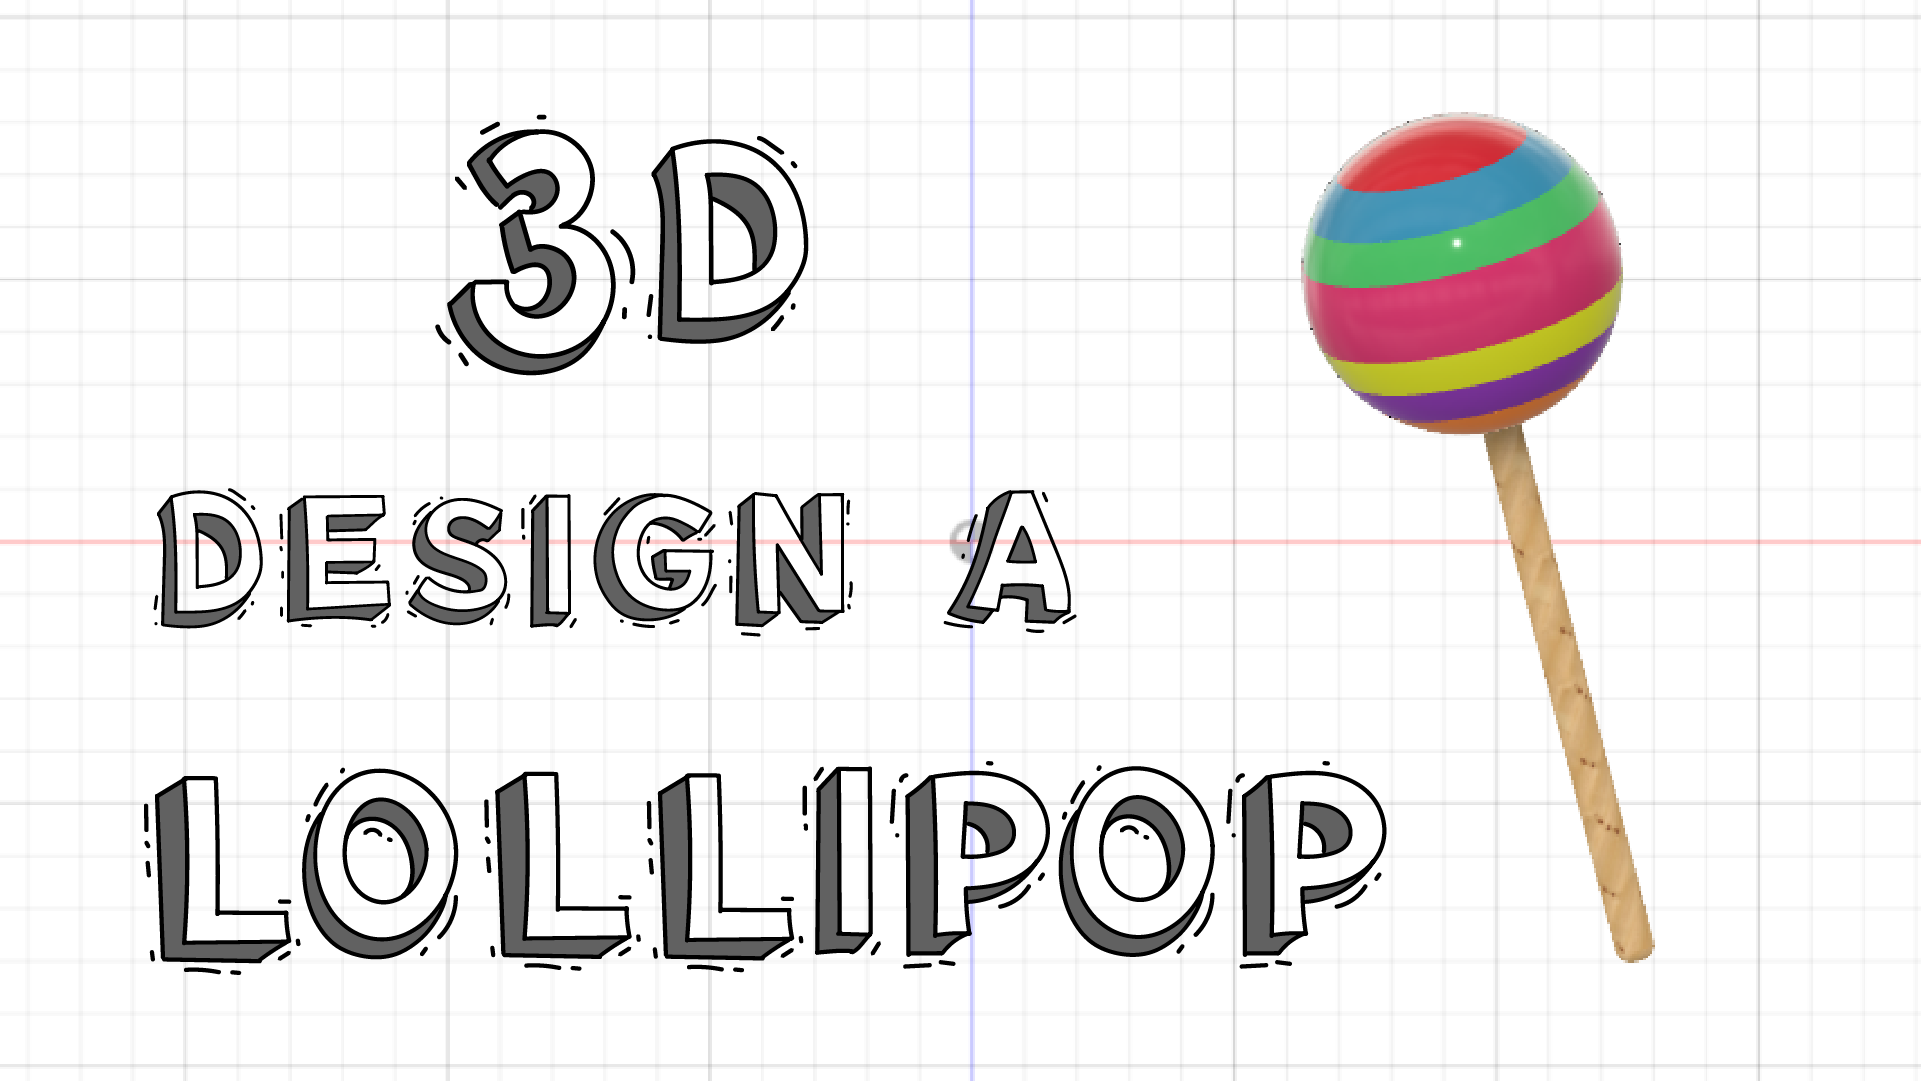
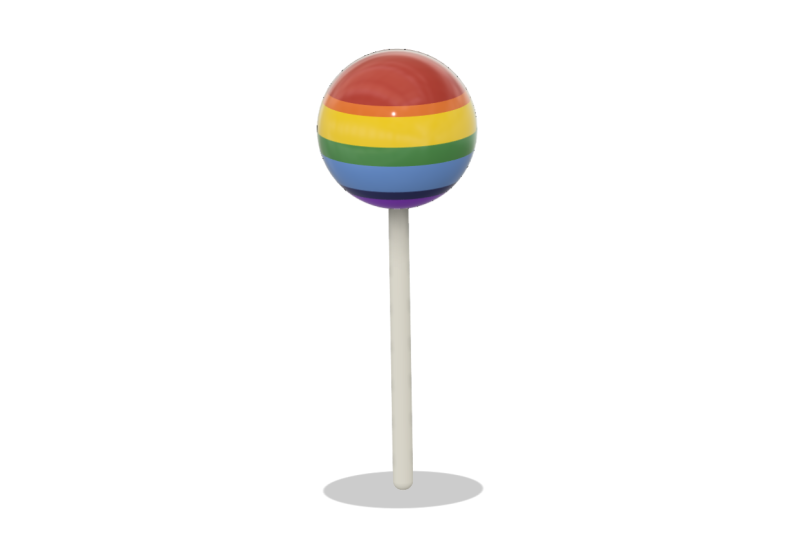
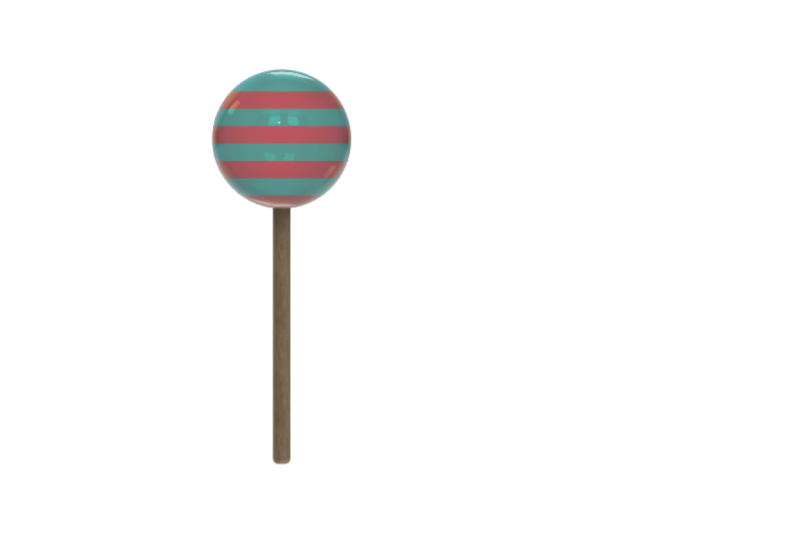
2. Project: Once we have gone over how to navigate and work within the software, we will be moving on to our project. And this is where we will be 3D designing our lollipop. Now, as this is a beginners class, please note the lollipop is not a printable design. And as basic as the form may seem, we will be using quite a few tools and functions to create our lollipop, which as a beginner are the essential building blocks for starting in 3D design. Firstly, we will create a 2D sketch. And what is really fantastic is that you don't have to have any crazy drawing skills, the software is designed to help you with that. Next, we'll be moving on to creating a 3D model from our sketch. Once our model is finished, we will be moving onto how to change the color or appearance of the model itself. Now how you approach the final look of your lollipop is completely up to you. You might not necessarily have a sweet tooth. You may want to change the appearance to be a wooden lollipop or maybe use glass. So depending on your unique style, will also depend on the final look of your lollipop. Once we have finished with the appearance, we will move on to saving our model. And then I will show you how to capture an image of your model within the software to make it a lot more easier to share your image with the rest of the class. While with all of that said, let's get to class.
3. Settings and Preferences: The first thing we're going to look at is our settings and preferences. Now the software does come with pre-selected preferences, but I just want to go in and change a few things just to make it a little bit easier for you to work within the software. You can always go back and change a few things if you like. But we need to start from the basics and you need to know where to look if you want to change some things. So if we lgo to our workspace, we're going to go here to the top right-hand side and click on this icon with your name or the name you gave your software. We're going to click on Preferences and this wonderful intimidating box will appear. Don't worry, we're gonna go through it quite quickly and it's nothing much to worry about. We're just going to select the language we want to do the program in. Obviously I'm doing this class in English, but if you prefer another language, you are welcome to select it here. Next thing we're going to look at is our offline cache time. This is full when you work offline quite a bit. What fusion does is it saves your files locally on your computer as well as in their Cloud. But I do not work offline so much. So mine is set to 15 days. If you find you're working offline for long periods of time, rather change this to 30 days or 60 days just to make sure that you don't lose any of your work. But like I said, I'm going to change mine back to 15. Recovery time interval here, mine is set to 5 minutes. This just means that fusion will automatically save my work every five minutes. One thing that I really love about the software is the fact that if it does crash, which is not supposed to do, fusion says that the software doesn't really crash, but it does happen. It actually auto saves your work before it crashes. Now it automatically saves your work every five minutes because we've put that in the prefernces, but it will save it before it crashes. So if everything goes black and it's gone, you just open the software again, a pop-up box is going to appear. It's going to ask you, would you like to recover your files or restore your files? And you just click - Yes. Next our default modelling orientation, makes sure it's on Z-Up. Now this has got to do with our axes and our planes when we're working in a 3D environment. And for now, all I want you to remember is that Z equals height. Now make sure all of these are ticked, don't worry about them too much. I'm not gonna go through everything. I just want you to note that this reverse Zoom direction, yeah, this is important. This has got to do with your scroll wheel on your mouse. And I will explain that to you a little bit later. I want you to leave that unchecked for now, but I just want to make sure that you know where it is because for personal preference reasons, you may want to change that a little bit later. Next, these two at the bottom must be ticked. And then we're gonna go here to the left-hand side and click on Design. Make sure you tick everything that I have ticked. But I wanted to make sure that here, scale entire sketch at first dimension is ticked. Once that is done, we're going to go here to data collection and use. This is the section that answers that big cloud of a question that is hanging over everyone's minds of whether or not fusion can view and steal your project and files. You're welcome to read through all of this. I'm just gonna save you some of the time. So fusion just wants to see where you are working. They are mainly looking at what workspaces you are using for data collection and analytics. So you never have to worry about them stealing your work. For example, I work mainly in the design environments here on the top left you'll see on this drop-down for now you can't access it. But if you were to click on it, you'll see that there are options for environments that you could be working in. Animation and manufacture. But as a beginner, we're going to stick to the design environment. And I also spend most of my time in the solid workspace and the surface workspace. All right, so we're gonna go down here on the left-hand side, Let's go to default units and click on design. You can see our default units, mine is set to millimeters. I will be doing this class with units in millimeters. You're welcome to change it if you'd like, but for now, maybe follow along how I do it so that it looks exactly the same. I will show you later on how you can change your units per project so you don't have to keep coming back to your preferences and settings. You can literally change it from project to project. So if at any point in time you think that you may have clicked the wrong thing or something went wrong. You can click here on Restore Defaults. And that will just take you back to the original default settings of the software. But if you're ready to go, we can click Apply and OK.
4. Interface Layout: So if we look at this layout, it seems that there's quite a lot going on. I don't want you to worry too much. It's actually very well structured for ease of use. So one thing I want you to note as a beginner, a hobbyist, and if you're using the free version of Fusion - here on the top right-hand side you will see this folder. It says 0 of 10. That just means because you're using the free version of fusion, you're only able to edit ten models at the same time. Now don't be alarmed by this. This is just a system that was put in place for larger companies who have been taking advantage of the free software. For you as a small user, it won't have any impact on your work. So let's go here on the left-hand side and click this grid box. Now these are all of my projects. Now I'm going to go to my project folders and select one. I'm going to go to my model tutorials and double-click on it. And here are all my files. As you can see, I've made quite a few comical animations or tried. But here it stays read only, so if you click on it and you make it editable. If you go here to the right, you'll see one of ten files are editable. Now if I want to open a folder, I'm just going to double-click on it. Let's see, it opens and there's Gary. As a beginner. You'll see that there is a yellow thing here on my history timeline, which means there is a problem there. And I'm sure that's got to do with the factt that these are not complete circles. So when I did do this project, I was very much just trying to create characters and seeing what it took to 3D model. I had a lot of fun with it. But obviously for copyright reasons, I don't 3D print Gary, I don't sell Gary in any form. This is pretty much just a mockup that I did for fun. So remember when you're doing your own models, do not produce and print things that have trademarks or copyrights on them because you may get in trouble. So I'm going to say bye-bye Gary. And it's close him. Going to close this project folders. Next we're gonna go to this file icon and click on the drop-down. You see we can create a new design, Open, Upload, Save, Export. And this is where we will be capturing our image a little bit later. And also what I'd like you to note is that here - Open recovered documents. So if the pop-up box doesn't appear, this is what I was talking about earlier. This is where you can go to click to recover your document. Next is our save button or undo and redo buttons. Next we've got this design drop-down. And like I said before, here are all our other environments that we can work in - Manufacturing, Drawing Animation. As a beginner, we're going to stick to the design environment and we will be working in the solid environment. If you click, you will see there are different ones, so there's the surface environment. We've got sheet metal and tools. So if at any point in time you're looking at your interface and it does not look like mine. Make sure that you're in the design environment and in the solid workspace, because it can easily happen that you may accidentally click on something else. So just double-check that it's Design and Solid. If you hover over these icons, you'll see that these are shortcuts and they tell you exactly what they do. But for now, I want you to ignore these. We will be using the drop-downs just to make it a little bit easier because all of these will be in the drop-downs. Next, we've got our browser. And this is where we will be naming our project - our 3D model, but we'll do this once we've started. Next, we've got our document settings. If you click on this arrow, you'll see there we've got our units in millimeters. And if you hover here on the right-hand side, you'll see a pencil and paper appears. If you click on it. You can see there we can change our millimeter units to make it inches or whatever we like. And this is where you can change it from project to project. So we're going to keep it in millimeters and just say Cancel. Here on the left-hand side at the bottom, we've got our history timeline. And as you saw with Gary, this was populated with little icons and we had the yellow highlighted icon that was showing, which was obviously a problem. But if you're designing and you realize that you may want to change something or that you have made a mistake. You don't have to go undo, undo, undo, and go back all that way. You can literally click on the icon and the function and tool that you were using, and edit it, which means everything from that icon that you edited will change and your whole model will change to where you are now. I know it sounds a little confusing, I'll show you when we start with our models. But it's just important to remember that you can edit the model from the button here to make your life a little bit easier and you don't have to delete everything, you can just change it accordingly.
5. Axes, Planes & Grid: Now let's have a look at our axes. our planes and also our gid layout. Let's click on our origin. You'll see this little eye, just click on it. And these are our axes and all our different planes. So we've got our X, Y, and our Z. You'll see they're also color coordinated. You've got X which is red, Y, that is green and Z that is blue. So RGB, For all those designers. And then we've got our planes and if you hover over them, you see they change color. Here on the right-hand side we've got our View Cube. And if this was our model, we can click on the View Cube, and say we want to view it from the front, from the side, from the bottom. You can even rotate it, click on these arrows and rotate it. So you can have quite a lot of fun with it. So for now I'm just going to unclick the origin and I'm going to click the home button. Now I want to make sure that all grid settings are the same because if yours is different from mine, you might get a little confused. So let's go here to grid and snaps here at the bottom of that, click on that and your going to grid settings. And you're going to choose fixed and major grid spacing. we're going to change this to 10 and minor subdivisions - Let's make that one and make sure your reference numbers is ticked and say, OK.
6. 3D Model Tester: So how and where do we start? Well, we're quickly going to do a tester model just to see how everything works together. Go the Create drop-down and select Create Sketch. So now we're going to create an enclosed shape. And what I want you to note is that we're working in a 2D space, meaning a 2D environment, we're creating a flat sketch, it's not 3D. Now we need to select the plane we want to work on. I'm going to select this front plane, this ZX plane. Let's click on that. It should flatten out. If you find that your sketch is not flattening out, you can go here on the sketch palette and press look at or if your view cube is skew, you can click on the front part and it will flatten out automatically. I'm going to go to Create. And we're going to select Line. Now go to the left-hand side. And I want you to click and release. So anywhere, just click and release. And if you drag your mouse you see the line is almost like an elastic. And we're taught with our mouse to click and hold. So sometimes it can be difficult to remember to click and release. So I want you to get into the habit to click and release. So we're going to make an enclosed shape. I'm going to click release, click Release, release, click Release. Please note no overlapping lines - with no lines that go like that. We have to make a shape that's completely enclosed and solid. So we take it to the first point and we know the shape is enclosed because it's changed color. You'll see it's blue. If you feel at any point in time you've made a mistake. You can say control Z, control Z. And you see the line goes back and back. Or you can go undo, undo, undo, undo, undo, undo. And I'm just gonna do it again. The shortcut for line is actually 'L'. See if I click 'L', I can do my lines - click and release. Now our basic sketch is done and we know we're in the 2D space because if you look at the icons, they're all sketch icons, so they are all lines. there are no 3D models. And we're going to make sure that the sketch is done we say, Finish Sketch. So now we're in the 3D modelling space and that finished sketch button here has disappeared. So therefore, we know we're in the 3D modeling space, but now we need to make a model. So I'm going to click on the top. Let's look at it from the top. No, not the top. The front. Sorry. Like I said, if you get confused, just move around the view cube. Now to make it look 3D, we have to go to Create. And let's press Extrude. And if we look here, we can leave all of this as it is and let;s say, make this distance. let's change it to 20. And say body and Okay. Now at the moment it's still flat, you can't see anything. I'm going to click here at the bottom. And there is our shape. Click around and have a look at it. Now if we're looking at our model, the edges are not clear. So if we go here to display settings here at the bottom, what I want you to do is go to visual style, Shaded with visible edges. You'll see that these lines have appeared, which makes it a lot easier for you to see what the model looks like and where the edges are. You can hover over them and they light up.
7. Orbit pan zoom: So we've reached the final small hurdle before we start our 3D model. And that is - how to use our mouse and scroll wheel to pan, orbit and rotate. Firstly, I want you to hold down on your scroll wheel. And if you move it around, you'll see that your model pans around .... you can let go. In order for you to get your model to orbit or to rotate. I want you to hold in the shift key and the scroll wheel simultaneously at the same time. And you can see that you can move your model around. This may take a little bit of practice. Have some fun with it. If you feel at any point in time that you're not really sure what's happening, just click the Home button and it'll go back to the home setting. Now when it comes to zooming in and out. So when I zoom in on my scroll wheel - my scroll wheel is going backwards, if I zoom out, my scroll wheel is going forwards. Now you may want to set your preferences up differently where if you were to zoom in, you want to scroll wheel going forward. And if you zoom out, you want to scroll wheel going backwards. So depending on your preferences, if this is not the way you want it to be, then you go here to your name again and go to Preferences. Here we see reverse Zoom direction. You can click that and say, OK, and then if you zoom in, your scroll wheel is going forward. And if you zoom out, the scroll wheel goes backwards. But I am the opposite, for some reason I like it the opposite way around. Not everyone does. I'm just going to change mine back. If you find you've zoomed out way too much or that your model has completely disappeared. All you need to do is double-click your scroll wheel and it'll pop right back up. So I want you to practice moving it around, orbiting it, having a little bit of fun with it, and just getting used to how to move around. Because after this will be doing our model and it's a lot easier if we have a little bit of knowledge with regards to how it works and how to move around. So before we start sketching our new model, we obviously need a new design. So we go here to the top right and say new design. And OK, we have a fresh design area to work on.
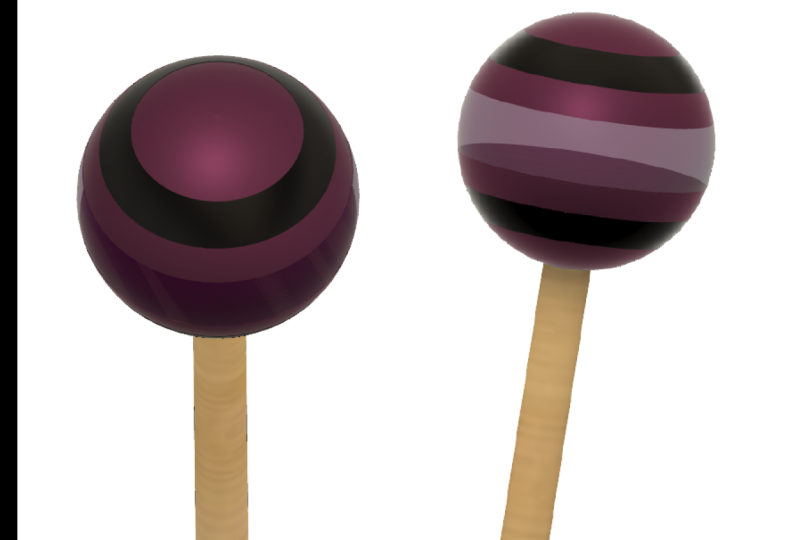
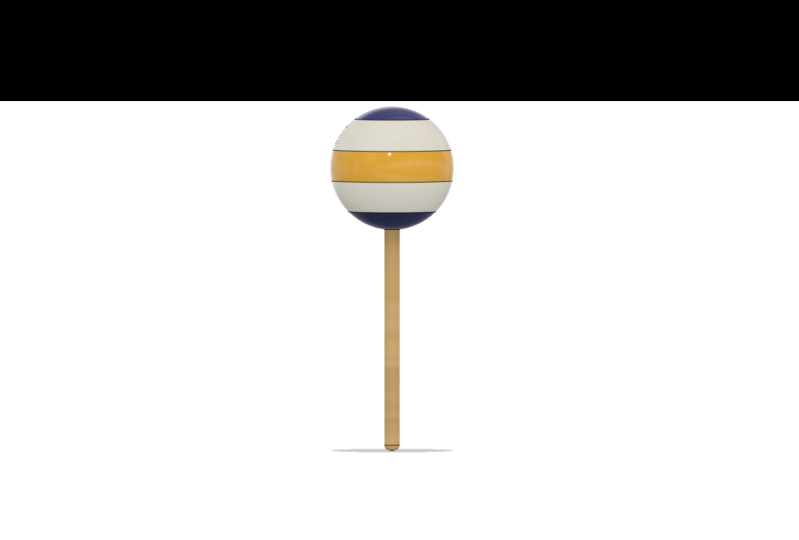
8. Sketching Your Lollipop: If you look at the basic shape of a lollipop, it consists of two parts, the sphere and a thin stick. Now the first thing we need to do before we can create the 3D model is to sketch it. So we got Create, Create Sketch. We're going to choose the plane we want to work on, I'm going to choose this front plane and it levels out. And this is our center, which is our origin, which is the center of our 2D grid. Now the first thing we're gonna do is to create the stick of the lollipop. So I'm going to create and rectangle. To make your life a little bit easier in the beginning let's use a center rectangle. I'm going to click in the middle and drag the rectangle out. The blue highlighted area at the top is the width of our stick without pressing anything, all you need to do is press 10 on your keyboard the number 10. And you'll see there is our width. Now to go to our other number, which is our height, I want you to press Tab and you'll see that the number lights up, and we're going to make this 150 millimeters. And you can say enter. Not to make it a little bit easier later when we're 3D modeling our model, I actually want to create a line through the center of the model here. This will make a little bit more sense later. And we all know that we can create a line, but the shortcut is L. We're going to press L on my keyboard and we have a line. Now, I'm going to click on my origin and drag it up and click on the center. You'll see it's the center of the top line because a little triangle appears and that's exactly what we want. So I'm going to click and there's the line. Let's do it for the bottom... pan down. Zoom in a little, Click on the origin - Release, drag down to the center. The triangle will appear and click, zoom out a bit. So once you've finished using the line tool, you must press Esc Now let's create the sphere at the top. So let's go to create again. Circle, Center diameter circle. And I'm just going to click here, click release and drag out. You'll see the highlighted area. Let's make that 80. It's quite a nice big lollipop. And I'm gonna say enter, And I'm going to press Esc to make sure that I'm not making another circle. And I can click on the center and I can move it around. Now because there's no line here If I hover over here and I put it on this line I can't be 100 percent sure that I will be on this center line. I'm going to say L for line again. Click on the center and drag up and click. And then we click the green icon to say yes, we're finished. And I'm going to press Esc I can move it up and down the line if I want. It's made a constraint. So it's automatically put it on the line. But if I click on this right-click and I say Delete, I can move it around again. So sometimes it might not automatically make the constraint and put it on the line. So let's go to the top here to our constraints. We'll go here to the top and say coincident. We're going to be using this one. The coincident, we're going to click the line and then the center of the circle. And then you see it snaps into place. Now if I want to move it off, I can't, and we know all our shapes are in enclosed because theyare all blue. We need to clean up our model - when we are making a 3D model, it's very important that our model is cleaned up and ready for 3D modeling. And by clean up, I mean that this doesn't have to be here. We can actually trim this away. And how we do that is we go to Modify, trim. And if you hover over it, you'll see that it turns, pink, this pink reddish color. So if you click on it, it turns it away. Let's trim it. That's nice and cleaned Next, I'm just going to trim this top part of the line. If for example, I have made a mistake and I have trimmed this line, you can go Modify - Extend. And if you hover over this line, you see that this red line appears. You can just click. The line will be restored. I'm going to go Finish Sketch and there is our lollipop. Ok.
9. 3D Model Your Lollipop: It's finally that time we can move on to creating our 3D model. We are going to go to Create. And let's click Revolve. I'm going to be revolving this whole shape. Let's start with the stick. Its asking you the profile. I'm going to select this left profile. Then it's going to ask you the axis. I'll be selecting this Z axis, this one here - don't get confused by these lines. You need the center line and it quickly revolved it all the way round. It revolved it all the way around because here it says 360 degrees. We're going to make sure it's on a new body and say, Okay, There is our shape. Remember if you don't see these lines, you're going to go here down to Display - Visual style - Shaded with visible edges. And there we see our visible edges. It's just a lot easier to design that way. Now the top sketch has completely disappeared. We can go here to the left-hand side. Let's click on this little arrow and let's click on the eye to activate the sketch. Now we will be doing another revolve, which means we're actually doing a repeat of the tool we used before. And the shortcut is to go right-click. And at the top you see repeat revolve. Just click on that. And there we go. It's going to ask the profile, we are going to choose the left-hand side one. The axis is our z axis, our height. And its revolved around and we're going to - It's wants to join the two bodies. I want you to get used to saying New body and say, okay. We can still see all of the sketch lines. If you want to get rid of that, you can just turn your sketch off and there they are, They're all gone. Now while we're looking around, I want to make a few modifications just to streamline the shape a little. For example, here at the bottom. This is quite a sharp edge. I don't like that. I want a softer age for the bottom of the llollipop. And how did we do that? Well, we're going to Fillet it, which means we're just going to smooth the edges. Let's go to modify. Fillet. It's going to ask you what you want to fillet. Let's just move our design. I were to click on this and you see an arrow appears. Now we can modify it and pull on the arrow. And once it gives you a red line, it means you've gone too far, which means the design won't allow you to fillet it that far, which means you can only go up to a point. I'm going to push it to the point where it's pretty much almost in the red and that's 4.5 millimeters. I'm happy with that. You can change it here if you want 3 instead. So you can play around, but I'm going to do 4.5 and enter or you can go, Ok. Now the bottom is nice and rounded. I was going to go to my Grid and snaps and the layout grid. I'm just going to untick that, so that the grid is away. It's sometimes distracting for me when I'm working with my 3D model and the Grid is in the background, That's why I just put it off.
10. Offset Planes: Now with lollipops, they sometimes have different layers. They don't always just have one layer. And for our appearances later, we might want to change some layer colors. And how do we break up this body so that there are different parts of it? One way we can do it is to say Construct an Offset plane. Now let's zoom out. Now there are all our construction planes. I'm going to click on this bottom plane and drag this up 80 millimeters. II'm going to say OK . And we've made a new construction plane. You'll see on the left-hand side here with the arrow. If I put it off, it disappears. Now I want to make some more construction planes. So I'm going to right-click, repeat Offset plane. I can click on this one and drag it up a little. And let's make the distance 20, perfect. And Ok. Now I want you to play around a bit and create quite a few more going up So we'll go to modify. Split body. The body we want to split is the sphere. The splitting tools we'll be using are all of these construction planes. And if I click on the top one, you'll see it creates this red ring. That just means that it's cutting the body, so it's splitting it. But you don't have to individually go and click on all of these construction planes. A shorter way, especially if you have quite a few, is to go here to the left-hand side, click on the construction arrow, and just click on all of these planes. You don't have to hold in shift, you can just click on all of them and they're all selected. And we're going to go, okay, I'm going to switch this construction planes, switch them off. If we go over here to our bodies, Let's click on that. Here are all our different bodies. So there's the stick at the bottom. If you'd like to, you can name it. So if we click on this first body, we double-click. And you can say stick, rename it. And you can rename all of these if you want. I'm not going to do that now, but all in all, this looks good. We can just click outside so that the blue is gone. I'm going to close this up. I always want to neaten up my model. Here on our history timeline. You can see that here is everything that we have done. For example, if I wanted to change the fillet here at the bottom, and I'm not happy with that. Fillet and I've decided, you know what, it's too much of a curve I'd rather change it, right-click on it and say Edit Feature. And the fillet is 4.5. Maybe I wanted 3.5. All the split bodies are still there. It's literally just changed the bottom of the model.
11. Adding Appearance: We're going to modify and all the way down - go to Appearance. If you'd like, you can actually drag this up a bit. And if we look down here, you can see they are quite a few things we can do. We've got fabric glass, leather, liquid. I'm going to go to the first one is just do paint. And I'm going to pick glossy. And there are all the different colors. For example, the stick we want, maybe white. I'm going to click on the color and I can drag it to the object and drop. Now let's add a little red. I'm going to click on this red. Let's add it there. Now while I'm looking at this red, I'm not a 100 percent happy with it. I actually want to change the color. All you do is you hover over this color here on the right, right-click. And I'm going to say Edit. And here is our color palette and we can move around at the top here and you see the color changes. We can also move here, just leave it on that one. What's also great is you can change the roughness. So if I don't want so much reflectiveness, I can change the roughness, or the reflectiveness. So you can play around and have a lot of fun with it, So I will say Done. You can see the color changed. Now for example, I want this one to be green, but I'd like it to have the same roughness as this one. But if I drag this in here, you'll see it's not the same. So I'm going to right-click and just say and Unassign and Delete. So an easy way to do it is to hover over this - right-click - duplicate, and there is a new one. And if we right-click - edit, we can change it maybe to the green and say done. And then it'll be the same roughness or reflectiveness that you created with that one. Now maybe you don't want to use these colors. Maybe you'd like to make it out of wood. Let's take the pine one at the bottom here and drag that in. This is actually quite a nice one to work with. Right-click Edit, We will look at scale. And done. So we've got gloss, let's do color density gloss. Let's take this blue, one, drag it in. If you use glass, you need to note that it obviously will shine through because it's gloss. You can look straight through it, you can however change somethings - changed the color. You can change the refractive index and the absorption of the glass and the roughness. One of my favorites is metal. I'm going to go to copper. But if you've got one that has this little download arrow, it just means that it's not in your software, you just need to download it if you'd like, but you don't have to use the ones that are available for now. Let's drag it in that's a nice color. Right-click - Edit. Let's change it a little - make it a bit more smoother and shinier. Look at that. And if you take it all the way, Fusion actually has this in the program where it reflects the top of a factory roof. Like an industrial roof. So that's quite nice. I'm going to have some fun and change a few colors, change a few things around. I would suggest you guys do the same, have some fun with it. Like I said, you might well have a sweet tooth. You may enjoy using the wood or the glass or the metal, whatever your preference is. have fun with it. I'll see you on the other side. Appearance My models all done, I've made a little bit of a retro. Lollipop. I'm quite enjoying this. I hope you guys have enjoyed making your model and adding some appearance.
12. Save: We're going to File - Save. It's going to ask you, what you want to call it, I'm going to say Lollipop. It's going to ask you where you want to save it. And you can call it Skillshare Classes. And Save. You can see over here, it's saved, because the name is there. Our tester is still there, If you want to save it, you're welcome. I'm just going to close it here and not save it.
13. Capture Image: We'll go to File - Capture Image. It's going to ask you, look at the bottom here. If you want a transparent background, you can choose whether or not you want a transparent background. For now I would say rather not, keep it as a white background. Because if it's a transparent background and you're taking a photo and when it's uploaded it may come up as a black background. So I'm gonna untick that and say, okay. We're going to name that and just say lollipop. Make sure it's a PNG file. You can also do JPEG, but PNGs just better quality. I'm going to go save to my computer - saving it in downloads. I'll say Save. And it's taken that picture and taken it to my download folder.
14. Finishing Up: Well, it's that time of the day, we've come to the end of this class. Thank you so much for joining me. I hope that you have found this class helpful. Please remember to share your images, with the rest of the class, I know in the beginning it can be quite scary to share your art with others, but I promise you it's completely worth it. So please don't be shy. If you'd like to share your images on Instagram, you welcome to tag me. My handle is @hendrienhorn, and I'm quite excited to see what you guys come up with. If you have any questions or queries, you're welcome to drop them in the discussion section for this class. Also, if you have any feedback for me with regards to the class, or if you have any ideas for 3D models that I can potentially make in the future, you're welcome to let me know. Other than that, I am Hendrien, thank you so much for joining me and I'll see you next time.
 Hendrien Horn, 3D Potter