Transcripts
1. Promo video: Hi guys, my name is Edina and I'm a professional
guitarist. You might know me from the Spanish guitar
hub YouTube channel, which has over 70
thousand subscribers and tens of millions of views. Are you struggling with your
chord changes and learning the major
and minor shapes. And are you feeling that
you had not fast enough to sound very musical when you are
learning your songs. Now in this course, we're going to tackle this problem and we
will learn a lot of different little songs which will help you to change
between chords. We will also learn how to strum in two different
time signatures. And this is enough to learn
most of the songs out there. And finally, I'm going to
give you a chord chart, which will be a
chord progression. And I'm going to play
lead and you need to play the background strumming guitar to practice the chord changes. Lastly, I will give you an ear training
exercise where you need to recognize the major
or minor chords. And this will be very useful later on for your music carrier. Sign up for my course today
and learn the chords with me.
2. Little Intro: Before you start the course, I just want to say
it would make me really happy if you
could leave me a review. So I know how I have done
with the course for you. Also, you'll see
some assignments in the course if you
decide to do them, I have a loop
personally to each of the assignments and either
give you a feedback. So I know how you have done. I hope you will enjoy this
course and I'm really looking forward to see your
reviews and assignments.
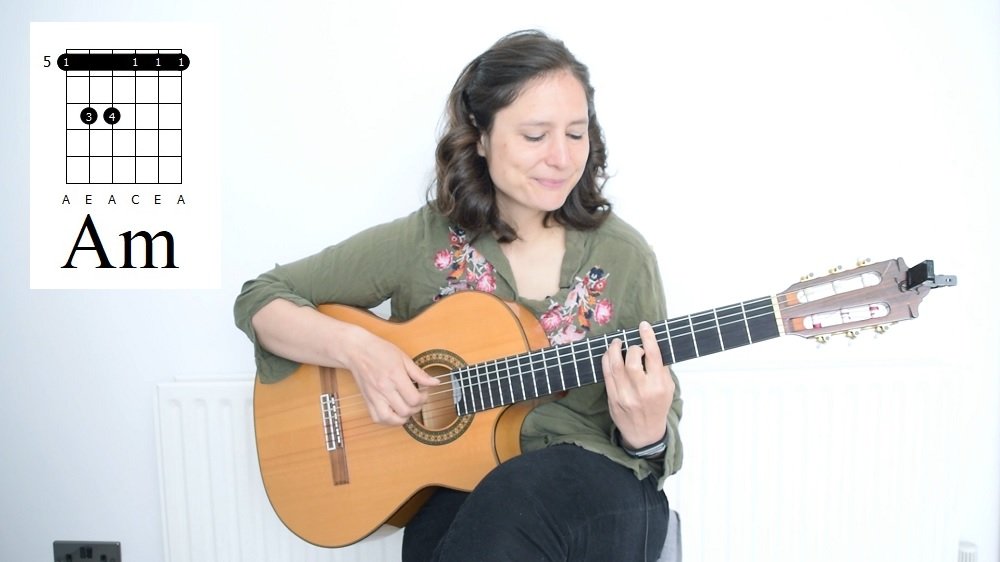
3. How to read TABs and chord diagrams: At first, let's learn
how to read the tab. Tab is like an ancient
way to notate the guitar. So it will have six
lines which represent the sixth strings
or upside down. So it's exactly
the opposite way, like it would be
from the guitar. Let go from the top and then
match it with the strings. The top string will be E, but this is the high E string, which is this one. And after we will have b, after we will have G, D, and a. And then now when
you're not there, denotes you do it on a VAE
that you just write down which strategy would denote
if you play an E minor chord. Do the same thing
like we did before. So we played the
strings one-by-one, then this will be 0, which means open 00. When you know that courts, you do exactly the same. So you notate them upside down, but not you, right? Or the frets down
in the same line. So it means that you need
to play them together. There are some
issues with the tab. For example, in the tab you wouldn't know how
to read a return. That's why most of the
books now they are not dating with tabs and
with music as well. So Dan, you can see bleach flat, you need to play exactly an oil. So what is dirty term? So you can read the
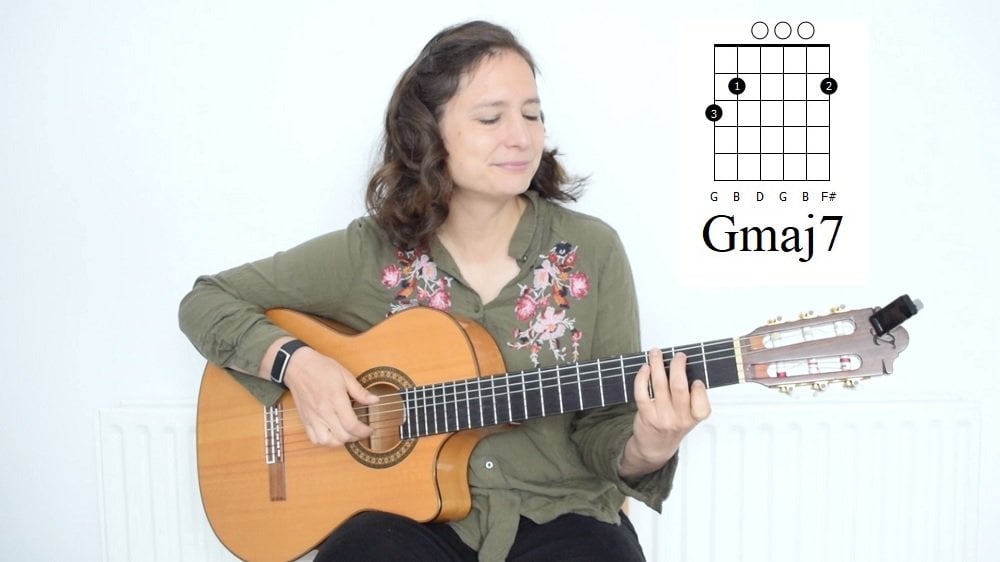
third on the bottom, but the return on the top. Now let's learn how you can read a chord diagram according the ground is notated
with the strings as well. But now we did not create
it from left to right. Left is the top of
the strings and right is the bottom
of the strings. When you play an open string, it just notated as a circle
outside of the core chart. And when you are
playing certain frets, then it is notated in the circuit inside the
court chart and it is also writing usually
ditch fingers you need to use to hold it. If you use your index finger, then it will be
notated with one. If it is middle to bring
three and lethal for, then you update a body. It will be a straight line and it will be very tended one, if you are not playing
from the top of the neck, but you are starting to play it, for example, from the fifth
flat and a major chord. Then you can see a number on
the court chart on the side. And then it will tell
you which fat you need to start holding
the position. Either the tab and
the chord diagram can be very useful to
learn the details. In this course, I'm going to
use both of them to help you to learn the songs and the exercises that I'm
going to give you. It can be a little bit of
practice to get into them, but after a while it will
become second nature and it can be a basis of your
future detailed cardiac. So it's good that you know both.
4. Learn Notes on the Guitar: To be able to play
any song that you want and any code that you want. It is important to
know the notes on the guitar or the
sequence of dynodes. Harmonic nodes exist
on the guitar. We have 12 notes and after
12 they will repeat. So they are actually in a cycle. And once the cycle finished, that is a new cycle coming up. And it means that those notes
will be one octave higher. Now let's see what
are those 12 nodes? It is like the ABC. So we have a, B, C, D, E, F, G, although
this is only seven. So we need to add some
more notes to this one. Because between some of these nodes that I
had an extra node, actually these nodes can
correlate to the frets. So in each single fat
that is a different node, when you are playing
different threats, it will mean that they
will be different nodes. Okay, so we know the
basic seven notes. Let's add the notes in-between. Now we can either raise this
node so it will be a sharp, or we can lower the next node. So it will be a flat after
a, that is a naught, which is called a
sharp or B flat. But for simplicity, we will just use in this course be flat. But these two are the same note in-between B and C.
That is no node. We just move forward. In-between C and D. We have C sharp or D flat. And after we have D, and after the we have
D-sharp in E-flat. Between E and F, that is no node. After F we have F
sharp or G flat. And after G we have
G sharp or a flat. And the next note will be a, which is one octave higher. It will be good to learn
the fret board and especially these notes in
the first three frets, so you can make up Court easier. Let's learn the strings. We have six strings, which will correlate
to six notes. These notes are LF, fan and don't kids grow big ear. So it is the G, B, E. The next thing that you can do, you can learn the
sequence starting from the E on the first three frets. Then you can use these to
locate every other node. So we have F, G, a, B, C, the b, c, d. You can play this scare
just with your thumb. It's the best specially
by newer starting out. And then you can just practice this shape
and this is oil. So the C major scale, because all of the
notes at home or not, so that is no raised or
lowered note inside.
5. Basic Major and Minor Chords on the first 3 frets: In this lesson,
we're going to learn the basic major chords on
the first three frets. And after we learned the basic minor chords on
the first three frets, going to look at it, which fingers you
need to use and what is the best
way to play them? Let's start with
a C major chord. I just wanted to say,
then you play a chord, tried to go like oil together to the court,
not one-by-one, because later on it has
top you to change quartz fast and you need to go sometimes very fast
to the next chord. So it's the best to practice
to arrive at the same time. Also, when you are
playing a chord, you are kind of trying to
be just behind the fret, but it's more
important to be just behind the fret in the bottom strings than
in the top strings. Not in the C major. You are playing on the a string, the third fret on the D string, second fret on the B
string, the first fat. It is sounding clean. But if you hear this, it means that it's not clean and you need to push a
little bit hard that, and then you need to
correct your position. Let's learn or next chord, which will be the a major chord. A major chord, you are holding the second fret of the D string, the G string and the Beast. Think also you at
holding with index, middle and ring finger. And you are a little bit curved. Try not to put your
thump to high. Try to place your thumb in
the middle of the back, and then you have a little bit
more space to move around. It is the same with
the C chord as well. You can hold a major
other ways as well. You can hold it with the middle
ring and little as well. Literally be quite
useful later on. Because if you push
forward this position, you can use your index
finger at the Hood body. Body just means that you use your index finger and you heard all of the
strings together. Then holding different
shapes on the guitar, you can get two different court. Now let's look at
our next chord, which is g. This could be one of the most difficult
Court toward you add holding on East drink sort fret, second fret on the a string. And you can hold the third
fret of the E string. So you can word in
other ways as well, the G major, for example, you can place your ink
finger to the third fret of the B string and your little finger to the
third fret of the E string. The same code, just
different versions of it. So you choose which fund
you are trying to hold. Again, everything is curved. And if you hear a doctor, you need to change your
position and correct it. Next major chord
will be E major. You add holding the second
fret of the a string, second fret of the D string, and first fret of the G string. It is middle finger
on the a string, ring finger on the D string, and index finger is
on the G string. Finally, our last chord via BD. You add holding the second
fret of the G string, third fret of the B string, second fret of the E
string in the bottom. And oil saw you are
holding with index finger first and off the ring
finger and middle finger. Now, let's look at
the minor chords. In the minor chords, you only need to learn
three petitions in the first three fats because the other positions
are not really used, so there is no point
to learn them and OS, so you can't really play
without an awkward position, all of them, but
all of the strings. Let's start with
the a minor chord. The a minor chord, VRB. You place your middle finger on the second fret of the D string. Your ring finger, the second
fret of the G string, and your index finger, the first fret of the B string. Next chord will be E minor. Placing your middle finger
on the second fret of the a string and link finger to the second fret
of the D string. Finally, we have
the D minor chord. In this case, you are
holding middle finger, second fret of the G string. Third fret with the ring
finger on the B string, and first fret with the index
finger on the E string.
7. Etude 1 - Learn the fingerpicking technique: In E2 advance, the only
used three chords, which was a minor, C major, E minor. Now when you have
changing between chords, at first we are changing
between the minor to C major. And this is very
easy because you don't have to move
all of the fingers, but just your ring finger. And then you can get
to a different chord. And of course you need to
move up getting venue at changing to the E minor chord. Then you are picking
in this song, you are using your thump
to add the bass notes. You are kind of picking
a day from the guitar. And with the other three
fingers you just picking on. Also when you finish
one part of the song, you pick with everything. It just means that
you picked with the top and all the
other fingers together.
9. Etude 2 - Learn the fingerpicking technique: In method two, we actually have a different time
signature, which is 34. It means that you
have less notes or you play less
strong in one bar. The technique is quite
similar like the one before. When you play the bass, you play with your thump. And after you use your other three fingers to
play with the other strings. Except now we have
like a walking bass, which means that
you play one thump on the a string and one
thump on the E string. And it works in the
other part as well. So we started to introduce
our first penn jaws, which means that we play the thump and the ring
finger together at first. We will use the middle and
index finger to play up.
11. Etude 3 - Learn the fingerpicking technique: In ETO tree introducing some new techniques to
practice or finger picking. And this will be an
alternate picking between the index
and middle finger. This is how you
play the melodies. You play steer the bass
notes with the term. But everything else we do, index and middle finger in
some parts of the song. Once you go to the a minor, then you will need to use
a like a mixed technique. And this will be adding this kind of like
soloing technique, but also adding some arpeggios because you are
changing in the middle. After you change two arpeggios on the D as well, I added a little bit
different technique, and it is also called tremolo, which means that you play the
bass with your tamp and you play three notes with the
ring, middle, index finger. And the middle finger. You use on the B string.
13. Etude 4 - Learn the fingerpicking technique: In attitude for we actually
introduced few new things. One was the triplets. Now instead of playing one note per beat or two notes per beat, we are playing three
notes per beat. You can easily practice your
triplets with a metronome, or you have to do is put your
metronome up to one speed. And after clapping
Three claps per beat. Then you have some breaks
between the three plots. So sunlight, it means
that you are not on time. You shouldn't have any breaks. Everything needs to be
like a constant beat. That's when you know that
you are definitely on time. The other thing that we
introduced here is using the little finger separate
live and we add an extra node. We actually had
an E minor chord. We audit the little finger
to add the cex random water. And it is great
that you can start practicing with your
little finger because you need to strengthen
it to be able to play more complicated
songs later on.
15. Etude 5 - Learn the fingerpicking technique: At five was a little bit complicated because
of the rhythm as well, because he started to
introduce like Hoffa nodes, which means that there
were two beeps on each of the node that you played
because they lasted longer, because 1.5 and worthless
for two quarter notes and all the metronome beeps
are set to a quarter note. Otherwise it was just G, C minor, D major.
17. Etude 6 - Learn the fingerpicking technique: It took six was actually
the hardest exercise because you have to switch
between courts so quickly. Even for me, it was
quite tiring to go really quickly from one
chord to another one. But this will be very useful
when you are learning songs later on because you
need to change courts quickly. The other thing is there
were some rhythm changes as well inside the
song. In the end. 12121231, that will be a change between a triplet and 2 eighth notes. So again, you can
practice this with a metronome just to clap
between twos and threes. And then you can be more ON time when you're playing
it on the guitar. 1212123112121231. Also, when you are playing this, you will actually add a
bass note and two melodies. The two melodies you
can either play it with your middle and index
finger and middle finger. It is actually your choice which one you use to play this melody. And when I was playing it, I was actually
switching them around. So once I use this and the
other time I use that one, I hope you enjoyed
this exercise. And let's move on
to the next section and let's learn about
the core charts.
18. Learn the Basic Strumming Techniques: Let's learn some basic
strumming patterns. Before we do that one, we need to learn about
time signatures. There are some songs which
has a pause of four. There are some songs
which has a pose of three or two or any other posts. And it just means that the time signature
is ADR for four. We have four beats in each bar. And then they have
straightforward, which means we have
three beats in each bar. And we have, for example, two for when we have
to beat on each bar. Four could be Twinkle,
Twinkle Little Star. Because when you play this song, you can count 121212. And it will go with the song. It will be bond, bond, bond. When you play 34, then the pose of the song
is this kind of walls boys. And then it via worked
with 123123123, for example, this Mexico
and traditional song called CLA tolling though
is 1231231231231. G button, button. 12344 is the most common. Actually most of the
pop rock songs at in 44 and some traditional songs as VAB venue and
learning some songs, especially I think you start
with pop or rock songs. Then you use this kind
of strumming patterns. In 44, you can count until four. For example, that
is Ginkgo bars, which is in 4434341234. Let's have a look how you can strum when you are
streaming on the guitar. It doesn't matter if it is
an Ireland steel string. It is a kind of a same
technique that you need to use. Don't use the Arm. A lot of people at the beginning they're
using the arm too strong. But this is more from
the police and it is more like little movements because if you
strong from the arm, it is just so tiring and
you won't be able to go fast in some of the
songs venue out of strumming it actually
when you go down, use your finger in the US
and you go all the way down. And then you go up. You can either use
your index finger and the skin or the index and
middle finger and the skin. You can just use your
thumbnail venues from. Now let's learn some
strumming in for four. And after we will learn some
strumming in 34 as well. Then your thrombin for, for the song pose
is in fourth beat. And these four beats usually correlates with quarter notes. Now, let's make a little bit
more detailed or strumming, because you are not just strum slowly on the beat of the song, but you add some more strands. Let spot eight nodes. So it means that we will have eight Trump's
within Bombay. Let's learn how to con this. We can count the four
beats like 1234. But because we added the eighth note with the
current like this, 1234. Now the first exercise will be that you can just store
it an easy court, for example, an E minor chord. Then we put or metronome one. And then we will just
thrown down with all of the aid beats 1234. And the next step of this exercise via a bead
that we were strong, Dan. And when we add the offbeat, then we start to strum up, down, up, down, up. The 1234. In the next step, we're going to add
an accent so it will sound a little bit more
dynamic when we are strumming. When we have the oxidant, we can just start to
stretch a tiny bit louder and everything else
a little bit more quiet. And then we add the oxygen. We don't throw them up, we just thrown down. So it will be 12341234. Now, I'll show you three strumming
patterns when you skip straps on the beat. And this will make your
strumming really, really nice. So at first videos keep
this Trump's on the three. So it will be 1234. And now let's keep this Trump's on the three
and the fourth beat as well. And video only strum
on beat 12341234 and the final strumming pattern in 44. We skip the strong on the
two and the three as well. Everywhere else you, this term. Let's learn some
strumming patterns in 34, because I'm pretty sure
you will find songs which are in 34 and
that you want to learn only comment on
tier three at this point. So it will be 123. And again, the, the strong
on the eight nodes. And then we count
the numbers we go down when we add
offbeat VBA go up. But the first step, we will just do the
dance thrumming. So it will be six thrumming
each time the bar. The next step there'll
be the same again. So we built out the
accent on the one and then the du and down, up, down, up, strumming
on the two and the three. Finally the best
skip some strong. So at first we are
going to skip the two. So it will be done up, up, down or the final strong
that we are going to learn. We'll be skipping
the two industry. So it will be done up, up, up.
19. Learn the Chord Charts: What is a chord chart? A core chart is a
chord progression or a sequence of the
courts and which is indicating card the
song is played. Actually when you
are playing songs, you can see all these
letters, a, b, c, d, e, f, g, or flat or sharp. And also you can see
sometimes numbers or other symbols which will indicate what court
you need to use. Usually when you are playing
a chord chart in bombard, it will be just one quart. And after in the second bar
that will be the next chord. But sometimes that are
core change in Bombay. So let's have a look at one core chart that
I made up for you. And then they can play together. By the way, this
will be amazingly useful for your
future music cardiac, every single professional
media chance or using core charts, especially if you plan to
play in some cover bands, then it will be very
useful to be able to read this and play
it straight away. So that's why in this course I'm going to make for you a
lot of different types of core charts when I introduce some new courts and you can
practice your knowledge.
22. Ear training game: major or minor chord?: Now we're going to play a game. For this game, you
need to use your ear. In this game, you
need to recognize the major and minor chords. What will happen
that I'm going to play you three different courts, which will be either
major or minor mode. And you need to
guess what was it? How to recognize a
major or minor chord? Major courts are all the sand, happy by minor chord sound said, for example, let's play
an, a major chord. Sounded very happy. But when I play an, a minor chord, the son said, it is the same with
other courts as well. So if I play an E
major, sounds happy. Song instead. Now without further ado, let's start or ear
training game. And you can guess what courts I played as well if you want to, or you can just guess if it
was a major or minor chord. This was major because
I played C major, E major and a major. Let's go to our next game. This was major again
because I play D major, a major, and E major. Next game. Now this was mine because
I played D minor, E minor, an AMI node. Next minute again, because I played E minor
minor and D minor. Next. This first major, because
I played G major, D major, E major. Next. This was minor because I played a minor, D minor, and E minor. Next. This was major again because I played C major, E major and G major. And the final game. Finally, this was a major again, because I played a major, D major, and C Major. I hope you enjoyed
this game and OS saw the liter songs and
exercises that I included. And you become a better guitar is playing and changing
courts easier. If you like this course, please leave me a review
because it will greatly help other people find it
and sign up for my course. Thank you again for
joining this course and see you may be
in another course.
23. Outro: Thank you so much for signing up for my course and completing it. If you enjoyed it, why not
check out my other courses? I have spent his guitar
strumming techniques, if you would like to learn
hard to strong like a pro and hard to strong
in Spanish guitar style. And it has 19 different lessons and the loads of exercises. You can go ahead and
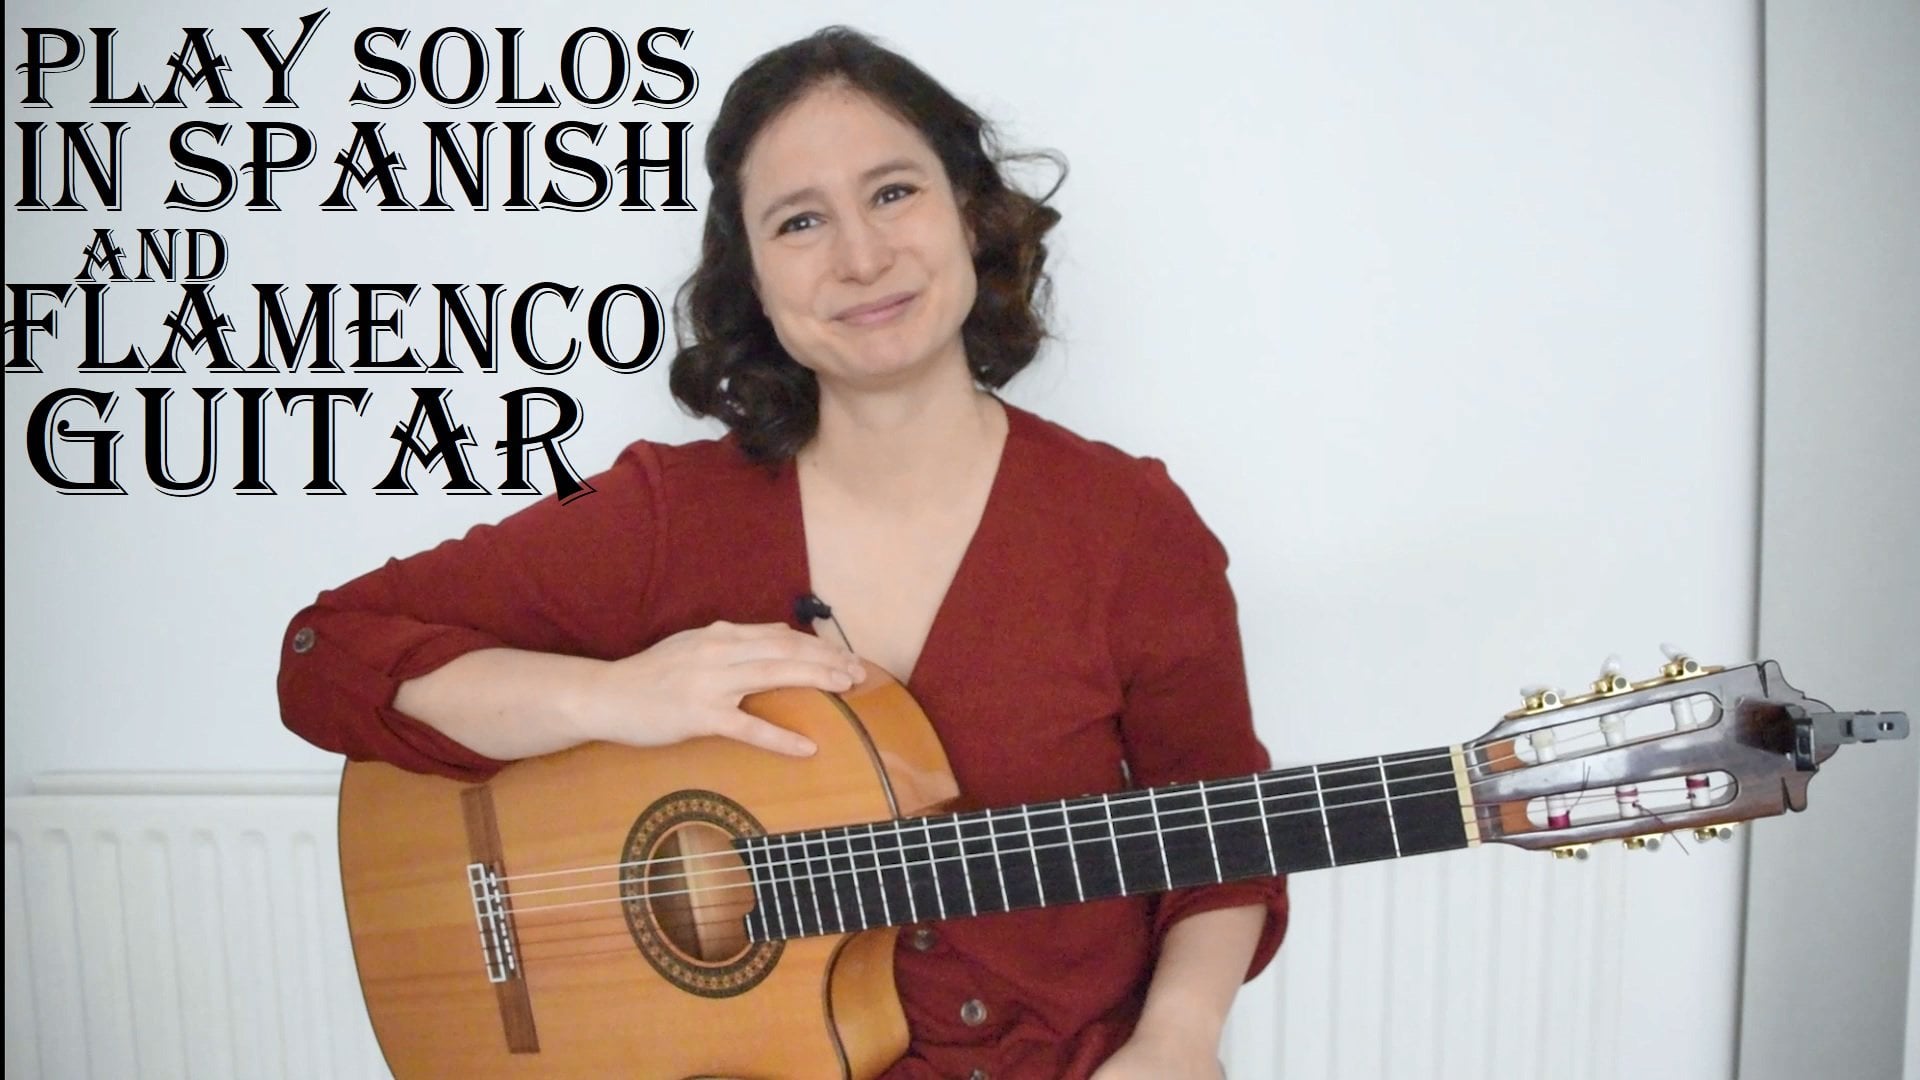
check out that course. Or you can also sign up for play solos in Spanish and
flamenco guitar that you are going to learn how
to play a lead guitar in a Spanish style and
hard to improvise, learned skills and hard to
sound good using the skills. I will also provide you with a lot of backing track so you can try out your newly
learned knowledge too. Finally, I have a
course which is called learn to read return from
beginner to mastery. In this course, you're
going to learn in seven different levers and
14 different exercises. Hard to read return. And you are going to clap
with me with the metronome. And this will be so useful for
your future music cardiac, because the more returns
you ought to your playing, the better the sound and the more songs you can
learn later on as well. And 34, Yvonne, eat, repolarize. So please check out my other courses and if
you enjoyed this course, please leave me a review. It will be greatly
appreciated and I'm working on other
parts of this course. So checkout the space later
on for the other parts.
 Edina Balczó, Award-winning Guitarist