Transcripts
1. Welcome! Let me show you what you will learn in this Notion Course: Hello and welcome to the Notion
all on one master class. I'm super happy to have you
here because we have a course packed full of information
to do anything possible. Turning you from a notion
beginner into a notion masser. My name is Fred and I'm
a notion trainer since a couple of years
and I've released more than 30 different
notion templates. Many of them were recognized by the notion official
template gallery. And with that experience, I want to give you the
best possible notion. Quick start guide.
First things first, let's talk about
notion and how it revolutionized the
productivity landscape. And for that, I want
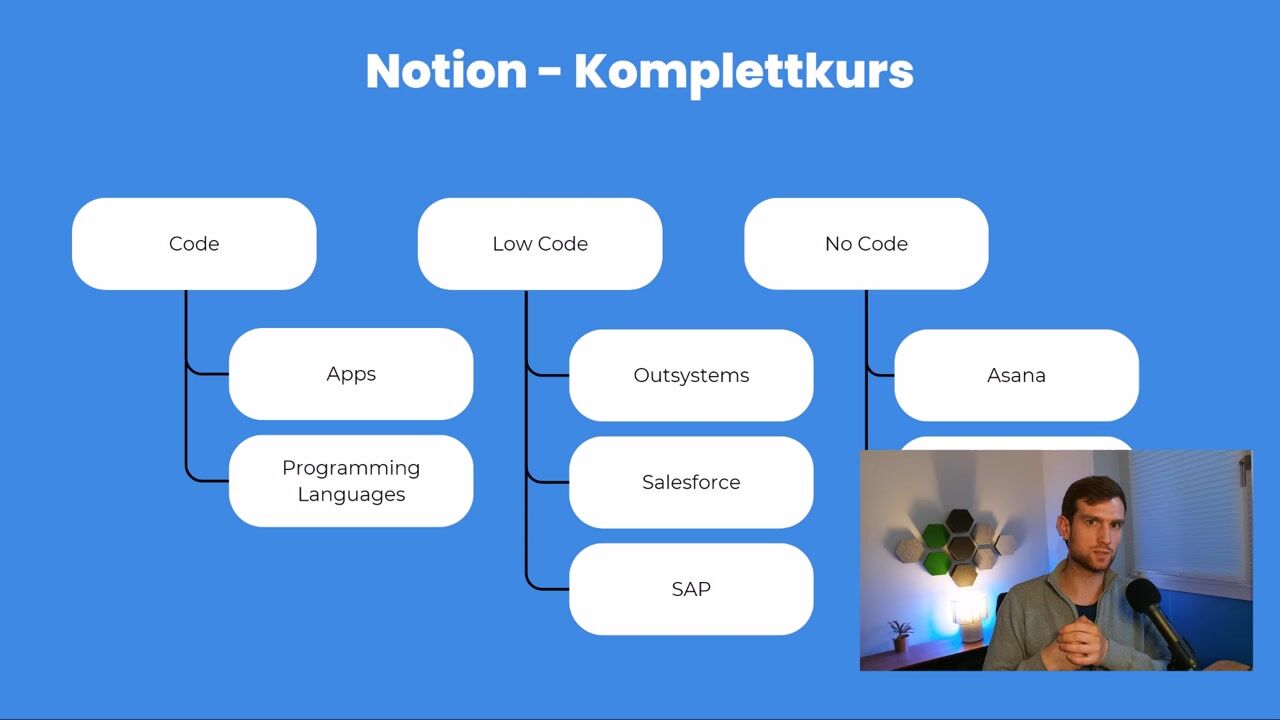
you to understand, read general categories
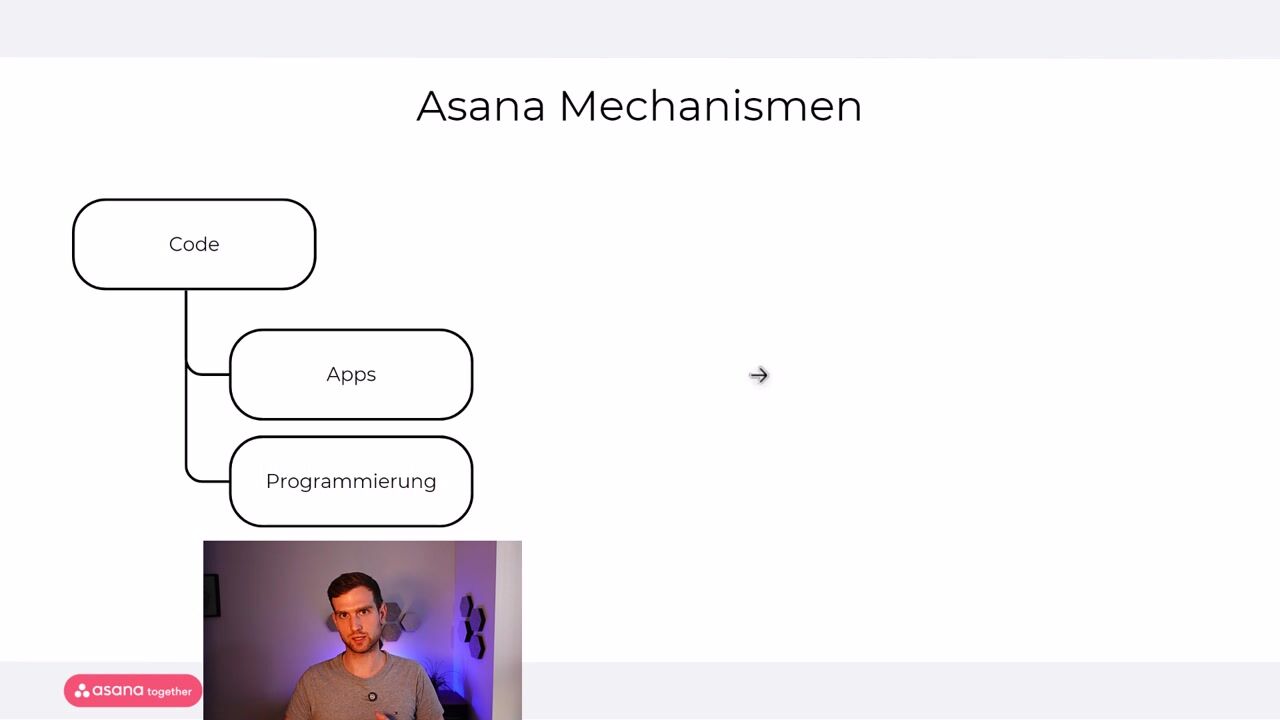
of applications. Number one is
traditional coding. Traditional coding,
you might know, for example, programming
languages like HTML or Python. Which means you can design your very own application and it will do exactly
what you need. It comes, however, with the downside that you either need to know a program language, it will take a lot of time to design the
application that you need, or you will need to hire someone who is able
to do that for you. Typically, this is
nothing to really start off casually with more, something for large
scale corporations, something that requires
less resources is low code. Examples for low
code applications are out system,
Salesforce and SAP. You can start with
them out of the box, but usually they would come with a consulting services
consulting agreement, which means they will adapt
the solution for you. It requires not really
deprogramming skills, but you still need
someone or you need the expertise to adapt the
tool to your personal needs. And the last category, which is where notion
fits into, is no code. Nodes, as the name suggests, means you do not need
any line of code to operationalize your
processes in a tool. Typical examples are Asana, Mandate.com and
of course Notion, which is what we are
going to talk about. These are very flexible. They come out of the box as
a fully operational tool. You can build them as you go. And building means really
like a Lego system. Lego bricks where you
have different modules that you assemble and
adjust to your needs. And whenever you feel now
that doesn't fit quite well, you just reassemble your
complete system as you need. The pro side is no code doesn't
require any upfront cost. They are typically very cheap. But of course you
need to go with what the programmers give you. Notion is a very versatile
tool but still of course limited to what is possible in the tool,
if that makes sense. So in a nutshell, notion is a comprehensive productivity and
collaboration platform that allows you to take notes, organize information
projects or tasks. And also to foster
team collaboration, which is particularly
of interest. If, for example, you're
working with a lot of clients or a larger team, or different suppliers
and you need to have a way to work asynchronous
on a project. So that means across different time zones or
different locations. So this is where you would want to look into notion because it really is a system that
structures information. So you put in a lot
of information, you can structure it in
notion and as an output, you structure them into project, into a Kisor knowledge
data bank or in a process, making sure that information that you repetitively
need or that a larger audience need access to is organized in a
central system. Whenever you think about notion, I want you to think of a tool where you can create
your very own system. You can either create your
very own website, a wiki, which is what I talked
about or referred to when I said this is
a data repository, a customer relations
management system, an enterprise resource
planning system, budget plan, goal plan database. So as you can see, there are dozens of different use cases. And for sure you
will have your very own or you will
identify your very own. You can use Notion as an individual contributor
for your personal hobby or personal life organization or as a large corporation organizing information. And that's
the beauty of it. Now, with all these functions
and options in mind, how will I turn you in it
to a true notion, master? We will do that in this course step by
step and bit for bit. In part number one
of this course, I will teach you
all the functions, all the basic
functionalities of notion. I want you to know notion
in and out part two. We take this a bit further
and talk about customization. In this module, we will talk
about formulas for example. And in Partnerber three, which
is my personal favorite, we talk about practical
applications. So I will show you
real life examples, for example Mclein's or my very own consulting
work where I'm using notion to
manage and organize information projects and tasks. Keep an eye particular on this partnerer three
because it will grow over time as I'm adding the cases frequently and also offer
you free templates for that. That being said, pack your bags. Your journey starts right now. Whenever you have a question, feel free to reach out to me. In the next module, I will show you how you can
interact with me And with that in mind, I wish you pleasant experience. I wish you lots of success and
enjoy the process. Cheers.
2. Create your Notion Account and select the right subscription!: Hello. Hello and welcome
back to this course. In today's, in today's lecture, we are going to talk about
not account creation. In this module we will
talk about how to create an account with
notion as a foundation. We are also talking about the
different pricing options in so that you understand
which account to choose from. For that, we will start on the Notion website.
Let's jump over, here we are on the
Notion website, you will find it under
notion dot product or simply notion dots. On the notion website,
you will find all the information
around notion. But we want to first understand which
account to choose from. We have three different options. One of it is three, the
other one a page options. The good news here is 90% of what you can
do notion is free. This is also why love Notion. If we score down, you
will see the comparison between those plans
as you can see. As you can see, notion free is recommended for
individual contributors. As soon as you're
working with a team, I would recommend to go with
a plus or business option Y. Because you're unlimited
for individuals, but you have limited block trial for you have a limited block
trial for two plus members. What does that mean?
What does that mean? As soon as you're going
to share your work, which is obviously what you
want to do when you're using not with more than two persons, then you will be very quickly limited in terms of the amount of pages that
you can share with others. In a nutshell, if you want to go and try out notion as a team, then I would go with a
plus or business option. If you're using notion for
yourself to start off with, then you can definitely
use the free option. Another limitation
is the file uploads. The free version, you can
upload up to 5 megabytes. That's perfectly suitable for documents and small attachments, but of course doesn't
work if you're uploading tons of
gigabytes of data, like video files
or anything else. This might be the
other point where you want to choose the plus
version over the free version. The page history, like the
audit history, the audit, all the changes
that were made to the page can be
viewed seven days in the free version versus 30 days in the plus version and 90
days in the business version. If you're using it
just for yourself, then seven days might
be more than perfect. If you're using it in a team
where multiple people are working on the same page and things might be
deleted accidentally, then you would want
to definitely look at the 30 or 90 days
option page analytics. Again, something
that is not such, again, something that's
not of huge relevance. Or if you're using notion
just for yourself. If you're using it
as a wider team, then you might want to
know how much access and traffic you have on
your individual pages to optimize those that have exceptionally
huge traffic or your users. Apart from that you
will find a limit in. Apart from that you will find a limit on the free version. When it comes to site domains, you can use Notion as a website. You might want to look
into custom domains if you're using it as
corporation or as a wider team. If you're just using
it for yourself, then you will be perfectly
fine with the notion domain. Other things that differentiate the versions are team spaces, so you can create private
spaces that are not shared with everyone in the business and
enterprise version, which you can do in the
free and plus version. We'll come to that
when we talk about permissions and also automation. Notion offers in house
automations on databases means you can set up routines and processes
in Notion directly. In the free version you're a
bit limited on that account. We will talk about
this when we talk about automations in general. This will visualize what
we're talking about. We have another
slide limitation in the free version when we
talk about sync databases. Databases means that you're administrating
just one database, but it will be updated in various other databases as well. So we can and connect data bases with each other
where you're limited on the free version to only
one database and unlimited in the and business version of not everything else doesn't
play too much of a role. If you ask me something
else that you might want to be aware of is the
admin and security part. When you go for the
enterprise version, of course you can integrate notion into your corporate
security landscape. That means security settings
such as single sign on and much more is possible
in the enterprise version. But this is really
just relevant if you're working in large
scale corporation. Last but not least,
you have, of course, priority support if
you're on a paid plan. As you're on a free plan. To summarize, in
9% of the cases, the free version is more
than good enough because you can start off with
all the functions and you can expand as you go. Usually if you're on a
small team or just want to opt into notion to see if that's a viable solution for a team. Again, the free version
might be completely enough. I would recommend anyone, I would recommend, in general, everyone to go and start with a free version as you
can upgrade later on if you find the limitations on the free
plan limiting for your need. As we have discovered the different plans and decided
to go for the free plan, let's log in or create
an account respectively. In order to get an account
we click on Get notion free. This will populate
our login screen. We can sign up with
our work email address with a general e mail address. We can also sign up with a Google account or
an Apple account. Once I added my e mail address, I will click
Continue with Email, and I will get a temporary
login code in my inbox, which I then can start
off and log in to. I will paste the
login code here and then click on Continue
With Login Code. I would continue pasting my work email address here and click on
Continue With Email. I will get a temporary
login code where, which I can retrieve
from my e mail inbox. And I would paste the login code here and click on
Continue with login Code. After having clicked
on Create an account, I can add a photo if I want to. I can add my name
and set a password. Afterwards, I can decide whether I agree to
Notion sending me marketing communications
about Notion to my email inbox if
I do not want to. After that I can
either add a photo, give me a name like my username, and I can select a password. I can make a decision on
whether I agree to Notion sending me marketing communications
about Notion or not. Then I can click Continue. Afterwards, I can decide on whether I want to
use notion for my team, personal use, or for school. I will select personal,
click continue. That's it. Now I'm a notion and this is my start
screen for notion. In this lecture, you learn about which account
might be usable. In this lecture, you learn about which account plan is the best
choice to start off with. And you learned also how to set up your account
appropriately.
3. Quickstart guide - learn the Notion essentials in 180 seconds: Welcome back to this course. In this lecture,
I'm going to give you a very high level
quick start guide, which is by no means
a replacement of any function that
we are going to dive deeper on later stage. This is purely tended If
you're short on time, time is a constraint
and you want to kick things off right now. So let's jump into it. This is our welcome screen after we have created
our workspace. Means our account with no ship core thing here is to remember
that notion isn't too different to any other
text processing program that you might be aware of
from all day life like Word. The core feature or the
primary purpose of notion is of course to record
and share information. I text information, we start a new line by clicking
anywhere into the document. And then we start writing
what we need to write. We add a space or go into the next line
by pressing answer. Hence, we are in the next
line. And that's it. Of course, you don't want
to have all plain text. You also want to
format your text. And this can be done by
simply highlighting the text. And then a new context menu
opens up in the context menu. You can do everything that
you can also do inside Word. For example, adding bold, italic, or underlining format. You can change the text
size by clicking on text. There you will have
different text styles like a heading text, you can change it to the
bullet list or to do list whatever is
required right now. Next thing to remember
if you're short on time is that you can add different
elements to your document. An element or called block in notion is anything beyond text. Let's open up the Context
menu to see what I mean. I go into the next line and open the Context menu by
adding the command. Here you will find all the
basic and advanced blocks that you have available in notion
elements that you can add. You can add, for example,
again list a table, a heading, a numbered list. Just go through the entire list of things that you can add. And of course you can
add media files as well. Now if you're not too certain or don't want to scroll
all the way down, you can also simply search for the element that
you want to add. For example, if I
want to add an image, I simply enter
Image and it's auto populating me the
suggestion image. Now I click on Image
and it is asking me whether I want to
add a stock photo, whether I want to add a
link from another webpage, or whether I want to
upload my very own bi. Just remember maximum file size in the free plant
is five megabyte. Next thing to
remember is that on the left hand side we
have our navigation menu. In the navigation menu
we find our search. We'll find all the
notifications if anyone is pinging us inside Notion
and waiting for an edit. For example, we'll find
our settings where we can also change notion from
light to dark mode. Again, I will show you
more in detail later on and you will find the
hierarchy of all your documents. Now in ocean you have documents, but these documents can
also be file drives. Imagine you pair word
with the Explorer. If you want to change the
location of a document, you simply can drag and drop
it into another document. In that very moment, you see
quick note appeared here. That means quick node now lives on the
Getting Started page. If you want to see all the pages that are on another page, then simply click on
this toggle and you find all the documents that
live on this specific page. If you accidentally deleted a web page and you
want to recover it, just go to trash there, you will find all
the deleted pages from the past seven days. On the right hand side, you have the sharing
capability of notion. If you click on Share, you
can either invite someone with an e mail address to give exclusive access
to your document, or alternatively, you can
publish your page to the web. That means everyone with this link has now unlimited
access to your web page. You can limit access by
using one of these toggles, but unless I unpublish
my web page, it is visible to
anyone with the link. So be careful if you have confidential information on your web page, that's
it for the moment. As promised, rest
assured we will go through each of these
settings individually, step by step, so not missing out on anything that
I've showed right now. So stay tuned and I'll see
you in the next lecture.
4. Where is what in Notion? Navigate with confidence: Hello and welcome
back to this course. In this lecture, we're going
to talk about navigation and the notion user interface.
Why is that relevant? Well, for first time users, it might be a bit
overwhelming to see the notion interface and to
understand how it works. Let's jump over into notion. Here we are, back into our
newly created workspace. First things first notion is organized in so called pages. Pages are actually documents. Documents in turn are
similar to files in Word. Just imagine every page is equal to document
equal to file. The main difference between
word and notion though, is you do not have to
save any of your work. Because as long
as you're online, all the files are
automatically saved. Which is great because as
long as you're online, you cannot lose any information. This is the main
section in which we are going to type out information
or reading information. Now on the left hand side, you will find the
navigation bar. In the navigation bar, you will find all the different settings, documents and connected apps. Starting out with the pages, I told you every page is equal to document and every
document is equal to file. More or less, put things simple, so that means you will see all of your documents
on the left hand side. Every page here is a document. The big difference
now to word is that you can combine
documents into each other. You can build a registry
of multiple documents. Just imagine, I want to have a high level document
which is the man hub. In the information
hub, I want to have all the other links to
the other documents and I can simply drag and drop the other pages
into my notion hub. What has happened?
As you can see, we have arranged
all the documents under our central document hub. This way we also created
links in our main document. We have moved the location of these pages into
the central page. This way we can organize
links and information, cluster them like
topics or chapters, which makes it easier for users to interact
with the information. Of course, you can consolidate the page content by clicking on this arrow and you can unfold it again by again
pressing on the error. This way you can always
easily identify which pages are stored on
your main hub page. What else can we do on
this navigation bar? Well, first of all, we
see our account name. We can identify if
we are, for example, in our own workspace or in
someone else's workspace. Here you would see
other workspaces. Next up, we have the search bar. The search bar searches
through everything in notion, but not only the pages, the page content, but
also the meta data. For example, if
you're looking for something that was created
at a specific point in time, like a date that is located
somewhere specific, or you might not remember
any of the media data, you just remember who
created the page. You can search for all of that inside your workspace,
that's super handy, and you can turn on all
the filters in here, or you simply add your
search into the search bar. Next up you have an inbox notion is quite a collaborative tool. That means it's intended
to work with others, with team members, clients, suppliers, whoever
on your workspace. That means you can
split up parts of your work where others can
comment or add information. In some occasions you
would like to get a notification on the
work others have done, so you're not missing
out on information whenever someone is working
on one of your pages, pages that you own or
that you have created, or if someone is
tagging you in a page, and I will show you
later on how to do that, you will be notified
in your inbox, so all the notifications will
be centrally stored here. Next up, you have
the setting page. On the settings page,
you have a multitude of different options to choose from to customize your account. We'll go through each of the
settings in a later video. Just remember, this
is the central place to administrate members
of your account, guests on your account. The appearance of
not notification, settings, billing,
everything that's related to your account. You will find here. Next up you can also create a new page. This is a dedicated button
for it to create a new page. If I do that, it will create an untitled page
and a pop up field. But I can also enlarge it to full screen. Let's
go full screen. I just call it test. As you can see, it
created a new page. We can also add a page down
here as a separate option. Next up, you will find
the Notion Calendar. The Notion Calendar is a central calendar
to manage all of your deadlines and dates that you have stored
inside your notion. We will go over the
notion calendar, more detailed in a
separate lecture. Below that you can
create a team space. Team space is a dedicated area where you can invite parts of your team or
your entire team into it. The pages in the team space are available to
the members only. That means you can have in
your workspace 100 members, but invite into your team
space five members only. Below that, you
will find templates as it's sometimes very daunting to create a whole
new notion page on your own, you will find hundreds
of templates to choose from various
different use cases. Again, templates
is an own story, which we're going to talk
about in a later video. You also have an import
function which is here. The import function
helps you to migrate your data from other databases
or documents into Notion. And finally, we have the trash. The trash is maybe the single most
important feature in notion because in particular, if you collaborate with
several other people, it might happen that either intentionally or
unintentionally, data gets lost. The trash is where you want
to check if you miss out. On a page on the
right hand side, you will find sharing settings. Every page in notion
can be shared. These permissions
are on a page level. That means you're not going to share your entire workspace. If you share a page, you have two options
here to choose from. You can invite people or
you can share entire link. Again, this is a
feature that we're going to talk about
in a later video. Next up, you will find
the common section. Here you will find
all the information or comments that others
have done on your page. You will also find
an update section. Here you find all
the trailing updates for the past seven days. If you're on the
free version, if you have upgrade
to other versions, it might be 30 or even 90 days of history
that you can see. You can favorite a
page, for example. If it's a central
element of your work, you need to view it
on a daily basis. Then you can kind of bookmark
or favor this page with the star on the very right. You will have style
export and more. Here you can adjust for yourself how you would
like notion to appear. For example, you can
change the font. The text can decide whether you want to use a
full width of the page. You can lock a page for edits, you can turn it into
a Wiki duplicate, delete a lot of customizations that you can add to a page. Also, you can add connections. Connections are
external applications to which you can
link your page to. Again, all of these will be
subject to a later video. In this lecture,
we have discovered the most essential
features of notion, the core structure of
the user interface. In the next lectures,
we're going to dive deeper on each of
these sections.
5. What is a Notion block?: Welcome back. In this lecture, we're going to talk
about notion blocks. Why they here, how to use them, how to transform them.
Let's kick things off. When you start using notion, you might encounter
the term blocks and wonder, why do
you need to care? Well, because notion is
organized in blocks. A block is nothing else
but an element on a page. Imagine a word document
where you got a heading, where you got an image,
where you got text. All of these are
blocks in notion. If you look at this image, you can see that the heading, the text, the video embed, as well as the
database is a block. Everything is a block.
And you can compare a block a bit like a
set of Lego bricks. You assemble the
Lego bricks as you wish to create the
sculpture that you want. Once you feel, no, I don't want to have
it like this anymore, I want to rebuild it,
You just rebuild it? Similar concept applies to not. If you say I want this heading to go
here, you just do that. If you think this notion
heading should go here, you simply do that by drinking
and dropping it around. Same with images. This is
one of the key features in notion versus other tools like Microsoft Word,
in my opinion. Because if you ever tried to move an image around
in a Word document, you might mess up
with the Ormat, which isn't the case with n. That's a big perk in my opinion. Let's jump over into
notion and explore the first set of basic blocks
in my Notion workspace. I'm going to create a new
page by clicking on you page. I will give it a title
saying Basic blocks. I press Enter to jump
into the first row. Now I'm presented
with an empty page and I want to fill
it with information. But I want to not only add text, I also want to add
a heading first. How do I do that? By opening up the block menu
with a command. By doing that, a context
menu is opening up. It's offering me all
the basic blocks that I can leverage in Notion. First basic block
is text. Let's add. You see nothing has changed
because the default block that you're adding in
notion is the text block. A text block works like this. You start simply writing
down what you need to. You go into new line
by pressing Enter and you go into next line,
and so on and so forth. Now as you can see, if I'm hovering over the lines, you see I have this
drag and drop. I can hear that
means I can drag and drop around this line of text to the position
that I want to. It's either at the
end of the document, right in the middle,
or even next to it. So I'm creating two columns
of text so to speak. But going back to the text, I can either just move
one line around or I can mark multiple lines and move them all around at
once. It's that simple. Instead of marking everything, copy and pasting around to
change the position of text, you simply drag and drop it. That's the beauty of notion. Next I want is
potentially a heading. And if I scroll down, you see I'm now jumping over
two other basic blocks. But no worries. We're going to talk about all basic blocks. I just want to make sense of them and cluster
them together so that we talk about them in the appropriate amount
of detail and time. If I want to give
my text a heading, I can do that by clicking
on heading one heading, one is formatting it
according to a heading. And I say, for example, this is the introduction. Again, I will move it around by simply pushing it
to the beginning. Then I might add
additional texts, and I want to give
it another heading, one saying this is chapter one. Now I might want to structure my text a bit more because I might have not only heading
one type of sections, I might also want to
go into more detail. Let's say I have additional
material to chapter one and I want to cluster it
as Chapter 1.1 or one. I select heading number two, I will name it Chapter 1.1 If I have no multiple lines of text and I need
to scroll a lot, I want to find an easier way
to navigate through my text. Obviously, what I can do then is I add another
line of text, go to the command, and scroll down to
advanced blocks. Advanced blocks is nothing we are going to talk
about too much. Right now is just one thing I want to show you out of
the advanced blocks, which is the table of contents. As you can see, it has
created a table of contents based on the hierarchy of headings that we have chosen. As you can see, my both heading one style headings
are in the hierarchy. One of the first, Chapter
1.1 which is heading two, is dented into heading one. I could also add
a heading three. Let's say this is Chapter 111. As you can see, it has created this
hierarchical structure. And I can of course add
even more text if I want. I can add a divider simply to visually divide
sections by each other. That's a nice thing to style
your page if you want. That's of course not necessary. It doesn't have any impact on
other formatting settings. It's just a styling element. If you want to
also this divider, I can move around by
dragging and dropping. Now, what if I want to change the look and feel of a text
and want to turn it into, for example, a heading? This is also super easy. I'm just highlighting the
respective text passage. Click on this, pop a
menu where it says text and select the respective
block I wanted to turn in. Let's say I want to turn
it into heading two. I just do that by
clicking on heading two. And this way it transforms
to heading two. If I want to transform
it back to a text again, I will simply
highlight the text. Go on the pop up menu
and select text. This way it's formatted
back to text. As you can see, the concept
of basic blocks makes sense. It's super easy and convenient
to move things around, to convert them
into other blocks, and to structure information. The key thing to
remember here is that everything is
oranized in blocks. Formatting isn't
really an issue, nothing to really worry about. You can rearrange your blocks
whenever you want to stay tuned for the next
lectures where you're going to talk about
more basic blocks.
6. Create simple lists and toggles in Notion: Hello and welcome
back to the course. In this lecture,
we're going to talk about more basic
blocks in notion. Where we're going to build up on the last video
where we talked about how to create basic blocks and what the concept of blocks
in notion is about. So let's jump over
into Notion and we are back into our
basic block age. As mentioned, this
lecture will be all things lists in notion. And the beauty in notion apart from the basic block
methodology and concept is also to create visually appealing lists
and structure data. That's really a powerful perk
that we got with notion. In this lecture, I'm
going to show you how by pressing the command, we open up our context
menu of basic blocks. As you can see, we have plenty
of choices to choose from. When we talk about lists,
we have to do list, a bullet list, a numbered
list, and a toggle list. Let's kick things off
with the to do list. Let's imagine you want
to collect tasks. You can of course, do
that with bullets, but why not using a checkbox style of
structuring information? So let's say you
have a to do list. It can also be a shopping list. I want to style
that as a heading. Let's say this is a heading one, By adding it to do list, we can simply put all of
our tasks into the list and go to the next
line and it will auto populate the next check box. Let's say we need
to buy groceries, update computer,
clean the house. As you can see with
every enter I'm pressing a new line appears
and a new check box appears. If I want to delete
the last check box, I simply go on the delete button and maybe one more to go
back to the previous line. If I have completed my task, I simply can click in
the checkbox and you can see it's graded out. We checked the checkbox and it as also a strike through
format to our list. We can continue
doing that until we are at the very end and
our to do list is over. Now I can of course
uncheck if these are reoccurring tasks or I
delete my to do list. But this is of course
not the only form of creating lists in notion, let's continue with
a bullet list. For that I will create another
heading and I will call it bullet list Again, I will open up the
context menu with the command and I will
go onto Bulleted list. With bulleted list we
get a bullet point. And I will note down
what I have to, let's say groceries, update, clean, whatever it is. It's the same methodology
as a to do list. When I press Enter, I go to the next line and it's adding automatically
a bullet list. But choosing a bullet list from the context menu isn't the only way to
create a bullet list. I can, of course, also
simply use my keyboard. By pressing this bullet line
and followed by a space, I will create a bullet list. What else I can do
with a bullet list? I can format it onto
different hierarchies. If I press Tab on my keyboard, then it will indent
my bullet list. I can create a structure. I can do that twice
or three times. Can even do it a fourth time, even a fifth time. I can continue as long as I
want to create a hierarchy of information which
helps me to structure the information as we go. Next list is the numbered list. Numbered list is, as
the name suggests, a list that instead
of adding bullets, it will add numbers
if you want to visually show the
prioritization of tasks. For example, then you
can add these numbers. You can start writing
information down again. Pressing Enter jumps
to the next row, giving you the next
higher number. You continue until the infinite. I will also give it a heading
just to stay consistent. We'll call it
numbered list again. We also have an
alternate way to create a numbered list by simply
adding a number manually, for example, one dot and
then pressing space, and you create a
numbered list by that. Also, here you can create a more structured list by simply pressing tab
on your keyboard, it's indenting your list, and you create a more structured hierarchical
numbered list. Last but not least, we talk
about the toggle list. A toggle list is a great way to show more or less information
at the user's pace. You can make a
decision on what's the most relevant
information and the user, reader, consumer
of your document, can then themselves decide on whether they need
more information. This will make
sense in a second. If I show you how to do
that, let's select Tolist. Let's say we want to provide information
on opening hours. We call it opening hours. What I can do now is to unto the list and add
additional information. Let's say set. It's nine to 12. It's ten to 11. Only what I can do now is I can consolidate the
information behind this. Till this way someone who's visiting my page will
only see opening hours. They can decide on whether
they need more information, they want to dive deeper on
that information or not. This way you can, for example, arrange links,
additional information, whatever you feel this is
good to have on my page, but way it's not the most
important information at this given point in time. It's a great way to style your
page to hide information. Provide a gated mechanism
based on which the user reads through your page
as you want them to. In this lecture, we talked
about list blocks in notion. We talked about how
you create them, how you style them, and how you arrange information
in a structured way. Stay tuned for the next
blocks in the next lecture. Cheers.
7. When and how to use a Notion table: Welcome back to this course. In this lecture we
are going to talk about all things, notion tables. If you like to structure
information into grid view, then stay tuned because
in this lecture we're going to talk about how to
create and edit a table. I will also give you
a guideline as to when it makes sense to
use a table versus, for example, a
database which will be subject to another
video later on. So let's jump over into notion We are back to our
notion workspace. And I created already a
headline that's called table. And in order to create a table, guess what we need, of
course, our command. So we scroll down to tables. As you can see, it creates a default table with
a two by three grid. Let's imagine we want to create a customer friendly way to communicate our opening
hours of our shop. A table is the
favorable solution. I would say we start
off with the days in one column and the hours
in the other column. It might be that we
have opening hours, Then on fright set, then we might want to
add Sunday as well. But we reached the limit of
our table. What do we do now? We hover with our mouse
to the end of the table. You can see a plus
button will appear. And we either can just press
once we add another line, and we can repeat that
as much as we want to, or if we need to add
multiple lines at once. Then we hover again
over the plus press and hold our left mouse and
scroll all the way down. We just move our way down towards the grid view
that we find acceptable. In this case, I go back because I just need
one more line. Same applies to the columns. If I go to the right hand side, I either can just
press one the button, so it's adding another column. Or I press and hold this button and I just
pull it to the right. I can just the
width of the page. If I want to do both at once, like adding columns and lines, then I have this plus button
in the corner down here. I hope that you can see
that I press and hold it. And this way I can play around with width in
the length of my table. As much as I want to, I complete my table
and I will add some. Now I want to add the hours. Let's imagine Monday to
Thursday we have 1014. Then on Friday it might
be longer, 14 to 15. And on Sundays, very short
until 11. What is missing? Now we have of course, headlines in our table, and we want to give it a more visually appealing
structure. How do we do that? We go on the options and
we say we have a hetero. What happens now when we
add a hero with a header? We have a grayish background and we have made the text bolt, which helps to
distinguish between the information of the headline and the actual table content. The same works also
with the first row. Let's say the first row
is also a headline. Then we go onto the option and say we have a header column, which doesn't make
sense right now, but just that you get an
idea of how that works, what else can we
do with our table? Now we can say that this
table in this size is completely appropriate
because it's just small amount
of information. We do not need the full
width of the page, but what if we want to use it for the full
width of the page? That isn't a problem either. We go back into our table
and click in one of the cells so that our
menu is appearing. As you can see, we have these
two arrows which go into different directions
where we can select to fit the table to the
page with, let's do it. Click on that, and
as you can see, it's now filling the
entire width of the page. We have it as a dedicated spot, so it takes up the entire width of the line in our document. If you want to delete or
move around our table, then we either can simply click again into our
table and click on the three dots where we can delete or duplicate our table. We can also copy the
link to this block. That way if someone
is clicking on this link or entering
this link into their URL, then they will be
directed to this table. Otherwise, we can also
move the table around. As every block we can drag and drop it to the appropriate place where
we want it to be. On the menu. On the
left hand menu, we can also delete, duplicate, literally
anything that we also have in the other menu. It's just a replication. We can also met specific
lines or columns. Let's say I want the first line to be formatted into
specific color. Then I click on this pop up
menu on the left hand side, which is this one. In there, I can select
a color text color. Let's say it should be orange. We can also select a
background color, maybe red. If we want to highlight
that information, we can do the very same
for the column as well. We can decide on a
color or a text color. As you can see, it's overriding the format that we
previously selected. Else we can also add
additional lines or columns. If we click on Insert
Above or Insert Below, then we can directly
create a new line. Same also works on the column
side. We can insert left. This way we add another
column to our table. Apart from that,
we can also clear the entire content
from our line. So if I do that, you see it's now empty. And if we say we don't
need the entire line. So we not only want to
delete the content, we also want to delete
the line itself. Then we click on Delete. This way you can organize and structure a
table as you want. As promised, I also wanted
to give you an impression on when it makes sense
to use a table versus when it makes sense
to use the database. In notion, it makes
sense to use a table for any information that is more considered to be
static or temporary. So that means
information that is not regularly
updating or changing. And also data which you do
not need to filter a lot for it makes sense to have a table that is pretty
static and simple, which you do not really
need to work with. For example, a timetable
opening hours. Anything related to
that makes sense. A database in turn, is intended to be a place to
store dynamic information, Information that can
either change because it's client data and you want to change the status
of your client. You want to add
information frequently or delete information
frequently moved to new process status. So anything that
is really dynamic, you want to use the database for also information that you really actively
need to work with. For example, through filters, through automation, or through using it in the
negative process. In this lecture, you learn
about tables in notion, how to create them,
how to edit them, how to format them in a
visually appealing way. And you also got an idea on when to use a table
versus a database.
8. Notion pages - Creation, Linking, Moving and Deletion: Hello and welcome
back to this course. In this lecture, we are going
to talk about notion pages. We will explore how
to create a new page, how to move pages around, and how to link pages
with each other. Just be warned, I will use the word page a lot of
times in this lecture. But first things first, why do we even care about pages? Well, notions, essence
and core feature is to manage information
as it's so good in it. We want to keep as much information in notion as possible as our
database grows. We want to give it a structure because we want to
find our information. Again, we don't want to end
up searching for forever. This is why we want to
create individual pages, breaking up information into
smaller bits and pieces. Think about it like different word documents that you have. So instead of having one word
document with 1,000 pages, you create smaller ones to
cluster the information and to make it more handy also in terms of sharing
information with others. You can share a dedicated
page instead of the whole document with
someone, if that makes sense. But that's enough of theory. Let's go into practice. And jump over to not back
in our notion workspace. We have our basic blocks page. Everywhere where
we can write down information is
essentially a page. Basic blocks is a page. This page can continue
until forever. I can add as much information as I want to and could continue. There is no end of the page. You're writing as much
information here as you want to. If we now focus on
the left hand side of our navigation menu, we see some pages already. These pages usually
have a hierarchy. We have so called
top level pages, which is Information
Hub and Basic blocks. And then we have sub
pages attached to it. In this case, information Hub has the subpages personal home, task list, journal
and reading list. These are attached to
the information hub and they stay physically on
the information hub. That's a very important point. If I click on the
information hub, you see all the pages on the information,
they stay on it. This means as soon as
I delete such a page, if I delete this link
now click on Delete. The page is gone, it's
physically deleted. Never delete such links if you're not sure you want to delete the content
that's behind it. Now what can I do
with these pages? I can move them around. I can drag and drop
this page out of the sub page and making
on top level page. Now it's not connected
to information hub, it's gone here and it's an
own self standing page. I can make it a subpage by simply drag and
dropping it in it. Again, I can make an entire top level
page, even a sub page. If I drag it into
the basic blocks, you can of course unfold
the hierarchy this way. We made information hub and everything that is a sub
page of information hub, a sub page of basic blocks. You might now ask, how can I create a new page inside a page, IE. Create a sub page? You simply go onto blank
space, press our command, and then you take
the second entry, which is called page, embed a sub page
inside this page. If I click on this, a new page is generated,
currently is untiled. I will just call it subpage. Subpage is a subpage
of basic blocks. If I go back to basic blocks, you see the entry subpage. I can continue this until
the infinite means. I can go in the hierarchy
as deep as I want to. I can create a sub page of a sub page of a sub
page of a sub page. The more granular become, the more structured
the information is. But of course, the less
handy it is to administrate. Because we have a
lot of sub pages, I would recommend
not to go that deep, maybe just two or three levels. In practice, instead of creating a page in a page,
create a sub page, or moving it into a main page, we have a third way that allows us to keep a page completely
separate from other pages. And I will show you what I mean. Just imagine we have
another top level page that's called Test. We want test to be referred into Basic
Blocks because maybe Basic Blocks is our
information hub where we have all the links
to relevant resources. But we do not want to actually put test into basic blocks. We don't want to become test
a sub page of basic blocks. When is that relevant?
Well, notion is also about sharing
information with others. Very easily you can share an entire page with
someone else which we're going to talk
in a separate lecture because this is super important. If I want to share basic blocks, I might not want to share
the content of test. But if I share basic blocks, everything that's
physically inside basic blocks will be
shared with others. If I want to stay
test separately but still want the link
inside basic blocks, then I will do the following. I go to basic blocks, go on and empty space, press and screw all the
way down to link to page. Now it's suggesting me the top level pages that are available. In this case I use test. Now something special happens. You see that the
page gets an arrow. We also see that the
subpage also has an arrow, and we see that the test page is still a separate
top level page. What has happened? We have
created a link towards a page, but we have not moved
the actual page. When I click on Test, I will be directed to the page, but as you can see with the highlight on the left hand side, we are accessing
the distinct page, but not a page
inside basic blocks. This link here just showcases or indicates that we
have created the link. Every link that we create
always gets an entry. If it's just a view or a link, it gets this error on
the test page itself. On the top level page, we received a so
called back link. What's that? A back
link means that this page is referred
to from another page. This way, we can always check which other pages are
referring to my page. If I want my page not
to be referred at all, then it would be concerning
if we got a back link here. And if you click
on the back link, you see which page is actually referring
to your main page. If you want to delete the link, then you go simply back
to the basic blocks. Click on the link left
hand side of the link, and then click on Delete. And the link entry is gone and the basic
blocks entry is gone. Don't say, I didn't warn you, I talked a lot about pages. If you have any questions, please feel free to reach out. In this lecture, we discovered
the features of pages. How to put them
into a hierarchy, how to create a new page, how to make a page a subpage, and how to link a page. We also understood
what a back link is. That being said, this is
enough pages for now, and I'll see you in
the next lecture.
9. Notion Callouts and Quotes: Hello and welcome
back to this course. In this lecture,
we're going to talk about quotes and call outs. With that, we're concluding
the basic block section. Why would you want to
use these two blocks? As mentioned, notion is a system that's all about
communication and information. With the growing database, you might be overflowed
with information so that some information may get lost. That actually matters. With quotes and call outs, you can give them a
dedicated spot so that everyone is aware of what
you want to tell them. So let's jump over and look
how this works in practice. Here we are back into
our notion workspace. And I created already two headlines for
quotes and call outs. Let's begin with, we
have our standard text, we write something down. Then we might want to highlight an information that was
posted by someone else. We want to quote someone or something out of
another context. How do we do that? We go
with our standard command, which is the command, and we scroll down towards
where we can capture a quote. What you can see now
is we have this bar on the left hand side
which is visually highlighting that there is an information that is
dedicated or that's important. And if we want to quote
something from another source, we simply add the
quote as we want to. And then we might want to add the source which is Confucius. We can then press Enter and continue our text
in the next line. If we want to extend
the quote because the code is longer
than just one line, then we press Shift
on our keyboard, or keep shift pressed
and press Enter. We can continue this until the infinite and make
our quote very long. Of course, you can use the quote also to highlight information. Simply, it doesn't
have to be a quote. But of course, as everyone
has used this to be a quote, you should not misuse it for other information if you want to highlight specific
information. For example, let's
imagine you have a very long document or
very large information hub, and you want to show
temporary information that require attention
of employees, your colleagues, or clients. Then you could use
a call out box. This call out box, just imagine that you're working in an office and the coffee
machine broke down. You want to inform everyone that the coffee
machine is broken down and the repair team
is already alerted. Because you want to avoid that, everyone is calling
the repair team, then you can use a callout box. How does that work? We go
into our slash commands, scroll a bit down until we reach call out with a call out, we get such a box that has an emoticon on
the left hand side, which we can change and then
we can add information such as coffee machine is down, repair is underway,
something like this. Now if we want to
extend or expand on the call out and we want
to go into the next line, then we can of course,
simply continue writing. If we reach the end of the box, it will jump down into
the very next row. But we can also manually trigger
going into the next row. Again, we need to press and
hold shift and press Enter. This way we're going into
the next line of text. If we're just pressing Enter, it will jump out of the box, which is not the intended
way we want to handle the information and press Shift and type what we
need to type down. Of course, we can format text in the call out
box as we want to, so we can make it bold. We can make it underline
whatever is required to make the impression of
the call out box that you want it to give. Then we can change
the emoticons. We can of course, add emoticons from the
standard set of emoges, but we can also add icons to it. Notion has its own
set of icons where we can choose from a
variety of icons. Or we can upload our
very own custom icons. If for example, our company has its own brand voice with a set of icons and we
want to import them, then you can stress out on
the brand voice, of course. What else can we do
with the callout box? We can change the color
coding of the callout box. This way we can make it
even more prominent. We click on this button on the left hand side
of the callout box, and then we go towards Colors. And you pop up is
showing up there. We can not only change
the color of the text, we can also change
the background color of the callout box. For example, let's say I want my color of the text to be blue. Then I'm clicking on
blue, the color changes. If I want to change
back the color again, I press on this button on the left hand side and go onto Color and change
the color as I want to. Same applies to the
background color. I can either choose a
background color, for example, red to make it really
prominent or alerting. If I want to make it more minimalistic and
with less style, then I just go on color again and click on
Default Background. With default background
I just get a white box that has just this
border attached to it. Something else that's super
handy about call out boxes. You can move them around
as every block in notion. The good thing here is
that you do not need to highlight all lines that
you want to move around. You just move the entire
call out around as a block. Let's say you want to have it
here, you just move it up. You can even integrate it into your quote if you want
to, or vice versa. You can have the
call out here and move your quote
into the call out. This way you can combine those two features that even works with other
types of blocks. For example, if you
have a to Do list, we can add it to Do List, and we pull this block into
the color block or the quote. This way we make
it very versatile. If we want to move entire
parts of the page around. We can even put everything into the color box and move the color box around,
if that helps. In this lecture, you'll learn
about call outs and quotes, two ways that are super useful
to highlight information. With that being said, we conclude the basic
block section. Well done so far and I'll see you in the next
lecture. Stay tuned.
10. Advanced Blocks (Table of Contents, Toggles, Headings, Columns, Breadcrumbs): Hello and welcome
back to this course. In this lecture, we are going to talk about advanced blocks. And this is good news for you. Why? Because you have successfully completed
the basic block section, which in turn means you can
use notion out of the box. You can start writing texts and style it on a basic level. So that's a very good fundament to add the advanced
blocks on top of it. Why are they called advanced? Well, not because they
are specifically complex, just because they have a very specific use case and are less universally applicable
as the basic blocks. But let's look at
them in practice. We are back into our
notion workspace and I want to show
you in this lecture, the table of contents heading. Toggle list, columns
and bread crumbs. Let's kick it off with
table of contents. Actually, this is a repetition
out of a basic block. I just want to close
the loop as it is technically an
advanced block. A table of contents always adds structure to your document. In particular, if your
document is very long, you have various chapters
and you want to guide the reader through your
document step by step. Then it makes sense
to give headings and structure your information
with a table of contents. In order to create a
table of contents, we go to any place on the page, add a blank space, and
we use our command. We scroll down the
advanced blocks are at the second half of your hop. A menu, There you will
find table of contents. As you can see, it's
creating a table of contents with jumping points. That means if I click
on a specific headline, it will jump to the respective
point in the document. Let's figure it out. In this
case, it's bread crumbs. Let's make the
document a bit longer. I'm clicking on bread crumbs. As you see it's scrolling
down to bread crumbs. It's an incredibly handy
tool to add on structure. How do we distinguish
between headings that are recognized in the table of context versus normal text? As you can see, if I'm
typing normal text, it's not going to pop up
in our table of contents. So how does that
work? Well, with formatting our text
into headings. So a heading is supposed to appear in
our table of contents. And how do we do that? Either we mark our text, so
we highlight it. Click on the pop
up menu and then select heading 12, or three, heading 12.3 The
difference between them is the hierarchy heading
one is the top heading, two is the sub level he, heading three is the sub
level of heading two. If I make this heading one, this setting two,
this heading three, as you can see, they are
all differently formatted. This is the largest font, this one is a bit smaller, and this one is the smallest
in the table of contents. This hierarchy shows up by
slightly dented positions, so that means you can really see how the content
belongs to each other and how they integrate
into the hierarchy. If you want to create a
heading out of the blue without reformatting
an existing text, you use again the command and
scroll down to heading one, heading two, or heading three. This is how you
create a table of contents and add on
structure to your text. Next up, we already talked about toggle
list. Toggle list. Just as a quick refresher, we open up the context menu with our slash command and we
scroll down to toggle list. A toggle list is an ideal way to expand on information
on the user's reference. That means we can
give it a headline. Let's say opening hours. Then you can open the toggle and add
additional information. For example, to fry, then we get Sun. You can open or close
the toggle list. Expand on information. This is just a styling
element helping you to organize information
in a proper way. But there's also another
way of using toggle list. If we open up the command and scroll it down to
the toggle headings. Toggle heading is identical to the heading format that
I just showed you. It's also a hierarchy
to heading one. Heading two is a sub level, heading three is the sub level. Let's format a toal heading one. We give it a name, so let's
say this is heading one. As you can see, it's popping
up in our table of contents. We can use the heading
to again expand on text. Instead of writing our
document in a long format. All information next
to each other with headings separating
between those sections. We can also decide to use
a list of toggle headings, which we are then expanding on the content with the benefit on. Making them appear in
our table of contents. If you want to format a
text into a toggle heading, that's the same way
as if you would format a normal text
into a normal heading. You just highlight it. Go on to text, scroll
down to toggle heading 12 or three, selecting
togalhading one. It's again, popping up into our table of contents
Simple, isn't it? Having talked about table of
contents and total headings, I'm going to clean up the
page just for visibility, to make it a better
overview columns. What is a column? A column, you may know from a table, that means you're arranging
information next to each other in parallel
blocks, so to speak. Let's say we have a long text, even more text, and we
have even more text. Wouldn't it be cool instead
of reading from top to bottom to display it
in a parallel way. For example, if
we want to create our page just like a
magazine or a book. So how do we create a column? We simply mark and highlight or text that we want to
make it a separate column. Drag and drop it next to the very first line of
text of the other column. Put it there. As you can see, it has now created two columns, but we want to get rid
of the space in between. We again highlight the text
on the left hand side. Pull it just next
to the first line. That's it. We
created two columns. We can even create
a third column doing the same like this. And we can even create
the fourth column. It's been, just highlight
the information, put it on the right hand side. If you think four columns
still are not enough, just take the fifth one,
pull it to the right. As you can see we
have five columns. This is incredibly
handy to, again, structure, visualize
information on your web page. This works not only with text. It works with all elements in notions, whether it is a table, whether it is a picture, you can organize them in
columns. That's super easy. If you say you want to start using columns
right from scratch, means when you just
opened up a new document, you want to create
columns instead of holding them manually as I did. Then you can also select
columns from our slash command. Just press slash, scroll
down to the advanced blocks. They come right after
I blocks and database, and there you will
find 2345 columns. Just select the right amount
of columns that you need. Click on five columns, and as you can see, it
has created five columns. If you already have a
text and don't want to manual pole the information
next to each other, manually create the columns, Then you simply can mark or highlight this
one line of text. Go on the button, click on Turn Into on the left hand side, and then go down to
234, or five columns. Whatever you need, select
two columns, for example, as you can see, we have created two columns in parallel
next to each other. This is a super simple
tool to style your text. Last but not least, I want
to show you bread crumbs. What is a bread
crumb? Bread crumb is actually just
a navigation path that you can showcase
on your page to see how pages integrate
into each other. If you just have
one top level page, that's pretty easy because
it's just one level of pages. But if you have
multiple sub pages, then it might become
very difficult to understand where this
exact page belongs to. Let's create some sub pages
to showcase what I mean. In order to do that, I will use my command and select page, create a page, call it sub one. And I will create another page, call it sub two and maybe
another one called sub three. Bread crumb is actually what you see on the left hand side. It's showing always with
the separated the path, the navigation path that
you need to take to reach the current sub three Sub three
is a sub page of sub two, of sub one of advanced blocks. But you can also showcase this bread crumb
directly on the page. If you, for example,
want to give your user a more handy way to navigate between the pages you select for that
the command scroll all the way down to advanced
blocks until the very end. And select bread crumb. You get the navigation path
links that you can click on. So if I click on sub two, I'm directed to sub two. Or if I click on sub one, I'm directed to sub one. So that way you can display the navigation
path on every subpage, giving you a direct access to the individual subpage
without the need of opening up all the sub pages, the entire directory, or clicking through all the
pages that are linked. So as you can see, this is quite a daunting thing to do if you want
to quickly navigate between the pages versus just clicking advanced pages
through a bread Cr. Well done. In this lecture we talked about advanced blocks and kicked off a new chapter in
our learning path. You learned about table
of contents, columns, toggle headings as
well as bread crumbs, all elements that
will help you to facilitate your information hub.
11. Maintain Notion pages with ease - use synched blocks: Hello and welcome
back to this course. In this lecture, we are going
to talk about sync blocks. A feature that will not only
save you from headaches, but also will help
you to claim back your most precious
resource, which is time. But first things first,
what is the sync block? Imagine you're serving a lot of clients and for every client, you have an individual
page in notion. Let's say you have 100 clients. So 100 pages and you want to show on every page
your contact details. Now you can of course,
start in copy and pasting your contact
details individually, but what if your
phone number changes? Do you really want to
spend your time to change 100 pages manually?
No, of course not. And this is where sync blocks come into the game
with the sync block. You have one piece of
information which is your contact details
and you link this block to the other
blocks on the client pages. Means once your contact
information change, you go into the contact details. You added your phone
number and it will update on all the other
pages handy, isn't it? Let's look at it in practice. So we are here in our notion workspace and we
want to create a sync block. So let me create one by
pressing the command, and then we scroll down to the advanced blocks
until we find a block. As you can see, we have here a little diagram on
the right hand side which shows you that the
information can stay up to date because of linking
quantum pieces together. Let's click on a sync
block and create content. The content is Hello, my name is Fred. I want to copy and sink
this block to other pages. I click on Copy and Sink. Now I create another,
call it page two. I added it and I pasted in. I will add another page, calling it page three. I'm copying in again
our sync block. If I go back to my
advanced block, I want to change the
information because I feel my name is not fred
anymore, my name is. Maybe I go in and what happens to the content blocks
on the other pages, they update as well. As you can see, it shows hello, my name is Mark,
and here as well. How do you identify a block? Block always has
this red border. If you click into it, you see on how many pages you're editing
right now, the information. If we click on Advanced blocks, this is our original source of truth in order to
manage the information, but you can also manage
it on the other pages. If we want to stop this block from syncing with other blocks, then we click on the three
dots on the right hand side. Go down to Sink All. If we press this, all
blocks became standalone. I click on Senal. As you can see, it turns back into a normal standard block. If I now change the
name back to fred, the information won't
change in the other blocks, it is still mark
within the S block. You can add an unlimited
amount of information. Just press Enter,
continue writing. You can even add other
blocks into a sink block, for example a heading
or a bullet list. You can simply continue
and they will stay up to date also in the other
blocks, as you can see here. Now going back to my
initial example where we are dedicating
one page per client, Do we really want a client to go in here and
either intentionally or unintentionally change any of the data that I want
to show just to them? No, of course not.
In order to protect our pages against these
unauthorized dits, we can lock our page. We do that on the
right hand side. If you click on the three dots and then select the
toggle lock page. If we now click on that one, the page is locked and no one
is able to edit our page. You see, I can type as much as I want with as much
effort as I want, and I won't be able
to change this page. However, I'm still able
to edit this block, add a new line or
multiple lines. If I go back to my page, you see it has
automatically updated. So in this lecture, you'll
learn about syn blocks. Syn block is a great way to distribute one piece of
information to multiple pages without having the headache of maintaining all 100 pages but
just one source of truth. With the log function,
you can protect your page against unauthorized
editing at all times. That's it for this lecture.
I'll see you in the next one.
12. Embed additional content seamlessly into Notion: Hello and welcome
back to this course. In this lecture, we are going
to talk about media files and embedding content directly into your notion workspace. Until now we have used Notion to capture text
base information. But in order to use Notion as our central information hub,
there is something missing. We also want to add audio
files, video files. We want to capture images and maybe other
content from the Internet. Lucky as that notion doesn't
stop at text based editing, it also incorporates
exactly these features. Let's have a look
at it. Here we are, back in our notion
workspace and we want to add some
media files to it. Question first,
how do we do that? And what media files can we
add in order to find out? We use our slash
command, add a slash, and then we scroll down
to the heading media. As you can see, we
can add an image, we can add web bookmarks, video, audio code, and files. Let's start off with an image. When I click image, I have the option to upload
my very own image, to embed a link, to
use the stock image, or to add a gift. A gift is a short animation. Let's add an image
from our own database. I click upload
file and I need to choose my file that I want to upload from
my file directory. Once completed, my picture is loading in and is
starting to render. Right now, I can change the
size of my image by simply dragging and dropping the
right border of my image. As you can see, I
have here my cursor to make the size of the image larger or
smaller respectively. Alternatively, I can also use an image from
embedding a link. In order to do that, I'm
looking up on Google Images, an image that I would
like to upload. I select an image here
or like this one, and I will right
click on the image. Then I select Copy
Image Address. I go back to Notion Workspace. I'll do a right click on
the embedded link side, Click Paste, and click
on Embed Images. As you can see, the image
is now embedded with the advantage of not downloading the image but pulling it
directly from the web page. At the disadvantage, of course, if the source image is gone, if the web page shuts down, my image might get lost. If you want to, you can
of course download it. Alternatively, you can use also the unsplash stock library and select simply a
photo From the library. You can search for an
image in the search bar. Same applies for a gift
when using an image. I'm scrolling up again. When using an image,
you can also decide on how you want to align the image with the
rest of the page. Do you want to
have it centric on the left bound or
the right bound? That really depends
on how you want to structure your
notion workspace. Below that you can
create a caption, for example, describing
what you can see. This is sometimes important
for search engine optimation. Here I would write a map of Europe just to describe
what we can see next to it. We also have a download button, so you can also download images from Notion to
your personal computer. And on the right hand side, you have more actions by
clicking on the three dots. Under the three dots,
you have a default set of options to choose from. You can delete the image,
You can duplicate it. You can view the original, which guides you to the
original source of the image. Let's click on it.
As you can see, it will show you a larger
scale of the image itself. Go back to notion and again
open up the more actions. You can also replace
the image here. If you decide on, hey, I want to show another image, you can simply click on Replace. The good thing
here is this logic applies to all media files
that we're uploading. If I make a bit of space and add our command and we're going
down to our media files, I can do the very same
with web bookmarks. Here, I just add my
URL of the website. I want to show notion. Let's imagine this side
is what I want to store. I copy it with control C or by right clicking
and clicking on copy, I go back to my Notion page, right click into Paste
and click on Paste. Now if I click on
Create Bookmark, it has created me the
respective bookmark and I click click on it. So I'm guided to the
respective website checking out the other media
blocks that we can add. We also can upload a video by simply pasting the
video L into here. I click on Themed,
and as you can see, it just populates the
respective video. But in turn, if I click on the three dots on the More
action and I click on Replace, I can also upload
my very own video. Just be reminded that both for images and videos
in the free plan, you have a five
megabyte upload limit. So that means you cannot upload incredibly large
files for a photo, this would work for video. This is kind of limiting as video files are usually larger. Another media type that
you can embed is audio. So if I express slash scroll down to media, you find audio. Audio works the very same way. You choose a file, upload it, or respectively embed the
link into the your El bar. If you want to upload
something that is neither video nor an image, nor an audio, then notion
still got your back. Just enter the command, scroll down to media
and add a file. With a file, you either upload directly the file
or embed the link. This can be, for
example, a document, a PDF file, or whatever. There's almost no
limitation on which files are accepted
or as you've seen, we skipped one media block
which is the code block. We talked about the code block already under the
advanced blocks. If you're interested in adding
code to your notion side, just go back to the
respective lecture. That's it for the media. Now, I also want to show you how you can embed even more things
into your notion page. For that, I'm going to delete
what we have uploaded here. Press delete and go
back to our command. I scroll down to the
blocks of embeds, and as you can see here, you will find a lot of different online
applications and tools which you can embed
directly into notion. It can be a Google Drive file, it can be Tweet, Google
Maps, Igma Maps. And there's so much
more to explore, the way to set them up
is always the same. You simply click on what you want to embed, for
example, in this case, a Google Maps map, and you add the respective
link of your map. I pace a map in here
and click on Embed. As you can see, it
imported the map. I can even view the map on
full screen by clicking here. And apart from that, I have all the very same tools as I had with the images and
the other media files. I can resize the entire screen or shrink it down
to the original. Alternatively, you can look up all the different applications that have a dedicated embed. For of course, you
can always simply copy and paste the link
also directly into notion. And you might ask, why would I want to use these
dedicated embeds? Well, because they are already
optimized for their size, for the type of content. So in order to make your
site look professional, I would always recommend to use the respective
embed application of the embed block if
that's offered for the application that you
would want to show a notion. In this lecture, you learned
about media blocks and embed blocks in order to showcase
even more information. Aside from pure text
based information, you can add images, video files, audio files, code blocks, and also any kind of other file that you would
want to centrally store. Also, you can embed content from other applications
such as Google Maps, Google Drive, Dropbox,
and so much more. That's it for the
current lecture. I will see you in the next.
13. Notion Math and Code Blocks: Hello and welcome
back to the course. In this lecture we
are going to talk about two very specific
advanced blocks, namely the block equation
and the code block. If you're working
with a lot of code in your documents or
with math equations, then stay tuned and let's
jump over into Notion. We're back into our
notion workspace and I've created a blank page that's called advanced blocks
with two headlines, Block equation and code. Block equation are
math equations. Of course, we can add
our math equations to our normal text that
we are writing down, but it might be a
bit complicated to read or to identify the
respective equations. Or we might not be able to use the rightful math
symbols in order to give it a designated
place where we can showcase our equations. We are adding the
block equation. How do we do that? We
add our slash command. We go into an empty
spot, add slash, and scroll down to the
advanced block section, where we find block equation to display a standalone
math equation. As we click on that, you see we get a box that's caught at a text equation and a specific pop up field in which we can fill our math equation. For those of you who are deeper in the topic of math equations, notion uses K tax to render math equations which support a large subset of
latex functions. As I'm not a mathematician and I don't know anything
about math equations, let's keep things simple. Just to give you an impression
on how this looks like. Let's add a very
simple math equation, which is three plus
four equals seven. As you can see, it's
highlighting our math equation. And once I'm ready, I
simply click on Down. As you can see, my equation is rendered in a central spot. Of course, you can change this equation by simply
clicking into it, changing the formula,
or deleting it. We go back to zero. Next
up we have code and we can display here in a similar
way as a block equation. We give it a dedicated spot
to avoid formatting errors. If we're pasting
the code directly into our notion
text to add code, we simply use our
command and scroll down all the way
to the code block. Mermaid. For those of you
who are into the topic, you know mermaid is already
a code to showcase diagrams. And not only can
you display code, but you can also
transform the code, the Mermaid code,
into a diagram. I will attach some
resources if you want to showcase a
specific diagram. So that it can be either flow
chart or can be pie chart, bar chart, whatever it is, it's made out of code. So you need to do a bit
of deep diving to create the code that you need to
import it into notion. But just for you to get an idea, I will add a bit of
sample code in here. As you can see, it's
rendering my diagram. And I can also decide
on whether I want to showcase both the code
and the rendered diagram. Just the code or
just the diagram. That's a helpful tool to, again, style a bit around
your notion page. Now if you're not up for a mermaid code but you
need any other code, then notion can display
all those codes. As you can see down here, it has a selection of different code languages
that you can select from, for example, Abab
or anything else. Of course, Abab can't
be read deleting it, but you can now add
it and it will format your code in the relevant
programming language. Something else that
you can set up is the so called P code. P code means if your code
line becomes incredibly long, it will add a line
break so you don't have to endlessly scroll to
the right hand side. That's just a handy feature to improve usability of
your notion page. If you want, you
can add a caption, a so called caption,
to your code, giving the reader a bit of an explanation on what
the code is about. Let's add a bit of
explanation here which helps identifying the use case
of this code block. That being said, in
this lecture we talked about math equations
and code blocks.
14. Maintain Notion pages with ease - use synched blocks: Hello and welcome
back to this course. In this lecture, we are going to talk about button automations. If you're not yet fully
convinced notion fan, then this might
change your mind. Imagine following scenario. You're the proud owner of a coffee machine with
a press of a button. The coffee machine
will roast the beans, grind the beans, brew the
coffee, and fill up your cup. What I just described was
automating manual task. And the very same thing is
possible in notion as well. Sounds cool, let's look at it. In practice, we are back to our notion workspace and we want to create a
button automation. All we need is an empty
space or slash command. And we scroll down to
the advanced blocks, which is in this case
the button block. Run custom automations
with a click. This is exactly what we need to. Let's click on the
button. As you can see, it has indeed created a button. We can give it a name. Let's say this is
Test, true teen. We can also give it an
emoticon if we want to. I will give it this
airplane in this color. And then what we see
is we have a trigger. The trigger event is
the button itself. We cannot change
this. This is static, and then we need to
add an action to it. If I click on a action, our pop up menu appears with all the
actions that are possible. We can insert a block. We can add a page to a database. We can add a page in a database. We can show and ask for
confirmation to execute the step, and we can open a specific page. Let's insert a block first. When we click on inserted block, we can decide on whether
this block shall be created above or below the button. In this case, we want to
have it below the button. Let's imagine you have
specific meeting minutes for a meeting that you need to capture each and every
week, week in, week out. Wouldn't it be cool if we can autopopulate meet minutes
structure already? This is exactly what
you can do here. Let's say these are the
meeting minutes or day, month. Here we could say
these are the topics. The good thing here is
we can pre integrate blocks into this
button automation, almost all the blocks
that we know already. In this case, I will
insert a bullet list. Let's add the bullet. We have topic 12345. Going back, I want
to have the to do. Let's add a heading
we add to do, then we add to list. To do list, we call
it 1234, maybe five. That's it. This is
our first automation. I'm clicking on Done, because we set up
out automation. If I click now on
the test routine, it will do exactly this. We have our meeting minutes. I can note down the topics. That's it. Once we
have a new meeting, I will again click on it and
we have new meeting minutes. This is just, of
course, one example on how to use this button
automation there much more. But let's go back
to our setter menu. We get back by clicking on the gear icon on the right
hand side of the button. We click on it and then I
can addit our automation. If I click on the three buttons, I can either add a
step above or below. So we can actually combine multiple actions
with each other. And that's very
powerful because we can let the button automation do
multiple things at a time. For us, the important thing to know is if I'm adding
multiple steps, the automation will go through each and every step by
the order of steps. That means if I'm adding a
step and I add a step above, I'm adding another block. Let's call it one. It will first create this block
and then this block. If I feel now I want
to change the order, I simply drag and drop the respective block automation to have it in the
rightful order. What else can I do here? I can duplicate this step above, can duplicate the step below. I can delete it, and I can also change the order
of events here. But for now, I want to delete those steps because I want
to show you something else. I want to show you how you
can add a page to a database. Don't you worry, we have
not yet covered databases. I will dedicate a whole
section to databases, so making sure that you learn every bit and
piece about databases. This is just to show you that automations also
connect to database. Just imagine a database
is kind of like an intelligent table where we can capture dynamic information. Every database entry is
actually a page in notion. With the click of
a button, we can create this new page
in the database. Let's do that. We add
a page or select, add a page, select database. I've created a test database. Then every database entry
needs to have a proper name. So we can give it a name, let's say test one. And we can also define
properties in our database. As I said, this is
now very high level. We are going to dive deeper on this more at a later stage. I have a property
that's called tax. The tech can have a
value one or two. These were all predefined by me and in this case I want
to have the value one. Then I can also
define that I want to add a page in the
notion database, just taking the very page
that I've just now created. I could add another property
of it if I want to. Let's say I want to replace
tag one with tag two. This doesn't make
much sense because the page was just newly created. If I wanted it to have
take two already, I could selected by adding
a page to the database. But just to show you
that this is possible. And I also want to open the
new page that I just created. When I click open page, I will select the page. I want to open up the
newly created page. I can decide on
the viewing pane, so I can either use Center Peak, which is the central pop up. I will show you in a second
what this exactly means. I can do it bound to the right hand side or
can open up the new page. In the full page view, I go to Center Peak first. Then I also want to have a
confirmation step in between, Let's say before I create
this new database entry, I want to get the confirmation whether I really
want to do that, to avoid hitting this
button by accident, I click on Show Confirmation. I can customize the confirmation
message to what I need. I can customize the text
of the continue button, so the accept button, and also customize the
cancel button. Now I of course want this
confirmation page to show up very first before any of these
steps have executed. Because if it was an accident, I want to cancel
the action right now and not after
they have occurred. This is very important to make this confirmation the first
step into our automation. Now I'm ready and I click on Done and we will have a look
at what this all means. I click on my test routine. First of all, I get
my confirmation page, which is this one. As mentioned, you can
customize your message, the continue button
or the cancel button. Now, of course, I
want to continue. And what happens now is it
creates the database entry and it will open up
this database entry. I click Continue. As you can see, it has created my database entry with
the test value two. This is now the
center peak view, but I could also view it in
full page or in side peak. Full page would simply be full
page as the name suggests. When I go back to
my database and this is the first time
you will see a database. Again, just for
demonstration purposes, we will capture database
in a later stage. When I go to my database, you will see that the record test one has been created with the tag value two. This is all customizable. And what can we use these
button automations for? What are use cases that
might be relevant? Well, we can use this
button, for example, for internal processes if we
want to request something. If we want to provide
feedback to something, if we want to showcase
that there is a buck, then we usually use databases to record all
of the information. With the click of a
button, I can create such a new database entry and direct myself into
this database entry. So I could add here
information on, hey, this and that is
the buck right now. Could you please have a look
at it so we can build up a structure that we just need to replay over
and over again, saving us tons amount of time. In this lecture, we talked
about button automations. A way to ease up our life by saving time by automating
specific tasks. For example,
recording information in a very same structure
over and over again. Or to create database entries. Databases is a topic that
we've not yet covered, but the only thing you need
to remember for right now a database is like
a dynamic table, where you can add information. To end with the
button automation, you're able to
automate the creation of database entries
through a specific scheme. This might be a good
idea, for example, if you want to capture
feedback, request information, if you want to provide
input to something, or if you want to inform others on a software buck for example. But of course, there are
much more use cases for that and I'm 100% sure you will make good use
of the Barton Automation. That's it for the
current lecture. I will see you in the next one.
15. Lets build: a CV in Notion (Exercise): A low. And welcome
back to this course. What would be a course
without any practice? Exactly, it would be boring. Boring stuff is
hard to remember, since I want you to make the
most out of this course. We are going to practice
now a little bit. Of course, this
is non mandatory. If you want to skip this
lesson, just skip it. However, I highly recommend
you to practice a little bit. Our exercise today will be
to create a very simple CV, a curriculum guitar,
for our career. Let's jump into notion and
look at the task. Here we are. I've built myself a
very simple CV with a headline with some
core data, an image. We created a
professional summary, a skills overview, and an
experience with a table. Down here we have a sync box
with a call out feature. Now you can pause
the video here to take this as a template and try to rebuild the
exact same thing. Once you're ready, you
can play the video again. And I'm guiding you through
each and every piece of this document so that you get kind of a solution on
how I have built this. If you want, you can
pause the video now. All right, we are back
with the solution. I will guide you now
through this document. We're starting off the
document with the heading. That's the default
heading of notion, so no need to really format it. I just typed down my name. Next up, I've
created two columns. How do we create two columns? By using the command and
scrolling down two columns, you can also type the command. I just created two columns. Down here where we have now two. Then I created on the left
hand side a heading two. That's this one where I
entered the details name, press Enter again, heading two, and then I added the H
on the right hand side, I used an image, I created an image block here. I uploaded it from my computer. And so we have arranged in
this dual column set up. Now I'm going to lead that one. This one is again a heading
two with a bit of text down here to just complete
the professional summary. This is followed by
another heading two, This section where I
visually showcase my skills. I again created two columns. Again, with the column command. I created two columns on the
left hand side, simple text. On the right hand side,
I added emoticons. Emoticon is added
with the command, and then you simply enter Emog. I use the star Emog to indicate my proficiency
with these skills. Of course, you can
change that as you need. Next up again, a heading
two followed by a table. Of course, with this table, I could have made the
first row a header row. So let's do that right away. I added here simply
a table view. And I created specific
columns like role title from, I added to more columns, in this case two and
responsibilities. Then I made this table full width and expand it
on the right hand side. By pulling the right border
slightly to the right. Since to and from are
just years or dates, we can make them smaller, giving more space to the responsibility tab
on the right hand side. Again, readjusting the size. This way we can create a simple grid view of our
previous work experience. I'm going to delete
this for a moment. And then I created a
think box. Why think box? Well, maybe I have my contact
somewhere else already. Maybe I don't want to manage my contact details
everywhere because I'm lazy. Hence, I use the think block. Inside the think block,
I created a call out. The call out was died to not
having any background color. Again, go to Color and
select default background. This way we just
have this light box with the white background color. I kicked it off by
writing contact here, and the contact was formatted to bold as a standard formatting. And below that I added
website and e mail, but not with any
bold formatting. So just a standard format. As you can see, this
is quickly done. If you're using the basic blocks that we have used so far, this shouldn't
introduce anything that we haven't talked
about until now. I highly recommend
you to practice it. If you're confused
with one block that we just talked about, then I highly recommend
you to go back to one of the other lectures where we talk about these
blocks in detail. Well done. This was your
first practice exercise. I hope you enjoyed it. If you have any questions, please feel free to
reach out to me. Otherwise, I will see
you in the next cheers.
16. Setup your first Notion Database: Hello and welcome
back to this course. I'm super proud
and super excited that we reached this
point in our journey. Because right now
we're embarking on the Notion Databases which is the core feature of notion
to work and live with data. That's the essence of
notion is database. And database is notion
that starts with the differentiation
between what's a database versus
what's a table. A table essentially is
aesthetic view of information. A grid view where we can arrange columns and
lines accordingly. Static in this
respect means that the information should
not change too much. Means we might use a
table, for example, to showcase opening hours, to
indicate responsibilities. But nothing that's too dynamic. Why? Because we cannot
really apply filters, We cannot really play
around with the data. So it is not really meant
to be a work instrument, rather a tool of visualization. Instead, a database helps you to manage and maintain data
in a structured way. We can work with it in
terms of filtering search. We can apply logics
to it, automatisms, so we can really arrange our workflow around
database or vice versa. The database helps us to
maintain our workflow. Also, we have the option to choose from specific properties, like columns that only allow certain data formats
As an input means, if we want to collect in a specific column
a phone number, we will select the
phone number property only allowing phone
numbers to go in there. It's a great way also
to upboost and improve your data integrity because if you're working with
multiple persons, which you cannot really
control their actions of whether intentional
or unintentional, the database properties
will prevent from either intentional or
unintentional incorrect entries into the wrong columns. So that's a great tool
to have up to date and correct information database
is a very big topic. They seem very
intimidating at first, but I promise they aren't as complicated as you might think. So bear with me. Give some rope. We are going to dive deep into database in a
series of videos. But rest assured, we will go
through this in a step by step approach covering every bit and piece of the database. But that was enough of theory, Let's jump into it right now. We are here on our
notion workspace. And I will call this
page simply database. And in order to create a
database that's pretty simple, we just use our
command as always. And then we scroll down
until we reach database. I don't want you to be
confused now with table view, board view, This is all stuff that we take care of later on. Right now, the only relevant
thing is we want to create a database either
in line or full page. What's the difference?
Let's try out a database. We create a database as a block. This means we can create data and information
before that. We can create a to do
list or whatever we want. We can work before
or after means below the database and we can also move around the
database as a block. This is great if, for example, creating a document
where we want to reference information to
the database or vice versa. Or we build ourselves
a dashboard with different other metrics and we just want to visualize
information. But this might not be the ideal solution if you
want to create a database, for example, for your
customer clients, for your transactions,
for your projects. Because there you want to have a distraction free environment. And also you don't want to accidentally move
around the tables, So let's create instead
a database full page. Those two databases are
exactly the same by the way. They do not differ in terms
of functionality or options. They just have a
different setup. Because a database full
page is itself a full page. So that means we
are now creating a database on the database
page as an individual page. I will call this now database full page for differentiation. Welcome to your first database. How does it work? We have
columns and we have lines, where every line is representing an own entry into the database. And every entry
means every line is an own document that
lives in this database. If we're opening up one of the three records that
are completely empty, you see we will open up a
completely new page and we can also go full page on the
top left of this window. Once we go full page, we see we can give it a title, so call it test number one. And we can assign
different properties. We will talk about
these properties later, but this is the example
I've referred to. We have a dedicated property
just for phone numbers, which will not allow any other entry but a
phone number format. Below that, we can add comments. We will come to the commenting and review functions
at a later stage. And then we can add text. It's just like a page. So we can add any kind
of blocks that we want. Once we're done with this page, we simply go back
to our database, and as you can see, it's indicating that this page
now contains content. If we want to move the position
of this database entry, then we simply drag and drop it to the
respective position. If we want to delete it, we simply highlight
this one line and go on the Delete button. If we want to delete
more than one entry, then we select those two with
the highlighting function, and then we click on Delete. If we want to create
a new database entry, we either create one
by clicking here on you or on the blue
button on the top right. Let's click on New, and I will create a test entry. And that's your first database, as I said, super simple. Nothing too complicated,
nothing to worry about. We're going to pause here
because in the next lectures, we're diving deeper
on every bits and piece of the
database functions. In this lecture, you'll
learn about how to create a database
and also what's the difference between
a database full page versus a database in line? If you have any questions, feel free to reach out. Otherwise, I'll see you
in the next lecture.
17. Basic properties of your Notion Database (Text, NUmber, Sing. Select, Multi Sel): Hello and welcome
back to this course. In this lecture, we are
going to dive deeper on the basic properties that we can add to our notion database. And for that we will jump
into the topic right now. All right, we are
back to our database, full page that we just
created in the past lecture. And now we want to explore
some of the basic properties. As mentioned before, properties are kind of like a
gating mechanism to ensure we are only allowing certain data formats to
go into our database. Up boosting our
data integrity and preventing from
unintentional mistakes. The way the properties work, they are actually columns, and as such, we have them
arranged on top here. The first column needs
always to be a text field, Means we can enter
anything here, we can add text links, numbers as much as we want to. This first one is also equal to the title of
the page below it. If we change the record here also the title of the
page will change. Next up, the default value
that is always coming up. The default property
is a so called tax. Tax property is a
multi select property, so that means we can use
tax to cluster information. Just think of it like a label and we can stick
multiple labels. For example, on your phone
it's like an iphone or an IOS, it's a small or large phone. And with all these labels, we can rearrange our
information at a later stage. If we want to add a label, we just start typing. So we want to, for example,
classify a vehicle. A vehicle can be fast, A vehicle can be slow. A vehicle can be large. Large, A vehicle can be small, can be cabrio, can be super car. As you see, we can add unlimited
amount of different tax. Of course, some texts
do not make sense. Car cannot be fast and
slow at the same time. It cannot be large and
small at the same time. Attack usually
makes sense if you can assign more
than one property to an individual record, but this entry should
not be unique. We can allow multiple entries. If I want to get
rid of an entry, I simply go in here and
click on the X. I remove the unintended properties
from the text. If I want to change
the options available, I can either drag
and drop them if I want to make them appear
in a different order. Or I click on the three dots
in order to delete them, to rename it or to
arrange another color. That's a multi select field. What other fields do we
have to use inside notion? We have a text field which
is similar to the first one. Means we can enter any
information that we want. It can be text, it
can be numbers. It's not limited by any means. Next up we have numbers. Number feels only allow numbers. It doesn't need to
be a phone number, but it needs to be a number. And it can be infinitely
long, It doesn't matter. And we can format
these numbers if we click on the property and
then addit the property, then we go into the
settings of our property. We can change the name of the property from number
to something else. We can change also the property type from
number to anything else. And we can select
the number format. This doesn't have a
format as of right now, the format is number, but we can also add number with a percentage or for example
a currency like Euros. Then we also can decide on
whether we want to show it as a true number or
as a progress bar. A number is appear like this. A progress bar looks like this. A progress bar needs to
be divided always by 100 so that we can
create a progress. Let's imagine we are now
switching to ten, for example. Then the basis of the
progress bar is 100. So we can set our own scale on how quickly we want to
move this progress bar. We can also change
the coloring of the progress bar and we can decide on whether
we want to show the number or just
a progress bar. We also have a P
in view function. This works like if I just use a number and we have a particular
long number like this. If we're wrapping, you see we get a line break
in between here. This is like a visual thing. If you want it to
become a line break, then toggle it to wrap in view. If you do not want this to
happen, then simply disable. And then it's summarized
in just one long line. If you disable it, you get,
of course, more space. If you have, for example, the list full with lines, then you get more space to visualize or display
more lines at a time. Now, something else
that we can do in every property is we can
add a property description. This is sometimes handy
if we were, for example, describing different metrics and working with a wider team, and not everyone understands
what number means. So we can, for
example, say this is the budget for the year, just to give you an idea. And then we close
the entire property. And someone who wants to
understand what this number represents clicks or
hovers on this info image. And then on the right hand side, it's getting displayed
what this is about. If we want to rearrange
our properties, we simply can drag
and drop them. We can change the order. If you want to
delete a property, then we can simply right
click on the property. We can delete the property here. You can also duplicate your
property if you need to. You can also freeze
up to column. So that means if you have a large database with
more properties, then you can display at a time. So imagine you're having like
2030 different properties, which is an easy
thing or to reach a notion, then you
can freeze it. So that means this
number property will always stay visible, irrespectively of how far
you scroll to the right. So that can be handy
to demonstrate the most important information
inside your database. Also, you can hide
information in view. If you click this,
it will disappear, which doesn't mean that
the information behind it is disappearing.
It's still on the page. So if we are opening
up the page, you will still be able to
see the number format, just a way to clean up the and to adjust
it to your needs. Next property we want to talk about is the
opposite of our tax. This was a multi select field, and now we talk about
a single select field. A single select field makes
sense if we want to capture a property where
only one property at a time can be, right? So let's imagine I'm a
landlord out of like 23 flats. And they can either
be occupied or not, but they cannot be
both at a time. So this is where we want
to use the single select. And the way it works, we
have already opened up on the right hand side,
our property menu. We can give it again a name. We can, by the way, also give it a different icon if you want to. We can also remove the icon
if that's not necessary. And then we can add options. One option can be, for example, occupied or they can't. Again, we have the
rep in view function. We also can change the
options means the name. We can delete them,
or we can change the color coding of our options. If we have more than
two or three options, we might want to sort them. We can sort them either
manually or we can also sort them alphabetically or reverse alphabetically.
That's up to you. Now, if you're selecting from a single select property,
it will look like this. We select occupied,
and as you can see, if I'm now trying to
also select vacant, it will simply change to vacant. So this is a great
property if you just want to allow one property
at a time to be true. Next property we
want to look at, we are skipping Multi Select because Multi Select
is actually tax, we already talked
about, it is a status. The status is a great tool to visualize or
indicate, for example, in a process how far we
are with the process, have we not started yet? So is it part of the backlog? Is it part of the to do
list or did we already start so it's in progress
or it's already complete? We can select those
status in here. It's also just a
single select field. Now you might be asking, hey, why should it take status
instead of select? Well, the status has more downstream effects in terms of managing and
visualizing data later on. Because the status not only
comes with the status, but also with the status
groups in the to do list. We can, if we go to
edit the property, we can add more substeps to it, for example, not started. Or we can say it is
assigned but started. We can have, for example, another option that's
called waiting for edits. As you can see, we can be more granular in this
three step approach. Again, we can change the
color coding the name. We can also set it as default. And we can also change
the group which this property option belongs
to in the Context menu. We can also change
the way it's shown. For example, we
can either show it as a select means as a dropdown, or we can also make it
appear as a checkbox. It's either checked
or unchecked. Then we are, however,
losing on the sub steps. I will go back to
the select status and now we have all
the statuses in here. And this gives us the option
to, at a later stage, rearrange the views by the
current status groups. Everything that's in to
do, everything that's in progress or everything
that's completed. That's it for now.
In this lecture, we talked about tax properties. Tax single select, multi
select status properties, as well as number of properties. In the next lecture, we will continue with the next
round of properties. If you have any questions,
feel free to reach out, Otherwise, I will see you in
the next lecture. Cheers.
18. Basic Properties (Date, Person, Checkbox, URL, Phone, Meta Data): Hello and welcome
back to this course. In this lecture,
we are continuing our path on learning
all the properties that we can add to
our notion database. Let's jump into them. We are back to our
notion workspace and we will head directly
to the properties. Last time we ended our lecture
with a status property. That means the next
property is our date field. The date field is interesting because we can set
it to date ranges. We can use it for
individual dates, but we can also
become as granular as collecting times and time
slots for an individual day. In the settings menu
of our property, we can set the date format
to different styles. We can either take
the full date, we can take month, day, year, different versions to accompany
different geographies. Or we can use a relative date. That means we can
say it's tomorrow, this week, next week, but it's a bit less defined and less strict as the
other date formats. We can also select
on the time format. Again, it depends on whether
we want to hide, by default, the time, or whether
our preference is to use a 12 hours
or 24 hours format. If we go into the field format, we see that we have here a date picker, a
little calendar. We can move forward.
We can move backwards. We can also jump
to a certain time. Let's say we want to go
to 2020 and press Enter. Then we are moving to March 9, 2020 and can select
the respective date. We can set ourselves a reminder, for example, one day before
on the day of the event, two days or a week before,
if that's for example, a due date and we want to just be reminded
of the due date. We can also decide on whether we want to include an end date. So we're turning a
date property into a date range property which is technically
nothing different, but we can just collect this
additional information. As I said, if we want to
become more granular, then we can also
include the time. That means we can, for example, book a time slot or record a time slot for the
exact same day. If we want to clear
out the date field, then we click on Clear. And if we want to change the
date and time zone format, then we click here and can
change also the time zone, which is an
additional setting to the property setting
we just looked into. The next property
that we want to dive deep on is the person property. The person property is
great if you, for example, want to assign a responsibility
to a specific property. Or if you want to get notified
about every change for this respective database entry
in the property settings, we can decide on
whether we want to have a limit for this data field. Either it can be one
person assigned to a task, to a database record, or we can say we have no limit. That means that 2030, 50 people can be responsible. So that really depends on how
you set up your workflow. You could, for example, set up a person property for responsibility where you set
the limit to one person. And in addition, you could
have a separate person field where you don't
have any limit and you call it just spectator. Or viewers or notify me so that people can sign
up for notifications. You can also set default value, so if you want, for example, that every person who creates a new record is automatically
responsible for the record. Then you go to the default
and set to created by. This will set the
person creating the record always by default
in the driving seat. The next property
we want to look into is the files
and media upload. This is a property where we
can attach files, links, audio, video files to the table, but be aware of that. In the free plan, we got a
five megabyte upload limit. So we cannot upload large video files or
large audio files. We need to limit
really to 5 megabytes. If we want to upload something, we can go here and
click on Upload. Then you can select from any file on your computer
to, for example, upload a PDF or any
other media file, or you can embed a link
from an external resource. But remember, this file
will then only be available for as long as the
link behind it works. So if the data file is getting deleted on
the source of truth, then you won't have
access here anymore. So consider downloading
it and uploading it directly to your database. Next up we have a check box. Checkbox is great to
indicate process steps, like sub process steps. Let's imagine we are still our landlord and we want to rent out a property and we want to manage every step
of the process. We want to create the Post for social media
that we have a vacant room. We want to screen candidates, we want to check on
the documentation, we want to prepare the contract. Every bit and piece of the
process could be a checkbox. And if you're
collaborating with others, we can then simply said, okay, this process step is checked, we're done with it, and hence it's proceeding
to the next step. Next up, we can
also collect a URL. If, for example, you are a social media company
and you want to collect resources of
external websites that serve as an inspiration, then you can collect URLs. In here, you can decide on
whether you want to show the full URL or if
you want to wrap it to the most central URL. Let's try to collect this
URL of this notion page. If I put it in here, we are now wrapped it to the most essential
part of the URL, so it will show notions and
the rest is like aggregated. But if we want to
show the full URL, we just toggle this one and
then we get the full URL. Next up we have the
e mail property. The e mail property will again, only allow data to enter that
has an ad domain behind it. There's nothing
really to set up. It needs to be the
rightful information we can use it to add. For example,
Notion@gmail.com This is an e mail address or
an e mail address format. So this will be
allowed as an input. Next up, we have
the phone property. The phone property we have
here very limited settings. Actually no settings.
The phone property will only allow number
formats to go in. Everything else won't work, a measure to protect the
integrity of your data. The last thing I want to
discuss with you are so called meta data data about data which is the created time created by last edited time, last edited by, and the ID. This is information
that we can add to our database to verify who has created information and who has changed information and
when it was last edited. This helps us to verify and
keep information up to date. For example, if you see
a database entry or two similar database entries that have different
last edited times. Let's say one was last edited two years ago and one was
edited five weeks ago. Then you know which one
is the most up to date. And the way this thing works, these are actually
completely automated fields. So we add the created time, we can change the date and time format as with
our date field. We can also add the created by. This will automatically pull in my information because
I've created it the same thing for
last edited time and the last edited by. If we use the ID as a property, this will create a unique
ID to your database. So let's imagine you want
your prefix of your ID always starting with cast
as a customer. And then you can see
in the preview that every new entry
will be cast 1234. The good thing here
is even though you're deleting
previous entries, it will continue counting, so we are not in danger of overriding an ID that
we have used before. Once an ID was used, it's gone. If we update the ID, then click on Update the ID, it's recreating
our ID structure. If we create a new entry, as we've done right now
and scroll to the right, you see as its
continue counting, we will pull the ID all
the way to the front. Now I'm deleting this entry
and we're creating a new one. As you can see, it's giving us cost six and not cost five. I know this was a long lecture, but we made really good
progress on the properties because we have now concluded
on the basic properties. And the next properties we take care of our advanced properties. That means there are a lot
more to explore and set up. We're dedicating full
lectures to them. If you have any questions,
feel free to reach out, Otherwise, I see you in
the next lecture. Cheers.
19. Databases templates - manage repetitive tasks: Hello and welcome
back to this course. In this lecture, we are going
to talk about how you can create templates for
database records. That means if you
have processes that require the same content
structure inside your database, means for example,
you need to record invoices or work requests
always in the very same way. Then you can create
templates in order to pre populate the structure in which you want to collect
this information. So let's jump into the topic. All right, we are back on
our notion invoice tracker. And an invoice
tracker should have, of course, a similar layout
every time we created. So how do we make sure we
get the very same layout? Let's go to the new
button on the top right. Instead of click on your new, click on the drop down button
on the right hand side. This will open up the
replication feature. For a certain page formats we want to click
on new template. This opens up our
template wizard. Let's say we want to have every new invoice
called New Invoice. We want every new
invoice to be attached, for example, to Josh, because the good
thing here is we can create as many templates
as we want to. We could create a template
for Josh, one for Fred, and one for Mark,
under the condition, of course, that we do not
have many more other clients. And we need to send
the same invoice over and over again to
the very same people. Next up, we could set a fixed amount of the
invoice sum, let's say 150. So we say this is the
new invoice for 150. We have set certain properties
now to a fixed value. Next up, we can style the layout of the
properties a little bit. Maybe there are certain
fields for example, or the calculation fields that are in that, relevant
in the view. When we create a new invoice, we can hide them away
from the default view. For that, we do a right
mouse click on a property, go down through
property visibility, and then we can decide whether we want to show a property. Always hide it when it's
empty or always side. Let's click on Always Side, because we might not need
this information right now. This property, we
might only want to show it when it has a value. Let's click on Height. When empty, those
properties aren't gone, they're just hidden
below this one. So we can open it up if we click on this
drop down button. As soon as I'm adding a Due
date here, for example. As you can see the
invoice Initiate Payment by Field is now popping up
once we delete this entry. Also this property
will be hidden. Again, this helps to clean
up our invoice layout and only put the focus on those properties that
matter right now. For example, those that require an input in the moment
of creating the invoice. Next up, we can define a format. Let's say we want to add
the invoice details, we're adding a heading. Let's say this is
invoice details, then we're adding a divider. Then we add the items. The items are one, 4 hours times 103 hours times $550 each. Online resources
which are included, the total payment is
something like this. So of course, you can design the entire invoice
out as you want to. This is just an example, right now we are done with
it and we are clicking back. Now we can either
create a new invoice, this will be a blank invoice, or we can decide to go with
our new invoice template. If I click on the
invoice template, it's creating the new
entry, opening it up. And it's also pre populating
our format down here. If I want to make this
template a default template so that every time
I'm creating a new invoice, it shall have this layout. Then we click again on
the drop down button, click on the three dots
next to new invoice, and set it as default. Now we can define whether
we want to set this invoice as a default for all views
in our notion database. We haven't talked
about views yet, but views are simply different arrangements
of the information that we see in our database. This is a table view. We can also arrange it as
a list, as a gallery view. And as we continue to
add different views, this will add up as
a tab over here. And we can now decide if this invoice should
be the default for every view or just for the view that we are
currently seeing right now. I'm simply saying this is
for the table view only, but we can define that
later on as well. Now if we click on you
and new invoice will be created with our
template respectively. If we have other templates, it will always select the new $150 invoice
as a default value. If you want to add our invoice, then we go back to
the template menu, and then we click on Added. This will bring us back
to the template editor. Now we can define that a
new invoice is generated based on the template on a specific cadence
that makes sense. For example, if you have
fixed or fixes with your clients and for every or fix you can create an invoice. Or another use case
might be you have a weekly meeting and
every weekly meeting has the very same agenda
which you want to pre populate without
doing it manually. Or if you're writing
a journal and you want to have your
journal records always be styled in the very
same format and you don't want to miss out writing your
journal on a single day. For that, we go back
on our dropdown menu. Go on the three dots
and go on repeat. On the repeat, we can set the cadence to
either every day, every week, every
month, or every year. You can decide what
the cadence should be, or we can turn it
off completely. Apart from that, we can also
duplicate our template. If we want to duplicate
it and change it a little bit to have
another template, then we can click on duplicate or we can delete it completely. So it's completely gone out
of our template repository. If we want to have an
empty page as a default, rolling back to square one, where every page that we're
creating is an empty page, then we simply select
the empty page. Click on the three dots
and set it as a default. Again, we were
asked if it's just for this view or for all views. In this lecture,
you learned about templates for
database records that you need to replicate
or reiterate on, on a fixed cadence, or every time you pull
the information in, you can set a
default layout that you wanted to appear
in your database. And also you can style the properties by
hiding them away. Use cases for that can
be meetings, journaling, task management, or as shown
in this example, invoices. If you have any questions
in regards to this, please feel free to reach out. Otherwise, I will see you in
the next lecture. Cheers.
20. With these notion formulas, you can solve 99% of all problems: Hello and welcome
back to this course. In this lecture, we are going to talk about notion formulas. If you have ever
used formulas in Microsoft or Google Sheets, then this will be an easy win. If not, don't worry. We are here to go through
this step by step. For some people, formulas
might look a bit intimidating. But I promise you,
even though they are like 80 different formulas, in the reality you
might need maybe 610 different formulas to
solve 99% of the problems. I speak out of experience. I've also started from the point where you are right now
for everything else, you will find a cheat sheet
that I've created for you, explaining every
formula in detail with an example in the
video description. You can take the cheat
sheet whenever you feel blocked or don't know which
formula to choose from. For now, let's start off with the formulas and
jump into notion. All right, we are back on our notion database and
this is a test database. Just imagine this
is customer data. We have here some
records, some numbers, some dates that we collect in potentially a zip code and a country code of the
respective entry. Now we want to make use
of our formula property, and we do that by clicking
on the plus and then selecting formula out of
the property repository. We want to rearrange
it to the numbers at first because we want to
start working on numbers. The way this works is we click simply into the empty field. This will open up the
Notion formula menu. This window consists of
a central prompt intake, where we can add
our Notion formula. We get a preview of the results. We have some properties and the formulas on the
left hand side. As you can see, there's a lot of different formulas
to choose from. We won't go through each and everyone just through
some highlights, the most used and the most
important ones for the rest, please refer to the cheat sheet that's in the video description. In the middle, you will find a quick explanation
of every function. And it will also show
you the syntax that you will need to use in
order to get a result. But let's start
from the beginning. The first thing that
we see is that we have all the properties that we have created in our
database available, so we can use any of the
values here for a formula. First, we want to create
a very simple calculation like a normal
calculator would do. So we're using number
one and adding it to number two.
This is how it works. We are simply adding numbers. And we get a preview down here. Once we are done, we
simply click on Done. As you can see, it is
applied to all the records. We can use this formula to calculate all the
different operators. So we get the divider, we can use the multiplier, and we can use the minus. It just works out.
Something else that we frequently need to use is the so called
comparison function. We can compare number
one against number two, and if it's true,
we get a checkbox. If it's not true,
we get no checkbox. Let's try it out by
simply using number one. And then we do two equal signs. The two equal signs mean
that the both entries need to be the same in
order to get the check box. Finally, we are adding
number two to it. If I click now on, done, we get unchecked check boxes. This is because the two
records aren't the same. Let's change this property
to a normal number, not a percent, and
create similar records. For example, here we
will simply add a five. As you can see, it gives
us the right checkbox. We can invert this
equation by simply removing one equal sign and
adding one exclamation mark. This will invert the formula by stating those two numbers
should not be the same. Only if they are not the same, we will get a check
box five is the same, hence the checkbox is empty. And here, the two
numbers aren't the same. This is why we get the checkbox. A use case for this comparison might be, if we are saying, this is the percentage
of number one, this is the current
percentage of a task. Let's say we are currently
at 10% and this is 100% We want to compare
those two numbers, of course, we need to change
it to the equal sign. Let's put it this way,
the current value. This is target value only if
we reach the target value, the job is done or
the task is done, and hence we getting
the completion status. This formula, we could rename
it to Completion Status. And this might be a use case for using the comparison values. Another formula that I want to introduce to you is
the if statement. The if statement is a
very simple equation where we verify if a
condition is true or not. Let's say if this field
number one is empty, then we want to show an alert. If the field is not empty, then we don't want to show an
alert. How does that work? We go into our formula field, we create an F function. The function starts off
with an if statement. We open up the breakers, and then we say empty. There's a verification
step of the number one. We are checking if number one
is empty, if that is true. Now with the comma,
we're separating the condition from
the output value one, which is the output when
the condition is true. If that's true, if
number one is empty, then we want to
showcase an alert. We're doing this with the
quotes, the alternate output. We are again separating
with the coma. We just put empty quotes, so that means there's
no output whatsoever. And then we closing
the equation, Now we click on Done, and the formula is empty, y, because number one isn't empty. If we are now
deleting the number, you can see that we get an alert here indicating that
number one is empty. That's the first if statement
that we learned here. In combination with an
empty verification, that's also great
for data integrity. Let's imagine we have a
customer database and we want to verify that all
entries are filled. So we could, for every entry, create such an alert that informs us if there's
an entry missing. Now something else
that we can do with numbers is we can calculate, of course, percentages
and something like sales tax or the end price. Let's say number one
is indeed the price. Number two is the tax amount. We are changing
this property back to a percentage down here, and we say the percentage
on this product is 5% and this one is
10% First of all, we want to calculate
the tax amount by simply calculating the
price times the tax. That's it. Then we wanted to
calculate the final price. We are duplicating this
property, we call it. Then we go in here and simply add the price plus the tax amount that we
just calculated here. And click on Done This way, we calculated price times
tax equals the end price. If we want to, we can of
course hide the step. We can also combine those two
steps in one calculation. I just separated them so that the calculation is
easier to next. Calculation I want to
show you is with dates. Let's create a new
formula and we push it forward to the dates. Let's imagine this is a
date payable of an invoice. We say due date now we
want to with the formula. If we have already exceeded
the due date, and if we did, then we want to create an
alert. Let's jump into it. We need to start off
with an formula. And we want to check
whether the due date is smaller than today's date. And we can call in
the today's date as a variable with
the now statement. Now, opening closing
brackets. That's by the way. Whenever our formula is
incomplete or has an error, we get this error
message down here and it will explain us what's missing. In this case, our
if statement is far to be complete,
so let's continue. If today's date is greater
than the due date, so we exceeded the due date, then we want to get an alert. If not, we don't want
to get anything, we just close it down. As you can see,
today is 9 March, so we have exceeded the due date here and we get an alert. Versus this one is not getting an alert because
it's still in the future. Something else that we can do
with our formulas is to add certain days or to deduct certain days from
a date property. Let's go in here and
we can use the date at function to add
certain days to a date. We are using date
number two here. After we have referred to the respective date to which
we want to add days to, we need to define how many
units we want to add. And I'm intentionally saying
units, in this case three. In the next
condition, we need to define what kind of
currency we want to add, whether is days,
years, weeks, months. We can define that by an
opening and saying days, closing quotes, then we
close the records again. If we now click on Done, you will recognize that we have added the days to the date. Number two, The very same thing works with subtracting day. If we select date Ad, or simply just the Ad, then we add sub tract. Then we can also delete three days from the previous
date that we have here. Also, we can calculate
how many days are left. For example, if this is a
due date and we want to know how many days we have
until we reach this one. In order to calculate that, we want to calculate
the distance between now and the target date, which is date two in
the currency days. We are closing this
property and click on Done. As you can see, it is calculating me 29 days
from the ninth till 31 March and 41 days until April 20. This
is a great formula. For example, if you have
a approaching due date and you just want to see how
much time you have left. Something else to keep
in mind is a formula to connect different
fields with each other. Let's imagine again, this is
our customer database and we want to create a
unique customer ID based off the properties
of the customer. Let's say it's the name, it's potentially the Zip code, it's the country code,
and maybe the date when this person
became a client of us. These are, in our case now, enough properties to create a unique alphanumeric
code based on which we can
identify the client. In order to create
now this code, we simply connect different
fields to each other. We first select name, then we take the plus state, two plus zip code,
plus country code. Now if we click Done, you see we have an entire string of all the records that
we have added here. If we want to format this in a bit nicer way so that
we can read it better, then we simply add in between
of the plus a add space, potentially connector another
space and another quote. You can see we have now structured the information
a little bit better in order to give a
better readability to all the components we just add what we created in
between of the pluses. Have we now click on Done? We have successfully formatted our formula towards
what we need. That's it. We have
successfully applied the most important formulas
to our notion database. If you ask me, these
are the formulas that I would recommend
you to somehow remember. I mean, you don't need
to learn them by heart. Of course, you can use the cheat sheet to go through these, but I guess these
are the ones with which you will solve 99% of all the problems that you
face when you want to work with data and want to manipulate
data in a certain way. If you have any questions,
if you feel there's any formula missing that you would like to
have insights into, then please feel
free to reach out. Otherwise, I would see you
in the next lecture. Cheers.
21. Notion Database - Ingest data from external sources: Hello on, welcome
back to this course. In this lecture, we
are going to explore external connections to
your notion database. So if you're using Github, Google Drive, Figma, or Zendez, then listen because you
can import information from those sources directly
into your notion space. In particular, for the
case of Google Drive, this is a great way to, number one, overcome the
five megabyte upload limit that you have on the
free plan in notion. And number two,
you do not have to recreate your entire file
structure in notion. So let's jump into notion
and figure out how. All right, we are back on
our notion workspace inside a database and we want to click now on the plus to explore
those connections. As mentioned down here, we see the currently
available connections. We have the Github connection, Google Drive,
Figma, and Zendesk. This is a great way to pull in information that
you have stored on these systems in order to enrich the database that
you have right now. Let's try out for Google Drive, the sign up process and
the connection process itself is similar irrespectively which connection
you want to build. So we will figure out at
hand of Google Drive. Let's click on Google Drive, it's opening up a new column. Let's open up the column. And we do that by simply
clicking inside the column. Now we have two options
to choose from. Number one, we can paste a Google Drive link
into this column. We need to make sure that
this Google Drive link is however public link, so we do not need any
permissions to access it, otherwise, it's just a link. And we can pull the
information in or number two, we can connect our database
directly to Google Drive. And this is what we're
doing right now, so let's click Connect
to Google Drive. It's opening up a paper window. We need to select our
account. Confirm permissions. Again, confirm permissions
and after a few seconds, we have connected successfully our notion account with
the Google Drive account. As you can see, it has
confirmed the connection. In order to attach a file to
our newly created property, we simply click
into the property. And again, we either
pay the link to the Google Drive file
or we can scroll through all the available files by simply clicking
on our account name. This will open up
paper menu and we can select a file which is now
attached to the property. We can as the file by
simply clicking on it. This will open up a
new tab in our browser where we can view the
file in full size. Or we get a preview down here. If we want to get the direct
link to the original file, then we simply click
on the three dots and copy the link to original. With that, we can access the original file on
our Google Drive. If we want to detach the link between the file
and our property, then we simply need to click in the top right corner of the
respective property cell. Then we can delink the
file from the cell. And we can repeat the
process simply to attach a new file if we want to
get rid of the connection, because we say we don't want to have any personal
files anymore in here. Then we simply go to the
Settings and Members menu. Click on my connections, select the corresponding
connection, click on the three dots, and select Disconnect account. This will work the very
same way also for Github, Zendesk, and Figma files. This was a short one
showing you how you can connect external
sources towards your notion database so
that you can directly import files and information
into your database. If you have any questions,
feel free to reach out, Otherwise, I'll see you in
the next lecture cheer.
22. Database Connections (Link and Rollup): Hello and welcome
back to this course. Sometimes there are things
that just go better together, such as mobile
phones and signals, or plants and water. The very same thing can apply
to data structures as well. Just imagine you own a
business where you have a database for your client data and a database for
your invoices. Now, wouldn't it be cool to connect those two
databases together so that you are always aware
of which client made you, how much money or which invoice
belongs to which client. And also in turn,
you could even pull information from one
database to the other. So when you create
a new invoice, you don't have to manually write down the address
of your client, but you can pull it
in automatically. So there are numerous
arguments to connect those two
database together. And in this lecture we
will have a look at notion database relations and roll up fields.
Let's jump into it. All right, we are back
on our Notion workspace. And in our Notion workspace we have created a
little client tracker. It's a very simple,
a database actually, where we collect the
name of the client, a date since when they are our client and the
phone numbers. We could of course, add
multiple more properties, but for our example,
this will work out. On the other hand, if
I'm going up a level, we have an invoice
tracker where we record the invoices that
we are sending out. Also, we want to collect potentially how much money
we made with an invoice, so let's call this invoice. It's a simple numeric
field, number field. And we can't collect the sum in US dollars just pulling it over. Invoice one was 50 bucks. In invoice two was 100 bucks. Now we want to connect those
two database together. And we do that by
simply clicking on the plus on the right hand side. Then we go down to relation. Once you click on relation, we need to define which
database we want to relate to. We are using the
client tracker now. Notion has opened up
the property settings menu here it confirms again that we are connecting
it to client tracker. We can also give it
a different name, but I just wanted to call it client tracker for visibility. Next up we can define the limit. A limit means how many records can we connect to each other? Should it be a
want, one relation, or can we connect
multiple records with one individual record? In our example, it would make
sense to go with no limit. Why? Because one
customer can have, of course, more
than one invoice. It makes sense if we are opening up this
relation to no limit, otherwise, we would
set it to one page. Next up, we also want to show
it in bidirectional way. If we toggle this off, it would only show up
on our invoice tracker. But if we're toggling this
one to the right hand side, then we get this relational
field on both ends. Let's connect it and
add the relation, and it has created us. Now this relational field, as you can see,
it's indicated that this is relational
field with this arrow. We had this arrow
already when we talked about external
connections. Whenever you're
connecting something, then you have this arrow. Next up, we need to
connect the invoices to the respective entries
in our client tracker. So we have to map
the information. For that, I simply click into the field and I am now searching for the
respective client. To attach the invoice two, I'll say this is Fred. I want this one to go to mark this where we have
now created the relation. If we want to get
rid of the relation between those two entries, then we simply
click on the minus, as we have allowed more
than one relation. We could potentially
also add Josh here on the invoice
track review. It might not make
that much sense because usually one invoice goes to one customer and not to multiple customers unless
we're splitting the invoice. But in this case,
we keep it as one. I'm clicking now out of
the relational field now, as indicated, I want to pull in some basic information
from Mark and Fred, so I don't have to manually
look them up for that. I am creating a so
called roll up. A roll up formula is like a look up formula in Google
Sheets or in Microsoft X. We can actively pull
information from other databases or other tables that meet a certain condition. The condition here
is the relation between those two entries. We are on our Property
Settings menu. We can change the type of the relation from roll
up to something else, but roll up is what we want to. We can also change
the name here, and now we need to select
the respective relation. As you can see also the Google
Drive relation shows up. All the relations that
you've created for a single database will
be pre populated. In this view, we can search for the respective relation
in case you have dozens of different
relations on top. Here, let's select
the client tracker. Now we are defining what
property we want to pull in. Let's say we want to
get the phone number. Then we can even calculate. We can show the original, we can show all unique values. We can count stuff. We can count fields
that are empty, count fields that are not empty, and we can count the percentage, which doesn't make much sense, since these are phone numbers. Of course, maybe next up we want to duplicate this property, but instead of the phone number, we want to understand when
they are our clients. Click on added property
and change the property to the client since fhere again we want to
show the original. So far, so good. We
connected those entries. Now let's look into
the client tracker and see what we can do with the invoice tracker information
in the client tracker. Now that we are back in
the invoice tracker, we have also created
automatically a property field
for the relation inside the client
tracker and it's also showing which invoices are
related to the individuals. Now we might want to understand how much money we made with
each individual clients. We are using a roll up formula and we want to
collect information from the invoice tracker. Instead of the invoice number, we want to have the invoice sum. And we don't want to
have the original, we want to have the total sum. Now if we go back to
our invoice tracker and we are simply adding
a few more invoices, then you will see
how these properties behave with more than one
record assigned to it. Let's say this is
again 50 bucks. We are adding invoice number four which is another 150 bucks. And we are connecting
this one again to Fred and this one also to Fred. Now if we go back to
our client tracker, we'll see that the
sums have added up, so we can see the total amount of money that we made
with each client. Of course, you can transfer this example to a
lot of use cases. It could be, for example, houses versus individual flats. It could be bookshelves
versus individual books. It could be individual
files versus file drives. It could be departments
versus employees. Or it could be categories
versus individual entries. Whenever you need to
sum up information by a higher category or you simply want to
connect to records, then it makes sense
to think about a two database design
where you connect the databases with
relational properties and pull information
with a roll up property. If you have any questions,
feel free to reach out, Otherwise, I'll see you in
the next lecture cheer.
23. Notion Database Button Automations: Hello and welcome
back to this course. In this lecture we are
going to talk about notion button automations
in your database. If you now think that sounds
a bit like a repetition, then only because you're right. We have already talked
about button automations, but in the context of integrating them into
a page directly. However, in this example, we are placing this button as a property into our
notion database, giving us a chance to semi automate different steps of
our workflow in our database. So let's have a look at it. All right, we are back
on our Notion workspace and we are in the
client tracker. And in the client tracker
we are connecting our client tracker with the
notion invoice tracker. Wouldn't it be cool?
Now if we simply go to our client tracker and
with a click of a button, we can register a new invoice. This is what we're
going to try out here. Let's click on the
Plus, and we go down to Button. Let's
click on Button. And you will recognize this property layout
because it's the very same as with the
button automations that we integrate it
into our notion page. As always, we give
it a handy name, we can give it a
label if we want to. And then we simply
have a trigger. The trigger is, the
button is clicked. Next up we can add the actions with the
click of a button. We can add a page to
another database. We can addit a page
in another database. We can show the confirmation. We can open the page that
we've just newly created and we can also addit any property
that we have in here. So right now we
want to add a page to the invoice tracker. So let's go down to
the invoice tracker. Invoice number can be blank. Let's call it new
invoice so that we know we have to add some
more information to it. We want to set a due date
by, for example, today. And we want to set
the invoice sum to $100 So that makes sense if you have a limited
amount of services, of course, where you might create a button for
the $100 service, $50 service, and $25
service, just to name it. Right then we want
to add another step. As a next step, we
want to add the page. We want to attach this page, like the page where
we click the button towards the newly created page, and therefore we are selecting a and select the new page
which opens up directly. That's it, We want to
give it a proper name. Let's add new $100 invoice
as a name and press Enter. And we are now exiting the menu. Let's test it out. We click
on Ne hundred Dollar Invoice. As you can see, it has created a new invoice in the
invoice tracker, it has already added the
sum to the roll up field. And let's go into the invoice and check out how
that looks like. It has created a new page with the right sum and
the right due date. That works out fine. We can of course, add
multiple button automation. If we stick to the
example of adding a new invoice and let's say
you have three services, then it would make
sense to, for example, create a button where you say, this is the new $50 invoice. So that you can trigger the respective invoices
with a click of a button. We would simply again add
the page, then add the page. We could also show
the confirmation or open the page
directly afterwards. So we are redirected to the
page that we just created to add the respective
details if we want to. As you can see, this
isn't much different from the button automation that we added directly to
our Notion page. It gives you lots
of opportunity to semi automate processes that you would otherwise do manually. And also it's up boosting your data accuracy
because you're entering the information just
once and it's then repeating the very same step over and over again as always, the example of creating a
new invoice is transferable, whether it is to create
a ticket for a bar, a ticket for a new work, request a new task of a project, or adding a new agenda point
to your weekly meeting. As always, if you have any
questions in regard to the notion button automations,
feel free to reach out. Otherwise, I will see you in
the next lecture. Cheers.
24. Notion Database Automations (Paid Feature): Hello and welcome
back to this course. In this lecture, we
are going to talk about Notion database
automations, which is the next level of
notion button automations. With Notion button automations, we trigger semi automated
workflows by pressing a button. If we even want to get
rid of this button push, then we can opt into Notion
database automations, but beware, this
is a paid feature. So here we are hitting the limits of the
notion free plan. If it's worth the money, this is up to you to decide. Let's figure out how this
feature works inside notion. We are back to our notion
workspace and we are entering our invoice tracker where we still have our
button automation. So if you remember, with
the push of a button, we can execute certain steps. And the very same methodology works also with
notion automations. And we can create a
workflow by clicking on the bolt on the top
right of our database. By doing that, we can
add a new automation. You will recognize this
interface as this is the very same workflow as
for the button automations. We can add a trigger. A trigger event can be
literally anything that happens inside this tracker or
inside this database. We can trigger a workflow
by adding a page, any page to this database, or by the change
of any property, or we can use a
specific property. In this use case, I want to
change the invoice number by clicking into the check box and confirming that
an invoice is paid. In this case, my trigger is the check box paid,
needs to be checked. I click on Don.
This is my trigger. And now I want to add an action. In this case, I want to change the property of the
invoice number, which is our very first field, and I want to set it
into the paid mode, so simply adding paid as a
node here, And that's it. I could add other steps. I could, for example, addit any property inside
this database, but I could also addit pages in other databases and I could also add another
page to a database. For example, I could trigger an automation on my
invoice tracker saying, whenever a new
invoice is created, it should be assigned to a specific client if
that makes sense. If there's for example a dedicated invoice
tracker just for a client and I can connect my notion account
to your slack account. Means when there's a change
in my notion database, it triggers a notification to my select channel or
as a direct message. I will show you this at the
very end of this lecture. So let's first continue
with our automation. So we have selected
paid set to check, and set invoice to Paid. We click on Create, and now our database
is up and running, so let's test it out. I will click this
invoice to be paid. It will take a few seconds
until the automation executes, and it has changed
the invoice number to paid on the left hand
side, as you can see, this is a very
helpful feature to automate certain steps
into your workflow. If we click on the
bold, we cannot only change and edit
our automation. We can also pause it temporarily or delete
our automation. Now I want to click on Added. As always, it will execute the automations
from top to bottom. So based on the actions
that we have defined here, it will just go
from top to bottom. In the very same order, we should arrange the steps
that they make sense. In this case, I want to delete my action and add the
notification to slack. This is actually the
only free automation that you can set up
on the free account. All of these actions are not
enabled on the free account, but the select
notification is enabled. Let's figure that one out. We are selecting slack. Now we need to select
a select channel. And it's telling me
that we have not yet connected a
select channel to it. We connect it by
clicking on Connect. The next thing that
we need to do is we need to actually sign
into our workspace. If you have a workspace, then you can click on Find
your Workspace In Slack. I will log into Slag with my Google account because this is a linked
account already. So I confirm it. I give
all the permissions necessary and I will select
the appropriate workspace. Once I've connected
my slack workspace, I can now select the channel that I would like
to reach out to. So in this case, I'm selecting notion
Punk, click on Safe. On the other hand, I'm
logging into Select just to check out if my
automation is working. So I've set up the automation. I've opened up slack in another browser tab to check out if the automation
is working. So let's figure out, I'm now adding a new invoice. Just call it test. Now, I will set it on pad. We will have a look if the
automation is triggered. And as you can see, it has sent me the notification
into my select channel. So this is a very handy feature. In this lecture, we talked
about notion automations, a way to completely automate workflow steps
in your notion database. As I said, this isn't
a free feature. It's up to you to decide
whether you want to pay an extra fee to
get this function, or if you also can
live with pressing a button on the
button automations.
25. Notion Database Entry Dependencies: Hello and welcome
back to this course. In this lecture, we
are going to talk about dependencies
between tasks. You might remember that
we talked about splitting databases into two if the
data structure requires it. Our example back in
the days was we have a database for invoices and
a database for clients. Both require their
very own database. Why? Because the data
structure is just different. It doesn't make sense to
try capturing invoices in a client database that
is just collecting data points for clients
and vice versa. So it makes sense
to split those two. But what if we want to
stay on one database because the data structure
isn't any different? Let's say we have a big task and we want to just become more granular and break this big task up into smaller bits and pieces. For example, to collaborate with others or to outsource a task. Now this is where
dependencies and sub level items
come into the game. And I will show it to you a
notion. So let's jump over. We are back on our notion
workspace and I've created a little work
tracker. Very simple thing. In the first column, we have the task name, we have a status bar, we have the Dubai column, and we have the
assigned person to it. This is great if we have
a simple process or simple task that does not
require any more detail. But what if we want
to break it up into several components
so that we can say, okay, this part of the
task is being dealt with by another team
or another colleague. Now this is where we want to
add a sub level to our task. And we do that by clicking on the three dots on the right
hand side of our database. And you go down to sub items. Then you click on
Turn on Sub Items. And what happens now is that
we are adding another layer to our task or to our
database entries. If I click on the new item, this item will belong
to task number one. So it will be attached
to task number one. And I can call it, for example, Task 1.1 This is adding a hierarchical sub
level to task number one. And I can continue by
adding, for example, Task 1.2 and I can
also add Task 1.3 Now, this gives me the option to take Task 1.1 and assign it
to a different person. For example, if Task 1.1 is being dealt with
finance department, I can just assign the finance
department and they would know which part of the process
they are responsible for. It's a great way to
organize work and to split things into
smaller bits and pieces. If I want, I can become
even more granular, even more detail, and add
more sublevels to it. So as you can see, if
I even untoggle Task 1.1 I can add Task 1.1 0.1 and I can become even more granular in breaking
this one up into Task 1.1 0.1 0.1 Of course, the more granular become, the more administrative work is required to keep
everything up to date. So try to find a good balance between breaking up the task
in smaller bits and pieces, but on the other hand,
keeping it manageable. As you can see,
the data structure isn't changing and
we can collect the very same data
points and manage the very same data points
inside the subtask. I can assign persons or I can adjust the columns
to what I need to. This is a great way to keep
things organized and to have the oversight of your
project and task completion. Next, what I want to show
you is dependencies. A dependency is if we just
deselect all those subtasks. A dependency means
that a task can either block another task or can
be blocked by another task. Let's imagine we have
task number two. And let's imagine task number one needs to be recoplete first, then task number two, and
then task number three. That means if we look
at task number two, task number two is
blocked by task number one and is simultaneously
blocking task number three. That means it doesn't make any sense to start
with task number three when task number 1.2
haven't been completed. In order to showcase and
visualize these dependencies, which can become very relevant if you have
complex topics or complex processes
where the gears need to fit into each other. We are opening up our database
on the right hand side, and then we go on Dependencies, and we are going to
turn on Dependencies. Let's click on Turn
on Dependencies. As you can see, we
have technically created simple
relational columns. This means we create
relations between tasks and not between databases. Let's stick to our example
of task number two. Task number two is blocked
by task number one In turn, task number two is blocking
task number three. This is like a
balanced exercise. Means as soon as I'm adding
a block by or blocking task, the opposite will happen with the task that we
are just assigned. When I add blocked
by task number one, we will get a
blocking task number two in task number one. This is indicating
in which order, kind of, we need to
complete our task. This feature becomes even
more sophisticated when we go into our date field
and include an end time, because now we are
able to capture a date range until which
we want to complete this. Respective task.
Let's say task number one goes from fourth to seventh. Let's say task number two
goes from eighth to 11th. Let's say task number three goes from 18th, 22nd of March. Now we are just adding
time lines to it. Wouldn't it be great if
we could visualize those on our calendar and this
is definitely possible. Let's add another
view to our tracker. Actually, we have not
yet talked about views. This is a separate lecture, but I just want to show
you how this works. We are creating a timeline. This timeline is called time line view and
I click on Don. As you can see right now, we are just visualizing the very same information
in another order. Instead of a table list view, We are now switching
over to a timeline. We have task number one, which is blocking task number two which is blocking
task number three. We can show these dependencies
with these arrows and all the subtasks are organized below it with the toggle
feature turned on. This requires that
you always enter a start and an end date for your task in order
to make this work. We can also change
the dependencies of these tasks in
this tracker by simply deleting a dependency by clicking on this
X, for example. Now if I want to
recreate a dependency, then I just attach it back
to the respective task. We can even add
another dependency by simply dragging and
dropping the arrow. The thing that I just
skipped a few seconds ago in our dependencies is how the calendar should behave
if we're moving around task. As you can see, if I'm now
moving task number two, it shifted task
number one because logically we still are
dependent on task number one. Task number two cannot start before we have not
finished number one. If you want to change
this behavior, then you click on the menu
on the right hand side. Go to Dependencies,
and you click on Shift and maintain
time between the items. This way, the
shifting of one item will move the entire project
to the left or to the right. The time relation, the time distance between
those tasks will stay intact. The other option that you have here is do not shift
automatically. If I'm now shifting around, it will mess up with my times, but it will not automatically adjust any of the
timelines itself. The default value, if I go
back to the dependencies, is shift only when
dates overlap. So that means I can
move task number two around and it will only have an impact on the previous or the next task if there
is a date overlap. As you can see right now, this is a great tool to manage tasks and projects
and to make sure, number one, we have the
oversight of a project. Number two, we can
get granular and manage inputs from various
teams or various colleagues. And we can use it as
a tool to make sure that our timelines are
realistic and then we're not messing up
with any workflows that need to be followed in a
specific sequential order. If you have any questions,
please feel free to reach out. Otherwise, I will see you
in the next video. Cheers.
26. Lets build: a Notion Invoice Tracker (Exercise): Hello and welcome
back to this course. This lecture marks
a little milestone on our journey to become
a true notion master. Why? Because we have
successfully completed the notion foundational
properties and databases. And we also talked already
about the formulas. This is kind of the most
important thing that you need to know about
notion database. Of course there is much more, but if you want to reduce
it to the most essential, you completed it already. That's great. In order
to continue on our path and since formulas are super
important, you get it right. This is another
exercise lecture. The exercise scenario
I've prepared for today is a little
invoice tracker. As always, this is completely voluntary and you can
skip the lecture. But I highly recommend you to keep on practicing
as much as you can. So let's jump over to Notion
and look at the example. All right, we are back on our Notion workspace and we are here on our
invoice tracker. Every line represents an invoice that we want to keep track of whenever we are adding a new line.
This is a new invoice. We have a due by date, and we have also a paid checkbox
and an invoice storage. So we could upload our
invoice into this database. Now this checkbox
triggers something. Whenever I press paid, I update the status
into nothing. So the total status is empty, the payment status is okay. We are also calculating the remaining days until we
need to pay the invoice. And we also calculate the
day by which we need to initiate the payment
pay all formulas, they are just support
formulas to break the big formula into
certain smaller components. Actually, I just want to see at the very end just
the total status. So I want to understand
whether I'm overdue, how many days I'm remaining, and I want to understand
by which date I need to initiate the payment so that I'm not at risk
of being overdue. In the end, I would
simply hide those two. You can pause the
video now and in a few seconds I'm going
to review the solution. So take a bit of time
and try to recreate. Think about the solution. Think about the formulas. We have talked about all
these formulas before. And give it a try. I will
see you in a few seconds. All right, welcome back. I hope you enjoyed this exercise. And don't worry if things are not working out at
the very first time. You're here to learn
and it's completely okay to take the course
at your very own pace. Coming back to the solution. Let's go through
it step by step. The basic properties we
have already discussed. I think this is nothing new. Let's maybe start with the support functions
that we have created. Maybe the date status first. We want to understand if an
invoice is overdue or if not, how many days are left for that we have created and if formula. So first of all, we're
comparing now versus the Dubai. As soon as now the Qd date is
larger than the Dubia date, then we are of course,
overdue hands. The first reaction on if this is true is overdue Alert here. If this is not true, so means we have still
some time to go. Then we are combining
a fixed expression, which is the remaining days, together with a
dynamic component, which is the date
between the due by date and today's date
in the currency days. This leads ultimately to
remaining days four or overdue. The other thing that
we want to verify on is whether or not the
invoice is still to be paid. This is why I've created another formula for
the payment status. As soon as I'm taking the box, it's switching over to
paid. Very simple formula. We are simply checking if
the box here is empty. And if it's empty it's still payable because
then it's not paid. And if it's not
empty, it's paid. So we can switch
over to paid status. And finally, those two formulas speak into the total status, which means we are simply checking is this
box checked or not. If it is empty, then
we want to simply showcase the payment status
so it's still payable. And we want to also
give the date status. Means we have
remaining four days. If it's not payable because
the box is checked, we just want to display nothing. This is the logic behind it. And of course, you also have a date subtract formula
attached to calculate the due by date minus
three days so that we know when we need to initiate the
final payment. All right? I hope this was a fun
exercise for you to do. If you have any questions
on the formulas, consider revisiting
the previous lecture where we talk about the
formulas in detail. If you have any other questions,
feel free to reach out. Otherwise, I will see you in
the next lecture. Cheers.
27. Notion Timeline View and Notion View Settings: Hello and welcome
back to this course. You start getting bored
by the default list view of our databases then,
don't you worry. We are now embarking on to exploring different views
in our Notion database. And I promise you can design your very own database in
the view that you prefer. Let's jump over into Notion
and explore them first hand. We are back on our
database, our work tracker, and just as a little repetition, we talked about the
timeline view before. The timeline view is just a different visualization
of our list view, where we can define
the timeline and visualize the timeline and the dependency between the task. We can zoom in and zoom out on our scale on the
right hand side, from yearly view
to an hours view, a day view, or a month view. As you can see, we
are changing then the granularity on how
much we want to zoom in, which just helps to
manage our information. We can go back and forth on
our timeline by these errors, or we can go back to today
by clicking on today. Other than that, we also have an open and
calendar function. This opens up the
notion calendar, which is a topic for itself. I'm going to talk about
that in a separate topic. If you want to create a
new item on this view, then you simply go on the
left side and you click on. By doing that, you
can give it a name, press Enter, and that's it. This is how you
can create a task. Also on the timeline view, else we have certain
settings that we can adjust for our view. We can of course, change the layout by
clicking on layout. So here we have
different other layouts that we are going
to talk bit by bit. We can decide where it should
pull the timeline from. Just imagine we have
multiple date fields in our notion database. Then we might want to select a specific column that it
should pull the dates from. In this case it's the Dubai. If we would have
more date columns, then we can select
a different one if that's the right forum. Next we can decide on whether
we want to see a table on the left hand side which gives
us a line for every task. And we can unfold
also the subtasks. We can do that, of course,
also in our timeline view, but this just helps us to see a list of all the tasks
on the left hand side, because maybe there are
some tasks that are out of our current view which are
indicated by these errors. But with this view, you see
all the tasks at a glance. Going back to the
layout settings, we also can decide on how many table properties
we want to show. In this case, we are
only showing the name, but we can also enable other data points to be shown in the table on
the left hand side. We can manually select
them by clicking on this. And we can also go
on the timeline and decide on which properties
we want to show here, the more information is
shown on our timeline. Going back to the
property settings, we can also decide on
how we want to open up a page if we click
on a database entry. So let's click on, for
example, this task. It will now show up
in the side view. But we can also define a
different view if we want to. Let's click on the
layout and select, for example, Center Peak, which means we get a pop up
in the middle of the screen. Or full patridch means we're
jumping on the entire page. The last thing to decide on is whether or not we
want to show a page. Can Page can, if I
simply click on a page, is an icon that we can
select on the top row. We can also add a cover, an image, to a page. We'll talk more about this when we discuss the page
styling elements. We can also add an icon. An icon can be an imoge. It can be either one
of these emoges, an icon from the
notion templates. Or we can add a custom
emoge if we want to. Closing that one
down, as we have enabled showing the
icons on our timeline, the icon will pop up here. Next up in our menu, we can select again the properties
that we want to show. Similar view as we
just had before. We can filter by certain things. Let's say we want to only show things that happen
after 8 March. We can decide on the
property that should be our decisive filter criterion,
in this case, Dubai. And we can set the
filter to, for example, start date is relatively
to today, or maybe today. This way we can filter out all the other tasks that
might be irrelevant. These filters are dynamically, so that means they
apply at every second. Once we move forward
and we are on the 21st, the task number two won't
be displayed anymore. Check always your filters. You can also combine
different filters. If I go out here, we can add another filter and can
filter, for example, by status and only
showcase information that are, for example, done. I can also delete the filters by simply going on the filter. On the three dots on the right hand side
and select Delete. Same, I go on the arrow on three dots and select
Delete Filters. Now if I go back to
the main interface, we can also sort the views. By clicking on the sort view, we can decide on what should be the decisive column or data point by which we want
to sort the information. Let's say name is the
decisive criterion, then it will sort the
view by the name. The filter menu on the
left hand side gives you an indication on the
currently applied sortation. We can change the sortation, change the respective property. We can change whether it should be ascending
or descending, and we can add in
different sortation. We can put multiple sortations
into it if we need to. If we want to reset the view to default,
we click on Reset. If we want to save the
view for everyone, then we click on this button. Otherwise, the view will
only be visible to us. Next up, we have the
Group functionality. With a group functionality, we can group together tasks and we can group them also
by different properties. Let's say we want to
group them by status. This means, as you can see, it's now grouping everything that is not started
in progress or done. This might help to
visually indicate in which status our
tasks are right now. Other grouping mechanisms
could be, for example, to group by customer, by invoice date, or by the day. You can group it as you want. In order to change
the group property, we click on Group By, and there you can define
the respective property which shall be decisive
for your grouping. For example, if you
want to group instead by the Dubai date,
then you can do that. As you can see, it's grouping by the last 30 days or
the next 30 days. You can also decide on how
it's going to group the date. So we can either use
a relative date. We can group by the day, either week, the
month or the year. Again, we can sort it
as it makes sense. We can decide on
whether or not we want to hide empty groups or not. If I de select
hide empty groups, then there is a group
that's called no due date. So there might be a
task that has not yet assigned a due date
that would pop up here. But if we want to hide
those empty groups, then we simply select the
toggle on the right hand side, providing you a cleaner overview of your tasks going back. The remaining options
are subs dependencies. We have already talked about this in the previous lecture. We have a so called load limit. This indicates on how many
tasks are going to be loaded, right from the beginning
when you open up the page until you have to scroll
down and it's reloading. That means it is just limiting
the first preview to, for example, ten pages, 25 pages, or 100 pages. The less pages you select, the faster the response time off the notion page will
be. Below that. We also have the automations
which we already talked about so you can build yourself on workflows
inside Notion. You have also the option
to lock your database, so that means no one else can edit the database aside from you to avoid any unintentional
changes to your database. It can also copy the link
to view this database. If you click on
this and send over the link to someone who has
an account with notion, they are able to
directly view this page. We can of course duplicate
this view if you need to, and we can delete this view. In this lecture, we talked
about the timeline view. We also talked
about the settings that you can apply on a view. Of course, these
are a bit different depending on the view that
you're going to install, but generally they are
more or less the same. In the next lectures,
we are more focusing on the view itself rather
than on the settings, even though I will give a quick indication on the settings. But if you need a detailed
explanation on the settings, please go back to this lecture to get the complete explanation. If you have any questions,
please feel free to reach out. Otherwise, I will see you in
the next lecture. Cheers.
28. Notion Calendar and Board (Kanban) View: Hello and welcome
back to this course. In this lecture, we are
going to talk about the calendar view and the
board view in our database, giving you two more
options to choose from to visualize instyle
your dashboards according to your needs. Let's jump over Interina
back on our work space, we have our work tracker opened. In the last lecture we talked
about the timeline view. A view that is somehow similar but still a bit different
is the calendar view. Clicking on the plus
as we are opening up our new view and then
selecting calendar view. As you can see right now, it has created
ourselves a calendar. What's now the
difference between the timeline view and
the calendar view? The timeline view gives us a horizontal view
of our timeline. Means we are working from start to finish to
the right hand side. Whereas a calendar view is really what the name
suggests, a calendar, we are not really seeing the
dependencies between tasks, but we can see for which days
we have planned our tasks, so we are occupied. So instead of showing a timeline kind of view in between of the week
days and the weeks, we will see a bar that is
extending over the calendar, gaming us a good bird's eye view on what's currently going on. Of course, we can open
the view in the calendar. The notion calendar is a
separate feature that is quite a big tool
that we enhance. We are going to talk about
it in a separate view. We can scroll through the
calendar by the arrows and we can jump back to the current
day by clicking on today. Else we have certain
settings that we can set. Of course, we can
change the layout. If we click on the layout, we can select the
respective property by which we want to
sort our calendar. We can show the calendar
as month or as a week. We can turn on or off the
weekends to be presented to us, giving us either just the business days or
the full calendar. Again, we can decide
on how we want to open our pages and whether or not
we want to show page items. I'm flying a bit through the settings right
now because there was an extensive
explanation already in the previous lecture where we talked about the timeline view. If you want to get a detailed explanation of what
all this means, then please go back to
the previous lecture. If you go out the
layout settings, we can select our filter, our sortation, our sub items, dependencies, automations,
everything that we have discussed already previously
about our database views. Nothing different to
the calendar view. Another view that I want
to show you that helps, in particular if you're
having a very task heavy and process
heavy workload, is the board view. The board view might remind
you of a Canman system. Why? Because you can
set it up as a Canman. So what is the Canon?
A Cain is actually a work system
productivity system, which categorizes your tasks and your processes
in three stages. The three stages are not
started in progress or done. Why is it a good idea to use a Canman system for
productivity management? From my perspective, there's no better way to get
a quick overview on the work assignment as of
right now with a Can View. Because you directly see
what needs to be done, what is already in preparation,
and what is concluded. It's giving you a very
simple but effective way to manage your workload. How do we create a Cavan
in our board view? First of all, we need of course, a specific property to refer to. This can either be a tag, so means a multi select property
or the status property. The status property is great. Why? Because if we go
in the status property, it already comes with
our three groups to do group in progress,
group, complete group. We can of course, get more granular in the statuses
and subs status. For example, here I created an not started
assigned in progress, waiting for approval
and done status, so we can become more granular. The default value
here is that we are getting all the subs statuses
as individual column. But we can also
change it, as I said, to a menu by clicking on the three dots and
going on the layout. And then group by status. If we then select status by
group instead of option, you see that we are now having just three
columns in here. This is the puristic canon
view that I was talking about. If we're working on this view, we simply shift the task from
one column to the next one. If I start working
on task number one, I will push it into
task in progress. And if I completed task number
four, I will move it over. As soon as I'm
shifting the tasks, the status will update
automatically on our status bar. This is a very handy feature if you have a lot of
tasks that you work simultaneously on and you want to maintain
oversight on it. Other settings that are
specific to the board view, if I click on our three dots in the layout menu is
the card preview. So we can decide on whether
we want to show page cover, for example, the image that
we've selected in the page. We will talk more about the page cover when we
talk about page styling, but in general, you
can select a cover here and you can decide on
whether you want to show it. Another setting that
you can take is to decide on showing a card
preview with the page content. This way, if you go on a page
and add a bit of content, you will see a preview
on the card itself. This makes it easier to identify the task if the task
name isn't self explanatory and you need to see a bit of the page
content as a preview. Next up in the layout settings, we can decide on the card size. Do we want to have it small, do we want to have
them medium size, or do we want to have
them really large size? That depends on your
preference on how you want to manage your tasks in the
work in the board view. Next up, you can decide on whether you want
to fit the image. If we go to the card preview, select page cover
and toggle this one. You see that it will go with the original size of your
cover with the nets. Next setting Rep
Ball properties. If you are showing
more properties on the cards as if we would go here and select other properties and the properties would be
longer than the cards with, then you can decide on
whether you want to wrap. This means you add
a line or not. So it depends on
your preference, what you want to do here. Below that, we can change the
grouping that we selected. We can define on
whether we want to color our columns to
have a better oversight. And we can decide how we
want to open the pages and whether or not we want
to show the page icons, for example, for those two. In this lecture, we talked
about the Or view in comparison to the timeline
view and the board view, as well as we also understood how we can set
up our board view as a Cam, as a means of
productivity management and improving our efficiency. If you have any questions,
feel free to reach out, Otherwise, I will see
you in the next lecture.
29. Notion Gallerie and List View: Hello and welcome
back to this course. In this lecture, we are
going to conclude on the Notion database
views and we're concluding with the list
view and the gallery view. So let's jump into
Notion and check them out on our
Notion workspace. I have created a little
bookmark tracker. And this bookmark tracker
has just two columns. On the one hand we have
the name of the site, and on the other
we have the URL. This tracker is in a table
view of our database. The table view can be more
or less universally applied, but sometimes it's just too much and overflowing
with information. So let's figure out a leaner way to visualize limited
information. And we click on the plus
to open up another view, and then we select
the list view. List view is a really
simplified list of things. If I just ted the view, you can see that we have just a consecutive list of
all the different bookmarks. As always, we can adjust the
list according to our needs. For that, let's check out the options that we have
in our layout menu. However, they are very limited
when we click on a page, if it should open up in a
side view, center view, or as a full page on whether or not we want to show H icon. So this is very
limited, but what we can add to the properties, if we want to also
show the properties, which I did right now,
just closing it down, then you can see
that we're showing the properties on
the right hand side. And the way we are
displaying properties is generally different than other views because they will distribute over the
length of this list. So giving us a very minimalistic style
element to visualize data Else we just have the standard settings
such as filter sort, group, sub items,
dependencies, and automations. If you want to have a
detailed explanation of those settings, then please go back
to the lecture where we discussed
the timeline view, where we are going to explore
all the features in detail. This is the list view, as I said, nothing
overly spectacular. Just a minimal version
of our table view. The other view that I want to show you is the gallery review. And the gallery review
is, for example, great. When we talk about
a contact database, let's imagine we are
having a client tracker. On the client tracker, we
have certain individuals. We have the name, the
clients in state. We have the phone
number, So a couple of relevant information for
our contact database, but we might want to visualize them in a more flashcard
style of view. In order to do that,
we click on the Plus, and then we select
our Gallery Review. On the Gallery view,
as you can see, it will change the view
into a board view, but without the columns
that we used to have over here we can customize the
cards that have been created. Right now we can decide
on whether we want to show the card preview
as a page content. So that means if we go on the
page and we, for example, make notes and say notes of the last call and we add
some information here. Then in the view, in the page preview,
page content preview, we would see all those notes. If we instead, for example, want to show the cover images, for example, the images
of our employees. If this would be an
employee database, then we can of course, go to our layout settings and
select cover image instead. Here I've added some stock
photos of some individuals. As you can see, this gives us a good overview of
individual persons. Of course, we can
select the card size. Whether it should be
small or they should be large really depends on
how we want to use them. We can decide on whether we
want to fit the images so they are as a complete
image on our card. We can wrap the
properties if we want to. We can decide on
how we want to open the pages or if we want
to show the page icon. Now if we go back, of course, we can also adjust the
properties that we want to show. For example, if it's
relevant for me to also indicate the phone number
or the total turnover, then we can do that in here. This is a great way to build
our order dashboard and visualize information in
a very consolidated view. In this lecture, we concluded
the notion database. We with the list view
and the gallery view. You have now seen all the different views and know exactly how to set them up and in which use cases they make sense. If you have any questions,
feel free to reach out. Otherwise, I will see you in
the next lecture. Cheers.
30. Notion Templates - find, use and create own templates: Hello and welcome
back to this course. In the past lectures,
we talked intensely about how to build
out our database, how to arrange the views, and how to visualize the
information as we need. And this is great, being able to build something from scratch the exact way we want it to be without writing
any line of code. But sometimes we don't even
have the time to do this, Sometimes we just want
to start out without even giving a thought on how
to structure our database. And this is the moment
where we're super glad that notion offers a notion template gallery which is the topic of today's lecture. So let's jump on
Notion and figure out how we can save
ourselves time and haddock. We are back on our
Notion workspace here. We got our trackers and now we want to create
a new tracker. But we do not want to
start from scratch, we want to use one of the
pre packed templates. And good thing is that there is a very extensive notion
template gallery. And for using this
template gallery, we simply click on templates
on the left hand side. It couldn't be more
convenient and you will find a long list of
different templates for different use cases, different categories
of your life. So to directly jump
into a project, on the top we find
suggested templates. This is referring back to
when we initially said, hey, I want to use notion for work, for my personal
use or as a team. This will influence the
suggested templates also being influenced by the
previously selected templates. From the template gallery, you can see we start here
from the very simple to do, list over projects,
task, task, sprins, meetings, dogs, wiki, whatever it is, you
will find it here. You will also find product
specific templates. Marketing, engineering
design, start up operations, sales, recruitment, HR, IT, and stuff for individuals. You can even use Notion
to do journaling. And of course, there are different templates for
different areas in our life. So there are templates for work, for school, for personal
use, for projects, wikis and dogs notion
will provide us always with a preview of the template in the middle of the screen. On the left hand
side, we can decide on the individual templates or the categories on the top on the different areas of our life. In the middle, we will see the preview and we
also got a search bar. Let's imagine I want something
for task management. I would switch back to
work and look up task. You can see this
gives me a list of two different templates
to choose from. If this isn't enough already, then we can click
on more templates. And this will guide us to the extensive notion
template gallery, where you not only
find templates created by notion itself, but also templates
from other creators. And also from me.
Here you will find tens of thousands of
different templates for almost every use case. If you want to select
a template from here, let's say we want to
use this book tracker. We just go on the book tracker. We always will get an indication on whether
this template is three. Some templates are premium, so just keep an eye open
on the free templates. We click on the template again, we get here a preview. And if we want to
get this template, we simply click here. Sometimes this will redirect
us to an external page. Not all the templates are hosted on the Notion template gallery. Sometimes you will be redirected to an external page.
Don't be scared. If it's free, it's
free. If it's not free, it's not free,
just check it out. In this case, I'll simply
click on Get Template. And this will open up now the template from the
Notion Template gallery. And it's starting to duplicate the tracker into my
Notion workspace. This might take a bit of time depending on the
size of the template, on the sub levels of template and the files in the databases. Once it's ready, the template
will be populated as a new page in our
notion workspace and we can start using it. Sometimes there is like a
manual off the template that explains the basic workflow of the template, sometimes not. It really depends on the creator and how they style
their template. When you go back to the primary
notion template gallery, which offers only templates directly by Nan,
created by notion. If you want to make use of
one of these templates here, then you simply
click on again get template and this will
populate the template in here. Sometimes the template
might also look like this. Of course filled
with information but with a dark mode labeled. And you wonder how you can import a template from
a fellow creator. Then you go on the
right hand side and check if there is a duplicate
button on the top right. If there is, then this is
good news because then you can import the template
directly into your workspace. If there is no such
duplicate button, then it might not be
intended for duplication E, not intended as a template, or it is a paid template. So you need to pay to unlock
the duplicate feature. In this case, if I want to
duplicate this template, I just click on Duplicate. And it will recreate
the template directly into my workspace. And here it is. Well done. In this lecture, we talked
about notion templates, which is a great way to
save on time if you're busy or simply don't want to reinvent the or start from scratch. I invite you to have a look at the notion template Gallery. As I said, many of
them are for free. The notion templates from
notion itself are all for free. So there's a great value add
in using those templates. I wish you a lot of fun
exploring the templates and I'm curious to know which use cases you will use
the templates for. So have a look into the gallery, and I'll see you in the
next lecture. Cheers.
31. Notion WebClipper - save bookmarks directly to Notion: Hello and welcome
to this course. Do you also find it sometimes hard to manage your bookmarks? Save it for later, to
read through them, or to organize them in an actionable way, then
you're just like me. And the good thing here is that notion has a tool for that. It's called the notion
Web clipper one and all tool to manage and organize bookmarks in
an actionable way. Sounds good to be true.
Let's find out in Notion. We are here on the
notion website and we have selected
the notion web clipper, which you can find under
nano web minus clipper. The web clipper is
an extension for your browser means for Chrome, Safari or Firefox, you
will simply install it. And it gives you a way to
save a page with one click, storing it into your
desired destination, means in a data bank. Then you can make it
actionable by, for example, categorizing it as a book, as a resource, or
as an inspiration. This way you can stay
organized at all times. How does that work?
Let's find out. For the case of Chrome, we simply click on Install. For Chrome, it will direct us to the Chrome web store where all the different
extensions are available, and then we click
on Add to Chrome. It will ask us for confirmation whether we really want
to add it to Chrome. I do it now. It will download the package and
we'll install it. And now we have
installed the tool. How does it work? Let's
imagine we want to save this notion Wikipedia
article to our database. And we read through
it, but we find our, we don't have the time to read through the entire
article as of now, so we want to store
it for later. So we click on the
icon on the top right of our newly installed
tool, of our web clipper. And then it already
identified the title of the page which is Notion
Productivity Software Wikipedia. We can of course rename
it to whatever style we want to organize our
bookmarks database with. I call it just
wiki minus notion. Then we need to decide on which database it
should go into. I want to add it to the bookmark database that I created before, but here is also selection of different databases
that it found. Let's look at bookmarks. We'll just scrape your Notion workspace and then I'm selecting the bookmarks database
and I will click on Safe. Now, I can either open it in Notion directly or
I can of course, manually go to the
respective tab. But in this case, it has
already created the page. On the notion side, it has not only given
me the entire link, but also saved the entire
article to my notion database. If I go back to my bookmarks, I will see there is
the new notion page. And of course, I can add some
kind of properties in here. So for example, if I want to add a new property to the database, I can do that by simply
clicking New Property. Then I could select the multi select feature and add some categories,
let's say books, wiki articles in
Spo, whatever it is. Going back to the properties and exiting the properties and re selecting the
property settings. I want to of course
show the multi select. I now want to assign
the specific category to my Wiki page. I'm opening up the page and then I go to the
multi select entry, and I will define
it as a Wiki entry. If I closing now my page, you will see that it added
here, the Wiki entry. Of course, you can also work, for example, with categories. Let's say you have
a category of to be read or archive or deleted. So you can group the
individual records in your list view or table you whatever view you're preferring. You can manage the information directly inside your
notion workspace. In this lecture, we explored the notion web clipper as a simple widgit
for your browser. In order to safe and
store content into your notion database and to stay organized at all
times, check it out. I will put the link to
the web clipper into the resources so you can install it and make
up your own mind. Cheers, and stay organized.
32. Lets build: a Notion Expense Tracker (Exercise): Hello and welcome
back to this course, Congress for
Mastering the Notion. Database videos. I know this was a pretty
intense series of lectures that you went
through, but don't you worry, once you master and
understand notion databases, everything else will become
super smooth in notion. If you feel now intimidated,
that's completely normal. Rest assured, I've been in
the very same position and the only way to get better
is exactly practice. This lecture is indeed
again, another exercise. As always, this is
completely voluntary. If you want to skip
to the very end or skip the entire lecture,
feel free to do it. However, I highly recommend
you to practice and to become real master
in notion databases. As always, you can watch
the video until the mid, where you can pause the video. Just try to build the database yourself or build the
project yourself. And then watch the video
until the very end, where it will give you a step by step solution on
the entire thing. Of course, I will also attach the template into the
video description so that you can download
it and you can see every bit and piece
of it firsthand. That's enough for a moment. Let's jump into notion
and look at the exercise. We are back on our workspace and this exercise is an
expense tracker. We are building ourselves an expense tracker
where we can capture in and outflows of money
on a daily basis. How does this thing work?
This is a dashboard. Indeed, we are
building a dashboard, and this will include everything that we
have done before. This should not be containing
any new element to you. First of all, we have here a headline with an
expense tracker. Then we got four different
views of two databases. So let's start off with
the databases first until we understand how
the rest works out. So we have a database that
contains all the transactions. We have the transactions
named on the left hand side, we gave a category,
income or cost. We give a total sum
of the invoice. We want to have a status
whether it's paid or overdue. That refers back
to our checkbox, whether it's paid or overdue. We have a date payable. We also have a due date that we're displaying
through a formula, so kind of adding the due
in front of the date. We also have a
total sum where we are calculating a plus
or a minus or positive, or a negative value in
front of the sum itself. And we have a connection to our categories and moving over to the financial categories which this tracker connects to. So we have a relational field in the financial categories. We have defined every category
as in very own entry. And we're using the roll
up function to view and summarize the total sums from the all
transactions tracker. This is possible
with a relation. You will need to work with a relation and of
course, with formula. So going back to our dashboard, we have here a simple
view of our categories, summarizing the
total sums we have. On the left hand side, a new transaction field
which is nothing else but a view of the all
transactions filtered. I will give you a little
hint here to where name is empty because
every entry has a name. You won't see anything here
besides the new field. This is kind of a button
that we created here. Below that, we have
the unpaid invoices. It's another view of the
all transactions dashboard. And we have here all
transactions, which is again, just a view of the all
transactions database. That being said, I know this
is a lot of information, might be confusing
at the moment. Try to get as far as you come. If you're stuck, either pause, look at the template, or go to the solution. It's not at all a
shame if things do not work out at
the very beginning. Enjoy the exercise. And you
can pause the video now. All right, we are back. I hope you enjoyed
this exercise. So let's break down our
database and dashboard. So first of all, we go to the
all transactions database. Actually, we just have here
a normal table view of our transactions where every
new record so to speak, is a new transaction. Next up, we have here a
single select property. Because it can be either
a cost or income. It cannot be both at a time. How did we do that?
We simply added the choices, nothing
to spectacular. Next up is a simple
numeric field where we collect the
sum. Nothing to fancy. I will go over the native
fields first and then we can talk about the
formulas in depth. The next native field
is the date payable. It's just a date field. We get the paid check box. Yes, no, we got an
attachment property. Also very simple,
straightforward. Next up we have a first formula. We check if something
is paid or not. And this works of course, with two if functions. We check in the F
function if empty paid. So that means the checkbox, if the checkbox is empty. If this is true, then we check the date between today
and the date payable, and we want to have
the result in days. If this is greater than zero, then we want to show
that we are overdue. Because if we have a
positive value here, then we are beyond
the date payable. If this is not true. So
if we are below zero, then it's still payable
because if we still have time and we have not checked that box, then it's
still payable. Once we check the box, though, it is already paid because then it doesn't matter how much overdue we are or how much time we have left,
then it is just paid. So this is the alternate
ending, so to speak. Again, we have two if
function if number one, then the first outcome
is another if statement. And then we concluded with a paid kind of connecting
two if statements. The way it works is simple. We click on Paid, it will change to paid. We deselect paid. And then it will simply
check and compare the today's date versus
the date payable. Today is 2024, and
this one is 2023. If we go and change
this one to 2025, just as an example, and I click on 7 February, it will change to payable. Next up, we have the Due date in order to display the due date
with the due in front of. And I will show you in a second why I have created
this extra step. We created simply a
connection between the due we added as a phrase. Then we format date
payable. We use the format. Why? Because we want to
display it not as a number. If we just would connect
the due with date payable, it would give us a number, return a number, which of course is nothing that
we can work with. With the format feature, we are turning it actually into a true date. This
is why we need it. This might be a new element where we haven't
talked before about. So just be aware that this is something that
you need to take care of. Next up we have the total. The total is just
an if statement. If the category is not, we have an imation mark and
an equal sign is minus cost. Then it should just display the total sum because the
total sum is always positive. But if it's a cost means we want to have a
minus in front of, then we calculate zero minus the total sum so that we get a negative value in front of. This is also just for a visual impact and to also
calculate the sum correctly. Otherwise it would
just calculate everything and this wouldn't
equal the correct balance. Next up, we have our
relation property to our finance tracker categories. So this is a simple relation, and once we have a new cost
that we have incurred, so I go into the field
and I would select the rightful category
to put it onto. And then I have a total display. So means I put the total
in front of, again, I'm using the total with $1 plus format total to get
this formatted value. Now if I go back to the
financial categories, so what do we need here? It's a very simple database. We have just the names. I've added an icon in front of this one just for
styling purposes, you don't have to do that. And next up we have
a roll up function so that we can pull in the total sum of all the
category expenses in there. So if I use the income,
it is positive, everything else
should be negative, and we have a total
balance sum down here. So if we go back
to our dashboard, how do we create our dashboard? This is also not
too complicated. Of course, we start off
here with a heading one. Again, here I told you how
this works, so essentially, if I delete it right now, this is just a view of
all transactions with a layout gallery and
filtered to the name. And the name is empty
when the name is empty. Also, this one is empty
since we should not have any cost that we have not
categorized with a name, The view isn't showing anything
else and we can use this plus icon as a plus button to simply add a new transaction. What else we got?
As you noticed, this is just a gallery view of the categories that we have. In here, it's showing the
exact same information. This is a table view
on the dashboard. We simply have the gallery
review, so nothing different. Then we have the unpaid
view on the left hand side, which is just a gallery review, again of our expenses. I want to show here all
the overdue expenses. So I go on the filter and
select Status Overdue. The status is the calculated
Datus that we have created and I want to see
here all the information, all the properties that
matter to our dashboard. So I want to understand
if it's overdue, indeed, when is it due? What's the total sum and
whether it's paid or not? So that I can also take
that off in here directly. And this one is just a table
view of all transactions. It's not really filtered.
It's just sorted, I guess It's sorted
by the date payable. Yep, it's sorted by
the date payable. So nothing to fancy and this is organized in a two
column design. I hope this was
fun for you to do and you were able to
recreate some of this. Don't you worry if you
felt stuck somewhere. There's so many ways to
build out your dashboards. And just because
I do it this way, it doesn't mean that you need to do it the same way you can develop your very own style on how you want to build
your dashboards. This is just an example, an exercise scenario for you
to get practice. Well done. Thanks for joining
this exercise and congratulations for completing the entire database
section. You did great. And I'm sure that you will also enjoy the
rest of the course. So stay tuned. If you have any questions
on the exercise, please feel free to reach out. Otherwise, I will see you in
the next lecture. Cheers.
33. Notion Dashboards - Create yourself a cockpit of control: Hello and welcome
back to this course. There's a topic that we need
to urgently address with our database after we have discussed everything about them. We know the settings in and out. We know how to build our views. We need to find a way, how to build ourselves
personalized dashboards. Because if we have
full page databases, they are great to consume data, visualize data, and
work with data. But sometimes we
just want to get an overview at a lens with the
most relevant information. For that we are going
to use database views. These are actually
just copies of databases that are staying up to dated at every
point in time. So whenever we change something, they will also update
automatically. But we can arrange them
and move them around, kind of turning a
full page database into an inline
database as a block, so that we can really style
and build out our dashboard. So let's have a look into
and find out how that works. We are back on our
notion workspace and we have different trackers. I've added a few, for example, a personal to do list, a task and project tracker. We have our bookmarks
work tracker, so a lot of different trackers. And do we really want at the beginning of a day or at the end of the day to
go through each and every tracker to understand
where we are or what our to Ds are for the
day? No, of course not. We want to have a
consolidated view of the most relevant topics
and only if necessary, we want to go to the source of truth database and look
at all the data at once. So how can we do that? We are going to an empty
spot on our workspace. Use our slash command, the good old slash command. We haven't used it for a while. We scroll down towards database, you see we have here
some table view, board view, gallery view, list view, calendar
view, timeline view. These are actually just views
onto an existing database. When we're using
any of these views, we are actually not
building a new database, we are just referring
back to an existing one. Giving us a preview that
we can style with filters and we can sort the
information and we can really build
out our own dashboard. So let's start off maybe with
a list view, first of all. And now it's asking us, okay, which data source is it that
we want to make use of? Let's say I want to have a quick overview
of my bookmarks. So I will select bookmarks
and close the entire thing. As you can see, now
we have created a list view of an
underlying database, and this is indicated
with this arrow. So it's like the relation arrow. This is indicating
that this block is only a database view which
does not have any limitations. Means we can change data, access data all in here. And when we change it here,
it will also change in the underlying database.
And why is worse? But the good thing here
it is just a block view, so we can move it around and
give viewing permissions to other teams on other Wikis without giving them the
underlying database itself. If we are opening up the page hierarchy on the
databases and the trackers, you will see that this
view is displayed like an on page without
being an on page. We are seeing here again the arrow and this
indicates that we are actually just referring back to an underlying database. And the underlying database in this case is the
bookmark database. This is why it's called
view of bookmarks. Now in the list, what
can we do with it? We can use it as
any other database. First of all, we can
decide on whether we want to show the
database title or not. So again, this is element of style and we can consolidate the
information a little bit. We can also apply
filters, for example, we might want to only show data that is related to
Wiki entries like this. Then we want to maybe call it
with a heading number one. This is Wiki resources. We can also hide the filter
by clicking on this way. We filter it down only to
the relevant information. This is the first part
of our dashboard. Now maybe I also want to see my personal to do
on my dashboard. I'm adding another
heading, number one, we'll call it maybe. Another information
that I want to see is the tasks that are
high priority. I need to take care
of them today, I will call them high tasks, go one step below and
add a database view. I will just look up for data
base and then I will select a table view Source I'm going to refer to will
be task and projects. I am closing this one
down a little bit. I certainly do not need all the information
that's in here. I will customize the
view as to what I need. For example, the SNE, I won't need this information,
I will need the status. The due date might
not be relevant for this one and I
don't need the summary. I will also hide this one else. I maybe want to apply a filter. So I'm adding a filter
based on the priority. I only want to see stuff
that is high priority. I will hide the
database title again. This way I can see
my high prioritasks. If I want to give myself more space and rearrange the
views that I have already, then I can go on the three
dots on the top right. We are going to talk about
the styling elements of an notion page in
a separate topic. But we will select with giving us the room of the
entire page with. Now what I can do is I
can add two columns. For example, selecting
two columns, column one and then
I get column two. I can pull those two, the heading and the
database itself, into the left column. I will pull the other two, the wiki resource and the database view into
the right column as well. What I've done now is
created a consulate view. I can look at multiple
information at a time. I could also add a new wiki resource on the right hand side
here, simply adding it. And the same is
possible on here. Of course, I can
also, for example, add the gallery review
of my client tracker. So let's add a gallery review. And I will add the
client tracker in here. I can also push it to the
top. Let's put it here. And let's add another
heading, heading, one where I say this is clients, I might only want to
see small cards here. Let's go to the Layout
Settings Non card Review and select card size small. We have a very
small list in here. This way I can see the most
important information. I see the numbers
of my top clients. I see my high prior tasks. I also see how much
money I made with them. If I want to add
another tracker to it, add another table view. Let's select the
invoice to here. I'm going to close that down
adding another heading, one, calling that one invoices. Invoices. I will create another two columns,
dial like this. For example, I'm selecting
those two blocks, moving it to the left hand side, the clients moving to the
right hand side of the columns like this, like this. Get rid of the database, title like this and like
this for my invoices. I actually just want to see if there's any overdue invoice. I select my invoices and
what I want to see is actually just the total
status and that's it, closing everything else down to see also the status
of my invoices. And maybe I want to actually change the layout
of my invoices. Maybe also to a gallery view, changing it as a
preview to none. And then selecting
the properties, only the status, maybe the total sum and
the invoice amount. Closing that one down, I could filter down to
my formula where it states over due that I
only see overdue invoices. This is our final product
with our very own dashboard. In this lecture, you learn
about database views, which is a great way
to simultaneously show information from different
databases at one place. Creating yourself a very own
personalized dashboard with the metrics and information that truly matter
to your business. The next lecture, we will do a little bit of
exercise so that we can train and practice building ourselves a very own dashboard. Stay tuned and I see you.
34. Notion Page Setup - understand the most important settings: Hello and welcome
back to this course. In this lecture, we are
going to talk about notion settings so
that you're exactly aware of what you can
choose from in terms of options to customize
your account on our Notion workspace. We are going to access
the settings if we click on the Settings and Members tab on the
left hand side. This brings us to the
central account overview. First of all, we have
here our invite link so we can invite new
members to our workspace. We have an overview on all the members that
we have right now, all the guests and all the
groups that we have created. On this view, we
can, so to speak, manage all the different
access regimes. We can define on an individual
level what people can do. So whether someone is
a workspace owner or just a member
workspace owner has more rights in the workspace. So they can delete staff, they can delete
entire workspace, which a member cannot do, in order to more easily manage roles and access permissions. You can also create a group. So for example, you
can create a group for multiple persons
being a team member, multiple persons who are admins. So if an access
right shall change, you do not need to apply to
every individual member, but you can apply it to
the very same group. A guest in turn is
just someone who is able to view
all the databases, but they are not able to work with the materials
inside your workspace, and hence they won't
encourage charge for you. It depends on the plan
that you're on a notion. If you have a limited amount
of guests that you can allow to go into your
notion workspace for free, or if you have an
unlimited amount of guest. Next up, we have the
Account overview. Here we can change
our e mail address, set our password, and
two step verification. However, the two
step verification is actually a paid feature, so you won't have it on the free plan. Next
up you have support. You can give the notion support access to your database if you have any trouble with
any of the settings. You can also log out
from all devices. If you feel that
you're accidentally still locked in in device that you do not have
access anymore to, then you can log
out of this device in here and you can of course, delete your account, but
this is danger zone. Once you delete your account, all the information
are of course gone. Next up you have
settings you can decide on the appearance of
your notion account. I've currently turned
on the light mode, but there's of course
also dark mode and you can use the system
settings below that. You can decide on
which page should open once you are
re entering notion, should it be the last visit page or the top page in the side bar, this is up to your discretion. You can also open links in the desktop app and you
will also find here the link to the desktop app if you're more preferring
to work locally, which doesn't mean
you can work offline, it just means that you have a dedicated application
on your computer, but it does require, of course, a stable Internet connection. Next up, you can
set the time zone automatically using
your co location. For that it needs
to detect where you are right now in order to
set the right time zone. Or you set the time zone
manually. You can do that here. You also can here customize your cookie settings and you can record
your view history. Or if you don't want to, you can choose to not record them. Also, you can decide
on whether you want your account
to be discoverable. Means that other people can
search for your account across your workspace
or with the notion, if you do not want that,
just toggle this two off. Next up we have notifications. You can enable push
notifications, slack notifications,
activity notifications. So it really depends
on how much appetite you have for information, what's going on on
your notion workspace. I typically would recommend to turn them all off
in the beginning and then add them gradually once you feel you're
missing out on information. Because usually it will be a very high information
overflow that you receive. Because every change to every database will
trigger a notification, go in here and decide on your own how much
information you need. Next up we have connections. Connections are relations
to external applications. In this case, I have one with notion drive and slack.
But there are much more. We will dedicate a
very own video lecture to connections because there's much more to know about than
just where to find them. But you will see all the
active connections here. So if you're sharing
the account, if you're using a workspace with multiple team
members and you want to check what
other accounts are linked to your
notion account, then go check here. And you can also get
rid of the connection. If you click on
Disconnect the Account, then you can delete the
account connection. Next up, you have the language and region where you can select the language and you
can whether you want your week to start
on Mondays or not. Below that, you have your
workspace setting before that. All of this is an
account setting, means that they only apply
to your personal account. But once you're
using a workspace, workspace settings differ
from your account. Workspace settings can be
completely different from what your account looks like
in your workspace settings. You can of course,
decide on the name of your workspace and you
can create an own icon. You can either upload one or pick an emoji,
whatever you want to. You can also connect it
to your very own domain. If you have an own
domain address secured, you can connect it in here. And you can also decide on
which e mail domains you want to let into your
workspace domains. If you only want to allow your corporate e
mail addresses to be able to register in
your notion workspace, then you can define
this in here. And you can also select
your public homepage and connect it to your
Notion workspace. Below that, you can export all
of your workspace content. So if you want to create
regular back ups, this is a place where
you can do that. Next up, you can
export the members. However, this is only
a paid function, so it works only in the business settings or
the business tier. Below that you can
set the analytics. So whether you prefer to
collect the page views, the amount of page views or not, you can decide this by toggling to the right
or to the left. Below that, you can delete
the entire workspace. This is again danger zone because once you
delete your workspace, you will lose access to all the data that's in the workspace. We discussed already
the people settings. Below that, we have the
different plans available, giving you the overview of
what plans you can use of. Next up you see the
building options where you see all the bills
that you have incurred, the charges, as well as you
can manage your VAT numbers, as well as your payment method. Below that is a very
crucial security feature. The sites that are public, sometimes you publish
and share a site with others and you just
forget about it, and you might add additional
information to the site. You will easily figure out if the site is public
because it will then get this blue banner on top here indicating that this
site is public. Also on the sites, you will see all
the different pages that are publicly available. You will figure out the link and you can also view the site. Also, you can configure
the site settings here if you want to
unpublish a site. This is your end in
court to unpublish the site and also to
give the permissions. What you can do with a
page that is online, very important to know and
sometimes good to revisit. Frequently below that, you
have the security tab. A lot of these things are only available for business
and enterprise customers. So have a look here, if this is relevant for you, consider upgrading to
the respective accounts. Next up, we have the
identity and provisioning. Again, a lot of things only available for business
and enterprise accounts. Have a look down here and see if there's any relevant
feature for you. Below that, you will
find all the connections that are connected
to the workspace. So again, you have personal
connections that you do on an account level and there are workspace connections connected
to the entire workspace. So it's basically
the same thing, but just on a different level. Last but not least, do you
have an import feature. These are the services
from which you can import data, tables, files into your notion workspace
If you're using Asana, if you're using X,
you might use CSV. If you're using
Monday.com or Quip, you can import all
of that into Notion. And down here you can also
upload work documents, pop files or latex equations into your notion
pages. That's it. That's a rundown of all the
different settings with some explanations on what to do for which plans
they are available. So it's good to go through this occasionally to check which
connections are live, which pages are online, which pages are shared
with the entire world. And if this is really
what you need to do, if you have any questions,
feel free to reach out. Otherwise, I will see
you in the next lecture. Cheers.
35. Notion Page Styling - make your page accessible!: Hello and welcome
back to this course. In this lecture, we are going
to talk about page styling. Beware, this might contain
some repetitive elements, because here and
there in the course, I have already touched
upon those points. However, I wanted to make
sure as a full master class, to provide you the full
big picture and to dedicate an own lecture
on page styling. So if you feel this
is too repetitive, feel free to jump to
the next lecture. If you want to learn about page styling in an
all on one lecture, then stay on for now. We will jump over to notion. We are back on our
notion workspace. And I've created a new
page that is currently empty that I call page styling. When we style a page, I want to start
from top to bottom. First of all, we can
add an icon to it, something that we have
discussed in the past. But I don't want you to
miss out on this as well. So we can select memoji
can scroll through, it can also select one of the notion provided icons
which you can find in here. You can filter and search. Or you can select a random Mogi or a
random icon next to it. You can also select the color. You can decide on
whether you want to be asked every time for a color. Or if you untoggle it
and select then a color, then this will be
the default color. To go forward, I will select a random icon
for now next to it. You can also upload
your custom icons if your company has one or
if you want to create one, for example, on camera, which is a very
simple graphic tool. If you want to remove your
can simply click on Remove and then it's gone next to
it. We can add a cover. A cover is like a
very broad image that we can attach to our page, which gives a bit of flare, which gives a bit of styling
element to our page. We can reposition the image because as you can
see, it's very broad. Very few images will
have the ideal size, the ideal resolution
to fit directly into. Here we can click on
Reposition and simply drag and drop the image to
meet our preference. Once we're done with
that, we simply click on Safe Position. We can of course, also change the cover and select
either from the gallery, we can select from some
color ingradient images, some Nasa archive
images, some patterns. We can of course, also
upload our very own image. We can link something from
an external resource. However, if that
external resource is at some point
in time deleted, then we won't have
access to it in here. Or we can use the stock
image library from unsplash. We can of course, also
search for certain images. And if we want to get rid
of the cover completely, we click on Remove Next. Something else that we can
adjust in terms of styling. We can select the default
font of our page. We can either go
with a default font, very modern and minimal font. We can go with serif font, or we can go with a monophont. Just select the font that
you find most appealing. If I now start
writing, for example, just some random letters, we go back here, then you will see what impact it
has on the page. Styling serif is a bit old fashioned but very
good for publishing. We got mono, which is
a very minimal font, which is ideal for drafting nodes or creating
nodes next to it. We have the option to
select small text. If we want to have
more space or give the page more space
for more information, then we can select small text. And we can also go with the
full width of the page. That means we take the full page dimensions from left to right, giving more room
for information. In particular, you can
use the full width if you're creating a dashboard, if you're using any kind of database that contains
a lot of information. If you're just having
a page with text, I would not go with
the full width because it's much easier to read through a narrow passage
in the middle of the page, closing down the popular
menu on the right hand side. What other style
elements do we have apart from, of
course, headlines? We talked about headlines
in the basic blocks. Already we can style our letters and our
sentences and our lines. If we highlight words
or sentences or lines, then we can decide on
whether we want to have a bold italic, underlined. We can also strike through. This looks like we want
to get rid of this part. We can also market as a code, so if we're pasting something into a page that
is actually code, then we can rebrand it
or reform it into code. And we can also
create an equation, so adding latex and
mathematical equations to our notion page next to it. We also have the text color. So we can change
from the color of the text and the background
color of our text. If we go with
default, then we have the default black color without any background and we remove any background that
we had there before. Last but not least, we have
the symbol with the D symbol. We can mention
people on our page. We can create reminders a date or we can also
link to another page. We talked about this
already when we looked into the Wiki functionalities
where we used the ad symbol. So instead of using
the ad over here, we can simply go to
an empty spot and create the ad symbol which
opens up the very same menu. In this lecture, we talked about page styling elements enabling you to create your very own and very
personal customized page.
36. Create the Notion Wiki with the click of a button: Hello and welcome
back to this course. Imagine the following situation. You work for a
company and you're tasked to create a
central data repository. Search is a wiki, so you want to have a central
store where you manage and host all the policies processes and any other information
that's relevant to everyone. But you want to make sure
also that content is verified as up to date and that you have a
clear information structure. Does that sound like an
administrative nightmare? Well, maybe not with Notion, because Notion offers
the feature to turn any page into a complete wiki
at the click of a button. Sounds too good to be
true. Let's find out. In Notion, we are back on our Notion workspace and this is our page where all the trackers that we have created
are living on. We want to turn this
thing now into a wiki, addressing all the
pay points and all the requirements
that we just mentioned. So means we want to have
a verification tab. We want to have clear
responsibility and we want to have a central store with a clear information
structure. How do we do that? We go to the right hand
side of our notion site and we go on turn into
Wiki, press the button. Now we get some
information on how that will change to
influence our page. But we are brave and
simply try it out without reading
what has happened. We have created a simple
list view database. So it's an actual database where all those pages
are located on. We can delete those
spaces, this is necessary. We can also keep it,
it doesn't matter. And now we can change from the list view to
a all pages view. And the all pages now features
the owner of the pages. By default it's me because
I've created them. We can also see who
last edited them. We can add text as to
what this belongs to, so we can add additional
information to our wiki. And we have a
verification property. And this verification
property is for the owner of the page
to verify the content. So let's click into it and
look at the different steps. We can validate the
content for seven days, 430 days, or for 90
days if we want to. Or we can say this
information so low level it will be relevant and it
will be verified infinitely. This way we can signal
that the information was validated and holds true even after a certain
period of time. So let's click on
for seven days. As you can see, it now
gets the blue hook and it indicates that
this page is verified. We can also remove
the verification. If the verification is
removed, it's again empty, or we can pick a
date, for example, tomorrow or whatever it is. On the other hand, we are getting the indication
when the page was last time edited apart
from all the pages, I can also only show
the pages that I own. This will make it easier for
me to navigate through it. Now I'm owning all the pages, so it doesn't really
make a difference. But in case they are
like hundreds of pages, I can just drill them down as a default filter to the
pages that I truly own. Now, if I want to
change the owner, I either go in here and
select a different owner that I want it to
be the owner of, or I go in the page. On the page, I open it up and on the page I can
select a different owner. And again, I can verify or reinstate the verification part. Everything else
is simply a page. And this hasn't
changed anything. It just added this kind of
governance structure to make sure the information
is accurate and up to date. Of course, you can also
undo the Wiki if you don't want to use the wiki anymore or you created the
wiki by accident, then you click on the three dots and you simply click
on under Wiki. Above that you can
lock the wiki. So we can prevent your
wiki from either being intentionally or
unintentionally be edited. Now if we look at our wiki, we have currently
only databases, but of course you can also
add other normal pages to it if I click on you and
just create a test page. Let's open it up then you can use this page as
like a Word document. You can note down information, create processes,
policies, whatever it is. A true superpower of notion is also to communicate
within the sites. That means you can add,
for example, comments. If you're reviewing this page with the multiple other persons, you can simply click
on Add Comment. They can, for example, tell you please date page. Once they press Enter, the comment is visible
for every comment. You can also attach a file. You can also take and
mention a person. We will talk about
this in a second. If you're the owner
of this page, you can simply revisit the comments and work
on these comments. Either you can react with
emymogi, for example, an emoji that indicates that
you're currently working on it or that you
accept the comments. Or you can simply
resolve the comment indicating that you have
worked on the topic apart from the communications
part notion is truly designed to
collaborate with others and you can do
that super simple, Instead of commenting on a page, you can simply tag someone. For example, if I want fred to change
something on this page, then I would simply go at and then select fred and mention. Please update the page. Thanks. If I want to
add a timer to it, I can go and select again the ad symbol and add
a reminder to it, either today or I can say, please remind me tomorrow. I can also create more than one reminder,
whatever is required. Also, with the ad symbol, I can not only tag people
and add reminders, I can also add a different page. For example, if I want to
refer to a specific tracker, then I simply click
on the tracker, and now we have the
link to the page. If you click on the link, you
will be redirected to the. In this lecture, we talked
about how to create a wiki, how to create a central
data repository, a real source of truth, so that you can accurately
manage all the information. We also explored how you
can comment on pages, how you can tag other
people in order to foster a collaborative
approach when using notion.
37. Create Custom Notion Progress Bars and stand out!: Hello and welcome
back to this course. In this lecture, we
are going to talk about a little styling element giving you a bit of
extra customization to your notion database. Specifically, I'm talking
about notion progress bars, but not the kind of progress bar that we already have explored in terms of adding a number field and
adding the progress bar. I'm talking about truly
customizable progress bars that you even can design on
your own if you want to. So let's check them
out on Notion. We're back to our notion
workspace and I've opened up a template that I created
specifically for you. And you can find the template
in the course description, so you can open it
up and duplicate it. Attach it to your
notion workspace as a repository or as a resource
to use them later on. The way this thing
works is we have 18 different progress bars, which are all called
variant variant 15161718. And we start off with
variant one to five. Now this works all
the same means a progress bar is calculated
in a formula field. It is an extensive formula. I don't expect you to remember this formula or
being able to recreate it. I just want to show
you how you can copy them over and
adjust it to your needs. A progress bar that is based on a formula always
needs two things. Number one, a current value
and number two, a goal value. Why? Because we're
calculating percentages here. This is essentially
what's been done. It is taking the current
value divided by the goal value and translates it into kind of symbols, right? So we always need one number field that provides
you the current values. Just imagine we have
a book tracker, and I actually have an
example of a book tracker where you are showcasing at
which page you are right now. Where is the number field
that is representing the goal means how
many pages there are. And what the formula
then does is you simply click into the
formula to open it up. As I said, it's quite
a complicated formula. I don't expect you
to remember it, I just want you to show how you can adjust
it to your needs. It's taking the current value
divided by the goal value, and as I said, it's translating
it into the symbols. As you can see here, we have here two versions. We have one for
number fields and one for date fears
for date ranges. This, however, only
works if you have a separate date field for the start date and a separate date field for the end date. It doesn't work if you're
combining this, for example, if we go in here and say, okay, we also have an end
date, this won't work. So we need those two
separate fields. Now of course, you can
go through the views and select the progress sad that you find most appealing
to your needs. Now if you say you want to
use variant number six, then you simply click inside. You need to copy the entire
formula. Copy and paste. It won't work if you'd simply copy this one to your clipboard, because this is just the result, it's not the actual formula. Then you go to your test page. I created one which
is a book tracker. So let's say book number one. We are currently on page
78 and it's a large book, so it has 1058 pages. And now we go into
our formula field. I paste the formula in here, and now I need to adjust. Of course, the
fields of reference, current state isn't a field
that we have available here, but it's the current page. Now we need to go through it. Goal is also nothing we have, we have instead the total pages. We have the current state again here which is
actually the current page. The goal again, which
is the total page, We also need to change this one into current page
and we also need to change this one into clear and page and this
one into total page. It's a bit of yes customization.
And I missed one. Which is this one here. This one is the total pages. Now as you can see
in the preview, it's ready to
calculate our results. Let's click on Done. As you
can see, it just works. We are at 7% I am
changing the value now. The progress power will
update dynamically. So let's say we
are at 150 pages. Once we're adding also
here different values. I'm not that creative. Let's put it this
way, 200 pages, maybe this one has 51 pages. As you can see, it's updating the progress bar dynamically. And the very same applies
also to date field. Let's say we want to have
a date progress bar. Let's add a date number one. We want to also add
a date number two. Let's use this one. Date number two, we have a date range from the fourth
until the end of the month. And I'm using now this field, I will use a different
formula for that. This is the template here, you'll find all the
different formulas. As I said, it's attached
to the resources. Let's say I want
to use this one. As you can see, the
formula is a bit more extensive than just the number
field, but that's fine. I go in here, delete
the entire formula, and add the new formula. As you can see, we have a lot of different fields to change. I'm speeding things up a bit. The way back, I changed
now all the dates. Yes, it's a painful task, but you just need to do it once. Then we click on Done. As you can see, we have our
date progress bar here. The good thing is it's always put into relation of
the current date. So that means it's updating
itself on a daily basis. We don't need to do anything. And once we move the due date to the start date and
sooner to today's date, you see that the progress bar is filling up until we reach 100% If you want to give more space to the
right hand side so you don't have
the line break, just push it a bit over. And that's, that's it. In this lecture,
you have learned about custom progress bars, how to create them, how to implement them for
numbers, for dates. And you also have the template available down
on the cost materials. Be free to duplicate it and
make your database stand out. Have fun with it. Cheers.
38. Unlock the next level with Notion App connections: Hello and welcome
back to this course. Okay, I get it, I'm
advertising notion here a lot. Why? Because I'm a
true fan of notion. But maybe there's still data outside notion that you want
to keep outside notion. And you still need to find a way to integrate data into
your notion workspace. Or to two way sync data
with external applications. For this use case, we are
dedicating right now, an entire lecture to which is
called Notion Connections. Let's jump into
notion and figure out how we are back on notion. And as I mentioned, there is a way to sync data that comes outside from
notion with notion. So that means you can keep your data in your
current system, but still can make
use of Notion as a productivity system or a central hub for
all the information. So how does that work? Essentially, we need to
go on the Settings menu. On the Settings menu, you will find something that's
called connections. A connection is, as
the name suggests, a connection to a
different other tool. In the past, we have already
set up a connection to slag. That means we are triggering
a notification toward slag. If there's a change on our
notion database that's free, you can use that and it's incredibly handy to
keep your team updated. If Notion isn't the primary tool on which you're communicating, then we can also
integrate Google Drive. That means we are accessing
files from Google Drive in notion and we need
to connect them if we're adding a connections
property to our database. But what other
connections are there? Let's click on Browse
Connections at Gallery, which will open up a
new page on Notion. As you can see here,
we have tons of different integrations that are categorized on the
left hand side by different properties. For example, you have stuff
for security, compliance, productivity, identity.
Even have forms. We have designers
in own categories such as Figma and Canva. And you can also use category. All should just get an idea
of what's all included. Of course, you can
also search them. Right now we have 82
different integrations. So it's an ever increasing
database of integrations. Let's imagine you're using Asana as your
productivity central. And because the set up of the integration always
works in a similar way, we are going to use one
example which is Asana. So imagine you're using Asana for your productivity
workflow where you manage all your
projects and you want to bring this
information into notion. So let's click on Asana to
select this integration. The first thing that you will find is you will
get an overview. You will see how to use Asana. You will find the category, you'll also see the previews. And you will also
see the features. So you can link previews, you can sync database, and you can import information. If you say, this is
what I want to do, then you click on Add to Notion. This Add to Notion button
will redirect you to your very own connections because it's a personal setting. Hence you need to set it
up under my connections. And then you will
scroll down to Asana. In this case, click on Connect. It will open up a new pop up
menu where you need to give permission to Notion accessing
Asana and vice versa. So as you can see,
it popped up as a linked account and that's it already super easy to set up. Let's go on Energy page
and look at how this works out on our Asana page
that we just newly created. We can now add the command
and simply type Asana. This will give you all
the different options that you have out of the box. With Asana, you can use Mbts. However, this is
a default feature that you don't need to
connect your accounts with. What we're really looking
at is the sync database. Click on it and it will open up an Asana interface similar to creating a notion
native database. On the right hand side is asking me which projects
I want to sing. Let's use Test for a purpose. And now you see how
Nan has pulled in all the Asana information
from the Asana workspace. We have here our task. We have assigned
updated projects which are assigned
to the sections, completed dates, the sections, the created, ad, and
the description. We can even open up
the different tasks, see all the properties,
all the information. If we want to access the row level information
in Asana directly, then we click on
this link button, which will guide us to our Asana application and
directly to the task. That's an incredibly
handy feature to sync data from external
sources into notion. The setup process
is always the same. Of course, the functions and the integration itself
differs a little bit. Just have a look at the
Notion Connections gallery and check out the
different use cases of the external connection. Something else I want to show
you is how to make use of datasets outside notion that do not offer a
native connection. As you can see from our Settings menu and the
Not Connection gallery, there are currently 83
different connections possible. But of course there are more
than 83 different tools. So what are we doing if we are not using a tool that
is mentioned here? Then we have different options, we can head to automations. This offers us a broad range of sync services that are connecting to Notion
and on the other hand, connecting to thousands of different applications that are not mentioned inside notion. My go to tools, if this
then that z here and make. But of course there
are also others which makes sense.
Let's try out. If this then that we click on this one and it gives us the information
on how to use it. So we cannot start
from this gallery. Let's set back to our
notion workspace. We simply go on the three
dots on the right hand side. Go to connections,
connect two there. We'll find if this then
that now we need to confirm that we are directed outside notion on the integration side. We simply click on
Learn More to figure out what we can do
with this application. As you can see,
we are now on the If this, then that side. And here we got a bunch
of different ideas on which tools we can connect to Notion
and the use cases. For example, we can use it
with Alexa or with Siri. You can use it with a
email provider such as me. Typically, these automation
providers connect to thousands of
different applications. I click now on Connect because I want to
create this connection. Of course, I have
to sign up also with these automation providers. Click on Continue with Google, You need to confirm
the connection, then you need to
give permissions to the respective pages where you want to use the automation. Two, if you want to
use the automation on your entire workspace, then click on the
entire workspace. Click on Allow Access. Now it's authorizing the access. Then then that menu, we click on Create
on the top right. Now I start off with which is similar to the automation directly
inside notion. We need to create a trigger
and then an action event. Let's click on if this and I
will look up Notion no NSO, for example, a new page
in a database is created. I need to select the user in the database that I want
to connect the automation to. Then I need to tell
if this and that what kind of data is
located in this database. In this case, roles I click
on Create the Trigger. These are all the tools
that I can use for, let's say I use Google mail. I want to send an external mail. I need to connect now my e mail account
and allow the usage. And now I have to select
the parameters I need to address the e mail,
of course, to someone. So I can either use a freestyle e mail address or I can use the so
called ingredient. Ingredient is a
property inside notion. So imagine I've collected
the e mail address here. Then I could simply select
the e mail address to get a dynamic aspect
to the automation. In this case, I will simply select my very own
e mail address. I can create a
subject if I want to. I can create a dynamic
body with content from notion and I can
attach something. But now I'm done with it
and click Concrete Action. I can add more than one steps. However, then you need to use, if this is in that Pro account, I click on Continue
and click on Finish. Now let's check if
this is working. As I connected my Asana
page indeed towards it, I actually go to Asana
and add a new task. Let's add a new task.
Call it test four. Press Enter. This test number four should then appear in Not. Our test task was updated
in our sync database with Asana and I received
the E mail as created. This was an example of
an external automation. As I mentioned, Zepia Make. If this and that are
my personal favorites, you can reach with
those three providers, more than 10,000
different applications. Some of them are
more complicated set up and manage than others. If this, then that is
a great beginner tool. Apart from that, we
also talked about how to create a
connection inside notion. How to sync it with,
for example, Asana. If you're going on the
connections gallery, you will find more than
80 different connections to get data from external
sources into notion. Maybe this is the remaining
argument that's missing to convince also the
biggest notion critics. If you have any questions,
feel free to reach out. Otherwise, I will see you in
the next lecture. Cheers.
39. Add Notion Widgets to your site and build beautiful dashboards: Hello and welcome
back to this course. In this lecture, we are
going to explore Widgets, which is a great way to upgrade your dashboard to
real command room. You might know Widgets
already from your smartphone, which are kind of
summarized views. We can generate a preview, for example, of the weather, a clock Spotify, or
upcoming calendar events. Notion allows you to create such Widgets also
in your dashboard. So let's head over to
Notion and explore them. We're back on Notion and I've created a couple
of widgets already. So this is how it looks like. You can arrange them as blocks, push them next to each other, and creating such kind of dashboard or enriching your dashboard with
live information. So they're like numerous
examples or which is that you can create
beginning from a clock over, whether any kind of countdowns and of course
also buttons that you can link with a page that is really great to
upgrade your wiki and give your team this
little bit of add on information to create
stunning dashboards. So how do we create them when you Google
Notion plus widget? There are multiple
providers for that. I will show you here
three different examples of widget providers. Most of them require
you to create an account to be able
to manage your widgets, but the majority of them is free Provider
number one is Infi. You can explore different
range of widgets. For example, quotes,
live progress bar, weather, app, calendar,
app counters. You can also upgrade
with buttons. So let's create, for example,
weather application. We click on Create widget. We need to give it a name. Let's call it Simply Weather. We click on Create,
and it's opening up our Design wizard where
we can create our widget. First of all, we can define our location that
we want to display. We can also change the
preferred units and the number of days we want to get the forecast in advance. There are of course, features
that you can make use of when you upgrade to pro
account for the beginning. I guess it's completely fine if we go with a free account. And we can also
change the style. We can go to gray scale style, we can change the form type, also adjusted to
the light or dark more depending on what we
have chosen to use in Notion. And once we are ready, we simply copy this
link down here. Go back to Notion, go to an empty spot. Simply copy and paste it over. And then instead of dismissing
or creating a bookmark, we click on Create, Embed. This will create the view
of our weather forecast. We can adjust it in size and the width in the height,
whatever we want to. And we can, of course,
pull it as a normal block and adjust the position
of our widget. The other provider I want
to show you is widget box. Widget box gives
you also a range of different widgets
that you can create. For example, simple calendar. We can define the
background calendar. We can decide on whether we are using the notion
dark mode or not. We can define the font, the color, the background,
the header, color, the border, the
width of the widget, whether we want to use
rounded corners or not. Once we are ready, we
simply click again on copy. Go back to our notion workspace. Go to an empty spot. Paste the link into it, and click Create, embed. It's as simple as this. Some widget providers
such as Indifi also give you live feed
of other accounts, for example, of Google Calendar. So with this widget, you can get a live view into your
Google Calendar. In notion that requires, however, again, a
pro membership. Something else I
want to show you is the option to create charts. We have databases in our
Notion workspace and we can visualize them not
only as a database but also as a chart
inside notion. For that, we need to go on a tool that's
called Chart based. So we click on
Connect to Notion. Hence we need to
connect to accounts. As always, we need to
give read access to our, for example, the progress bar. Click on Allow Access, and next up we can
create a chart. Let's click on Create New Chart. We can define if we want
to have a pie chart, a line chart, bar chart, horizontal bar chart, doughnut, a radar chart, or any other KPI. So let's decide on a KPI. We want to just
display a number. We need to refresh our database. We want to select, in this case, our progress part
numbers go further. Now I need to decide on
the column to display. I want to display the
current state, whatever. And now we are creating
the database here, This is just a number. We can of course also
switch the type of the chart to a bar chart
or to a line chart, Whatever it is we want to. We have right now just
one number in there. There's not much to display, but you get the idea
of how that works. We can adjust the
colors, the styling, we can change the data labels, the time zone, We can
define the appearance, and we can use also filters. Once we are ready
with our chart, we simply click on Embed Link. Copy that link, and we go
over to our workspace. Go to an empty spot. Paste the link in here, and click on Create, Embed. After a few seconds,
our bar chart is visible in our
Notion database. In this lecture,
we learned about notion widgets, how
to create them. We looked at three
different providers. We also learned on how
we can create charts. I will provide you the links to all those providers in
the course resources. If you have any questions in regards to that, feel
free to reach out. Otherwise, I will see
you in the next lecture. Cheers.
40. Use Surveys with Notion!: Hello and welcome
back to this course. In this lecture, we want
to talk about surveys. Surveys are a great
way to collect information from
different personas, such as employees, customers,
or business partners. On the other hand side, we
now learn about a tool called notion that offers great
functionality to work with data. In terms of databases,
for example, with properties and filters, we really can design different analytics and
work with the results. It sounds like a perfect match. If we are connecting
surveys and notion, in this lecture we
will figure out how. So let's jump into notion. All right, we are here
on our survey site. So I just created a
new site that's called survey and I will
implement a database, this case a database in line. And we want to just collect some numeric information
potentially. So we add a number field and we might want to also
collect a phone number. I select the phone
property, that's it. We are going to start
with that and now we are using a survey provider.
That's called Tally. Again, there are also
different survey providers, just Google Survey and Notion, and we'll come up with
different solutions. In this case, we are using
tally dots and I will put, as always, the link into
the resource of the calls. We can create
surveys with tally. For that, we want to
create a free form. We start on the foreign builder. You will recognize this layout. Why? Because it was inspired by notion and Tally was
explicitly built for notion. This is why those two
go well together. We call the survey the contact form and
we want to collect the phone number of someone similar to notion, we
work here with blocks. And we call up the
blocks with a command. I want the short answer, the answer shall be
accompanied by a heading. I will add a heading
one, call it name. Put an example in here,
for example, fred. Then I want a, another heading one
with the phone number, and I want to have a
phone number here. Below that, potentially I want
to have a third question. For example, random number. I'm adding a number here. So this is our form. We can change the
appearance of our form by simply dragging and
dropping around the blocks. This is absolutely
similar to notion. We have also Submit Button, which we can change
the language here. Instead of Submit, we can also
say Confirm, for example. That's totally up to you. This is our survey,
super simple. We click on Publish. Now we need to, of course,
to create an account. As always, I will add
my details sign up. You will need to confirm
your e mail address with the verification code. We continue. It's asking
us how we want to use it. This is just like another
survey for the survey tool. So we continue to our
dashboard. Ready, set, go. We click on Publish, and there is our survey. The front end is ready. Let's test it out. This is
how our survey looks like. Now we need to get the back
end working means that the information shall be
pushed into our database. We go back to our
tally dashboard, we go on integrations And we
want to connect to Notion. We click on Connected Notion. We of course need
to log into notion, give permission to add information to our
H. In this case, I want to push the
information into survey. If you want to give access
to all the different pages, means you give general
access to the pages, then just go to the
top level entry here, and then we click
on Allow Access. Next up, we need to define how we want to make use
of the information. So we need to select the
database and we need to the teleform fields with
the notion properties. I will call a test. And now we need to select
the right database. You might need to reload
this page after you have connected and make sure you
give your database a title. Otherwise, Tally won't be
able to find the database. Even though the
database is existing, it always needs to have a title. So let's go back to tally and survey as a database is
already pre populated, so we're going to select it. Now we need to map
the teleform fields with our database property. So we are connecting the first field which is called fred, because I have added
the example of fred as a name towards
this property. So we'll select Fred and I
want it to go into name. Next up I want to connect
the phone number into phone. And finally, I want to
give the untitled number, the random number into the
number field called text. In this field, I can
add some page content to the survey results. But in this case
I don't need it. So I simply click Connect to Notion and we have
connected it now. And let's try out
whether this works. I am adding in your record, I call it simply new
telephone number is 01. And then some random numbers
and another random number. It's just an example.
And we click and submit. This is our confirmation page. And now we need to
look up whether the information was
added to our database, and as you can see, it just
pushed into our database. So we got the name,
we got the number, and we got the phone number. So in this lecture, we learned about connecting
surveys to notions, So having the front
end of teleSOhere. You can design different forms
for different use cases. We used it here for
a contact form, but you can also use it as a feedback form And
order form or indeed as a survey means
sending out questions to hundreds of thousands
of people and collecting, managing and analyzing
those responses directly. Notion as our back end. As always, I will
put the link to the survey tool into
the course description. If you have any questions,
feel free to reach out. Otherwise, I will see
you in the next lecture. Cheers.
41. Find and sell Notion templates with Notion Marketplaces: Hello and welcome
back to this course. In this lecture, we
want to talk about notion marketplaces as
a source for templates. The past we already
discussed that a template is a great way
to save yourself time If you're short on time
and don't want to spend the time into building your very own dashboard from scratch or
database from scratch, then a template might be
the way to go for you. And of course there
are free templates as in the notion
template gallery, but there are also
paid templates with complete operating systems
for a specific use case. For example, for agencies if
you're an e mail marketer, if you're into social media
or writing newsletters, there is literally a template
for each and everyone. And there are numbers of
marketplace where you can get free but also
paid versions of it. And we are now going to explore five different
marketplaces where you can get templates from. The first one is the
Notion Template Gallery, we already looked at it. You get like more than
10,000 different templates, both free and paid versions. You can simply scroll
through them and, for example, check out
personal trackers. And there are filters
that you can apply. For example, you can
select just notion created templates or templates
coming from creators. You can also filter down
by paid or free options. For example, just have a
look at the paid options. As you can see, the
prices really range. The notion template gallery will usually for
the paid templates, redirect you to individual
shops of the creators. But the Notion
Tamblate Gallery is a great information hub on which Tamblates are
actually out there. I would say this is the
greatest research tool to find templates
for your use case. Next up tool that I want to
show you and which I think is the second largest
template marketplace out there is Gum Road. It's like the official
official marketplace where you sell hate and
free templates for not, not every template gets
featured in Notion. So it might be that you even get more templates on
the Gum road side. If you simply look up in the search for Nan
and press Enter, you will find all the
different templates that are in here for Nan. They're also like texts
that you can apply here, for example, notion templates. And you can also set a
minimum and maximum price. If you want to see all
the pre templates, just set the maximum
price to zero. So this is where you find all
the zero priced templates. Some of them have
a zero plus means. Gumroad has like a
donation feature. Means you can set the price of the product yourself. You
can take it for free. But if you think there is
some value in the product, then you can set
it to $1 or $10 or whatever amount you want to spend on this
respective template. But yeah, they are like
thousands of different templates on this template gallery
or on this marketplace. Another one is Gridfiti. On Gridfiti you also have different notion templates that you can buy or that
you can look through. There are also
different articles around notion templates. Sometimes they do tests
of notion templates. If you want to buy a template, you simply go to the
shop and there you will find a lot of
different templates, again, for various use cases. Another one is Notion Plaza. Notion Plaza is also a very
large template gallery. By the way, on all
these marketplaces, you can also become
yourself a creator. There are like no real
requirements to become a creator. Of course, you will require like a following or some kind of community market and advertise your narration templates too. But if you feel well, you want to step up the game by becoming yourself
a notion creator, because you have
great ideas or you have a great way to
visualize information. Then you can upload
your templates to those marketplace and
make money out of them. So on Notion Plaza, you can browse the different
templates and you have also here different texts and use
cases for which use case. The respective template is for both paid and
free templates. And the last marketplace I want to show you is
Notion Everything, which is also one of the larger notion template galleries here. In order to find the
notion template gallery, you simply go on templates. You directly can decide
on whether you want to have a premium template
or a free template, or want to browse, or templates. I got a real big bunch of
different templates from here. Sometimes it's also
really great to start off with a free
template and just get an idea of different
template compositions on how to visualize data, on how to arrange dashboards. Sometimes you really
need this bit of extra creativity to go further. So that's a short lecture about notion marketplaces,
Template marketplaces. I will link you
all the different marketplaces in the
course description. So feel free to check them out
if you have any questions, feel free to reach
out, Otherwise, I'll see you in the
next lecture. Cheers.
42. Notion AI (Paid Feature) - Leverage the power of ChatGPT in Notion: And welcome back to this course. In the past weeks and months, you might have heard about
GBT and how it started to revolutionize the way people work from starting
to write blog post, e mails, and translating documents into
even writing code. Everything is possible
with the power of AI. The good news here
is that you can use AI directly into notion because notion has integrated an AI feature directly
into the interface. In this lecture, we will
figure out how that works. And for that we will
now jump over to notion we are back on
our notion workspace. First thing, first notion,
AI is a value added product, so that means you need
to pay for it to use it. There is a very limited amount of credits that
you can use if you have the free version of notion to test out the AI capabilities. So you can experiment around in what you
can or cannot do, but if you want to use it professionally or on a regular basis, then
you need to upgrade. But the good thing here is
you can upgrade also just to the AI feature without
upgrading notion itself. So that means you
have two different subscription or
subscription packages. You can stay on the
free tier for notion and upgrade simply to
the notion I feature. How do you manage
the subscription? You simply go to the settings in members and then
head over to plans. On the plans, you will see how many credits you have
left on your notion AI plan. For this demonstration,
I've upgraded to the nation AI premium package and you can also cancel
your subscription here. Now if we go back to our page, we want to start using
AI. How do we do that? We scroll down all the way
to AI and click on More. As you can see, we can ask
the AI to write something. We can ask it to create
brainstorming ideas or blog post, an outline social media
post and lot, lot more. Let's kick things off with
a very general prompt on ask AI to write. Now it's opening up
the prompt interface. And the prompt interface is the input that you
give to the AI. I need to tell the AI exactly what I want
to see as an output. It's similar to when you talk to a friend and ask them
to do a task for you. The more information you give, the more precise will be
the outcome and the less the friend needs to guess about what Fred wants him to do. Try to create a
prompt that contains all the information about the outputs that you're expecting. You can even be as
creative and say, I want you to think
like a lawyer. I want you to think like
a marketing manager, giving the AI as much
context as possible. The prompt I've chosen is
I want you to think like a corporate
communications manager drafting an e mail
to all employees, inviting them to the
summer party in July. Now I press Enter and
let the AI write. This is the first
draft of the AI. I can now either tell
the AI what to do next. For example, to refine, I could also click on Done. I can also ask the
II to continue writing or to make it
longer respectively. Or I can go back and
say, please try again. For that respect, I am
now done with the e mail. That's it, but maybe this
sounds now a bit too formal and I want to change the tone so I'm going to highlight
the entire e mail. This also works with
any kind of other text. Wait until the context menu opens up and then
I click on Sky. Next thing I can
either add the prompt, what it should do with the text, or I simply go down and
select Change Tone. And I want it to
become very casual. Let's try it out.
As you can see, it has redrafted the e mail
in a more casual style. And if I want to,
I can now replace the selection boom, that's it. Our e mail is now
in a casual tone and directly replaced
in the text field. For the next example, I'm simply deleting what we
have written before. I want to start afresh. My new prompt is I want you to think like an online
creator and come up with a list of steps to
take in order to create an E learning course
with the topic cooking. I press Enter and see
what it comes up with. All right, the AI is ready
with the entire lists. And it summarized me the
steps that I can take. Now of course I can
become more granular. And again mark it and instruct
to become more granular. My new prompt is
become more granular. I press Answer and see what
it becomes. Now it is ready. Now I want to replace
the selection, and boom, there is the new list. Else I can also mark
the entire thing again. Go on SKI. And I
can translate it, for example, into Spanish. So the AI is now translating
everything into Spanish. And there we go, it
translated into Spanish. Next up, I'm going to
ask the AI to give me an entire comparison of cameras that are good for recording
an online course. The prompt is, create
a comparison list of cameras to use for
an online course. Let's see what's coming up with. Okay. It has now
given me a list, but I want to turn
it into table, turn it into a table. It has now converted all the
information into a table, which is a better
format for comparison, to consume the information
out of something else. I can do is I can ask the I also to code for me so
it can generate code and specific code languages
under the condition that you exactly know what the
results should look like. I will simply ask the I to create myself a simple website. The problemt is create
a simple website code. I press Mer and let's
look at the output. And it has created
me a very simple HTML code to make use of. It can also write Python or any other code that you
might be aware of like SQL. So you can use the AI to
solve simple coding issues. Last but not least,
every notion site also comes with a little
Q and A button down here, which is like your
virtual assistant. And you can ask
certain questions that the II will answer. For example, what is a database? And it will generate you a
reply inside the chat window, It's looking up the replies. It can also search through
your entire notion workspace. If you have a question
about the data that you have in your workspace, it can crawl it and
search for the answer. It gives you here
the full information inside the chat window, which is a great way to
save on time finding the right solutions instead
of googling for example. Another use case
for the notion AI is to auto enrich database. Let's imagine we have
a simple database, let's call it database. In line I have a entry
that's called Notion Story. I simply open up the page, we add the entire Notion
Wikipedia article with everything that we
need to know about Notion. Now we are adding a
simple text feature here and we want to
use AI autofill. We want to select
the auto fill as a summary of our notion
story page contents. So let's click on
Try on this view. Now it has created us a summary of the
notion page behind. It can also try again
or save the changes. Now that we have
turned on auto updates on page edits, we
need to confirm this. Actually, this means that
as soon as the page itself, the page content
significantly change, also the summary of
the I will change. It will constantly monitoring the page contents and figure out if it needs to change
the summary as well. Let's click on Turn on Auto
Update and exit this page. We can of course, also use AI
as an individual property. For example, to translate
what we have here, let's translate the name. And we want to
translate it in German. Let's save the changes
and see what's going on. As you can see,
it has translated the entire page into German. Something else we can do is
when we click on the plus, we use the AI custom order fill. Here we can actually give
a prompt that it's going to execute when reading
through the database entry. Let's say give me a one
page sentence summary of the page content. Let's try it out.
Click on Safe pages, Click Safe, and
we're exiting it. And it has given us, indeed, in one sentence, summary
of the entire document. And this works, of course,
with different languages, different document types. You can extract action items, you can extract also risks that are mentioned
in a document. So a very versatile tool to use notion AI inside your
notion database. In this lecture we
learned about NotionaI. We explore different
use cases from creating e mails, changing
tone, translating, creating lists, and creating comparison tables
or ultimately code. You see that NotionaI is a very useful tool to integrate it into
your daily routine. You need to decide on whether
you want to pay for it or you want to use Che GBT as
an external alternative. That is of course, up to you. If you have any questions,
feel free to reach out. Otherwise, I will see you in
the next lecture. Cheers.
43. Ditch your Planning and switch to Notion Calendar: And welcome back to this course. If at the end of this
course you decide, well notion is the go to platform your central
operating system. Then you might start
out building a lot of different databases where you collect individual
dates here and there. And of course, you
can build yourself multiple views to have a central dashboard where
you see all the dates. But still you would
need to manage all of your dates in
the different views. But you're lacking
a central view of all the dates in your
entire workspace. Wouldn't it be great to
have the central view? And the good news is Notion
has its own calendar, and this is free also
for the free tier. So let's check it out in Notion. This will be an extensive
guide on the Notion Calendar, on our notion workspace. You might have already spotted the Notion calendar feature
on the left hand side. Once you sign up
for the first time, you will need to connect
your Notion account to your Google account so that
you can sync it with dates. Let's open up the calendar. This is a central overview
of your calendar. It looks like actually any other calendar that
you might be used to, but we have some
added values here. So let's drill down bit by bit. On the left hand side, you have a mint view of your calendar, so it makes it easy to navigate through the
individual dates. And then you have on
the left hand side, the connected calendars
from your Google account. So in my case, I have
a personal account. I have also some birthdays, some Celebration day, some
holiday, so to speak. And you can enable
viewing them by simply clicking on the eye on
the right hand side. Of course, you can also add
other calendar accounts, so you can add multiple
Google accounts. For example, you can add conferencing tools such
as Zoom or Google Meet. This will help you to embed
directly into a new invite, the link, to meet up
online, so that's great. In order to connect them, you simply select the tool
that you would like to use. You connect your register
with your login, and then you will have
it as a plugin directly installed into your
Notion calendar. So I will do it for the
Google meet and below that, you're also able to
connect notion workspace. So that means your
notion calendar is completely independent of
your notion workspace only. If you connect those
two, you will be able to see all the meetings, all the events,
all the due dates from your notion workspace. In the notion calendar,
let's connect it. And it pops up a new
message window where I need to allow access
to my workspace. I need to connect
those two again. Now they're authorizing,
and as you can see, my workspace connector, you can also connect more
than one workspace. So that's pretty handy if
you have multiple accounts. I'm closing the settings
menu for a bit. We will revisit it
at a later stage. And then you can see
on the left hand side all the different
databases that it has detected where it
contains dates. Let's enable those in here. As you can see, we have our
dates in our notion calendar. If you ask yourself,
why are these just like random blocks
on the top here? This is because we have scheduled them for
the entire day. We have not included any times. If I want to check out
a specific task or specific entry in
my Notion database, then I simply select the date and I click
on Opening Notion. This will direct me to
the exact same page where I manage the due date. And I can go in
here and include, for example, a time. This will create a time frame. If I also include a time
window, so an end date, I can actually block
myself a whole 2 hours. For example, if I'm using
02:00 P.M. Just going to check this out and
go back to my calendar and it will update the entry
to have an hourly view. That's incredibly handy
to move back and forth. Of course, I can
also change this internally in the
notion calendar. I can move the day around. I can also move the
entire meeting around. This will have an impact. Let's see if Friday
the eighth has been updated in here,
and yes, it did. I can also change the duration
of the meeting in here. I can of course, also switch the meeting from one calendar
to the other calendar, or from one database to the
other database if I want to. Another feature of the
notion calendar is of course to create your
very own invites. If I want to create a new event, I simply click onto an empty spot. I will
give it a title. For example, private work time. I can select the
date and the timing. Here I can invite participants. I can use a conferencing tools such as Google Meat for example. I can define the
location and I can also add any kind of links or documents that we
want to read through. In this call, I can set
myself to busy or free, depending on how I would like to appear in the
calendar for others. If I set myself to free, then I'm not blocking time. It's just a reminder for myself. And I can also select
the default visibility. So whether I want
my meetings to be public or private,
that's up to you. And you can set up
yourself a reminder before the meeting to make sure you're not missing out on the meeting. Another handy feature
that you can use is sharing availability
if you want to tell some. When you have time.
Instead of writing down, hey, here I have a slot. You can easily share
your availability by clicking on
Sharing Availability. You mark those spots
that you want to share or where you could
imagine to have the meeting. You can also include
a schedule link link, and then you simply create
the availability note. Once created, the
snippet was copied to your clipboard and then
you can share this link, which gives the other
part the opportunity to book the meeting directly
into the available slots. Nowhere else isn't this
handy. I find this feature. Awesome. Next up what we can
do is we can add time zones. Particularly interesting
if you're working across different geographies
across different countries. You can add up to three
different time zones and you can choose from the time
zone on the right hand side. So let's add just
two more time zones. And this will give you the view on the left hand side where you can schedule the meeting
to the appropriate time. And you always know what time
it is for your counterpart, if they can make it to the
meeting or if they can't. Navigating through your
calendar is just as easy as you know it from the timeline view or
the calendar view. You can skip four
or back by the day, the week, the month, or
by the number of days. You also can select the
viewing settings so you can decide whether you want
to show the weekends, if you want to show declined
events, the weak numbers. And it can switch over
to the general setting, which I'm going to show you in. Second, if you want to go
back to the today's date, then you simply
click on Today and it will guide you back
to the current day. The side node, There's
also a Notion app available and Notion Desktop
app for the calendar. But there's also Notion app
for the application itself. If you want to, you can download it on the right hand side. Which gives you an
application downloaded to your desktop PC and
you do not need to open up the calendar
view in your browser. Something else I want to
show you is how you can switch between Notion as an
application and the calendar. If you have a due
date planned out in Notion and you want to switch from the calendar to Notion, you can click on the
respective task or the respective entry and click on Open
Notion, vice versa, you can do the very same
if we go, for example, to our work tracker
on the timeline view, you can click on
Open in Calendar, which will guide you
to the calendar. And the same is possible
on the calendar view. Back to the notion calendar. Something else that's
super handy is shortcuts in notion calendar, you have a bunch of
different shortcuts. If you want to review
all of the shortcuts, then simply press question mark. Question mark will open up all the commands on
the right hand side. One of the most useful
ones is the shortcut. So imagine you're somewhere
else in your calendar and you press it will always bring
you back to the current day. If you press it will show you the very next meeting
that's scheduled. So you don't have to manually go and find your next meeting. If you press J, it will
bring you to the next week. So whenever you press
J, it will jump and scroll to the next
week in your calendar. So it's an easy way to
navigate through it. And the opposite of
the J command is the K command which
brings you a week before. These are my four go to
shortcuts that I will use frequently to navigate more
easily in ocean calendar. Last but not least,
we want to have a look at the settings
of our calendar. For that, I click on
my profile on top, and I want to go to the
Settings On the Settings, I can again decide on whether I want to show
weekends declared, the ends week numbers. I can also decide when my week
should start on which day. I can also define my calendar
navigation shortcut, so I can either go to today
or align today in the view. I can also decide on my upcoming meetings to be
shown in the control panel. Can decide on the
language, the time format, the time zones, and the
appearance of the tool. Of course, we also
have the dark mode as well as the light mode. We can also go onto the
notifications and enable notification so that we get a pop up notification once the next meeting
is around the corner. Below that, we have
our integration. So where we manage our
calendar accounts, where we manage our
conferencing tools and our Notion workspace. And below that we have
our profile settings where we can give us
a different name. If you have a different
name and notion and you do not want to use
the very same name also in the notion calendar, then feel free to change it. And here you can also delete
your calendar account. In this lecture, we talked about the notion calendar feature, which is a great
way to consolidate all the different days and due dates from inside Notion Plus, in addition, all the other
scheduled meetings on, for example, your
Google calendar. This holistic view brings back the command over your time. You can easily
schedule meetings, you can share your
availability with others. So it's one of the best
features that notion offers in terms of productivity
and work management. If you have any questions,
feel free to reach out. Otherwise, I will see
you in the next lecture.
44. Use Notion as a Website with Pro Tools (Not only sharing a page): Hello and welcome
back to this course. In this lecture we
are going to talk about using Notion as a website. In previous lectures, we have already talked about
using Notion as a central data repository for our internal use case
means when we work, for example, in a
company we have a central place where
all the information goes into in terms of wiki
or in terms of databases. However, we can also use Notion for external
facing information. With the click of a button, we can turn an entire
Notion page into a website. And with the right
third party tools, we can even use it
as a no code website using cutting edge technology
and design elements. Let's jump over Intonation. All right, we are on our
Notion page and we have here just a random page that we want to create a website for. We click on the
Share Share button, is already common knowledge. We talked about it previously, so you can invite people, but we can also turn a
page into a website. Let's go on the Publish button, and then we again
publish the site. Now you get the indicator
that this is live on the web. You also get this
banner on top of here to see which page is
currently online. With online I, anyone with this link can access
your site right now, which doesn't mean that any
random person will find it. However, it is findable and
accessible from the external. So let's copy this
link and we'll enter the URL into our browser. As you can see, we have now here our website with some
clickable links. We can access the
template site below that, and we can go back
to the main page. Now important to know is
that once we publish a site, all sub pages of this
page are also public. So that means anything that is incorporated into the
site is accessible. We cannot go one level up. So that means we are not able to get the top level domain, the database domain
of this page. But you need to be aware of that all sub pages are now live. If you want to see which
pages are currently online, you can click on all
published pages, which will give
you an overview of all the currently
published sites. We can allow commenting for people who do not
have an account. We can also decide on
whether we want to allow the duplication feature. So that means if
we go on our page, this is the duplication
feature with which we can replicate the site in
our personal work space. Any random person can do that if this function is turned on. So let's undo it and
reload the site. As you can see, the
duplication feature is gone. It's just the site right now. If we go back, we can turn on
the search engine indexing. That means if we turn this on, then our page is truly
accessible by Google. Anyone who is googling this page might be able to find it. If we want to unpublish a site, then we simply click on
unpublished. So far so good. We have created a
website in notion, however, with a very
uncomfortable link. This isn't of course,
the link that you would want to use for
an external site. So we can go into
our settings and set a public domain for our
website. We can do that here. In order to do that, you need to register for a domain
and you can enter it here and connect
those two records with each other. So far so good. This works for simple websites where you just want to
showcase information. Maybe opening hours
of your restaurant, maybe using it as a
digital business card. But the more complex we want
to have Pro Tools to manage our website and this is where third party software
comes into the game. One software that we
can use is Supersite. Supersite is like a plug in that we can install
in front of our page, which gives us
certain benefits such as accelerated loading times, optimized page layouts for mobile tablet and desktop users, and some other style elements. So let's head to super site. There are of course
more providers. I'm taking Super
just as an example. So as you can see,
you can create websites with Notion
and turn them from the notion look and feel onto a super site look and fear
means a professional website. If we click on the
showcase there, you can see different
examples of sites that were professionally created
with the help of Super. And we can also check
out the features. I mean, the features are also available with other providers, but essentially it gives you higher performance
custom designs, SEO different domains, and SSL encryption analytics,
further integration, password protection,
and custom code that you can embed onto your site. So let's start
creating a site with Super just to get an
idea of the workflow. First of all, we
need to sign in. And by the way, Super
is a free service. However, there are of
course, premium features. As always, if you go all in, you will need to pay for the
features we are signing in. And we need to, of course,
give permission to su, as always, if we are connecting
to third party software. So we are logging in. Now
we want to create a site. First of all, the site
will be called test site. I am going to take the
link of our public site, I will copy it, put it
into the Super site, paste it in here, and
select Create Site. Super has assigned a
new URL to the site. In this case it's menus, Snail dot, super dot site. If you want to
have a custom URL, you need to go for the
pro feature in Super. It connects it to a
public facing domain. You see it's looking
differently, it doesn't have all the notion generic features
on the top here. It's also indicating
that this was made with super on below here. Going back to the
site administration, we can just for example
custom code here. We can change settings
set of Favicon, select a site language
if we need to. We can connect
different domains. We can also change the domain
that was attached here. We can change the sites, we can add a new page to it. So for example, if we are turning on the publishing
feature inside notion, as I said, all the subpages
are going to be visible here. We can make a
decision on which sub pages we actually want
to publish externally. We can also work on SEOs. We mean search
engine optimization, so that we get more
traffic from Google. We can also change the design. We can add different colors, typography layout, we can
add different blocks. We can change the block design, change the database design,
the navigation design. We can also turn it
into a theme that we can apply to multiple sites. We can add a navigational
bar on top here. We can add a footer
if we want to. As I said, we can also add custom code for that
we need to upgrade. However, we can
set some options, some properties, and we
have a Page Analytics. We can see in the pro version how much traffic we get
from different sites. Complete analytics tool
to summarize with notion, we get already very, very good tools to publish our site or to turn a
site into a website. However, it comes at
certain limitations. For example, with the general
notion look and fear. Sometimes we don't
want to show or indicate that we build
a site with notion. For some use cases, it
might make sense to switch to a third party
provider giving you third party professional
website building tools such as adjusting code or
adjusting the domain, or adjusting the user experience with the site by turning on certain sites or using a certain theme to apply
on the entire website. I'm going to attach the link to the third party provider that we used here into the course resources so that
you can make use of it. And if you have any questions,
feel free to reach out. Otherwise, I'll see you
in the next lecture.
45. Introduction into OKR (Objective and Key Results) System: Low. And welcome
back to this course. In the coming lectures,
we are going to practice a little bit what we've learned before at end of a new topic. This new topic is OKR as a productivity system
for your personal, but also for your
professional work life. And we are in part
one of the lectures exploring the theoretical
foundations of OKR. And part number two,
we are going to become very practical
and apply what we've learned before by building our very own dashboard that incorporates the methodologies
of the OKR system. Let's jump into the
topic and find out why OKR is such a popular tool. Okr is an acronym, Objectives and key
results in this lecture. As mentioned, we're
going to build out the theoretical basis so we can apply what we've
learned into practice. For that, we of course need
to understand what OKR is, what the pros and cons
are for and against it, and how it's actually
working in practice. The OKR system was initially
founded in 1970s and it's actually a very
powerful framework to reach your corporate goals
and missions and vision. So it's kind of a way to connect the broader
vision of your company or your personal life. And breaking it down into actionable items that you can distribute out to
different individuals. And they in turn, feel connected to the overall
mission and vision. So it's kind of a good way to measure the progress of
your corporate vision. But also to make everyone
feel connected to it, increasing the chances
of completion. How could that look in
practice in a company? Every company should have
a mission in vision, like the broader vision
of where we want to be, what we want to represent, what kind of problems
we want to solve. This mission typically
is broken down into objective kind of clear milestones that
they want to reach. In turn, you can break down these milestones into
actionable key results, so measurable results that help you to reach and track
your objective completion. And these results, however, can be broken down into individual initiatives which you can assign to, for example, employees or departments to reach and contribute their part for reaching the upper levels
means the key results, the objectives, and the
mission in the division. So let's put it onto an example to understand how
this could look like. Imagine the overall mission
is to become a market leader, to be the best in a
certain category. Different objectives
could apply here. And one objective could be, we want to be the
company that has the most customer
recommendations or the best customer
recommendations on the market. So that is the objective and the way we can measure
it in a key result. Like one key result,
there can be multiple key results
attached to it. But one key result could be, in order to have customer
recommendations, we need, first of all,
satisfied customers. So we want to reach a customer satisfaction ratio of 90% In order to achieve this, which is a very smart means, a very specific, measurable, actionable, and realistic
and time bound result. We need to create initiatives
that support this, because this is usually
a key result that composes of different
influence factors. Such as, do we want to automate things so that we get rid of manual mistakes or we want to decrease the response time
for customer requests. So this is a typical KR layout
for one specific mission, one objective, one key
result, and two initiatives. If you want to transfer this to a private example out
of your private life, the overall mission could be, I want to learn how to sail
a sailing boat, right? This could be the
overall vision, which seems to be
very far off because there's a lot of steps that
you need to take in between. So one objective could be, I need to get a specific
certificate for that, like a sea going certificate
or navigation certificate. These could all be
different objectives. And one key result
for that could be to attend the respective
theory hours, to get the practical experience, to master the exams, the practical and
theoretical exams. And in order to
do that, you need to build a habit of learning. You need to attend those
classes and stuff like this. So as you can see,
you can break down the overall goal that you want to learn how to sail a boat
or maybe even broader, you want to do a vacation on a boat where you're the captain. You can break it down into
different objectives, different key results, and
different initiatives. Making the overall goal far more tangible for you so that you can measure the progress towards
this goal in half your time. If someone is asking, hey, you wanted to become a
Captain, how far are you? You could say like, okay, I'm at 50% because this and that initiative I have
ticked already off. So try to make all the key results smart
by making them specific, measurable, achievable,
realistic, and time. That's a great aid to make it happen at
the end of the day. What is an argument
for an OKR system? Number one, we have complete transparencies and
goals and progress. That means everyone
feels connected to the goals and it's clearly measurable for
everyone where we are. We see where we get the input, we see where we get the output, and we see if what
we are doing right now is right for
achieving those goals. We also focus on
measurable results. So instead of having very fluffy designed objectives
where you ask yourself, why are we doing it, We have
a clear measurable result where we can decide
on whether this is successful or not successful. Hence, we can streamline our investments in
terms of money or time. Agility and adaptability to changes is also a clear
pro, factor here. Because as we visualize all of these interconnections
between objectives, missions, key results, we see if we're changing any kind
of factor in between. Or if an external factor
changes how we need to adapt this entire strategy
to the new situation. And finally, it fosters employee engagement
and motivation. Because if I, as an individual, understand how my role plays out or supports the overall
mission vision, I feel much more motivated
to achieve my goals. Also because you have
objective, clear, and measurable results for
your performance evaluation. So it's a better indicator for my performance as an employee, but also a better indicator for the company to measure the
performance of an employee. The contra argument against
it is that you have a high administrative effort
to create those calls. Of course, you need to map out all the missions you
need to break them down. Meets, you have a lot
of working sessions, not only with your managers, but also with your teams
and your colleagues. So that's high effort task. Then you might be at risk of pursuing too many
things at a time. So for example, if an individual is responsible for more
than one initiative, it might just be too much
to handle at a time. And also it can put excessive
pressure on your employees. Because if everything
is transparent, if everything is measurable, employees might be super
fast overloaded with peer pressure or
with the pressure of performing in order to avoid, in particular this
pressure thing, it requires a very, very clear communication
and training to everyone participating This Ok R strategy needs to be trained for it. So the next question after hearing the pros and
cons is of course, who should use the OKR system? For which kind of situations
is OKR a great measure? So it is great in a
corporate environment. If you need to work, Agile means you need to quickly
respond to market changes. It is a high dynamic environment or you want to increase the collaboration
of your employees. So if you, for example, do an employee survey and
your employees tell you, I don't feel really connected through the overall
mission vision, then OKR might be something
you want to look into. Also, if you want
to have a way to clearly track goals and the progress against
the goal achievement, then OKR might be something you would want to look into
for your private life. You can use it, of course, in
a less administrative way, but if you have a lot of goals or a lot of
dreams that you find not really the time for to work on these
goals and dreams. And you want to make
it more tangible, means you want to break it
down, or you work better. If you have smaller
smarter goals, then okay, R can be a measure to
alter your motivation and also the probability to reach
your overall goals in lie. And finally, how do you
implement the strategy? So step number one is to find clarity of what
I want to achieve, whether me personally or me as a company, or
us as a company. We need to understand
why we are doing what we do or what should we do to achieve what
we're dreaming about. Next up, we need to
define objectives. We need to break this
overall vision down into objectives and then into
measurable, key results. We need to think of, how can I measure for myself
or from my company? How can I measure clearly whether or not I'm
doing the right things? What are milestones? Or how can I measure the
achievement of milestones? And step number four,
we need to be agile, so we need to regularly verify our progress,
measure our progress. And if we see, for example, that a objective is too far
off or too far to reach, then we of course, need
to adjust and maybe break it down even further into
smaller bits and pieces. After having talked about
KR in a theoretical manner, let's jump into our
productivity system and build our
dashboard for our own. For that, I will see
you in the next L.
46. Lets build together: an OKR/Project Tracker System in Notion: Hello and welcome
back to this course. In this lecture, we
are going to have another practice
exercise where we build ourselves an OK R tracker, objectives and key
results tracker. If you wonder what this is about and want to learn more about it, just go back one lecture, because there we will examine the theoretical foundation
behind the methodology. But in a nutshell, it's actually just a tracker to
capture objectives, means goals, and to break it down into actionable initiative. It could also be used for
project management and task management to have a central view on
everything, what's going on. As always, this is
voluntary exercise, so you can skip it
if you want to. But I highly recommend
you to stay until the very end and to practice
as much as you can. That being said, let's
jump into notion and explore our
today's exercise. All right, we are on
our work space notion workspace and this
is our OKR system. We have on top here
our objectives that we want to reach grouped
by the quarters. No worries. I will show
you how this works. This is a new element that we haven't touched before,
It's just a small one. Down here we have our
results and initiatives. Our key results means what we
try to measure at the end. And below that, in the sub
level we have our initiatives. But you could also
use it, of course, to capture projects,
the top lane projects, and then the tasks below that to measure the
overall progress on it. The way this thing works
is we have two databases. These are database use, but we have two database, objective database and
a results database. If I want to create a new
objective for my database, then I simply click on you and create myself
a new objective. Let's call it
objective number four, and I can add some
details to it. So let's give some details. I have an automatic alert here which is referring
to the due date. If we are at risk of
exceeding our due date, then we will get an alert here. We, of course, need to
enter our due date. So let's say by end of the
month we want to get it done and here we got our
quarter calculation. As I said, this
is pretty simple. So we're taking the
due date and format the date into the quarter
and breaking it down into the years and put
the que in front of it so that we have a way to group our quarters in the view here. Next up, we also want to
have a way to connect our objectives with our
results and initiatives, which we are going to do
in the very next step. If you have a look
at the grouping, here we are, grouping
everything by the quarter. And this is the formula
that I just explained before that works
out for the quarter. Below that, we have
our results and initiatives where we
can add a new entry. As I mentioned, you can
fully customize this if you, by the end of the day say, I don't want to capture
any objectives, I just want to
capture my projects and the task below that
or attached to it. Then just rename
Objectives to projects and results in two tasks
that's also workable, or you say the key results are the projects and the sub
level are the tasks. That's completely up
to you, but let's create a key result
for the example. Here we open up our key result and I will call it
simply key result. Number one, I need to assign a tech define whether it's
a key result or initiative. The way this thing works
is that everything in the top level is a key result and everything
below it is an initiative. We call it a key result. We give it a due
date, which should of course be before the 31st. Otherwise, we are
having a problem. Let's select the 29th and we're connecting it
to an objective. The objective in this case should be objective number four. We can start our progress
measurement with 0% because right now we are at 0% We can add some details
here about the project, the task, or whatever
we want to attach here, we can put it directly
into our key result. Now a last word about the alert that we have in our
objective view. Let's say we move our due date sooner
or even exceeding it. Then we just get here an
alert that's saying alert, we have our due date
at risk. That's all. It's nothing to fancy
something we have done before. Be creative and define your
alert with a simple formula. That being said, this
is a task of today. You can pause the
video right now. In a few seconds,
we will go over the solution step by step. All right, we are back
on our OKR tracker. As mentioned, OKR is
just a suggestion. We can of course interchange
the levels of measurement. Means objectives could
also be projects and results initiatives could
be tasks and subtasks. That really depends on your preferences and how you
manage your daily workload. But let's kick things off. Okay, we have here our headline, this is the default headline
of the Notion page. We are then progressing with
a divider and a callout box, a simple call out box here, where we are getting rid of our imog followed
by the divider. The divider, we have
a headline that's in a grayish box which
isn't really a call out. It is simply or matted headline. Let's put objectives here. Mark this entire thing as
a headline number three. Then we want to turn
the entire block into a gray background
block like this. As you can see, we
have now created a alternate format
of the headline. Below that we have
our objectives. The objectives is
very own database in the gallery view if by opening up we are not having too many different formulas, just the alert formula. And this says if the due
date of the objective is smaller than the last due date of the result, then
we get an alert. So that we get a hint, if the due dates
are not adding up, we are pulling in with
a roll up formula, the last date of the key result and also the progress
so that we can, number one, make use
of our alert function. And number two, so that we get an aggregated overview
of our progress. The progress is
being calculated by a number field of all progresses that are
attached to the objective. So all key initiatives have a progress and we want
to take the average. So to avoid that,
we are summing up or using any other
way to calculate it. We want to have the
average in here. That's for the objective. If we are opening up the key
results and initiatives, then we see we do not have
any formula attached to it. It's really just a single
select field where we can define whether it's an
initiative or a key result. We have a due date where we capture both the start
and the end date. And in order to indicate or make everyone aware of that,
we also need an end date. I added the respective hint towards the description
of the property. Next up we have the
connection towards our goal and we have potentially a sub and apparent
item attached to it. So I have enabled
for this database, the sub item feature
as you can see here. This is why we have apparent
child relation inside our key results because this is already the
top level key result. We do not have any
level above it, we just have sub
items attached to it. We have also a checkbox, and we have a progress bar that is formatted with a
circle in percentage. If we look at the
property itself, we have the ring progress bar attached to it and the
number format is percentage. We have a look at the
sub items in turn. They are formatted the
very same way, just that. They have now a parent item, which is the complete research here and no sub item
attached to it. For the results, I
have two more views. One is the tab where we have all the different tasks and
initiatives and results. We also have to do
filter attached to it. This filter, if I'm opening up, is just verifying if the
result is achieved or not. It's all unchecked here. Right now for the done, we have the vice versa
or results achieved, just the check marks. So if I go to do and say, okay, this one is ready, then it moves over into
this view just to give us a clear view of all the results in initiatives that was
the exercise for Okay. Art tracker. I hope it was achievable for you and
please don't worry if you were not able to
completely recreate it as there's multiple ways to
achieve the very same thing. You can build it in a different way or you can build it in the
exact same way. It's completely up
to you. As always, I will attach a link
of this template into the course description
so that you can duplicate it. Either use it out of the box
or change it, for example, to this project and task narrative that I
was just talking about. If you have any questions,
feel free to reach out. Otherwise, I'll see you in
the next lecture. Cheers.
47. Introduction into Second Brain Concept by Tiago Forte: Hello and welcome
back to this course. In the next two lectures,
we are going to talk about the second brain
methodology by Tiago Ford. Second brain, as
the name suggests, should be the one and
only place to capture everything that you have
in your mind means notes, thoughts, projects,
resources, actionable items. Simply an all in one place to store and manage information. And it should be so
intuitive that you don't even have to think about
how to stay organized. Because the system
will do it for you, of course, with your input. But you can trust the process, so you're not missing
out on any deadline on any information or
forgetting about something. If that sounds interesting
to you, then stay on, because in lecture number one, we are going to discuss the theoretical
foundation behind it. And in lecture number two, we have another exercise. So we will have a look at
how to build a second brain. Of course, I will provide you with the template so you can start off right from scratch
or build your own second. Brad, as you want to, let's jump into the topic and
explore the second. In this lecture, we
want to understand how to transfer our mental
load into a system so that we're not missing
out on any deadline or missing or forgetting about
any kind of resources. How do we do that? First of all, we need to understand
what the second brain is about, how it works. And finally, we will understand how you can build your very own. The second brain is a
productivity book by Tiago Forte, and it's designed as
a proven method to organize your digital life and unlock your
creative potential. The problem this
book tries to solve is that in a world
as we live in today, we are flooded with
constant information. And we need to have a method to remember things like
using post. Its. If you're like me, I
was using posts and note taking here pen
and paper over there. I was literally cluttering my entire workspace
with all these nodes. And this isn't efficient either because you forget about nodes. If they are buried
under other posts, we need another
productivity system. Second, brain is a
methodology for having one central space where we can capture and remind
ourselves on ideas, inspirations, insights
and connections that we have gained
through our experience. This is the one place
where we want to store everything and
why should we care? By creating this all
in one place where we can store and unload
all our mental load, We create a process
that we can trust. And hence, we do not need to
remember all these things. And we do not need to worry about not forgetting about it, because we just put it there. And this relieves us from
so much stress that we can unblock a lot of our mental
load to be more creative. So as an example, there
was a time where I had trouble finding
sleep in the evening. This was because my brain was constantly thinking
about stuff that I need to take care of that I would like to
remember myself on. And since I'm using
the second brain and unloading everything there, I have a place where all
this information goes. I don't think as much over
these problems anymore. My thoughts are more
of a creative nature. So instead of being
reactive in my thoughts, like I need to react on
an approaching deadline, my thoughts are more proactive and creative, if
that makes sense. And that, of course,
leads ultimately to also more calmness. At least that was
the case for me. So how do we build
our own second brain? It's like a funnel on the top, we put everything that comes into our mind and
through the process, only those ideas and resources that are relevant will be
actioned at the very end. So it's like a filter
mechanism if you want to, which cuts out all the noise that we are maybe hyped about, but which actually
doesn't really add value to our personal life. In order to make sure we're capturing the
information we need, one place that is
super simple to reach, best place would be online, because this is usually
reachable from every location. It's not like a posted
that I write on the go and then need to remember
to stick it on my computer. No, it should be
in the best case, an application that's
online where we simply can add everything
we want to remember. Next thing, we need to
have a robust methodology to organize our thoughts. This organization should go directly into distill process. That means we are only actioning at really
relevant things. And not like
capturing everything, organizing everything, and
everything needs to be action. No, there is like a clear list of priorities that
we need to take care of and stuff that is simply
not relevant for right now, but we store it just
for the future. And the last step is express. This means we want to action on the points that
we find relevant, which is the net
outcome of our funnel. The way this thing works is we have a central place where
we capture information. As mentioned, this should
be something where we can access this
spot all the time. It should be online, and
then we're organizing and distilling it into the
so called Perra method. Perra is an acronym for project areas,
resources, and archives. A project is something we
are actively working on, stuff that we are actioning
more or less right now. An area instead is something that is timed
out to the future. So that means something
that we are generally interested in
generally working on. But it's not like a
really tangible project because a project would
go under project. Of course, resources is everything we are
generally interested in, which, however, neither
fits directly into an area. So something that's like a
mid term goal or a project, it's just like, hey, I found a really good
recipe for something. I would like to cook
sometime somewhere. But I don't really know when, how, what, and stuff like this. So this would go under Resources
And Archives is a spot where we are putting all the information from
our projects areas. Resource that we
don't need anymore, but we don't want to also delete it simply we just
want to put it into place, but it's kind of like the inactive part of
our second brain, really something that
we want to dump there. We are not intending
to look at it, only if we have a
similar project or a similar problem to solve. We would consult the archives
folder to see if we had a similar problem before and
to see how we tackled it. And that's it, that's the
theoretical foundation of the second brain. In the next lecture, we're going to look at how to operationalize this methodology so
we don't have to think about how to
capture information, how to process the information. So if you have any questions, feel free to reach
out, Otherwise, I'll see you in
the next lecture. Cheers.
48. Lets build together: your own Second Brain in Notion (Exercise): Hello and welcome
back to this course. In this lecture, we are
having another exercise. We are going to have a look at how to build a second brain. If you wonder what
a second brain is, just go back one
lecture where we are discussing the
theoretical foundations of a second brain in detail. In a nutshell, it's
a central place where we organize
our thoughts, ideas, resources, our
nodes, our projects, so everything that's actionable. And that otherwise we
would manage somewhere across our entire desk with
posted nodes, different apps. So we are creating
one central spot where we can really transfer our mental load into
so we don't have to be stressed out and have
more time to be creative. As always, this is a
voluntary exercise, so you can skip it. But of course, I highly
recommend you to stay until the very end so you can
practice as much as possible. That being said, let's jump
into the second brain. All right, we are back
to notion our workspace. And this is the second brain
dashboard that we tried to recreate in a bit.
How does that work? Don't be intimidated by
all the different views. Essentially, we have here just two different databases
that are quite simple. First of all, we have a project
and areas database here. We are capturing everything
that we are actioning right now and areas that might
be relevant in the future. It's a very simple
thing. We collect the relevant projects or areas. We select the type, whether
it's a project or an area. We give a due, and we can assign a task and note a resource
or whatever it is to it. Then we have a roll up
function that in turn relates to the tasks that
we create for it. On the other hand side, we
have a task data repository, a database where
we are collecting, first of all, everything. This is a place where
we're capturing our task resources and nodes. Then we assign the respective
category and decide on whether it is already
done or we have it archive. We want to have it archive. The next we decide
on the status, whether we are
actioning it right now, it is a progress or done. We manage the due dates and the progress and also
the priority of it. Last but not least, of course, we need to attach
it to a project or an area which we
are doing right here. If we go back to our dashboard, we have just different
arrangements of the views where we can quickly
capture something new. We talked about these
buttons before, try to remember how this works. We, of course, go
through it step by step. In a few minutes, we have a quick access bar
to our databases. We have a quick overview
of our projects and areas, our tasks and our calendar
with upcoming dates. Down here we have a view on our nodes which was already
hint on how to build it. If you want to recreate
this entire template, then you can pause
the video now and in a few seconds I will go with
you through it step by step. All right, we are back
on our second brain. I hope you enjoyed this
exercise and don't you worry if there's anything
that you were not able to immediately build up. As always, this is just one
solution to the problem. Of course, there much more. So how this thing works
is we said initially we want to have a central place where we capture everything. So we want to have a place
where we can centrally capture all the task nodes
and resources which is here. How do we do these? We
have created a button. Button is essentially
the button automation that we can add as a block, where with the
press of a button, we create a new page to our task database and directly
classify it as a task. We are repeating this
step for nodes we are classifying as a node in the text and as a
resource in the text. Simple as it is, the entire
thing lives in a callout box. And we have assigned
a respective icon, a minimal icon from the
notion can gallery. The next one is our quick
access to the databases. This is like a little trick
because if you remember, every page that lives on a page needs to be
mentioned at least once. We cannot get rid of this. Instead of placing it somewhere
and trying to hide it, I simply use it as a
quick access guide and place it simply
in this callout box. Below the callout box, we have another callout box
for our projects and areas, which is simply a gallery
view of our database. As a total, we have two
columns where I reduce the space of the left columns to minimum giving more space
to the central view. On the right hand side, the
scale review is grouped by the tech project in areas
as you can see here, we are grouping it
by the type which is essentially the two
single select fields. Next up, we simply
have a new view of our task database that
is filtered to tasks. We have the task
and tech unchecked because we just want to
see the active stuff. Every task should come, of
course, with the due date. We are visualizing our due dates in a central calendar view filtered by archive
unchecked because we just want to visualize
active task. Of course. Below that we have our
Quick nodes repository, where we are filtering our task database
by the tech nodes. If you look at this one, we have assigned tech node
and archive unchecked. Of course, I could also
create a quick link to, for example, the Archive. However, this is
a dashboard and I just want to consume
everything that is burning right now or has a higher priority right
now in my dashboard. I don't want to have a
look at my archived stuff. In order to do that,
I simply go on my task database
and there I have a dedicated view just for task and for the archive itself. Done, you have
managed the exercise of creating a second brain. As always, you will
find the link to the template in the
video description. You can either duplicate it
and use it out of the box, or you can create
it on your own, or you can alter it
in order to make it work for your very
personal situation. If you have any questions,
feel free to reach out. Otherwise, I'll see you in
the next lecture. Cheers.
49. Thanks: Hello and welcome
back to this course. Congratulations, you made it
through the entire course. You have watched
all the lectures, participated in
all the exercises. I couldn't be more proud of
you in this very moment. So thank you very
much for joining this course and you're
truly now a notion master. I've told you everything I know about notion, all the details, everything about
databases, styling, communication,
external stuff that you can connect to notion. We have also gone through a bunch of exercises
helping you to practice more and
build out notion as a true skill for your civ,
for your personal life. And I truly hope you
enjoyed this course. If you found value
in this course, I would be super glad if
you could give me a review. This would help me a
lot to get more eyes on this course and to educate people on the
benefits of notion. So we all can jointly create more efficient work lives environments and
create great things. As you have dedicated so much time and
initiative to this course, I won't let you go
with a little bonus which you will find in the
bonus section down here. It's a free gift that
I want to give you as an added value for your
participation in this course. For now, nothing else remains
to be said from my end other than thanks again for joining on this
exciting path. I wish you lots of
fun exploring notion, lots of creativity, lots of success with the project
that you try to achieve. And if you ever have a
question around notion, I'll be here and available
to all your questions. So feel free to reach out and I hope to meet you again.
Thanks and good.
 Fred B, Online Teacher / Productivity Nerd