Transcripts
1. Introduction: Hi, I'm Nadine. I'm
a watercolor artist from Melbourne, Australia. Thanks for joining me
today for this fun Alison. And what I wanted to do today is look a little bit
more at wet and wet. So I love painting wet and wet. I don't like having a
whole page wet that freaks me out and I don't
enjoy that process. This project today is designed to show you that
you can just work in small areas wet and wet and
get a really nice soft feel. We're also aiming for soft
and hard edges as well. You hear that a lot
when people talk about finding lost and found edges
and hard and soft edges. That's what we'll do a little
bit of in this lesson. We'll go step by step
through the painting. It's not a particularly
difficult one. There are a lot of a lot of layers all again
still wet and wet, so it's building up the tone, building up the color to be
happy with the end results. So we're looking for a really
soft feel in this painting. So there's a little bit of
drinking coffee and waiting, waiting for things to dry. When you get to the end,
it'll be great if you can pop a photo of
your painting up on the projects section for
me to have a look at and always happy to give you feedback. So let's get going.
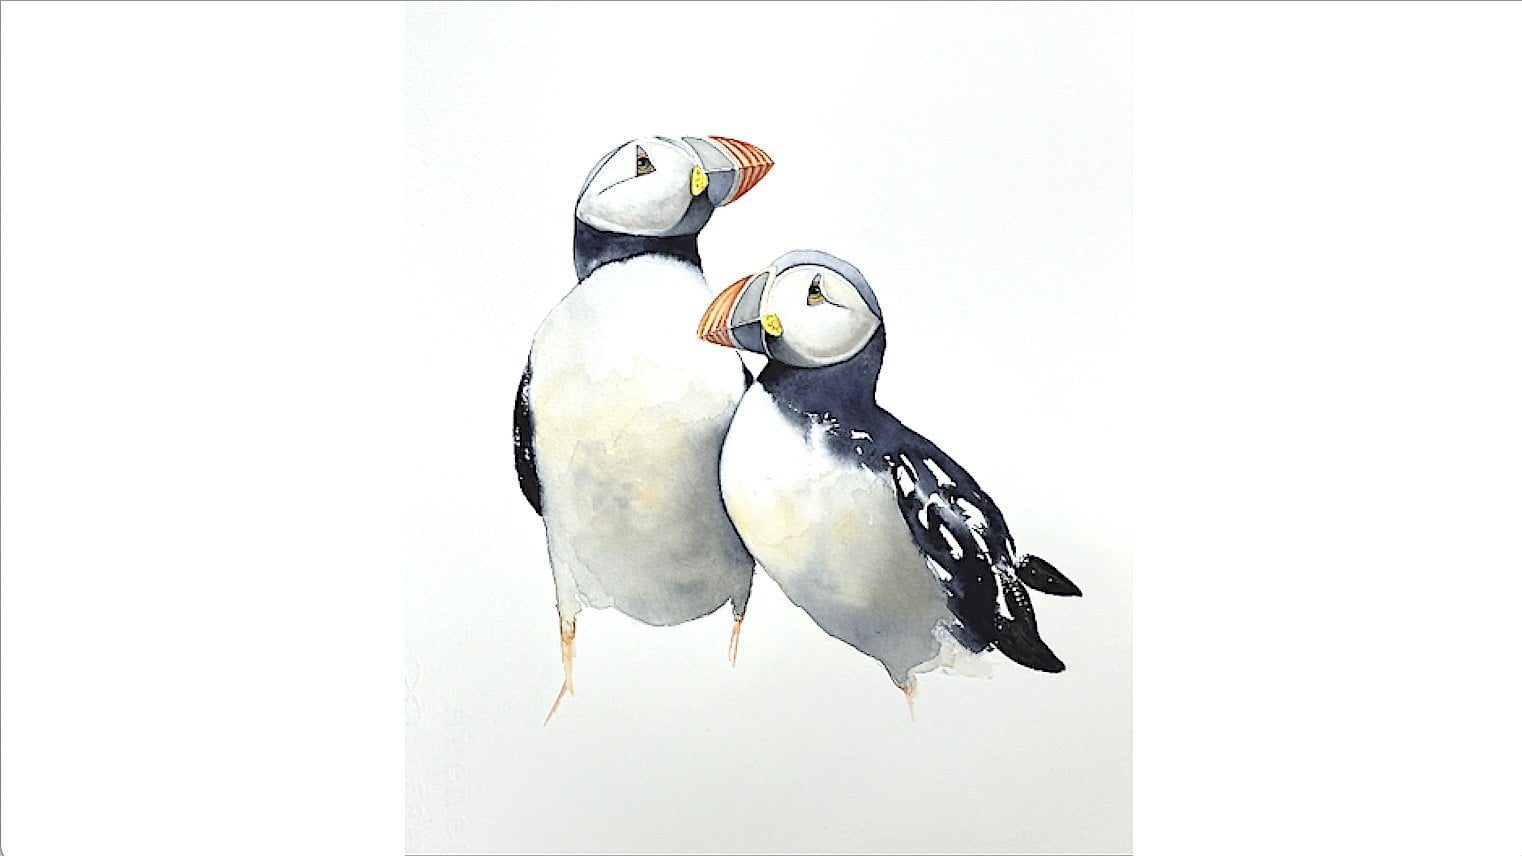
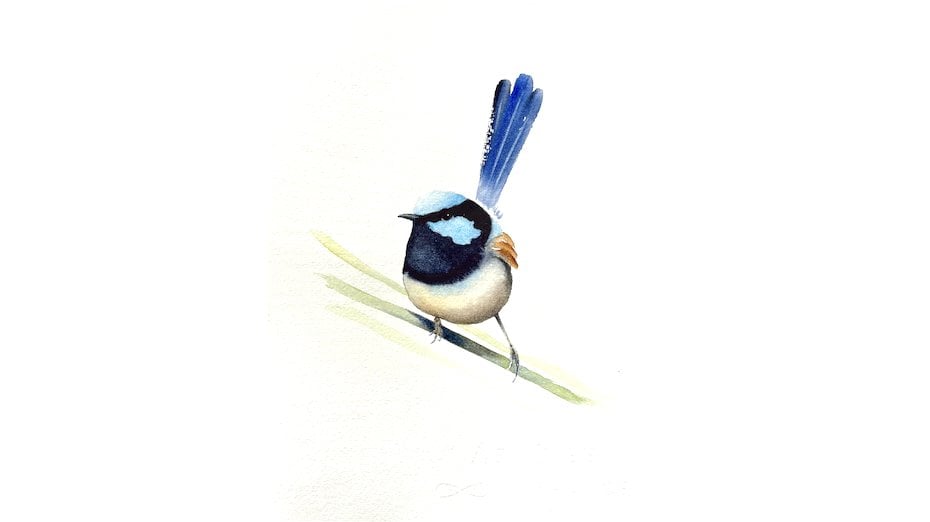
2. Materials: The materials for today's class. The reference photo is
mine. You can download that directly from
the Skillshare site. I'm painting on 300
gram arches called press paper and I'm
painting flat on a board, but I'm not taping it down. You'll need a regular HB pencil and eraser and for the
paints, I've got a bunch, you don't necessarily
need them all, but for the main
body of the bird, I've got some yellow ochre
or you could use raw sienna. I've got some burnt umber, that's a real orange brown, a little bit of vandyk brown. And also for the strong ducks, I'm using a little bit of
indigo from Daniel Smith. Now, in the beak, I've used a little bit of permanent rose and yellow ochre, but it's such a small thing that you could probably
get away with just using yellow ochre on the beak. I certainly wouldn't
go out and buy a great big tube
of permanent rose. The background color you can put in whatever color you like. I've used French ultra from Windsor and Newton
just because actually, I like the way that
it granulates. The other thing you
don't need to buy, but I've got a tiny
spot of white gouah in the back of the eye
there you could use titanium white or
China white for that. In terms of brushes,
I have a few, so I'm using three, really. I've got a tiny one for the fiddly detail and I'll put the numbers of these in
the material section, slightly bigger one, one, this is the one that you
really need will one like it. What I've picked
here is something that's got a nice shape so that it forms these
feathers in one stroke. Try and find yourself
something reasonably big. And then I've also got again, you don't have to have
this, but right at the end, I've lifted a couple
of veins out in the feathers and this is just
a stiff synthetic brush. Again, I'll put the details of that in the material section. Other than that, you'll
need your palette, a glass of water,
and some tissues, we'll move on to the sketch.
3. Sketching Up: Okay. So for the sketch, like ways, keep
it really simple. I'm not worrying about all
the patterning on the bird. I'm also not worrying
about the feet, which if you want to put
the feet in, of course, go ahead and do it, but
I'm not going to bother. I do need you to
pay attention to the shape around the face
and particularly the beak. I don't know why, but I find
our beaks a bit tricky, maybe because he can't see them because they're
underneath all the feathering, pay attention to this shape. I'm actually not putting
in the bottom bit of it. I don't think. I think
I'm going to ignore that, but you want to get
this curve in here. Get the eye shape bright and the only other thing is the position
of the shoulders. I'm giving myself a bit of
an indication where they are and probably about where where the feathers
here are down here. If you don't want to
sketch it yourself, I have included a template A four template that
you can download from the material section on the Skillshare site.
Let's get painting.
4. Starting the Eye and Beak: So we'll start off small. We're going to start
off in the beak, the eye, just to
ease you into it. So I'm going to take, I
think, really little brush. I'm going to grab a touch of I've got some permanent rose here and a little
bit of yellow ochre. I just mix myself a tiny bit. I want this really,
really light initially. So small brush straight
onto the page. I'm just brushing my tissue. This holds even
though it's little it holds quite a lot of water. So I'm just coming
into that. Beak shape. When I hit this top bit here, I'm just going to suggest
a few bits of feathering. I'm not painting a solid line. I'm just going to drag
my brush through a bit so that you can see feathers placed on top of that
beak. All right. Come out of that really soft, keep it really light initially. Then I'm going to
come to the eye. I'm going to start with I've
got some burnt umber here. The eye is really
dark, but initially, I'm going to paint
it with the brown. Quite creamy consistency paint, I want to quite thick. Okay, now, then what I'm
going to do wash my brush. I'm just going to
drag a little bit of water around didn't
clean it very well then. I'm just going to drag a
little bit of water around the top and the
bottom of the eye. Painting the page. And then I'm just going to come and touch while that brown is still wet while the burnt
mb is still wet. I'm just going to come
and touch to it and let it bleed into
that web page a bit. Then I'm going to just drag that brown down to just start to suggest that line that comes down from the
eye to the beak. Just soft and subtle initially. I'm going to put it just
underneath the beak. I don't want to
touch to the beak. I'm just dragging down. Depending on how much
paint you got in the eye will depend
how much that bleeds. If it doesn't move
at all, just grab a bit more paint and
throw it into the eye. If you haven't got any bleeding, you can see if I put that in. You can see it's quite
messy initially. I'm just trying to get a bit of interest without having
to work too hard for it. But that's why I started
with the brown and not going straight
into the black. Softly, softly. Then we'll tidy that shape up later when we go to put
in the dark of the eye. I'm going to let
you stop there for a minute and then we'll
come into the face.
5. First Wash on the Head: So I'm actually drying here now. It doesn't matter
if you are or not because we're not really
going to touch in there. I'm going to take
my next size brush. They're slightly bigger. I'm going to grab
some clean water. I'm going to just throw on
some water around the face. I'm coming around that
kind of moon shape. I'll hold it up and
show you how much water I've got on being careful not to go over my pencil lines. So I want to touch
to the edge of that. You'll see why in a second. Not saturated, but I'm pretty
damp and pretty patchy. Where are we? There. Actually, when I do that, I can see I probably need a
bit more water up top there. Then I'm going to grab just
a touch of yellow ocha and just throw you probably won't be able to see it all that
well on the video. It's very light, keeping
it really milky, just starting to get a
touch of color on the page. I want to keep it light
on the top of the head. So all wet in wet
and just messy, patchy coming over
those shoulders because I'm not
ready to go in there yet, coming under the chin. I'm going to switch back
to my little brush. I'm going to pick up some
burnt umber now and just dragging my brush around that
face and letting it bleed. I want a mixture of these hard edges where
it hits a dry page and these soft bleeding bits where it hits where
I've just wet down. Don't forget this side as well, and I'm going to bring
it just slightly. That's heavy. Going
to wash my brush. I've got a big lump of paint on there. I'm just going to soften. That's probably a bit
thicker than I wanted there. So I just soften it
off a little bit. What I don't want you to do, I don't want you to paint the one line all
around the face. I want it to be a bit messy. I'm going to just do a second layer because there are all sorts of ruffles and
things going on in here. But let the paint, let the paint the water
do the work for you. Don't overthink it, don't
stress too much about it. Now while I've got that on, and this is still damp, I'm going to just touch
a few little bits of paint around because
it's very spotty. While it's still
wet, if this took you too long and this
has started to dry, just throw a bit more water on before you put on
those little spots. Now, it's quite blacky blue through there.
I'm going to grab. I've got a little bit
of indigo in my well. I'm going to grab a little
bit of water indigo and just throw a little bit
of that around. We can keep going
back into this. You don't have to get you
don't have to do it now, you don't have to get
it all in, you can just start to get a little bit. In. As soon as you start to
think, where do I go next? It's time to get out
and just let it dry. Before I come out, I am going to pop a bit of that indigo underneath
really milky, just underneath the chin
here while we're still wet because that's going to
be relatively hard shadow. I'm just going to start
to build that color up. Now, if I was painting
this for myself, I would keep moving
down through the body. But because I want
to go step by step, I don't want to do that to you. I'm just looking at,
I've got a couple of hard edges there
that I don't like. That's why I'm keeping it soft here so that when
I add the wings, I can still get them
to talk to each other. Come out of that, let that fully dry and then
we'll keep going.
6. Back Wings: Okay. It's been about 10
minutes and I'm dry up there. Now we're going to
do the fun bit. I'm using I've grabbed myself. This is a size 12 brush, so it's nice and big. Pick a brush that's got a nice shape on it
so that you can get these feathers in
through the back. Now, I'm going to patally wet
down the top of the wing, so I want kind patchy
soft wet and wet up here. And then I'm going to keep my page dry down
the bottom here. I've got my paint squeezed
out reasonably fresh, but I've also got a piece of scrap paper because I want to test the intensity of my paint
before I go onto my page. I'm stalling because
this bit it's fun, but it can go wrong. So stop talking, start painting. I'm going to patally
wet like we did around the head through the shoulders. Okay. Now, I'm not going to wet down here, staying through the top here. I'm gonna grab my large brush, and we're going to
start in these two wing feathers down
the bottom here. I'm going to use a mix of
what am I going to use? I'm going to use some of my burn tumba and my
van ****, I think. I'm just touching two to both. I just want to test on my paper what a stroke that's going
to make before I head on. Maybe more maybe I need
yellow ochre in there too. This holds a lot of paint, so that's why I can get away with doing a few strokes and
then going onto my page. Tip down one feather, need
more paint than that. I got off too much after
saying that. Two feathers. Then I'm going to start the
ones that go on the top, coming into now this wet on wet. I'm going to pick up a
bit more yellow ochre to try and match it into here. Now I'm going to turn
my hand to the side a bit and just come into those shoulders because
I want random strokes. Without overthinking it. Now I'm going to switch to
my middle brush, my smaller brush, and
I'm going to tidy up. So taking the excess water. I wanted that kind of
not thinking too much, but then I need to make
those shapes make sense. So if I can put a few in there. So I've got all
this nice bleeding. While it's still wet, I'm going to pick up
a bit of my indigo, turn my brush to the side, and just put in a few of those because when I
look at the reference image, these are brown, but I've got
these blue spots in here. I've got to make it work for what I've got
in front of me. Before it dries, I'm
going to just chuck a few more indigo spots
around the place. I'm just looking to
see whether I need to just bring that
one out a touch. And on this side.
I don't want to make him too, he's quite skinny. This bird was halfway
through its molt, so it was quite thin. Alright. So I didn't quite
come to the tips there, but that doesn't matter. There's not much I
can do about that. I might extend that one a bit. There we go. Just make him
just a touch wider there. So it will depend, what your
strokes have been like as to whether you have to play
catch up in spots like that. Alright. So I'm gonna come
out of that, let that dry. Then we're going to start
to work in the face.
7. Building up the Face: So it's been
probably 10 minutes, maybe a bit less,
but I'm drying here. I might have to when
I look at this, I may end up having to balance
this little dark here, this little umber on
this side as well, but I won't make that decision until we've done the rest of it. Too soon. Too soon. All right. We want to get a bit strength of color in the face and we're going to leave this side white. I'm mentioning the
lights coming this way. I want to first up, I think, put the indigo in the eye, paint in the dark of the eye. I got my smallest brush and I'm just going to
paint that shape in. Then I'm going to drag wash my brush and I'm
just going to drag that Indigo down that line. Restating that. Then I'm going to grab
my middle size brush and I'm going to throw some
water around the face. I might actually come touch
that little bit of indigo where we just were
underneath the beak. Now I'm keeping a little bit of dry paper between the edge
here and where I'm wetting down coming along pretty wet. Then I'm going to grab a
bit of my yellow ochre. Throw that in initially. Nice, wet and wet, keeping
it soft up to that. Okay. I'm gonna grab, then.
What am I going to do? I think I'm going to
grab my little brush. I'm going to grab a little
bit of my burnt tumba, and just that same thing
that we did along here. Just really messy edge. I've got to bring
that just a touch on the other side as well. On this side, down the bottom
there, it's pretty dry. Just to add a touch of
something on that side. Same thing about don't paint it all in
really messy strokes. Then we're going
to build up I need some strength on this
side to put it in shadow. I'm going to start with a
little bit of my indigo and touch that just under that eye, under the beak, coming around, I'm going to try
and keep the light here coming across the top, throwing a bit in knowing that we can come back
and do more later. Don't have to get it all in now. Want to build up the darks rather than going
too hard too soon. I'm just going to wet my brush flooding it a little bit
to just keep the light. Through this part of the face. And then I'm going to chuck in, I think, a little bit more
burnt umber around the eye. So just through You know, and as that's drying, I can see already that
it's just way too light. So more more indigo. Keeping that light. And I'm really flooding. I'm really flooding the paper because I want it
all nice and soft. I'm going to the side.
Every time I wash my brush, I'm painting my
tissue so that now my brush isn't too wet. Okay. So really kind of messy
coming around that eye. So that initial hit of paint looked pretty
dark and scary, but it's already
starting to back off. I'm going to grab a
bit more burnt tumber. There's actually probably some permanent rows
in around here, but I'm going to go with
the burnt umber instead. You could put a little bit of pink of touch of
pink through there. I'm not going to bother
going to keep it simple. Under the beak, bringing
that color around. The important thing here is
just it's all wet and wet or really soft and we can
build up if we need to. This light here is important
to give a little bit of dimension to the
face this shadow. I said that I was
ignoring the beak. Instead, I'm just making a
bit of a shadow underneath. Just softly dragging
my brush through. I'm going to drag
just a little bit of that same color just underneath where those feathers are sitting on top of the beak. Then I'm going to
strengthen a bit of indigo. I'm just going to strengthen that underneath
where the beak is. Then I want to watch for
I'm getting a bit of a hard edge here. I'm just going to
wash my small brush, soften that back a bit. It's just a clean damp brush
and just running it along, worrying that edge a bit. I quite like the idea of maybe strengthening
trenthing this edge. So again, I'm still wet chucking in a bit
more burnt umber. They're just slowly building
up around top a bit. Starting to settle in. Now,
while that's all drying, I'm going to
strengthen under here, which isn't really kind
of in the reference, but I want it darker
underneath the chin. So I'm going to take I'm going to keep with
my small brush just because I don't
want to touch into where I've just been wet there. That's too much paint. So I'm going to
flood that a bit. Just keep washing my
brush and pull it around. So I'm completely dry under
here, and I've got to me, you can wait until the face is dry before you do this
if you're worried about touching, but
you should be right. Should be enough space. And I'm using the small brush just
because I want to chisel out that shape over the
shoulder and up here. Okay, then I'm going
to wash my brush, C paint outside
of that wet edge. So I'm painting the
paper here and then coming up to meet that. Just it's easier to
get a transition rather than starting here
and dragging the paint out, you can end up
chasing your tail. I tend to paint from the
outside and come to touch the wet edge when I want this transition
from dark to light. When I sit back, one more before I let you stop for a bit,
softening that edge. I want to balance a little
bit that onto this side. Now, I didn't quite come all
the way to the edge there. Don't really mind that, but I'm going to
put a little bit of this same color just
over the shoulder. I think I'm going to take my medium brush and just
wet that down again. This time, I'm going
to come a bit out to my pencil edge over
that shoulder. I'm just going to chuck a bit of the indigo in, just
see what it does. Wash my brush, move
it around a bit. And now I can tidy
up and come out to that pencil edge that I missed
soften over the shoulder. So I'm just dragging my
damp brush on that edge, so it's not really, really hard. Bush my brush, soften Okay. I probably comes all the way over to there what
I also can do, I'm going to take a little
bit of maybe my van dike. I'm just going to restate all my little spots have disappeared and I don't
want to paint too many in, but I can just throw
a few in while that's drying and maybe
some black ones as well. So some indigo. But this time, really toothpasty
consistency paint. So this dark was really milky. Now I've got slightly
stronger paint. Don't overdo it. So I'll
let those settle in. I went on to dry paper there, so I'm just going to
soften that back a bit. So I don't want to
go too crazy there. Okay, come out of that. Give
that 10 minutes to dry. Come back and add
some more detail.
8. Adding the Blue Background: So I'm completely dry again now, and I've changed my
mind and decided that what I'm going
to do next is I'm going to pop a little
bit of a blue background behind the bird, maybe from mid back
around the head. So to do that. Firstly, I've
rubbed out my pencil lines. I've left a few of them here, just gently just so that I can figure out what shape
I'm going for there. I've cleaned my big brush
and my little brush. I've got clean water and I've squeezed out I'm going
to use some French ultra. I've squeezed out a
bunch of French ultra. What I'm going to
do, I'm going to wet down further than I
want the pigment to go. So make sure my brush is clean, and then I'm going
to come around the bird come as close as I can initially
in to the pencil edge. I'm doing this so then I
can decide, well, you know, the kind of level of detail I need to put in the
rest of the bird. I've got a chisel
into this shape. So I'm pretty wet. Fair
bit of water on here. Yeah, I have to do this. I
don't often do background, so it is quite nice with this one because it's
so light on this side. It's nice to have the contrast. Now I'm going to make up a big
puddle of my French ultra. Actually, I might use, I might switch to the
medium brush in between. We'll see how we go. I just want really milky paint initially. So a lot of water in it. Then I'm going to start in here. Is that it is, I think. I think I that looks more like cobalt. What
did I squeeze out? Well, we're going with
whatever this is anyway. I think it's French Altra. I'm just throwing some
pigment into that web page. You don't want to spend too
much time overthinking this, you want to throw it
on and then come out. Yeah, I think the way
that granulating that probably is French ultra, then I'm going to go
to my smaller brush. Maybe the medium one
would be better. See how you feel, see what you've got the most control
over because I need to now bring this in,
choose the shape. While it's still wet. That's why I really flooded it because I
don't want this to dry on me halfway through. I can move the
pigment around a bit. You have to work pretty quickly. All right. Then here
around the face. I'm going to tilt it. I'll try. I'm just trying not to put
my hand in the wet page. What I want to do, I'm
coming up to my pencil edge. Then I'm going to drag my
brush through to just suggest a few bits of feathering. The blue just runs a little bit, but I need to change direction. Feathers down the bottom here, they're then going to
be coming up that way. Just a little bit
of the ruffling. Now, I've got a lot of
water on the page still. I'm going to now probably
wix some of that off because I need it to
move the pigment around, but I don't want to start
doing crazy stuff now. So now what I'm going to do, I'm going to tilt
my page a bit and just wick the water off underneath that
underneath the chin. It's a good place
to do it because I probably will build
up some color there. All right. Now I need to close up
some of these gaps. So my brush now, to be able to manipulate this needs to be drier than my page. So I can't introduce
any water now, or that will do terrible
things to the wash. Now I might pop, going to see. I'm going to take slightly
stronger pigment. Just going to touch a little
bit stronger paint just in underneath the chin. Still less water on my brush than in the page to be able to get some more
pigment in there. I think I maybe want it
slightly darker on this side. I'm sticking my brush into really thick paint and just chucking it in while
the page is still wet. Spreading it around. I can still play here as long
as I keep my brush dry. I'm moving the
pigment around and then just painting my tissue. While that's drying, one
thing I am going to do, I'm going to pop a
little bit of this is too brush in here, too white. I'm going to paint
down with water first. I just got my little
brush it's easier. I'm just going to throw a bit of my yellow acro and a bit of my burnt umber to
choose that shape. Uh huh. Then I'm going to take
a touch of my indigo and just put a
little bit of dark. I'm trying to push that show that this feather
is sitting on top. Maybe just touch more. I'm just washing my
brush and softening that indigo into the yellow
brown mix underneath. If I need to strengthen
that up later, I can, but I need to come
out of that and give that a really good
10 minutes to just let that I don't want
to do anything else until that background
is fully dry. Okay.
9. Finishing the Face: Okay, couple of things I'm
going to do here in the face. First up, I'm going to pull a little bit of light back into the front of the eye here, so I've got my small brush. I'm just going to
paint I'm fully dry, so I'm just going to put the wet brush just in the
corner of the eye there. Wash my brush, dry it off. If nothing's moving, you can touch your tissue into
the web page to help. But I tend to find
you just need to keep going in a few times. Some papers will lift
better than others. This is arches,
so it lifts well. If you find you can't
lift any paint, you can just take a touch of white gouache and put a
highlight in here instead. If you take off too much, it doesn't matter because
you can just go back in and add back in. So this brush is getting a bit thick on the end
now when I push down. So I've probably taken
off more than I want. Okay, so I've taken off
more than I want there. So what I'm going to do
give that a minute to dry, and then I'm going
to come and back fill to where I
actually want it. So I've just picked
up a bit of indigo. Just a suggestion
of light there. Then when that's dry, I
think I'm pretty dry. Let's live on the
edge, I'll see. I'm going to take a little
bit of gash and just pop a tiny highlight straight
into my tube, white guash. I'm just going to
pop a little spot just in the back
of the eye there. Now, I need to strengthen up
a couple of things on edge. I need more something in
the beak. I'm going to. I'm going to keep life
on this side of it, but I need to strengthen
a little bit in here. I might take I used initially a little bit of permanent rose and yellow ochre. I'll give myself another mix
of that, just a tiny bit. Paint my tissue so I've
not got too much water and see if I can come
and strengthen the tone. Just pull it down. I've
got some tissue in there. Just a little bit
more pigment and wash my brush and blend that out, which then dilutes the pigment as I've blended it that way. So then I'm going to drop a bit more pigment into that wet edge on
the right hand side. Just a little bit, but I really think this is
probably stronger. There's a lot of
color through here. I'm just going to take
my little brush sell. I'm not going to I'm
painting under the bed, but I'm not actually
going to touch that yellow and pink
where I just put it in. But just wetting
down a little bit. I'm just going to
strengthen my burnt umber. Through that join. I just think it needs
a little bit more. Then make it a little bit, it's a little bit
too tidy there. If when you're mucking,
you lifted too much paint, you just go back and throw
it into the web page. Okay. It's going to drag
there's little bit eyelid over the top there drag the
suggestion of that. Now, I think I
probably want one more go at the let's do it. A little bit more of the indigo. Just to accentuate, I want this light to stick
out a bit more. Let's see if we can manage that. Don't touch the beak,
coming up to the beak. Didn't get enough pigment. Just throwing in a
little bit more paint. Softening the edge. Drag that across the
top onto my dry page. Again, you put it on, you move it around and
then it all disappears. Just touch more. I think I probably need a touch of that
just on this side. I'm just going to wet down
the other side of the beak and just put epis slightly. Just a touch of that indigo. Not even sure that
you'll be able to see Then I think I probably want a bit more of
that color around here too. Same deal that we
did on this side, whacking on a bit of water. I just want a bit of
that bit more color. Wet in wet. Just to really push that this
side is in shadow. Nice and soft. Doesn't
matter if I leave a light along that
along this edge. Just sitting back and
seeing if it's got enough maybe a bit more I've just picked up a bit of the umba I'm just going
to throw that in as well, a touch of warmth
around the face now. That's probably enough. I'm going to come out of that, let that dry and
then we're going to do a couple more details on
the body and then we're done.
10. A Few Last Details on the Body: Okay. We're on the home stretch. I need to do a couple of
details through the body. I want to get a bit
more yellow ochre, I think through here. I'm going to take
my medium brush. My water is a bit blue. It's all right. Just going
to wet down around here. I just want to warm up this part of the shoulder
at part of the neck. Throwing a bit of
yellow ocher on. Then I'm going to strengthen up the shadow underneath
the neck there. Come on a bit stronger
yellow ochre first. I think I'm going to use a
bit of my transparent brown. Sorry, it's not transparent
brown burnt umber. Then because I can't get into
that space with that brush, I'm going to switch
to my little one. Chiseling out that shape. Then I'm going to
drop a bit more of my indigo into there now. Just a bit stronger
through there. Now, then I want to. I want to curve the
head over a little bit. I'm going to just use a
slightly darker tone of my yellow ochre to just get
a bit of a three D feel. I want to do it all wet and wet, so I'm going to take
my little brush. I'm just going to wet along this join between the yellow
ochre and the French tra. Again, this isn't true
to the reference. It's doing what works
for the painting that I've actually got
here rather than stressing about what's
on the reference. I'm going to take a touch of yellow ochre and a touch
of my burnt umber, a bit of a mix of both. I just want to pop a little
bit along that edge. I'm going into the web page. And just being careful not
to paint into the blue. I actually might try. Let's see if it works down. I'll keep it light
up the top here. As I come around down here, maybe we'll try to add a little bit of indigo
in there as well. Let's see. Chasing that, making sure I've got
water along that edge. Grab a bit more of
my yellow ochre, my burnt umber, chuck that on. And then I'm going to take
just a fraction of my indigo. I'm just going to
softly drag that down. That's probably a bit better. I've got my join
between my blue and my birds just a bit too there. This again, as well
as if you didn't get enough spots and things in the first place while that's wet, you can add some more in. I need a bit more my head
is very yellow ochre. My wings here are
very burnt umber. I'm going to just throw a bit more yellow ochre
just in the shoulder. Both shoulders
probably. Just to make them balance up, match
up a bit better. Got some blue there. Throw
that on. Just a bit more. You you might have got
the same amount in both, but mine needs
just a touch more. I think I'm going to put again, to make this talk a bit to this, I'm going to put
a little bit more a few more spots of the indigo. I don't want much
water on my brush. Just a few suggestions of the pattern without
going overboard. Some of you will want
to go overboard. Some of you will delight in all that patterning and want to put it in and that's fine. You do what you enjoy. Just going to strengthen
that shoulder a bit. I've just gone
into the web page. I just want to define
that shape slightly. I'm going to pop.
I want to chisel out a couple of feathers. I've just picked up a tiny bit of fully dry down this part, picked up a tiny bit of indigo and a tiny
bit of burnt umber. I can see this feather
probably comes up like that. Then I'm going to wash my brush. Soften that down, maybe go again now that I've got
the shape where I want it. I'm putting the shape in then
just softening that edge. I want the hard
edge on this side, and then I want it
soft on this side. I feel like it probably comes just a couple
of little details. This one I feel
like I can get away with popping a line here. Then I'm going to make
that slightly stronger. It will depend what
strokes you made in that first wash as to whether you can put any of these in or
where you put them. If you can't put any in, then don't might just
chisel out this one. That way. Then I think
I might strengthen. Yeah, I'm going to just
pop a little bit more. I think I want that a
little bit browner. Pop a little bit more
burnt umber in that bit. Then a bit more
of my indigo just to make that a bit stronger. You might find when it's fully dry that you need to
strengthen in there. But probably leave that for now. I am going to go a
little bit stronger, one last time because I want it to be one last
time, I'm drying there. I'm going to go
straight on dry paper rather than doing
the wet and wet. Just straight on
bit more pigment. Then I'm just going
to tease that out. Trying to decide whether I
need a little bit of that. I lost that shoulder a bit. I've just done the same
thing that I did there, again, you might not need it. Going to strengthen that
up just a little bit. One last thing that you
can do if you need to. I don't know that
I really need to, but I'm going to do it anyway. I'm going to take
my stiff brush, clean it, take off the excess, and then I'm just going
to drag a couple of little veins through
a couple of leaves, a couple of the feathers. You just have to keep
washing it to lift. You don't need to go the whole
way through the feather. And I think for the
sake of not fiddling, that would be where I stop.
11. A Final Word: Thanks for joining me
for the lesson today. I hope that throughout
this class, you've seen that wet and wet doesn't have to
be terrifying and that you can do
really small areas, fairly controlled still and
get really nice soft results. And I think this one,
probably the trickiest bit is getting that background in getting the color
on and keeping the wash clean without fiddling. But hopefully you're happy
with your end results, and I'll get you
to post a photo of your painting up on the
project section for me. And if you have any questions, I'm always happy to answer them. So ask away.
 Nadine Dudek, Professional Watercolour Artist