Transcripts
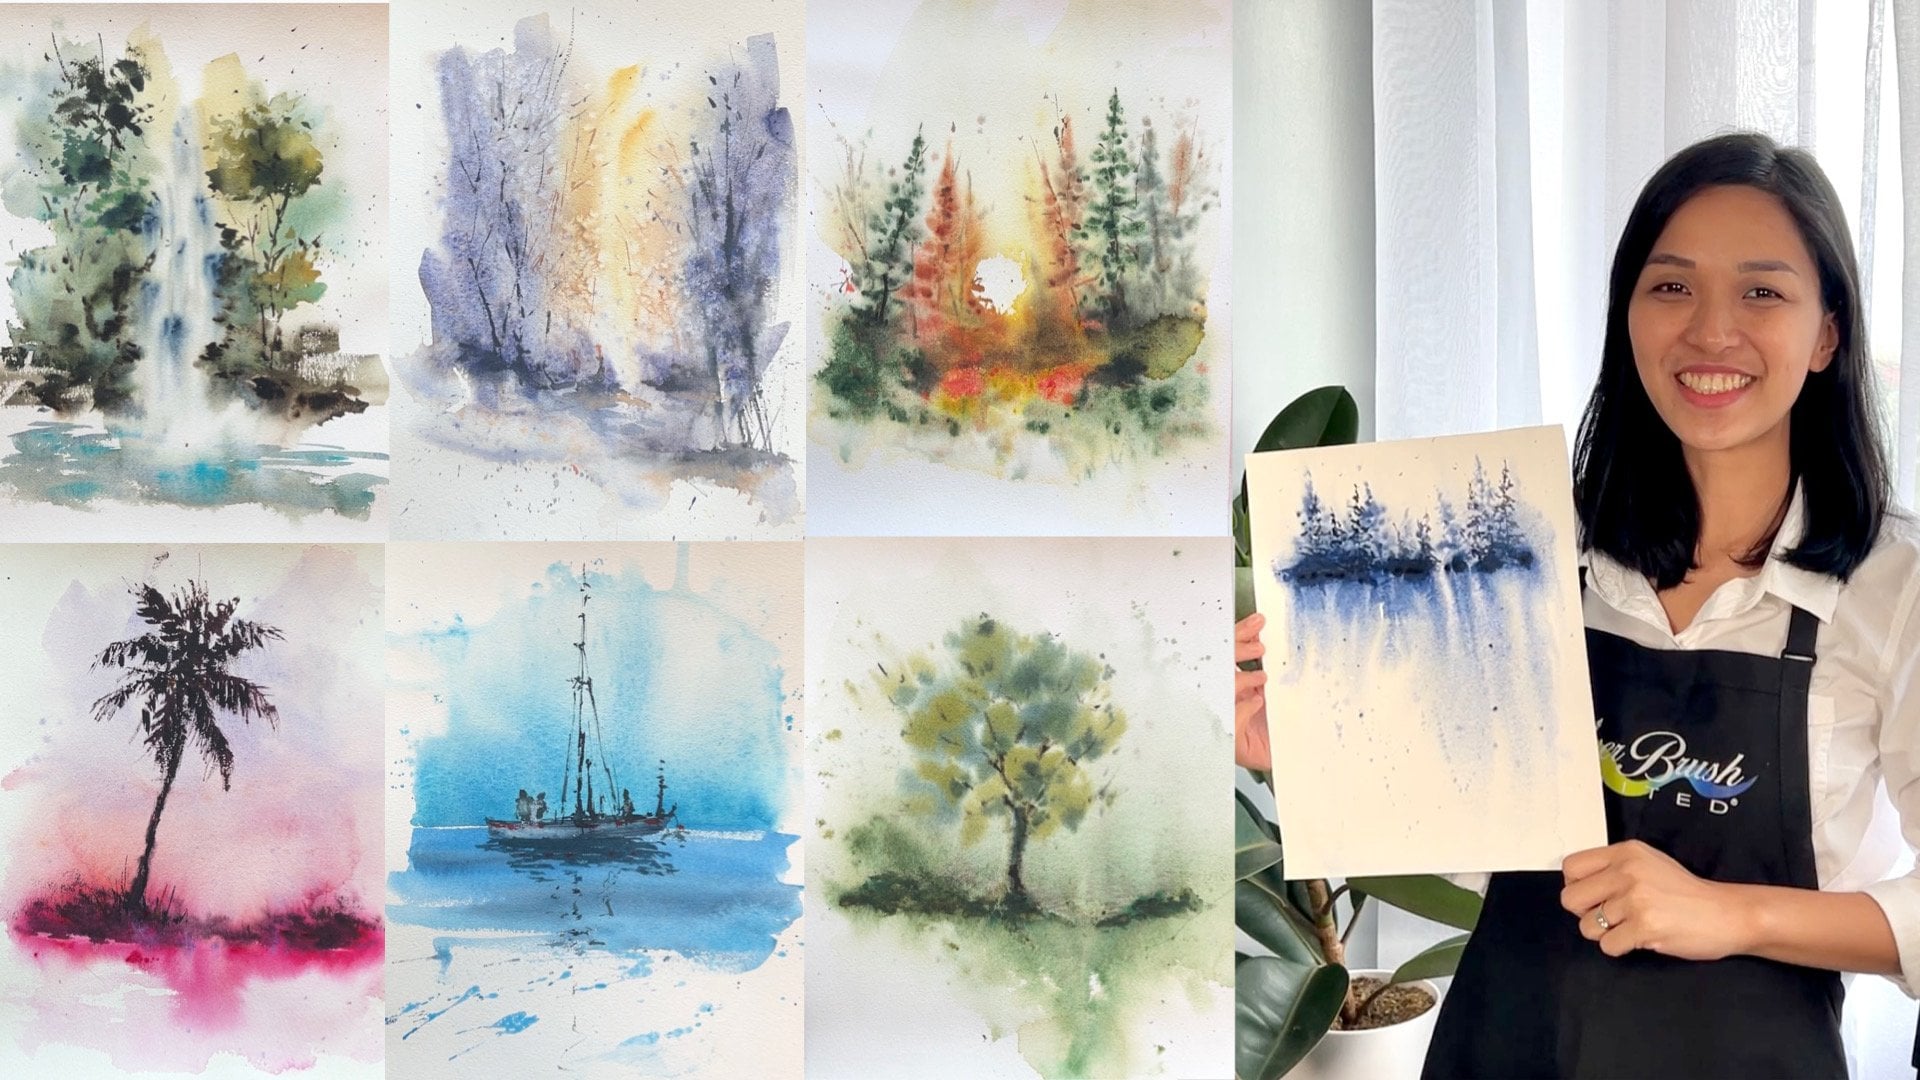
1. About The Class: Hello, everyone. Welcome to my old barn and
flower field watercolor class. My name is Bianca Rayala. I'm a watercolor artist
from the Philippines. I love painting and I'm
so passionate about sharing my love for
watercolors through teaching. In this class, I
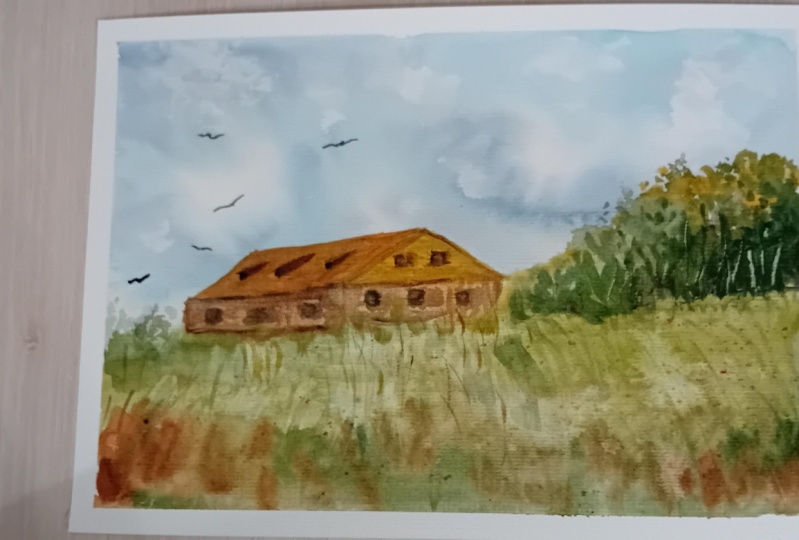
will show you how to paint this beautiful
landscape in watercolor. In the first section
of our class, I'll talk about understanding your subject and planning
your composition. I will share also the materials that you will
need and the techniques that you can apply to paint
loose watercolor landscape. I will show you step-by-step
how to simplify sketching, how to paint the
soft blue skies, which is essential to create the mood and atmosphere
of your painting. I will also talk about the different color
mixtures that we can create using a few number of pigments to help us paint the flower field
with depth and to make the old barn stand out
through adding textures. I will lead you from painting the base wash to
enhancing the foreground, and finalizing the painting by adding details
and highlights. I hope you continue watching
and enjoy the class.
2. Materials: To create this landscape, the basic materials
that we will be needing are first,
watercolor paper. This is 300 GSM made
of 100 percent cotton. Next is watercolor paints. For our project, I will only use just a few
colors from my palette, yellow ocher, burnt sienna, neutral theme, and this
genuine horizon blue, this one is indigo, and then olive green. I'll be mixing these colors together to create the
shades for the sky, the field, and even the barn
and trees in the picture. We'll be using also
whitewash for highlights. For the brush, I'll use the flat brush
in pre-wetting the paper. If you don't have one, you can use a mop brush
as an alternative. I'll mainly use round
brushes like this one, the silver black velvet, and also the golden
natural in laying colors. I will also use an angle
brush like this one, and the liner brush for lifting colors and for painting
details on the field. Prepare also pencil, eraser, a mixing palette, cup of water, and
some tissue paper. You can download the
reference photo from the resource section for
your guide in sketching.
3. Understanding The Subject: Before we start, let's understand first a
picture that we'll be painting. Whenever we paint, it is important to know the
mood that we want to portray. In our image, we can feel that it is
a bright and sunny day. Here, there's an old barn situated in the middle
of a wildflower field, so we imagine
ourselves standing by the field and looking
towards the old barn. Let's do a quick sketch
for the composition. This is your workspace, we divide our paper into three. We will allot a larger
space for the bright sky, so we position the ground
somewhere here in the bottom. Let's just do a rough guide
for the trees on the side, and then we will position the barn right
next to the trees. I will show you later
on how to easily sketch the barn on
the next video. We want the old barn to be the main focus in our painting. We will also put some
clouds up here in the sky, but we don't have to sketch it on our actual working paper. Now we are good to start.
4. Pencil Sketch: Let's start with
our pencil sketch. Identify the lower third of your paper as your
basis of the ground. I'm doing a rough sketch here of a slope as my
guide for the field. Next, let's draw a rough guide for the trees here on the right. Then we can proceed
in drawing the vine. As you can notice, I try to copy the angle
of the sides of the roof to get the right perspective
based on the photograph. This technique is an
easy and quick way to draw without worrying if you get the
correct angles and perspective of the object. Using your pencil, copy the angle of
each side of the roof from the photograph and then transfer it to your
working paper. I will also not be placing
too much details on my sketch as I will let the watercolor create details and
textures for me. This is our pencil sketch.
5. First Wash Painting The Sky And Field: [MUSIC] Before we
begin painting, erase excess and unnecessary
pencil marks on your sketch. Our first step is to pre-wet
the entire paper with clean water so we can create
a soft transition of colors. Using my flat brush I
pre-wet the entire paper, making sure that
nothing is left dry. Let the paper absorb
the water first before painting so the paint would
not spread uncontrollably. While waiting we can prepare
the color for the sky. I'm mixing horizon blue
and a bit of amity genuine to create
the bright blue sky. You can test the color
mixture on a separate paper so you can have
your desired tone. When the paper is ready tilt your board on
a slight angle and then paint the sky starting
on top and leaving some white spots for the
lighted part of the clouds. I'm just following
the shape that they see on the reference photo. That's why it's
important to have the reference photo
right next to you so you can be guided
in painting the sky. Notice that the paint
doesn't move uncontrollably. It still creates soft edges
as I lay down the colors. That's because I applied
the pigment when the paper is not too wet, not too dry. In painting, it's
important to know the right timing and
the temperature of your paper as different
temperatures will affect the movement of
pigments on your paper. Now, we can see little by little an illusion of
clouds on the bright sky. I will add a little darker tones on some areas to show shadow. The upper part of the
sky should be darker in tone to show
perspective in the sky. Using a clean dry tissue I will leave the color and define
the shapes of the clouds. Always use the clean portion
of the tissue when lifting colors to avoid staining the
white areas on your sky. Next, I will paint
a light wash of yellow ocher here at the
horizon for a warm light glow. I will softly blend
the warm yellow with the light blue to avoid
a green mix on our sky. Let's add some contrast on the clouds by building
up the shadows. Always remember to
follow what do you see in the reference photo so you can apply the correct
tones in your painting. When you're done
with the clouds, let's proceed on
painting the field. Since the field fragment
is still moist, I won't be pre-wetting
it with water anymore. I create a mix of yellow
ocher and a bit of olive green for my base
wash of the field. I will also add a
little bit of horizon blue since I use horizon
blue for the sky. I just laid down the color
first with bold strokes. Next, I mix indigo and olive green to build up the
color of the field. If we look at the
reference photo, we see a mix of yellow-green and dark
greens in the field. We will try to
depict what we see while we maintain the
looseness of our painting. For the foreground,
I use branch and now mixed with the other colors
are used for the field. Remember the rule
of perspective that the foregone should always
have the darkest tone. In this way, you avoid making
our picture flat and we put depth in our picture. I Just paint with bold strokes and I darken the
foreground even more. It's important to
work wet on wet on this particular stage to avoid
hard edges in our field. To keep our painting harmonious we maximize
the limited palate that we have by mixing colors among the pigments that
we have in our palate. I also sprinkle some water on the field for a nice effect. When the paper has
absorbed the pigment, I use a liner brush
to lift color and show an impression of grass
here at the foreground. Since we want to direct our
viewers towards the barn, this stroke for the grass
should be directed to the barn. Be careful not to
overdo and place too much strands or place too
much strokes for the grass so that the old
barn would still be the main focus in our painting. I just add some
more splatters on my field using
greens and yellows. You may also cover
the sky part with a clean tissue to protect the sky from having
these splatters.
6. Second Wash Painting The Field: [MUSIC] When the film
fragment is almost damp, we can lift again
some more paint, to show grass blades. You can do this step
using a synthetic brush. I will be using an angled
brush and also a liner brush. When lifting colors always clean your brush every after lifting. Using the same angled brush, I will paint the trees
here on the right. I start first with a light yellow green color to show this top of the
tree being lightened by the sun and then top it with another layer
with a darker color. As you can see I
lay the belly of the brush flat on the paper to create rough strokes
with a semi-dry paint. I will also darken this
bottom part to show shadows. Another technique
that I will share is scratching the paper. I scratch some parts here under the threes to show an
illusion of tree trunks. You can use your fingernail or a card to do this technique. Now, we don't want the trees to look
separated from the field, so to blend the trees
with the field, I will use my flat brush and drag the color from the base
of the tree going down. The flat brush
should not be wet. I'm going back to
my field to add some more colorful splatters to make it more
interesting and vibrant. Always remember that water color tends to fade in color
when it dries out. I will splatter their
brunch henna, ocher, purple and also
whitewash to show impression of different
wild flowers in the field. I will make my
color mixture a bit creamy so this splatters would be bold and vibrant instead
of being too transparent. Splattering is a wonderful
technique to add details that are loose and very natural. Since we don't have control over the splatters that we make, what we can do is to position the brush at the
correct angle so that the direction of the splatters would be
appropriate on the picture. Now I'm mixing my white gouache and yellow ocher to
create an opaque yellow. In this way, when they
splatter this yellow pigment, it would stand out even more since it is now opaque
because of the whitewash. If you want bigger splatters, you use a bigger brush. If you want finer splatters, just use a finer brush. You can do this
splattering technique both when the paper is
still wet to create soft textures in the field
and also you can do this when the paper has already
dried to create more detailed and
vibrant details. [MUSIC]
7. Painting the Barn: [MUSIC] My paper is completely dry and this is the right time to
paint the barn. I will use yellow ocher as
my base paint for the barn. To darken the tone a little bit, you can add a hint of
barn channel in purple. I will follow the tonal
value of the barn on the reference photo
so that object would not look flat and so I can show the right shadow
and light in the object. Now, to paint the
sides of the barn, I will use barn channel with
a bit of amethyst genuine. My mixture is a bit thick
and my brush is a bit dry. I will blend the barn with the
field using my flat brush. This is the same technique
that I did with the trees. Again, the flat brush
should be down, it shouldn't be wet. Now, let's add more contrast between the barn and the field. I'll add dark color on
this side even more. After this let's repeat
the same process of blending the barn with the
field using the flat brush. Our focus is to make the barn be the main focal
point in the picture, that's why we put
additional contrast. Now, I'm adding some strokes to show the windows with
a dark brown color. I will be adding
some other details once the layer is dry. Since the layer is still moist, I can add some
textures that will naturally blend in as it dries. You can also use your finger to blend the paint on
your first layer, and then add some more
dark tones here to enhance the shadow
part of the trees. [MUSIC]
8. Final Details: [MUSIC] As we finalize
the painting, let's add some more contrast on the trees and
here on the barn. [MUSIC] This will help us make a barn and to support the element which is the trees to stand out in our picture. [MUSIC] I am creating a dark green mix using
indigo and olive green. [MUSIC] I paint the base part of this group of trees here. [MUSIC] Then again, I will scratch the paper, to show an illusion
of branches and trunks in-between these greens. [MUSIC] As you add another layer, don't forget to
smudge the paint, to blend it with the base layer. Next, I'll add a few more
grass here in the foreground. I make a very fine, thin strokes using
a dark brown color. I will also add splatters too. [MUSIC] Here I'm
using my liner brush. [MUSIC] I'm putting just very few
strokes here on this side. This strokes are leading
towards the old barn. This will serve as an
element that would lead viewers to our focal point. [MUSIC] Using a whitewash. I will splatter some
of it on my field to create white flowers
glowing on top. [MUSIC] When we're done, for the last step I'll put
on some details on the barn. First, I'll start with the
shadow under the roof. I'm mixing a dark
brown color using my neutral tint and burnt sienna to paint the
shadow right under the roof. This will give the
barn more dimension. Using the same color. I'll also add some
lines and details on the wall for added interests. [MUSIC] My brush is semi dry and
I always rubbed the paint after applying it to have
a nice blending on layers. Next, I draw the windows by the roof and also
add the shadows too. [MUSIC] I'm adding horizon blue on my dark brown mixture to
paint the cool shadow. [MUSIC] I'm using again, my whitewash to add some tiny details that
will also serve as highlights on the barn and
also some parts of the trees. [MUSIC] I actually mix this
whitewash with a little bit of yellow ocher so it
won't be too bright, when I apply it on
a dark old barn. [MUSIC] At this point. I'm also checking my work
as a whole and I try to figure out if there are areas
that needed to be enhanced. [MUSIC] If you feel the need
to add some more splatters, feel free to do so. Just add a darker splatter of the same colors that
you use in the field. I think it is also a good
idea to add some birds in the sky so that there will
be dynamics in the picture. Be careful to place the
birds with appropriate size, not too big, so that it would be realistic and it
would match the image. [MUSIC] Once your painting is
done and completely dry. Carefully take off the
masking tape to get a clean and crisp border
around your painting. [MUSIC] Don't forget also to sign your work and share it with me so I can see and
help you in your project. Refer to our next video for
the important things that we need to remember as we
summarize this landscape class. [MUSIC]
9. Class Summary: To review us with important things we need
to remember in painting an old barn in a flower field
landscape like this one, we need to remember to paint the sky using
wet-on-wet technique. This is important
to create a nice, soft blend in the skies. To create the clouds, we leave unpainted spaces
in the sky to set up the clouds and we also use the tissue paper to lift
the pigment from the paper. We also paint the
field by blending in the colors on a wet surface. Always remember the
rule in perspective that the foreground should
always have the darkest tone. We also add the base
texture of the field while the layer is still wet using splattering technique
and lifting technique. For the barn and the trees, we refer to the reference
photo to identify where is the light coming from so we can place the
shadow accordingly. The most important thing
in painting is to enjoy the process and to
keep on creating, to learn, re-learn,
and unlearn things. It's fun and exciting to discover new things
as we mix and blend colors and experiment on different techniques to
bring life to the picture. If you wish to learn more
about watercolor painting, I invite you to join my other classes on
painting seascapes, still-life, flower
subjects, and more. See you there.
 Bianca Rayala, Top Teacher | Watercolor Artist