Transcripts
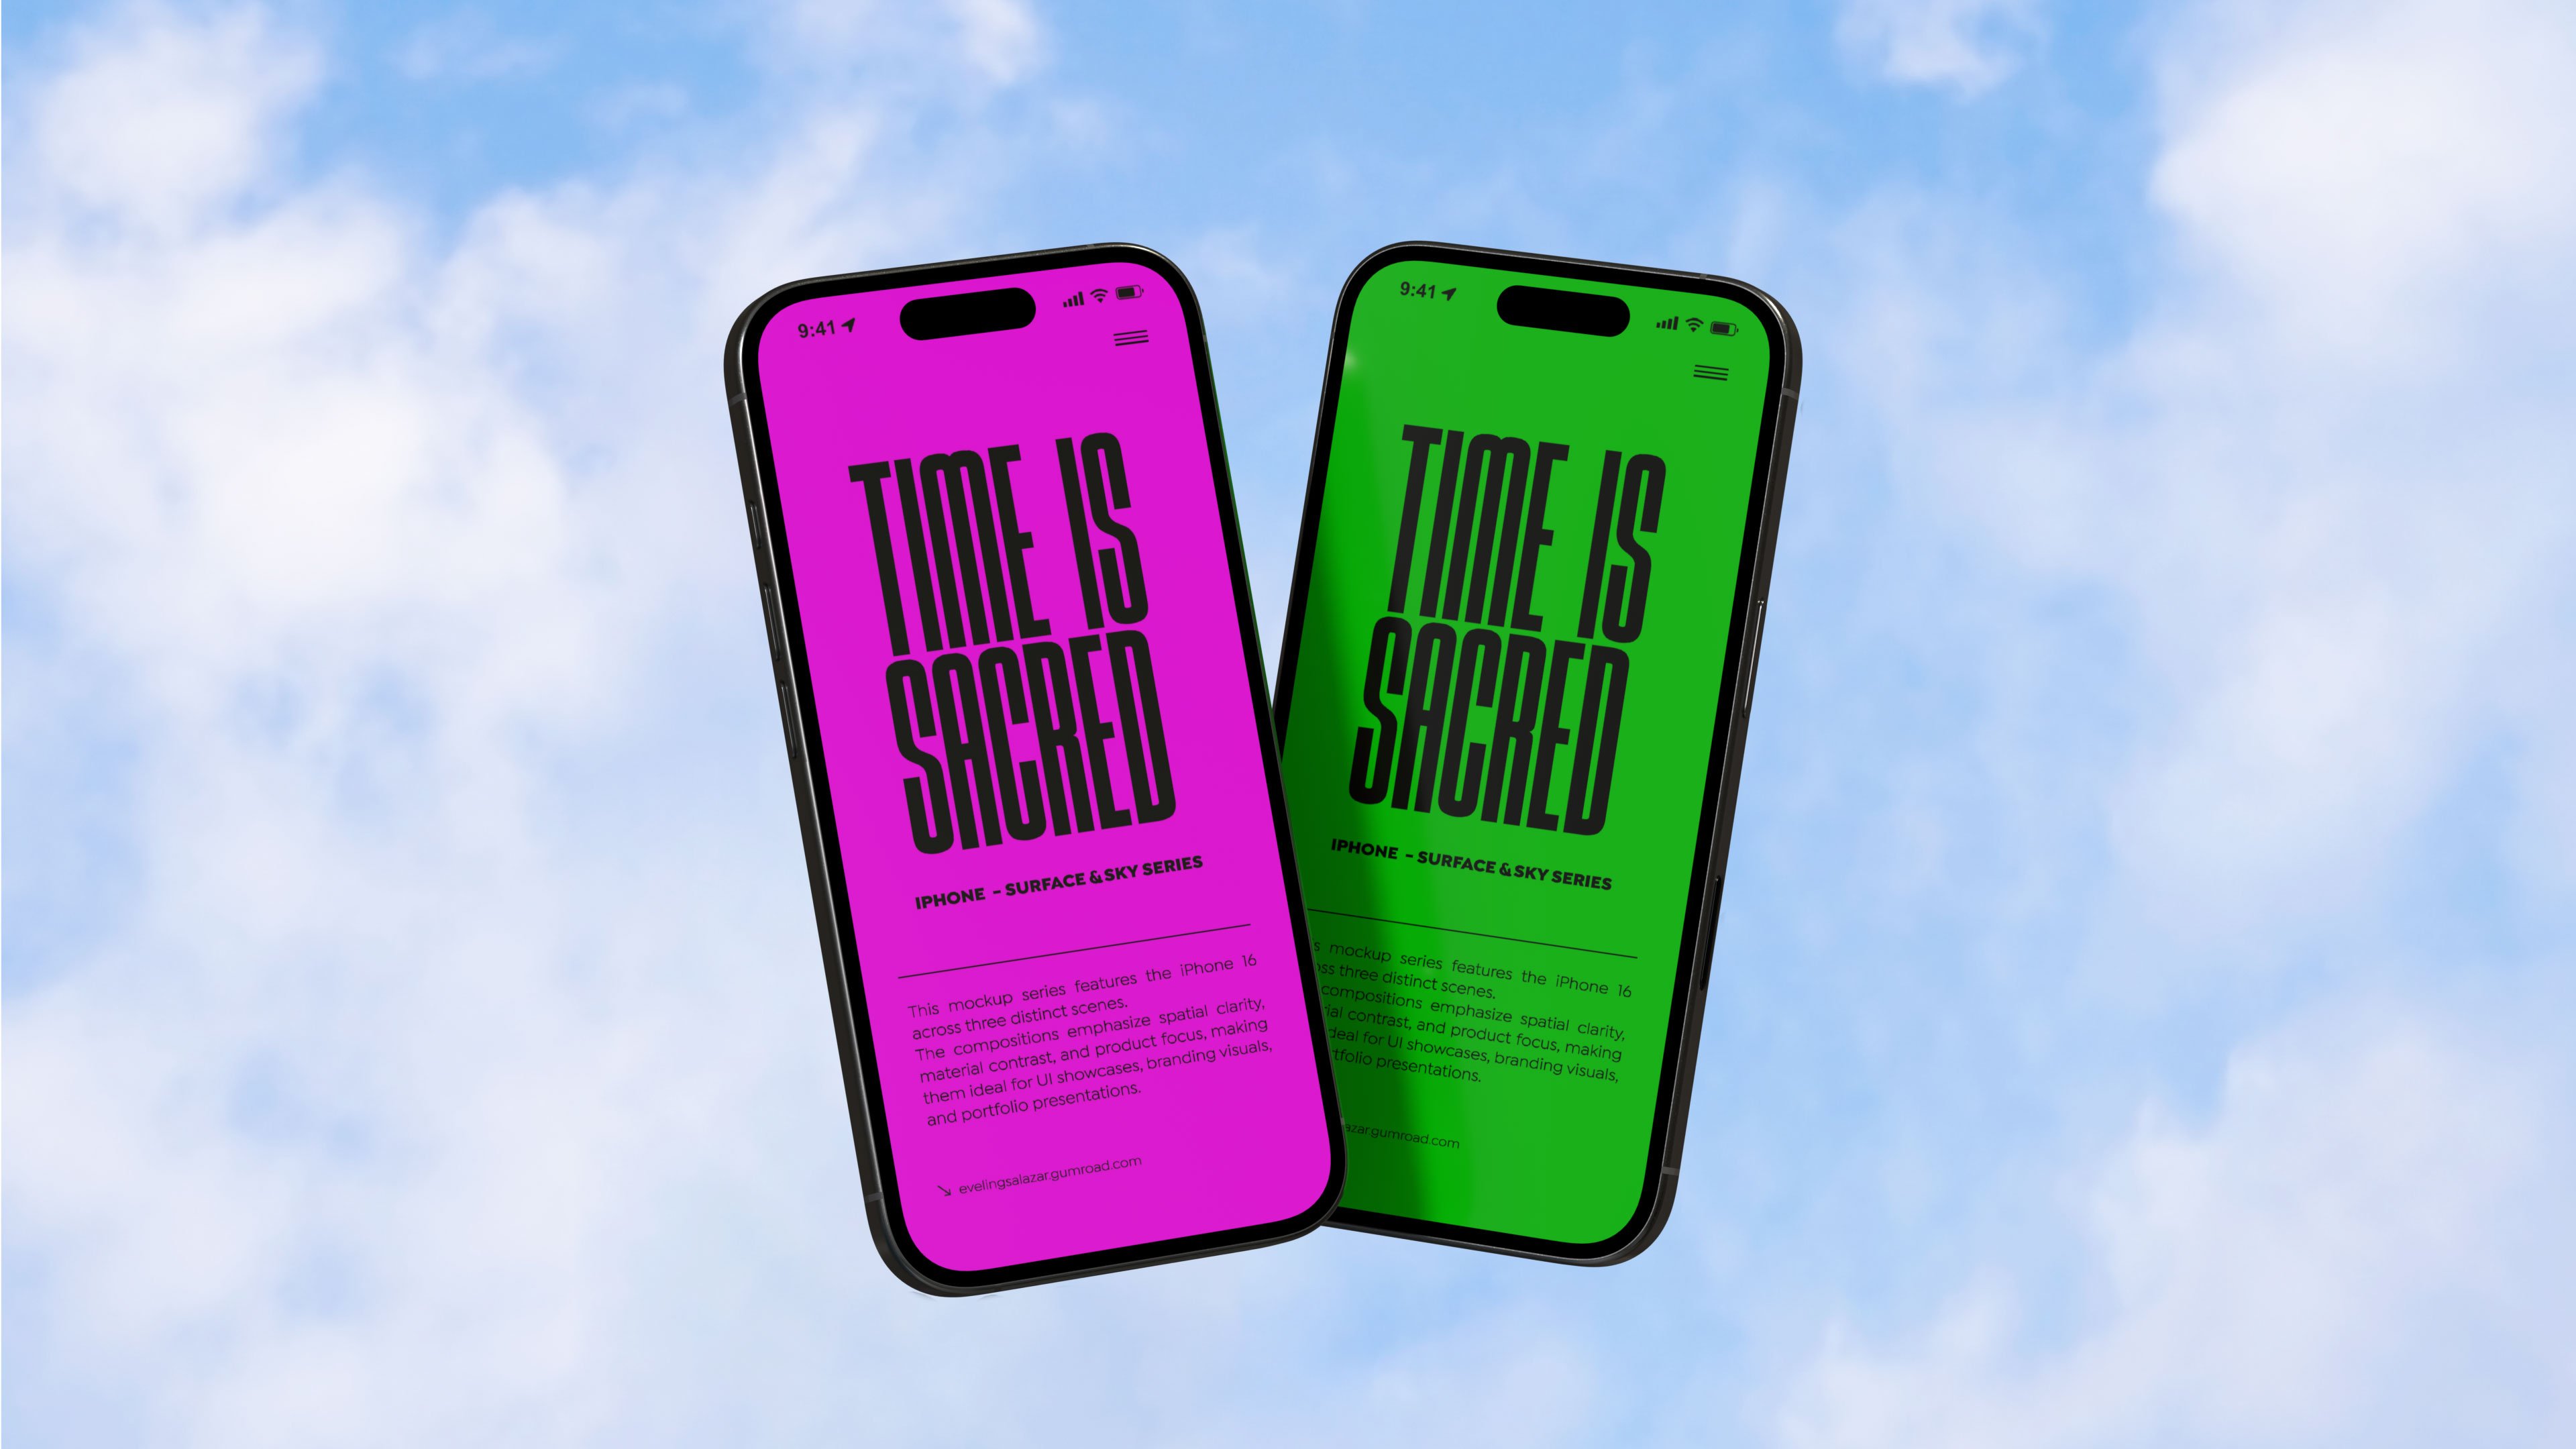
1. Intro: Goma Blender or cinema for
tea and one of lop skills. German class balloon
Tris D Tipipy discovered how to make Tris dtypipy no matter
which oh you have. I'm Evelyn Salazar a Tris
D designer from Lima Peru. With over six years
of appearance, I've worked at Studio Angwas
and several studios in Lima. My passion for Tris design has helped me to develop a
variety of techniques. I'm excited to share my knowledge with
future Tris D artists. In this class, you learn to create amazing TD
balloon typography, using render and Cinema for D. We're focused on specific
techniques in Blender, the alters and the lighting, user, work simply
in both platform. Whether you're beginner or Hass, this class will help you turn your ideas into
stunning TSD art. This class is perfect for
beginners and TSD enthusiasts, as well as professional looking for new techniques and skills. You don't need to
have experts in this d for participating
in this class. Just have blender instat on your computer and if
you want cinema for D, the great thing is that you
can do everything in Blender, and if you're reallyd
familiar with it, you can compete the world
class in this software. Of course, you'll also need a passion for learning
and experimenting. Our class will be dVDI
into five main lessons, selecting your film and
perfecting Typoaphy, mastering TD blender
typorophy techniques, importing blender models, T techniques, incidemo D, materials, and
rendering incidemoD. By the end of this class, you'll have created a
fantastic three D Valentipop using your parity word. A going to start this
creating journey with you, see you in the first lesson.
2. Class Project: Hi, everyone. In this project. We bring our clues
to why by creating a TRD Valen typography
with your arity word. An exciting way to miss
creativity and skills. Remember, this class
is designed for both entuss and people with
a background in TRD design. So feel free to show off your skill and make
this project your own. The goal of this
project is to create a Z dip graphic with a
balloon like effect, featuring a word of your choice. Throughout this process, you are applying
modeling in blender, imparting your word
to cinema for D, and then adding textures, lighting and rendering to
create your funnel masterpiece. Step to compare your project. One, choose your word and thin, select a meaningful word and decide on its
style or theme. Two, modeling in blender, apply Lesson one and Lesson two to the century
D balloon style letter. Three, part two Cinema four D. Use Lesson three to simply
transfer your design. For lighting and material in
Cinema four D or blender. If you're working Cinema four D, apply the lighting and texturing techniques from Lesson FR and so Pi to enhance the look
and feel of your typography. Alternatively, you
can continue working on the lighting and material
directly in blender. It suits your work flow better. Five, final render, explore a high quality render
reD for presentation. As you work on your jet do
get experiment and have fun, creativity and practice are key to mastering these skills. When you're done, share
your project with our skilled community
or on social media. I'm sure your work will inspire other th artists and designers. Thank you for your time and
dedication to this course. This is just the
beginning of your journey into the exciting world
of TD typography, keep exploring,
learning, and creating. See you in the next lesson.
3. Blender: Selecting Your Theme and Perfecting Typography: Starting a T D
typography project can be exciting and creative, but it's crucial to choose a theme that will guide
your entire work. First, identify the
purpose of your project. Ask yourself, what is the goal? Is it a logo, cover,
and animation? The purpose will determine the theme and style
of the typography. In this case, we will do it for our portfolio on Instagram. Look for inspiration and
references on design website, magazine, books,
and everyday life. You can create an
inspiration board on platform together visual
ideas that you like. In this project, I created based on my own desires
and intropection. I've developed it as a progress without relying
on external references. This is also a way to
create creative processes. Use the one the best suits you. The color palette
and visual style of the theme will also
influence the Tibora them, colors and chips should plement the message and
overlay tactic of the project. Experiment with different
ideas in your mind before deciding
on a final theme. When it comes to choosing the perfect typography
for the TD project, there are several important
factor to consider to ensure the final design is effective
and visually appealing. Readability. Make sure the
typography is easy to read, even when scaled or
deforming interZ. Readability is crucial for effectively communicating
the message. Contrast and width. Consider the contrast
and width of the tiporapy form
with different wave. Live, regular volt can add dynamics and depth
to the composition. Compatibility with
thmEnsure that this select tiporp
fits well with the schosenthm the
tiporapy s complement and enhance the measures
aesthetic of the br. For my project, I
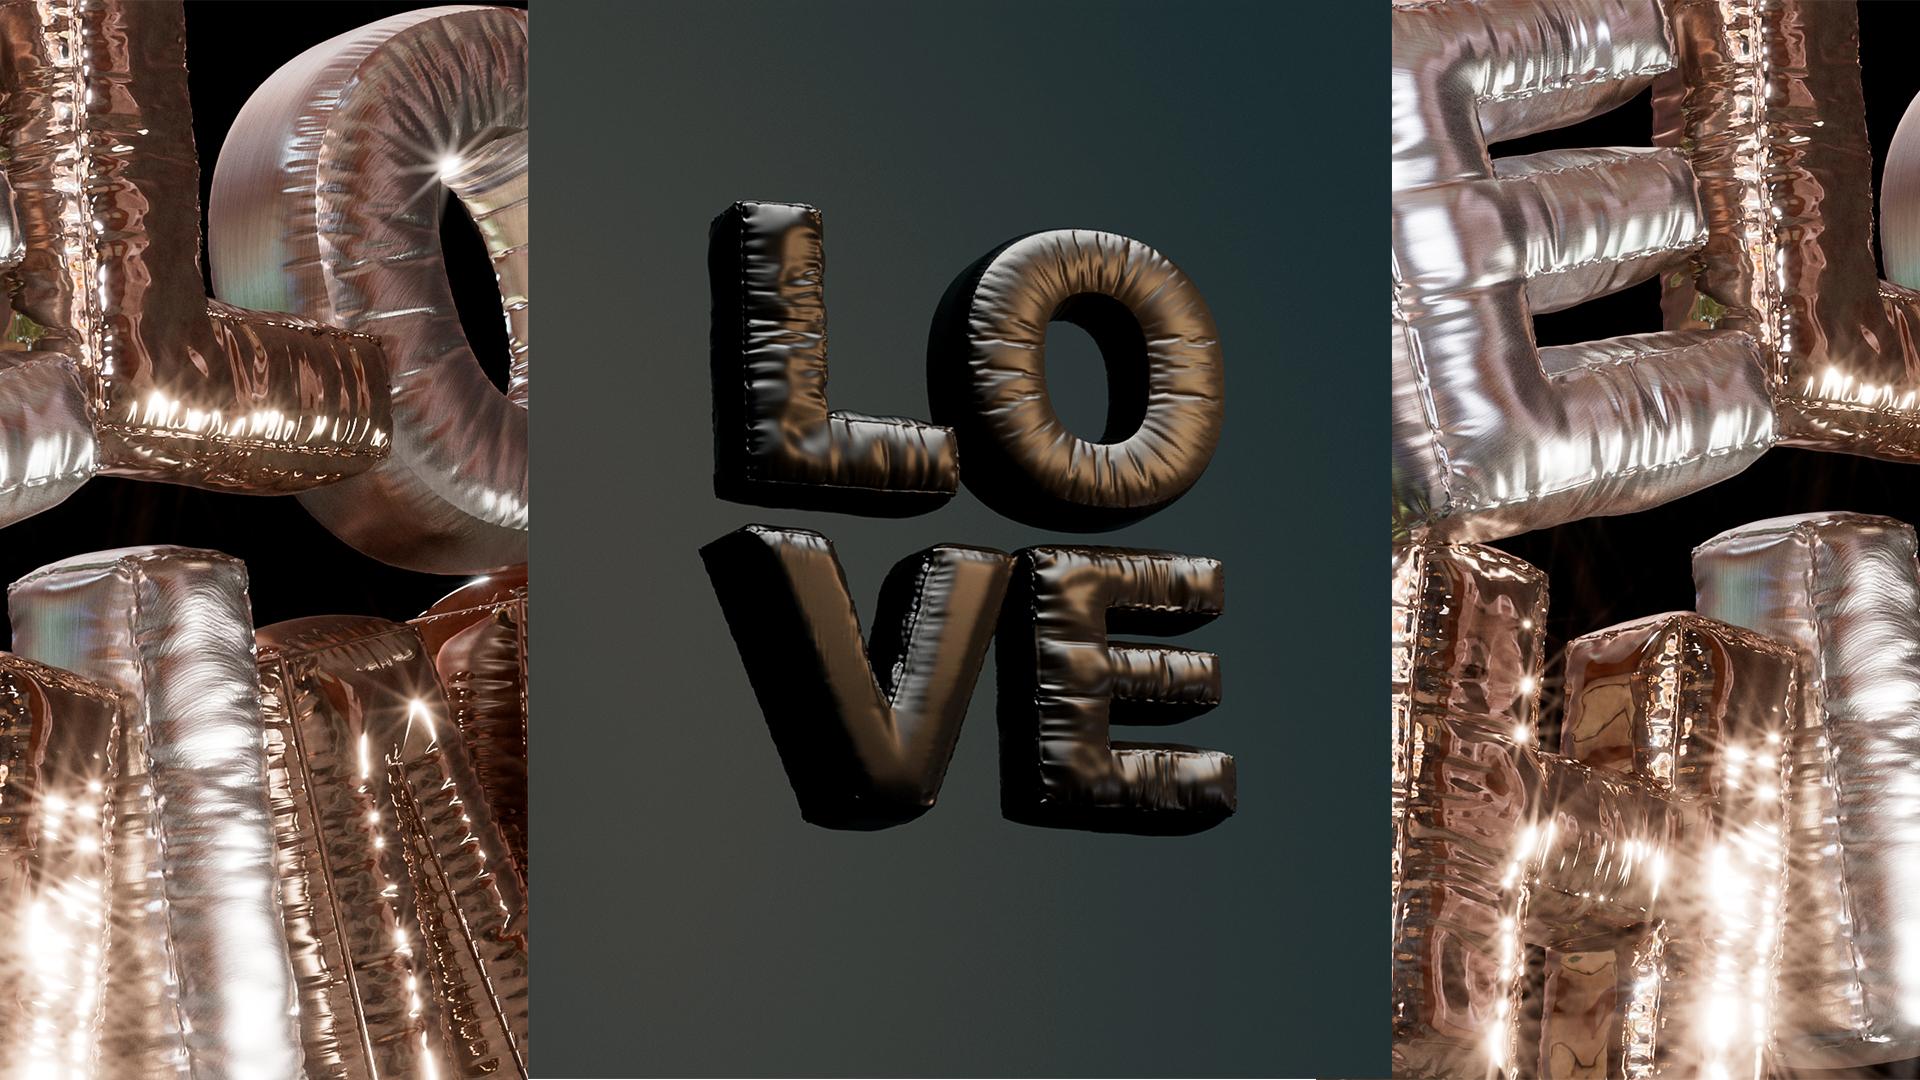
choose the word love. This seti can colors
will align with the fm, incorporating warm
and inviting tones, ref the emotion, and
essence of love. We can also explore new visual
proposition based on love. Dichotomy, like love in black, Mike's guess and correct love or perhaps the
search for love. Give your c the meaning you desire and project
is interesting. To close this lesson,
remember that taking these tips and
considerations into account is essential
for achieving a successful and visually
appealing project. Seeing the class reveal
train creating in blender.
4. Blender: Mastering 3D Blender Typography Techniques: Welcome to Lesson two, Mastering Tr D blending
typography techniques. In this lesson, we'll dive into practical and quick
techniques for creating stuntZ
typography blender. Get ready to unleash
your creativity and transform your ideas into
activating TRS D designs. This technique is
not only efficient, but also incredible fun
to learn and apply. Let's get started and make
some amazing TD text together. To start, we add the tiporapy We have
chosen with selected work. In my case, I use
the word love and apply the Aerial black font. Let's begin by going to add
menu on selecting Tiporaphy. Write the word you want. Just a tap key to delete
and write the text. In part one, find
that typography. In this case, I'll reduce the
first letter of my word L. In the paraph section,
center the text. In object mouth, convert it to mesh to grade
the text mesh. Then go to set origin, origin to geometry to
move the origin point of the letters to the
center of their geometry. In a din mold, press
the Aki to sweat and track upwards to give the
leader structure and high. Part two, modifiers, remember that the essential
option allows us to create detailed variation of the geometry without
altering the base objects. For our leather, we will
use the Reminge option, which helps generate
a new topology that resizes the geometry. In the short tap
at wpth of seven, this helps preserve the edges
and corners of the letters. Enable emus shading. Part three. In Obj mode, activate the
object convert and mesh. Tap to set the mesh
solution and the polygons. This will give us a more
detailed result for the leaders. In a de mode, go to
select sharp edges to mark specific edges of the mesh and keep
the edges definite. Avoiding smoothing along with
the rest of the geometry. Part four, index, add
group, and assign. Add a new modifier, Vivo to smooth corners. Assign three segment, and
apply it to the vertex group. The last one is part five. In this last part, we'll
add modifier, cloth. This modifier is
used to simulate fabrics and textile
on Z objects. We'll give our leather effect. In cloth, set quality
step to seven. Stiffness plays a
fundamental role in the behavior of
cloud simulation. Tension define how much the
fabric resists stretching. High tension, stiffness makes the fabric harder to stretch, maintaining its original
shape even after tension. Set to 200 for this letter. Compression, certify. Damping helps control
how the fabric dissipates energy and
reduce movement over time. A hope causes the fabric to lose energy quickly
when stressed, resulting in less pronounced and more controlled movements. Pressure helps create the
balloon effect in the leather, take to 170. Cache, set 225. This allows the
simulation to play back without recal coding
each time saving time. Shape allow us to control the shape of the fabric
during the simulation. Crick in factor, set to 0019. This number is perfect
with this letter. Collision, set quality 23, then zero, zero, 015, and the same for
self collisions. These are all the parameters for our leather now per play
and see how it transforms. For the other letters, follow the same procedure. The interesting part is
that for each leather, we can add new
cloth parameters to adapt according to the
shape of the leather. We've reached the
end of Lesson two. Thank you for joining
me on this journey and congratulations on all the
progress you've made so far. Remember, if you have any
questions or concerns, you can leave them in the
discussion tab of the class. I would love to
see your progress, so I encourage you
to ala your project, and don't forget to tag me
on InstaA every Tuesday, so I can share your
amazing creations. I'm very happy that you made this far in the curse
in the next lesson. We will use Cinema for D
to set up the composition. But if you prefer, you
can copy it in blender. I invite you to join me because even if you are
working in Blender, you will be able to replicate everything I do in Cinema for D. I invite you to see you in the next lesson and move on to most credit part. See you in the next lesson.
5. Blender: Importing Blender models into C4D: Welcome to Lesson three, blending diverting blender
models into Cinema FD. This lesson, we will explore
the process of importing three D models rated in
blender into Cinema FD. This skill is essential
for those who want to take advantage of both
software filters and create stunning composition. Exporting models from Blender. Open your Blender project and select the model
you want to export. Go to File, Export and choose a compatible
format such FVX, OBJ or D. In this
case, I choose OBJ. Safe exported file to
your desired location. Important model into Cinema for D. Open Cinema for D and
create a new project. Go to file, merge, and select the
sported Blender file. Verify that the model appears
correctly in the viewport. Troubleshooting common issues. Scale, square penses ensure the scale setting are consistent between
blender and Cinema 40. You can use these tools, This process opens up a word of possibility
for the two Z projects, allowing you to
create more complex and visually stunning
composition. Remember if you
have any questions, feel free to leave them in the discussion tab of the class. I would love to
see your progress, so please upload your projects
or tag me on Instagram FZ, so I can share your
amazing creation. Remember that even though I will be working on
in Cinema for D, if you prefer to
work in blender, you can also replicate it as the same technique can be
applied in any software. In the Ntrasm one of the most important lessons
to bring the render to life. I'm looking forward
to seeing the dirt.
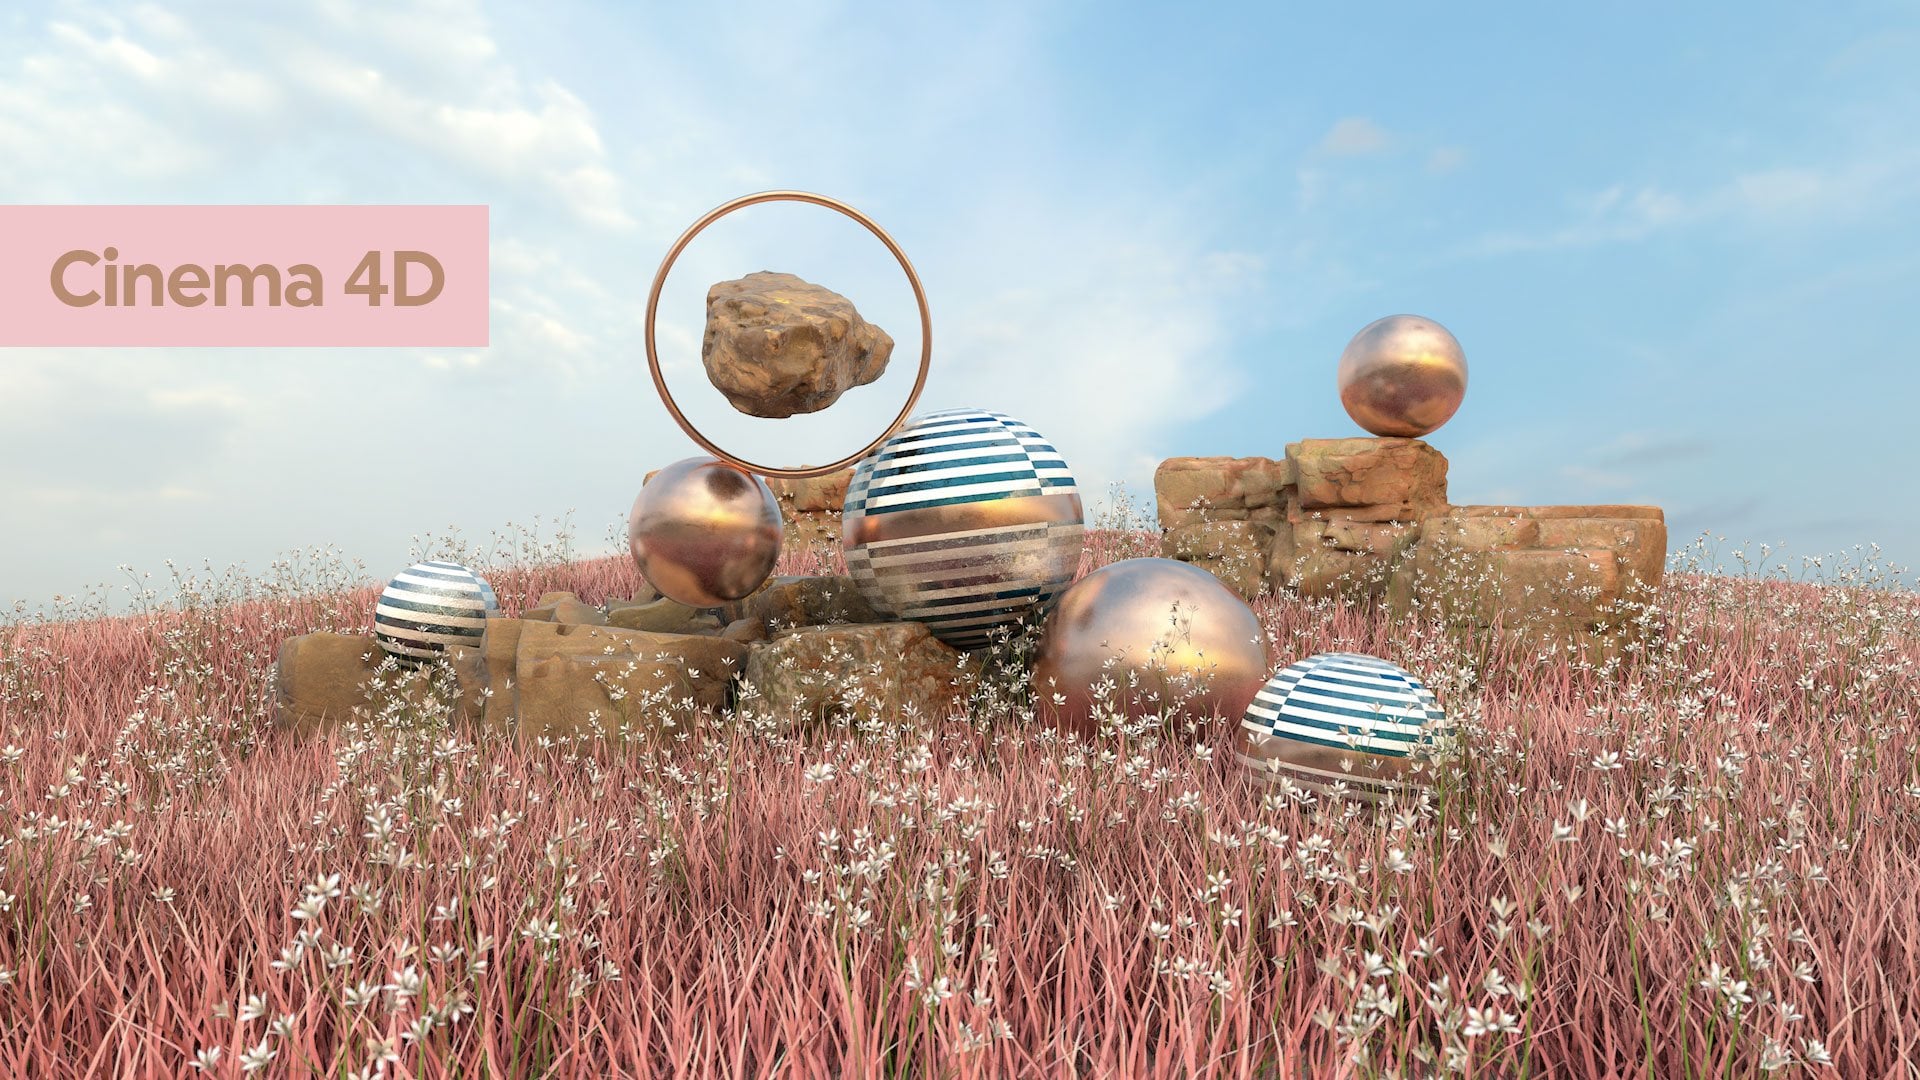
6. Cinema 4D: Lighting Techniques in Cinema 4D: Hello, everyone. Welcome to the first lesson of our blender and mapredicurs. I am really excited to see
all the progress you have made to discover the incredible project
you're working on. Now, we are going to dive into the fascinating world of lighting techniques
in Semaphordy. But if you choose Blender and aplicate it there,
let's get started. Lighting is a fundamental
aspect of TD project, as it defines the atmosphere
and lambs of our scene. Good lighting can transform a flat composition into a
visually stunning work art. In our class project, we will focus on two
essential types of light the area light
and the dome light. The light will
allow us to create a main light source that simulates soft and
natural lighting, ideal for highlighting the most important
details of our model. On the other hand,
the dune light will help us to create a more global lighting
environment, simulating the sky light and providing a more
uniform lighting setup. This light will not only
serve to add a main light, but will also help
us set up reenlight, field light, and
reflection light. Let's start by adding
the lights to our brick. But first, I will
add a new panel to view the lights from
the right perspective. Now I will add a camera
with a focal length of 200. I will arrange the letters
and ensure the dimension. In this case, I use
instant run dimensions. Now, let's add the light. Number one, key light. Atominlight start by adding domain light key
light to the same. And now we add the Tari light. At red light added
is orientation. Tori Light allows direct focusing the light
towards a specific point, IL for highlighting
important detail of G model. Intensity and size adjust the intensity and
side of the lie according to the
needs of your sin. Place slightly
behind the product, position the light slightly behind to create
a counter effect. Hav sprit the chess spread
option is n for this used to adjust the spread angle of the light emitted from
the light sources. Allowing control
over how white or concentrated the
lighting is in icing. Tempo Add color and temperature, adjust the color and temperature
of light, make it warm. The color temperature in Kelvin, four refers to the
of the light emitted by the source simulating
different lighting conditions. Lower temperatures are around
thousand 2003 thousand K produce a warmer and
more yellowish light. What higher temperatures
5,000 and 65k, red color, and
more bruise light. Add texture to the light, adapt gradient texture
to the light to achieve more interesting and
detailed lighting effects. This texture is available
in the resistor section of the class and can be loaded
for use in their projects. Number two, re light. Now copy and paste
the main light. Start by copying and pasting
the main light, key light, rename the new light to
rainbn to avoid confusion and focus the target on
the specific point at the bottom of
the composition. Then adjust the orientation
and position of the light. Intensity and size,
adjust the intensity and size of the light according to the
needs of your scene. Place below, position
the light at the bottom of the object to
create a fine ring effect. Emphasize color
temperature in that area. Adjust the color temperature
in the area illuminated by the contra light to create
attractive visual contrast. Add color and temperature, adjust the color and temperature
of the light to make it warm or cool according to the lighting proposal you
decipher your design. Now, number three, fill light. The flight is used to soften the shuttle created
by the key light. It helps to reduce
contrast and add the ties in the dark areas
of the object or seen, providing more balance
and natural lighting. At Pi throw an HDRI. HDRI high dynamic range imaging. It is used to eliminate a complete scene using a
high dynamic range image, which contain
detailed information about lighting from
all directions. HDR Los creating realistic
and complex lighting, capturing the noun soones
of light and shadow in the scene as if it were illuminated by a natural
ambient light source. At HDRI, if you wish, you can use the
HDRI I have used. They are in the
resistor section. Then shine the color. Now set the reflection to
zero in the details tab. Now. Number four,
reflection with HDRI. The user reflection light is used to create
realistic lighting effects that contribute the sin of depth and
materiality in a scene. Now, copy and paste
the previous light. Copy and paste
perviousm light and rename it to reflection
to avoid confusion. In the detailed step,
set the reflection to 100 and the other
parameters to zero. Increase the intensity
of the light to highlight the reflection
in your skin. Just write around and put
what better is for you. Change coordinates. Adjust the lights coordinate to optimiside deposition
and improve the reflection effect
in your composition. Now, we add background. Add background to
the composition. To add background
to the composition, will we use a plane. I usually add this as
a shallow de camera to maintain a constant
relative position. As material. In this case, gradient. Apply the material with
a gradient to the plane. Gradient material.
Apply material with a gradient to the plane. This material is available
in the resource section. Use a node based system, which will allow you
to combine and adjust different properties and effect to develop custom materials. A TAM in the nodes, a AM configured with a gradient, adjust gradient settings
including color and orientation. According to your preferences, you achieve the desired look. Congratulations to
everyone for reaching this point in the lesson and adding lies to
your composition. I am sure your projects
are turning out amazing. In the next flex on, will
talk about the materials, and we will tell you
which ones I have used. I can wait to see you
in the next lesson, so we can continue learning
and creating together. See you in the next lesson. M
7. Cinema 4D: Materials and Rendering in Cinema 4D: We're talking about
mio de previo sa. In so f we explore various lighting techniques in 40 using tools such as kilt, red light, and GRI to create balances and realistic
lighting in our scenes. We learn how to
adjust intensity, color temperature, act texture to achieve distinct
visual effects. In this lesson,
we will dive into fascinating Word of materials
and rendering in Cinema four D. We will disco how to apply customized
materials to bring our three D models to life at Expert Best Practice
for rendering our sins. To start this lesson, I use two materials
for this project. These materials are included in the project I left in
the resources section. You can shine this color and
color of these materials. It's really, really easy. Additionally, there are
materials assets in this area of c4d that you can apply spring
with in your composition. Once you have completed
your composition, we will move onto
the rendering stage. Now we will adjust the
parameter for the render. Output chore the dimension. In this case, I'm
using sorenson I'm sending it to the 150 DPI. Save. In this section, save the path for the render
and choose the format. I will work with PSD to make certain colors
correction and final doses. Red chief, I will use high finally add render
to the Quiv and render. I hope this lesson has been very useful for you that you have seen how easy it is to bring your composition to life with
Cinema for gene or Blender. Congratulations on
getting this far. In the next lesson, we will have a special bonus where you will see how I can play
the finiTurtius Infchop in other projects, how I live flares. Don't miss it. Thank you for your dedication and
for in this lesson. I look forward to seeing your next one to continue
learning together. See you in the next lesson.
8. Bonus: It In this lesson, I will show you how I add
the final touches in PZ, how I incorporate light and
lights in other projects. The opportunity to observe additional techniques that can elevate your composition
to the next level. You will see final touch in
Photoshop in this lesson and adding lights and flares in other techniques
to enhance lighting. Color correction
adjustment, adding special effects
and final touches. Thank you all for
participating in this lesson. I hope you found
it very useful and enjoy learning these
additional techniques. In this lesson, we will summarize everything
we have learned. I will provide additional
recommendation to further improve
your project. Se
9. Conclusion: Congratulations on
receiving the final lesson. Throughout this
course, we explored the versatility of working with both Blender
and Cinema forte. Both provide a very powerful
and unique tools that can be combined to create
attr composition. You also have the option to go entirely in blender
if you prefer. In this class, we have learned in lesson one,
selecting your team, perfecting type prophy,
we explore how to select an appropriate them
perfected prophy in blender. Lay the foundation for
our Tre D composition. In lesson two, we learned estrictyPp
technique in Blender, getting texts and
balloon effect. In lesson three, we discovered how to import models
created in blender into en 40 shooting smooth and
effective transition between the two programs. Lesson four, we developed into
lighting techniques in 40, using kill ring Light and DRI to grab lands and rusty
lighting in our scenes. In lesson five, we're
learning how to apply and custom
side materials and adjust rendering
parameters to achieve professional results
quickly and easily. The bonus lesson, lesson six, we show how to add the final charges in
Photoshop and how to incorporate lights and light in other projects to
enhance our composition. I hope I inspire you that you've learned something
new with each lesson. I would love to see your projects in the class
project section, please. You can also share them with
me on Instagram, a TSD. The best part of project
is sharing them, seeing the progress we make
in our try learning journey. So please applet your work
and show your creativity. Additionally, I would
greatly appreciate if you could leave a review
of the course, please. It's very important to me. And if you enjoy
it, please do so. You can follow my
social media on YouTube Instagram on my website
for more content updates. Lastly, feel free to suggest any other classes you'd
like to see in the future. I greatly appreciate
your participation in my class and dedication
throughout this course. So you're going slash. Thank you for joining me on this
learning Adventure. Bye.
 Eveling Salazar, 3D Designer - Graphic Designer