Transcripts
1. Introduction – Welcome to Atmospheric Watercolor Florals: Have you ever wanted your watercolor painting
to feel lighter, softer and more alive, like the paint is
almost painting itself. In this class, we'll
explore how to create atmospheric loose
watercolor florals that flow with ease and emotion. I'll walk you through every step from building gentle layers and creating soft edges to balancing movement and control
of your brushwork. Before we begin our
final floral painting, we'll spend time practicing a few key techniques together. Exercise that will
help you loosen up, trust the water, and let the color flow beautifully
across the page. This class is for
watercolor artists who already know the basics, but want to go deeper to paint with confidence,
freedom, and intention. Gather your supplies,
take a deep breath, and let's paint florals that feel as effortless as they look.
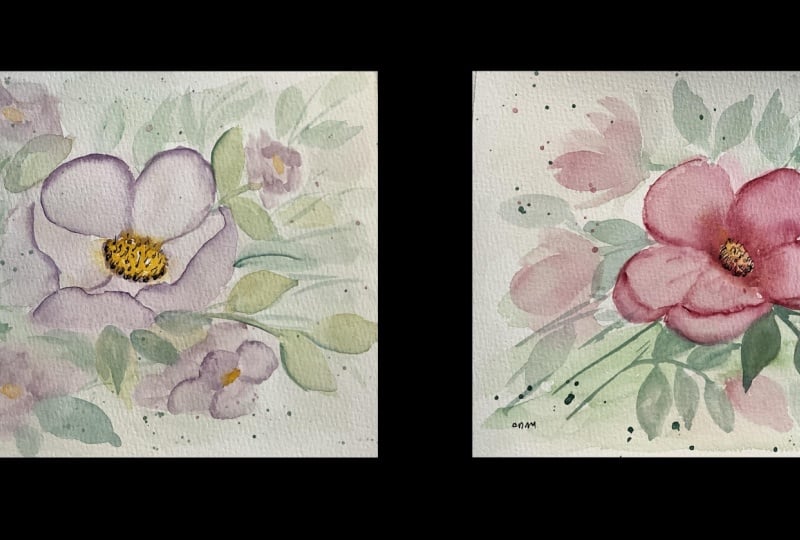
2. Supplies & Overview – Tools, Techniques, and What to Expect: We're going to be practicing some of the techniques
that we're going to learn in this next class
for your art project. I'm going to make this
into a quadrant of four using some tape and
just marking off that. I'm going to be using
this palette that has just the colors that
we're going to be using, keeping it a little bit limited, I'll just be using a couple of different reds and maybe this. Let's look like a red, orange color and then
I'll also be using some yellows in an amber
and then of course, a couple greens and possibly
some purples and that brown. This brown that I have is called sepia and I really like that, so I'll probably be
using that as well. These are all dry.
They're just paints that I had out of tubes. They're already dry, and so what I'm going to do is
spray them down with water and get them activated so when
I'm ready to paint, they are all ready to go. I also have some water
and some couple brushes that I have here and I'll be just using a couple
of different brushes. I like these mop style brushes
for something like this, but you could absolutely
use any size, brush or style brush that
you are comfortable with. To get started, I am
going to separate my paper into fours so that I have different
quadrants to work on. This is all just for practice. You can use practice
scraps of paper. Whatever you have
that's convenient, it's ideal if
you're going to use the same paper that you will finish your art project with so that you know that it's
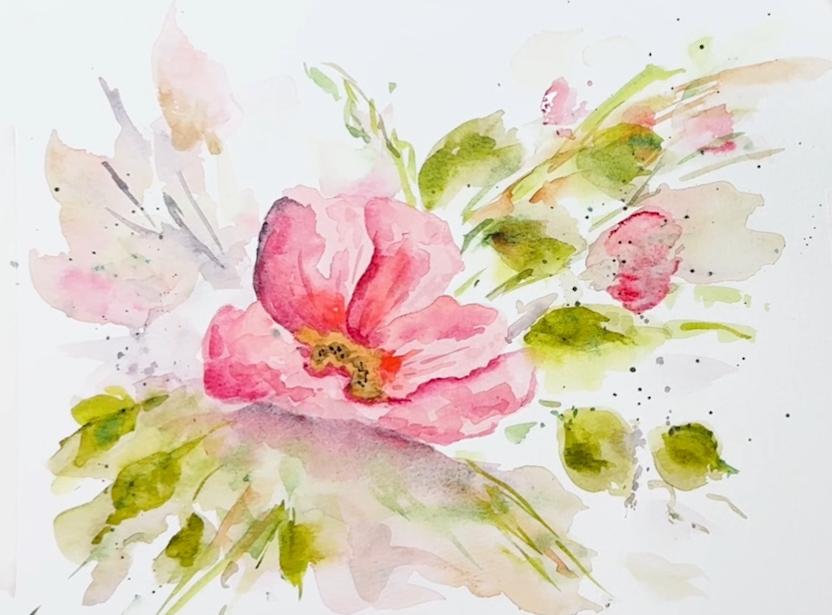
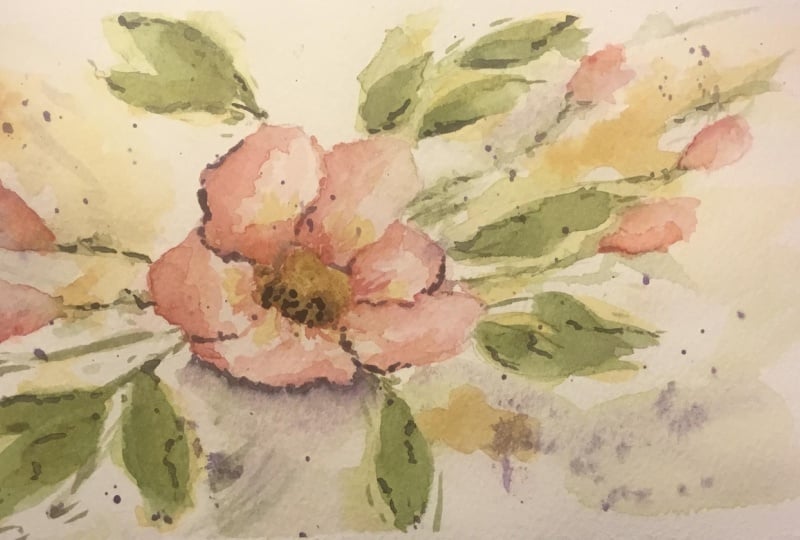
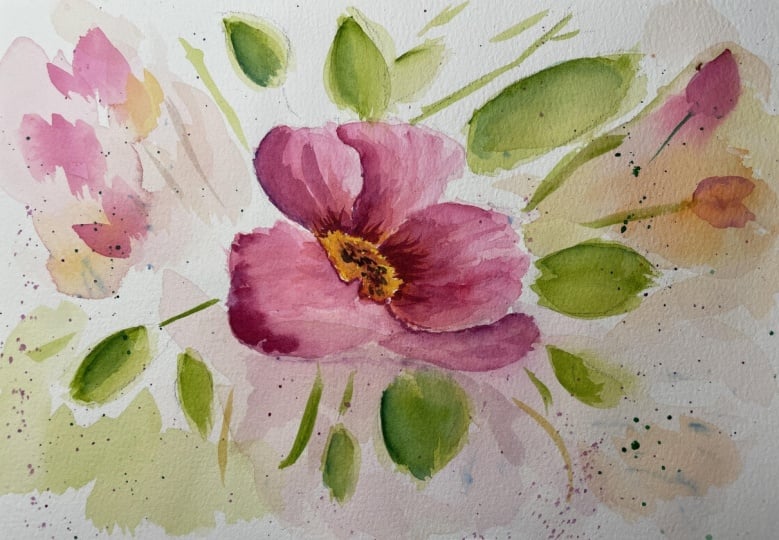
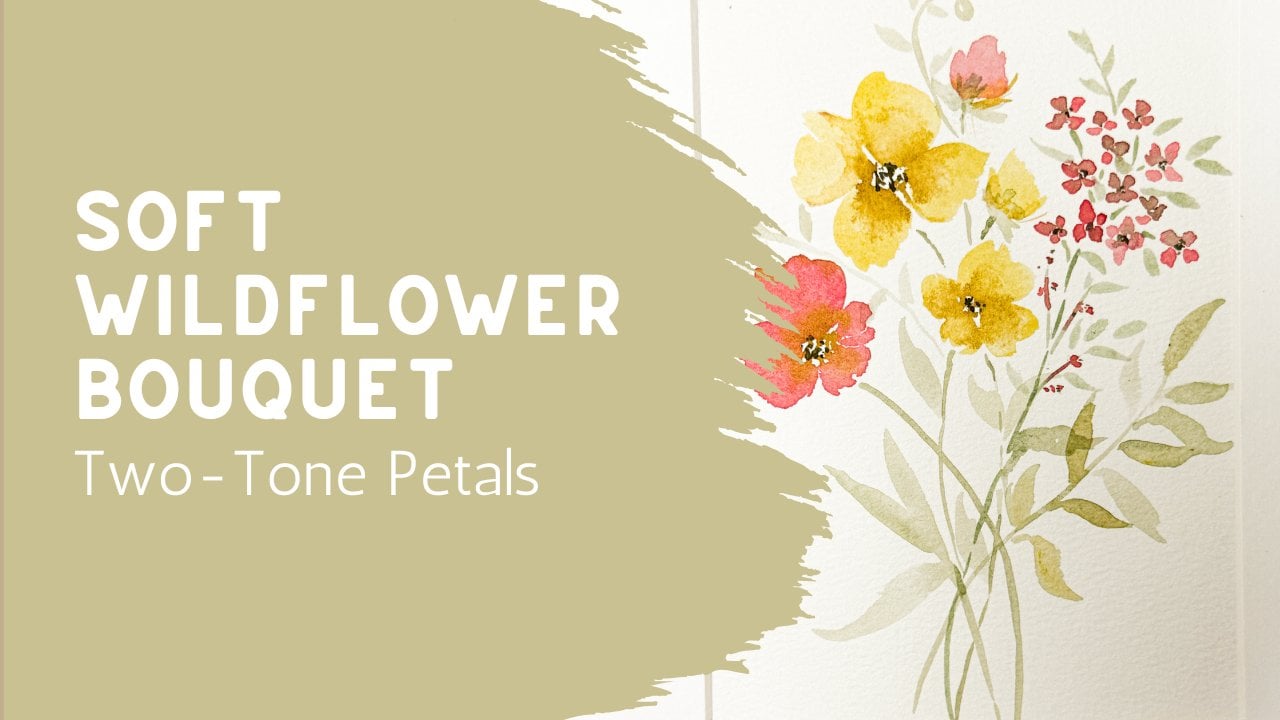
going to work the same way. So this is the finished
piece that I have, and with this finished piece, we are going to be
practicing making this very, very light background as one of the things we're
also going to do splatter, and we're going to talk
about how we splatter paint. And then we're also going to
be working on these edges of the petals where we can
create the edge of the petal. Then I also want to work on adding in the
different layers. Those are the four things
that we're going to be doing in these four
different quadrants. You may decide that you
want to practice each, each technique multiple times and maybe you want to make
a whole page or you have some scrapbooks or you have a notebook and you'd like to put your notebook to use and have several pages
of each of those. That's totally fine, and I definitely encourage
you depending on how advanced you
are to practice as much as you need to
before you move on.
3. Lesson 1 – Creating Light, Atmospheric Backgrounds: First technique is to be adding in that really soft
background look. To do that, I'm going to be using just some color that
is left here in the center of this palette and I
want that to be really watered down so that there's
more water than paint. That's very loose almost to a, a black tea consistency. See how it's just
really liquidy. If you pick it up, it will just drip right off of
my paint brush. That is the consistency
that I want. In order to practice that, I want you to create
just a really light, transparent, watery
blob, circle, a square, a rectangle, whatever shape you
want to make it. We're going to
just let that dry. You could add in a second color just to create and see what happens and just make
a second color here. All I did was add in just
a little bit of yellow. You could add a little bit of yellow stuff that was still
left on my brush and then go back in and add a little
bit of your purple and just put in a swish so that half of it is that
yellowy ambery color, and the other half
is that purple. You could use that
same paint brush and add in some of that purple. Wash off your paintbrush, go in and grab that amber, make a swish of
your amber color. Then what happens when
you just pick up some of that green and just add that in? What happens when
you make a line? We're going to allow
these things to dry. I'd probably be best if
you allow that to dry naturally instead of using
a dryer like a heat gun. The reason is is
that this is so wet. We had so much water that if you use the heat
gun or a hair dryer, it will move that paint around and will dry it in
an unusual way. So let that just dry
naturally for a little bit. And then if at the end you want to use the heat gun,
you could do that. So I'm going to go ahead and because I still
have some paint here, I'm just going to
create a leaf look. Maybe put another one
here because I have a little bit more space and then maybe grab
a little bit of green and just add
another bit right there. We're just going to let those
dry and see what happens. Okay. Now this is almost dry. You can see that they're
very, very transparent. If I come back over to
my finished art piece, this is the area
that we're working on where you have this very, very loose and light, transparent colors that
are shining in behind, and then we're
going to be adding these darker ones on top of it. All of this is what we are
working on that background, that behind the scenes look. Here you can see that
it is very, very light. Even these ones that I added in a second green color or an
amber color to the purple, you can see that it
actually created such a beautiful combination of colors, and I
really like that. Now, if I wanted to, I
could then come in and say, well, let's just add a
second layer to that. And in my paint, I will just make it just
a little bit darker. Than it was the first
time around and I can lay a second piece
on top of this. I could do something
that just adds just a touch of some
other dimension or maybe I'm putting
a leaf on top of it. I'll put another one
here as a little extra. Or maybe I want to bring
in that green again, and I can put a leaf
on top of this one. So we're going to
allow that to dry and see what happens with that when it
dries out completely. So here you can see where
I was able to add in some extra colors on top of that and really add a lot
of different dimension. Go ahead and practice
this as much as you need to until you have figured this out
and you have maybe a page full of layers, what colors work well together, what techniques you like, how much water you need. Practice that as
much as you need to, and then let's come
back to the next lesson where we're going to
work on splatter.
4. Lesson 2 – The Art of Splatter and Flow: Okay, now that you
have practiced that, I really want to work on
a splatter technique. There's several different
ways of doing that. You can use a rigor brush, something like this, that's
long and straight and thin. You can use your
regular round brush. This is a size eight. You could use, one of these, um, synthetic quills, that's
a little bit shorter. Pretty much any brush
that you have is going to be working
fine, personally. I like these kinds of brushes
that are long and skinny, that gives a good a
little whip that really creates a lot of dramatic
drops of splatter. This set comes with
all different sizes. Let me see if I can
find. Here you go. This set comes with all
these different sizes, and so I like some of
these that are extra long. You might want to pick
up something like that. If you have your brush wet, I'm going to use a red so
that you can really see it. Again, this paint is
going to be very liquidy, but not as liquidy as what we did for this
background color. It's going to have
a little bit more, it's going to be a
little bit more opaque, a little bit thicker, so
that when it splatters, it has a good, you know,
amount to land on. Citing most of it in here. If you are ever painting
on something and you want to make sure that it's
going to land in that area, I highly recommend
that you put down other pieces of paper or
something to protect your area. Since I don't really care what's going to happen
to these other things, I'm just going to
hold my hand over it. What I like to do is either use a second
brush or my finger and I tap we're going
to put all the paint in this one and then I'm going to just before it's
ready to drip, I'm going to tap
this brush against a wooden stick and you can
create little splatter. The more paint on the bigger
the droplets will be. I'm going to do it the other
way around and use the size eight brush and really fill that bristle up so that the whole head
is filled with paint, and now I'm going to
splatter it again. You can see how much
bigger those droplets are. It really depends on
what you're going for. Practice several different
styles of paintbrushes. See which ones you like better. Do you like the tinier droplets? Do you like the bigger ones? Do you like to put it against your hand or against
a second paintbrush? Because I can do
it this way too. And I can get that splatter to go exactly
where I wanted it to go. Not that I have any choices, but I can aim it in
the right direction. You do want to
protect the rest of your table because it
will splatter everywhere, so be prepared for that. Go ahead and practice
some splatter on some different paper and see which technique
works best for you.
5. Lesson 3 – Soft and Defined Edges: In this next lesson, I really want to show you
how you're going to create these edges and how you can create an edge
and then soften it. Because when we go to
paint these petals, we want to be able
to create a line, but then soften it so that you really get the definition of this petal versus that petal versus this petal
versus this petal. When you are doing this, it's a really great
idea to practice that. We're going to create this
line and then soften it. To do that, we're going
to put it in here. And what I want is to create
this background color again. I'm going to add a
lot of water with just a little bit of
pigment of paint, and I'm going to create
I'm just going to make a organic petal shape like that. We're going to make
a couple of them. Just a couple ovals,
teardrop shape. These are going to represent our petals that we're
going to work on. Maybe we'll make one
this direction as well. Okay. We're going to let those
just dry and be transparent, like the background of our petals that we'll work
on for the class project. Now that they are dry, I am going to use my paint brush and use a
little bit thicker paint, the thickness that we
used for the splatter, fill my paint brush up, and I'm going to go right along the outside edge
like an outline. I'm just going to outline
that edge, very faintly. Get just clean water
on my paint brush, possibly drop off some of it. Now I'm going to come
back in and just soften that edge a little
too much water in it, and just barely touch that
line and let it bleed down into the rest of the
background pink that we used. See how it's just bleeding
across let's try it again. I'm going to use a smaller
paint brush with this one. Just create a line
of a darker area, and then using a
clean paint brush with just water and
dabbing it off so it's not soaking wet and
just coming in and touching that line and
allowing it to bleed. The more water you use, the more it'll bleed, less
the less it'll bleed. We Let's do it again. I just create it
along the top here. Nice bold line using
just my clean brush, touching that, and
letting it bleed across. If you feel like you
got a weird line, you can always come in
and let it bleed again. One more time here. You can even make it thicker. Go ahead and practice
that a couple of different times to get
that technique down because this is going to be
very important when you go to make your flowers and you want to define
each different petal.
6. Lesson 4 – Building Layers and Definition: Now we're going to practice
doing some layers. I'm going to create a
little flower petal there where we're going to be able to create
some layers here. I'm going to wait for that to dry and then I'm going to add in this little extra detail and then we're going to add in
some layers inside of it. Just like we practice here, I'm just going to
define that edge, whatever area I want to define. Using my clean brush
with just water on it. Often that edge. Do this one over here too before it dries. We'll do one here. We do another one here. Okay. Wait for that to dry and then we're going to
add in those details. So now I want to add in
some of those details. Let's take a look at this again. In here, you can
see that there are all these different layers where it goes from the
very lightest to the very, very darkest and even some extra different
colors in here. We're practicing now. Using this little
flower as an example, I can create a little this almost like the thickest part of the paint now is I can
add in a little bit of a little extra and I can
put in some little lines, add in some little lines. And then if I feel like maybe
that was still too strong, I can come back in here and
water it down a little bit. Soften those edges. I'm going to let that dry and
come over and add in. Oops, do it this way. Maybe add in some over here, maybe some over here. I draw those out. This is just layer one, because we can always add in additional layers
on top of this. And if I felt like
that's a little too bold to begin with, I can soften that
because credium layer. Then once that is dry, I can come back in and
add another layer. I think what I'll do
is add in some of this Ambry golden
color into the center. Okay. Go ahead and practice with making your flour. You can make several different
flowers until you feel as if you have mastered
making layers. Now that layer is dry, I'm going to go ahead
and add another layer. See how we're just adding
layer after layer, a little bit more definition, a little bit more depth to it. You can add in little lines
come back in and say, I really want this edge to
be even stronger than it was before and make that edge one more depth of color. Or maybe you really want to have this center over here
dark and this one. Draw it out a little bit. And then maybe you're
thinking that maybe that center needs
some little dots. That's another
layer you can add. If you don't feel like
that was quite right, if it was a little too strong, you can always come back in. This is clean water and just soften that edge
again. Same technique. Go in strong and then come back in with just clean
water to soften it. Let's try this completely and see if we should
make another layer. Okay, I'm really liking that. I like the way that looks, but maybe I want to add
in a different color. Maybe I want to add in a little
bit of this orangy color. Add a little different
dimension to it. I can draw that out. I think you get the
point. I would love to see you do an entire page of this layering technique
where you just create these little random
layers really adds a lot of dimension and
movement to your painting. Practice creating an
edge and softening it, practice doing some splatter, figuring out how to tap
your paint brush and how much paint to use and what that thickness of
that paint should be. And practice making these
really, really faint, transparent layers, which is going to create
such a beautiful. Join me in the next lesson when we are going to
start this project, and you're going
to get a chance to see exactly how to
paint this from doing all these different
background layers to adding in your
flower to your layers, and even adding in the little extra buds
over here to the side. I hope that you join
me, and I cannot wait for you to upload
your painting so that I can see what you've
been able to accomplish and that we can celebrate
your creativity.
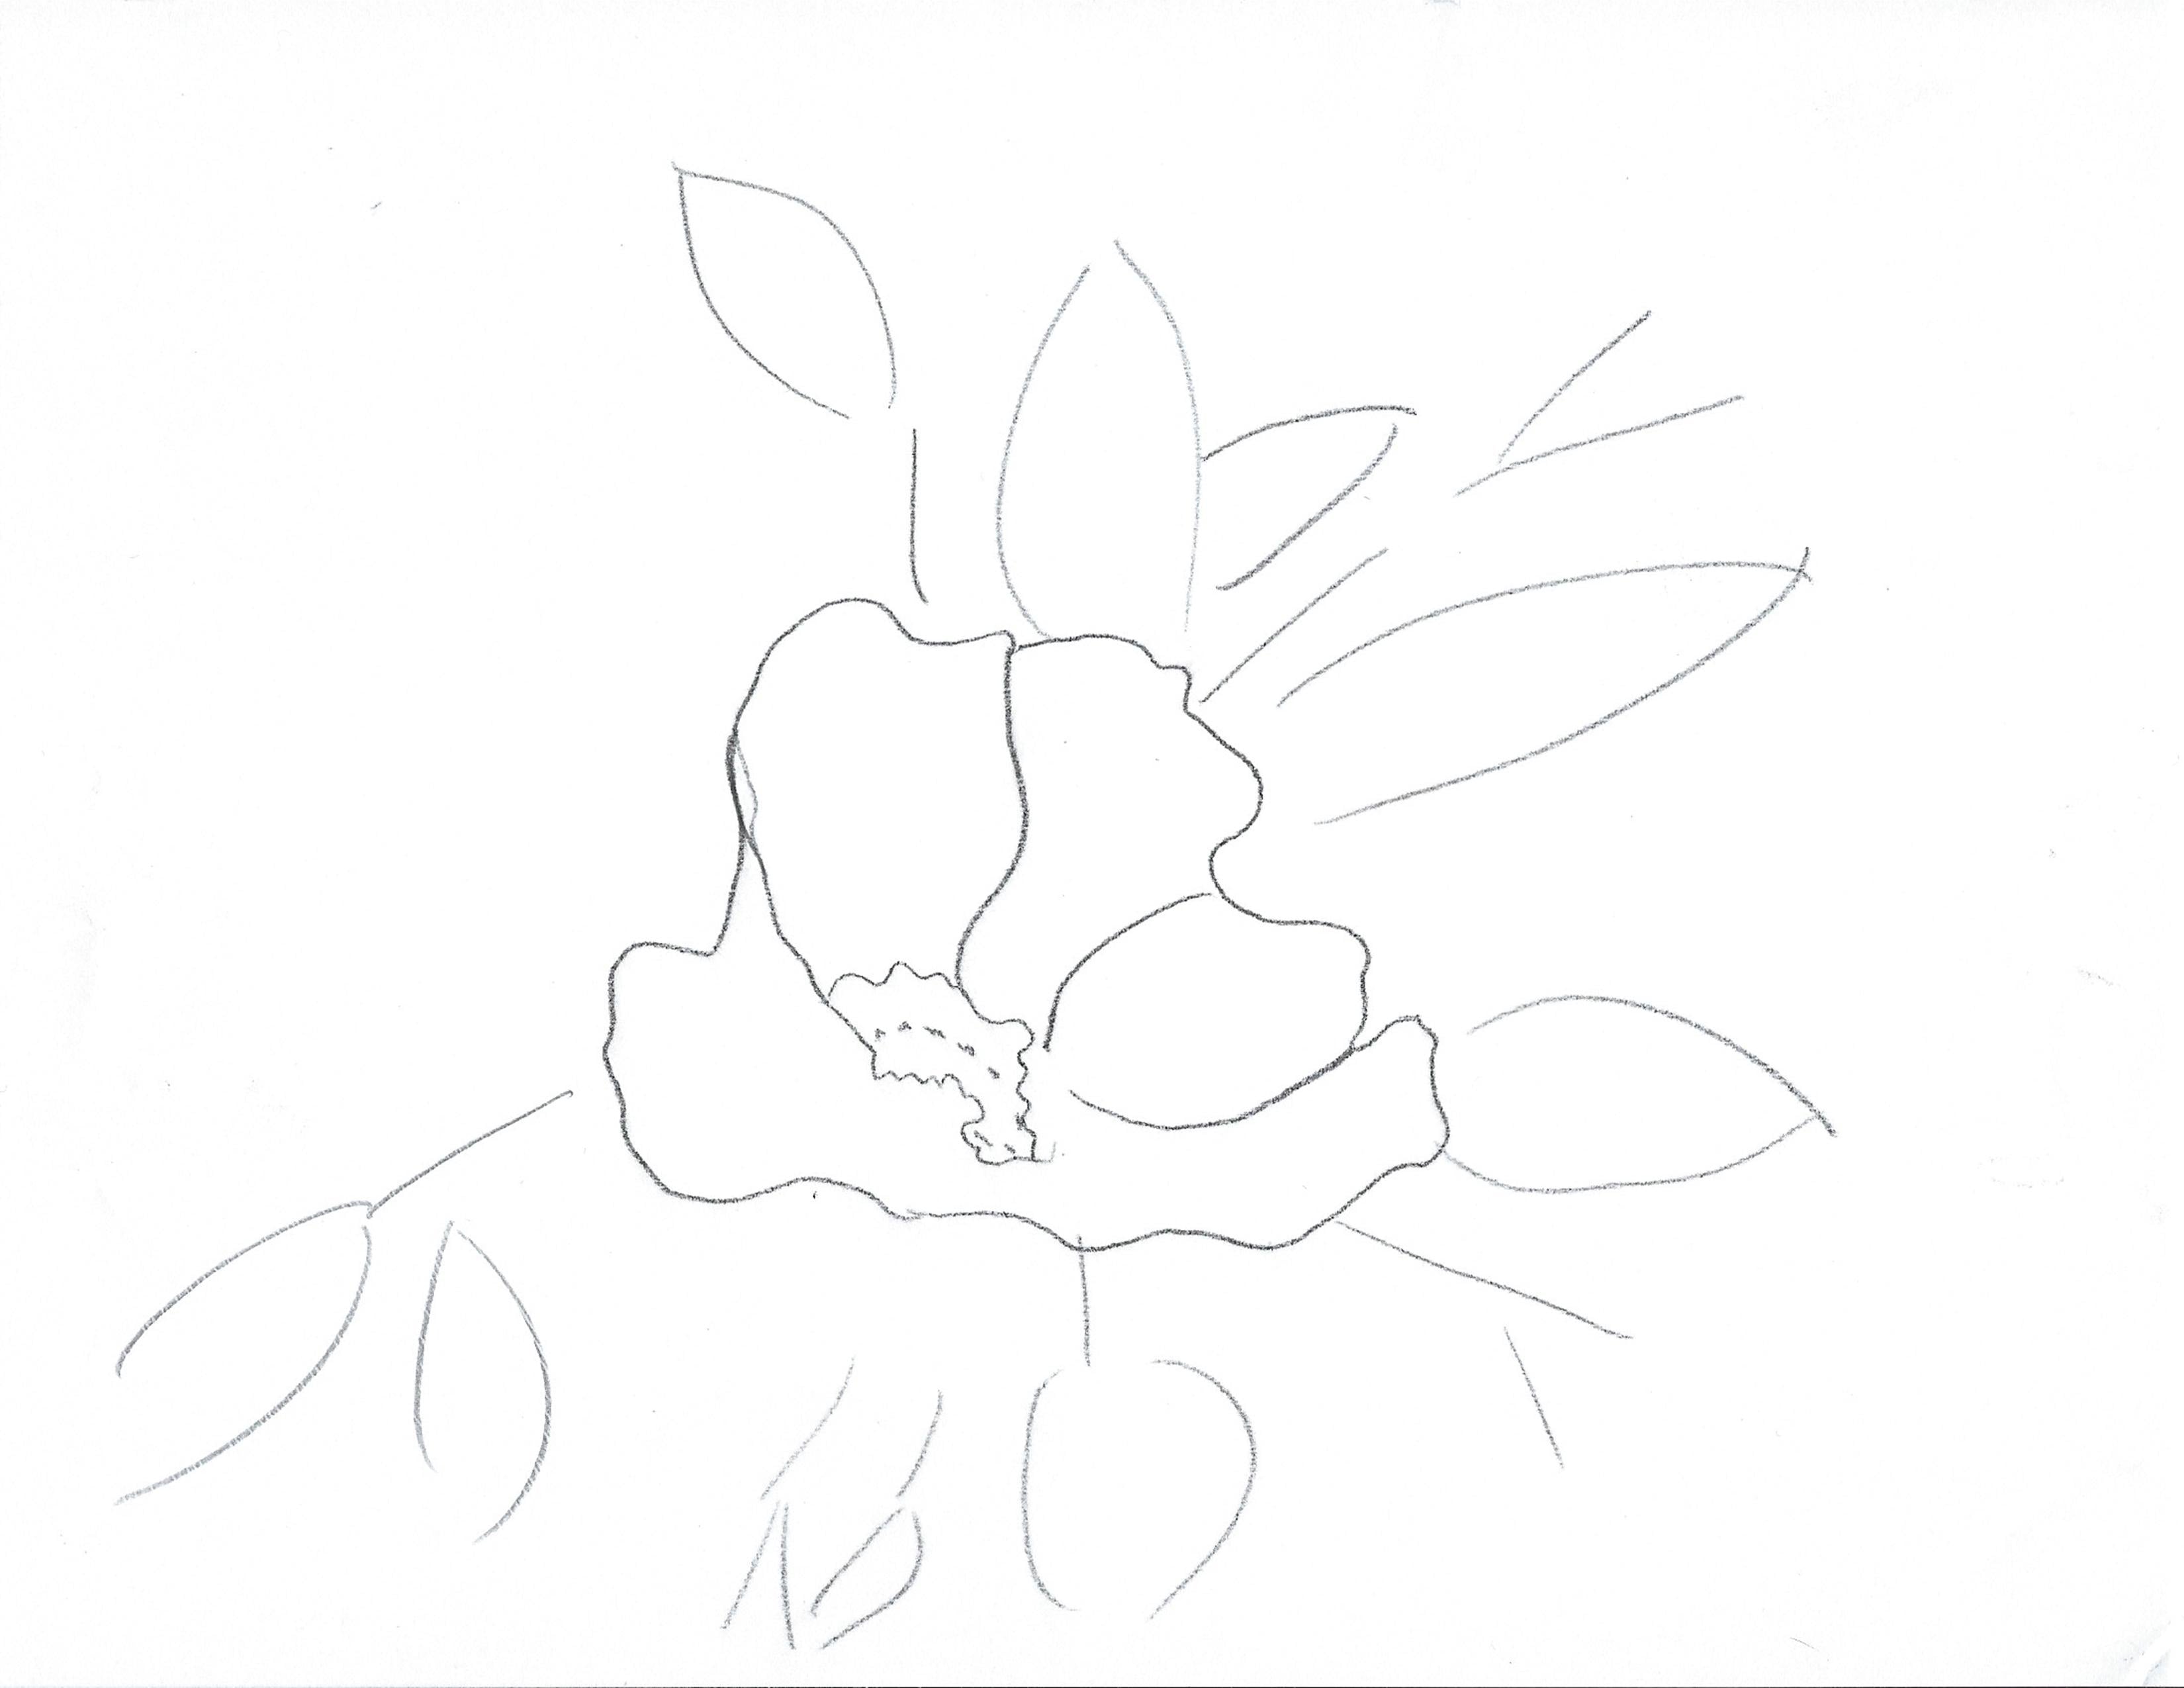
7. Class Project, Part 1 – Drawing & First Wash: To get you started,
I will be providing you with a outline
that you can use. You could use some tracing
paper and put it underneath so that you could trace
out the outline of what this flower is
going to look like. You could also just
free hand this. This is just a very simple
with a couple petals, a little simple flower. But if you're struggling
with confidence in drawing, feel free to print
mine out using some tracing paper
or a light box. Or however you would
like to transfer this onto your watercolor paper, you can use this to
get you started. As you can see, I didn't
use this exactly for here. The leaves are not exactly where I ended up
actually putting them. So if you want to only add
in your flower and then let the leaves be more organic
and flow as you paint, I might recommend
that you do that, allow that creativity
to come out of you instead of
feeling structured. Thanks for joining
me in the class and I hope that you
have a lot of fun. As we get started,
we're going to remember that you
may or may not have a lightly drawn outline of where your flour
is going to be. You could have it drawn here or you could just be
doing something freehand. Either way would work fine. As we've practiced in
other earlier lessons, you're going to be using
a very light wash, something that has
a lot of water and just a little bit of paint. The main concept is to
just be adding a light, very pale background, and that is going to be
your lightest color. Remember, you can never go
lighter with watercolor, but you can always go darker. Start with your very
lightest color first, and then we're going to be
building up from there. Now that I have the general
shape of the flower, I'm going to be adding in just some little light
background details here. I actually washed my paintbrush off in water and then just used whatever little
bit of color was left in the paint brush
for that bottom part. I do want to start adding in a little bit of leaf formation. I'm not going to be
painting specific leaves. It's more just the idea
of where leaves might go. Again, this is going
to be very lightwh with lots of water and just
a little bit of pigment. It's really just an
idea of some leaves. They're not particular
or exact leaves, just a general sense
so that it'll help me guide me as I create
this composition. I'll be adding a darker
color on top of all of this at a later
part of the painting. One of the things I
really like to do is wet down my paint brush and
then kind of smear some of the paint that
has already been painted and move that around a little bit because
if you remember, as paint dries, it
will dry lighter. And so I sometimes just
use some water and smear the paint around from
what I've already painted. This is going to create
a very atmospheric or almost like an
impressionistic look. It really helps for adding in the details later
after this dries, and we go to add
in a second layer. Sometimes I even just
use the color that is in my water dish to create this section as long
as it's not too muddy. I remember to add in all the colors that I'm going to be adding into this painting. So whether it's a golden or the pinks or the
greens or purples, I'm going to just add little touches of it here and there, even putting purple
into the green areas because it really adds a lot
of dimension and texture. One of the things that
I like to remember is that we want to be
able to have shadow, a darker area maybe
underneath this flower. I'm only going to have
one main flower and then some extra smaller flowers up to the right hand side. But right here, I just want
to add a little darkness. I'm going to put that purple. You saw that I also just
did some splattering. We did practice that earlier, and that is a nice
time to just see where the color is going to land
and then work within that. This allows for a really
intuitive style painting where you don't get
to plan everything. It's a very relaxing, enjoyable way to
paint for myself. If any of the splatter ever goes somewhere
that I don't like, you can use another cloth to
just pick up some of that. But usually, I just go with
it and I say, that's fine. That's where it was
meant to go. In nature, there's a lot of straight
lines like sticks or branches, and so I sometimes
will be sure to add in extra little lines or squiggles or things
that will add some extra show
movement of direction. Please remember that
your painting is going to look completely
different than mine. You may choose different colors. You may choose to put in
three different main flowers. You could be choosing
a different flower. You could be trying to
make it exactly like mine, but it will still be different. Just like if I sat down
to paint this again, I would never be
able to recreate it and have it look
just like this one. That's the beauty of art. You are the artist and you
get to make the decisions. Sometimes our intuition will help us go one
direction or another. And if your splatter landed in a different spot that
might lead you to the different color way or a different place for putting your extra beautiful flowers. I want you to relax and
just have fun doing this. If your first one
doesn't turn out well, go grab another piece of
paper and try it again. Here I want to add in the
center of the flower so that I can really start forming what this flower is
going to look like. I'm going to be using this
almost a golden amber color, very jagged, allowing it to show that the petals are
looking up into it. Using a cleaned off brush, I was able to remove some of it to create some highlights. I want to have the outside
edges be the darkest areas. While my paint brush
has that golden color, I am going to bring it up
into the leaves and into the other background
areas along with some water so that I'm just getting that color
pulled through. Whatever color I'm going to
be using on that flower, I'm definitely going
to bring it up into other areas of my piece so that it looks
nice and cohesive. I don't want to start
using another random color if I don't pull it across into other areas
of the painting. These outside areas
are background. That's still wet
and I'm able to do a wet on wet technique
by just adding in some of that extra pink
and some purples and that amber color and
letting them flow together. I can use a dried off cloth
and manipulate it and move it around so that it's
not a strong pigment. It's just a little added color. This definitely takes practice and you do need to work quickly so that the painting is still wet when you add in
those extra colors. If your painting has dried, you might want to skip that part and try that another time when your
painting is still wet. You can really see
that this painting is going to be starting to
come together for me. You're seeing where
the flour is and where some of the leaves
are and the stems, that center is starting to
dry and look really nice. But we do need to
create some petals. A Join me in the next lesson where we
discuss all those petals and the outlines and how to create such a beautiful,
cohesive look.
8. Class Project, Part 2 – Layers and Leaves: So what I'm doing is using a
little darker of the pink, and I'm creating the edge
of one of the petals. You can see that
it is very jagged. It's not a straight petal. In fact, I even
brought it up into this green leaf where that
leaf was already wet, and so I had to kind of move
that around a little bit. I would call that a mistake that I'm just going
to roll with. That's one of the
fun things about watercolor is only
happy mistakes. If it blends and it
bleeds out like that, just roll with it and
push it around and say, that's exactly what
I wanted it to do. Remember what we
practiced earlier in the lessons where you
create a little line and then you come back through with some water and you're
just barely touching that line on the one
side and letting it bleed out into
the dried area. Allowing that water to just
flow naturally just like this is now going to
fill into that pink, pulling that purple out
into that second petal. I'm going to then go
and do another wet on wet technique and add in
a little bit more pink, moving it around slightly, creating a little bit of
depth right along that edge. I'm going to say on
this whole thing that the outside of my petals are always going
to be the darkest, and the inside of my petals
will be the lightest. I will also create the
inside of the flower, the part closest to where
the amber color is. That inside of the flower
will also be the darkest. If I feel like that color
is creeping too much into the center of the petal, I can just pull it away
with a clean brush. I'm going to start
this third petal here. Your flower might be
different than mine, so you don't have to do
it exactly the way I am. Take a look at your flower and decide where these
petals might be. Making a dark line,
kind of jagged, and then coming back in with a clean brush with
just water on it, barely touching that pink
line that I made and allowing that to bleed out
onto the lighter pink. It's such a fun technique. You really get a
great blend this way. Here you're going to be
able to see that I'm going to paint the one
on the left hand side. That top edge of that
petal is going to be the darkest area because
it's on the outside edge. And then I'm going to allow
that to pull into the center. This is allowing those
bottom petals to look like they're almost
turning up like a cup. It's hard for me to describe, but the petals at the top, you're looking at the
inside of the flower, and the petals on the bottom, you're looking on the outside of the flower, if
that makes sense. I'm picking up a much smaller
detailed paint brush, where I want to add in a really nice jagged
edge along here, because, again, what I
was saying is that's the outside of the flower petal. And I'm trying to make
that a really nice, crisp, dark etch to show that that is the outside
of the flower petal. I can then come in
later and soften that again with a
clean paint brush. Pretty much you're going to do that technique over and
over and over again, which is why we practiced
it earlier in the lessons. It's possible at this point that you need to
refresh your water, get a clean water so that
everything isn't getting muddy. It kind of depends on what the colors are that
you've been using. Anytime you need to
stop and refresh, that's a good idea to do so that your painting
doesn't become muddy. As I'm painting, I'm trying to remember what it is
that I'm looking at. Is this the inside of the flower that I'm
painting or am I actually looking
at the outside of the flower petal
because it's a cup? I definitely want
the inside to be the darkest down near
where the stamen is. I want to allow this
to have some lines, like if you think of
a petal in a flower, they often have
little extra details. I'm going to add a little
extra darker color pink, and then I'm going
to draw it up and out I am not painting over
the entire flour petal, just little pieces of it. And anytime I need to soften it, I'm just going in with clean
water and drawing it out. At this point, your whole
flour is probably dry, and this is allowing
you to put in a second layer without it bleed. You could use a hair dryer
to dry it completely, or you could have walked
away and gone to get a cup of water or
a drink of coffee, and then come back whichever
works best for you. I use a heat gun to
make sure that mine is completely dry before
adding on a second layer. Now that we're adding layers, you may have to do that several times in waiting for
it to completely dry because you won't be able to
add in that next layer until that first layer that you were working on is completely dry. Otherwise, it'll just blend out. This is a very slow process. Take your time, rewatch this video as often
as you need to. Come back to it, and
let's keep working on it. It is possible that you
will need to start over and try a new painting with
a new piece of paper, which totally makes sense. This is actually my
second one that I had to make because I didn't like
the first one that I made. You can add as much or as little detail as
you need to make. I'm going to add in some
more details to give it a little bit more dimension and to create a little
bit more variation. But if you are happy with where you're at
with your painting, you can always stop here
and come back later to it and take another look at it and see if it
needs more details. Just because I'm
still working on it doesn't mean you need to
still be working on yours. Maybe yours will take
longer than I did. It's important that
you work at your pace and that you get the details
in that make you happy. Because you're
watching the video and listening and then also
trying to do the work, you may find that the
first time you do this, you get a little frustrated
and get a little lost. That's okay. Go ahead and paint your first one along
with me and then maybe turn off this video and go back and try it again
without going over all the details
and getting bogged down by trying to make it
look exactly like mine. Now that the flower is almost
finished with the petals, I do want to go back in and
add a little darker color into that orange
amber golden area. I'm going to use a
really dark brown. I think it's actually
a sepia color, and I want to add in
just a little ring of brown and a little bit of shadow and depth
in the one corner. So go ahead and add something like that into yours as
well if you would like. You can always add some,
and then you can see there. I pulled it up a little bit, lifted it to create just
a little bit of a shadow. I'm just adding a little
darkness here and there in a half moon shape to create that same circle feeling
from the inside of a flower. Possibly if I was going
to do this again, I would use a little lighter
color than this dark sepia, or I would have mixed it with my yellow orange color just
to soften a little bit. It did give me a little
bit of problem here, but that's okay. I recovered. Now that the flour has
dried quite a bit, I will be coming in and adding just one more layer of color. I do like to add in
layers after layer, taking a break,
walking away from it, coming back at it, and saying, is it giving me the dimension
that I'm looking for? Does it have the details that
I'm looking and wanting? I realized that this
bottom corner over here, it just felt like it
was just a little too pale compared
to the other areas. I wanted to add in just
a little bit more depth. Now, the whole painting is dry and so I'm able
to just add in little bits here and there to add some more
extra dimension. If at any point, I don't
care for what I did, I can always lift
it up or I can get a clean paint brush and
soften it a little bit. But I do like the direction
that this is going. I feel like I can really
see the different petals. How's yours coming along? Are you happy with the
direction that it's going? Are there areas that you feel like you need to improve on? I think I'm going to let
that center flower dry a little bit more and come back in and work on these leaves. Now, as you remember,
when we first started, we were just adding in some
basic background leaves, and now I want to add some
darker colors right on top. And when I say darker, it's really more of
just a more pigment. I didn't change the color. I'm using the same green. I'm just using less
water and more paint. I'm painting additional
leaves on top, or sometimes it's just
a little highlight or a little extra on
one side of the leaf. I might go in with a second
color green and add that because I do really
like to add in several different
greens to my paintings. I really feel like that
adds a lot of dimension when you're painting to have
several different colors. Maybe something a
little bit more yellow. Another one, it's a little
bit more brown color. These are the leaves that
are going to actually show your really light color that you painted first are
just background, almost like the leaves
that were behind these leaves that you're
painting, if that makes sense. Pulls these leaves
forward and pushes the really pale leaves backwards so that you
have more background. Be careful when you're
painting leaves. It is very easy to
add too many leaves, and we don't want to do that. You can always add in an extra leaf later if you feel like it's
missing something, but it's very hard
to remove a leaf. You'll notice that I did a
little splattering there. I did with that green color
that was on my paintbrush, I just splattered a
little bit of green and then maybe some that's
landed in the pink, I just moved around
a little bit. It's totally fine. I don't mind that it landed in the pink. Take your time,
walk away from it, come back, look at it
from a different angle. How's it looking? Do you like the direction
that it's going? Is there anything else
here that you need to fix? Is that darker shadow on the
bottom needing something? Join me in the next lesson as we continue this
painting and wrap it up with some beautiful details that add just the
extra that we needed.
9. Class Project, Part 3 – Details and Balance: I think mine does. I
feel like it's just floating in middle air without
anything anchoring it. I'm going to be adding this nice purply color that's
going to create almost a purple shadow
underneath the flower. I'm using that same technique
of adding a dark line and then a wet brush to draw it out and let it
blend down underneath. I often bounce around. I will go and I'll smear
out a couple of leaves. Maybe I'm feeling like
those leaves are too bold. Maybe I feel like I
added one too many. I'll just use some water and manipulate those leaves
and blend them out so they have more of an
atmospheric feel to them instead of so precision because the last
thing I want for this painting is for it to
feel like it's precise. This is a very
loose water color, and I really like that look. I felt like the
purple that I added underneath was really pretty and was going to
be working well, but I wanted to bring it up
into other areas so that it didn't stand out so
much in just one area. Using a clean paint brush with hardly any
paint on it at all, I can really move that
paint around that's almost even already
dry and really get it to go exactly
where I want it to go and so that it is a little bit more blurry, a little
bit more blended. I think it's time
for me to finish the section underneath
the flower, adding in more leaves, maybe adding in some more color. I can add in some strong lines. I always find that
lines are very good with helping your
eye move across the page. The lines sometimes show direction and movement,
which I really like. They don't have to
represent anything other than it's a line. Going back over the
entire painting, looking for areas that
things are missing, moving paint around,
adding more splatter, maybe even adding a
little bit more darkness to the flower now
that it is dried. I do feel like maybe some of this needs just one more round of paint to darken and to add extra detail
that it is missing. Every time I'm adding detail, I'm not completely filling in the areas that
I had done before. I'm just putting
it in new areas, which creates such
a beautiful look because it adds texture and dimension and isn't just covering it over,
see that there. See how it is almost shows
you different highlights and shadows because certain areas have more color than others, and it's all jagged. Oh, I really am very
pleased with this. I cannot wait to see yours. I hope that you take the
time to take a photo of your painting and upload it to the class so that we can
all celebrate your work. Even if yours doesn't
look anything like mine, I want you to upload
it so that we can celebrate you and the
work that you have done. A lot of what you're
going to be watching for the next couple of minutes
is just me messing around, being inspired, seeing if I
needed to add in more color. Does another layer help
it or not help it? Playing around, having fun, and experimenting,
which I really hope is something that you
do when you are painting. Take time to experiment. What happens when I do this? What happens when I do that? Did I like when I did that, or do I want to say, please don't do that
again. I ruined it. I have a lot of paintings where I wished I
hadn't done something, but I wouldn't know that
if I hadn't tried it. I think it's really
important for everyone to take time to experiment
with their paints, experiment with their
brushes and their paper. See what happens when
you do different things. How does the paint
respond to you? You will only get
better with practice. I am also only able to
get better with practice. I'm not a professional. I just have fun painting and I want you to
have fun painting. I'm here to show you how I paint if you would like
to paint the way I paint. I have a lot of fun when
I paint. I'm relaxed. I don't have much
care in the world. I'm not painting,
thinking that I am wasting supplies or
that I'm wasting time. I am having fun and I really hope that you
are having fun too. If you took just 15 minutes
every day to paint something, you will improve in a huge way. I took an entire year where five out of seven
days out of the week, I painted something,
even if it was just a simple little
abstract painting. I put paint to paper. I played around with it. I figured out what
happens when But the improvements
that I saw by just doing that was
absolutely amazing. The more I play,
the more I learn, the more mistakes I
make, the better I get. Now you can decide if any more
extra details are needed. Again, I'm just bringing
in those colors that I've already
used in the flour and drawing them out into the painting to make sure
that everything is cohesive. And if I add a line
and I feel like maybe that's too
bold or too strong, you can always come back in with some water and soften it, maybe take out half the
line by just adding that paint brush that
only has water on it to soften that
line a little bit. You'll notice as
you take a look at this painting that you go
right to the center flower, and then your eyes kind of move up to the right and
down to the left. That is intentional.
I am trying to create movement within your
eyes and your gaze. Sometimes when I'm just
not sure what else I should be doing for a
flower or for a painting, I go in with another
round of splatter. I add in some color, and then I say, What happens
when I splatter this? Where does the splatter
go? Does it add something? Do I need to remove it? Do I need to soften
those splatters? Or does it add just the look
that I was looking for? Take your time, look it over, decide if it needs more. Let it completely dry. Do you need to add
in more flowers? Do you need to add
in more leaves, more stems, more background? Are you feeling content
with it just the way it is? Spend a lot of time just
staring at my painting. I didn't cut out any
of those times in this video because
I wanted you to get a full representation of how my mind works and what
my paintbrush is doing. I a lot of times just look at things and then try it and
see if I want to keep going. It's a slow, relaxed process. Does the center of your
flower have enough color? Do you want to add in
one more round of layers so that center is nice and
bold and full of detail? A your petals defined enough? Should you add one more layer of outside edge darkness and
then soften it one more time. Because your watercolor
dries lighter, sometimes you might
have to go in several different
times to create that darker edge until it is the depth of color that
you really want it to be. Can you tell that
the lower petals are the outside of the flower? Is there anything that
you could add that would create that to
look even more like it? It's very hard to
create dimension. It's something that I
really struggle with, something that I'm practicing. I sometimes use a larger brush when I get to this
area that just has clean water on it
that I can use to scrub out some of the bolder
areas that I don't care for. Maybe a couple of the leaves
have a little boldness to them and I want
them to be a little bit more muted or a little
bit more faded out. Using a large big brush that is floppy with just water
on it, clean water. You can really move some
paint around and scrub it out so that if
there's an area that you feel is too
dark or too bold, like I did here for that
bottom of that flower. As much as I liked that area, I also felt like it was just a little too bold and I needed to soften it with just a wet brush with
clean water on it. I'll also use that
brush to just pull out some of the color and add it in a little bit here
and a little bit there for a little extra details
in the background. You'll notice that I
have one main flower, but I feel like I need to
have a couple extra buds. I'm going to come back in
with a very diluted pink and add in a couple
more little buds up here on the right hand side. I'm not going to make
them into flowers. I'm not going to
give them petals. They're not going to look
like flowers in particular. It's more of an abstract, an appearance of flowers that might be in the
background here by just adding little ovals that
have a general bud shape. They will really give
an interpretation of another bud of this flower that is growing off here to
the right hand side. It will also help
your eye move up into that general direction
because you see that pink being drawn
up into that direction. Once those pink
little buds are dry, you can go in and add another layer or some
darker parts to it, or you can just leave it very, very light whichever way
is best for your painting. I think I'll keep adding in
one or two more layers for those buds just to give them a little bit more dimension
on the outside edge. I'm not going to be putting in petals or centers or
anything like that. I want them to just look like, very loose buds and
just the idea of buds.
10. Outro – Reflect, Celebrate, and Share Your Work - Please Follow Me: How's yours looking by now? Are you feeling
you're almost done? Have you finished
a long time ago and you're wondering
what on Earth I'm doing? Are you feeling left behind and that I've
moved too quickly? Remember that everybody is going to work at their own pace, and whatever amount
of time you need is just the right amount
of time, it's okay. Feel free to rewind this video, watch it again and again, or just pause it and catch up and then start
playing it again. Whatever works best for you. I would love for you
to give me a review. Let me know how you did. Give me any tips of things that would make
it easier for you. I would love to make a
video and teaching classes that make more sense
to my students. Be sure to upload your picture into the class project area. We all want to see it. We want to celebrate the
work that you've done. Thanks for joining me. I'm
so glad that you're here. I can't wait to see your work, whether it's in this class or in the next class
that you join. It's been my pleasure
painting with you. If you follow me over on
my social media accounts, please let me know who you are and that you found
me on Skillshare. I'm always open to chatting and getting
to know you better. You can post your photos on my social media account and I would love
to celebrate you. Please don't forget
to sign your artwork. You need to be proud of
what you've accomplished. It's also amazing
what happens when you put your art into a
frame and mat it. You are going to be impressed. You're going to be so surprised
at what a frame can do, as soon as you put
it into a frame, it just elevates
everything incredibly. I have an area in my
powder room that I can frame my artwork and keep
it there for the season. Maybe I only keep it
up for a month or two and then I swap it
out for the next season. But it's my way of always
having a spot where I can put something new that
I have recently painted. Splattering your paint
with a little bit of white adds just a fun
little highlight. Certainly not anything that's necessary if you don't
already own the white, but wow, it really brought in a lot of beautiful
highlights that I enjoy. I truly hope you enjoyed the class and that you
learned something new. It was so fun to
paint with you today. Follow me on Skillshare
and over on social media.
 Brenda Jones, Watercolor Artist & Teacher