Transcripts
1. Introduction and Supplies You Will Need: Hi, friends. How are you? I hope you're having
a great day today. I'd like to introduce
you to this project. This is a drawing and
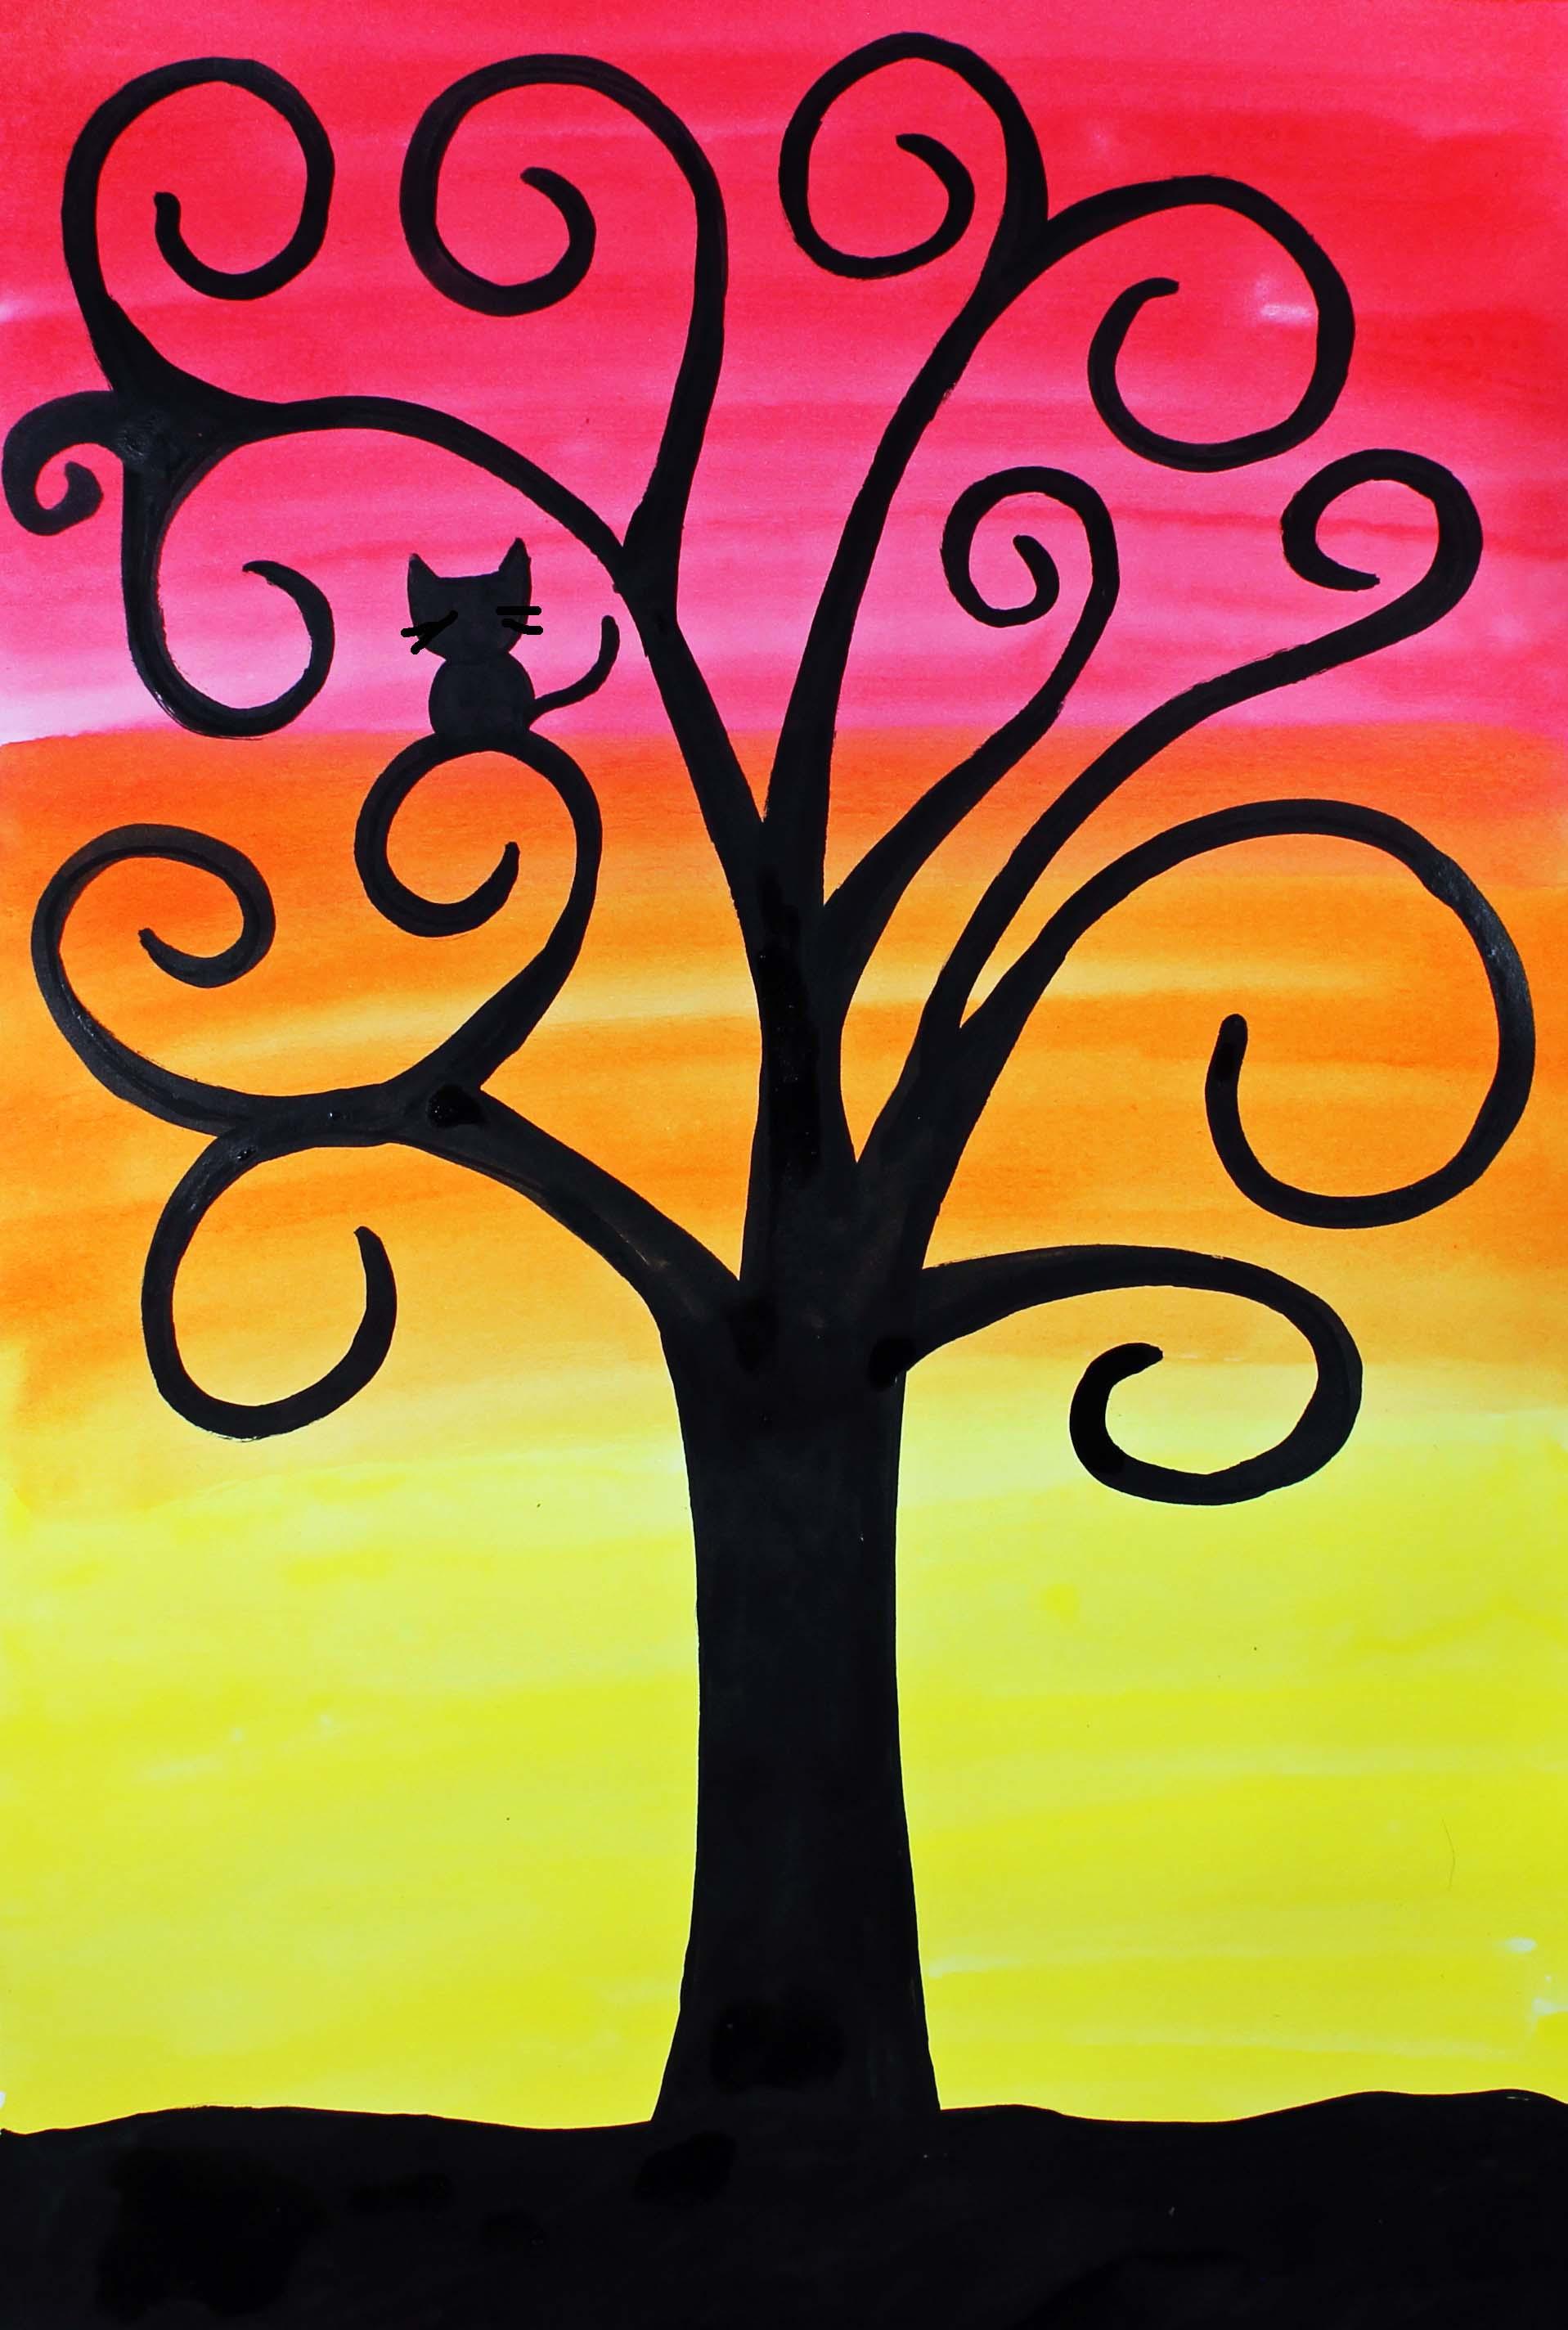
watercolor painting project. And today, we are
going to be creating this swirl tree
against a sunset. I hope that you have a lot
of fun with this project. Let's get started. Let's talk about
the supplies and the materials that you will
need for this project. The first thing
that you'll need is a sheet of watercolor paper. You will need a set of watercolor paints and two
different size paint brushes. We're going to use a
larger paint brush for the background and a
smaller paint brush for the details on the tree. You will also need a cup or
a bowl with clean water. You will need a
permanent marker. You will also need
a paper towel. So go ahead and gather all of those supplies and materials, and I'll see you back
here in the next video.
2. Step 1: Paint the Background: In this step, we are going
to paint the background. So let's get started. So what we're going to do
first is we are going to add a drop or two of water
into each pan of paint. And what this will do is it will soften up our
paints a little bit, so they are easier
for us to use. So I always encourage
my students to take that step because
it really does help. Now that our paints
are softening up, let's turn our attention
to our piece of paper. What we're going to
do is we are going to put some paint onto
our piece of paper. We're going to put three colors
onto this piece of paper. We're going to put
red here at the top. In the middle, we're going
to put some orange paint, and then at the bottom,
we are going to paint some yellow paint. So I'm going to start by putting my red paint
up here at the top. And as I'm painting, I'm going to make
sure that I have quite a bit of paint on my paintbrush and a
little bit of water, and I'm going to go back
and forth like this. I'm not going to go around
and up and down like this. I'm just going to go back and forth until I reach
about right here. Okay? If you don't go to the same exact spot
that I do, that's okay. Just go to roughly about here. Alright, so I feel
like I need to add a little bit more paint
onto my paint brush, and I'm just going to
go back and forth, a little bit more water and
a little bit more paint. And I'm just going to work my
way down my piece of paper. And I'm going to load that paint onto my
paint brush as needed. Remember, we want a
really strong color. So we want to use quite a bit of paint and a
little bit of water. Remember, as you're painting, we're not scrubbing really
hard on our piece of paper, because I'm not sure
if you know this, but you can actually
scratch paper. If you're not careful, you can scratch paper
with your paint brush. All right. So there we
go. There's my red. Now, I'm going to
go to orange next. I'm going to use orange next, and I want my orange paint
to run into my red paint, so I want to overlap it
a little bit. Alright? So I'm going to overlap
the orange paint with the red paint because I want it to blend in
together a little bit. Then I'm going to
do the same thing. I'm going to make sure I have a lot of paint on my paintbrush and a little bit of water and move down
to about right here. Alright, now we have
our red and our orange, and we're going to do the
same with the yellow. I'm going to overlap
here with the orange. Alright, friends, so I'm
finished painting my background. I have my red, my
orange, and my yellow, and I see that
they're starting to blend in with each
other a little bit, and that's exactly what I want. What we need to do now
is we need to allow our painting to dry completely before we
start our next step. So we're going to do that. We're going to give
it some time to dry. And when we come back, we
will start the next step, which is drawing our design onto our dried piece of paper. So I will see you back
here in the next video.
3. Step 2: Draw a Swirly Tree Design: In this step, we are
going to draw our design. So let's get started. As you can see, my paper
is completely dry. It's really important that
you allow your paper to dry completely before we
start this next step. Okay? That's super important. Once
your piece of paper is dry, then we can start drawing our design onto our
piece of paper. What we're going to do
is we are going to draw a tree on this piece of paper, and the tree is going to fill up the whole entire space, okay? So we could make a little tree, and that would be
so cute, right? But we are going to definitely
want our tree to be large, to be big on our piece of paper. Alright, so what
we're going to do first is take the cap off of our marker and put it on the back so the cap
does not get lost. And here, pretty close to the bottom of our
sheet of paper. We are going to make the ground. So we're going to make a line, and it's not going to be really straight because it is
going to be the ground. Okay, so go ahead and make
a line at the bottom. And this is going
to be the ground. And then up here, we are
going to make our tree. Alright? So to make our tree, what we're going to do is we're going to start at the bottom, and then we're going
to work our way up, and this tree is going to
have some swirly branches. And so I'm going to show
you and give you some ideas on the way that you can make your tree with the
swirly branches. As I said before, we're going to start at
the bottom of our piece of paper right below this line that we created for the ground. And we're going to go
here's the center. We're going to go
a little bit to the right. So about right here. And we're going to make
a line that curves just a little bit
and then straightens out and then goes into a swirl. Let me show you what I mean. So I'm going to start
about right here. I'm going to curve
in a little bit, come up and make a swirl. There we go. Now what
I'm going to do is I'm going to move over just a
little bit to about right here. So that's about 2 " over, and that would be
about 3 centimeters. And I'm going to make another
line similar to this one. But this is going to
either go a little bit shorter or a
little bit taller. Mine's going to go a
little bit shorter. We don't want it to be exactly like this line because trees, when you look at them, they're
not exactly symmetrical. So I'm going to come
up a little bit, go in, and then swirl around. There we go. Now what we're
going to do is we are going to build the tree off of
these two swirly lines. Okay? So you get to decide where you'd like your next
branches to be. Keep in mind these branches are going to be pretty swirly. Alright? So you can either
have your branches come out from this line right here or you can do
something like this. You can start a swirl
about right here, come down to a V, and then
create another swirl. And then when we add our paint, we are going to be
covering this part up, so this part will be attached
to this part as well. So now I'm just going to
build some more swirls. There we go. I think I'm
finished with my swirls. Actually, I might add
one more right here. I don't want the
swirls to be too close together because I am going
to add some paint to them. And if you add your swirls
too close together, then they'll all run together, and the paint will just
look like a big glob. Okay? So I think I'm
finished with this part. Alright, what I'm going
to do now is I'm going to find a spot on one of
my swirly branches, and I'm going to add either a
little owl or a little cat. So you get to decide if
you'd like to add an owl or a cat or if there's any other small animal
that you'd like to add, go ahead and draw that
animal. Alrighty. I found the perfect spot
for my small animal. It's going to be right here, and I'm just going to make the outline of a very small cat. So I'm going to make a we with two slanted
lines coming down. And a line coming across. And then I'm going
to make two lines, two curve lines coming down, and I'm also going to
make a small tail, and I'll double up that tail. So it's a little bit thicker. And I'm not going to put
any features inside of this cat because I'm going to be painting it in with
my black paint, and it's going to be a
silhouette of a cat, so we're not going to be
able to see the details. Alrighty friends,
if there's anything else that you would like
to add to your drawing, go ahead and do that now. For example, if there's
something that you'd like to put down here at the
bottom, you can do that, or if there's something
else that you'd like to add to the
branches of the tree, you can go ahead and
do that, as well. It's up to you. This is your artwork so you get
to do what you like. When we come back, we will start painting with some black paint. I will see you in
the next video.
4. Step 3: Paint the Design: In this step, we
are going to add some black paint to our design. So let's get started. The first thing that
we're going to do is we're going to add a drop or two of water into
our black paint, and then we're going
to let it sit for a moment while it
softens the paint up. That will make it
easier for us to use. Now let's turn our
attention to our design. Here we have our tree. You may or may not have
an animal in your tree, and we have the ground
down here at the bottom. What we're going to do
is we are going to use our smaller paint brush to add some black
paint to our design. And what we're going to do
is we are going to fill in down here at the bottom
with some black paint. And then the trunk of the tree, we're going to fill in
with some black paint, and we are also going to cover these branches with
black paint and then fill in some areas so everything fits
together properly. We are also going to
fill in our animal. If you have an animal, then we will fill
that in as well. So we're going to
start at the bottom, and then we're going
to work our way up. Remember to use quite a
bit of black paint on your design because we want the paint to be really,
really dark, okay? So the way to get
the darkest paint is to use a lot of the paint, as opposed to a lot of water. Alright, so I'm going to
start here at the bottom. I'm going to load my paintbrush, and I'm just going
to start painting. This is a pretty
small paintbrush, so we need to make
sure that we take our time and we
do our best work. So I'm just going to fill in
this bottom space. Mm hmm. Mm hmm. Alrighty friends.
Now I've filled in the bottom part of my artwork. I'm going to move
to the upper part. I'm going to start at the bottom of the trunk of the tree, and I'm going to move my way up, and you will notice that
I am going to cover all of these branches
with my black paint. As I am painting, I am going to hold my paint brush
more vertically. That means straight up and down. That way, I will have more
control over the brush stroke. So you'll see me doing that holding the paint brush
straight up and down. Alrighty friends, I have finished painting the
trunk of my tree, and I'm going to start painting the branches,
the swirly branches. And then after I do that, you will notice that I am
putting everything together. I'm pulling all of the
branches together with paint. All righty friends, so I'm
finished with the trunk, the ground, and the branches. However, we have areas that still need to be
connected to each other. So I'm going to work
on those areas. And also, I'm going to be looking at my branches
to see if there are any areas that I need to add a little bit more paint to to
thicken those branches up. When you think of a tree, you think of the trunk being the thickest and then the branches
closest to the trunk. That part of the branch
is a little bit thicker. And then once you get to the end of the branch,
that's pretty thin. So that's what I'm
going to be working on now is just connecting all of those branches and
then thickening up the branches in those areas. Okay? So you can go ahead
and watch me do this. M Alrighty friends. So I think I've finished covering all the areas
that I wanted to cover. I did add a little branch here because this area got
a little bit thick, but I feel like I'm really
happy with this artwork. I hope that you had a lot
of fun with this project. I had a lot of fun teaching you, and I will see you next time.
 Em Winn, Teacher, Art Instructor, Artist