Transcripts
1. Introduction and Supplies You Will Need: Hi, friends. How are you? I hope you're having
a great day today. I'm excited about sharing
this project with you. This is a drawing and
watercolor painting project that I designed,
especially for kids. Students do not need to have any drawing or
painting experience at all to be successful
with this project. I will guide students step by step through all the steps
that they need to take. Today, we are going
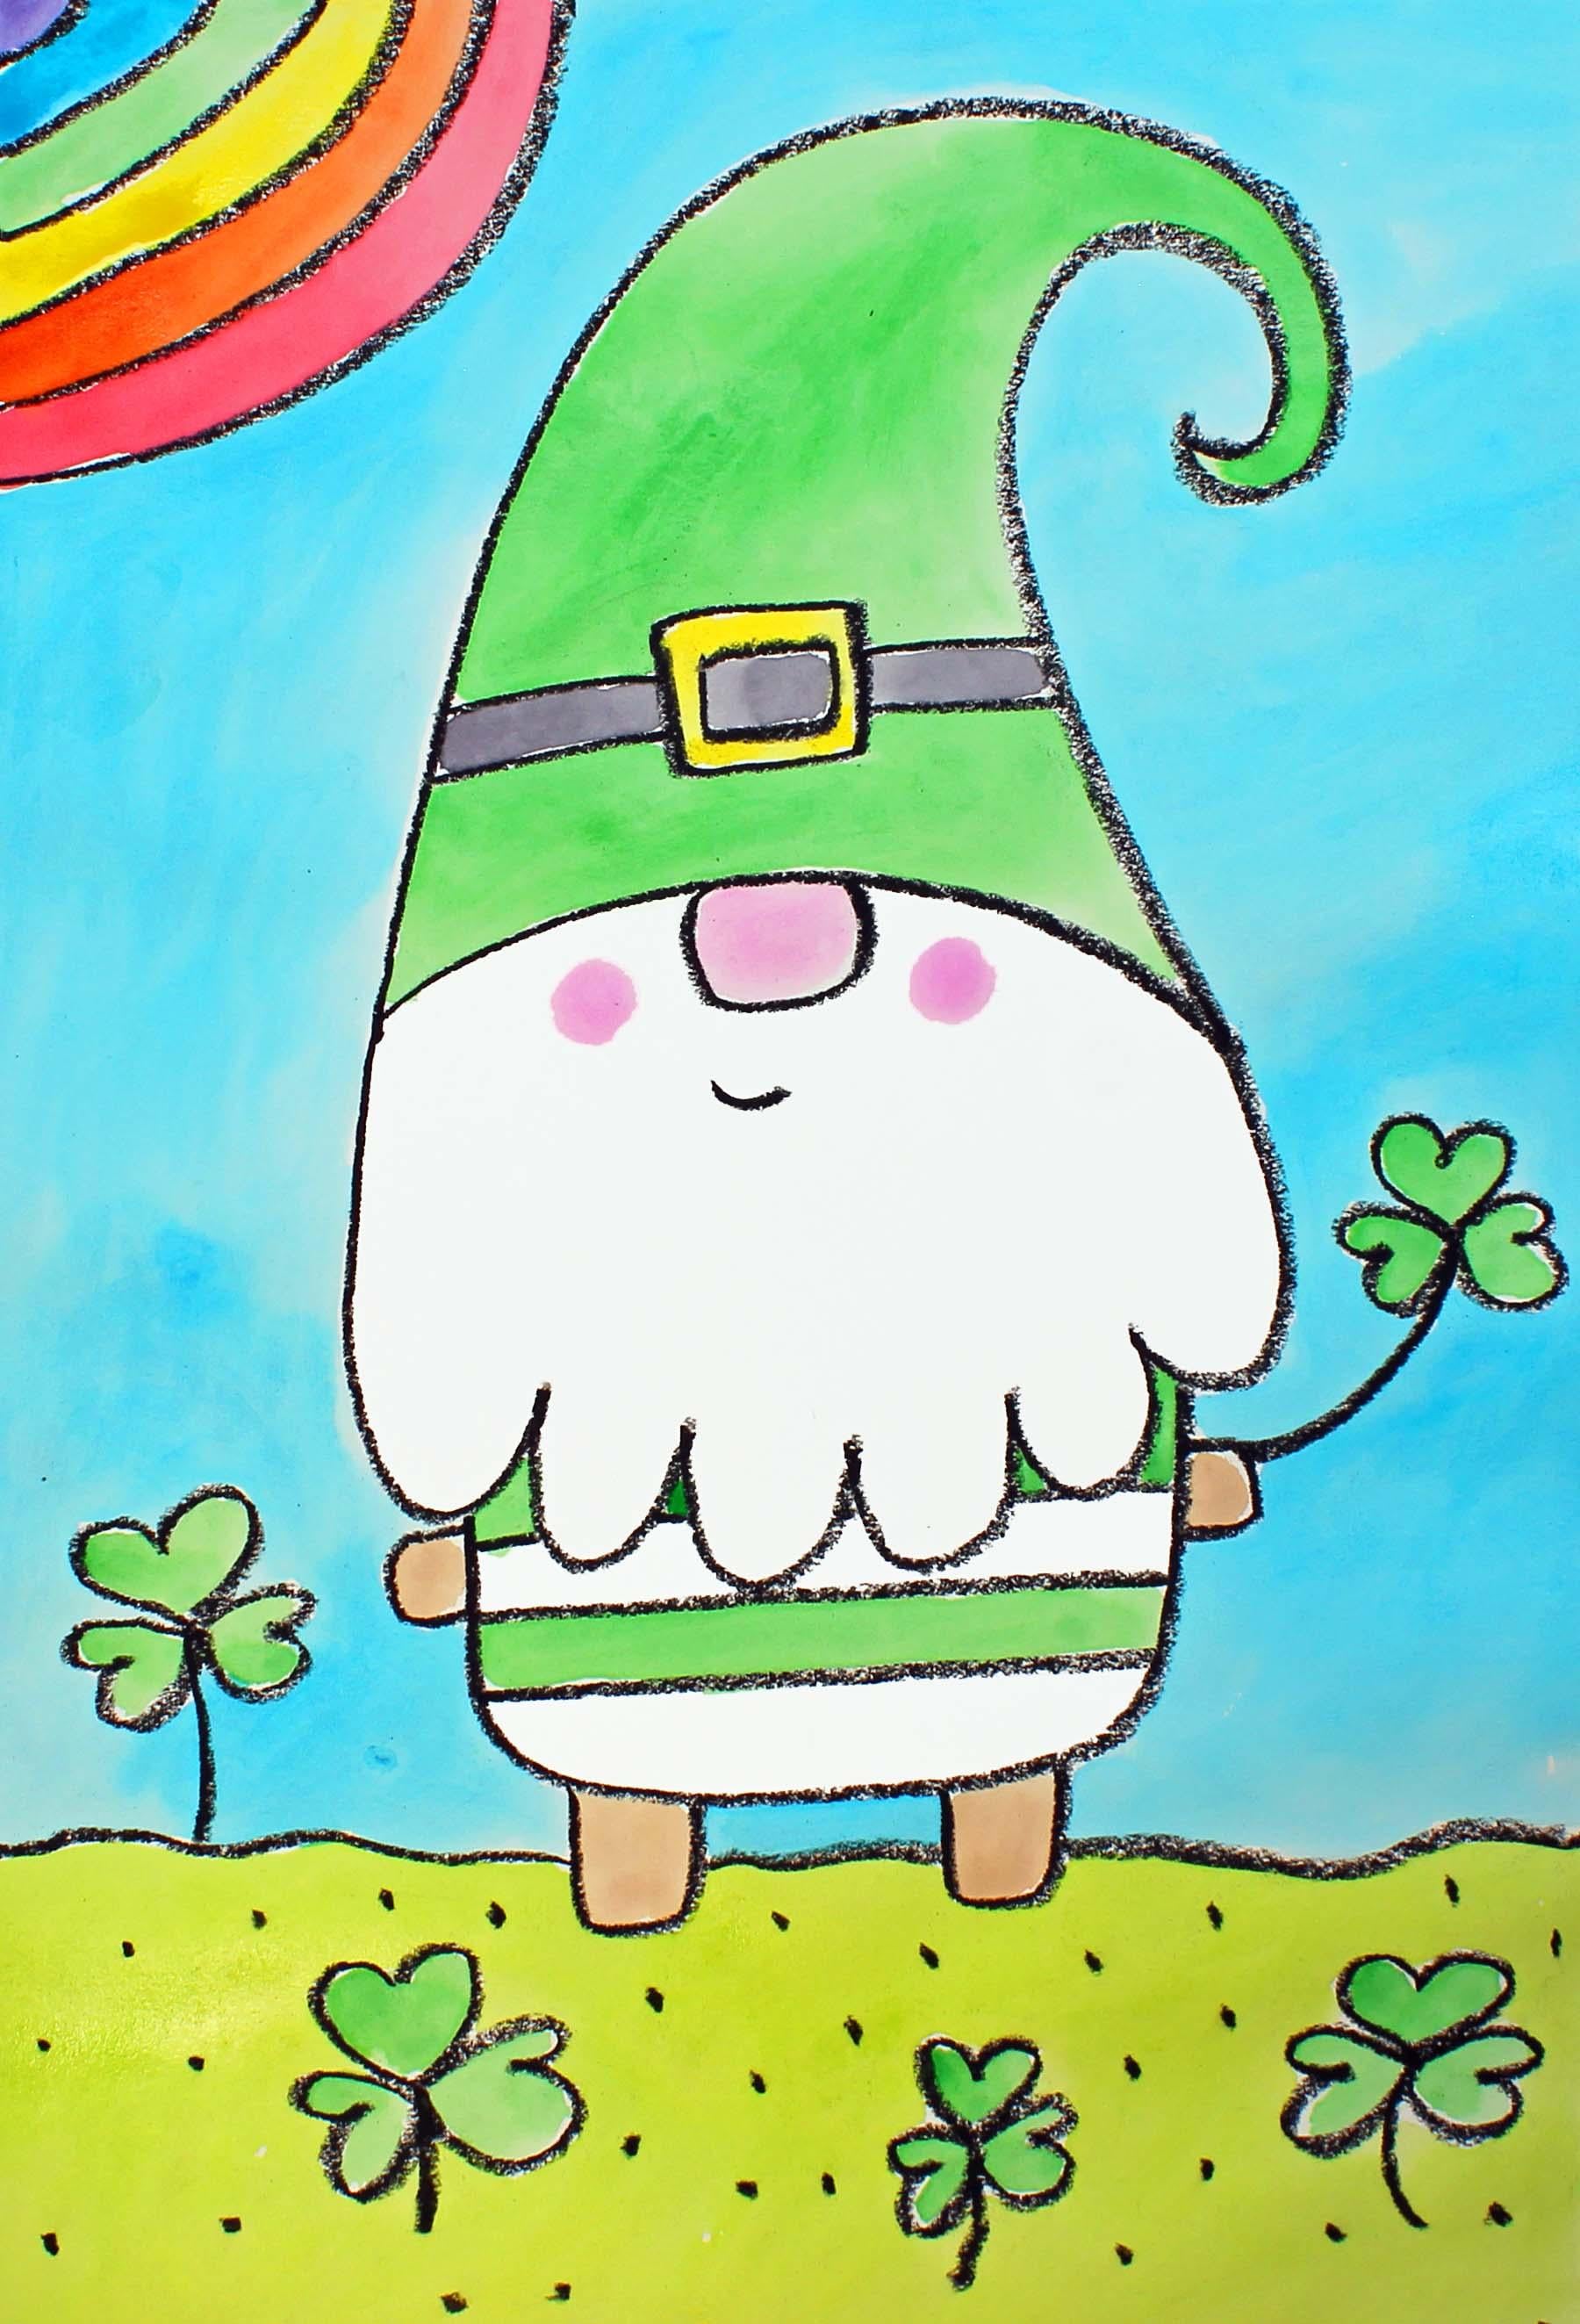
to be creating this little gnome for
St. Patrick's Day. I hope that you have a lot
of fun with this project. Let's get started. Let's talk about
the supplies and the materials that you will
need for this project. The first thing
that you'll need is a sheet of watercolor paper. You will need a set of watercolor paints
and a paintbrush. You will also need a cup or
a bowl with clean water, a black oil pastel or crayon, and a paper towel. So go ahead and gather all of those supplies and materials, and I'll see you back
here in the next video.
2. Step 1: Draw a Gnome Design: In this step, we
are going to draw a gnome with some sham rocks. So let's get started. The first thing that
we're going to do is we're going to find a middle
of our sheet of paper. The middle of my sheet of
paper is about right here. We're going to go up a
little bit from the middle. And what we're going to
do is start about right here and we're going to make
a curve line like this. This is going to be the
bottom of our Gnome's hat. Alright? So now that we have the bottom of
our gnomes hat, we're going to make
the top of it. So we're going to start here
on this side of our line. We're going to come
up and then come down with a little swirl.
Let me show you what I mean. So what we're going
to do is come up and make a little swirl
right there at the end. Now we're going to make the
other side of our gnomes hat. So we're going to
start at this end. We're going to come up
with a curve line and then swirl around and then
close up that line. Alright? Right here in
the middle of our hat, we're going to make
a small rectangle. And then surrounding
that small rectangle, we're going to add a larger
rectangle like this. This is going to be a buckle. Now we're going
to make two lines coming out from either
side of the buckle. Already, the next
thing that we're going to do is we're
going to come down here. Now, something that you
may or may not know about gnomes is sometimes you
can see their eyes, but sometimes you
can't see their eyes. Alright? So this nome, we're not going to be
able to see the eyes. We are going to be able
to see the nose, though. So let's make a nose. And then we're going
to make a beard down here because this
gnome has a big beard. So we come straight down, and then we make a series of curve lines that are
connected together right along the bottom here until you feel like
it's time to go back up and close that space. If you'd like to
add a little smile, you can go ahead and do that. But keep in mind, the eyes
are underneath the hat. Now, let's make a body
down here for our nome, and our gnome isn't very tall, so we're just going to make
a little body like this. And then if you'd like to add some details into this shape, you can maybe make some
stripes or flowers or hearts. It's completely up to you. I'm just going to make
some stripes. There we go. Now I'm going to make
some small legs and feet. They're going to be pretty tiny. And then I'm going to
make some small arms. They're not going to
have very much detail. And then I'm going
to choose which hand is holding a sham rock. I think this one right here is going to be
holding the shamrock. So I'm going to make a
shamrock right here. Let me show you how
to make a sham rock. So we start out
with a small heart. And then connected to this heart right here at
the bottom of the heart, we're going to make
another heart on the side, and then another heart this way. That's a really easy way
to make a sham rock. Now, this gnome is going to
be holding the sham rock, so I'm going to
make a little stem like this going to the hand. Okay. Now what we're going to do is we're
going to come back up to the top right here
on the left hand side, and we're going to
make a small rainbow. I don't know if we're
going to be able to fit the whole
entire rainbow there, but we're going to try, okay? So let's make a curve
line from here, going to here, but we're not going to be touching
the gnome, okay? So I'm going to curve
around like this. And then I'm going to
make some more curves, and I'm just going to keep going until I come to that corner, and then I will
know when to stop. There we go. So I don't think
I'm going to be able to fit all of the colors of my
rainbow, but that's okay. I can fit a lot
of them on there. Now we're going to come
down here to the bottom, and we're going to make
some more sham rocks. Alright, so I think I'm going to make some grass
coming along here. And then down here at the bottom and maybe
even right here, I'm going to make
a small shamrock. So we have a heart,
sideways heart, and then another sideways heart, and then a stem coming
down to the grass. And then I'm going to
put some more shamrocks down here at the
bottom, maybe one here. And then I think I'm just
going to add some dots here, and this is going to
represent the grass. Just fills up the space
a little bit more. You don't have to do this part
unless you really want to. I just think it looks
nice when I fill up that grass space. There we go. Now, if there's anything
else that you'd like to add to
your gnome design, go ahead and do that now. And then when we come
back in the next step, we will start
painting our gnome.
3. Step 2: Paint the Design: In this step, we
are going to start painting our gnome design. So let's get started. The first thing that
we're going to do is we're going to add one or two drops of water into
each of our pans of paint. And what this will do
is it will soften up our paints just a little bit so that they are
easier for us to use. So I really do encourage my students to take this
step because it helps. Now that our paints
are softening up, let's turn our attention
to our design. So here we have our little
gnome for St. Patrick's Day, and we're going to be
using a lot of green for this project because this is going to be a
shamrock gnome, okay? So the hat's going to be green, and the clothing is
going to be green, maybe white and
gold, if you'd like. And the shamrocks are going
to be green, as well. So what we're going to do is
we're just going to focus on painting the gnome
and the sham rocks. Okay, we're not going
to paint the sky or the rainbow or the
grass until the next step. Alright? Sound good.
Alright, I'm going to start painting the hat of my gnome. And I'm going to paint it green. Now that I have my
hat painted green, I'm going to go ahead and
paint the gnomes outfit green, and then the shamrocks
green as well. Alright, friends, I'm finished
painting with my green, and I think the next
color that I'm going to use is the yellow for
this buckle right here. So I'm going to use some
yellow for the buckle. And then I'm going to use a
very light pink for the nose. So I'm going to add
just a tiny bit of pink paint to some water. Oh, that's not quite enough. Okay, let's see.
There. That's better. And then I think
that I will paint some pink cheeks
about right here. And I'm going to leave the
rest of the beard white, so I'm not going to be painting that maybe a little bit
bigger on that cheek. And if I make that cheek bigger, I'm going to make this
one a little bit bigger, as well. There we go. Now I'm going to paint the
little hands and feet brown. So I'm going to
have a light brown. And then the last thing that I'm going to do is I'm
going to paint some black right here on this ribbon that's going through the buckle that's on the hat. It's going to be
very light black. So I'm adding mostly water in a little tiny bit
of black paint. And you need to be very careful when you're painting
with the black because it can spread around and muddy things up if
you're not careful. So I'm trying to be very careful when I'm
painting with my black. There we go. I think I'm
finished with this step. So we have our gnome painted and we also have our
shamrocks painted as well. When we come back
in the next step, we will start painting
the background.
4. Step 3: Paint the Background: In this step, we're going
to paint the background. So let's get started. We're going to start by
painting our rainbow, red, orange, yellow,
green, blue violet. If you do not have space for all of the colors, that's okay. Just do your best, okay? After we paint our rainbow, then we will start
painting the sky. I'm going to paint mine blue. And then the grass.
I'm going to paint mine a yellowish green. Alright? So I'm going to mix
two colors together. I'm going to mix a light
green together with a yellow. So my shamrocks stand out. Okay? So I'm going to start
here with the rainbow. I'm going to go
slowly and carefully, so I do my best work. After I finish
with my red paint, I'm going to go ahead and move
along to my orange paint. And then I'm going to move
along to my yellow and so on. If my colors mix together
a little bit, that's okay. Have you ever seen a real rainbow in real life or even a
photograph of a rainbow? It looks like the colors
mix together, right? They're touching
each other. So they blend into each other. Alrighty friends, I'm
finished painting my rainbow and my sky. Now I'm going to paint
the grass down here. Let me show you how I'm going to make a special color
for the grass. I'm going to start out with some drops of water
into one of my wells. I'm going to add
some yellow paint. And then to this yellow paint, I'm going to add
some green paint, and we'll see what kind of
color I can come up with. Mix that really well. I want it to be a
lighter shade of green than these shamrocks. Let's see how that looks. Oh, I like it a lot. Do you see how that's
a little bit lighter? I'm not sure if you can
see that on the video. Alrighty friends, I'm
finished painting my design. I had a lot of fun
teaching you this lesson. I hope that you had a
lot of fun, as well. I will see you next time.
 Em Winn, Teacher, Art Instructor, Artist