Transcripts
1. Introduction and Supplies You Will Need: Hi, friends. How are you? I hope you're having a
really great day today. I'd like to introduce
you to this project. This is a drawing and
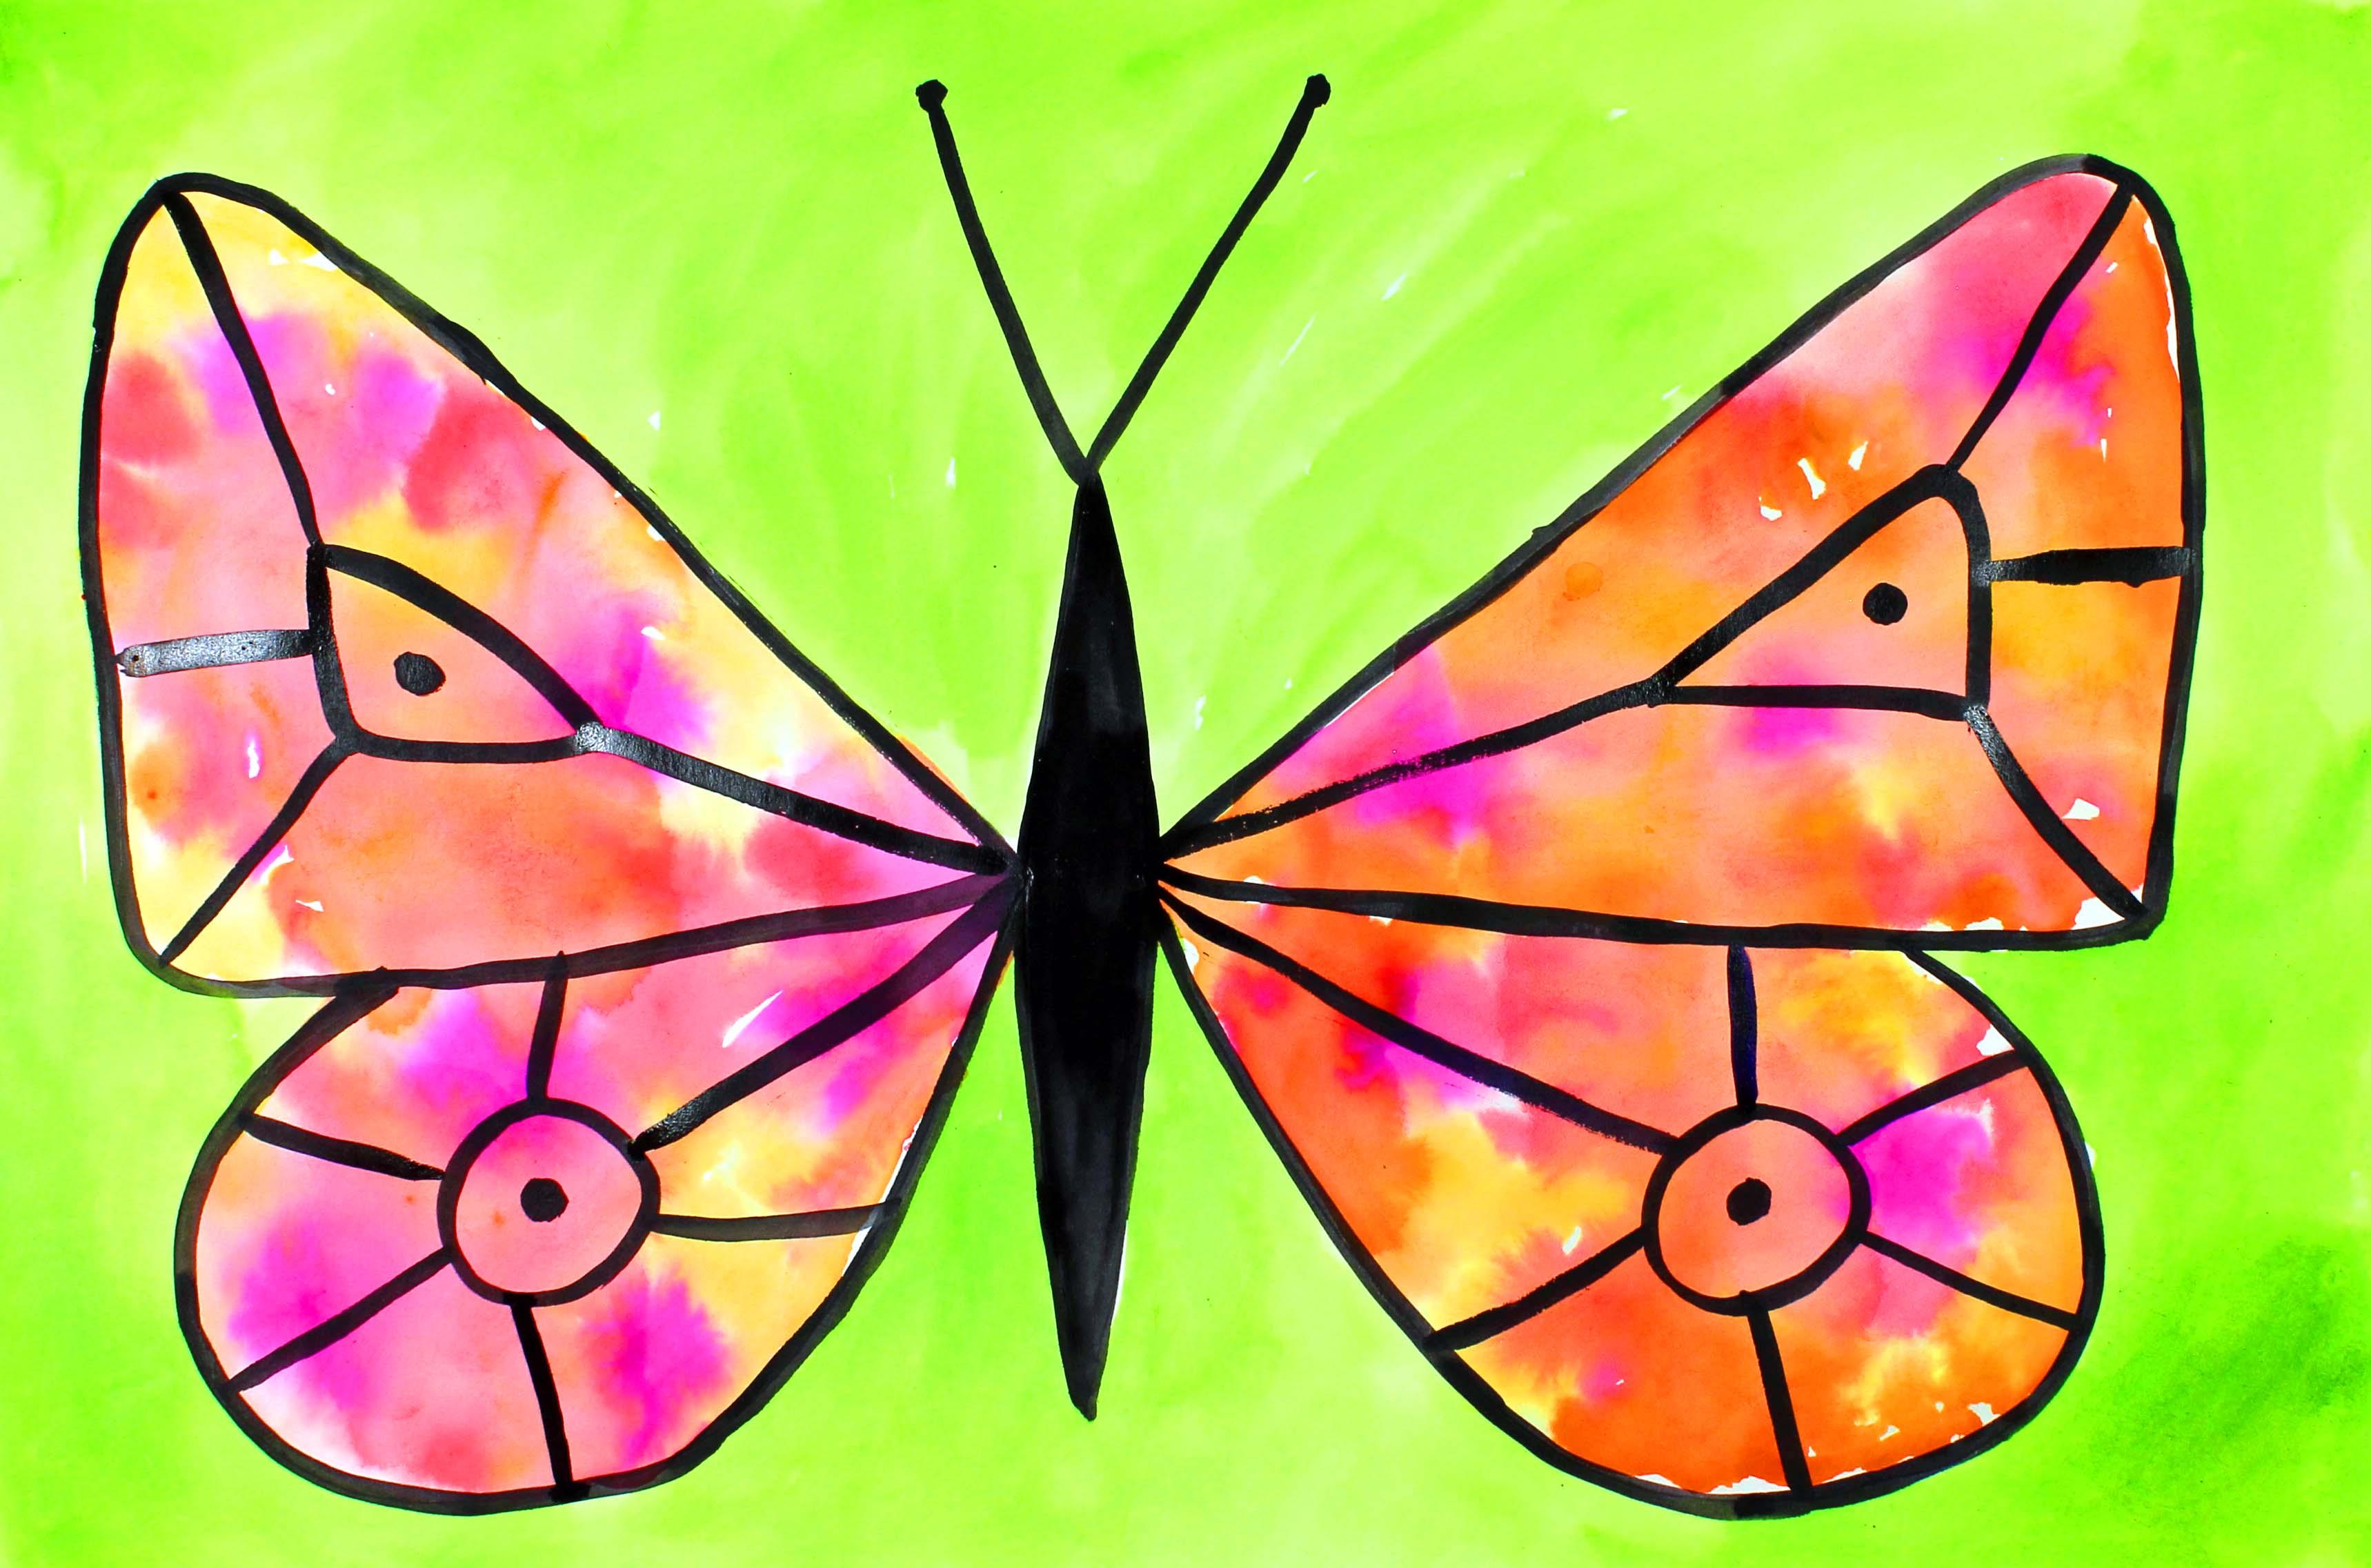
watercolor painting, a butterfly project that I
designed, especially for kids. You do not need to have any drawing or painting experience at all to be successful
with this project. I will teach you step by step all the steps that you need
to take to be successful. I'd like to go with
the supplies and materials that you will
need for this project. The first thing
that you'll need is a piece of watercolor paper. You will need some
watercolor paints. You will need a bowl or
a cup with clean water, and you will need two
different size paint brushes, one larger paintbrush, and
then one smaller paintbrush. This detail paint
brush right here is the paint brush that
we are going to use for our black outline. Then you will also need
a pencil with an eraser and a paper towel just in case you have
spills or cleanups. So go ahead and gather those
supplies and materials, and I'll see you back
here in just a minute.
2. Step 1: Draw a Butterfly: In this step, we
are going to draw our butterfly with our pencil. So let's get started. The first thing
that we're going to do is we are going to draw the body of our butterfly right here in the middle
of our piece of paper. We want to make
sure that we leave enough room for his antenna. So we're going to start maybe about four or 5 " from the top. And we're going to
make sure that we do not press really hard
with our pencil. Use a really, really light touch just in case
you need to erase. Okay? So I'm going to
start about right here. And I am going to
press a little bit darker with my pencil
so that you can see, but I would like you
to use a light touch. So we're going to use a thin
body for our butterfly, and it's going to consist
of two curved lines. So we're going to
start at a point, come down with a
slightly curved line, and then come down with
another slightly curved line. It doesn't have to be
perfectly perfect. Okay. Now we're going to
come back up to the top, and let's create im antenna. So just diagonal lines with
a little dot at the top. Now what we're going to do is
we are going to make a wing on this side and a wing
on this side, right? And we're going to find the
middle part of our body. So if this is my
body right here, I would say the middle of my
body is about right here. So I'm going to make a
little dot right there, just a tiny one that
only eye can see, but I'm letting you see it also because I'm instructing
you how to do this. So I'm going to make a dot on this side and a
dot on this side, but I want you to make
sure that you make small, small dots, kind of like a secret dot that you can
only see, only you can see. Now, from this dot, what we're going to do
is make a diagonal line up almost to the end of
your paper, but not quite. Then we're going to curve
around and come down, curve around, and close up. So it's going to be
almost like a triangle with soft corners right
here with soft angles. We're going to do the same
thing on the other side. So angle up, curve around. Come down, and then close
up where we started. Now that we have
our two top wings, we're going to make
our bottom wings. So we're going to start
about right here, maybe about two or 2.5
" in from the end, and we are going to come down, and then we're going to come
back up to that initial dot. All right. Same
thing on this side. So we go in about two or 2.5 ". That would be approximately
4 centimeters. And then we come down. And then we come back up to
that initial dot. So there is the body and
the wings of our butterfly. Alright. So what we're going
to do in the next step is we are going to apply
some watercolor paint. So I'll see you back
here in the next video.
3. Step 2: Paint the Butterfly: Alright, friends, in this step, we are going to apply
some watercolor paint to our piece of paper. What we're going to do is something a little
bit different. We are going to
get our paper wet first before we apply our paint. So we're going to use
clear water to paint inside each of our shapes inside each of our
wings of our butterfly. And we're going to use
quite a bit of water. Now, the thing about it is you might not be able to
see my water very well. You might not even be able
to see your water very well, but just do your best to cover the entire inside of each one of your wings and try not to go outside of your wing very much. This part of your project, you're going to have to
move pretty quickly. And let me tell you why. Because we want the water to be really wet on
our piece of paper. We don't want it to soak in too much because if that happens, then our paint won't
be able to run around and spread around enough. So we're going to just do
this part very, very quickly. Alright, so now I have
water on each of my wings, and I can see that this water on this wing because I
started this one first, it's starting to dry out, so I'm going to add a little
bit more water to that. So make sure you have a
lot of water on there. And then the next step
is we are going to drop some paint into our
triangles into our wings. So I'm going to choose the
warm colors which are orange, yellow, red, and
maybe even some pink. I'm just going to
apply color onto my piece of paper and notice
just a very small dot. Will create a lot of color. So I'm just going
to be doing that. And then I'd like you to
also do this, as well. I'm going to start
out with one color, and then I will move
on to another color. Righty friends, as you can see, my colors are starting to spread around and run
around with each other, and that's exactly what we want. We applied our water first, so this would happen. So this is actually
a really good thing. We're not quite sure what the watercolor paint
will do in the end. And that's the fun part about watercolor paint
because sometimes it's pretty unpredictable, and it just kind of does
what it wants to do. So make sure that
you have most of your triangles and your other bottom wings
filled with color. Make sure the edges get
color because sometimes you might forget a
little bit of color on the bottom part
like I did right here. You can just add a
little bit more color because it's important to
get all the way to the end. Alright, these need
to dry before we start our second part
of our painting. So go ahead and let those dry. So I'll see you back
here next time.
4. Step 3: Paint the Background: So now that we've allowed the paint on our
butterflies to dry, we're going to add some watercolor paint
to the background. The color that you
choose is up to you, but I would suggest maybe
a lighter color because we are going to be painting our outline of our
butterfly with black, and we really want that
black to stand out to pop. So take a look at the colors in your butterfly and then make a decision on the
background color, keeping in mind that we
are going to outline with black as soon as
the background dries. So I think I'm going to
choose green because I think that it would go really
great with these colors, and I'm just going to start painting with my
larger paint brush. I'm going to start
painting the background, and I'm going to be very careful
not to get my paint onto the space that's
already painted or onto the body of my butterfly. So I'm going to go
ahead and do that. And I'm just going to speed up this video so you can watch me, and I'll be back here
in just a minute. Alrighty friends, I'm finished
painting the background, and I'm going to want
it to dry a little bit because when I apply my black watercolor
paint to the outline, I want to make sure that
that doesn't spread around. So if you can make sure that your background is pretty dry, that will work the best. So I will see you
in the next video.
5. Step 4: Add Outline & Details: And now that our background
is finished drying, what we're going to do
is we are going to apply some black paint onto our pencil lines to create an
outline for our butterfly. So let's go ahead and do that. So I'm going to use my
smaller paintbrush. Your paintbrush
needs to be pretty small if you'd like
to have a thin line. If you'd like to
have a thicker line, you can use a larger paintbrush. One thing that I'd
like you to keep in mind when you're using
your paintbrush, make sure that you use your paint brush going straight up and down
vertically like this. That will create a thinner line. So I'm going to be using my water and also
some black paint. My black paint is right here. I'm just going to dip
just a little bit of paint onto my paintbrush, and I'm going to start by
painting my body first. And I'm trying to go slowly and carefully
right on the pencil line. And if I feel like I'm
running out of paint, I go ahead and I dip my
paint brush into the paint. Again, I load more paint
onto my paintbrush. So I'm going to try to
go slow and carefully. And I'm going to take my time in covering all of my pencil
lines with the black paint. But it will look like
I'm going pretty fast because I'm going
to speed up this video. So you can watch me, and then we will get started on the second part of
what we're going to be doing with our black
paint in just a moment. So I'll see you back
here in just a minute. Alrighty, friends, now that I'm finished with my
outline of my pencils, I'm going to go ahead and fill
in this space right here, the body part of my butterfly. H Alright, friends, now that I have my
body filled out in black, I'm going to start creating
some designs within my wings. And I think I'm going to make some designs similar to
a monarch butterfly. But if you would want to make any other designs, go
ahead and do that. So keep in mind, when you are
creating butterfly designs, you need to make sure that
they are symmetrical, meaning that one side is
the same as the other side. So if you put a
circle on this side, then you need to put a circle on this side. Let me
show you what I mean. So I'm going to start
here with a circle, and I'm going to make
sure that I have my paint brush held
straight up and down. That way, my line is
a little bit thinner. So I have my circle here, and I want to make sure that I make a circle over
here on this side. Now, it's okay if your
circle is a little bit bigger or a little bit smaller
than your other circle. Don't worry about that too much. I'm going to put a.in here. And so that means
I need to put a.in here because they
are symmetrical. These two wings are symmetrical. Now, if I want to bring
some lines coming out from this circle, then I need to make sure that they're similar, that
they're symmetrical. So I'm going to go
ahead and work on some lines to design
my butterfly wings. And remember, your
butterfly wings are probably going to look
completely different from mine. And that's a good thing. It's good when we all
have different artwork. Alrighty friends, I'm
finished with my design, and I'm really happy with it. I tried to stay as
symmetrical as possible. Is it completely symmetrical? No, it's not because
I'm a human being, so some of my lines are going to be a little
bit different, but I did try my best, and that's the important thing. So I hope that you
enjoyed this lesson. I will see you next time. O.
 Em Winn, Teacher, Art Instructor, Artist