Transcripts
1. Introduction and Supplies You Will Need: Hi, friends. How are you? I hope you're having
a great day today. I'd like to introduce
you to this project. This is a drawing and
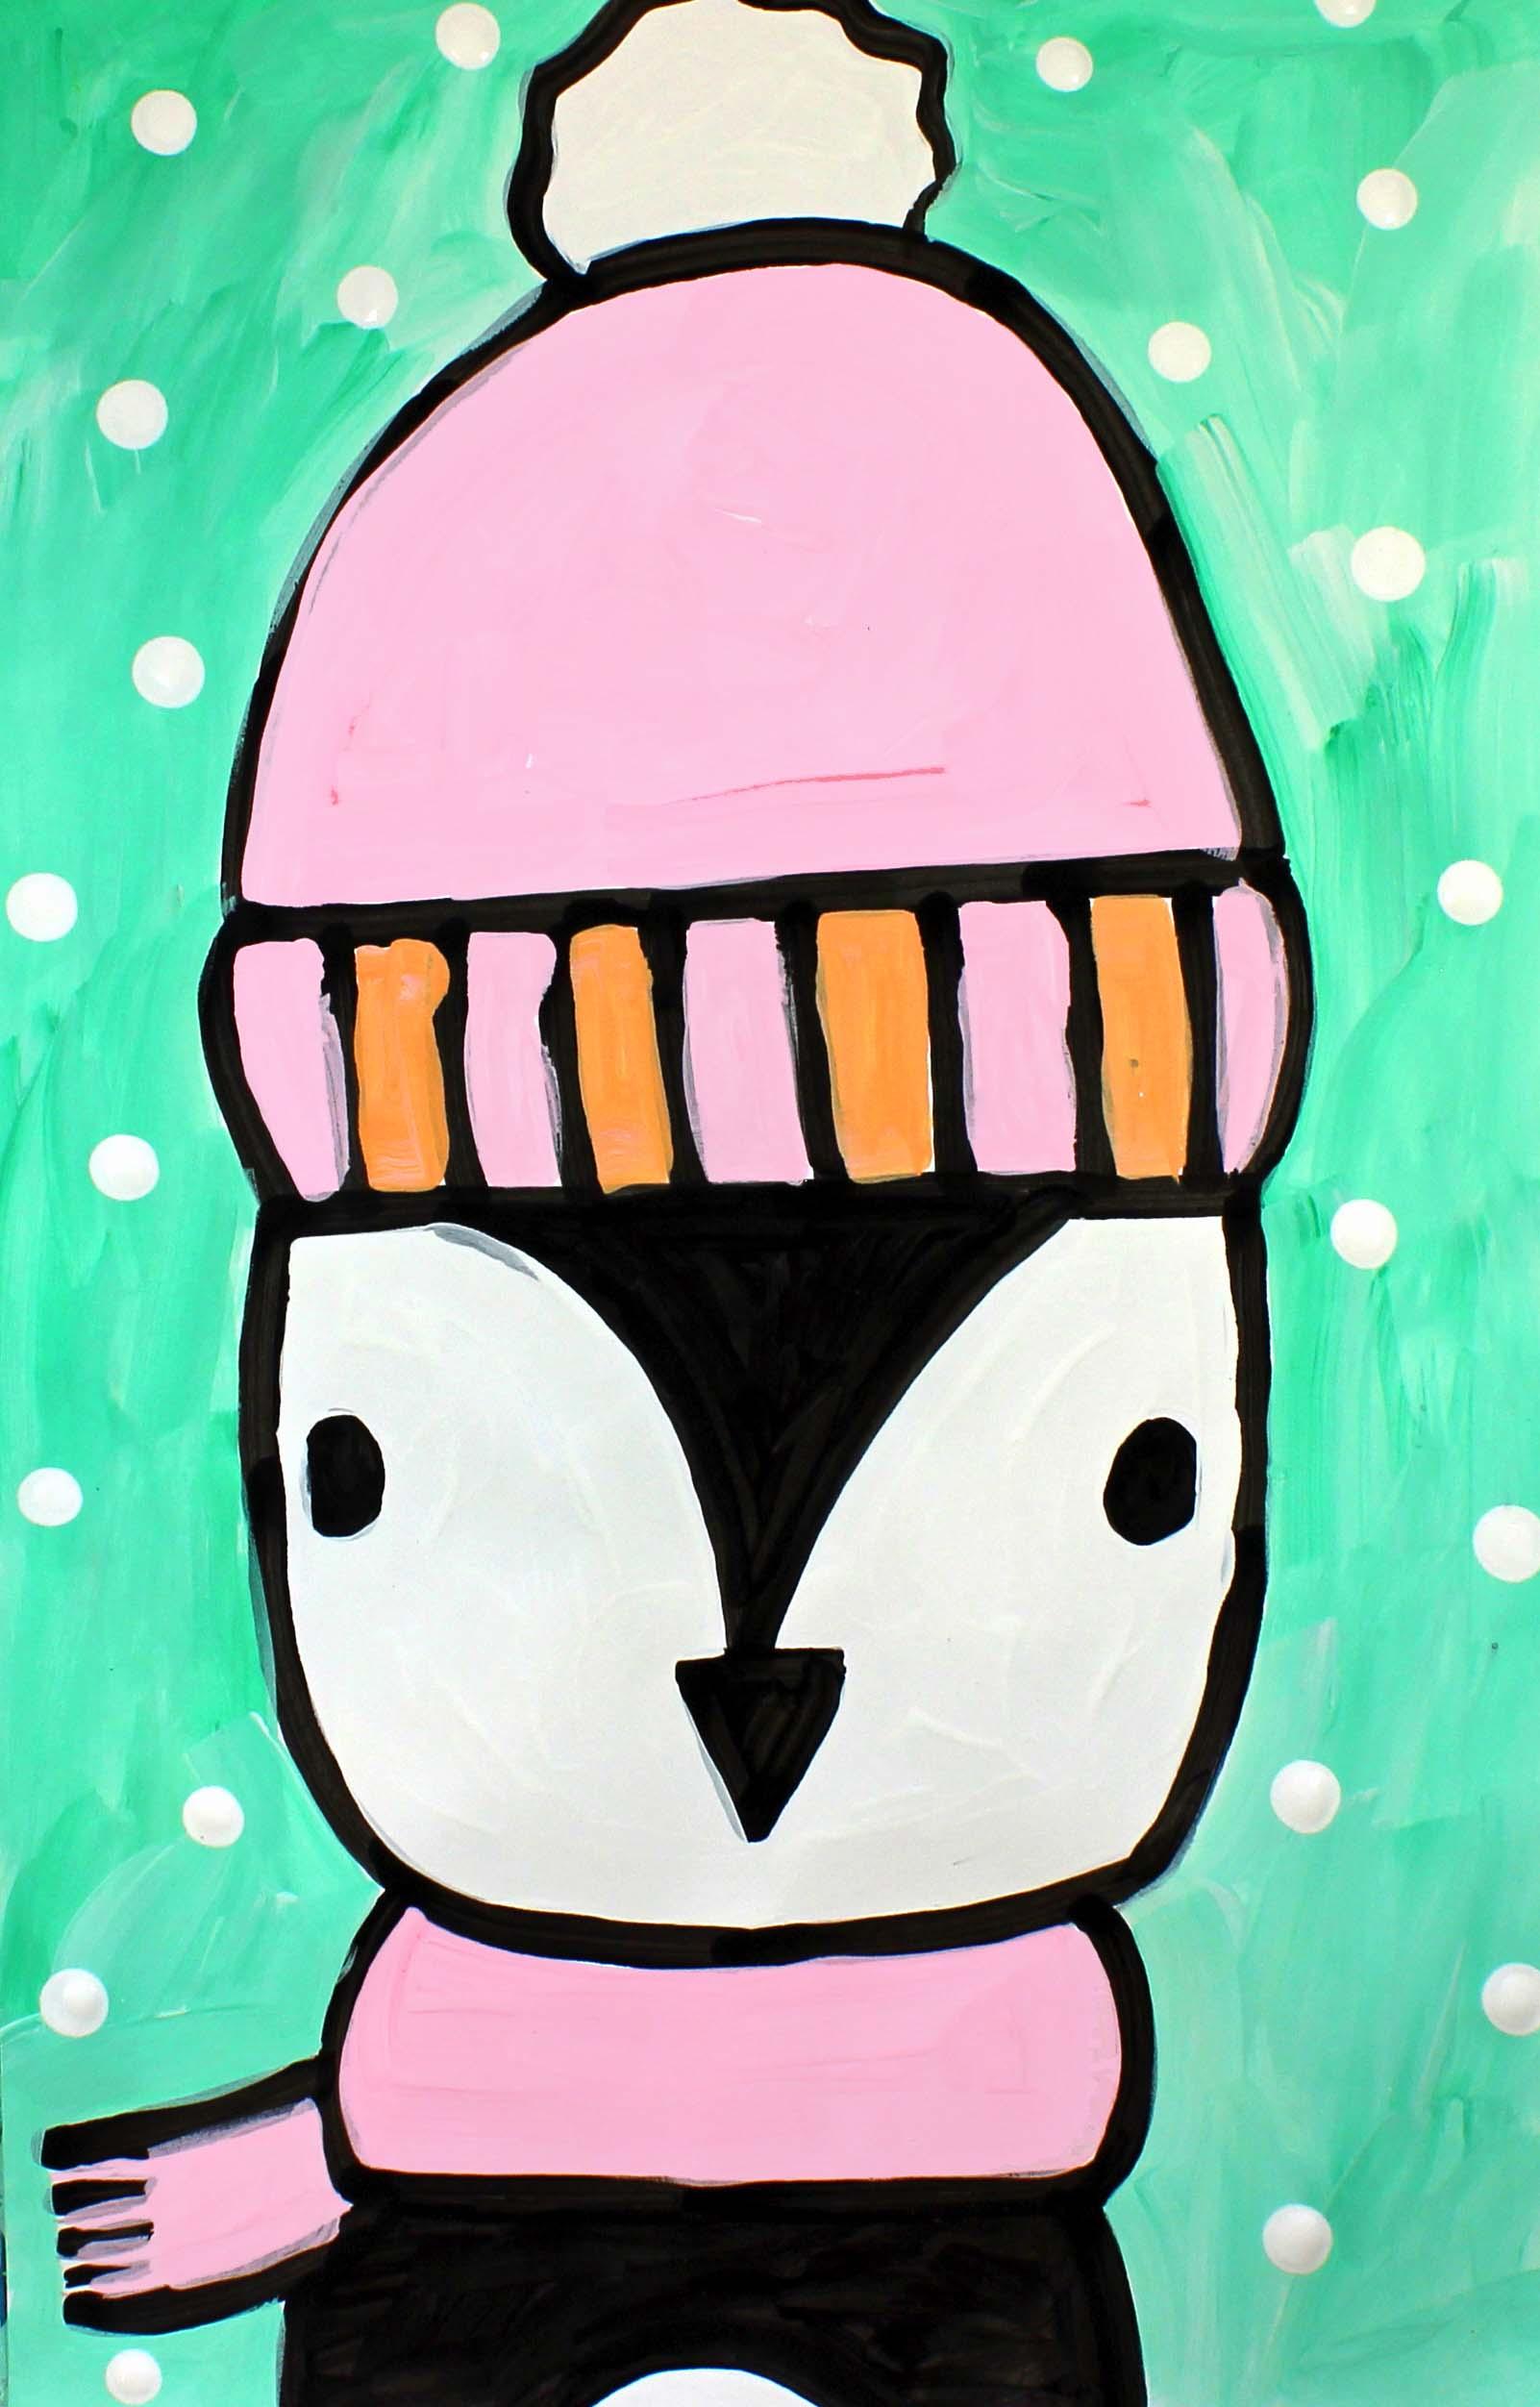
painting project, and we are going to be creating this cute penguin with
a hat and a scarf. So I hope that you have fun. Let's get started. Let's talk about the supplies and the materials that you will
need for this project. The first thing
that you'll need is a piece of thick white paper. You will need some paints. I'm going to be using
some tempera paints. And if you don't have
tempera paints, that's okay. You can use either
acrylic paints or poster paints, as well. The colors that I'm
going to use are green, red, orange, white and black. You do not have to
use these colors. Just use what you have
available to you. You will need a couple of
different size paintbrushes. I'm using a flat
medium paintbrush and a small flat brush. And I like to use the
larger paint brush for the larger areas and the smaller paint brush for the smaller areas
plus the outline. You will also need a
pencil with an eraser. You will need a paper
towel because we will not be using water today a paper
towels really important, and you will need some
sort of a palette. I just like to use a small paper plate to put my paints on. So go ahead and gather all of those supplies
and materials, and I'll see you back
here in the next video.
2. Step 1: Draw a Penguin Design: In this step, we are going to draw our penguin
with our pencil. So let's get started. The first thing that we
need to think about is how large our penguin
is going to be. Keep in mind, we are going to be making a large
penguin this time. Little penguins are so cute, but we want to make sure that this penguin can be
seen across the room. Alright? So pick up your pencil and find the
middle of your piece of paper, and we're going to
make a straight line. Now we're going to go a
little bit above that line, maybe about two or 3 ". That would be about
four or so centimeters and make another straight line. It's okay if it's not perfect. Now we're going to
make a curve line coming down and connecting
those two first lines. Now we're going to come
back up here to the top, and we're going to make a
curve line that goes from this line to this line, okay? So we're going to
make a curve line. It's kind of like an
upside down letter U, and come down and then
touch right here. It's kind of like the corner
between these two lines. Now, if you'd like
to make one of those poof balls at the top, you can go ahead and do that. I think I'm going to do that. Little pompoms. If you want to make it to the side, you can
do that, as well, or the other side,
or you don't have to have a pompom on yours
at all. It's up to you. This is your artwork.
So now we're going to decorate this little
part of our hat. And I'm just going
to make some lines. If there's something
else that you'd like to decorate your hat with.
Go ahead and do that. The only thing that I'm
going to ask you to do is keep in mind that we are going to be adding some of
this paint to the project, so we need to make sure that
we don't get too detailed. For example, if you made
a tiny little star, then when we add some
paint onto the star, it's just going to get all
covered up with the paint. So you have to
keep that in mind. We're just making big
designs on this project. The next thing that we're
going to do is we are going to make our penguins face. So we start here at the corner. We're going to make a U, and then we're going to come
up to this little corner, okay? So we come down. Come around and then
we come back up. Mine's more of a squarish
U at the bottom. Yours might be a
little bit rounder, but whatever U that you
come up with is great because it's okay to have a
different penguin than mine, and that's actually
a good thing. Okay, now let's focus
on our penguins face. So we're going to have
some eyes, some oval eyes. Their eyes aren't that big compared to their
head and their face. And these are going to be
filled in with black paint. Okay? So if you want
to fill them in, so you can remember, let's put a little
shine mark there. Little curve line shine mark. That'll remind you
to paint those in. And then we're going to put
a little beak down here, a little upside down triangle. And then what we're
going to do to add a little bit more
penguin detail to our drawing is
we're going to make two curve lines that come down and meet in the
middle of his nose, in the middle of his beak. So let me show you what I mean. So I go in a little bit, and I touch the hat, and I come down
with a curve line, and then I do the same
thing on the other side. That. And that will add just
a little bit more detail. This part will be black right here so that we can see
that it is a penguin. Now, let's put a little scarf
down here at the bottom. And if you don't
have that much room for your scarf, that's okay. I have some space for my scarf. I might not have enough space to put his little
tummy down here, but I will have
enough for a scarf. So everyone's artwork
is different. Just keep that in mind. So what we're going to do
is we're going to have a curve line and a curve line. And then we are going to connect those curve lines
like this. Okay? That's going to be the scarf. And coming out from the side of the scarf, just on one side, we are going to have a
little fringe right here. That's kind of like
the end of the scarf. Now, I do have a little
bit of space here, so I'm going to come down
with a line because this is going to be the
body of my penguin. So you can't see that much
of his body down here. Maybe I'll just make
this part right here. This is just a curve line that's just part of
his tummy right here. I'm not sure if you can
see that on the video. When we come back
in the next step, we will be covering our
lines with our black paint. I'll see you back here
in the next video.
3. Step 2: Outline the Design with Black Paint: In this step, we are going to outline our drawing
with our black paint. So let's get started. What we're going to
do is we're going to start at the top of
our piece of paper, and notice I don't have that
much paint on my palette. I have just about a
quarter size paint. And the reason why is
because you don't really need a lot of paint for
this part of our project. So let's load our paint brush, and we're going to go
slowly and carefully, and we're just going
to cover all of our pencil lines with
our black paint. And if we run out of our
black paint, we just reload. Alright? The reason why we're starting at the top
of the piece of paper, which is what I usually suggest is because if
you start, let's say, here on the nose,
then you might, by accident, put your
hand into your paint. So I like to start at the top, and I go slowly and carefully,
so I do my best work. And I'm going to be sure to
cover all of my pencil lines. And if I get a little bit
off track, no problem. I just get right back on track. Alright? So what I'm going to do is speed up this
video a little. So you can watch me, and then I will see you
after I'm all finished. We do Alrighty friends, I'm finished
outlining my penguin. I also filled in with
the black paint, the eyes, the nose, this area right
here on the face, and then this body area except for the little part that
is going to be his tummy. That's I'm going to
keep that white. So now what we're going to
do is we are going to allow our painting to dry completely before we start
on our next step, which will be
painting our design. So I will see you back here after your painting
is completely dry.
4. Step 3: Paint the Design: In this step, we are going to apply some paint to our penguin. You'll want to make sure
that your black outline is completely dry before
you begin this step. The colors that I'm going to use are white for the penguin, and then I'm going
to use some orange, red and green for
the background. You can use whatever
colors you like, but those are the colors
that I'm going to choose. What we're going to
do first is we're going to use our lightest color, which is going to be white, and we are going to load our
paint brush with our white, and we are just going to start painting our penguins face. And as you can see,
we're not going to be able to see the white
very much, and that's okay. But it's nice because the
space is a little bit larger. It's nice to have that white paint on our
white piece of paper. It just gives a little bit
more of a finished look. If you get a little bit of white on your
black, that's okay. I wiped mine off with my finger. But if you have a little bit of white that goes onto your black, don't worry about it too much. That happens to me all the time. So let me take a
moment to do that. Now that I finish
painting the face and the little white patch
on my penguin's tummy, I'm going to move on to the hat. I'm going to paint the hat, a combination of
pink and orange. And to make pink,
I'm going to use a combination of red and white. So I'm going to take
a little bit of red, and I'm going to put it in the side on the
side of my white, and that will make a light pink. So I want my pink
to be pretty light. I'll pull some of that white
into my little spot of red, and there's my pink. Okay? So I'm going to go ahead and I'm going to
paint this pink. And then these
stripes down here, I'm going to paint pink as well. And then the scarf, I'm not sure if
I'm going to paint that orange or pink I
haven't decided yet. Alrighty friends,
I'm finished with the base part of my
hat and my scarf. I decided to paint
those mostly pink. And what I'm going to do
is I'm going to leave this pompom at the
top of the hat white. I'm going to paint that white. I was going to paint it orange, but then I thought, Oh,
it will look cute, white. So I'm going to take
my smaller paint brush because it works it'll work
better in a smaller space, and then I'm going
to paint that white. So let me take a
moment to do that. Alrighty. Now what I'm going
to do is I am going to clear my paint brushes of
paint as much as I can. So I'm going to wipe my
paint off on my paper towel. And the reason why I'm using my paper towels
because we're not going to be using water today. And we're just going to
get as much off as we can. If we don't get all our paint
off of our paint brushes, that's okay. No problem. So what we're going
to do when we return is we are going to apply some green and white paint
onto the background. So I'll see you back
here in the next video.
5. Step 4: Paint the Background: In this step, we are going to apply some paint
onto our background, and I'm going to use a
combination of green and white. And I like that minty
type green color for the background on this one. You may have
different colors that you're going to be
using, and that's fine. This is your artwork, so you get to use the colors
that you choose. So I'm going to get
started on that. I'm just going to load my paint brush with my
white and with my green. And I'm just going
to get started, and I'm not going
to worry too much about if the colors don't
mix together completely, that's alright with
me, but I am going to try not to go too much
on my black lines. If I get a little bit
on my black lines, that's okay. No problem. But I'm going to try to not go too much
on my black lines. All righty, friends, I'm
finished with this step. And in the next step, what we're going to
do is we are going to add some snowflakes
to our design. So I'll see you back
here in the next video.
6. Step 5: Paint Snowflakes: In this step, we are going to add some snowflakes
to our design. So let's get started. I had to add a little
bit more white paint to my palette because I ran
out of my white paint. So I'm going to
choose one finger to make my snowflakes with. I'm going to touch my
paint with my finger, and then I'm just going to place it onto my piece of paper. And I'm going to spread out my snowflakes so they're
not in a straight line. And I am just going to
continue doing this, spreading those snowflakes out. Notice how I dip my
finger into my paint, and then I put it
onto my piece of paper over and over and
over and over again. So I'm going to do that
to the whole background. Alrighty friends, I'm
finished painting my snowflakes onto my
background with my finger. Now what I'm going
to do is I'm going to wipe the paint
off of my finger, onto my paper towel. If some of it doesn't
come off, that's okay. Just get the majority of it off, so it doesn't get
onto your clothing or onto any furniture or rugs. So I hope that you
enjoyed this project. I had a lot of fun teaching you, and I will see you
next time. And
 Em Winn, Teacher, Art Instructor, Artist