Transcripts
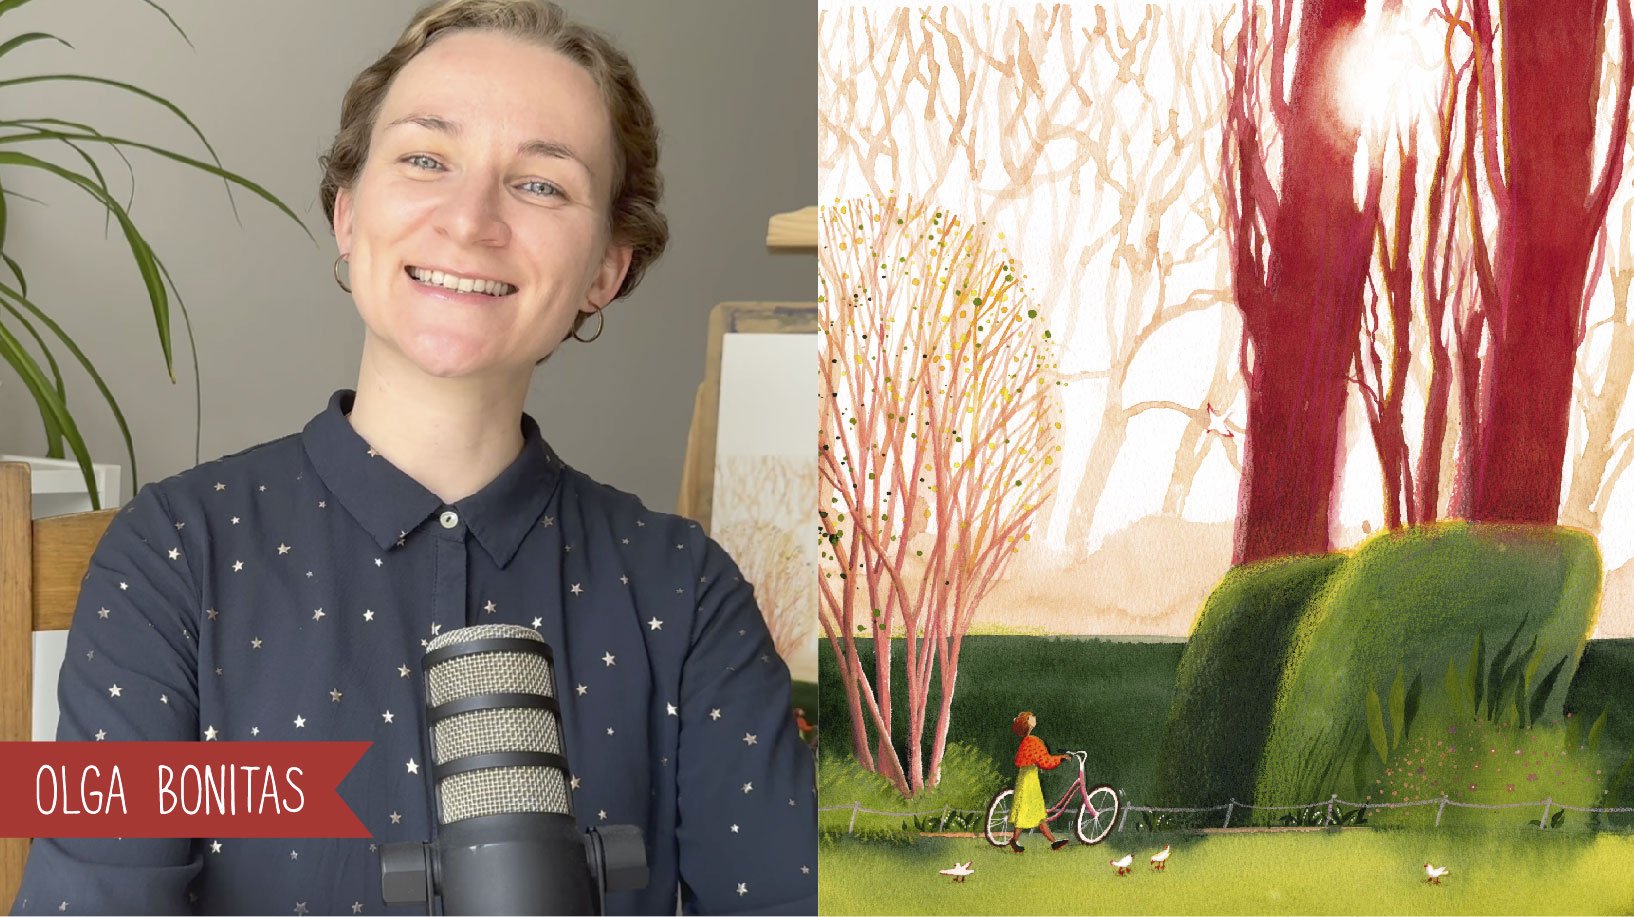
1. Intro: Hey, I'm Olgo Banits, and in this class, I invite you to draw food, reflect on your family recipes, and capture them in
your art journal. Every Sunday, I make pancakes. It's our family tradition. My granny shared
her recipe with me, and though I've adapted
it over the years, I still follow her advice. No, I won't be teaching
you how to make pancakes. Instead, I'll show
you creative ways to document your own meaningful recipes
in your sketchbook. Turning them into
visual stories because some recipes are more than
just instruction for cooking. They hold memories, traditions, and the warmth of
special moments. I've prepared three
different ideas for you to choose from
for your class project. They are simple and
relaxed because this isn't about creating
a perfect piece of art. It's about capturing something
personal and meaningful. So any skill level is okay. Welcome to my kitchen in
every sense of this word. And let's get started.
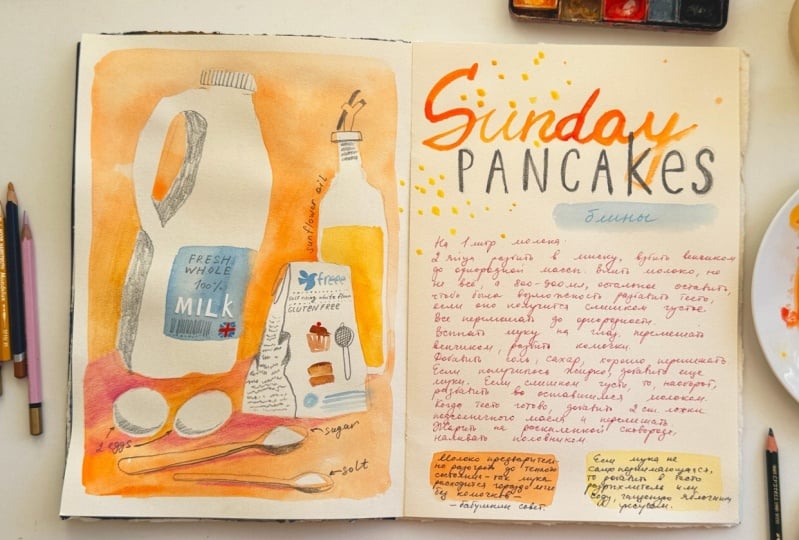
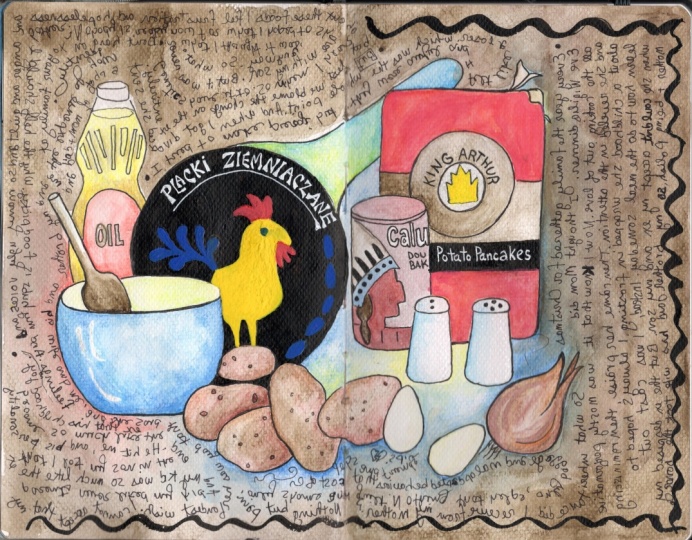
2. Idea 1: Ingredients & Recipe: Okay, I suggest we start
with something simple. Drawing the ingredients
for your favorite dish. I have a blank spread
in front of me. On the left side, I want to illustrate
all the ingredients, and on the right, I'll
write the recipe itself. First, I'll lightly sketch the layout with a pencil
to plan the composition. Here are my ingredients. They all happen to be white that wasn't intentional,
just a coincidence. So I think adding a
background will help them stand out while keeping the ingredients itself white. I'm sketching the basic outlines very loosely without
too much detail. It's milk, flour. A bottle of oil. Two eggs. For the salt and sugar, I'll just draw them in spots. That's enough for
the initial sketch. Let's move on to the color. I'll start with my
favorite brush and wet my watercolors to make them
easier to work with. Mm hmm. Now I'm painting the
background freely, leaving the ingredient
shapes untouched, so they remain white. The key here is not to
get lost in details. That's why I'm
using a big brush. By the way, even though I'm
working with watercolor, you can use any medium you like. Here is an example, a sketch
I made a few years ago, while traveling in Spain, I used my iPad and procreate to capture
my grocery shopping, even noting down the prices. With art journaling, the most important thing is to find a way to draw that feels natural
and enjoyable to you. The process matters
more than perfection. It's about capturing
meaning emotions and memories rather than
achieving a polished result. So if something doesn't go
as planned, don't worry, let it be and give
your inner critic a break and just
enjoy the experience. Now that my background is done, I want to add a touch
of color inside the oil bottle while
keeping its itches clear. I'll also give the milk
bottle a blue label. Here is something interesting. Ingredients, products, your usual stuff
that seem ordinary today might bring back strong
emotions years from now. They might even
make you nostalgic. That's the beauty of
documenting your everyday life. In the moment, it feels
like just another routine. But one day you look
back at your sketch with warmth and will be grateful
to yourself for depicting it. When drawing ingredients,
you don't have to copy every detail from
the labels or packaging, include only the elements
that matter to you. Maybe something that fits the color scheme or
carries personal meaning. For example, I love the little bird on
this flower package, so I'm keeping it in my sketch, but everything else will
be very simplified. Here is a cupcake
with a cherry on top, and this is a slice of cake. Okay, that's all for
the watercolor part. Let's let it dry and move
on to details with pencils. On the other page,
I'll write the title, the name of my dish. If you prefer more control, sketch it out with
a pencil first or if you like a more
spontaneous fill, go straight in with paint. There are no rules only
what feels right to you. Now I'm taking a soft
graphite pencil. This one is a six
B to add details. Here is the flower package. Since it's already
open and used, I'll add some folds
to show that. I'll put some text
here, not actual words, just marks to create the
illusion of writing. That helps separate different
sites of the packaging. Now let's work on the milk
bottle, adding small details. For the cap, notice how I
don't outline it completely. Just a few lines enough
to define its shape. I like how the handle looks, but this place needs
a little more depth. Should I shade it? I don't know. Mm. Yes, but very lightly. Mm hmm. I think that works. Next, the label, I cut out some letters
from paper to make the word milk stand out
with strong contrasts. To avoid smuggling
my pencil lines, I'm placing a piece of
paper over my drawing. Soft graphite can easily small. Now I need to add just a few
final touches to this page, small details and ingredient
labels where needed. I'm explaining each step
because I think you might find these ideas useful when
treating your own recipes. Watercolor washers combined with colored pencils always
work beautifully together. That's it. I'll consider
this page finished. Now I'll complete the title
and write down the recipe. Here, I'll add a
little painted stripe to write down the Russian
name of this dish. We call it Bleni. Oops, I accidentally
smuggled some graphite here. It could be easily erased
with a soft eraser, but to prevent this
in the future, I recommend fixing the graphite. I just use regular
hair spray for that. Now I'll write the recipe. I'm writing it in
Russian I can't imagine my granny's pancake recipe in any other languages
in my sketchbook. But if you are curious, I'll include the recipe in
English in my class project. I've also left space to
write down my granos secret tips like warming
the milk beforehand, mixing to help the flour mix
smoothly and prevent lumps. And here is the final result, light, effortless,
and enjoyable. Some decorative touches
will work well, I believe. Mm hmm. Okay, I'm happy
with how it looks. And the next lesson, Illustrate
the cooking process.
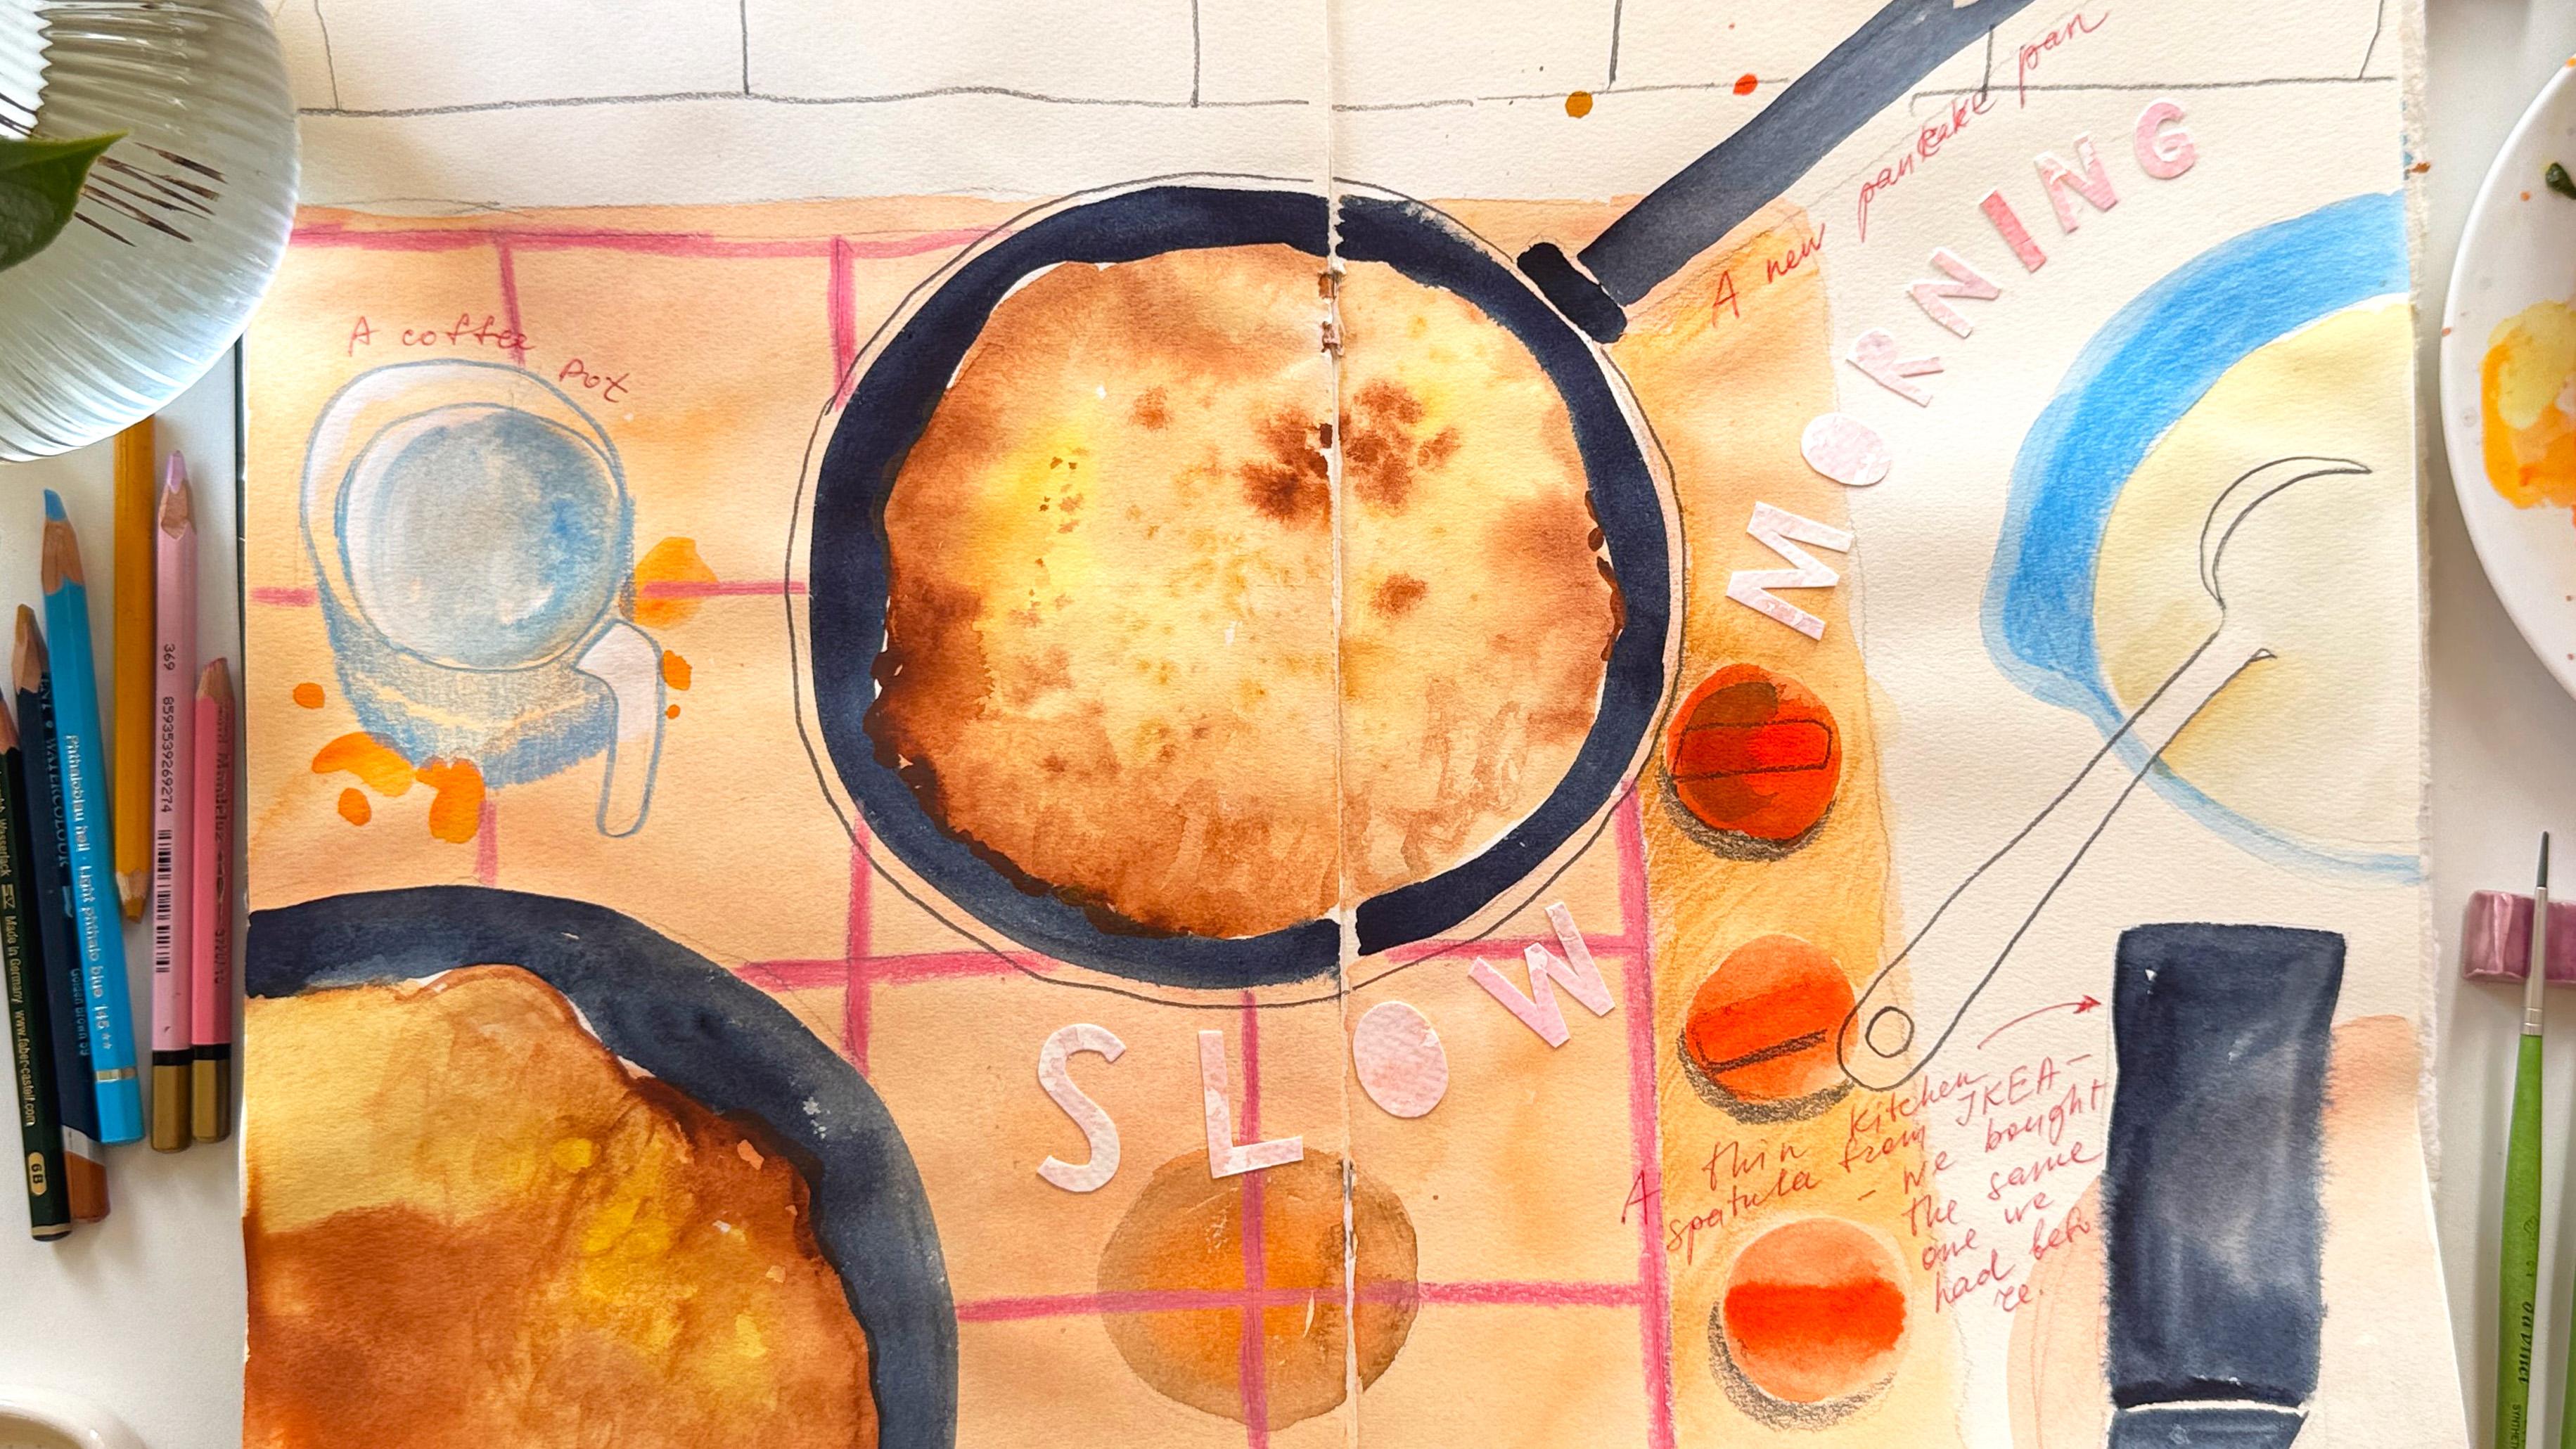
3. Idea 2: Cooking Process: Now let's move on
to the next spread. This time, I want to capture
the cooking process. I make pancakes using
two frying pans. One will go here, and over here, I'll
place a coffee pot. This is how it
looks in real life, two pans on the stove. Of course, your
stuff is different. Maybe you are baking
something in the oven. So illustrate how
cozy that looks, or perhaps you want to capture the preparation chopped
vegetables, butter bean mixed. What moment feels the
most beautiful to you? The most interesting,
most important? Okay, I'll start with
the light sketch, the outline of the stuff. I really see the
value in drawing ordinary everyday things because they are such a big
part of our lives. Over time, things will change. You might renovate your kitchen, replace your cookware
move to a new home. You daily routine
will look different. This practice helps you notice
life as it is right now. We are always in rush and our journaling is
a way to slow down, pause, breathe, and reflect. Here is one frying pan. And this is the handle. Mm hmm. Here is an empty burner. And here is the second pan. We can only see half
of it from this angle. The coffee pot goes here. I'm keeping
everything simple and sketching while looking
at my reference photo. Mm hmm. Over here, I'll add a mixing
bowl with butter. And next to it, a
plate with a spatula. Now it's time to add watercolor, and here is my little dilemma. Should I stick to
real life colors which would make
everything quite gray? The stove is metallic
and the pants are black, or should I focus
more on the mood and match the color palette of
the previous illustration. As you see, I've decided
on the second option, so my stove will have a
warm reddish orange tone. And here is pancake. I want to get its
real color right, a soft golden yellow with
a little toasted spots. While the paper is still wet, I'll add some dark touches. It's tricky to capture
the texture of a pancake, so I'm just going
with my intuition. That looks good, I believe. Now let's paint the second
pancake on the other pen. Okay. Now I need a
deep rich dark color. I'll use indigo for
the frying pans, painting carefully
but with confidence. The second bun. Done. This is the empty burner. And here we can see the
flame under the coffee pot. Making coffee while cooking pancakes is an important
ritual for me. The whole process
takes about an hour when I'm making pancakes
for my family and guests. So coffee is a must. The plate for the spatula,
it's actually white, but for the sake
of illustration, I'll give it some color. Mm. I almost forgot the
knobs on the stove, but I don't want
them to be dark and compete with the frying
pans for attention, so I'll make them
red instead. Mm hmm. I like them like this. And now the spatula, you know, finding the right spatula is so important for
making pancakes. Not every spatula works well. Somehow, we've been buying the same one from Ikea for years, no matter what country
we've lived in. Alright, that's enough for now. I let everything dry before adding details with
colored pencils. Now, something unexpected. The page in the middle of my
sketchbook tore slightly, which doesn't look great. Here is my solution. I cut out two paper circles to patch it up and keep the page in place. Since they are too bright white, I'll paint them to match
the spreads color. And here is how it looks now. Perfect. Well, let's back to
adding details with pencils. First, the coffee pot. It's not the main focus
of the illustration, but it's important because what's breakfast without coffee? It's part of the atmosphere, the smell, the mood. I'll add some white
gauge highlights on the handle and a
little on the top. Mm hmm. Done, I can
already smell the coffee. Now for the stove grates, let's make them pink. Why not? I want to capture the
peaceful feeling of a slow Sunday morning and inspire you to approach
our journaling playfully. Okay, it's done. I still
need to draw the ladle. Pancake butter is liquid, so it's poured with a ladle. For some reason, a
part of the recording where I drew the
ladle didn't save, but here is how it turned out. I think that's okay.
Nothing special was there. I also added little labels, just some personal notes. Here is the food spread. It's very quick and loose, but it really captures the
mood and the cooking process. You know, I have to admit, while filming this class, I first painted this spread in a more realistic
color palette. The warm golden
pancakes stood out nicely against the
neutral gray tones, but the mood fell off. So I repainted it. These colors are more
playful and dreamy and they reflect the way
my morning actually felt. There is no right or wrong. It's up to you to
decide how to draw. I think if it weren't
for this class, I wouldn't have made
the second version. So now we have the spread with the ingredients and another
one with the cooking process. You know, I think the space here would be
perfect for a little text, maybe a line from a song that was playing
during breakfast, something that matches the vibe. I had a scrap of paper with pink watercolor stains and
it made perfect letters. I couldn't think
of a song lyric, so I just wrote slow moaning. Now I'll glue the
letter in place. And here is the finished spread
fresh, bright, and soft. Now let's move on to the
third spread where I'll draw the cooked pancakes and
decor the family breakfast.
4. Idea 3: Breakfast: Well, my pancakes are cooked. It's time for breakfast. For me, our slow family
breakfast ritual is the most precious
part of eating pancakes. So that's what I'm
going to illustrate. A round table, four plates, and our usual stuff
things on the table. Of course, it is also an option to draw the finished
dish close up. About ten years ago, I already did it. I illustrated this recipe
for the first time. It was the year my
granny passed away, so it was in her honor. But right now, what
matters most to me is the time spent together as a family over slow breakfast. Here is our round table. There are four of
us, so four plates. You can also see my
children's hands. The table is full of everyday
items and foods we love. Now, I'll start laying
down colors with wood color and then add
details with colored pencils. But the main thing is
not to get to catch up in drawing every little
detail. Make it easy. I'll start by defining
the shape of the table. When choosing colors,
I'm sticking to the same palette I used in
the previous two spreads. These are the plates, my husband's Sons, mine. And daughters. Here is a large plate stacked
with pancakes. And a few pancakes on my plate. Little by little, I'm
filling the space with things that are important
and meaningful to me. The same principle applies
as in the previous sketches. First, I put color
with watercolor, and then I add details
with colored pencils. All right, the
color base is done, time for the details. Again, I'm staying within the same color palette as
the previous two spreads. For your class project, I invite you to choose one or more ideas
and illustrate them. Think about a special
recipe you'd like to preserve a family recipe or one you recently
tried and turned out delicious and made you
proud, whatever you like. Oh. Now I want to add cast shadows. I'll make them pink, just like in the first sketch. Let me show you here. In this sketch, the pink shadows helped tie all the
objects together nicely, and I want to do the same
here, playful and light. This shadows is lazy, azure because it's
cast by flowers. In some areas, I'll soften the shadows a bit so they
don't look too repetitive. Mm, I almost forgot the cutlery. Now let's take a step back
and look at the whole sketch. See these empty
spaces here and here, I left them intentionally
so I can write down a note about our Sunday
breakfast tradition or maybe something special, what happened on
this particular day, something I want to remember. So here is the finished page. And if I had a cat, I'd draw it right here. It would be the perfect spot. Let's take a closer look. There is so much here, and every single object
holds meaning for me. I really hope this
inspires you to capture a meaningful food related
memory of your own. It's such a wonderful
thing to do. In the next video,
we'll go through all the sketches I created and talk about
your class project.
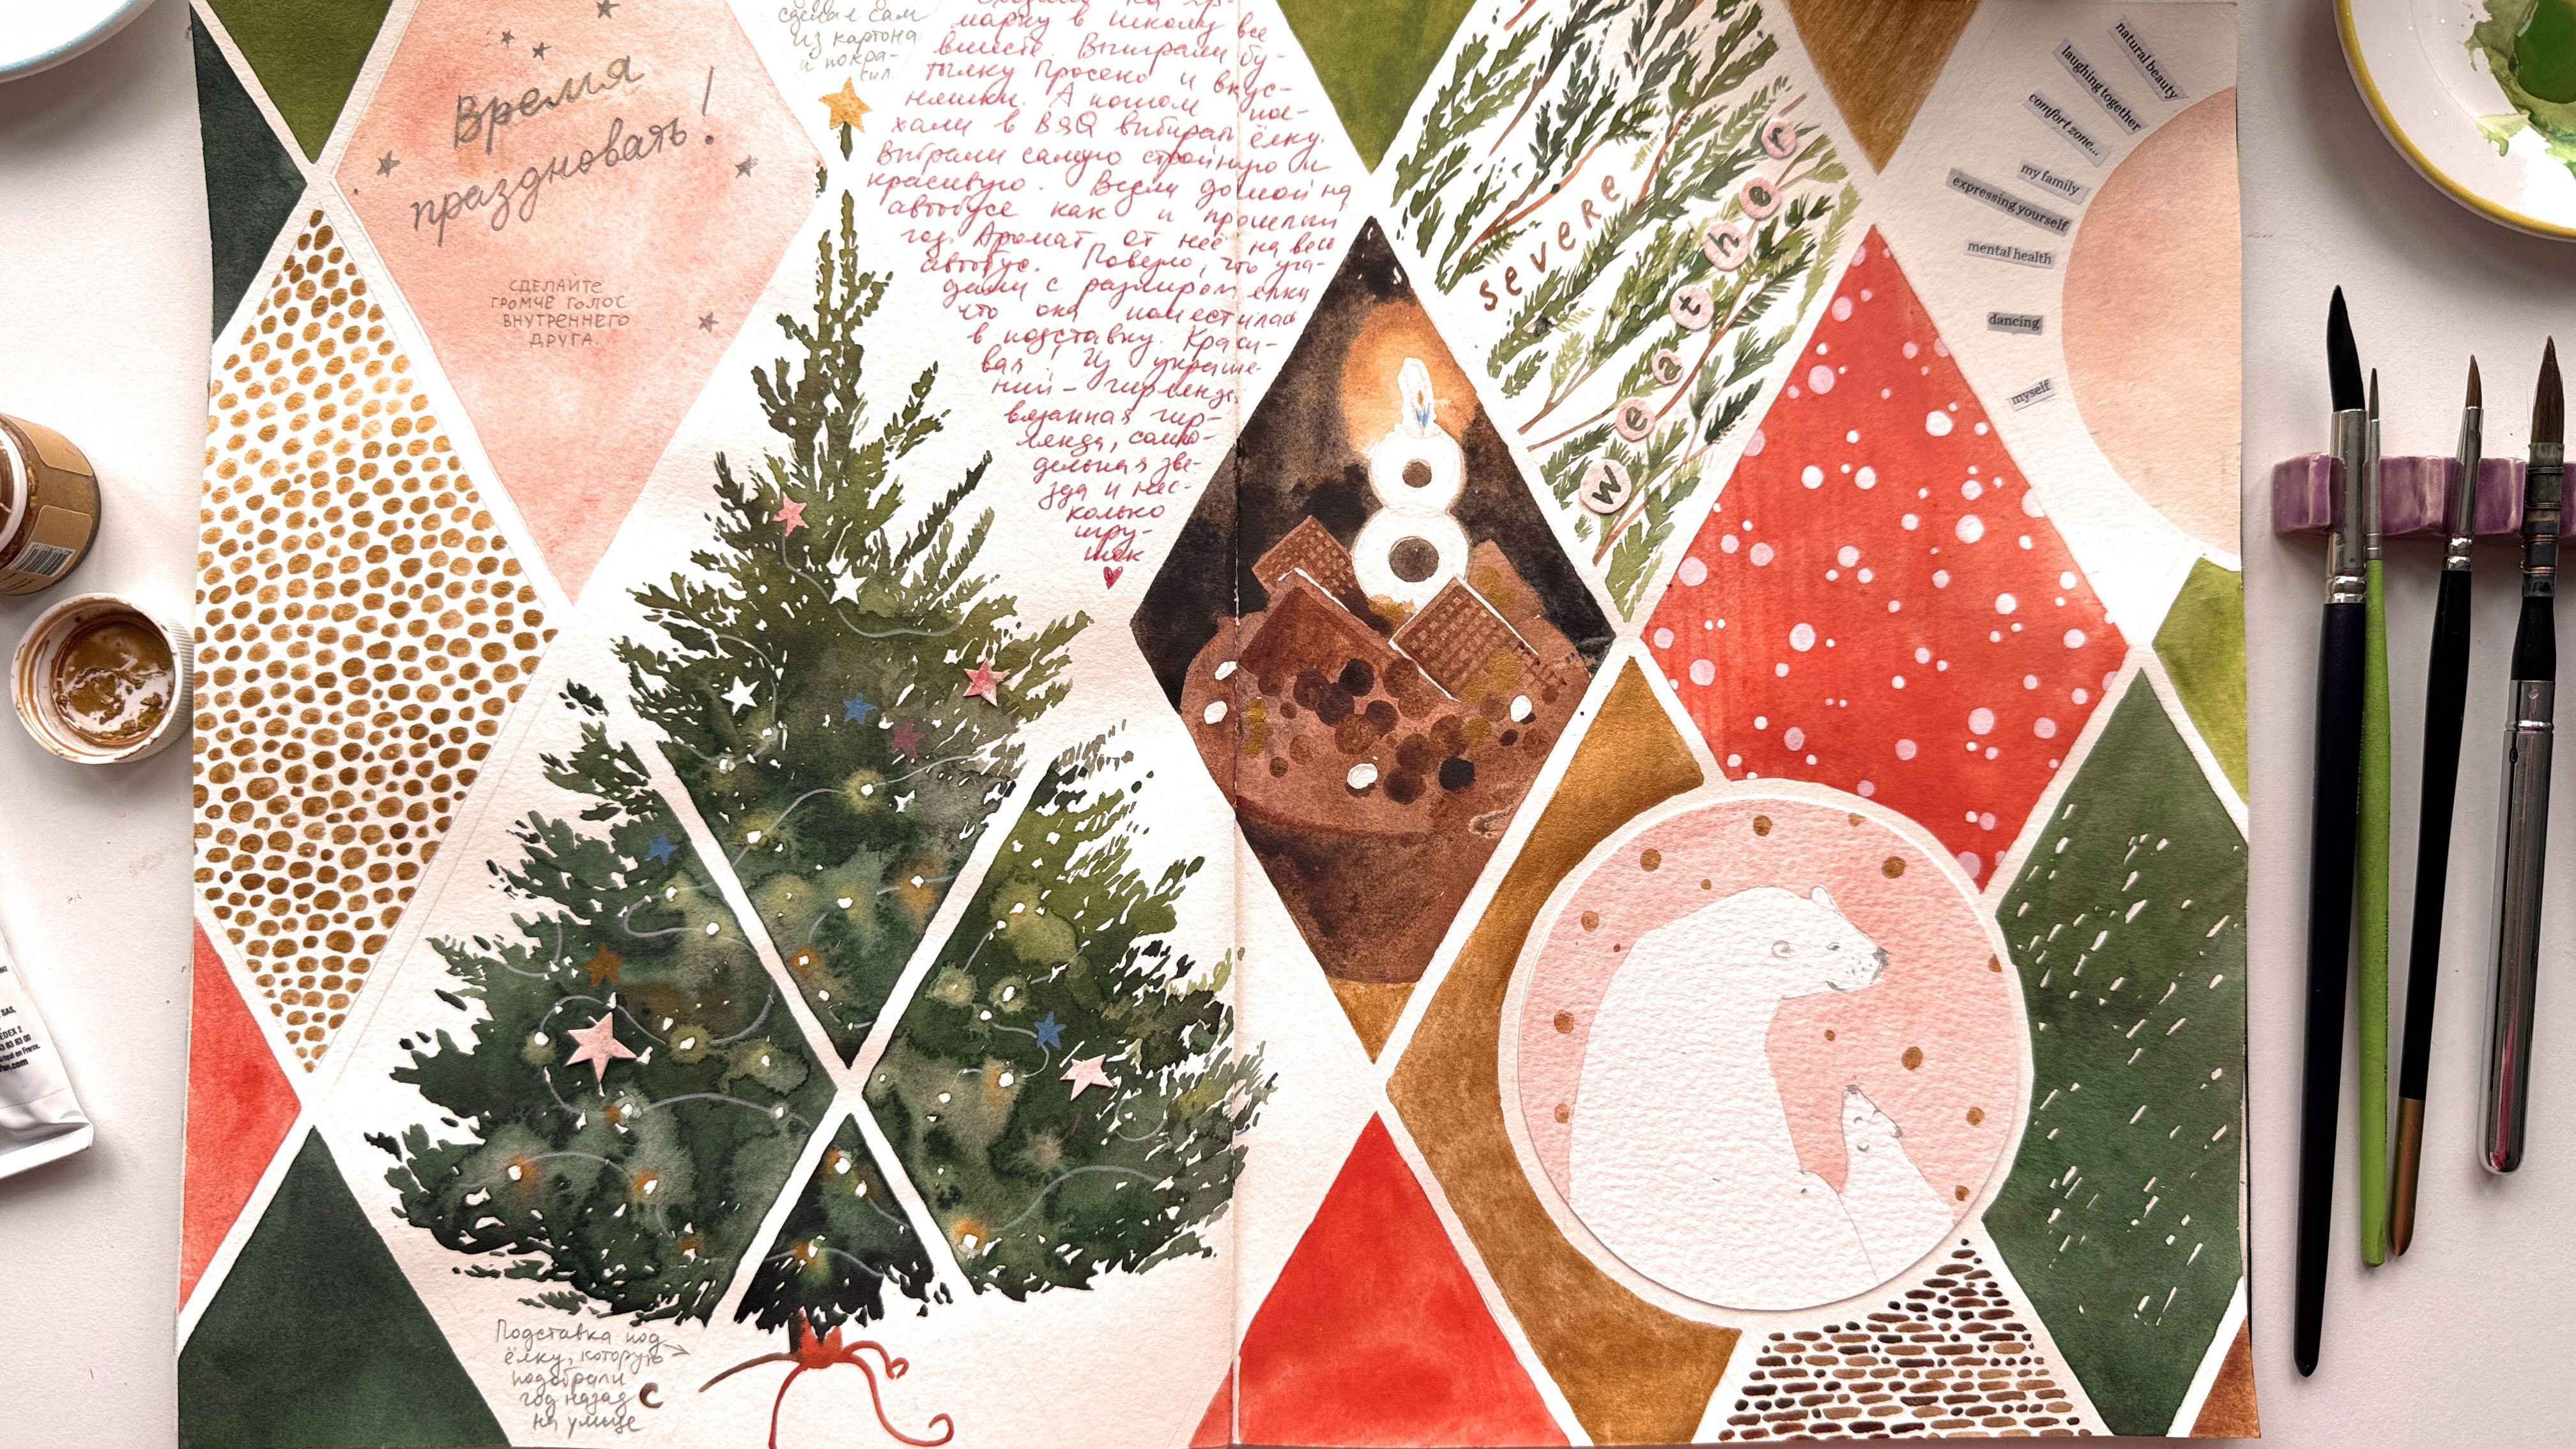
5. Class Project & Final Thoughts: Well, for your class project, I invite you to choose at least one idea
and illustrate it. Let's take a look at
all the ideas we've explored and go over the
key points one more time. We started with
the recipe itself. I illustrated all
the ingredients and wrote down the recipe, highlighting my granny
special tips and techniques. Next, I captured the
cooking process. I ended up with two different
versions of the same idea, but in different color palettes. One reflects the mood of my morning and
matches the colors of the first sketch.
The other one is more true to reality, but the atmosphere
feels a bit too gray. For me, this is a reminder
that in my sketchbook, I get to decide how
my world looks. And finally, the finished dish. Here is my stack of pancakes
and our entire breakfast, just the way I love it. Everything feels
light and effortless. This isn't about
creating masterpieces, but about capturing a moment. I look forward to seeing your favorite recipes
and food journeys. I'll include the recipe
for Russian pancakes in my class project just
in case you are curious. If you enjoy this class, please consider
leaving a review. It truly means a lot to me personally and helps make
this class more visible. Love you all. Take care and bye.
 Olga Bonitas, Watercolour girl