Transcripts
1. Sea Turtle Watercolor Introduction: Hey, friends, welcome back to this next lesson. Today we will be creating a sea turtle. We are going to use worker and watercolor and salt, and that might seem like a crazy thing to use. But there's a special technique where you can use some salt, and it makes this really cool effect on your paper. So before we begin, let's go over the supplies and materials that you will need for this lesson. The first thing that you will need is watercolor paper. Anything paper will do. However, watercolor paper works the best as it holds watercolor paints very well. The next thing that you will need are some watercolor paints. You will also need a permanent marker. Permanent just means it will not run. When water touches it, you will need some clean water and a brush a paintbrush. You will also need paper tells for a quick cleanup, and you will need some salt. I have some table salt here. If you have a course or salt that bigger green salt that would work well as well. This is a finer green salt, and then we have a little plate to put our salt on. So when we pinch it and pour it onto our pain, T, it makes it a lot easier
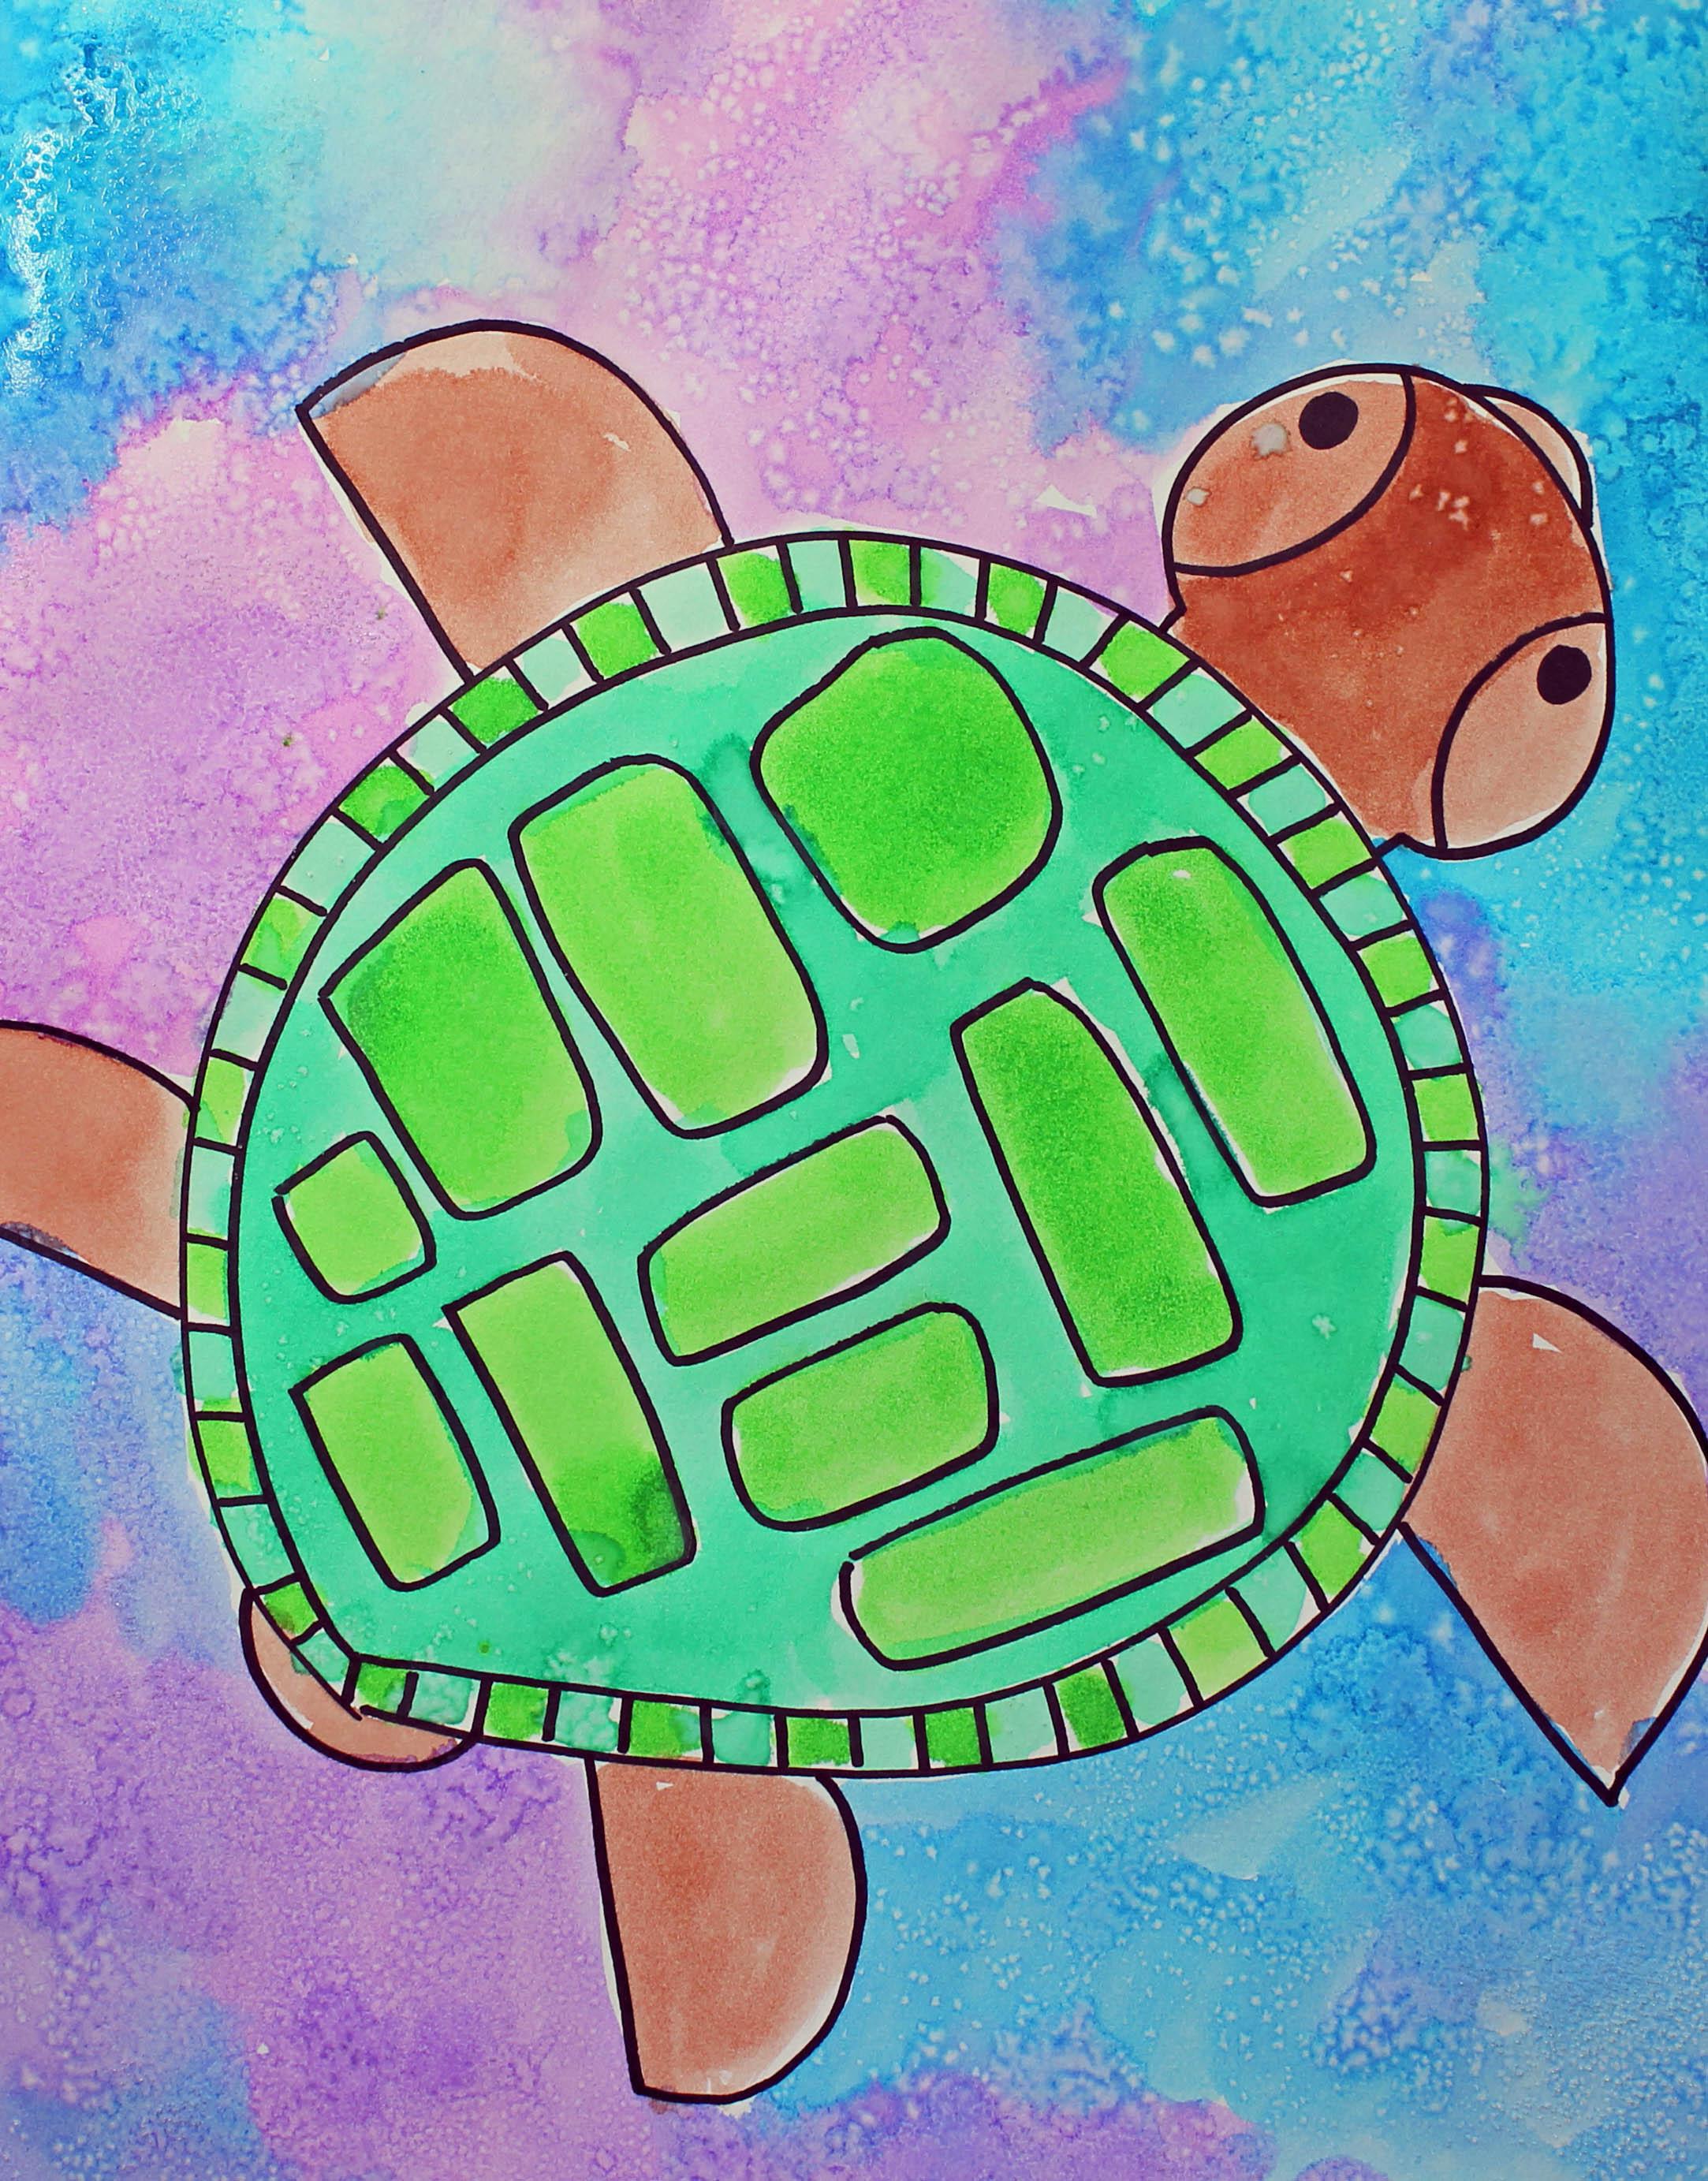
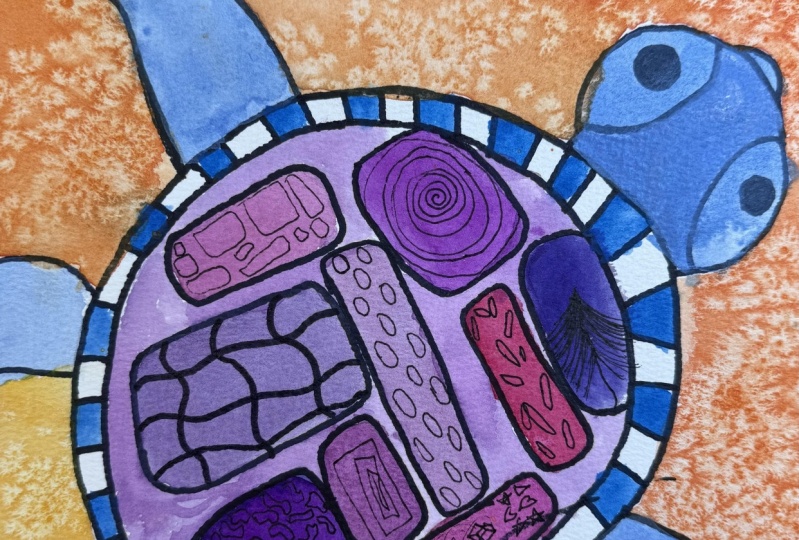
2. Step 1: Drawing a Sea Turtle: So let's get started. I'm going to put my supplies and materials aside, so I have enough room to create my masterpiece. So we're going to start out with a drawing first, I am going to make a shape. It looks like a circle, but it has a little point at the end. So let me show you what I mean. I am going to start maybe about right here on my piece of paper, down maybe a couple inches over from the left and a couple inches up from the bottom. And I'm going to make a kind of a largish circle shape with the point at the end. Said this right here. This is the back area of the turtle. Is this a perfect shape? No. In your shape might not be perfect either, but that's okay. All right. Now, at the front, at the top of our A turtle, I think this is the bottom, and this is the top. We're going to put his head. So there's two tiny, tiny little lions coming out for a mere shape. And then we're going to make a because it would be a sideways upside down. See, then we're going to make two curved lines on either side of the sea, and then we're going to make some dots for his eyes. And if you'd like to make just a slight little curved line for his mouth, that would be fine as well. Now we're going to go to this side and we're going to make a curve line coming out for one of hiss clippers, and then we're going to make a straight line coming down to close up that shape. We're going to do the same thing on this side and close it up, and then on that back, we're going to do the same. Look at that. I went off my paper. That's okay. No problem. Come back in and seem on the back bottom, Right. So curve line and straight line, and then we're going to put a small little curve line here for his tail. Now what we're going to do is we're going to create a pattern on his shelf. This is his shell right here. And I like to just make a combination of different squares and rectangles. Some of them are narrow and long summer more Square me. Show you what I mean, before I do that, though, I want Teoh follow along my line with another line. I'm going slowly and carefully, so I don't bump into the first line. And then all along here I am going to make some very small lines that connect our first shape to her second shape a way around. This is the side, uh, internal shell and take your time on this. I know I'm going kind of fast, but what you can do if I'm going too fast for you, is you can just pause the video in catch up. But it really is important to do your best when you are drawing. Okay? Looking good already. All right. So, like I said inside here, I'm going to put just some soft squares, you rectangle those think about what you want to dio, and that would be fine. It's almost like a puzzle how they all fit together. Some people like to do all squares, and that's fine as well. It is really up to you as this is your artwork. So I'm almost done there. I think he looks pretty cool. So this guy is swimming through the water. So what we're going to Dio is we are going to paint him first, and then we are going to paint his background next, and we are going to apply some salt to the background. And what that will do is it will create a really neat effect. I'll show you in the next video. All right. See you then. Bye.
3. Step 2: Painting a Sea Turtle: Hey, friends, Welcome back. We are at the painting portion of our lesson. So we have our cute turtle here. We're going to start out by painting the actual turtle and his flippers, and his head and his tail are going to be a brownish color. And then his shell will be a combination of maybe green and turquoise. But I want you to know that you can actually paint your turtle any color that you'd like. This is a cartoon turtle. It's not really that realistic. So it is up to you. I do like to plan out the colors that I'm going to use before I start painting. That way, I can be sure on where my ideas air going. So, as I said, brown, brown, brown, brown, brown, green and turquoise. And then I think I'm going to have a combination of purple and blue for the water. So you might want to do that. You might want to think about the colors that you're going to use for the different areas of your painting before you begin. Now, as you recall, we've already had a chance to prepare our paints so they're all ready to go I have my water here I wanted to mention If you want a lighter color of paint, you just add more water to the paint. And if you'd like a stronger color of paint, then you use more paint. So lighter, more water. Darker, stronger, More paint. Okay, also, usually we have a tray here for our watercolor paints. And if you want to mix colors here or if you want to just test out a color, this is a good area to use. Okay, so I'm going to get started with my brown. My Brown is right here, and I'm not quite sure how strong the brown is. So I'm going to put a little bit on here with a little bit of water and then Oh, good thing I have this over here. I'm going to test it out. So I like that shade. So what I'm going to Dio is I'm going to start out by painting his face and even hiss little mouth right here. And then I'm going to paint hiss full lepers around, and it looks to me like I'm going to need to mix up a little bit more pate, so I just put a little bit more paid in a little bit more water. Test it out. I think I need a little bit more water in there. Okay. Looks good. Yeah, we go Now. I know. I painting kind of fast. If you need some time, you can pause this video if you'd like to. Do you see this area down here? I feel like there's a little bit too much paint on there. So what I do is I rinse my brush out, I dry it off with my paper towel, and I just skip some of that pain right at like that. See how that works. Okay, Now I'm going to start with my shell, and I'm not going to be very careful staying inside the lines because I want the water tep color to work its magic and kind of spread around a little bit. So what I'm going to do is I'm going to start with some green Look at that color green. That's so beautiful. I love great green. Reminds me of the earth. That's why it's my favorite color. See how I'm taking some of the paint off of this little square in putting it on this one. See how I'm doing that? We actually do that a lot because I feel like this is a little bit too dark, and I I just want to use that paint if I can. All right. Looking good. Okay. Almost done with the squares. In addition to painting the squares green, I am also going Teoh paint the edge half grain in half like a turquoise color. So I'm going to Okay, so I'm finished with my green, and what I'm going to do is start on with my turquoise. So I want to make sure, but I have my turquoise nice and watch. They have enough water with it. Looks really good to graze is kind of like a bluish greenish color. So I'm going to go right around my squares, going to fill in all the spaces between the squares. You could tell I'm not being super careful with this because I wanted to have a little bit of a flowy fact. Here we go. Just a little bit of variation in the color here. So these air more of a true green and these air more This area's more of a turquoise. We'll sleep green. A little bit of blue now, do you see right here The color is coming to pulling a little. I want to take some of that away, so I just get my brush a little bit dry, and I pull it off of that area just like that. All right, So now I'm going to take my turquoise and I'm going to go around these areas, these little boxes around his shell, and then I can start on the actual water. Okay? Almost there. Okay, Now I see something that I like to modify a little bit. See his head. I'd like to put a little bit more brown on the inside here of his head. Just like that. Looks good to me. Okay, So what I'm going to do now is I'm going to have a lot of water on the area where it's going to be water. So I as I told you before, I'm going to be using some blue and some purple. So I am choosing this color purple right here, and I'd like to have it be pretty watery that way it will work well with assault. So what I'm going to do is basically just dribble the salt a long the water area where I want the special salt effect. Let me tell you what the salt does, so the salt takes it absorbs. Actually, it absorbs the water. So it takes some of the paint and pulls it away from the paper. Here's my salt. You can see that little pile of salt. So basically, what I'm going to do is I'm going to paint, and then I'm going to dribble the salt where I want the effect to be. Okay, So let's see how this color looks right here. Yeah, I like that. Actually, I like it to be a little bit darker, so I just add more paint. Remember, if you want your area to be darker than you adding more paint, you want it to be lighter than you add less paint and more water. Okay, so here we go. You know, I'd like to put a little bit assault there, and it's gonna be a little bit tricky and difficult for you to see, but I'm just adding the salt where I want it to be. We have been add a little bit of bullying now. Well, that's pretty dark, you know, light not up with some water trouble somewhere so that the paper has to be pretty wet when you add the salt has to be pretty wet when you add the salt. Otherwise, thean fact will not be as a parent said, make sure that your papers already wet when you're doing that, and you might not be able to see the full effect until your paper is dry. So what I'm going to Dio is I'm going to finish painting this and adding salt as I go, because I want to make sure that the area is wet and I'm going to speed this up a little bit. So I'll see you in just I'm in it. All right, friends, I'm back, and I'm excited to see what will happen with this painting. After it dries and I brush all of the salt off. I want to make sure that it gets really, really dry, maybe for like, an hour before I attempt to take the salt off. As you can see, the salt right here is already working its magic, and I also wanted to let you know that once you put the salt on. You cannot go over that area again with pain. And the reason why is the salt will dissolve into into the water, and then it will not have the same effect. So once you put the salt down, that's it. You can't go over it again and again and again. So what I did after I got all my salt down, I looked at my picture, and then I made a decision on if I need to put any more salt anywhere around, I might have got a little bit onto the turtle, like maybe right here. That's OK, though, because he is under water. So I will be back to show you how it looks after about an hour. If you live in a sunshiny area and it's in the middle of the day, you can even put this outside. But you do need to make sure that it is totally dry before you brush the salt off. Okay. See you in a little bit by Hey, friends. Welcome back. I'm excited to say that my painting is dry and the salt crystals have done their job. It looks really, really cool. So what? You want to dio is You leave there. Want to tip your painting up and kind of brush it off with your hands? Make sure that all the paint is dry or you can push the salt off with your finger and just notice the effect that it has left behind their little dots of, um, less color. So, yes, I really enjoyed showing you how to do this lesson. Please let me know what you think. And I look forward to seeing you on the next lesson. Take care by
 Em Winn, Teacher, Art Instructor, Artist