Transcripts
1. Introduction and Supplies You Will Need: H Hi, friends. How are you? I hope you're having
a great day today. I'm excited about sharing
this project with you. This is a drawing and
watercolor painting project, and I designed it,
especially for kids. Students do not need to have any drawing or
painting experience at all to be successful
with this project. I will guide students step by step through all the steps
that they need to take. Today we are going
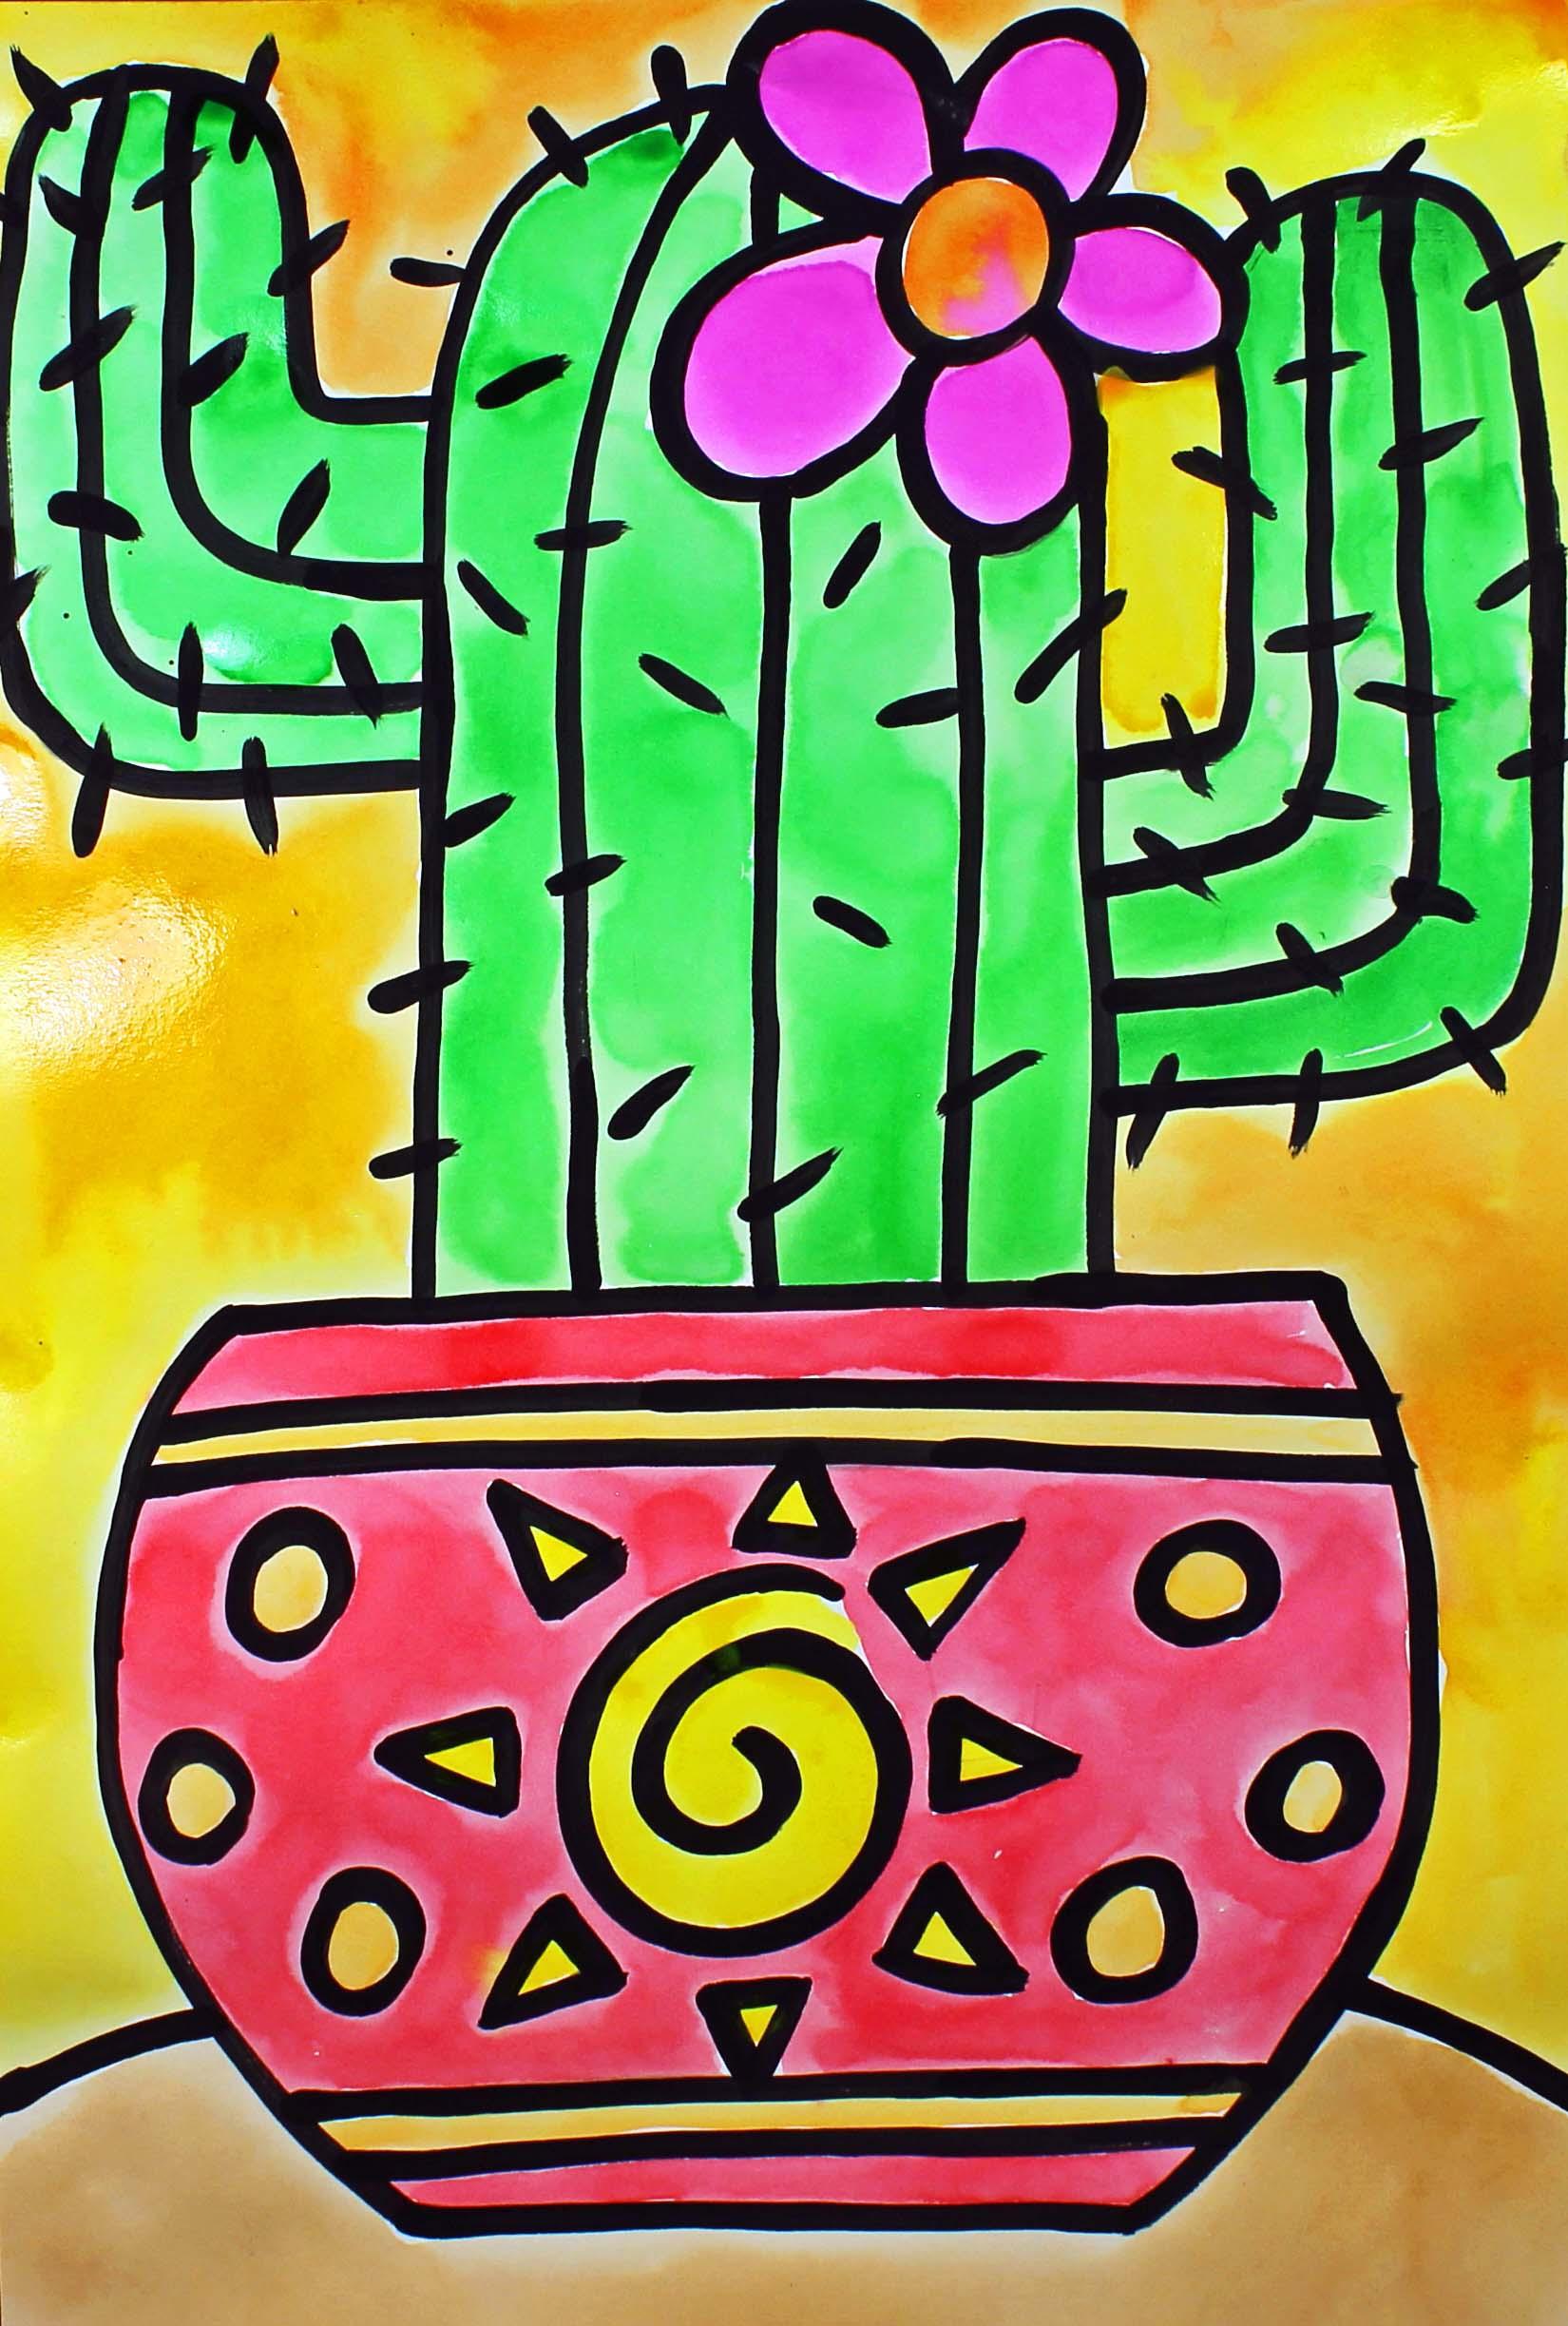
to be creating this really beautiful cactus in a bright and festive bowl. Let's talk about
the supplies and the materials that you will
need for this project. The first thing
that you'll need is a sheet of watercolor paper. You will need a set of watercolor painting and a bowl
or a cup with clean water. You will need a pencil
with an eraser and a paper towel and two
different size paint brushes. You will need a small
flat paint brush for these black
lines right here, and you will also need a larger watercolor
painting brush, the pointy kind, and that will be used for the painting of
the watercolor painting. Will also need some
black acrylic paint. The reason why we're using black acrylic paint
is because it will not smear and smudge around if you add
watercolor painting to it, and then you'll need
some sort of a palette. I like to use a
small paper plate. So go ahead and gather all of those supplies
and materials, and I'll see you back
here in the next video.
2. Step 1: Draw a Cactus Design: In this step, we are going
to draw our cactus design. So let's get started. The first thing
that we're going to do is pick up our pencil, and we're going to go to the middle of our
piece of paper. The middle of my piece of
paper is about right here. And we're going to go a
little bit in from the sides, and we're going to make a line. You don't have to press
very hard with your pencil, but I'm pressing pretty
firmly with my pencil. So I made a straight line coming across my piece of
paper, and down here, we're going to make a bowl
or a vase for our cactus, and then our cactus is going
to be up here at the top. Okay? So let's make our bowl. We're going to go back to
this part of our line, and we're going to make a
curve line coming down. We're not going all the way to the bottom of
our piece of paper, and then we're going to make
another line coming down. It's going to be
about the same length as this initial line. Then we're going to close
that up at the bottom. So this is our vase or
our bowl for our cactus. Alright, the next thing
that we're going to do is we are going to
create a cactus up here. So what we're going to do
is we're going to start a little bit in here and we're going to end up
a little bit in here, a little bit from this angle. So we're going to come up with a straight line, curve around. And then we're
going to come down. Your cactus doesn't need to look exactly like mine. All right. Now what we're going to
do is we are going to create some arms on our cactus, one on this side, and
one on this side. I'm going to choose
to make this arm a little bit higher than this arm to create interest
on my piece of paper. So I'm going to start
about right here. Come in. Come up, curve around, come down, and then come
back in. There we go. So now I'm going to create another arm on the
side of the cactus, and I'm going to start
about right here and I'm going to go over up over, come down, and then come in
and then touch my cactus. Now, if there's anything that
you'd ever like to erase, you can go ahead
and do that with your handy dandy eraser. I think I'm going to
erase this top part of my cactus because I'd like it to be a little
bit more round. So it's easy enough to do. So I want that a
little bit rounder, so I go ahead and
erase and then redraw. There we go. That's the
nice thing about pencils. You can erase a pencil. All right, so I'm really happy with the way that
this is shaping up. So we have our main cactus
and we have the arms. Now let's add a little bit
of detail to our cactus. If you'd like to add
a small flower or two or even three,
you can do that. Any type of flower
that you like. I'm going to add a
flower right here, so I think I'm going to
make a round circle. And then I am going to just make this type of a
flower with some petals. It's going to be actually
bigger than I thought, but I like it. Perfect. I think I'm just going
to have one flower. Now, as you can
see, my pencil line is going through my petals. So I want to erase
that because I want to be reminded not to
paint over that part. And if I don't erase it,
I might forget that. Alright. So now we have our
cactus. We have our flour. Let's add a little
bit more detail so we know that it's a cactus. So I'm going to start
making some lines. They're going to go from
the top of my cactus down, and it's going to be
a little bit curved. This line is going to
be a little bit curved. So then I'm going to make
another one coming down. And then I'm going
to make another one coming down right here. And remember, it doesn't
have to be perfect. Alright, now I am going to come back up here and
I'm going to add some stripes coming down this way on this part of my cactus. And then I'm going
to do the same thing on this side as well. Now I'm going to add
some cactus spines. I'm not going to add that many, but I do want to add some. They're just going
to be small lines, and they're going
every which way. They're not going to
be in a straight line. I like the way that
it looks when they're not in a perfectly
straight line. And if you look at a cactus, you'll notice that they're
not in a straight line. They're all over the place. That's how the cactus
protects itself. One more right there. So go ahead and put some little
spikes, little spines. Alright. Oh, I need one more
right here, definitely. Now that we have our details
added to our cactus, we're going to move down here
to the bull or the base, and we're going to
add a little bit of detail into this area. Keep in mind that
we are going to be covering the pencil
lines with black paint, so we don't want to make really tiny details because they will just get covered up
with the black paint. All right? So you get to decide what kind of details
you would like to put inside your bowl. I'm going to give suggestions, but this is your artwork, so you get to do what
you'd like to do. Alright, I think I'm going to
start with the stripe here. If you want to do
the same thing, you can definitely do the
same thing that I'm doing. Go to make another stripe. And then I'm going
to do the same thing down here at the bottom. So stripe and then
another stripe. And then what I'm going to do is I'm going to make, I think, a sun here, and it's
going to be a swirly sun. It's not going to
be a realistic sun. After I have the
main part of my sun, I'm going to make some
triangles that are going to start out as lines going
all the way around. And then I'm going to turn
those into triangles. I feel like this area could
use a little bit more detail. So I think what I'll do I think I'll add some circles.
Just a few circles. There we go. The
next thing that I'm going to do is I am
going to add a table. So I'm going to make
a curve line here, jump over my bowl and come
back over here. There we go. If there's anything else that you'd like to add
to your design, go ahead and do that right now. Make sure that you don't
make something really small because we are going to be covering our pencil lines
with some black paint, so we don't want it to get lost underneath
the black paint. Alright? So when we come
back in the next video, we are going to add some
black paint to our design.
3. Step 2: Outline the Design with Black Paint: I in this step, we are going to add some
black paint to our design. So let's get started. So I already have my acrylic
paint here on my palette, and the dollop that I have
here is not that large. It's about the
size of a quarter. You do not need a lot of
paint for this project, and it's really difficult to put paint back in the bottle if
you don't use all of it. It's much easier to just put more paint on your
palette if you need it. So I just have a small amount. I'm going to put a couple
of drops of water in my paint because that will make it easier for us to push around. So I have my paint in
here and if I am going to push that paint around. There we go. It's
all mixed up now. Now what I'm going
to do is I'm going to take some of
that paint off of my paint brush with
my paper towel. We are not going to be using water with this paint or
with this paint brush, so we want the paint to
be pretty thick. Alright? So I'm going to start by
loading my paint brush, and I'm going to start at the
top of my piece of paper, and I'm just going to start painting slowly and carefully, and I'm going to try to
stay on those pencil lines. If I go off the pencil
lines a little bit, I'm not going to worry
about it too much. That happens to me
sometimes, too. So just do the
best that you can. It's pretty challenging sometimes
to stay on those lines. But if you go slowly
and carefully, you'll be able to
do your best work. So I'm going to go
ahead and speed up this video and continue my painting, and
you can watch me. And then you can get started
on your own painting. Alrighty friends, I'm back, and I'm finished covering
all of my pencil lines, so I'm going to go ahead and take a lot of
that paint off, a lot of that black paint off with my handy
dandy paper towel. I'm going to try to get
the most off that I can, and then I can put it inside my water to
clean the rest of the way and then maybe use my paper towel to
clean it a little bit more. Let me tell you something
about acrylic paints, which this is acrylic paint. If you leave acrylic
paints on a paint brush, then it will ruin
the paint brush. It will stiffen up and you
won't be able to use it again. So it's important to try to
get that paint off of there. All right. So now that
we have our Outline. Now that we have our black
paint outline on our design, what we're going to do is we are going to allow it to dry. This has to dry completely before we add our
watercolor painting, okay? That's really, really important. That's an important step. So go ahead and let your
painting dry completely. And when we come back
in the next step, then we will add some
watercolor painting.
4. Step 3: Paint the Design: In this step, we are going
to paint our design. So let's get started. The first thing
that we're going to do is we are going to add one or two drops of water into each pan
of watercolor paint. And what this will do is it will soften up the
paint a little bit, so it is easier for us to use. So I do encourage
my students to take a moment to add those
drops of water. Now that our paints
are softening up, let's turn our attention
to our design. So here we have a painting
of a cactus with a flower, and the cactus is sitting
inside of a pot or a bowl. And what we're going to do is we're going to make sure that our painting is dry before we add our
watercolor painting. If the painting is not dry, then what will happen is the black paint
will smear around, so make sure that that
is completely dry. Alright, I am going to paint my cactus green and for the flower, I think I might paint
it orange and pink. And then down here for the pot, I might paint it red, and maybe the sun yellow. I'm not sure about these dots. And then that's what we're going to focus on right
now for this step. We're going to focus
on the design. And in the background, which is behind the design, we're going to make sure that we complete that
in the next step. I'm going to focus mostly
on the warm colors. So the warm colors
are red, pink, orange and yellow, and the cool colors are
blue, green and purple. I am going to use green for the cactus because I see
a lot of green cactus, so that's the color that
I'm going to choose. But for the other colors, for the other color choices, I'm going to choose
the warm colors. Alright, so I'm going to go
ahead and start painting. I'm going to start
with my cactus. And I'm going to try to
stay inside of the lines. That's important for
this particular project. If your paint goes outside of the lines a little
bit, that's okay. Don't worry too much about it. Just try your best. So what I'm going to do is I'm going to speed
up this video, and I will see you back
here in just a minute. Okay Alright, friends, I've finished
painting my design, and I'm really happy with it. I mostly use the warm colors
for my pot and my flour, and as I said, before, I see a lot of green cactus, so I chose green for my cactus. When we come back, we will
be painting the background.
5. Step 4: Paint the Background: In this step, we will
paint the background. So let's get started. So take a look at
your artwork and decide which colors you would like to use
for your background. You can use one or more colors. I'm going to use
orange and yellow, and I'm going to hope that they mix together a little bit. So orange and yellow
for the background behind the cactus and then
for the table down here, probably a really light brown. And it might even be
more of a tan color. So really, really light brown. So I'm going to just
start with my orange, a lighter orange and maybe add a little bit of
a deeper orange. And then I'm going
to add some yellow at certain points when I
think that it will look good. So I am going to get
started on that. And I'm going to speed up the video so you
can watch me paint, and then I will see you
back here in just a minute. Now for the table, I'm going to paint a very, very light brown, so I'm going to be putting
some water into one of my wells and then adding
just a touch of brown, just a very small amount because I want the table
color to be pretty light. Alrighty friends, I'm
finished with my painting. I'm really happy
with the way that my cactus design turned out. I hope that you had a lot
of fun with this project. I will see you next time.
 Em Winn, Teacher, Art Instructor, Artist