Transcripts
1. Introduction and Supplies You Will Need: Hi, friends. How are you? I hope you're having
a great day today. I'm excited about sharing
this project with you. This is a drawing and
watercolor painting project that I designed,
especially for kids. Students do not need to have any drawing or watercolor
painting experience at all to be successful
with this project. I will guide students step by step through all the steps
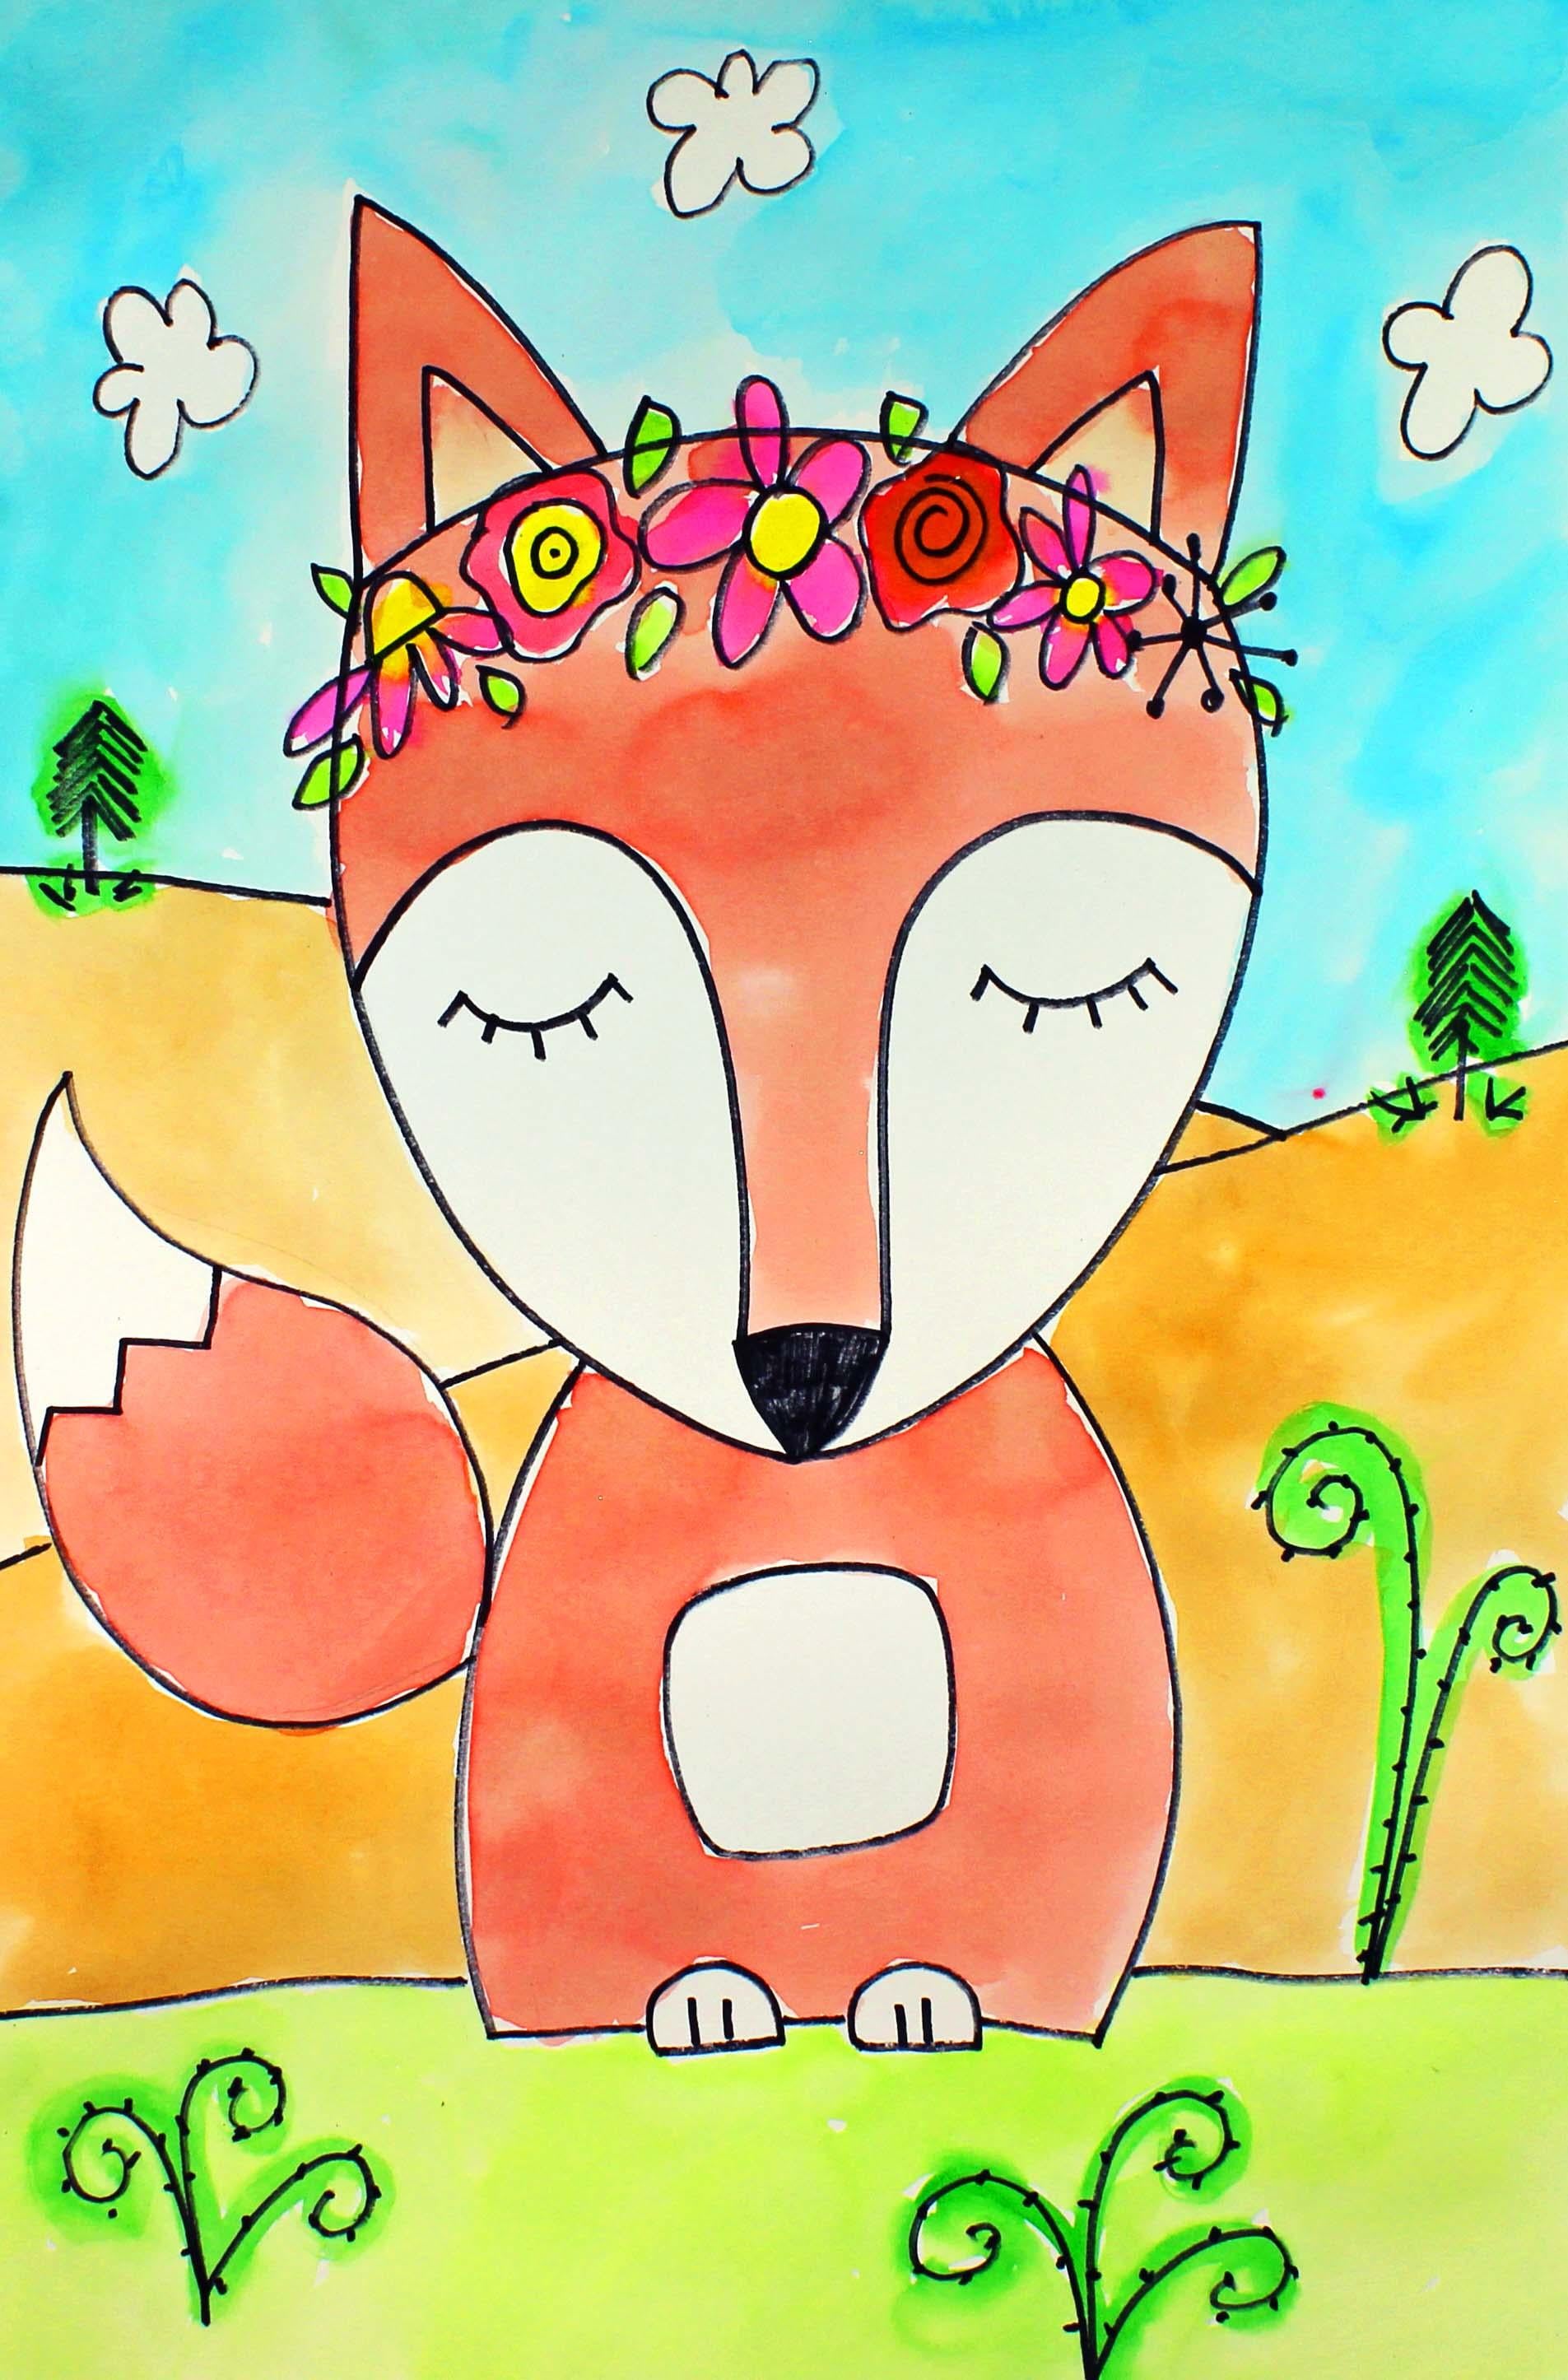
that they need to take. Today we are going
to be creating this cute fox wearing
a flower crown. Let's talk about
the supplies and the materials that you will
need for this project. The first thing
that you'll need is a sheet of watercolor paper. You will need a set of watercolor paints and two
different size paintbrushes, a larger paint brush
for the larger areas, and a smaller paint brush for the smaller detail
areas like the crown. You will also need a
cup or a bowl with clean water and a
permanent marker. Permanent means that
the marker will not spread around if you
add water to it, and you will also
need a paper towel. So go ahead and gather all of those supplies and materials, and I'll see you back
here in the next video.
2. Step 1: Draw a Fox with a Flower Crown: In this step, we are
going to draw our design. So let's get started. The first thing that
we're going to do is pick up our permanent marker, take the cap off and put it on the back of your marker
so it doesn't get lost. And then we're going to find the center of our
sheet of paper, and we're going to
go about halfway up between the center and the
top of your sheet of paper. Now we're going to
go in a little bit, and we're going to
make a curved line. About that large. This is going to be the
top of our fox's head. Now we're going to come down, and we're going to come
down to about right here. And it's going to
be a little bit of a point at the
bottom, but not much. So we start here
with a curve line, and then we come over
here and we make another curve line and
we meet that first line. This is going to be
the head of our fox. Now let's make some
ears at the top. So some nice triangles. And then inside those triangles, let's put some more
triangles, some smaller ones. That'll add a little bit
of detail to those ears. Alright, now let's
come down into the lower portion
of our fox's face, and we're going to create
the eyes and the nose. So we're going to make the
nose here at the bottom. So I'm going to
make a curve line, and then I'm going
to make a curve line that hits the tip of the chin, and then I'm going to
color that nose in. Going to fill it
in with my marker. Looks like my marker is starting
to run out. There we go. Now we're going to move to about halfway up these curve
lines on the side, and we're going to make
another curved line that goes up and then comes down to
the corner of the nose, and then the same thing
on the other side. Up and then down to the
corner of the nose. Then inside this
space right here, we're going to make some eyes. You can make whatever type
of eye that you like. You can make your eyes open or close or looking to the
side. It's up to you. I'm going to make closed eyes. So that's just a curved line. And then I'm going to give
my fox some small eyelashes. Can do this type of
eye if you'd like, but you don't have
to. It's up to you. Alright, now what we're going to do is
we're going to come down to the bottom part
of our piece of paper, and we're going to
make the fox's body. Keep in mind, this
is a cartoon fox, so it's not really realistic. We're going to go about
right here and make a curve line coming
down about that far. And then another curve line
coming down about that far. Alright, now what
we're going to do is we are going to make
some small feet, and those are just semicircles. And if you'd like to make
some little toes there, that would be fine. And then we're going to close up this shape right
here, the body shape. Now that we have
the body completed, let's add a little
shape inside here. It's kind of like a square, but it has really soft angles. And then let's add a tail. Your tail might be on this side, or it might be on this side. I'm choosing to have
my tail on this side. So what I'm going to do
is I'm going to come up from my body about
right here, curve up. So it's almost like
a really long S, and then I'm going to come down. And then right here at
the top of the tail, I'm going to make
some zigzag lines, and I'm going to leave this
space white right here. Now, what we're going
to do is we're going to add a little bit of
detail to the background. I just made a line,
and that represents the ground that the
fox is standing on. So I'm going to make a
few little plants that are going around my fox. These are going to
be little ferns. Alright, in the background, you can add some
mountains or you can add some clouds or
a sun or a moon. It's completely up to you. I think I'm going to
add some mountains. So I'm going to start
my first mountain or hill right here. So I'm going to
make a small line, jump over that tail. Jump over that head of my fox and come
out the other side, and then maybe I'll make another hill or a mountain coming down this way like that. That just adds a little bit more interest to the background. Whoops. I think I'll turn
that into something. My marker slipped. So I'll turn this into a tree like kind of
like a pine tree, and I'll make this into
some little grass, maybe, and then I'll make
another tree over here. Sometimes when I make
a little boo boo, I don't really worry
about it that much. I just turn it into
something else. I'll put some little
grass right here, too. Alright, I think
that looks great. I think I might
add a few clouds. In the sky, I like to make these really big fluffy clouds, but you can make
whatever you like. This is your artwork.
So you get to decide. So we have our fox drawing
and we have our background. I'm going to take one more step, but it's your decision as to whether or not you'd like
to do this, as well. I'm going to add a crown of flowers across this fox's head. If you do not want
to do this step, you don't have to,
but I'm going to. So I'm just going to
start right here, and I'm going to just
make some flowers going all across
my fox's forehead. I might add some leaves. I just am going to go
with it like this. So I have a daisy. I have
this type of flower. I'm not sure what it's called. And another type of a daisy. Just going to go
all the way across the fox's forehead.
And let's see. Maybe I'll make this
kind of flower. So I'm going to go ahead and
take a moment to do that. There we go. As you can see, I added some different types
of flowers and leaves, and I'm really happy with
the way that turned out. Now, like I said before, you get to decide
if you'd like to add this crown of
flowers or not. It's completely up to you. When we come back, we will
start painting our design.
3. Step 2: Paint the Design: In this step, we are going
to paint our design. So let's get started. The first thing
that we're going to do is we are going to add a drop or two of water
into each pan of paint. And what this will do is it will soften up our paint
just a little bit. So it will make it
easier for us to use. So I always encourage my
students to take a moment to add a drop or two of water
into each pan of paint because it really does help when you're starting to paint. Alrighty. Now that our
paints are softening up, let's turn our attention
to our design. So we have a fox here with maybe a crown of
flowers on, maybe not. Depending on what you choose. And we have a background
with some hills and maybe some grass down here at the bottom with some ferns and some trees in
the background. So you get to decide
the colors that you're going to choose for your design. I am going to make my fox
a reddish, brownish color. I'll show you how to make that
in case you're interested. And then the flowers, maybe some different colors. The sky, I think
will be just blue. And then I will add
a little bit of green to these ferns and
also to the grass down here. I'm not sure about the hills, maybe brown or green. I haven't decided yet. All right, so let me show
you how to make the color. It's like a reddish,
brownish color. I'm going to add some
water to one of my wells, and then I'm going
to add some red. Because I'm choosing not to make my fox a
really bright red. I'd like it to be more of a
brownish red, reddish brown. So I added some red to
my well and going to add a little bit of brown
soften up that bright red. Let's see what that looks like. Let's see here. I'll
try it on the ear. Oh, I like that color. That's a great color.
Okay, so what I'm going to do is I'm just going to
start painting my fox. And then I will speed up the
video so you can watch me. Alright, dear friends. I'm back, and I painted my fox, this custom color that I
created this reddish brown. And what I'm going to do
now is I'm just going to put a little bit of brown, a really light brown inside
the inside of the ears. I think that'll
look really nice. And then I'm going to leave this space right
here in this space. I'm going to leave the tummy, the tip of the tail and
the feet all white. Alright? If you'd like
to paint your spaces that I'm going to leave white a different color, go
ahead and do that. That's the neat thing about art. You get to do what
you want to do. Alright? Now what
I'm going to do is I'm going to take my
smaller paint brush. And I'm going to
paint the flowers. And I'm not sure what
colors I'm going to paint, but I'm just going to kind
of go with my heart on this. And I'm going to understand
that the colors, the paint might flow
into different areas, and I'm going to
be okay with that. Alright? So if the
colors kind of, like, flow into this
area or that area, I'm not going to worry
about it too much. So I'll start with my yellow. Then I will move on
maybe I think maybe to an orange. Okay. All righty friends,
so I have my crown of flowers and leaves
all painted in. And I do see some puddles
here that I'm going to absorb with my handy dandy paper towel because I want them to
be a little bit lighter. So let me show you how
I'm going to do that. What you do is you take your
handy dandy paper towel, you hover it over the spot that you want to where you
want to pull up the color. You tap it gently
with your finger, and it will soak up the color. So let me show you again that. So I have my color here. I go like this, and it soaks
it up just a little bit. You have to do this when
your paint is still wet. Otherwise, it will not work. It will dry. In the next step, we will paint the background. So I will see you back
here in the next video.
4. Step 3: Paint the Background: In this step, we are going
to paint the background. So let's get started. The first thing that
I'm going to do is take my smaller paintbrush, and I am going to put
some darker green on it, and I'm just going to
go over the lines on those ferns and on the trees, these trees right here,
these pine trees. That way, it will give it
a little bit more color. So I'm going to take
a moment to do that, and this is nice that I have this smaller paintbrush,
so I can do that. H. Alrighty friends, I'm
finished covering my lines of my ferns and my
trees with that dark green. Now I'm going to go
ahead and paint the rest of the background with
my larger paintbrush. I'm going to start down
here at the bottom, and I'm going to use
a lighter green. It's going to be fairly light, and I'll just go
around those ferns. And if a little bit
smudges and smears around, I'm not going to worry
about it too much. Alright, so I'll
speed up this video, and I'll see you back
here in just a minute. Thank Alright, friends, I'm finished
painting my design. I hope that you had a lot
of fun with this project. I will see you next time. O
 Em Winn, Teacher, Art Instructor, Artist