Transcripts
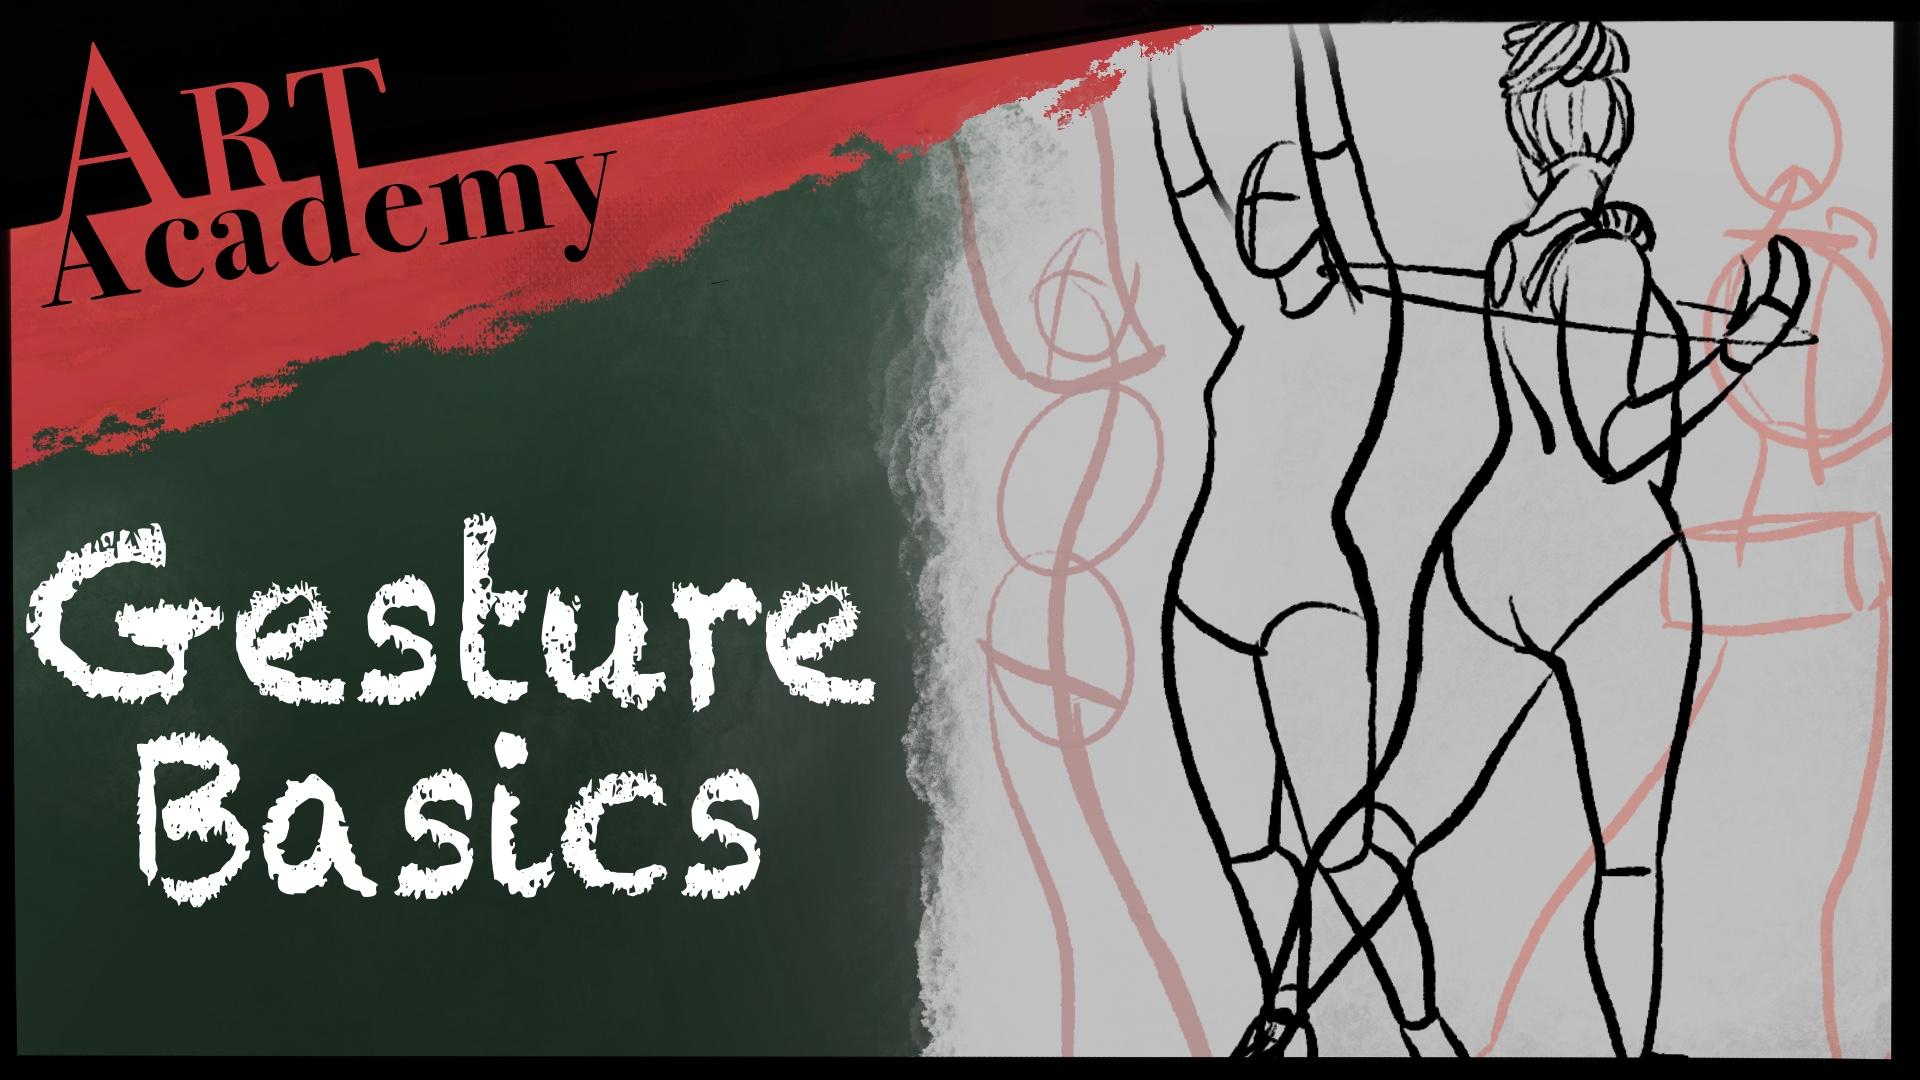
1. Welcome to Gesture Basics!: Hey there. Welcome to Art Academy, my Siris of classes dedicated to teaching New I've learned as a student and professional. My name is Jesse. I'm a freelance, two D and three D artists. I'll be covering an array of topics in my classes, ranging from drawing foundations to digital art. Kmart More. My classes were created with the idea in mind of teaching you glasses that I wish I could have had. It's fast and you'll see a huge improvement in a very short amount of time. Gesture Drawing is all about speed and problem solving. You'll loosen up your figures and push even stationary poses. To be more dynamic and appealing, you'll rely more on quick decision making and muscle memory. You'll also understand the forms and now me better as you add to your visual library and reference. So Maney poses over time. It helps you and other areas of your it as well. So why does it work? Well, the human figure is pretty complex. Sometimes it's easy to get lost in the details, which can hold your back accidentally. Gesture drawing is a quick method to shake off the tunnel vision and focus on the whole picture, or at least the whole pose a big roadblock. Growing artists have, as they feel like they're artists stiff, even with dynamic reference. Something that gesture drawing helped me to Rick through that block and finally be happy with the flow of my figures. And once you get the hang of gesture dry, it becomes a wonderful, warm up and relaxing practice. You can squeeze on just about any time of the day. This will be split into two classes, as all be a pretty in depth gesture basics, which is this class and part two advanced gestures for part. You will be going over more of the advanced parts of gesture trying but also pull from fake you're drawing. But for now, we're just gonna get the foundations said, so you can jump right in and start seeing improvements right away. The basics were no. One class. I will be teaching you defining gesture, drawing and explaining that practice and why it works. Examples of gesture drawing resource is that you'll need and materials for gesture drying how we get started Shortcuts, structures for your figures. Drawing exercises will be doing 60 seconds and 30 seconds and then we'll go into the project and bonus project details. Finally, we'll hit the finish line with our wrap up video, so I hope you're ready to learn and ready to create. I fell in love with art because there's always something new toe learn. You're always figuring out how things work and how to draw them and exploring so I needed from parts of life. There's so much information you can absorb is an artist, which is exciting and could be a little overwhelming sometimes. But for now, in this class will be focusing on gesture, trying, get comfortable and please join me in the next video for defining gestures, examples of it and some useful resources before we get pen to paper.
2. Defining Gesture Drawing: So what is just drying? It's capturing motion, emotion and rhythm. You usually drop from life and within a certain time limit sounds easy, right? In theory and after practice, it ISS. The thing is, it's not about creating a finished piece or finishing the details. It's about capturing, oppose and moving on to the next, getting as much visual information and muscle memory work in as possible. Seeing opposes an idea and emotion, and not just trying to coffee reforms that you see. Noting the mistakes and not getting caught up in them really is what you learn for future dressers. The goal is to show the main action feeling behind the pose. You should have a decent understanding of what the gesture is trying to get across. At first glance, some would say that it's the essence of opposed. You're trying to put down its done with confident lines, shapes and sometimes valleys. Don't worry, though. You can always come back later to oppose and use it for a full peace. But while practicing, try to ignore that urge until later, or you might stop on every other pose of ideas. Quick tip is put a little mark next to your favorites as you work, so you can quickly go back to them when you're done with the practice. When do they addressed your drying? You can do any time limit, but a good method when just starting out is to start long and in short. So you get used to the quick process gradually, ironically, a long gesture, maybe 1 to 5 minutes, depending on how slow you want to start. Everyone is different. A short gesture would be 15 to 30 seconds. Hold 15 seconds to record a figure. It's absolutely possible, albeit a little frustrated when you just start like could actually pretty relaxing as a warm up once you get the hang of it. Once you shake off the frustration of meandering over details or not being able to finish oppose in time, the time leaven isn't meant to feel comfortable at first. It's not the push you out of your routine and Onley focus on the essentials. It helps not to take each drawing so seriously as if it's going to become a final peace and help you learn to let go and loosen up, which could be very hard. Is an artist but you can definitely do it. Gestures require a little bit of abstract thinking, something I myself was never great at originally because they didn't practice it. Gesture drawing helped me a lot to open up my skill set to new avenues, even if it's just small ones. This is also a very quick practice that you can get in almost anywhere. You take a sketchbook, you can draw your local mall. You can watch movies and TV shows especially great when you could possum and there are even websites that specifically rotate through reference poses for you. Very two videos and plenty of photo resource is on the Web like stock sites and deep in art . You can even take pictures of yourself and creator imposed library, especially if you're having trouble with a specific problem, like for shortening the hands or trying to force short in the torso. I bought it a resource section for this class that goes into many different options and recommendations. When looking for reference and Chester drying material, I'll also go ahead and put some sites on the screen and in the project description. That way you can get started right away. You can pause here, and once you're ready, joined me in the next video to go over materials
3. Materials to Gesture Draw: all right materials. You can use just about anything for gestures. What I would recommend is using something permanent, like pen or felt brush. For example, you don't realize how often you're wasting time on fixing every mistake until you start gesture, drawing the less temptation to linger a race and fix mistakes the faster you'll improve your figures, you'll start to feel more confident. One putting lines down. The longer you practice, you'll make note of those mistakes that you do do and go forward to the next gesture with that knowledge to avoid making that mistake again. But using something permanent can be scary, which I understand. So you can always start out with a pencil or stick to a color pencil in step. If you have access to a tablet or an iPad, you absolutely use one of those. I will say that the larger the surface the easier to see east just trying because you're aiming to draw with your whole elbow on arm, not just moving your wrist. So a large drawing pad scrap paper, an old sketchbook you aren't gonna finish filling. Those are all great to use. I have used playing printer Braber before, which worked just fine. So usually you can just a drawing doesn't require expensive materials. So if all you have is an old sketchbook in a mechanical pencil, go for it. I will go into all the different things you can do with different materials, but those are optional, and you can always still do them with pencil ink. If you wanted Teoh, so those will be in the advanced part. So we have our materials now. Any of the reference and references pretty easy to Bryant. I would not recommend pulling gestures from other pieces of art, yet you should observe the body in life so that you can study it before style. Izing and pushing Abby. One of the biggest pieces of advice I was given was to learn the rules first before breaking them. It's easy to want to skip over studying anatomy, learning the muscle groups in the lake and trying to pull from styles that we love. But it's a lot easier to know how something works and build off a blueprint, then took estimate from someone else's interpretation. We'll talk about this more, but as you start, try to reference real people include this information on the resource is this Welker the class. But you're some sites that are available for figure drawing. You can also go to sites like Pinterest and stock sites for great poses. Although using poses from century stock on deviant art, which you'll see on the resource is says well, putting together a board or folder of images you like is also a great idea. You can also visit your local library, where they might have some think your books with collections opposes. There's also plenty of movies and videos that show action and movement. They can wash and pause to work from my friends, and I would do movie nights where would put on a film and randomly Paul's to draw whatever was on screen. Finally, you can always take a trip through local mall or park and trust your drove from life. It is more difficult as people move fairly often, but once you get used to gesture, drawing it becomes a lot easier to draw. In the moment, I would visit shopping centres, cafes and even zoos. All right, so I have my materials and I have my reference. We're going to start without a time limit as they go over some of the basics gesture, drawing
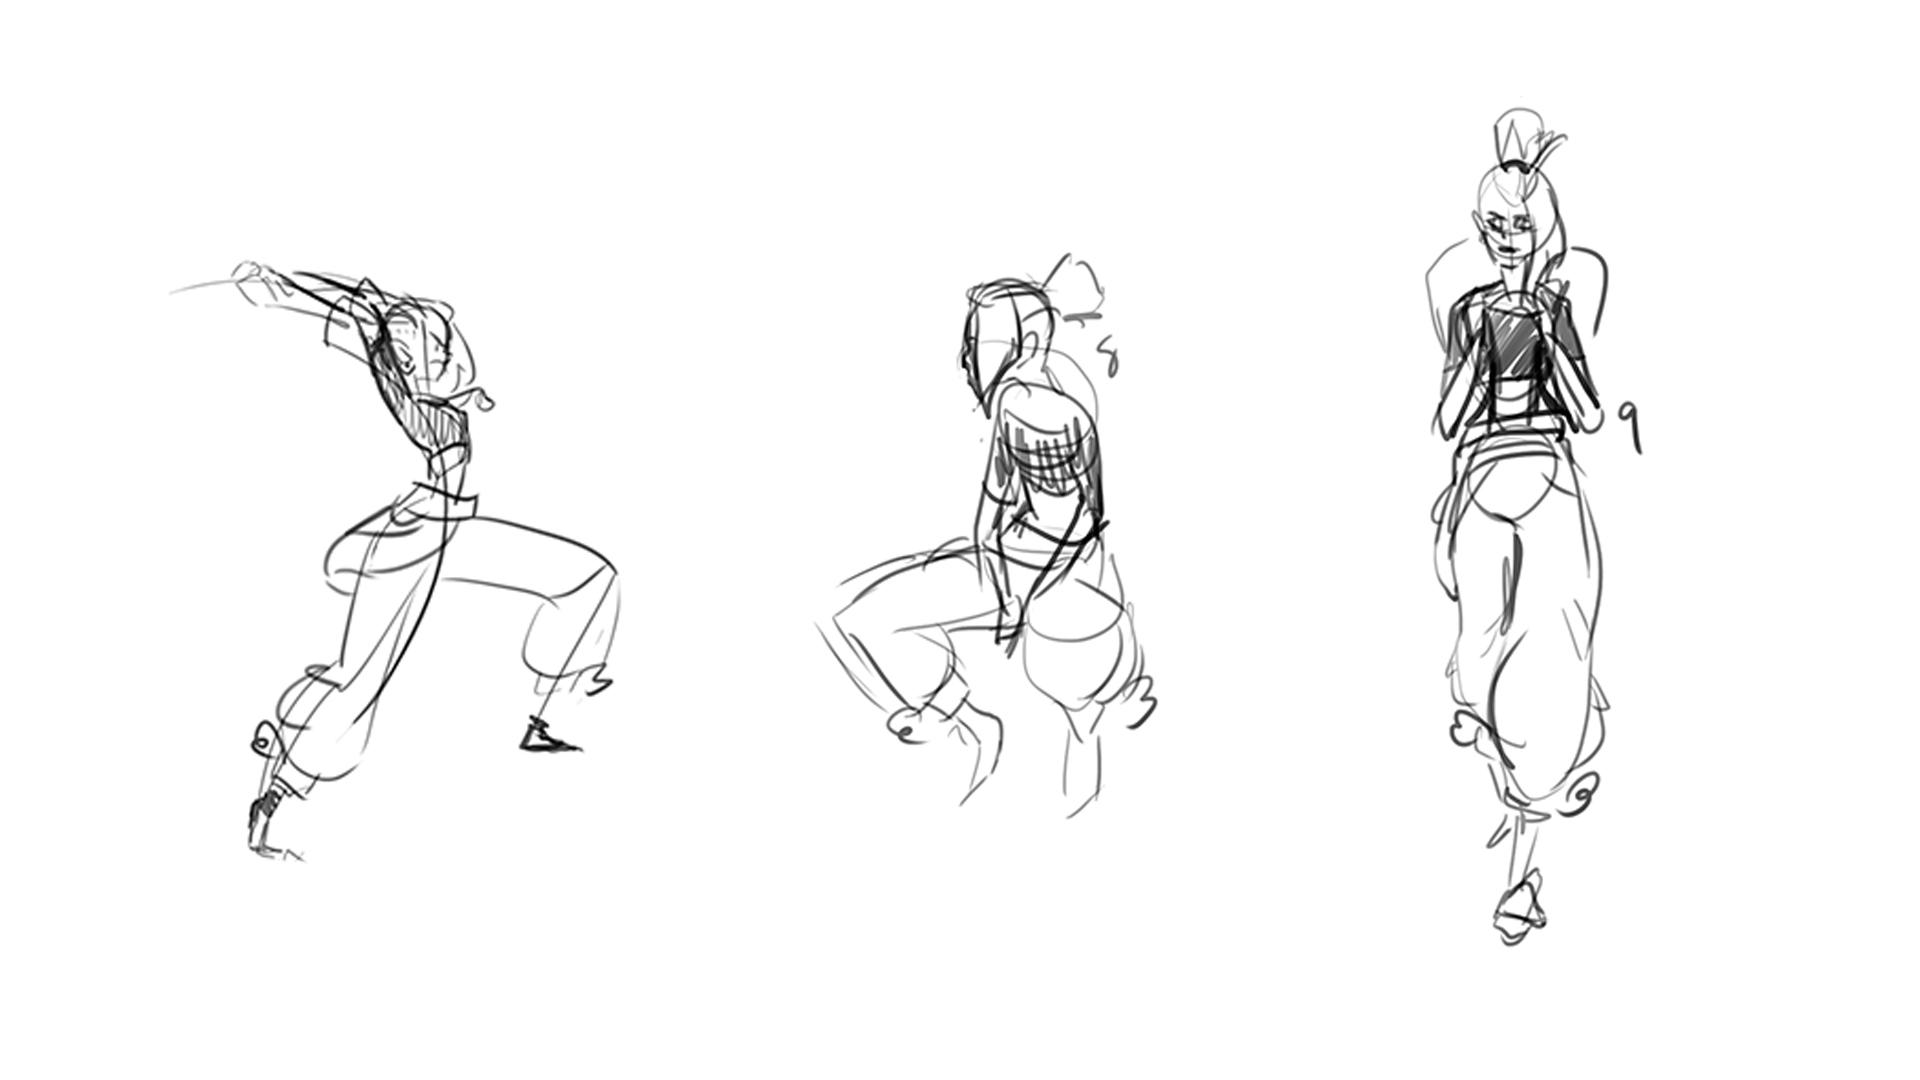
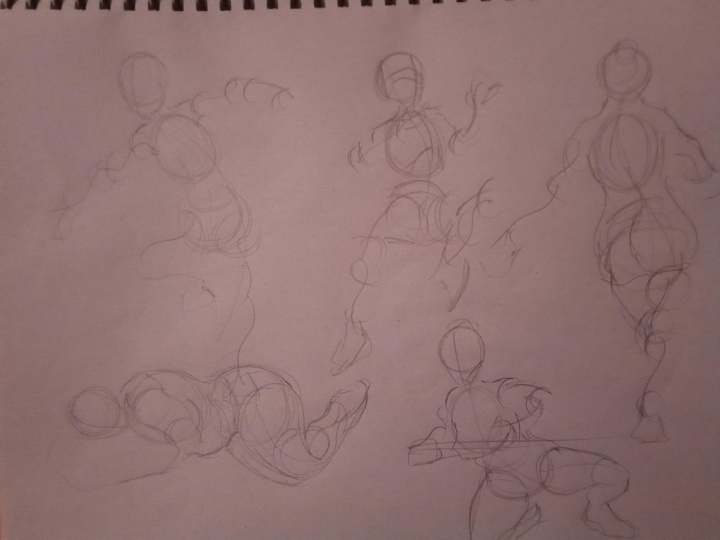
4. Getting Started: All right, let's get into the basics of how to start. We have our vic here. Now there's no right or wrong way to do a gesture drawing. There are some tools that help you capture poses accurately and quickly, and some key things you can do to keep your gestures looking really good while also pushing yourself toe have more dynamic gestures. The line of action as the biggest help in your pose, the line of action is the largest abstract one of motion. For example, a curled figure has a tight see or tight estate in a lengthened figure, often has very elongated C shape or very elongated s shape. It's very gentle. If it helps, you can even imagine shapes. And the action line is the longest line connecting these shapes. The shape itself is the form the lines that define that form our contour lines, which will touch in the advanced gestures class. Now the body can be broken down into sub sections of simple shapes, So imagine that there's a line connecting each of those shapes. Where is the strongest line of motion? I'll keep your arms loose, drawing from the whole arm and elbow not just small wrist movements. This helps you from falling into details and keeps you loosey goosey. I can help the change how you hold your pencil or pen as well. And remember to keep your pressure light, put down the line of action, starting from the head, usually down to the toes. Remember to put a line down the center of face to mark what direction and the person is. Look again and do another line across the eye line. That way, it's quick. It's easy to know what the rotation and island of the head are without actually having to draw the details and try to keep a curve in your line of action. Now capture the angle of the shoulders and the angle of the hips. For now, we're just using lines. It's like we're making a fancy stick. Figure will go into different shapes and forms of the body leader, But for now we're just sticking to the simplest basics. If you have a very static lobes, a good way of finding your line of action as looking toe wet foot is balancing the weight and then go up to the neck from there. So two lines for the angle of the shoulders and angle of the hips than two lines for the arms and to lens for like a simple line for the feet, a little bit curved. And for the hands you can either do a simple liner triangle or a ball. Always have a curve or motion in your lines. You shouldn't have any straight lines. Even the straightest leg will still have a curve to it. As you just your draw. You should be looking to make simple, confident lines, not a bunch of little lions to make a whole. Just because you're working quickly doesn't mean you should be reckless gesture, dryness, learning to be efficient. We're not just here to copy the pose, but they captured the essence of the pope's. So what does that mean? That means that we, as the artists and others is the viewer can feel the difference between looking at a copied , posed and oppose. That's translating the emotion an intention met behind it. Try and focus on how the body language feels. I know it might be hard for some. It was for me, since thinking abstract Lee wasn't a strength for me. You can do it Now that we have our basic stick figure. Let's look on how to structure in the body so that we can have a fluid gesture when we start the form.
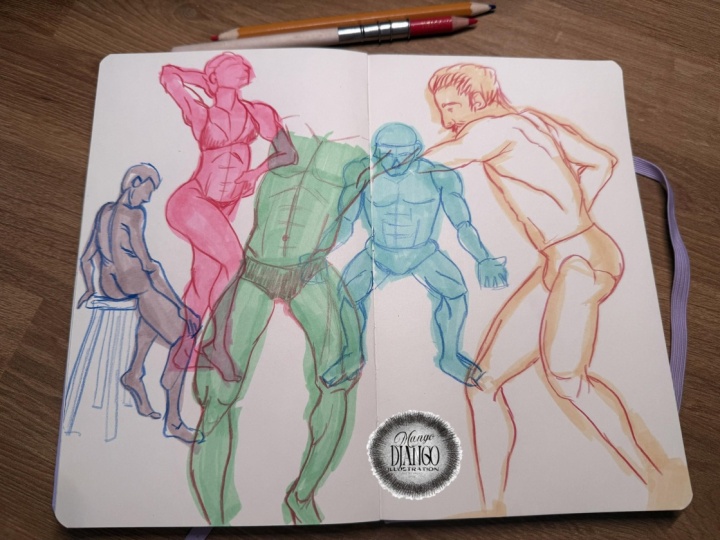
5. Gesture Structure Types: figure structures. What I mean by figure structures is that right now we have a basic stick figure. But what we want to have is also to include the rib cage and the pelvis because they're very key and drawing our figures, especially if we're gonna fill up the form. As you practice stressor drawing you might not need to do the structures as much or do really simplified versions of them. But when you're first starting out, it could be really helpful. So what are some of the structures that weaken Dio? Let's start back from the beginnings. We have our action line. Usually we've been note the angle of the shoulders and the hips. We're gonna go ahead and throw down a circle or elongated oval kindly connection for the rib cage. And then, for this one, we're gonna do a kind of squashed cylinder. Actually, put a lying down the oval toe, denote the sternum. This will be the center of your chest, and then we dio a circle on the bottom of it, angled towards Mr Numb to represent the rib cage and the curves that come with the rib cage . Here are some different angles of how you would draw this, depending on if it was side or front. And this is what it looks like with the whole structure of the stick figure. So what about the hands and the feet? So far, we have a line to represent them, or maybe a bald or triangle. So if we have the hands, if we're going to put a little bit more detail in them, we can still stick with a triangle, and we can also represent the hand with a rectangle. Then for the fingers. You can stick to simple lines and try to keep that gesture and fluid movement represented with those fingers. And you can do this for either the triangle or the square. Or what I like to do personally is combined three of the fingers on the outside of the hand together and then keep the index finger separate, as that's often the most flexible. On the most of motive finger for the thumb, I do align with a triangle representing the very last joint of the thumb for the fingers. They're just rectangles. This way you can have a little bit more detail in your hands while not going overboard and worrying about where the joints are and how the fingernails are in relation. So how about the feet? Feet can be a little more difficult for people. Actually, you can sick to pretty simple shapes for it as well. So right now we have also just been using, like a line or a triangle, which works pretty well. But a good structure toe have for the feet is that the hell makes up a rectangular block that goes up to the ankle. And then from that hell, you have a rectangle that goes down to the toes on those toes. You can either keep in a more triangular fashion or just like what the fingers You can a group together little toes and then keep the big toe separate, seeing as that's usually the one that's separate from the group of toes. If it's being just Auriol, so who's your figure? And here's your figure with their structured feet and are structured hands. So we kept kind of a triangle for the palm of the hand on the back of the hand, and then the group the fingers together and kept the index finger separate for one of the hand, since it's doing a little something extra for the feet. We just have a simple triangle from the front and rectangle from the side with the triangle for the toes, keeping a very simple still, while also trying to retain those shapes that the form has for when you fill out the form, we're still focusing on the gesture, the emotion of the rhythm and the movement of our figures. There are also different structures you can do for the body. Instead of having a disc almost for the hips. There are a lot of different ways to do the hips. You can do a box just like a rectangle that represents the front of the pelvis, the size of the hips and the very back of the pelvis, which usually covers the, say Graham area, not just the booty that's right about the booty. You can also use a blocked out triangle, a three D triangle that kind of represents like a bikini line almost and then we also have a bean. We're going to do some being exercises in the advanced section of just your drawing. But for the bean, it's two circles that are overlapping so that you can easily figure out where the contour lines of the overlapping happens With the torso, you can also just do a simple flat rectangle or something. I would use a lot to keep. The curves of the body and mind were two triangles pin together with a line down the front , represent where the curve, the body waas. You'll see in some of my examples that I stuck pretty heavily to the train Giller option because it also made for shortening a lot easier for me. But I also step to a lot of eggs troops for the torso and generally stuck to either a triangle or rectangle for the hips. As I got used to gesture drawing. I really only had to use a circle for both because I understood the angles pretty well. If I was having trouble with the hips, I would go back to using a rectangle, and if I was having any trouble with the angle of the torso, I would go back to using the egg shape and you'll see that I kept the lines for the legs very simple. A lot of the times, if it wasn't super important to the pose. I didn't even draw the hands because there wasn't enough time. I wanted to get the full figure job first, because that's what was important. Some of them have gestures of hands, just kind of blobs or triangles to represent where the hands were. But as you do your own gesture drawing, you kind of figure out what works best for you. Something that works best for you might not work best for someone else. So try out some different options while you're gesture drying to see what kind of clicks for you and helps keep you and the idea of keeping the fluidity of your gestures and going quickly while also hoping you think a little more in terms of dimension. It also helps you keep that idea of anatomy again. We're not focusing on anatomy. It's OK to exaggerate, oppose and exaggerate the figure and try and push it as far as it can go. So now we're gonna take what we know about structure. Apply it to the figures that we've just been drawing, and I'm gonna show you how. Fill out the form with those structures in mind and then from there will go on to do our exercises
6. Building the Form: Now we're gonna fill out these forms so we have our figure with our structure and you can use any of the structures that you want. We're gonna turn the opacity down. I'm gonna fill out the form over the drawing just so we can get our idea. Usually, when you're doing trust your drugs, you would not copy reform. But you can do that as a practice. Help you get used to it. Using magazines, for example, are great for that in a Sharpie. It's good to keep in mind that you should be looking for straights and curves in the body. The straights won't always be completely straight, but there will be a side that has more detail on a side that's smoother. So here we have. The left side is almost completely smooth, and the right side has a lot more bumps and ridges to it, which keeps the form looking appealing and dynamic. We make note of the angle of hips using the thighs, and we note the angle of the knees and the ankles. Now let's say that you get lost in the details. What does that mean? What does that look like? We're trying to use confident, simple lines. If you start going into the details like, let's say the arm, it's gonna look like this. It disrupts the rhythm of the figure. So a good way of thinking about the arms and the legs is that they're a series of tubes, or you can think of it as like a noodle and keep the simplest of curves that go along with that. The arms have a lot of muscles, but you don't have toe denote them on every turn. Then we can fill out the hands and feet and the head, and we have our figure. It looks pretty good, very fluid. The balance is nice, the lions are neat and it didn't take too much time. Let's practice this again on another figure, another standing figure. So we have our live action, and then we're gonna fill out our structure. I'm sticking with the egg shaped rib cage and the rectangular pelvis, and then you can see with the hands in this one. Specifically, her wrists are holding up the who. So I'm making sure toe mark the curve of her hand as well as her thumb, which is acting kind of the pivot. The feet aren't to two important with this post, So I just stuck toe lines and now we're gonna get into filling out the form. I turned down the opacity. Generally, if you're filling out the form with another drawing, the goal is to keep your sketch in. Your structure is really light and then go over with final lions for the actual form and contour. Or you can always use a color pencil or light colored ink and then do the final form fill out with a black ink or a drinker utensil. So we have our smooth one side, and then we have our harking back, which makes Mark detail. No, let's again think about smooth defining lines and streets and curves. What does it look like if you try to capture every curve in the body? It looks like this. It's a little sausage e Now, while the body has a lot of curves, it takes a bit more nuance when you're noting those muscles and where those muscles air going. So if you just try to capture it like this, it looks really bumpy and not appealing and also makes your figures looks differ that disrupts the flow of your eyes when you're going through the figure, the figure has a rhythm, and if you disrupt that rhythm by making unnecessary details, the I takes too long to go over it and makes it look stiff. When you're using streets and curves efficiently than the eye can move through, the body limbs smoothly. And that's what makes it appealing instead of having sausage E limbs. So let's say Okay, well, no curves and just straits. Why wouldn't that work? Straight lines can work, but they can also make your figure seems stiff if you're not using them correctly, and it also makes your I go through the figure faster. So instead of taking your time on the rhythm of the body, you just immediately go through every limb without taking the time to appreciate it. So, back to our figure, we have our torso. I'm going to draw the rest of this figure, so there are some lines that are curved around each other. But for the most part, the body keeps with simple lines on one side and careers on another, and this can flip flop depending on the part of the body So you have the thigh, for example. Might have a curve in a straight on one end. But then you go down to the calf, illustrating the curve might be reversed. And that's okay. You'll get the hang of it as you practice. So in her next video, we're going to be doing some practices we're gonna be doing 60 seconds to start with, and then we're gonna be moving down to 30 seconds, so that would be a really good time to get your materials together and get ready to draw. We're gonna put all of this into practice, and I'm still going to be going through and reminding you of the key features while we do it.
7. 60 & 30 Second Exercises: all right. Time to jump into our exercises. We're gonna be doing 60 and 30 seconds. We're going to start with 60 seconds and start drawing the moment their on screen. Here we go. Whoever to start with your action line, note the angle of the shoulder and hips. Remember to keep the curve in your lines. Start putting those structures in there. You're filling out the form. Remember, he's confident lines. Remember, we're ignoring anatomy right now that we're exaggerating the post onto the next. - You were my structures and my forms. Next one. - No . Here's my structure and form on 2 32nd exercises for this, it's gonna be a little bit different. The first will be an example along with side by side. And then the rest will be the image for the entire time. And then afterwards I'll show you my final pieces. So let's get started. So here's my skeleton. We're almost done. Here are my forms. Get ready to move on to the next one here. You gonna have in honor of the time, looking at this image, we'll take time afterwards to look at my structure and forms about halfway, and we're done here is my structure along with my forms onto the next one. Don't feel too overwhelmed with super dynamic posts like this to find your line of action. Look where this fight goes. Almost done. All right, here is my structure. And here are my forms. All right, over half way and we're down. Here is my structure. Here are my forms Onto the next we have a few more to go. This one includes a little bit of for shortening and perspective, and we're done. Here was my final form going under the next, and we're done. Here is my final four. Finally, our last one. Remember to push those figures, Exaggerate the pose and we're done. Here is my figure. You guys said a great job. I know it's a little frustrating, but gesture drawing is something that pushes you to be more creative with you or her limited scope of time that you have to draw the figure. It forces you to make shortcuts. You have to look for those quick ways to still make an appealing and dynamic figure, while also getting them down a time. Plenty of famous artists and gesture drawings they drew from life gesture. Drawing has been around for many, many, many, many years. So thank you so much for sitting with me and learning with me. Gesture. Drawing was one of the best things that could have happened to my heart. It helped me improve so quickly and loosen on my drugs when I just could not get past them . Being stepped remembered a gesture draw as often as possible. And for the next video, we're gonna go over our project and say goodbye for now.
8. Project Details and Wrap Up: we finally reached the end of this class. We've covered a lot and I've repeated a lot of different things that I hope stuck. I know that sometimes it can be overwhelming getting information, and I have certainly been there. Please put everything you've learned into practice. I do have a project for this class. I would like you to do between 10 to 20 gesture drawings using one of the sites I've provided. A link below or in the resource is you not use any of your own reference material. If you would like. If you would like to use movies or go straight out to a cafe, I would like you to do tend 20 of them. I would like you to focus on the gesture both the main skeleton, the main stick figure and also using different structures trying to see what works best for you. There is also a bonus project that you can dio where you pick your top three and refined those forms. So using those nice, confident straits and curbs to make three appealing figures that you're very happy with, it would like to share with both me and the glass. And if you would like to go ahead and share them on social media as well. Any artist friends of yours, I'm sure, would love toe learn, gesture, drawing as well, because it's a great warm up and it really helps improve your skills. Also, when you're doing these projects, I don't have a specific time limit, but I think it would be helpful and beneficial for you to stick to somewhere between 15 to 60 seconds. We're doing a staggered limit like 60 30 and then 15 2nd gestures. I cannot wait to see your work. Please take a look at the resource is Down below in the project section. I have listed some great sights. I've listed some options for resources books, some things that I would think would be very helpful. I definitely plan on doing more classes with my art academy. Siri's will be doing advanced gesture drawing, but will also be doing things like figure foundations, color lighting, digital art, Gaymard character design. I have so many things that I want to dio and want to share. So please follow me if you'd like to see those classes in the future and I can't wait to see your work. Help? You had a great time in this class and that you have a great time gesture drawing.
 Jessica Brown, 2D & 3D Freelance Artist