Transcripts
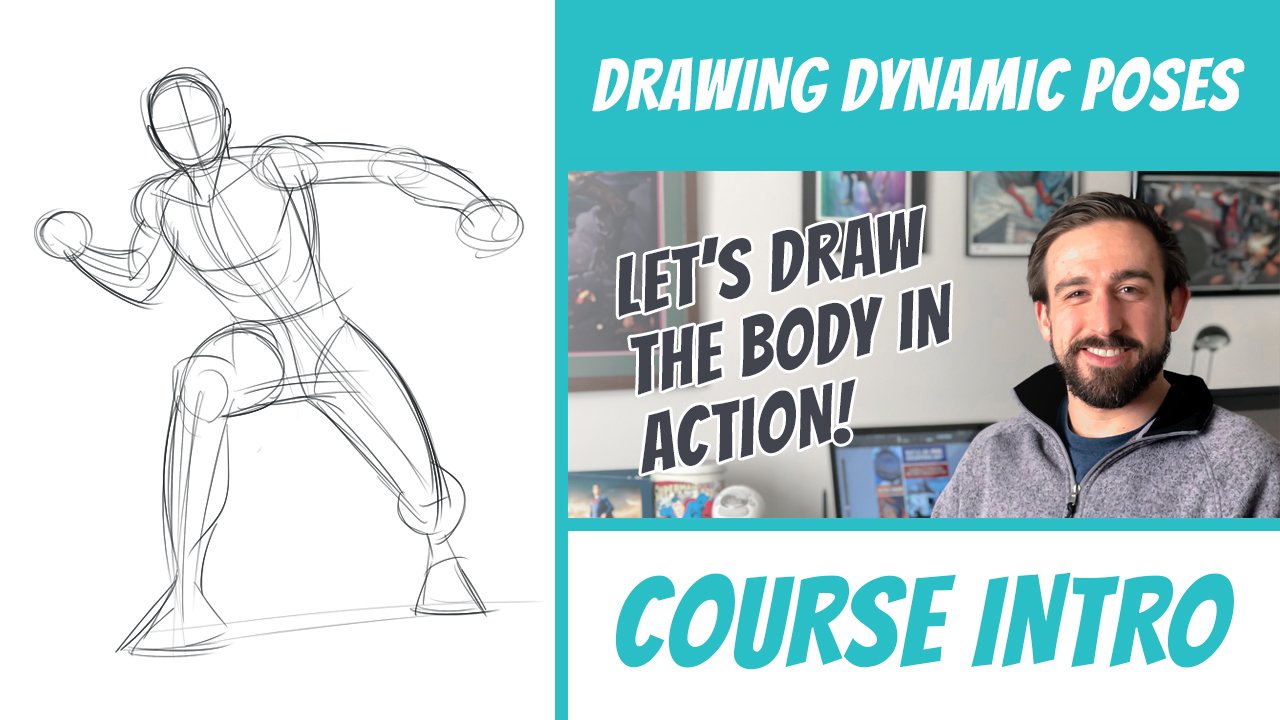
1. Course Intro: Oh, hey there. I wasn't about to get started on a sketch, but before I do, let me ask you this. Are you a beginner looking Teoh improve in the area that you're drawing? Or perhaps you are an intermediate artist seeking of a fresh, of course from into perspective, If you answer, guess that either of these then you're in the right place. I'm Chuck and I will be your instructor. What a wonderful world of figure growing of a full time freelance artist who is trained in graphic design and hurtful part. But I mostly specialized in illustration comical garden drawing has been a huge passion of mine for my entire life and my own personal. Our journey began when I was just seven years old. I started out with your typical number, two pencil and a piece of paper, but then eventually graduated to my very first wake on drawing tablet. In place after high school, I decided to attend college, but I didn't go to impossible because I wanted to swim competitively. And typically, art schools don't have any sports teams in college. I studied the art of commercial design because at the time I thought it would be a highly marketable skill. And who doesn't want a job after college? Right. This, however, was not the case because after I graduated with a B A, it took me nearly 13 months to get my career started. And during this entire time, I face constant rejections, disappointments, emotional turmoil and even fell into depression. But despite all of this, I kept pushing and didn't give up. Then I finally got my first job doing graphic design work. What, working this job, However, I suddenly realized that my talents were more well suited for a career in illustration. So after being at that job for just eight months, I left to pursue freelancing full time, which was initiated by a surprise opportunity with marble and then eventually getting into comic regard. It'll just don't write to me. And even though that leaves the fate terrified me. I knew that somewhere down the road, through intuition, everything would fall into place and work out perfectly. And so far it has. I tell you this because you may be facing the same or similar challenges with your own passion for, but I want you to keep persevering if you follow me on either Instagram or Facebook. You'll see that it's my personal mantra, and my hope is that it's just is inspiring for you guys. So with that being said, I welcome you on this dirty to becoming a better artist. You've already taken an amazing first step in my second sculpture. Of course, I walk you guys through my entire process for drawing a female picture. Each lesson is gonna focus on a different part of the anatomy. And then in the fifth video lesson, we're gonna take everything that we covered in the previous lessons and then titled together to construct a full female votes. I also have a class project for you guys to complete the end of the course as well. That was the one to get you guys. Some pre expects on some of the tools that I use when doing my artwork. So I worked on a way, comes antique 22 inch screen display. Along with using the program's called Water Sketchbook and Photoshopped. These two programs can be used and which makes them the perfect pair of traditional drawing in life. Thank you guys so much for choosing this force. It really means a lot to me. So without further ado, let's get started
2. Lesson 1: The Head: Hey there, guys. In this first video lesson, I am gonna be walking you through my entire process on drawing the female head and facial features. I'll be showing you how to construct the head using simple and basic shapes, the accurate placement off the eyes, nose, mouth and ears. And we'll even explore the head in a few different dynamic angles. So with that being said, why don't we jump right into it? Okay, guys, let's get started here. We're gonna first sketch the head from the front view. So first, start with a simple circle followed by a vertical line down the center to represent the line of symmetry. And next, we're going to sketch a horizontal line to show where the eyes will eventually be placed. Okay, Next, we're going to sketch another horizontal line to show the nose placement, and then we're gonna start constructing the front plane of the face from the top of the forehead, down to the cheekbones and all the way down to the bottom towards the chin. Next step will be to draw the years, which should be the same with as the space between the eye line and the nose. line. Then we're gonna draw the jawline and define that some more. We're gonna sketch the neck and the trap muscles on top of the torso. Next, we're going to draw a line for the mouth and then start to build the eye sockets. Next, we're gonna draw the nose and you can think of the nose as a diamond shape in its most basic form. After we've constructed the eye sockets, then we're going to sketch two circles for the eyes and in order to place the eyes accurately draw vertical line up from the outer nostrils on either side of the nose and angled lines at work towards the outer edge of the eye sockets. The space between these two lines we just drew will be where the eyes were gonna be placed and the next we're gonna draw the lips, which, because this is the female face, there gonna be a little bit more full than that of the male face. Now we're gonna move back up to the eyes again, and we're going to sketch the islands. Now imagine these circles that we sketch for the eyes as three D spheres because in real life, the eyes were not flat circles. They're three dimensional spears. So imagine the island's wrapping around them, and this will help you construct the final shape of the eyes a little bit more easily. Next, you're gonna have the pupils, and then we're gonna add details to the ears and the nose. The last few steps are going to involve drawing in eyebrows, and the hair hair extends from a central point on top of the cranium and the hair strands. We're going to flow downwards from this central point. Now, when drawing stylized hair, you don't want to go and sketch in every single hair strand because one that would take a long time and to when you're going for more stylized look, you want to simplify the hair a little bit more and only sketch a few of the hair strands in a flowing downward motion? Okay. Our next example here is gonna show the head from the side view. So we're going to start off again with that simple circle, we're gonna sketch a vertical line to show where the ear is gonna be placed. Next, draw two lines for the eye placement and nose placement similar to how we did in the first example. Next we're going to draw in the year and then that front plane toe represent the face starting from the top of the forehead, moving down to the eye socket cheekbone and all the way down to the chin. Next, we're going to draw in the jaw line real quick, and then we're gonna very lightly just sketch a line to show where the mouth is going to be placed. After we've done that, we're going to sketch in the eye socket and the nose for the eye socket. We're going to draw a circle for the I, much like we did in the first example, and the next we're going to draw the eyelid, and from the side view, the I is shaped like an arrow pointing to the left. After this, we're gonna draw the neck and the top of the torso, and finally, we're gonna add some details to the ear and draw in the lips. After that, we're going to sketch in the eyebrow and the hair, keeping in mind that when we're sketching the hair strands, they're going to flow from that central point on top of the head, and we're not gonna worry about sketching every single hair strand. Really gonna worry about a few of them because we're going for a more stylized look here. Okay, Now, our third example here is going to show the head from the back view, which is gonna be a lot more simple than the previous two examples. So, first, why don't we start by sketching or horizontal line for the top of the torso and then a few lines for the neck, and we're gonna lightly build the traps as well. Next, we're going to sketch that simple circle for the skull as well as the ears. But we're not gonna focus too much on details, because in a moment here, we're going to sketch the hair, which is going to cover these things. And finally, we're going to sketch in the hair following the same steps that we covered in the 1st 2 examples. And again, the hair is gonna cover the skull and the ears so we don't have to focus too much on detail ing those. Okay, now that we've drawn the head from those three points of view, we're now going to explore drawing the head from different dynamic angles. Keep in mind when sketching the head from various positions. You want to remember that the school is three dimensional meeting that the positions and angles of the facial features will also shift and change when the head moves in. These 1st 2 examples that I'm gonna show the head is viewed from slightly below and tilting to the side. When this happens, the space under the nose will be more visible, the eyes will appear closer to the nose, and the position of the year will change to really improve. In the area of dynamic angles such as these, be sure to study a lot of real life photos and references, so that way you can practice in practice and improve over time. I'm also just going in a bit and cleaning up the rough sketches. So that way, you guys can get a sense of how I work and go from the rough guidelines all the way to the finish line. Art An example. Three. The head is viewed from above, and as a result, the position of the ear will shift to above the eye and the eyes will be partially covered by the eyebrows or the upper eye socket. We also won't see as much of the neck from this point of view, since the jaw line will be covering it. Okay. Also, one key thing to keep in mind are the guidelines for the center of the head and the eye line knows line and the mouth line, all of which we discussed in examples one through three in the beginning of the video. Much easier time later on constructing the facial features and adding details. Awesome job. Congratulations on completing Lesson one of this course. By now, you should have a much clearer understanding of drawing the female head and facial features before we move forward, though I just want to do a quick little recap we covered here. So when you're beginning your sketch, always remember to start with simple and basic shapes to build the structures. And you also want to remember the accurate placements of different facial features. And you also want to practice by exploring different dynamic angles of the head. Thank you guys so so much for watching. I hope you learned something from this video and I will see you in lesson to take care
3. Lesson 2: The Torso: everybody in this video lesson. I'm gonna be walking you through my process for sketching the female torso and hips. I'll be showing you how I break down the anatomy and structures using simple and basic shapes. What? Some of the key differences are between the female body and the male body, and I'll be showing you the torso in several different dynamic, twisting motions. So with that being said, let's get right to it. Okay, guys, we're going to start here by sketching the female torso from the front view. So first, we're gonna begin with a vertical line. This is gonna be the central line of action. Next, draw a line for the shoulder placement up top. Then after that sketch on oval for the rib cage and then draw a upside down triangle for the LAT muscles in the back. After we've done that, we're gonna sketch two circles for the shoulder placement, draw the midsection and sketch the hips. Keep in mind, the female figure is gonna be more curvy than the male figure, so the hips are going to be very wide and curved. Okay, Now, the next steps are gonna be to define the abdominal section as well as the breasts, along with the traps and neck up top. Okay, now we're gonna define the rib cage, abdominal muscles and sketch in the obliques on the sides of the midsection. Then we're going to define the shoulders and throw in the upper arms and legs. You guys can get a brief idea how they connect to the torso overall. Okay? And now the last thing that I'm gonna do here is likely sketch in the head. So that way we can measure out the torso in headlines to make sure it's correct proportionally. And the female torso should be less than three head lengths tall. So we're gonna measure that out here on the side real quick. All right. Next, we're going to sketch the torso from the side view from the side. The torso is going to appear curved. It's not going to stand straight up and down, so we're going to start with that line of action and we're gonna sketch a curved line here next drawing oval for the rib cage, along with a circle to show the shoulder placement. We're also going to sketch in the spine just to get a sense of the flow from the top of the torso down to the hips. Then we're going to sketch the midsection and the hips. Next, we're going to draw in the abdominal section the breast trap, muscle and neck on top of the torso, and then we're going to sketch the LAT muscle on the shoulder blade in the back. I'm also gonna throw in the head real quick to show the placement. And then we're going to define the rib cage and draw the small Sarandos interior muscles beneath the breast along with the oblique muscle in the midsection. And then I'm just gonna quickly throw in the shoulder, upper arm and upper leg. Now, remember, the shoulder otherwise known as the deltoid, is going to be split into three main sections of muscle. So you want to make sure you define those clearly here. Okay. An example. Three. We're going to sketch the female torso from the back. So to begin, we're gonna repeat steps one and two from example, one from the front view. Although this time we're going to exclude the breast and the abdominal section since reviewing it from the back this time. Okay, After we've done that, we're gonna quickly sketch in the upper arms legs as well as the head. Next, we're going to sketch in the trap muscles, the shoulder blades and the shoulders, followed by the Latin muscles and obliques. And finally, the lower back area tailbone and the gaudiest Maximus muscles. Okay, now that we've sketched the torso from those three points of view, we're not gonna move into exploring some dynamic, twisting motions. So what I like to do when thinking of the torso twisting to the side is I like to picture the torso as a three dimensional rectangle. And then what you want to do is take this three D rectangle and twisted. This is just a nisi way to simplify the complex structures and the motion and movement of the different limbs and muscles when the torso is in this motion. And now we're going to sketch the first example here, showing the torso twisting with one arm extending out in front and the other in the back. And I'm gonna follow all the steps that we covered in the 1st 3 examples of this video. When building this pose. And now, when the torso twists. It's usually as a result of the limbs in motion. So usually when an arm is reaching forward and back, and then when the legs move the leg opposite to the arm that's reaching out is going to be back, and then the other leg is going to be facing forward. Sketching the torso from this kind of dynamic angle really takes a lot of practice, and it can be frustrating at first. But don't give up, because once you get a grasp of just how easy it is to construct the pose, you're gonna have a lot more fun doing it. Okay, so we're gonna sketch one more example here, showing the torso twisting, and this time it's gonna be shown from the back view. So again, we're gonna picture the torso looking like a three D rectangle that's twisting. And once you get this simplified concept down, it's gonna be a lot easier to construct the actual pose itself. So here we're going to start sketching the pose, and we're gonna follow all the steps that we covered in the third example, showing the tourists from the back view, as I always say, when doing these sketches forms follow gesture. So you want to make sure the overall gesture of the pose and the limbs is nice and smooth and fluid before beginning to build upon them with all the muscle structures. That way, your pose is gonna look nice and fluid rather than static and stiff. Fantastic job. Congratulations for completely lesson to why now, you should have a much better grasp on drawing the female torso and hips. Now, before we move forward, I wanted to a quick little recap of what we covered here. So you always want to remember that when you're starting, your sketch always begin with basic and simple forms and shapes. This will help simplify the structures a lot more easily, so that way you could build upon them. And you also want to remember that the female torso was gonna be a lot curvier er than that of the male. And you also want to expand your knowledge of it by practising sketching the torso in different dynamic, twisting motions. Well, thank you guys so much for watching. I really appreciate it. And I'll see you in the next lesson. Take care
4. Lesson 3: Arms / Legs: Hey, guys, in this video lesson, I am gonna be walking you through my process for sketching the female arms and legs. I'm gonna be covering each one separately and for both the arms and likes. I'm gonna be covering gesture, breaking the forms down into simple and basic shapes. As for the usual, and we're going to explore both the arms and legs in several dynamic poses that really show the muscles in action. So with that being said, let's get to it. All right, let's get started here. First off, we're going to draw the arm from the front view. So begin by sketching a circle to represent the shoulder or the deltoid and then sketch a smooth, fluid line and draw a circle halfway down where the elbow joint will go next. Draw another rough circle at the end of the forearm to show the hand placement. Okay, and then before we move forward, make sure that you nailed down the gesture of the arm first, because if the gesture is off, then when you start building the muscle structures, the pose of the arm may look a little bit stiff, so you want to make sure you get the nice fluid gesture down first because, as I always say, forms follow gesture. Next, we're going to rough out the bicep, draw the super nater muscle. Three extensive carpi radio Alice. Longest muscle on the left side of the forearm along with the flexor Carpi Radio Alice muscle on the right side, along with the small per nater terrorist muscle up top above that next defined the deltoid . And remember, the deltoid muscle is gonna be split into three sections, But from the front, we're really only going to see that first section and then a little bit of the middle. Since the arm is being viewed from the front here, we're not going to see the tricep and then lastly, just rough in the hand. So we're not gonna go into too much detail on that right now, but we'll cover hands in more detail in the next video lesson. All right, now we're going to sketch the arm from the side view so much like before I start with the circle to show where the shoulder is gonna go and then sketch a smooth flowing line downward to show the upper arm and forearm from the side. The arm is actually gonna be slightly curved. Not too much, but just a slight bend. And then draw the circle for where the elbow is going to go. And then another circle at the end of the forearm to show where the hand is gonna be placed and again before moving forward to building the muscle structures. Make sure the gesture of the arm is Nell down first before going in with details. This will ensure that the flow of the arm is smooth and fluid rather than rigid and stiff. Now we're going to sketch in the bicep super nature muscle and the extensive Carpi radio s longest muscle. After that, we're going to sketch the extensive digit orum and the tricep. Along with defining the deltoid muscles from the side view. We're gonna be able to get a clear view of the three sections of muscle that make up the deltoid. And then, as before, also, we're just going to sketch in the hand, bro. Quick. Just keep it rough and loose as well. Cover the hands in more detail in the next lesson. All right. An example. Three. We're going to draw the arm from the back view. So again, begin with that circle for the shoulder placement. And then we're going to sketch a smooth, fluid line to show the upper arm and the forearm. Draw a circle halfway to show where the elbow joint will go, and then another circle at the end of the forearm to show the hand placement. After the gesture has been nailed down, we're gonna sketch in the tricep muscles along with the elbow joint. Next sketch the Supinit, your muscle on the left side of the forearm along with the flexor Carpi radio Alice muscle on the right side of the forearm. All right. And then we're going to sketch the extent, sir, Digit Tora muscles just beneath the elbow joint and then define the deltoid much like with the front view, were only going to see the back section of muscle and a little bit of that middle section. And then we're gonna just lightly sketch in the hand so you guys can get a sense of the placement, but in the next lesson will cover hands in more detail. Now that we've drawn the arm from those three points of view, we're gonna explore the muscles in action by drawing the arm in a couple of different dynamic poses. So when the arm flexes forward, bicep is gonna contract and bulged outward while the tricep expands. The opposite is true. When the armed flexes straight. In that case, the tricep will contract and the bicep will expand. And as I mentioned before, the muscle structures of the female arms, even in different poses, are still not gonna be very muscular and bulky like that of the male figure. They're still going to be very lean and thin. Another thing to keep in mind is that when the forearm rotates, as shown in this third example, the super nater and the extent, Sir Carpi, Radio Alice, longest muscles are also gonna rotate. And that central point where they both meet is going to flow and point downward towards the pot. Okay, now we're going to sketch the legs. So first, we're gonna draw the leg from the front view, start by sketching the hips and as I discussed in the torso, lessen the hips are going to be ah, lot wider and more curvy than that of the male figure. Next, we're gonna rough in some smooth, gestural lines to form the legs, similar to how we did in the arms portion of this lesson. Because, remember, forms always follow gesture. Once the rough guides and the gesture looks good, we're going to start building the structures. So first define the kneecap and then sketch the vast ist ext earnest and fastest internist muscles. Then directors from Morris will be placed right in the middle above the knee. Next, draw the muscle that flows from the hips down to the lower leg called this sartorius and the tensor Fassi a lot a muscle on the outermost region of the upper leg. Lastly, we're going to sketch out the calf muscles and from the front view, the calf muscle on the outer part of the leg is gonna be placed a little bit higher than the calf muscle on the inner part of the lower leg. Now we're going to sketch the leg from the side so much like before, we're going to start off with the hip section and remember, the hips are going to be slightly tilted forward, and then we're going to sketch a circle for the hip joint and then proceed forward with the upper leg and lower leg, just lightly sketching in the gesture from the side. The front of the upper leg and back of the lower light will be curved, while the back of the upper leg in front of the lower leg will be straight. And then, as always, make sure the gesture is smooth and fluid before moving forward with details and muscle structures. Next sketch the vast ist Ext Earnest and the tensor Fassi a Let a on the upper leg, followed by the rectus femoris above the need. Next, we're going to sketch the side of the glute muscle over the hip joint and draw in the calf muscle on the lower leg. Also include the biceps femoris behind the upper leg as well. All right now let's draw the leg from the back view so much like before, we're going to start off with the hips and then form the glute muscles. After we've done that, we're going to sketch the upper and lower legs with smooth, fluid, gestural lines like we did before, and we're gonna rough out the back of the foot. Next draw the Sem attended know sis and bicep femoris muscles on the upper leg, along with the calf muscles on the lower leg. And now that we've drawn the leg from those three points of view, we're going to explore the legs in motion in a couple different dynamic poses. So if you can nail down the muscle structures when drawing the legs from the front view back view inside view, you should have no trouble at all practicing, drawing the legs from different positions. Different angles, different dynamic poses. Because once you get a sense of the muscles and how they move and flow, you'll have no trouble at all translating them to different points of view. Now keep in mind when you're sketching leg poses where the toes are pointing out forward. The top of the foot is going to fall right in line with the lower leg, and the hell is gonna point backwards. Now I'm only showing three examples here, but to get better at sketching legs in different poses and positions, be sure to study and practice a lot from real life reference photos. Some good sites that I like to use our Pinterest and quick poses dot com. There's many different photos you can draw and study from Teoh, improve your anatomy skills even more great work. Congratulations for completing less than three of the course. After watching these videos, you should now have a much easier time sketching the arms and the legs before we move forward, though, let's do a quick little recap. So when you're drawing female arms and legs, always remember that forms follow gesture. So before going in with any details or building the structures, you wanna make sure the gesture is nice and smooth and fluid. And then once that's down, you want to construct the forms using basic shapes. And then you also want to practice, sketching both the arms and legs in a variety of different poses that really show the muscles in action. Thank you guys so, so much. I appreciate it is always and I'll see you in the next lesson. Take care
5. Lesson 4: Hands / Feet: Hey, guys, in this video lesson, I'm gonna be walking you through my process for drawing the female hands and feet. Now it's without a doubt that the hands and feet are some of the most challenging parts of the anatomy to sketch. But I'll be showing you how I break down all the complex structures and forms using simple and basic shapes, and we're going to delve into a few different examples for both, showing the hands and feet in different dynamic poses. So with that being said, why don't we get started? Okay, so first we're going to sketch the hand from the front view, begin by drawing a square and then divide it into four sections. Next, sketch a triangle protruding from the lower left quadrant and a curved line in the same quandary near the center of the palm. Then sketch another inverse curved line in the adjacent quadrant and then draw a rectangle for the wrist along with the forearm. Next, we're gonna draw nigh sausage, please triangle above the top two quadrants and then create that same angle in the middle of the pump. After that draw, four circles up top to show the placement for the base of the fingers, including a circle on that lower triangle to show where the thumb is gonna be placed. Then sketch some lines of action for the fingers, draw the fingertips and a circle to show the lower joints and then draw the fingers by connecting lines from the fingertips all the way down to the base of the hand. Remember, the pointer and ring fingers will be about the same length, with the middle finger being the longest and the pinky being the shortest. Okay, now let's draw the hand from the back view. So, like we did with example, Number one. Start with that box for the palm, divided into four sections and then draw that triangle on the side of the lower right corner. And the I saw Seles trying laptop after that, draw the wrist and the forearm and then sketched the knuckles represented by circles. Next, draw the line of action for the fingers and the thumb, then get the fingertips along with those circles for the first joint on each finger and the thumb, and then connect lines from the fingertips all the way down to the base of Palm to form the fingers themselves. Lastly, connect the tendons from the knuckles, pointing downward toward the center of the wrist. And now I'm just gonna quickly show you an easy way to break down the structure of the fingers. You can imagine the fingers and thumb as cylinders, which are split into three sections. And of course, beginning with that line of action will help you to pinpoint exactly the position of the finger that you want to sketch. And then, after drawing the fingertip and the circle for that lower joint, it's real easy to just connect the lines down towards the Pum. Now let's get the hand from the side view. Begin by drawing a rectangle. This will be the palm, but from the side you can think of it as this shape. Next, draw that triangle to place the thumb and then draw a circle to show where the thumb and point your fingers will go. After that, we're going to draw those lines of action for the finger and the thumb, draw the fingertips on the ends of each, and then sketch a circle for that lower joint, complete this one by connecting lines from the fingertip all the way to the base of the hand. Okay, Now that we've drawn the hand from those points of view, we're now gonna explore some different dynamic poses to draw the hand in a variety of different poses and positions. Imagine that box for the palm in three dimensional form. Then you're gonna draw those four circles for the finger placement at the base of the palm and the triangle on the side down where the thumb will be placed. If you can perfect the steps for the front and back examples as well as the side that we discussed earlier in the video, you should have no trouble at all translating the different forms and structures into three D. So that way you can expand your now to be knowledge and be able to sketch the hands in a variety of different poses and positions. - Okay , now we're gonna move on to drawing the feet. So let's start by sketching the foot from the front view by drawing the lower leg and then a circle for the ankle bone. The inner ankle bone is always gonna be placed higher than the outer ankle bone. Next sketch the upper part of the foot and two circles for the foremost balls of the foot. The outer circle will be much smaller than the inner circle. Next, we're going to sketch the toes. The big toe was always placed on the inner part of the foot, and then the rest of the toes descend in length and size as we move to the outer area of the foot. Lastly, we're gonna draw the tendons by connecting them from the toes upward toward the ankle bone . Okay, now let's draw the foot from the side view. Begin by sketching the lower leg and a circle for the ankle bone. Next, sketch a larger circle for the back ball or heel of the foot and then sketch a downward facing rectangle for the top of the foot in the front. The next step will be to draw the smaller circle for the front ball of the foot and then sketch the big toe. Since we're viewing the foot from the inner side, the other toes will be hidden behind the big toe. All right, now we're going to sketch the foot from the back of you, so start by drawing the lower leg and a ball for the ankle. Remember, the inner ankle bone is always gonna be higher than the outer ankle bone. Next, draw the ball for the hell and sketch the visible parts of the front of the foot. Okay, Lastly, here we're gonna explore the foot in several different dynamic poses. When drawing the foot in various positions, think of the ankle bone as a hinge that is gonna rotate forward and backwards. When the toes are pointing all the way forward, the top of the foot will be approximately in line with the lower part of the leg. Look, when only the front bowls of the foot are making contact with the ground, there will be a bend as the heel lifts off the ground. Awesome work. Congratulations for completing lesson. For by now, you should have a much easier time sketching the hands and feet before we move forward. Let's just do a quick little recap of what we covered here. So you always want to remember that when you're starting your sketches, be sure to begin with simple and basic shapes. This is gonna help simplify the complex structures a lot more, and it's gonna make the whole process a lot easier. So that way it will actually be enjoyable to sketch the hands and feet. And you also want to practice drawing both in various different dynamic poses and positions . This is gonna expand your knowledge of anatomy greatly. So that way you're able to drop both in more diverse and very scenarios. Thank you guys very much. I really appreciate it. And I hope you learned something here. I'll see you in the next video lesson and take care.
6. Lesson 5: The Full Figure: everybody in this final video lesson, I'm gonna be taking everything that we just covered in the four previous lessons and I'll be tying it all together. I'm gonna be sketching a full female character while also talking about the gesture of the overall posed as well as basic proportions a t the end of the video. I'm also gonna take the sketch and tighten up the liner. So that way, you guys could get a sense of how I take the rough sketch and bring it to the completed finished liner. Also, stay tuned for the end will be discussing the class project for you guys to do as well thank you guys so much. And, uh, with that being said, let's do this. Okay, let's go ahead and sketch the full female figure. First, we're going to begin with the line of action to show the central movement of the torso. Keep in mind that this pose that were sketching is gonna have most of the weight placed on the right leg, meaning that the hips are gonna be tilted slightly with less weight placed on the left foot . We're then gonna lightly rough out the overall gesture of the pose before we even start to build the forms and muscle structures because, as I always say, forms follow gesture. And you want to make sure the gesture of the poses looking smooth and fluid first before moving forward So that way you're pose doesn't look stiff and rigid now before moving on any further. If there's any parts of the previous video lessons that are still giving you a bit of trouble, you can absolutely go back through and re watch them as many times as you need to get the concepts down before moving forward to sketching the full pose. But if you've got everything nailed down, let's continue. After we finalized the overall gesture of the pose, start constructing the forms and muscle structures in the torso with the rib cage, breasts, shoulders, abdominals and hips, all of which we covered in the torso lesson of this course. After the torso is set, move up to the head and build the traps neck and then the head itself and the facial features using everything that we learned in the first lesson of the course, talking about the head and facial features. One thing that I highly recommend. Doing in order to expand your knowledge of human anatomy and poses is to study drawing a lot from different reference photos. A few sites that I like to use most are Pinterest and quick poses dot com. And this will allow you to get a lot more practice in end, really diversifying your palate of different action poses and dynamic positions of the female figure. End of the difference. Limbs as well. After that begin to draw the arm muscles along with hands and again make sure that the gesture of the arms is smooth and fluid. First before going in and building the muscle structures. All right, And then the last area we're gonna cover here is the leg muscles and the feet. So again, remember that forms follow gesture, and we want the gesture of the legs, especially to be nice and smooth and fluid before we begin adding in the muscles. Okay, And now what I'm gonna do here is measured out the entire pose in head lengths. So a fully grown adult female should stand at around 7.5 head lengths tall. So I'm just gonna trace over the sketch. I just did with Red and I'm gonna outline the head and then take that and copy and paste it several times so that we can accurately measure out the height and make sure that everything is proportionally correct. Now that we've got the full post sketched out, I'm just gonna take that and then trace over it with clean Leinart. So that way, you guys can see how I typically take the rough sketch once it's completed and then move forward with cleaning up the completed Leinart. Another thing that I also recommend doing when you were cleaning up your line art is to vary the line. Wait subtly, meaning that you don't want to just stick toe one single line, wait for the entire drawing. You want to vary that in slight, subtle ways from thick to thin. Especially the outermost lines, though should be mostly thicker and then smaller. More detailed lines should be a little bit thinner, but again, you always want to try to vary that line. Wait to make the Leinart more interesting. Amazing job. Congratulations on completing this class. Thank you guys very, very much for watching. I really appreciate it and I hope you learned a lot about drawing the female figure here, so just keep in mind when you're putting these concepts and principles into action yourselves. You may not get it down the first time, or the 10 time or the 50th time, or maybe not even the until the 100th time. But that's the point. Artistic improvement. It's a marathon, not a sprint. But if you can learn from your mistakes consistently and persevere, you will see improvement eventually. So stick with it. Always try one more time and never quit. Now I got a little assignment for you. I want you to take everything that you learned in this course and use it to create your own female character. You could be as creative as you like with the outfit and appearance, whether it's your favorite female superhero or it could be a character that's completely made up. The choice is up to you. While going through the project, though, make sure you keep in mind the basics of proportion gesture and breaking all the forms down into simple and basic shapes, all of which we covered extensively in the course. After you've completed your project, please upload it and post to the class project galleries. So that way, myself and others Kenly constructive feedback uploaded as a J pic file. Whether that means it's a digital file that you completed photo shop or it's a a photo of your work that you completed. Traditionally, thank you guys again so much it really means a lot to me. And until next time, keep persevering.
 Kyle Petchock, Kyle Petchock Art